TP Link Technologies C7AV1 C7A FDD-LTE Smartphone User Manual 2
TP-Link Technologies Co., Ltd. C7A FDD-LTE Smartphone 2
Contents
- 1. User Manual_1
- 2. User Manual_2
- 3. User Manual_3
- 4. User Manual_4
User Manual_2

20Chapter 3 . Network and Share
• Install certificates: Tap Install certificates and follow the onscreen instructions to install certificates.
• View MAC and IP address: On the Advabced, you can view your MAC and IP address.
WLAN direct
Use WLAN direct to transfer files between your phone and another device without connecting to a WLAN
network. WLAN direct is similar to Bluetooth but offers faster transfer speeds, making it suitable for the transfer
of larger files such as videos.
Note:
1. Using WLAN direct to transfer files needs third-party applications support.
2. Before using this function, check that both two devices you want to connect support WLAN direct.
• Connect two devices using WLAN direct:
1. Switch on WLAN on both two devices.
2. Go to WLAN -> -> WLAN direct, your phone will search for devices automatically.Then keep the
WLAN direct search screen open on both devices.
3. When your phone detects the other device, select it. Follow the onscreen instructions to establish a
WLAN direct connection between the two devices.
• Rename your device:
On WLAN direct screen, tap Device name. Enter the device name you want and tap OK to Save.
• Manage peer device and remembered groups:
On WLAN direct screen, you can view your Peer devices and Remembered groups. Tap a peer device
and tap OK to disconnect. Tap a remembered group and tap OK to forget the group.
3. 2 Mobile data
Before using mobile data, ensure that you have a data plan with your carrier to avoid incurring excessive data
charges.
Connect to mobile data
You can connect to mobile data in following three ways:
• Swipe down twice from the status bar to open the Quick Settings Panel and tap . When it lights up,
mobile data is enabled.
• Swipe down twice from the status bar to open the Quick Settings Panel. Touch and hold to enter the
mobile data settings. Turn on the Mobile data switch.
• Go to Settings -> Dual-SIM & network and switch on Mobile data.
Note:
1. If a WLAN connection to the Internet isn’t available, apps and services may transfer data over your carrier’s cellular
network, which may result in additional fees. Contact your carrier for information about you mobile data plan rates.
2. When you don’t need to access the Internet, disable mobile data to save battery power and reduce data usage.
3. 3 Connect to computer
Transfer the data on your phone to your computer or transfer the data on your computer to your phone.
When you use a USB cable to connect your phone with a computer or another device, Allow access to device
data will be displayed in a popup dialog. Tap ALLOW to allow file transfer between your phone and the
computer. Tap DENY to deny data conncection and charge only.
Select the USB connection mode
Swipe down from the status bar to open the Notification Panel, and then tap the USB connection notification.
You can choose from the following USB connection modes:
21Chapter 3 . Network and Share
• Charge this device: Charge your phone only.
• Transfer files: Transfer files between your phone and the computer.
• Transfer photos (PTP): Transfer images between your phone and the computer.
• Use device as MIDI: Use your phone as a MIDI input device and play MIDI files on the computer.
3. 4 Bluetooth
You can share data on your phone with other devices using Bluetooth. And you can use Bluetooth to connect
your phone to Bluetooth headsets and in-car Bluetooth to navigate or listen to music while you drive. You can
also connect your phone to Bluetooth wearables to record and manage fitness data.
Enable Bluetooth and pair your phone with another device
1. Swipe down from the status bar to open the Quick Settings Panel.
2. Touch and hold Bluetooth to enter the Bluetooth settings. Tap the switch to turn it on. (You can also
turn Bluetooth on in Settings -> Bluetooth). Your phone will automatically list available devices. If the
device you want to pair with is not displayed, check whether the device is discoverable.
3. Select the device you want to pair with and follow the onscreen instructions.
Send and receive files using Bluetooth
Check that both devices are paired before attempting to transfer files.
1. Send files: Tap the file you want to send and tap > Bluetooth. Your device will automatically search for
nearby devices. Select the receiving device.
2. Receive files: When another device tries to send you files using Bluetooth, select ACCEPT from the dialog
box that appears. Open the Notification Panel to view file transfer progress. By default, received files are
saved to File manager -> Internal storage -> bluetooth folder.
Unpair Bluetooth devices
1. Go to Settings -> Bluetooth. Tap the icon next to the paired device, and then tap FORGET.
Rename your phone
1. On the Home screen, tap Settings -> Bluetooth and turn on the switch.
2. Tap Device name.
3. Edit the device name and tap OK to complete the configuration.
3. 5 Share your mobile data with other devices
You can share your phone’s mobile Internet with other devices (such as phones, tablets, or computers). The
following Internet sharing methods can be used:
Use Wi-Fi hotspot
Set up a portable WLAN hotspot to share your phone’s mobile Internet with other devices. Compared with
Bluetooth tethering, the portable WLAN hotspot feature offers quicker, longer range connections, but power
consumption is higher.
1. On the Home screen, go to Settings -> More connection settings -> Hotspot & tethering.
2. Switch on Protable WLAN hotspot. After enabling your personal WLAN hotspot, will be displayed in
the status bar.
3. Tap Set up WLAN hotspot to configure following settings:

22Chapter 3 . Network and Share
• Change the hotspot name: The Name is the hotspot name. By default, this is the name of your phone
model. You can manually change the name to something that is easier to remember. Tap Name to edit
the name of your hotspot and tap SAVE.
• Change the security setting: Tap Security to configure security setting. Your phone uses WPA2 PSK
encryption by default. Other devices will require a password to connect to the hotspot. If you choose
None, devices will not require a password to connect to the hotspot.
• Configure a password that is easy to remember: The hotspot password is generated randomly by your
phone. For security reasons, choose a password that is not easy to guess. Tap Password and enter the
new password (the password must have at least 8 characters), then tap SAVE.
• Set the maximum connections: Tap Maximum connections and select the number of maximum.
• Set the time for keeping hotspot on when idle: Tap Keep WLAN hotspot on to select Always/Turn off
when idle for 5 min/Turn off when idle for 10 min.
Note:
Your device can’t access the Internet using WLAN when your Portable WLAN hotspot is turned on.
Use USB tethering
Use a USB cable to share your phone’s mobile Internet with a computer. This is useful if your computer’s Internet
connection stops working. To enable mobile data, see Connect to mobile data.
1. Connect your phone to a computer using a USB cable.
2. On the Home screen, go to Settings -> More connection settings -> Hotspot & tethering.
3. Switch on USB tethering. After enabling USB tethering, your phone will display the icon in the status
bar. You can then use the computer to access the Internet.
Note:
Depending on your computer’s operating system, you may need to install phone drivers on the computer or establish a
network connection in order to use USB tethering. Please read the instructions for your operating system.
Use Bluetooth tethering
Use Bluetooth tethering to turn your phone into a wireless router and share your mobile Internet with other
devices. Compared with a portable hotspot, Bluetooth tethering offers a slower Internet connection, but
consumes less power.
1. Establish a Bluetooth connection between two devices and check that they are paired. For more information,
see Enable Bluetooth and pair your phone with another device.
2. On the Home screen, go to Settings -> More connection settings -> Hotspot & tethering.
3. Switch on Bluetooth tethering to share your mobile Internet.
4. Go to Settings ->Bluetooth and tap the device you want to connect. Other devices can now connect
and use your mobile data.
3. 6 Smart WLAN
Use smart WLAN to share WLAN password, connect to router and extend WLAN.
Share WLAN password
When connected to WLAN, you can share the password with other devices.
On the Home screen, tap Smart WLAN -> Share WLAN password to proceed to QR code screen (You
can also tap the connected WLAN in the WLAN networks list to proceed to QR code screen). You can share the
password in following two ways:
• Show the QR code. For the other device, see Connect to WLAN by scanning the QR code.
• Touch and hold Password and choose Copy or Share to share the password.

23Chapter 3 . Network and Share
Note:
This feature is currently only supported on Neffos and in some third-party apps.
Connect to WLAN by scanning the QR code
1. On the Home screen, go to Smart WLAN-> Scan.
2. Align the QR code within the frame, or tap to select a photo to scan. Then your device will connect to
the shared WLAN automatically.
Note:
When ambient light is not enough, you can tap to turn on light.
Connect to router through WPS
WPS allows your phone to connect to a WPS-enabled router without having to remember a password.
On the Home screen, tap Smart WLAN-> WPS and press the router’s WPS button.
You also can go to Settings -> WLAN to connect. For more information, see Connect to a WLAN network
through WPS.
WLAN extender
Use WLAN extender function to extend WLAN signals to a wider area.
• Extend the WLAN
Before using this feature, ensure that you have connected to the WLAN.
On the Home screen, tap Smart WLAN -> WLAN Extender and turn on the switch. When WLAN
Extender is open, will appear in the status bar.
• Set WLAN Extender
On the Home screen, tap Smart WLAN -> WLAN Extender -> Set WLAN Extender. You can
configure following settings:
• Change the netword name: Tap Name to set netword name, and then tap SAVE. The Network name is
the WLAN Extender name. By default, this is the name of your phone model. You can manually change
the name to something that is easier to remember.
• Security: Your phone uses WPA2 PSK encryption by default.
• Configure a password that is easy to remember: The network password is generated randomly by your
phone. For security reasons, choose a password that is not easy to guess.
• Select AP Band: Tap Select AP Band to choose 2.4 GHz Band or 5 GHz Band.
• Set Maximum connections: Tap Maximum connection to choose the maximum connections.
• Set duration of WLAN Extender: Set the time for keeping WLAN extender on when idle. Tap Keep WLAN
extender on to choose the duration.
• Manage the users
On the Home screen, go to Smart WLAN -> WLAN Extender -> Set WLAN Extender. The
connected and blocked devices will be displayed on the list.
• Name: Tap to set the name of your extender network.
• Configure a password that is easy to remember: Tap Password and enter the new password (the
password must have at least 8 characters), then tap SAVE.
• View the details of the connected device: Tap a connected device to view the MAC address and IP
address.
• Block a device: Tap the connected device you want to block and tap BLOCK. The blocked device can’t
search your WLAN extender singals.
• Unblock a devide: Tap the blocked device you want to unblock and tap UNBLOCK.
24Chapter 4 . Calls
Calls
Make calls with your phone to contact one quickly.
• Make a call
• Answer or reject a call
• Options during a call
• Call log
• Manage contacts
• Harassment filter
• Call settings
• Advance settings
• Contacts
4. 1 Make a call
Dial directly from the dialer
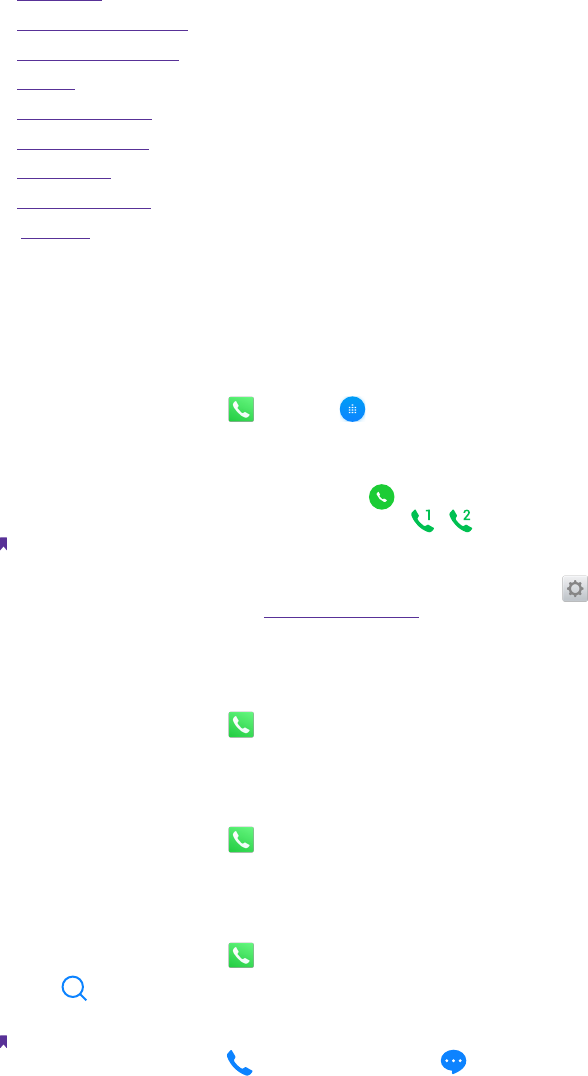
1. On the Home screen, tap Phone -> .
2. Enter the number of a contact in the dialer. Your phone will search your contacts and call log and list the
results above the dialer.
3. Select the contact you want to call (Or tap after entering the complete number). If you have inserted
two SIM cards, select SIM1 or SIM2 to dial (Or tap / after entering the complete number).
Note:
Check Always use this for calls and tap SIM1/SIM2 to make SIM1 or SIM 2 as the default SIM card to make calls. If you want
to change the default SIM card, or if you want to deactivate one of them, go to Settings -> Dual-SIM & network to
configure. For more information, see Dual SIM and network.
Dial a recent number from the Recent calls
All incoming, outgoing and missed call are in Recent calls.
1. On the Home screen, tap Phone -> Recent calls, a list of recent calls will be displayed.
2. Tap the number or contact to call.
Dial from contact list
1. On the Home screen, tap Phone -> Contacts.
2. Tap a contact and then tap the number to dial.
Dial from contact list and call log search results
1. On the Home screen, tap Phone.
2. Tap and enter the name, initials, or number of a contact in the dialera contact.
3. Tap the contact or number to dial.
Note:
If no results appear, you can tap Call to dial directly, or tap Send SMS to send a message to the number.
Make an international call
Before making a long-distance call, contact your carrier to activate international calling or roaming services.
4

25Chapter 4 . Calls
1. On the Home screen, tap Phone -> .
2. Touch and hold 0 to enter +, then enter the country or region code, area code, and phone number in
sequence.
3. Tap .
Make an emergency call
In the event of an emergency, you can make emergency calls from your device, even without a SIM card.
• Make an emergency call from unlock screen:
1. On the Home screen, tap Phone -> .
2. Enter the emergency number for your location in the dialer and tap .
• Make an emergency call from lock screen:
If you enabled the device protection (fingerprint, pattern, PIN or password), you can make an emergency
from lock screen by following way:
1. Wake up the screen and swipe up on the screen.
2. Tap EMERGENCY.
3. Enter the emergency number of your location in the dialer and tap .
Note:
1. You must be in an area with cellular coverage, when you have to make an emergency call.
2. The ability to make emergency calls depends on local regulations and carriers in your area.
3. Poor network coverage or environmental interference may prevent your call from being connected. Never rely solely
on your device for essential communication during emergencies.
4. 2 Answer or reject a call
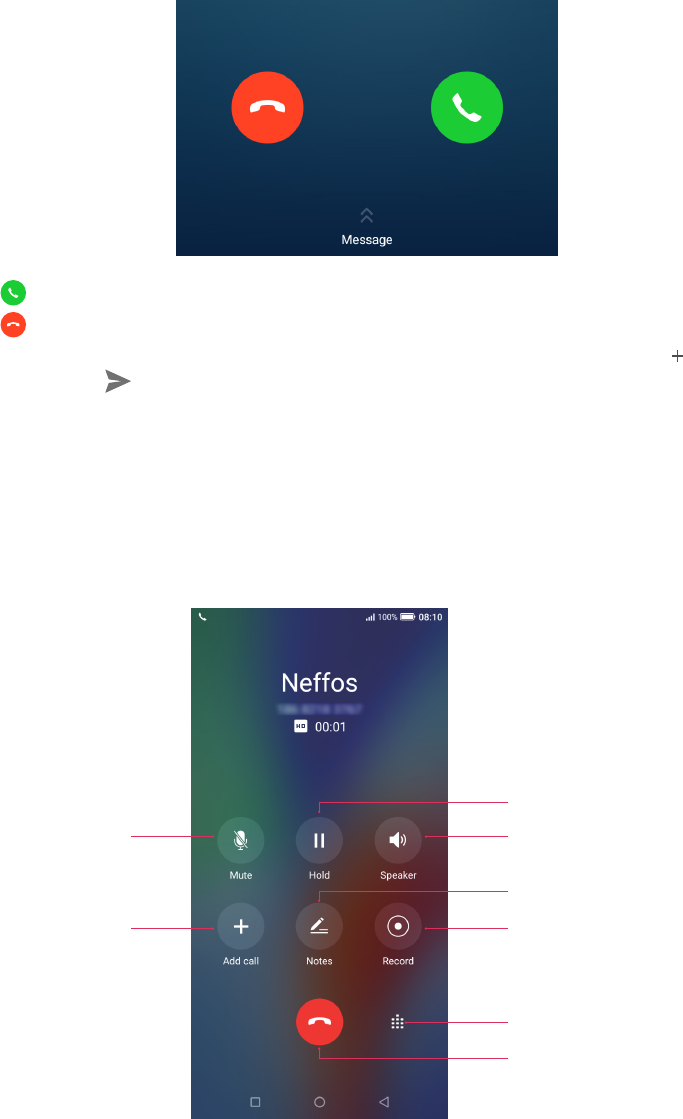
On the incoming call screen:
When a call comes in, you can press the Volume button (or Power button ) to mute the ringtone.
When the screen is locked
• Drag right to to answer the call.
• Drag left to to reject the call.
• Slide up Message to reject the call and send SMS. You can choose a quick response or tap to edit a new
message and tap to send it out.
Note:
You can go to Phone -> -> Advance settings -> Quick responses to edit the predefined text messages.
26Chapter 4 . Calls
When the screen is unlocked
• Tap to answer the call.
• Tap to reject the call.
• Slide up Message to reject the call and send SMS. You can choose a quick response or tap to edit a new
message and tap to send out.
4. 3 Options during a call
Your phone provides a variety of functions that you can use during a call.
In-call menu
During a call, your phone will display an in-call menu.
Mute the call
Place the current call on hold
Enable hands-free mode
Make notes during the call
Record the call
Open the dialer
End the call
Add a new call
Hide the in-call menu
Tap the Home button or Back button to hide the in-call menu.
To return to the in-call menu:
• Tap the green status bar at the top of the screen.
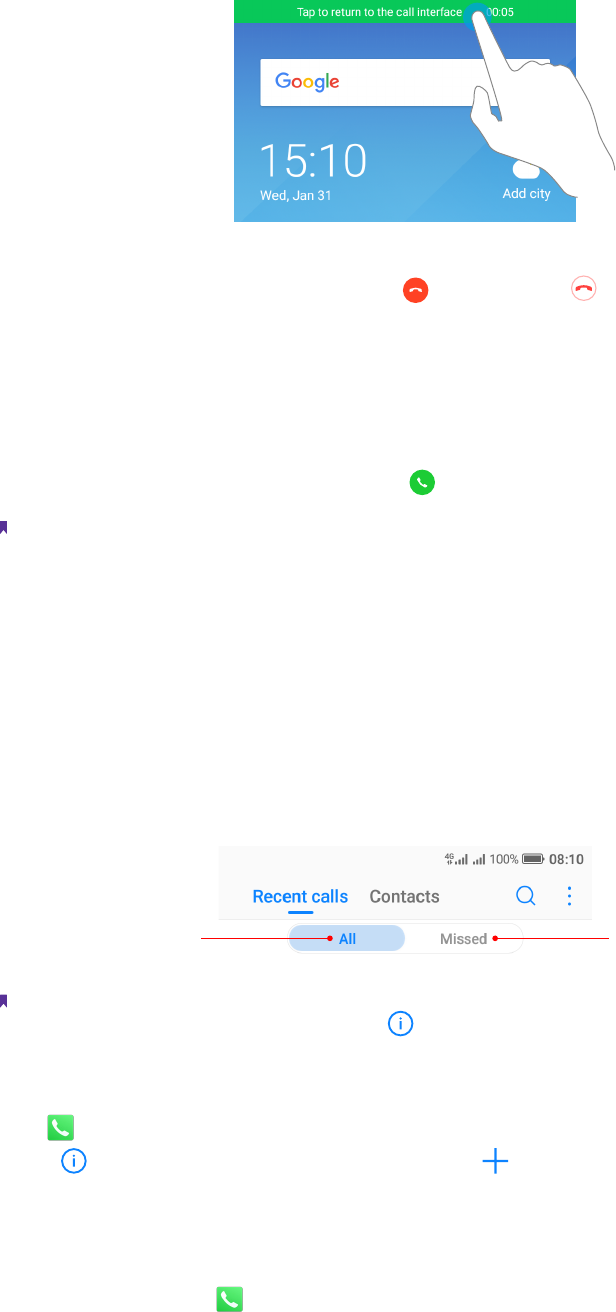
27Chapter 4 . Calls
• Slide down from the status bar to open the Notification Panel and tap the call item.
To end the call, return to the in-call menu and tap . You also tan tap on the Notification Panel to end
the call.
Adjust the call volume
Press the Volume buttons to increase or decrease the volume.
Answer a third-party call
If you receive a call when already in another call, tap to answer the call. The previous call will be holded on
automatically.
Note:
Before using this feature, check that you have subscribed to a call hold service and enabled call waiting on your phone. For
more details, contact your carrier.
Use an application during a call
To use an app during a call, tap Recent apps button to open the list of recently used apps, and then tap the
desired app (Or tap Home button to go to the home screen, then tap the desired app). The Dialer app will
continue to run in the background.
4. 4 Call log
All incoming, outgoing and missed calls are recorded in the call log. Missed calls are displayed in red.
Tap or swipe left
to view all the calls
Tap or swipe right
to view missed calls only
Note:
If a contact (or a number) has more than one log, tap to proceed to details page. Swipe down to the bottom of the
page and tap VIEW MORE, you can view all the call history of this number.
Add a number from the call log
Go to Phone -> Recent calls to select a number from the call log and save it to your contacts.
1. Tap beside the number you want to add and then tap .
2. If you want to save the numeber as a new contact, tap Create new contact. If you want to add the number
to an existing contact, tap the target contact, then tap OK.
Clear the call log
• Clear call history: Go to Phone -> Recent calls, touch and hold the number or contact you want to
remove and then tap Delete.
28Chapter 4 . Calls
• Delete call history in batches: Go to Phone -> Recent calls, touch and hold a number or a contact, then
tap Batch. Check the logs you want to remove and tap -> DELETE.
• Clear the whole call log of a number (or contact): Select the number you want to remove, then tap . Tap
-> Clear call history.
Add a number to blacklist from the call log
1. Go to Phone -> Recent calls, tap the number you want to add to the blacklist.
2. Tap -> -> Add to blacklist (Or just touch and hold the number and tap Add to blacklist). And you
will not receive calls from this number any more.
Do more settings about the call log
Go to Phone -> Recent calls, touch and hold a number and you can:
• Send a message: Send a message directly to this number.
• Copy number: Copy the number and paste in other place, such as in your notes.
• New contact (for Strange numbers): Add the number to create a new contact.
• Share contacts (for contacts): Share the contact.
• Add to blacklist: Add the number to blacklist and you will not receive calls from this number any more.
• Delete: Delete the call log.
• Batch: Select several numbers at a time.
4. 5 Manage contacts
Go to Phone -> -> Manage contacts to configure the following settings:
Import or export contacts
Your phone supports .vcf contact files. VCF is a standard file format for storing contact information, including
names, addresses, and phone numbers.
Go to Manage contacts -> Import/export contacts. You can:
• Import contacts from a storage device:
1 ) Tap Import from storage device.
2 ) Select one vcf file.
• Import contacts from a SIM card:
1 ) Tap Import from SIM 1 or Import from SIM2.
2 ) Select the contacts you want to import.
• Export contacts to a storage device: Tap Export to storage device.
• Export contacts to a SIM card: Tap Export to SIM 1 or Export to SIM2.
Manage accounts
Go to Manage contacts -> Manage accounts to view your accounts.
If you want to add a new account, tap Add account and follow the onscreen instructions to add your account.
4. 6 Harassment filter
The Harassment filter automatically blocks calls and messages from unknown or blacklisted sources.
Go to Phone -> -> Harassment filter to view the blocked messages and calls.

29Chapter 4 . Calls
Add numbers to blacklist
Go to Harassment filter -> to add numbers to blacklist.
• Add phone number: Tap Add phone number, enter the number you want to block and tap .
• Add prefix: Tap Add prefix, enter the number prefix you want to block and tap .
• Add numbers from contacts/call log: Tap Add from contacts, select the numbers you want to block from
contact or call log, and tap .
• Add numers from messages: Tap Add from messages, select the numbers you want to block from
messages list, and tap .
Clear blacklist numbers
Go to Harassment filter, touch and hold a number, select the mumbers you want to delete, and then tap
-> DELETE.
Edit numbers in blacklist
Go to Harassment filter, tap a number to edit it. Tap after finishing to save changes.
View the locked messages and calls
Go to Harassment filter -> -> Blocked numbers to view the blocked messages and calls.
Harassment filter settings
Go to Harassment filter -> -> Settings to configure the following settings:
• Block unknown number: Turn on the switch to block unknown numbers.
• Block notification: Turn on the switch to get reminders when your phone intercepts a harassing call or spam
message.
4. 7 Call settings
Go to Phone -> -> Call settings to configure the following call settings:
Note:
1. The following features may vary depending on your carrier.
2. If you insert two SIM cards and you don’t set the default SIM card for calls, Select SIM for calls will display on the list.
You can choose your default for calls, or choose Ask every time.
Voicemail
Divert calls to your voicemail when your phone is switched off or when there is no cellular coverage. Callers can
leave a voice message which you can listen to later.
• Service: Your carrier.
• Set up: Tap Setup -> Voicemail number to enter your voicemail number and tap OK.
• Notifications: Tap Notifications, you can set sound, enable or disable vibration, and configure other
advaced settings.
Note:
Voicemail must be supported by your carrier. Please ensure that you have subscribed to this service. Contact your carrier for
information about their voicemail service.
Fixed Dialing Numbers
Use fixed dialing numbers to restrict outgoing calls to whitelisted numbers.
• Enable FDN: Tap Enable FDN, enter PIN2 and tap OK.
• Change PIN2: Tap Change PIN2 and follow the onscreen instructions to change your PIN2.
• FDN list: Tap FDN list to view your FDN numbers. Tap -> Add contact to add a FDN number.

30Chapter 4 . Calls
Note:
1. Your PIN2 code is required to enable fixed dialing numbers. To obtain your PIN2 code, contact your carrier.
2. Numbers are added to the FDN list, and when activated, FDN restricts outgoing calls to only those numbers listed, or
to numbers with certain prefixes.
3. PIN2 must be entered before hand or when applying such settings, which is unique to each card and initially provided
by the network operator.
Call forwarding
If your phone can not answer or you do not want to answer the call, you can transfer the call to another phone
number.
Tap Always forward/When busy/When unanswered/When unreachable, enter the phone number you
want to transfer to and tap TURN ON. Then the call will be transfered to the present number always, when your
own number is busy, unanswered, or unreacheable.
Call barring
Turn on the switch to prevent all or certain calls from reaching to or from your phone number.
• Cancel all barring: Tap Cancel all, enter the barring password and tap OK.
• Change barring password: Tap Change barring password, then follow the onscreen instructions to
change your barring password.
Additional settings
• Caller ID: Display your number in outgoing calls.
• Call waiting: Turn on the switch to enable call waiting, then your will be notified of incoming calls during
a call.
4. 8 Advance settings
Go to Phone -> -> Advance settings to configure the following settings:
Display options
• Sort order: Tap Sort by to choose sorting by First name/Last name.
• Name format: Tap Name format to choose First name first/Last name first.
Sounds & vibration
• Ringtone: Tap SIM1 ringtone and SIM2 ringtone to choose the ringtone you like.
• Also vibrate for calls: If Also vibrate for calls is enabled, your phone will vibrate when receiving incoming
calls.
• Dial pad touch tones: Turn on or turn off the switch to enable or disable dial pad touch tones.
Quick responses
Tap the quick response you want to edit. Tap OK after finishing.
Auxiliary funtions
• TTY mode: Tap TTY mode to configure the TTY mode. Tap to view the information of TTY mode.
• Power buttons ends call: If Power buttons ends call is enabled, you can end call by pressing Power button.
31Chapter 4 . Calls
4. 9 Contacts
Add contacts
You have four ways to add new contacts:
• Add new contacts with Contacts app:
1 ) Go to Contacts and tap (You can also tap ADD A CONTACT if you are adding a contact for
the first time). Tap to save the contact to your phone or tap ADD NEW ACCOUNT and follow the
onscreen instructions to save contact to your personal account so that you can always get the contact
information when logging in the account. Now begin adding new contact(s).
2 ) Tap the contact’s profile picture to choose a photo. Enter the contact’s name, company, title, phone
number and other contact information, and then tap .
• Add contacts from call log: See Add a number from the call log.
• Add contacts from dialer:
1 ) Go to Home screen, tap Phone -> Recent calls -> to enter the phone number.
2 ) You can add the number to new contacts, tap -> Create new contact and enter the information,
then tap ; you can also add the number to an existing contact, tap to choose the contact and tap
.
• Add contacts from messages:
1 ) Go to Home screen, tap and select the message whose number you want to add to contacts.
2 ) Tap -> Add to contact -> Create new contact and enter the information, then tap ; you can also
add the number to an existing contact, tap and choose the contact, then tap .
Set up your profile
1. After you have created contacts, on the Contacts screen, tap Set up my profile to enter your personal
information and then tap to save.
2. After saving the information, you can directly tap -> Share on the page to share it to others as your card.
Or you can go to Contacts -> the name under ME -> -> Share.
Manage contacts
Go to Contacts, you can:
• Edit a contact: After creating a contact, you can edit their contact information at any time. This includes
adding or deleting default information such as phone numbers or email addresses. You can also choose a
custom ringtone or add more options, such as a birthday, nickname, or photo. Tap the contact you want
to edit and tap to start editing, then tap to save the information. You can also touch and hold the
contact and then tap Edit to edit the information.
• View contact information: Tap the contact to view the detailed contact information. You can also touch and
hold the contact and then tap View to get the contact information.
• Share contacts:
1 ) To share one contact, touch and hold the contact you want to share, then tap Share, choose your
sharing method and follow the onscreen instructions. You can also tap the contact you want to share,
then tap -> Share, choose your sharing method and follow the onscreen instructions.
2 ) To share multiple contacts, touch and hold one of the contacts you want to share and tap Batch,
select the contacts you want to share, then tap , choose your sharing method and follow the
onscreen instructions.
• Add a contact to your favorites: Tap the contact you want to add to your favorites, and then tap . You can
tap to remove the contact from your favorites (The contacts you have added to favorites will display on
the top of you contact list under ME).

32Chapter 4 . Calls
• Add a contact to blacklist: Touch and hold the contact you want to block and then tap Add to blacklist;
you can also tap the contact and then tap -> Add to blacklist. (To remove the number from blacklist, tap
the contact and then tap -> Remove from blacklist. You can also touch and hold the contact, then tap
Remove from blacklist.)
• Delete contacts:
1 ) To delete one contact, touch and hold the contact you want to delete, then tap Delete -> OK. You can
also tap the contact you want to delete and tap -> Delete -> DELETE.
2 ) To delete multiple contacts, touch and hold one of the contacts you want to delete and tap Batch,
check the contacts you want to delete, then tap -> OK.
• Divert calls to voicemail: Tap the contact, then tap and check All calls to voicemail to divert the calls from
this contact to voicemail when your phone is switched off or when there is no cellular. Callers can leave a
voice message which you can listen to later.
Note:
Voicemail must be supported by your carrier. Please ensure that you have subscribed to this service. Contact your carrier
for information about their voicemail service.
Contact groups
After you have created contact(s), go to Contacts, you can:
• Create a group: Tap Groups -> to enter a group name, and then tap to select the contacts you want to
add to the group and tap to save.
• View groups: Tap Groups to view all the contact groups. The figure beside the group name shows the
number of contacts in that group. Tap the group name to view the detailed contacts.
• Edit a group: Tap Groups and tap the group you want to edit, then tap and you can rename the group,
add new members or remove members from the group.
• Delete a group: Tap Groups and tap the group you want to delete, then tap -> OK.
33
Chapter 5 . Messages
Messages
Use Messages to keep in touch with your friends.
• Type of messages
• Send and reply to a message
• Search for messages
• Manage your messages
5. 1 Type of messages
Text Messages (SMS)
The Short Messages Service (SMS) lets you send and receive text messages to and from other mobile phones.
Multimedia Messages (MMS)
The Multimedia Messaging Service (MMS) lets you send and receive multimedia messages (such as pictures,
videos, and audio messages) to and from other mobile phones.
5. 2 Send and reply to a message
Send messages
Spice up your messages by adding emotions, images, videos, music, recordings, and more.
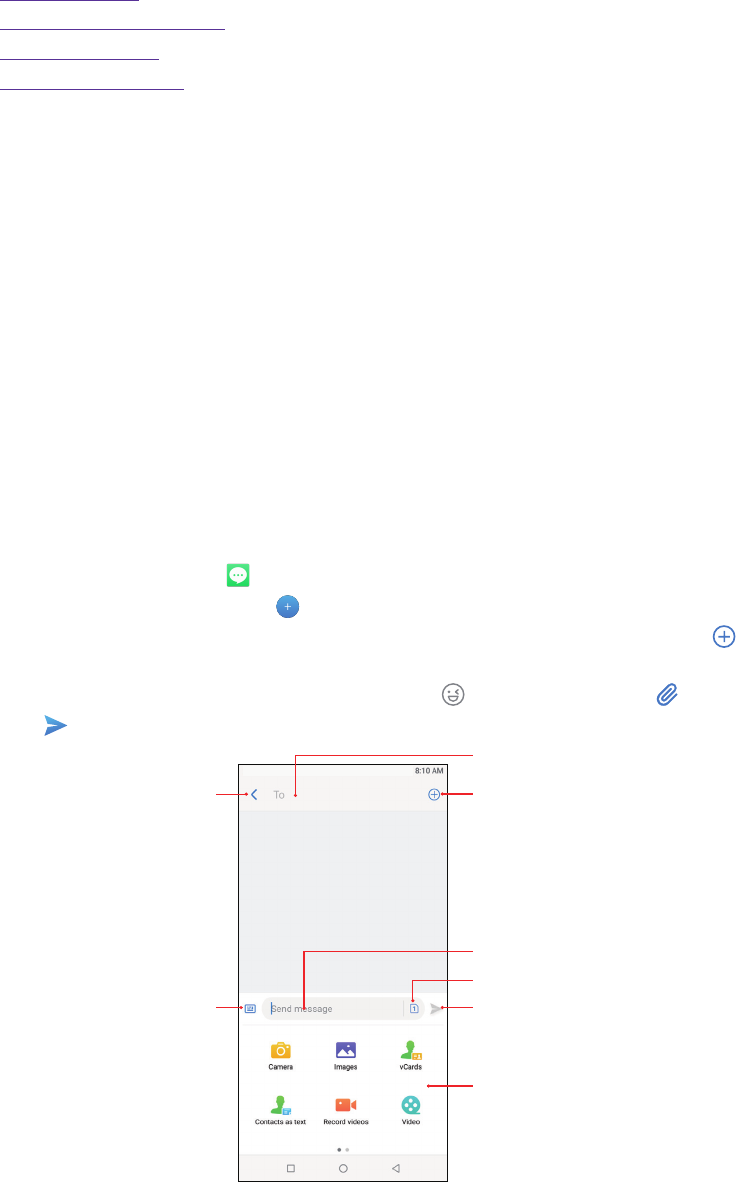
1. On the Home screen, open Messages.
2. In the list of message threads, tap .
3. Select the recipient box and enter the contact name or phone number. You can also touch to open your
contact list and choose a contact or contact group.
4. Select the text field and enter your message (You can tap to add emotions and tap to add attachments).
5. Tap to send.
Go back to list of
message threads
Recipient box
Choose recipients
Go back
to keyboardSend
Swipe left or right to select
attachment type
Text field
Choose SIM1/SIM2 to send the message
5
34
Chapter 5 . Messages
Reply to a message
You can reply to a message by following ways:
• On the Home screen, tap Messages. In the list of message threads, tap a contact name or phone
number to view your conversations. Select the text field and enter your message, and then tap .
• New messages will be displayed in a popup box at the top of the screen, you can also swipe down from the
top of the screen to open the message Notification Panel, tap REPLY VIA SMS and enter your message in
the text field to reply quickly, tap MARK AS READ to mark the message as read. If you tap the new message,
the conversations will be displayed on the screen.
Notes:
1. In the list of message threads, tap a contact name or phone number to open the conversations, you can reply a call by
tapping .
2. Save message attachments: Tap the attachment that you want to save and tap , the attachment will be saved to
Messages album.
5. 3 Search for messages
Use the message search feature to find messages quickly.
1. On the Home screen, tap Messages -> .
2. Enter one or more keywords. The search results will be displayed underneath the search bar.
5. 4 Manage your messages
Copy/forward/share/delete a message
1. On the Home screen, tap Messages.
2. In the list of message threads, tap a contact name or phone number to view your conversations.
3. Touch and hold the message, you can copy, forward, share or delete the message and delete multiple
messages by tapping More.
Delete a conversation
1. On the Home screen, tap Messages.
2. In the list of message threads, you can delete a conversation by following two ways:
• Touch and hold a coversation, and then select the conversations you want to delete, and tap ->
DELETE.
• Tap a contact name or phone number to view your conversations, and then tap -> Delete -> DELETE.
Stick a conversation to top
Pin important messages to the top of your message list so that you can access them quickly.
1. On the Home screen, tap Messages.
2. In the list of conversations, touch and hold a contact name or phone number to enter bulk selection mode.
3. Choose one or more conversations, and tap to stick them to top. For the stuck top conversation, tap
to unstick.
View the contact details and add a contact
1. On the Home screen, tap Messages.
2. In the list of messages, tap a contact name or phone number to view your conversations.
3. Tap -> Contact details to view the datails of the contact. For phone number, you can tap -> Add to
contact to add the number to your contacts.

35
Chapter 5 . Messages
Add to blacklist
1. On the Home screen, tap Messages.
2. In the list of messages, tap a contact name or phone number to view your conversations.
3. Tap -> Add to blacklist, then you will not receive the message from the contact or phone number. You
can go to -> Harassment filter to see all blocked incoming calls and messages.
Mark all of conversations as read
Mark unwanted messages as read to keep your inbox organized.
1. On the Home screen, tap Messages.
2. In the list of messages, tap -> Mark all as read.
Cell Broadcast
One Cell Broadcast message can reach a large number of terminals at once. You can go to Messages ->
-> Settings -> Cell broadcast to view the cell broadcast messages.
SMS center
The number in the SMS center is used to send and receive messages on the SIM card by the operator. Generally,
one operator will fix the SMS center number. Incorrect settings will result in failure to send SMS messages. You
can change the SMS center number by following way:
1. Contact the operator to obtain the correct SMS center number.
2. Go to Messages -> -> Settings -> SMS center.
3. Click the SMS center number, enter the correct SMS center number in the popup box and tap OK.
SMS delivery reports
Go to Messages -> -> Settings -> SMS delivery reports, turn on the switch, and then you can view a
Delivered shown beside the messages you sent successfully.
36Chapter 6 . Camera and Photos
Camera and Photos
Use multiple features of your camera to capture your precious moments.
• Camera at a glance
• Take a photo
• Record a video
• Shooting modes
• Camera and video settings
• Photos
6. 1 Camera at a glance
Launch your camera
• On the Home screen: Tap Camera.
• On the Lock screen: Just swipe up.
• On the off screen: Press the Volume-down button twice to snapshot.
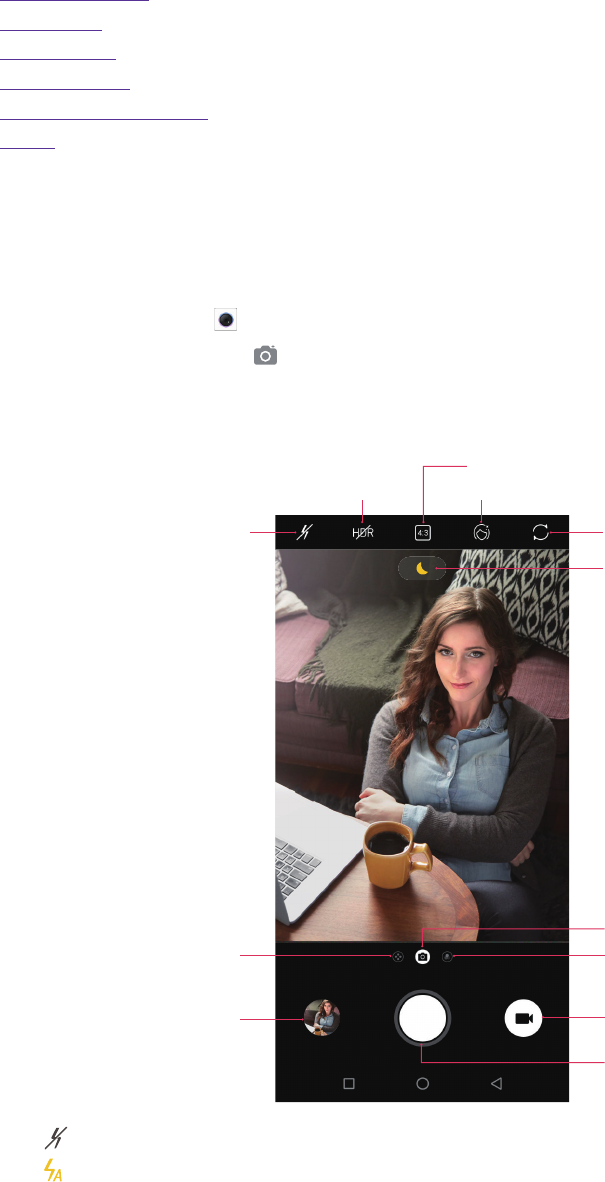
Camera screen
Switch flash modes
Switch HDR modes
Switch aspect ratio
Switch beauty mode
Toggle rear and fr
ont camera
Night mode
Switch camera mode
Switch filters
Record a video
Take a photo
View the photos and
videos you’ve taken
Change shooting modes or
configure the camera settings
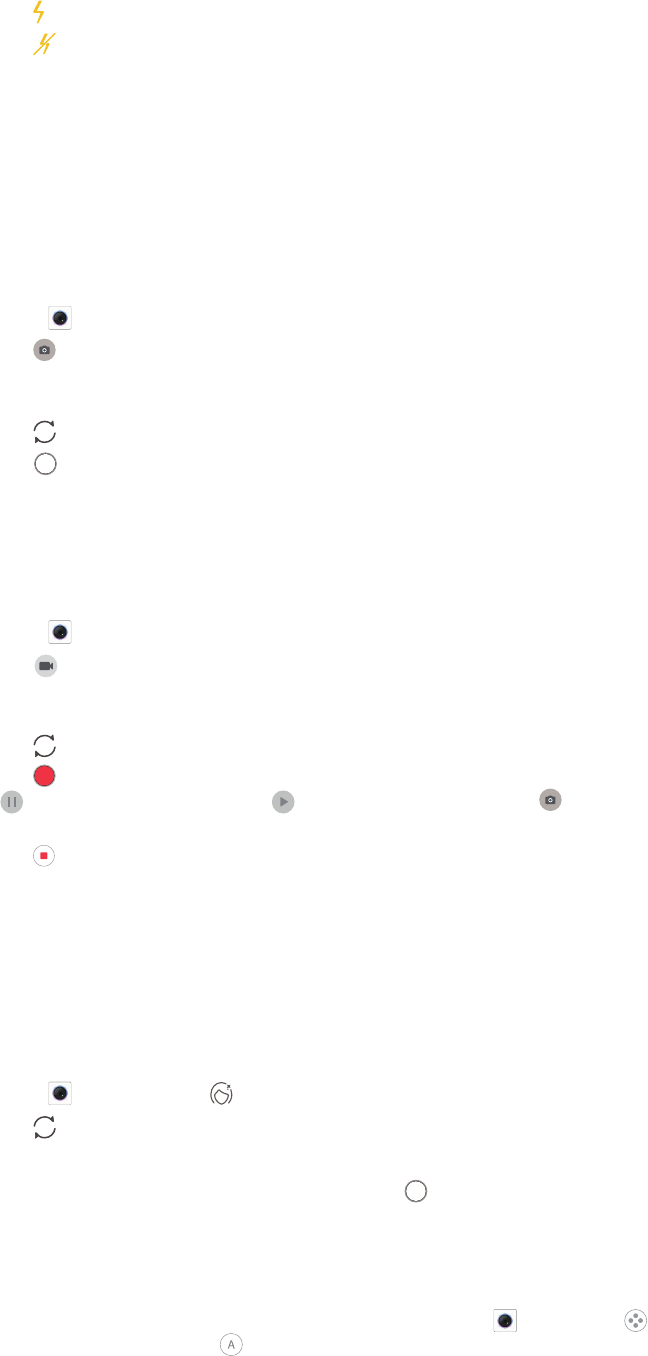
1. Tap to display flash modes’ three options:
• Automatically enable or disable the flash based on the ambient brightness.
6
37Chapter 6 . Camera and Photos
• Enable the flash.
• Disable the flash.
2. Tap the viewfinder to manually focus. Touch and hold an area of the viewfinder to lock the focus when AE/
AF Lock appears.
3. Swipe up or down the viewfinder to switch the rear and front camera.
4. Swipe right on the viewfinder to display the list of shooting modes.
5. Swipe left on the viewfinder to access the filter settings.
6. 2 Take a photo
1. Open Camera.
2. Tap to choose the camera mode, frame the scene you want to capture, tap any part of the viewfinder to
focus on the corresponding area, and lock the exposure and focus by touching and holding the screen. To
adjust the focal length, pinch two fingers together or spread them apart on the viewfinder.
3. Tap to switch between the front camera and rear camera.
4. Tap or press the Volume button, or press and hold your fingerprint sensor to take a photo. If you can’t
use fingerprint sensor to capture, go to Settings -> Gestures and smart assistance and switch on Press
and hold your fingerprint to capture.
6. 3 Record a video
1. Open Camera.
2. Tap to switch to video mode, frame the scene you want to capture, tap any part of the viewfinder to
focus on the corresponding area, and lock the exposure and focus by touching and holding the screen. To
adjust the focal length, pinch two fingers together or spread them apart on the viewfinder.
3. Tap to switch between the front camera and rear camera.
4. Tap or press the Volume button, or press and hold your fingerprint sensor to start a video recording. Tap
to pause the recording and tap to continue the recording. Tap on the screen during recording to
save the current scene as a photo.
5. Tap or press the Volume button, or press and hold your fingerprint sensor to stop and save the recording.
6. 4 Shooting modes
Your phone features a variety of different camera modes for different shooting scenarios.
Beauty mode
Use beauty mode for stunning selfies and smoother-looking skin.
1. Open Camera and tap on the upper screen to turn it on.
2. Tap to switch between the front camera and rear camera.
3. Drag the slider to adjust the beauty level.
4. Frame the scene you want to capture, and then tap or press the Volume button, or press and hold your
fingerprint sensor to take a photo. The camera will automatically detect each face in the photo and apply
the beauty settings.
CAMERA (Auto)
Your phone is set to use camera mode by default. You can also tap Camera, tap on the screen or swipe
right on the screen and choose CAMERA mode.
38Chapter 6 . Camera and Photos
PRO
In PRO (professional) mode, you can adjust the parameters manually.
Tap on the screen or swipe right on the screen and choose PRO mode. Tap to view the details about
Pro mode.
• Select metering mode: Tap to select a metering mode. You can select Center-weighted metering,
Average metering or Spot metering.
• Adjust image parameters: Tap . You can adjust the Hue, Saturation, Brightness and Contrast to make
your image look more vivid.
• Adjust the ISO: Tap ISO and drag the slider to set the ISO. The ISO determines the camera’s sensitivity to
light. Increasing the ISO will create a brighter image, but there will be a noticeable increase in noise.
• Adjust the shutter speed: Tap S and drag the slider to set the shutter speed. By default, the shutter speed
is set to Auto.
• Set the white balance: Tap AWB and drag the slider to select a white balance. You can choose from filament
lamp, fluorescent lamp, daylight, cloudy and shadows. You can also adjust the color temperature.
• Adjust the exposure compensation: Tap EV and drag the slider to adjust the exposure compensation. This
setting changes the brightness of the image. Touch and hold a setting to lock it.
• Change the focus mode: Tap AF and drag the slider to select a focus mode. You can choose from AF and
MF (manual focus). Touch and hold an area of the screen to lock the focus.
VIDEO
Tap on the screen or swipe right on the screen and choose VIDEO mode. See Record a video for details.
TIME-LAPSE
Make an accelerated video of a slow-changing scene. For example, you can record the opening of a flower or
the movement of clouds.
1. Tap on the screen or swipe right on the screen and choose TIME-LAPSE. Tap to view the details
about TIME-LAPSE mode.
2. Tap to switch between the front camera and rear camera.
3. Tap
ON
to display flash mode’s three options and select a flash mode. Tap
720P
to set the pixel as 1080P, 720P
or 480P, and tap 1s to set time-lapse as 1s, 2s, 5s or 10s.
4. Tap the screen to focus on an object or area. Then tap or press the Volume button, or press and hold
your fingerprint sensor to start recording.
5. Tap or press the Volume button, or press and hold your fingerprint sensor to end the recording.
PANORAMA
Use this mode to take wide-angle shots.
1. Tap on the screen or swipe right on the screen and choose PANORAMA. Tap to view the details
about PANORAMA mode.
2. Select a suitable location and hold your phone steady, and then tap or press the Volume button, or press
and hold your fingerprint sensor to start shooting.
3. Follow the onscreen instructions to take the photo. Slowly move your camera from horizontally, ensuring
that the arrow stays level with the center line.
4. Tap or press the Volume button, or press and hold your fingerprint sensor to stop capturing. The camera
automatically stitches the photos together to create one panoramic photograph.
Notes:
Excessive deviation and moving too fast will lead to failure in capture.
MONOCHROME
The camera comes with a separate monochrome lens that takes black and white photos with greater contrast
39Chapter 6 . Camera and Photos
and detail.
1. Tap on the screen or swipe right on the screen and choose MONOCHROME.
2. Tap to display flash mode’s three options and select a flash mode. Tap 4:34:3 to set aspect ratio as 4:3, 1:1
or 18:9. Tap to switch between the front camera and rear camera.
3. Choose the view you want to capture, position the camera, and then tap or press the Volume button, or
press and hold your fingerprint sensor to start shooting.
FOOD
1. Tap on the screen or swipe right on the screen and choose FOOD.
2. Tap to display flash mode’s three options and select a flash mode. Tap 4:34:3 to set aspect ratio as 4:3, 1:1
or 18:9. Tap to switch between the front camera and rear camera.
3. Choose the view you want to capture, position the camera, and then tap or press the Volume button, or
press and hold your fingerprint sensor to start shooting.
STREAMER
Streamer mode automatically sets a slow shutter speed to take long-exposure shots of light trails. This mode
produces stunning photos that have an ethereal quality. Streamer mode offers two creative shooting modes
for different subjects and light conditions: Traffic flow and Light painting.
1. Tap on the screen or swipe right on the screen and choose STREAMER. Tap to view the details
about STREAMER mode.
2. Tap to change the shooting mode. You can tap to set the flash time asos, 3s, 10s or 20s in the Light
painting mode.
3. Choose the view you want to capture, position the camera, and then tap or press the Volume button, or
press and hold your fingerprint sensor to start shooting.
4. A preview of the image is displayed in the viewfinder. Tap or press the Volume button, or press and hold
your fingerprint sensor to stop capturing.
Continuous shot
Use continuous shot when you want to take a photo of a moving subject, such as during a football match. The
camera will capture several images in quick succession.
1. Touch and hold the or press and hold the Volume button to start the burst sequence. The number of
captured photos will be displayed in the bottom of the viewfinder.
2. Release or Volume button to stop the burst shooting.
3. Tap the image thumbnail or go to Photos -> Camera to view the photos.
Notes:
1. This feature is not available in Pro mode, Panorama mode, Streamer mode and Face beauty mode.
2. You can take up to 40 photos in one burst sequence, provided that there is enough storage space on your phone.
6. 5 Camera and video settings
Open Camera, tap or swipe right on the screen and tap to configure the following camera settings.
• Auto night view: Turn on the switch to enable night mode when there is inadequate ambient light.
• Save the location: Save the location where the photo was taken (only when your phone is connected to the
Internet and enabled location access).
1 ) Switch on Save the location and then take a photo.
2 ) Connect your phone to a computer (taking Windows 7 as an example) with a USB cable, Allow access
to device data will be displayed in a popup dialog. Tap ALLOW.
3 ) Go to Computer -> Neffos C7A -> Internal storage -> DCIM -> Camera.

40Chapter 6 . Camera and Photos
4 ) Right-click on a picture and click Properties, you can see the location where the photo was taken.
• Grids: When Grids is on, composition of pictures is more convenient.
• Camera watermark: When Camera watermark is on, there will be a watermark of brand model added to
the photo.
• Shutter sound: When Shutter sound is on, a shutter sound is played during taking a picture or recording
a video.
• Timer: Set time-lapse interval, such as Off/3/10 seconds.
• Take photos with volume buttons: Turn on the switch, you can press the Volume-up button or Volume-
down button to take photos.
• Press and hold your fingerprint to capture: Turn on the switch, you can take photos with pressing and
holding your fingerprint.
• Screen off snapshot: Turn on the switch, you can press the Volume-down button twice to take a photo
when the screen is off. Due to the rapid capture time, the image quality may decrease for night-time or
close-up shots. Choose a location with ample light and shoot from a suitable distance. The feature is not
available during music playback or when your phone has less than 2% battery power remaining. Flash
mode is not available when your phone has less than 5% power remaining.
• Mirrored selfie: When Mirrored selfie is on, the preview direction will be consistent with the selfie shooting
direction. Otherwise the photos appears to reverse left and right.
• Mirrored video for front camera: When Mirrored video for front camera is on, the preview direction will
be consistent with the selfie recording direction.
• Smart selfie zoom: Turn on the switch to make the selfie camera smart zoom.
6. 6 Photos
View photos and videos
You can view the following photos and videos in Photos:
• Photos and videos shot with the camera.
• Photos and videos that your friends shared with you.
• Photos and videos synced from your computer.
• Photos and videos saved from messages, emails, or websites, as well as screenshots.
Manage photos and videos
Go to Photos:
• Select a photo, you can manage your photo with the following options: play in slideshow, move to folder,
copy to folder use as contact photo or wallpaper, print the photo and delete from device.
• Select a video, you can manage your video with the following options: play in slideshow, play the video on
loop, move to folder, copy to folder and delete from device.
• Go to -> Trash, you can restore the photos (videos) or permanently delete the photos (videos).
Edit an image
You can use the image editing tools to bring your photos to life.
Select an image you want to edit and tap , you can add a filter to the image, adjust the image parameters,
crop the image, straighten the image and rotate the image.
Edit a video
You can use the photos‘ video editing tools to edit a video.
Select a video you want to edit and tap , you can stabilize the video, rotate the video and clip the video.
41Chapter 7 . Videos
Videos
Use Videos to enjoy videos stored on Neffos.
• Play a video
• Video management
7. 1 Play a video
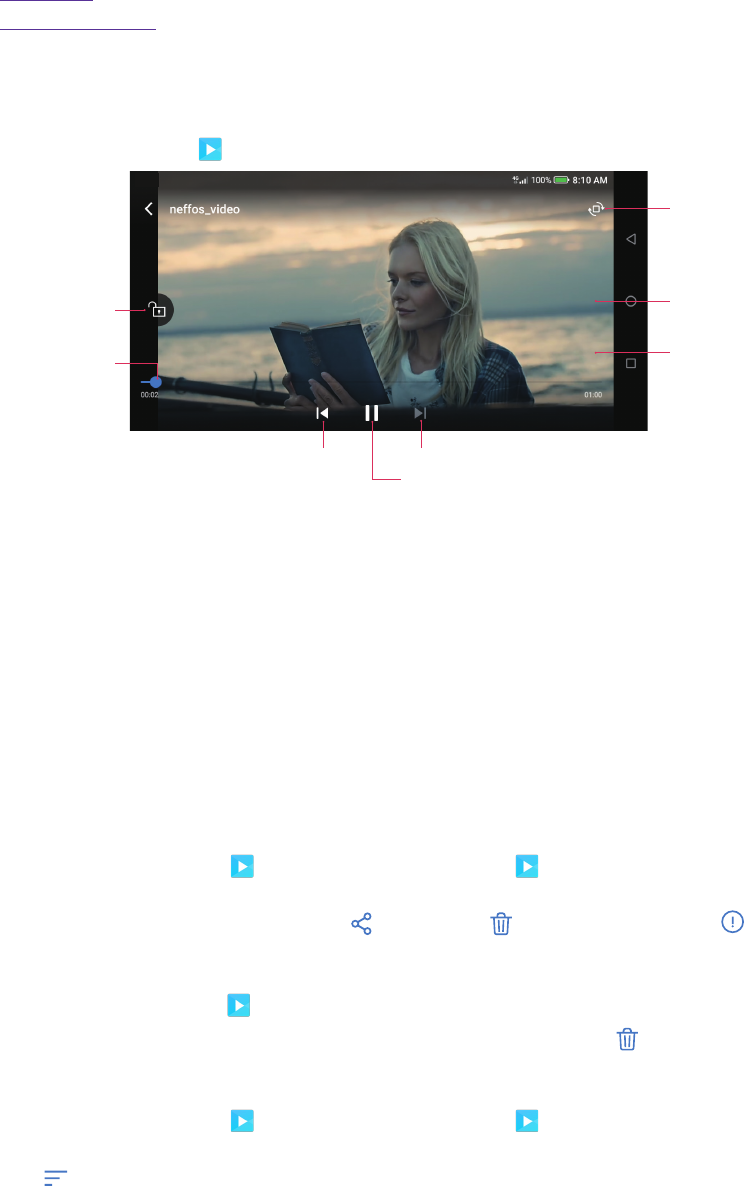
On the Home screen, go to Videos, tap the video you want to play.
Playback slider
Tap to play the previous video Tap to play the next video
Tap to pause the video
T
ap to lock playback
orientation
Tap to show/hide contr
ols
Double-tap to pause/play
Tap to rotate playback
orientation
During playback, you can:
• Adjust the screen brightness: Swipe up or down on the left-hand side of the screen. Swipe up to increase
the brightness, or swipe down to decrease the brightness.
• Adjust the volume: Swipe up or down on the right-hand side of the screen. Swipe up to increase the volume
or swipe down to decrease the volume.
• Rewind or fast-forward: Swipe left or right on the screen to accurately adjust the video progress bar. Drag
the progress bar left to rewind or right to fast-forward.
7. 2 Video management
Share/delete a video and see the details of a video
1. On the Home screen, go to Videos -> ALL Videos, or go to Videos -> Folders and tap to open a
folder.
2. Touch and hold a video, you can share (tap ) or delete (tap ) it and see the details (tap ) of it.
Delete the video folders
1. On the Home screen, go to Videos -> Folders.
2. Touch and hold a video folder, then select the folders you want to delete, tap -> DELETE.
Sort the videos
1. On the Home screen, go to Videos -> ALL Videos, or go to Videos -> Folders and tap to open a
folder.
2. Tap to choose sort the videos by name or by date added or by recently played.
7

42Chapter 7 . Videos
Search the videos
1. On the Home screen, go to Videos -> ALL Videos, or go to Videos -> Folders and tap to open a
folder.
2. Tap and then enter the video name to search.
43Chapter 8 . Clock
Clock
In the Clock application, you can add alarms, view world times, use the stopwatch and timer
features.
• Alarm
• Worldclock
• Stopwatch
• Timer
• Settings
8. 1 Alarm
Set an alarm to wake you up or remind you about important events.
Launch your Alarm
• On the Home screen: Go to Clock -> Alarm.
• On the Lock screen: When your phone doesn’t have a screen lock with pattern or PIN or password, just
swipe up and tap -> Alarm.
Create an alarm
1. Tap , choose a time for the alarm.
2. Tap Repeat to select the mode for your alarm clock frequency:
• Choose Only once to make the alarm ring for once.
• Choose Every day to make the alarm ring every day.
• Choose Week customized to customize your alarm clock frequency as desired.
• Choose Every other day to customize your alarm clock frequency as desired.
• Choose Custom monthly to customize your alarm clock frequency as desired.
3. Tap Alarm ringtone to select the alarm sound, or tap Alarm ringtone -> Custom to select an audio to
customize your alarm sound.
4. Switch on or switch off Vibrate to enable or disable vibration when the alarm rings.
5. Tap Label to add a label for your alarm clock.
6. Switch on or switch off Alarm ring notification to enable or disable dismissing an alarm with this
notification 20 minutes before the alarm rings.
7. Configure the alarm settings above and tap to save.
Manage alarms
• Enable or disable an alarm: Toggle the switch next to the alarm to enable or disable the alarm.
• Delete an alarm: Touch and hold the alarm you want to delete and then tap -> DELETE. You can also
delete alarms in batches by touching and holding an alarm to select multiple alarms at a time.
• Snooze: You can snooze the alarm in three ways:
• When the screen is locked, tap then the alarm will go off again after 5 minutes; when the screen
is on, tap SNOOZING on the pop-up prompts then the alarm will go off again after 5 minutes.
• When the screen is locked, press the Power button then the alarm will go off again after 5 minutes.
When the screen is on, press the Power button twice then the alarm will go off again after 5 minutes.
8
44Chapter 8 . Clock
• Swipe down from the status bar to open the Notification Panel, and then tap the alarm notification.
Press the Volume button then the alarm will go off again after 5 minutes.
• Dismiss: When the screen is locked, slide to stop the alarm; when the screen is on, tap DISMISS on the
pop-up prompts to stop the alarm.
• Mute an alarm: When the alarm goes off, open Clock and you can press the Volume-down button to
mute an alarm.
8. 2 Worldclock
Check the time in various cities around the world using Worldclock.
Launch your Worldclock
• On the Home screen: Go to Clock -> Worldclock.
• On the Lock screen: When your phone doesn’t have a screen lock with pattern or PIN or password, just
swipe up and tap -> Worldclock.
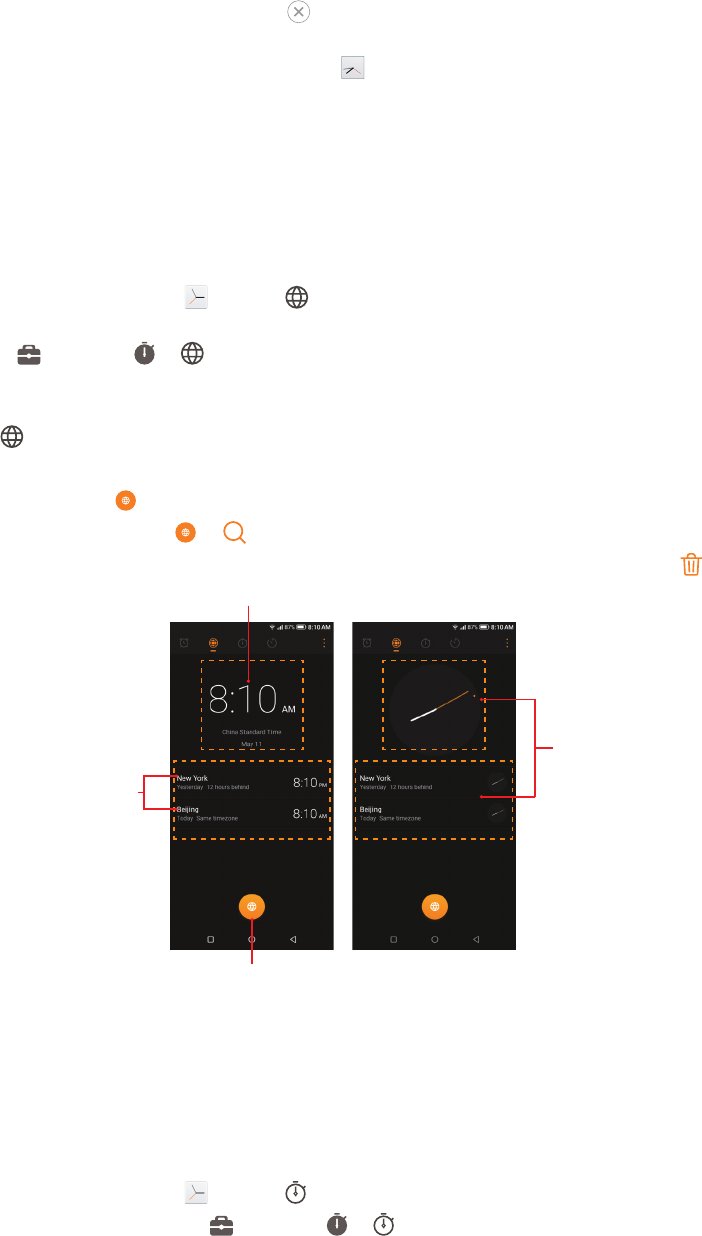
Configure the Worldclock
1. Tap Worldclock.
2. From the Worldclock screen, you can:
• Add a city: Tap . Enter a city name or select a city from the list.
• Search for a city: Go to -> , enter a city name to search for a city and tap to add it to the list.
• Delete a city: Touch and hold a city, then check the cities you want to delete and then tap -> DELETE.
Home time
Add city
Chosen cities
Touch the home
time or the cities
to switch the time
display modes.
8. 3 Stopwatch
You can use Stopwatch to keep time or record lap times.
Launch your Stopwatch
• On the Home screen: Go to Clock -> Stopwatch.
• On the Lock screen: Just swipe up and tap -> Stopwatch.