TP Link Technologies C9AV1 C9A FDD-LTE Smartphone User Manual 3
TP-Link Technologies Co., Ltd. C9A FDD-LTE Smartphone 3
Contents
- 1. User Manual_1
- 2. User Manual_2
- 3. User Manual_3
- 4. User Manual_4
User Manual_3
43Chapter 8 . Themes
Customize your Homescreen Wallpaper with Scrolling effect
1. On the Home screen, tap Themes.
2. Tap -> Wallpapers.
3. Tap to select an image.
4. Tap screen to open a Homescreen Preview which shows a preview of the currently selected wallpaper
without applying it.
5. Check Scrolling effect, and then zoom and move the image to adjust the maximum display area of the
wallpaper.
6. Tap APPLY to set the homescreen wallpaper.
8. 3 Change the icons
1. On the Home screen, tap Themes.
2. Tap -> Icons.
3. Select the desired icons and follow the onscreen instructions to set it as the applications’ icons.
8. 4 Change the sounds
1. On the Home screen, tap Themes.
2. Tap -> Sounds.
3. Select the desired sounds for SIM1 ringtone or SIM2 ringtone or SMS alerts or Other notification. You can
also tap to add audios as the sounds for SIM1 ringtone or SIM2 ringtone.
44Chapter 9 . Calendar
Calendar
Calendar helps you to plan your daily schedule. For example, it helps you to plan ahead and
displays information about public holidays.
• Use the calendar
• Calendar settings
9. 1 Use the calendar
Refresh
Show events for
current day
Add event
Menu
Go to today
Tap to expand and
collapse the month
View the calendar
1. On the Home screen, tap Calendar.
2. Tap to select Schedule/Day/3 Day/ Week/ Month to zoom in or out your calendar.
Create an event
Add events and set reminders to help you plan ahead.
1. On the Home screen, tap Calendar.
2. Tap to creat an event.
• Title: Enter the event title.
• Time: Set the start and end time.
• Location: Add a location.
• Add a notificaton: You can choose No notification, At time of event, 10 minutes before, 30 minutes
before or Custom… to customize your notification time and way.
• Invite people: Enter the people that you want to invite.
• Add note: Enter the note you want to add.
• Calendar default: Set your event’s visibility as Public or Calendar default or Private.
• Busy: Set your event show as Busy or Available.
3. Tap SAVE.
9
45Chapter 9 . Calendar
Search an event
1. On the Home screen, tap Calendar.
2. Tap -> Search to search an event.
3. Enter the key words of the event you want to search, and tap .
Edit/delete an event
1. On the Home screen, tap Calendar and tap the event you want to edit or delete.
2. Tap to start editing or tap -> Delete to delete the event.
9. 2 Calendar settings
On the Home screen, tap Calendar -> -> Settings -> General.
• Start of the week: Tap to choose the day when a week starts on (Saturday/Sunday/Monday).
• Use device time zone: Toggle the switch to turn it on/off to use device time zone, or choose a country time
zone.
• Alternate calendar: Tap to choose an alternate calendar, such as Chinese calendar.
• Show week number: Toggle the switch to turn it on/off to show/hide week number.
• Show declined events: Toggle the switch to turn it on/off to show/hide declined events.
• Clear search history: Tap to remove all the searches you’ve performed.
• Default event duration: This is the default duration of a newly created event. For non-Google accounts, the
default is 1 hour.
• Notify on this device: Check the option to enable notifications.
• Use standard tone: Tap to choose the sound when receiving notifications.
• Vibrate: Check the option to make the phone vibrate when receiving notifications.
• Quick responses: Tap to edit the quick responses.
46Chapter 10 . Clock
Clock
In the Clock application, you can add alarms, view world time, use the stopwatch and timer
features.
• Alarm
• Worldclock
• Stopwatch
• Timer
• Settings
10. 1 Alarm
Set an alarm to wake you up or remind you about important events.
Launch your Alarm
• On the Home screen: Go to Clock -> Alarm.
• On the Lock screen: When your phone doesn’t have a screen lock, just swipe up and tap -> Alarm.
Create an alarm
1. Tap , choose a time for the alarm.
2. Tap Repeat to select the mode for your alarm clock frequency:
• Choose Only once to make the alarm ring for once.
• Choose Every day to make the alarm ring every day.
• Choose Week customized to customize your alarm clock frequency as desired.
3. Tap Alarm Ringtone -> System to select the alarm sound, or tap Alarm Ringtone -> Custom -> Add
ringtone to select an audio to customize your alarm sound.
4. Tap the switch Vibrate to enable or disable vibration when the alarm rings.
5. Tap Label to add a label for your alarm clock.
6. Configure the alarm settings above and tap to save.
Manage alarms
• Enable or disable an alarm: Toggle the switch next to the alarm to enable or disable the alarm.
• Delete an alarm: Touch and hold the alarm you want to delete and then tap -> DELETE. You can also
delete alarms in batches by touching and holding an alarm to select multiple alarms at a time.
• Snooze: You can snooze the alarm in three ways:
1 ) When the screen is locked, tap then the alarm will go off again after 5 minutes; when the
screen is on, tap SNOOZING on the pop-up prompts then the alarm will go off again after 5 minutes.
2 ) Press the Power button then the alarm will go off again after 5 minutes.
3 ) Swipe down from the top of the screen to open the Notification Panel, and then tap the alarm notification.
Press the Volume button then the alarm will go off again after 5 minutes.
• Dismiss: When the screen is locked, slide to stop the alarm; when the screen is on, tap DISMISS on the
pop-up prompts to stop the alarm.
• Mute an alarm: When the alarm goes off, tap Clock and you can touch and hold the Volume-down button
to mute an alarm.
10
47Chapter 10 . Clock
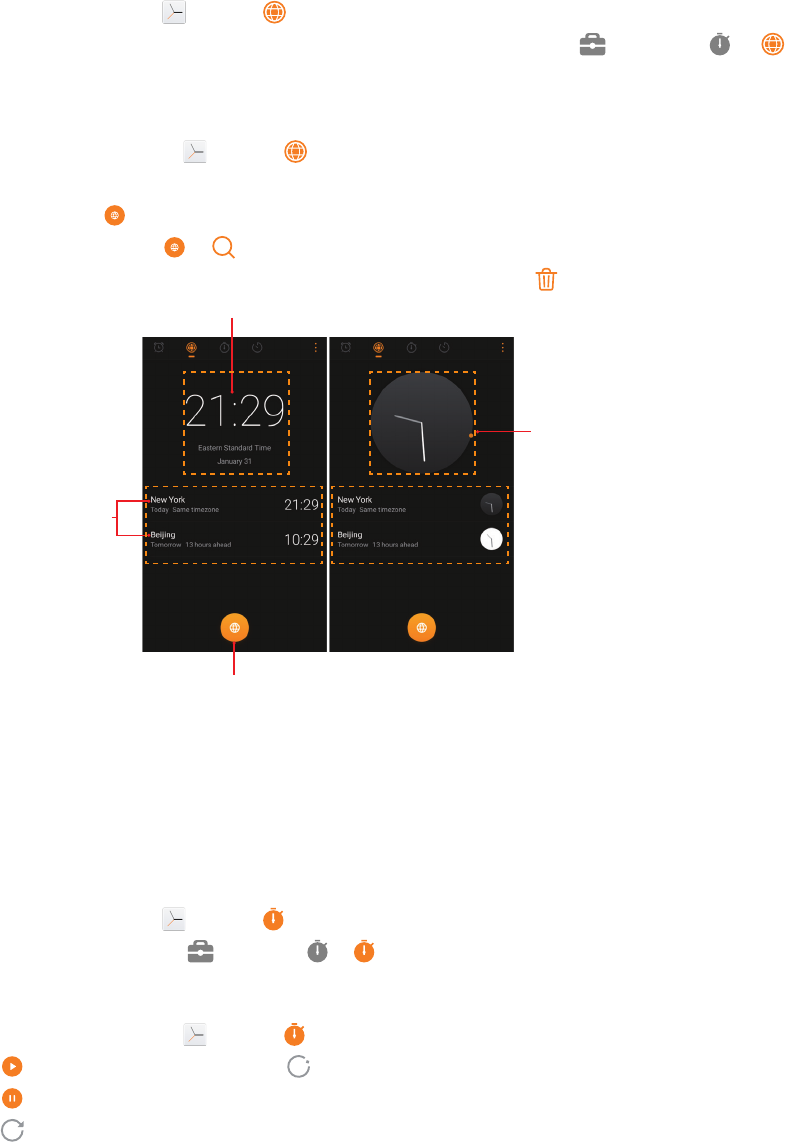
10. 2 Worldclock
Check the time in various cities around the world using Worldclock.
Launch your Worldclock
• On the Home screen: Go to Clock -> Worldclock.
• On the Lock screen: When your phone doesn’t have a screen lock, just swipe up and tap ->
Worldclock.
Configure the Worldclock
1. On the Home screen, go to Clock -> Worldclock.
2. From the Worldclock tab, you can:
• Add a city: Tap . Enter a city name or select a city from the list.
• Search for a city: Go to -> , enter a city name to search for a city and tap to add it to the list.
• Delete a city: Touch and hold the city you want to delete and then tap -> DELETE.
Home time
Add city
Chosen cities
Touch the home
time or the cities
to switch the time
display modes.
10. 3 Stopwatch
You can use Stopwatch to keep time or record lap times.
Launch your Stopwatch
• On the Home screen: Go to Clock -> Stopwatch.
• On the Lock screen: Just swipe up and tap -> Stopwatch.
Configure the Stopwatch
1. On the Home screen, go to Clock -> Stopwatch.
2. Tap to start timing. While timing, Tap to count laps. Lap data will be displayed on the screen.
3. Tap to pause the stopwatch.
4. Tap to clear the stopwatch records and restart.
48Chapter 10 . Clock
10. 4 Timer
Set a timer to count down and alert you when time’s up.
Launch your Timer
• On the Home screen: Go to Clock -> Timer.
• On the Lock screen: Just swipe up and tap -> -> Timer.
Configure the Timer
1. On the Home screen, go to Clock -> Timer.
2. Tap to add the timer’s label.
3. Turn the wheel to set the countdown time. You can also quickly add 5/15/30 minutes by using the
shortcut keys under the wheel.
4. Tap to start the timer. When the timer is counting, tap to pause the countdown, tap to add
another timer, tap to continue or tap to reset the count down.
5. When the timer goes off, tap OK on the pop-up promts to silence the ringtone when the screen is on; tap
when the screen is locked.
10. 5 Settings
On the Home screen, go to Clock -> -> Settings to personalize your clock.
• Ring duration: Tap to select the ring duration.
• Interval before ringing again: If you tap SNOOZING when the alarm rings, then it will ring again after some
time. Tap to choose a proper interval time.
• Sound after shutdown: Turn on the switch if you want to enable the alarm after turning off your phone.

49Chapter 11 . Browser
Browser
Use your phone browser to surf the Internet and find out all that you are curious about.
• Go to a webpage
• Browser tabs
• Browser settings
11. 1 Go to a webpage
Before you use the Chrome, it will pop up Chrome’s Terms of service and Privacy Notice, tap ACCEPT &
CONTINUE, then you can sign in to Chrome.
View a webpage
1. On the Home screen, tap Chrome, then tap the address bar and enter the web address you want to
visit.
2. Tap .
Do more options about the web page
Tap and choose the options that you want to configure.
• Add a bookmark: Tap to add a bookmark for the site you want to collect so that you can quickly find the
site next time by taping -> Bookmarks.
• Download a site: Tap to download the site you want so that you can quickly find the site next time by
tapping -> Downloads.
• Check the site: Tap to check whether the website you open is safe or not.
• Refresh the site: Tap to refresh the site.
• New tab: Open a new tab.
11
50Chapter 11 . Browser
• New incognito tab: Open a new incognito tab.
• Bookmarks: View your bookmarks.
• Recent tabs: View the recent visited tabs.
• History: View your browsing history.
• Downloads: View the files you have downloaded.
• Request desktop site: Check the option to turn the page to a desktop site.
• Settings: Configure the Browser settings.
• Help & feedback: Search for help or send your feedback.
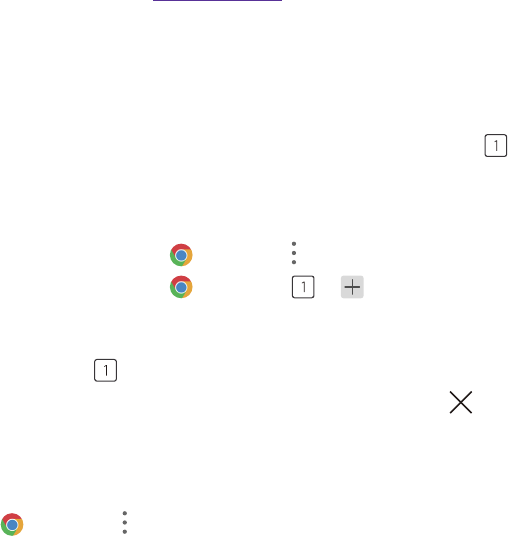
11. 2 Browser tabs
You can view multiple pages simultaneously using tabs. Tap the icon and all the pages will be displayed. The
number on the icon means the current number of the web pages.
Open a new tab
• On the Home screen, tap Chrome -> -> New tab.
• On the Home screen, tap Chrome -> -> .
Close a tab
1. Tap the icon and choose the tab you want to close.
2. Drag the tab left or right to close the tab (You can also tap to close the tab).
11. 3 Browser settings
Go to Chrome -> -> Settings to configure the browser settings.
Sign in to Chrome
This item only appears when you did not sign in to Chrome. Tap it to sign in so that you can get your bookmarks,
history, passwords and other settings on all your devices. When a Google account had been added in Account
settings (Settings -> Accounts), Chrome will automatically sign in.
Basic settings
• Search engine: Tap to choose a search engine.
• Autofill and payments: Switch on to enable autofill forms. You can also add billing address and cards.
• Save passwords: Switch on to enable saved passwords; check Auto Sign-in to enable to automatically sign
in to websites using stored credentials.
Advanced settings
• Privacy: Configure the settings about privacy.
• Accessibility: Configure the text scaling and force enable zoom.
• Site settings: Configure the site settings.
• Data Saver: Turn on the switch to enable the data saver.
• About Chrome: Tap to know about the application version, operating system and legal information.
51Chapter 12 . File Manager
File Manager
Access files stored on your device (including Audio, Video, Image, Document, Archive, APK and
Downloads).
• Create a folder
• View files
• Manage files
• File sharing
12. 1 Create a folder
Keep your device organized by creating folders for your files.
1. Go to File Manager -> Internal storage -> -> New folder.
2. Enter the name of the new folder and touch SAVE.
12. 2 View files
On the Home screen, tap File Manager. Files are organized into seven categories (Audio, Video, Image,
Document, Archive, APK and Downloads). Tap a category to view the relevant files or tap Internal storage to
view all the files.
Search files
Use the search feature to find files quickly.
Go to File Manager -> , enter the file name or keywords. Search result will be displayed below the
search bar.
Sort files
Use the sort feature to arrange your files by type, name, size, or date.
1. Go to File Manager -> Audio/Video/Document/Archive/APK/Downloads -> .
2. Select a sorting type to sort files by Date/Name/Type/Size as desired and set the order posted by Asc
(ascending order) or Desc (descending order).
Sort Internal storage
Use the sort feature to arrange your files by type, name, size, or date.
1. Go to File Manager -> Internal storage -> -> Sort mode.
2. Select a sorting type to sort files by Date/Name/Type/Size as desired and set the order posted by Asc
(ascending order) or Desc (descending order).
12. 3 Manage files
View the device storage
1. Go to File Manager -> Internal storage .
2. Tap to view overall storage availability and storage used per app.
12

52Chapter 12 . File Manager
Edit files
1. Go to File Manager.
2. Touch and hold a folder or file, you can:
• Copy: Tap -> Copy, select a destination folder, and then tap Paste.
• Move: Tap -> Move , select a destination folder, and then tap Paste.
• Rename: Tap -> Rename, enter a new name and tap SAVE.
• See the details: Tap -> Details to see the detailed information.
• Browse the directory: Tap -> Browse the directory to see the directory (only can be used for Audio/
Video/Image/Document/Archive/APK/Downloads).
• Delete: Tap -> DELETE.
• Share: Tap , choose a sharing method and follow the onscreen instructions to share your files (Folder
cannot be shared directly. You can choose one or more files to share).
Note:
When you touch and hold a folder or file, you can select multiple folders and files at a time.
Extract archives
1. Go to File Manager -> Archive.
2. Touch and hold the archive file and then tap -> Extract. Or tap the archive file, tap .
3. Select where the contents of the archive should be extracted to and tap Extract.
12. 4 File sharing
Files can be shared and managed on mobile phones and computers connected to the same local area network.
Before sharing files, make sure that your computer supports the network neighborhood feature.
1. Connect the computer and your phone to the same LAN network. For more information on connecting
your phone to a WLAN network, see Connect to a WLAN network.
2. On your phone, go to File Manager -> File Sharing and tap Enable file sharing.
3. In Windows, enter the IP address shown on your phone screen into the address bar of My computer. In
MAC, enter the IP address shown on your phone screen into the Finder. Then you can access the files on
your phone. Tap Disable file sharing when you want to stop sharing files with your computer.
53Chapter 13. Weather
Weather
Use Weather to check the current weather and multi-day forecast for your location and many
other cities around the world.
• Check the weather
• Weather settings
13. 1 Check the weather
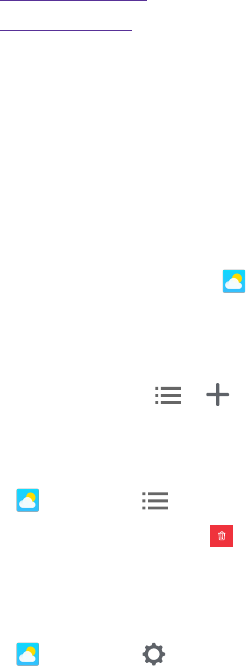
Add a city
Add multiple cities to the weather application so that you can keep track of the weather in cities of interest to
you. Before adding a city, please connect to the mobile data or connect to WLAN and enable location-based
services.
1. On the Home screen, tap Weather.
2. Enter a city name in the City field and a list of cities will be displayed on the screen. Or you can tap Add
current location to quickly get the weather of your current location.
3. Tap the city you want to add and you will see the weather information about the city. You can add more
cities by tapping -> and then enter the city name. After adding two or more cities, slide left or right
on the screen to view the weather information of different cities.
Remove a city
Tap Weather -> to log into the City list.
Swipe left of the city and tap to remove the city you don’t need.
13. 2 Weather settings
Tap Weather -> to configure the weather settings.
• Temperature units: Tap to choose ℃ or ℉ as the temperature unit.
• Alert notification: Select the city you want to alert and turn on the.
• Auto refresh: Turn on the switch to make the phone auto refresh the weather information.
• Refresh interval: Tap to set the refresh interval.
13
54Chapter 14. Notes
Notes
Use Notes to record important information to save and view at a later time.
• Compose a new note
• Note options
• Manage notes
14. 1 Compose a new note
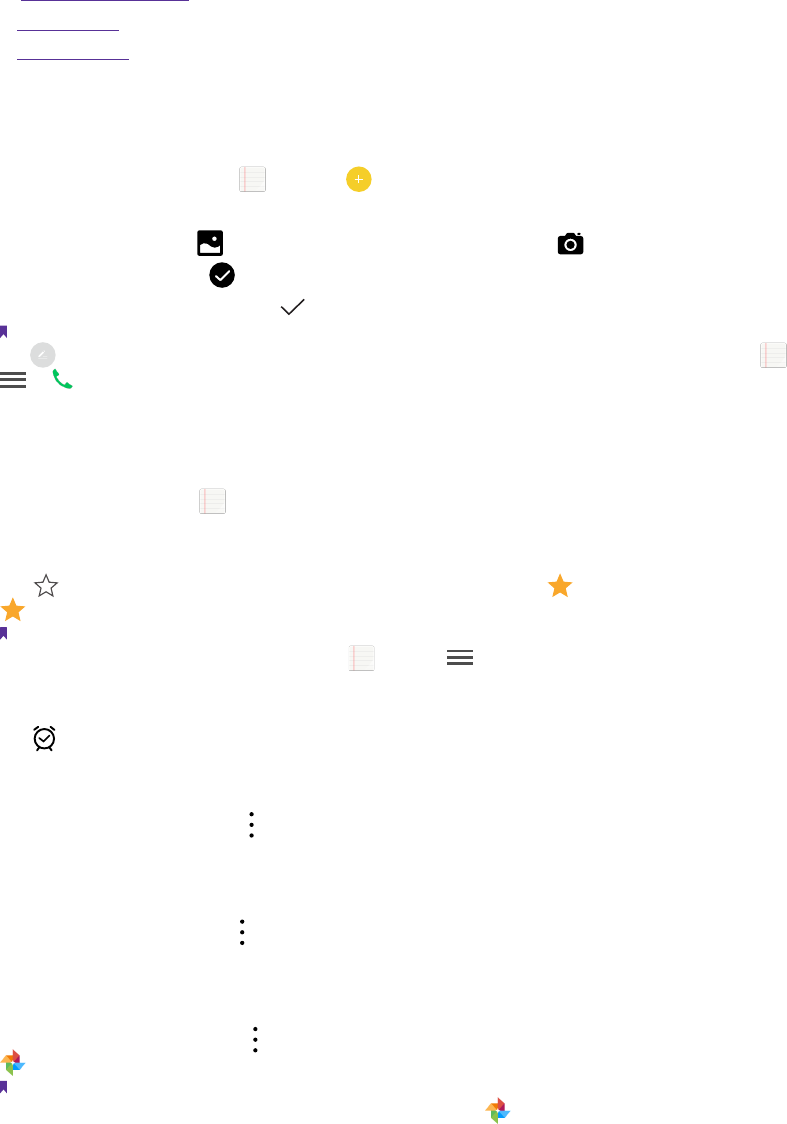
1. On the Home screen, tap Notes -> at the bottom right corner and begin composing a new note.
2. For the content of your note, you can:
• Add pictures: Tap to select a picture from your gallery or tap to take a picture.
• Add checklists: Tap to add checklist in the note.
3. After finishing composing, tap to save the note.
Note:
Tap Notes on the call interface to edit notes during a call and then tap SAVE. (These notes are saved in Notes ->
-> Call by default.)
14. 2 Note options
On the Home screen, tap Notes and select the note you want to edit more, you can:
Add the note to favorites
Tap in the upper right corner to light it up for important contents. means the note have been saved in
Favorites.
Note:
To see the notes you have added to favorites, tap Notes -> -> Favorites.
Set reminders
Tap to set times for your note(s) to receive reminders so you can deal with them on time.
Change the note background color
At the upper right corner, tap -> Background Color and select the color you want to set as your note
background color. The default background color is white.
Share the note
At the upper right corner, tap -> Background Color and the note will be created as picture automatically,
then choose the way you want to share and follow the onscreen instrutions.
Save the note as picture
At the upper right corner, tap -> Saved as picture and the note will be saved as picture and kept in
Photos.
Note:
If you have ever shared the note, then it is already saved as picture in Photos.
14
55Chapter 14. Notes
Modify a group
At the upper right corner, tap -> Modify a group, then you can either set a new group for the note by tapping
Add group, entering the group name and tapping OK, or you can select one of the groups displayed.
Pin to Home screen
At the upper right corner, tap -> Pin to home screen and the note will be pinned to Home screen.
Note:
To remove the note from Home screen, touch and hold the note on the Home screen, then drag it to Remove in the
status bar.
Print the note
Make sure your printer and phone connect to the same LAN network. Then at the upper right corner, tap
-> Print -> Select a printer to choose your printer, and follow the onscreen instructions to print the note as
desired.
Delete the note
At the upper right corner, tap -> Delete -> DELETE to delete the note.
14. 3 Manage notes
Search note(s)
On the Home screen, tap Notes -> and enter the key words to quickly find the note(s) you want.
View your notes in an organized way
1. On the Home screen, tap Notes and all your notes are displayed in chronological order.
2. Tap to enter the Group screen and view your notes in an organized way:
• Tap All notes to view all your notes.
• Tap Quick notes to view the notes you neither set for a group nor added to favorites.
• Tap Favorites to view the notes you added to favorites.
• Tap Call to view the notes you composed during a call.
• Tap Life/Work/Study to view the notes you classified into Life/Work/Study group.
Note:
Four groups (All notes, Quick notes, Favorites, Call) cannot be renamed/deleted, for more information, see Group
management).
Delete note(s)
On the Home screen, tap Notes, touch and hold the notes, select the note(s) you want to delete, and then
tap -> DELETE. Or you can tap the note you want to delete, and then tap -> Delete -> DELETE.
Group management
On the Home screen, tap Notes, you can:
• Add a group: You have three ways to add a group:
1 ) Tap -> Add a group, enter a new group name and then tap OK.
2 ) Tap -> -> Add a group, enter a new group name and then tap OK.
3 ) Tap a note and then tap -> Modify a group -> Add a group, enter a new group name and then
tap OK.

56Chapter 14. Notes
• Rename a group: Tap -> , tap the group you want to rename, enter a new group name and then tap
OK.
• Delete group(s): Tap -> , touch and hold a group, select the group(s) you want to delete, and then
tap -> DELETE.
• Change display order of groups: Tap to enter Group screen. For example, when you have added many
groups in Group screen and you want to view Life notes quickly, tap , touch and hold next to Life
and swipe it up to the top, then Life group will display on the top under Call notes on Group screen.
Note:
All notes, Quick notes, Favorites, Call these four groups cannot be renamed, deleted or changed display order. To see
the notes you have added to favorites, tap Notes -> -> Favorites.
57Chapter 15 . Google
Google
Enjoy the applications from Google.
Google
Google indexes billions of web pages so that you can search for the information you desire through the use of
keywords and operators.
Gmail
Gmail, a free webmail service provided by Google.
Maps
Google Maps helps you find your current location, get directions, and other location-based information. To use
Maps, you should enable location services first.
YouTube
Use YouTube to share and view videos.
Drive
Use Drive to open, view, rename, and share your Google Docs and files.
Play Music
Use Google Play Music to play music on the Internet or stored on your phone.
Play Movies & TV
Watch movies and TV shows purchased from Google Play. You can stream them instantly, or download them
for viewing when you’re not connected to the Internet. You can also view videos in local storage.
Duo
Experience faster and more reliable calls whether your are on WLAN or on-the-go with Google Duo, a one-to-
one video calling app for everyone-designed to be simple, reliable and fun, so you never miss a moment.
15
58Chapter 16 . Tools
Tools
Use Tools to enjoy more features of your phone.
• Sound Recorder
• Contacts
• Compass
• Downloads
• SIM Toolkit
• Feedback
• Calculator
• Kasa
• Tether
16. 1 Sound Recorder
You can use the Sound Recorder to record sound in a variety of different scenarios, such as meetings,
interviews, or your own voice.
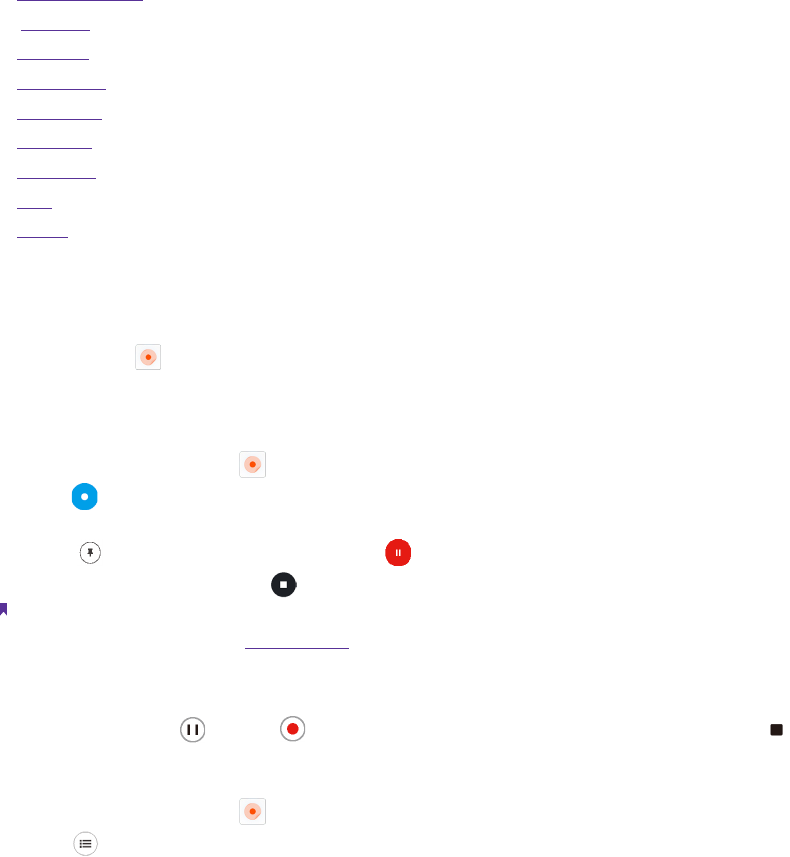
Record sound
1. On the Home screen, tap Sound Recorder.
2. Tap to start recording. In order to ensure optimum recording quality, place your phone on a flat surface
and do not cover the microphone.
3. Tap to add a tag for easy reference, tap to pause or stop recording.
4. After stopping recording, tap to name the sound record and tap SAVE to save it.
Note:
1. To make a call recording, see Record the call.
2. The Sound Recorder app will pause recording automatically when you receive a call.
3. When the Sound Recorder app is recording sound in the background, use the controller in the Notification Panel to
pause it by tapping , then tap to continue recording; or you can save the recording by tapping .
Play a recording
1. On the Home screen, tap Sound Recorder.
2. Tap , select the recording file you want to play.
3. When playing a record, you can:
16
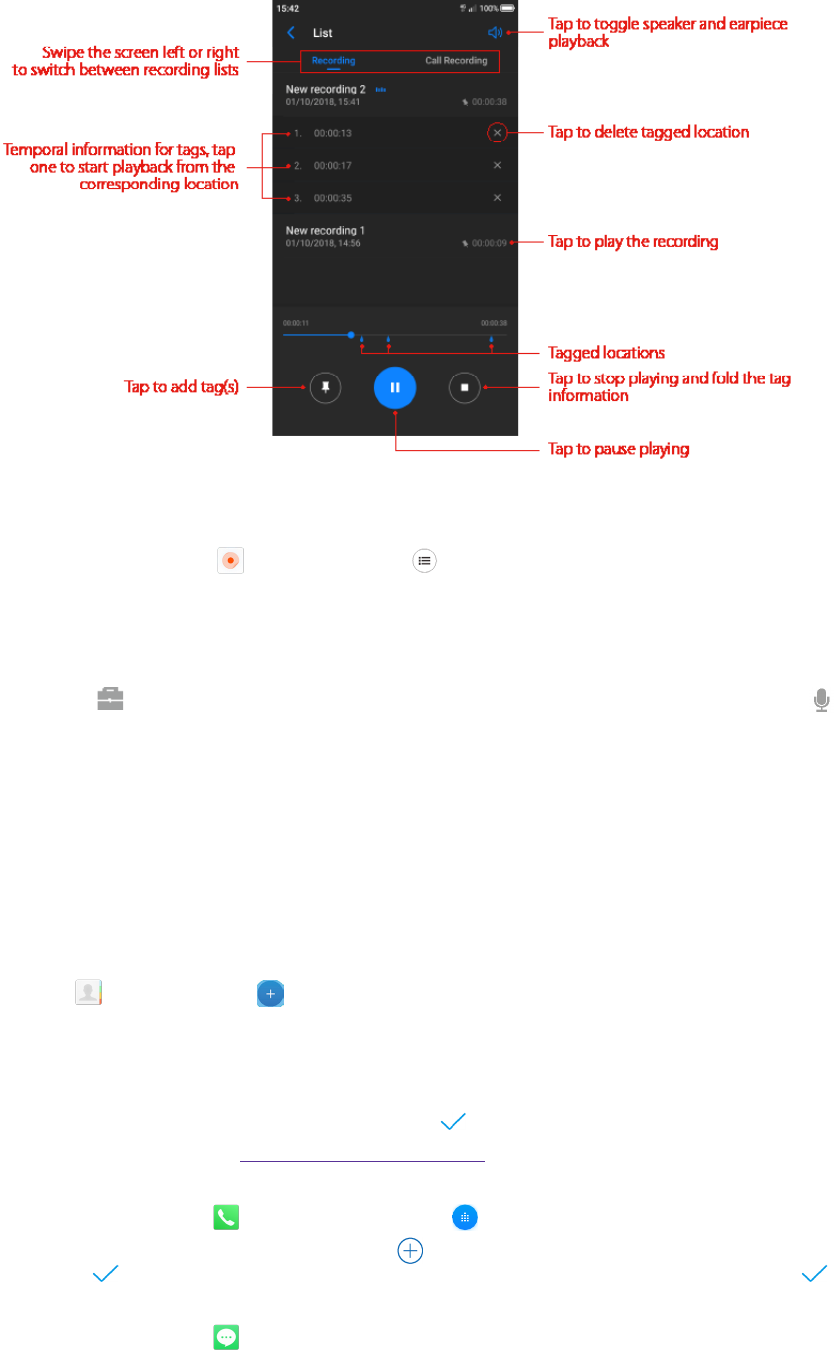
59Chapter 16 . Tools
Manage recordings
1. On the Home screen, tap Sound Recorder -> .
2. Touch and hold the recording, select the recording(s) you want to manage, and then you can rename,
share and delete it/them.
Sound Recorder shortcut
Swipe up from at the bottom of the lock screen to display lock screen features and tools, and then tap
to open the Sound Recorder.
16. 2 Contacts
On the Home screen, tap Tools.
Add contacts
You have four ways to add new contacts:
• Add new contacts with Contacts app
1 ) Go to Contacts and tap (You can also tap ADD A CONTACT if you are adding a contact for
the first time). Tap OK to save the contact to your phone or tap ADD NEW ACCOUNT and follow the
onscreen instructions to save contact to your personal account so that you can always get the contact
information when logging in the account. Now begin adding new contact(s).
2 ) Tap the contact’s profile picture to choose a photo. Enter the contact’s name, company, title, phone
number and other contact information, and then tap .
• Add contacts from call log: See Add a number from the call log.
• Add contacts from dialer
1 ) Go to Home screen, tap Phone -> Recent calls -> to enter the phone number.
2 ) You can add the number to new contacts, tap -> Create new contact and enter the information,
then tap ; you can also add the number to an existing contact, tap to choose the contact, then tap .
• Add contacts from messages
1 ) Go to Home screen, tap and select the message whose number you want to add to contacts.

60Chapter 16 . Tools
2 ) You can add the number to new contacts, tap -> Add to contact -> Create new contact and enter
the information, then tap ; you can also add the number to an existing contact, tap and choose the
contact, then tap .
Note:
The contact’s photo will be displayed when the contact calls you.
Set up your profile
1. After you have created contact(s), on the Contacts screen, tap Set up my profile to enter your personal
information and then tap to save.
2. After saving the information, you can directly tap -> Share on the page to share it to others as your card.
Or you can go to Contacts -> the name under ME -> -> Share.
Manage contacts
Go to Contacts, you can:
• Edit a contact: After creating a contact, you can edit their contact information at any time. This includes
adding or deleting default information such as phone numbers or email addresses. You can also choose a
custom ringtone or add more options, such as a birthday, nickname, or photo. Tap the contact you want
to edit and tap to start editing, then tap to save the information. You can also touch and hold the
contact and then tap Edit to edit the information.
• View contact information: Tap the contact to view the detailed contact information. You can also touch and
hold the contact and then tap View to get the contact information.
• Share contacts
1 ) To share one contact, touch and hold the contact you want to share, then tap share, choose your sharing
method and follow the onscreen instructions. You can also tap the contact you want to share, then tap
-> Share, choose your sharing method and follow the onscreen instructions.
2 ) To share multiple contacts, touch and hold one of the contacts you want to share and tap Batch, select
the contacts you want to share, then tap , choose your sharing method and follow the onscreen
instructions.
• Add a contact to your favorites: Tap the contact you want to add to your favorites, and then tap . You can
tap to remove the contact from your favorites (The contacts you have added to favorites will display on
the top of you contact list under ME).
• Add a contact to blacklist: Touch and hold the contact you want to block and then tap Add to blacklist;
you can also tap the contact and then tap -> Add to blacklist. (To remove the number from blacklist, tap
the contact and then tap -> Remove from blacklist. You can also touch and hold the contact, then tap
Remove from blacklist.)
• Delete contacts
1 ) To delete one contact, touch and hold the contact you want to delete, then tap Delete -> OK. You can
also tap the contact you want to delete and tap -> Delete -> DELETE.
2 ) To delete multiple contacts, touch and hold one of the contacts you want to delete and tap Batch, check
the contacts you want to delete, then tap -> OK.
• Divert calls to voicemail: Tap the contact, then tap and check All calls to voicemail to divert the calls from
this contact to voicemail when your phone is switched off or when there is no cellular. Callers can leave a
voice message which you can listen to later.
Note:
Voicemail must be supported by your carrier. Please ensure that you have subscribed to this service. Contact your carrier
for information about their voicemail service.
Contact groups
After you have created contact(s), go to Contacts, you can:
• Create a group: Tap Groups -> to enter a group name, and then tap to select the contacts you want
to add to the group and tap to save.
61Chapter 16 . Tools
• View groups: Tap Groups to view all the contact groups. The figure beside the group name show the number
of contacts in that group. Tap the group name to view the detailed contacts.
• Edit a group: Tap Groups and tap the group you want to edit, then tap and you can rename the group/
add new members/remove members from the group.
• Delete a group: Tap Groups and tap the group you want to delete, then tap -> OK.
16. 3 Compass
1. On the Home screen, swipe down from the status bar to open the Quick Settings Panel and tap
Location (If it is turned on already, move to step 2).
2. When opening Compass for the first time, follow the onscreen instructions to tilt your phone and calibrate
the compass. Tap Tools -> Compass to open the compass and view your bearings. The compass also
displays the latitude and longtitude. Swipe left to view the spirit level.
16. 4 Downloads
On the Home screen, tap Tools -> Downloads to view the downloaded and downloading information.
View files
Go to Downloads -> , you can:
• View images: Tap Images to view the pictures you have downloaded.
• View videos: Tap Videos to view the videos you have downloaded.
• View audio: Tap Audio to view the audio you have downloaded.
• View the recent downloads: Tap Recent to view the files you have downloaded recently.
Rank files
Select a ranking type to display your files in a list or a tile.
Go to Downloads -> , tap it and switch the ranking type of files diaplay mode.
Sort files
Use the sort feature to arrange your files by name or date modified.
Go to Downloads -> , Select a sorting type to sort files by name or date modified as you like.
Hide/Show file size
1. Go to Downloads -> -> Hide file size/Show file size.
2. You can select the display mode of file size by switching the order.
16. 5 SIM Toolkit
1. Before you launch the SIM toolkit, insert SIM card first.
2. On the Home screen, tap Tools -> SIM Toolkit.
3. Choose SIM 1 or SIM 2 to check the SIM card details.
16. 6 Feedback
1. On the Home screen, tap Tools -> Feedback.
62Chapter 16 . Tools
2. Follow the onscreen instrutions to enter your feedback, you can also attach snapshot(s), and then tap
Submit.
16. 7 Calculator
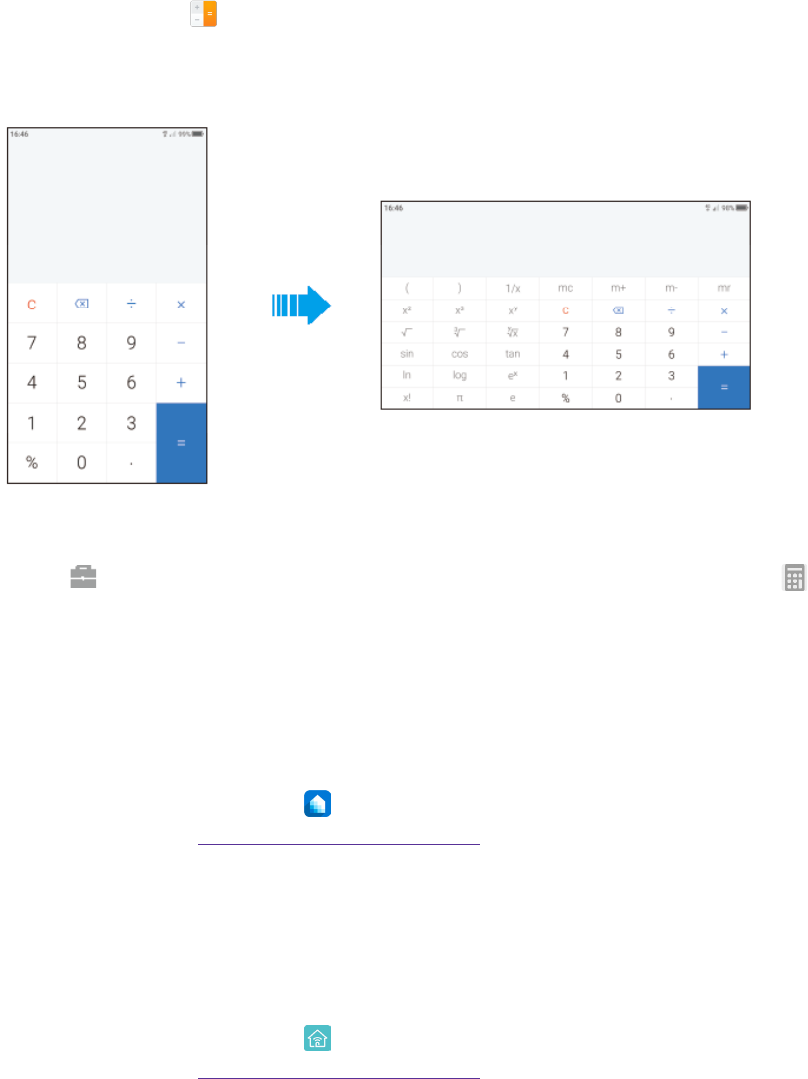
Use the calculator
1. On the Home screen, tap Calculator to open the standard calculators.
2. Rotate the screen to access the scientific calculator (The calculator will still rotate when auto-rotation is
disabled).
3. Tap numbers and use the arithmetic feature to complete an operation.
Calculator shortcut
Swipe up from at the bottom of the lock screen to display lock screen features and tools, and then tap
to open the calculator.
16. 8 Kasa
Kasa for Mobile is your portal to your TP-Link Smart Home. Kasa lets you add, configure, monitor and control
your connected TP-Link Smart Home devices from anywhere in the world. You can schedule your appliances to
turn on/off according to you plan, or set them to Away Mode to deter would-be burglars.
1. On the Home screen, tap Smart Life -> Kasa and follow the onscreen instructions.
2. For more help, please visit http://www.tp-link.com./us/support and enter Kasa in the search bar.
16. 9 Tether
Tether is an app that allows you to access your TP-Link devices on your smartphone or tablet. With Tether, you
can set up an Internet connection and configure a range of network settings such as access control rules and
your wireless network name and password.
1. On the Home screen, tap Smart Life -> Tether and follow the onscreen instructions.
2. For more help, please visit http://www.tp-link.com./us/support and enter Tether in the search bar.

63Chapter 17 . Settings
Settings
This chapter contains the following sections.
• Search settings
• Dual-SIM & network
• Data usage
• More connection settings
• Sounds & vibration
• Notification manager
• Do not disturb
• Display
• Apps
• Permissions
• Storage
• Battery
• Smart settings
• Float button
• Accessibility
• Apps Cloner
• Screen lock, fingerprint & security
• Location
• Accounts
• Google
• Language & input
• Backup & reset
• Date & time
• System update
• About phone
17. 1 Search settings
On the Home screen, tap Settings -> and enter the key words, then related functions from Settings
will display on the screen. Tap to select the function you want to know more.
17. 2 Dual-SIM & network
When two SIM cards are inserted, you can configure the default card for mobile data, phone calls and SMS
messages according to your plan.
1. Go to Settings -> Dual-SIM and network.
2. Configure more settings for your SIM cards and choose the preferred SIM for cellular data, calls or SMS
messages.
17
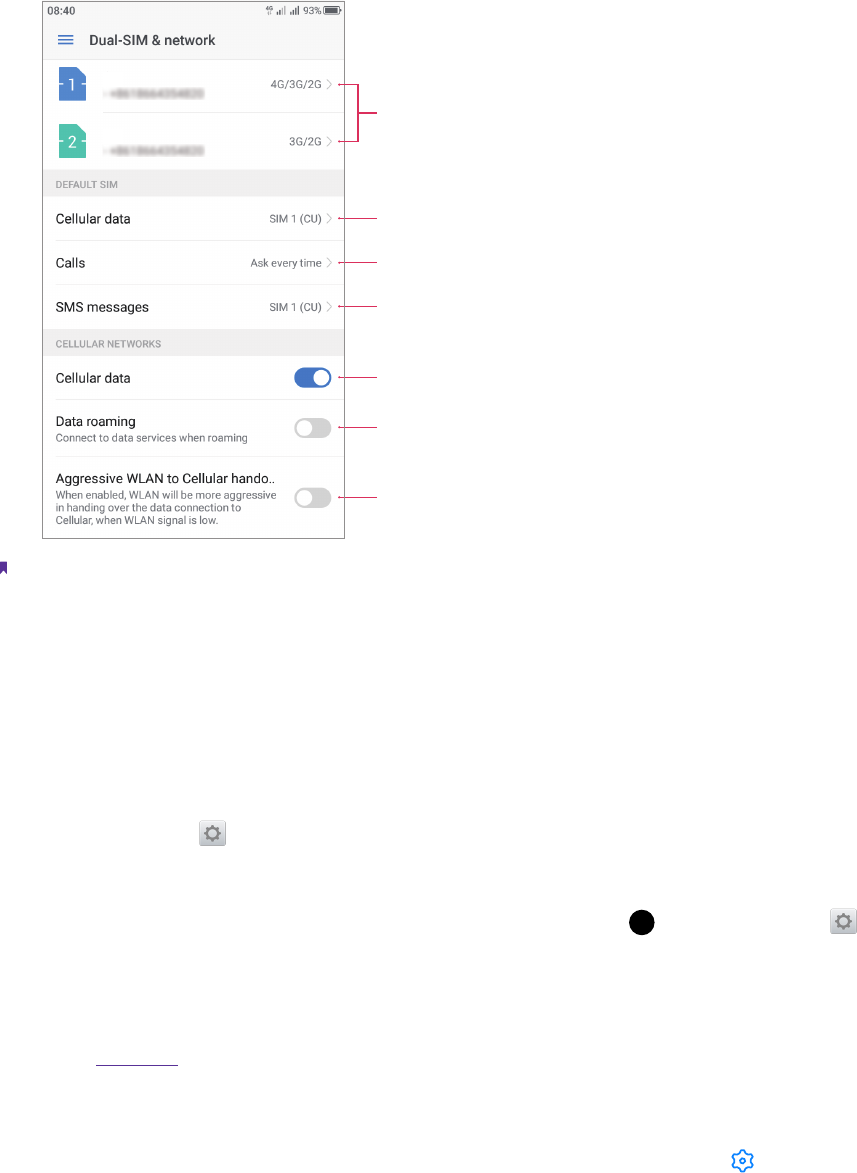
64Chapter 17 . Settings
Operator
Operator
Select default SIM for data services
Tap to configure more settings of you SIM cards
Enable or disable cellular data
Enable or disable data roaming
Enable or disable WLAN aggressively handing over the data
connection to Cellular when WLAN signal is low
Select default SIM for phone calls
Select default SIM for messages
Note:
1. If you disable a SIM card, you will be unable to use it to make calls, send messages, or use mobile data.
2. You can configure whether you want to select a SIM card manually or use the default SIM card each time you make a
call. If you choose to use the default SIM card, your phone will use that SIM card for all outgoing calls.
3. Your phone supports only dual card dual standby single pass, which means you cannot use both SIM cards for calls
or data services simultaneously.
17. 3 Data usage
On the Home screen, tap Settings -> Data usage, you can:
• View data usage: Data usage display on the top of the screen.
• Enable cellular data: Switch on Cellular data to enable it. To enable cellular data, you have two more ways:
swipe down from the status bar to open the Quick Settings Panel and then tap Mobile data or go to
Settings -> Dual-SIM & network and then switch on Cellular data.
• View apps using cellular data: Tap Apps using mobile data network to view apps able to use cellular data.
Turn off the switch next to the app to prohibit it from using the cellular data.
• Enable data saver: Tap Data saver and switch it on to enable data saver. For another way to enable data
saver, see Data saver. Still, you can have some apps allowed to use unrestricted data when Data Saver is on,
tap Data saver -> Unrestricted data access and turn on the switch next to the app you want to enable
using unrestricted data.
• View detailed cellular data usage: Go to Cellular data usage screen, tap the date on the top left corner to
select the time period, then detailed data usage for all apps will display on the screen. Tap to configure
billing cycle setting, this can also be set in Billing cycle.
• Configure billing cycle settings: Tap Billing cycle to configure more setting about billing cycle, data warning
and data limit.
• View WLAN data usage: Tap WLAN data usage to view the detailed WLAN usage.
65Chapter 17 . Settings
• Set metered network for WLAN: This function only works when the phone is connected to WLAN. Tap
Network restrictions and turn on the switch next to the WLAN name to treat the WLAN like cellular. Apps
may warn before using these networks for large downloads.
17. 4 More connection settings
On the Home screen, tap Settings -> More connection settings to configure the settings below:
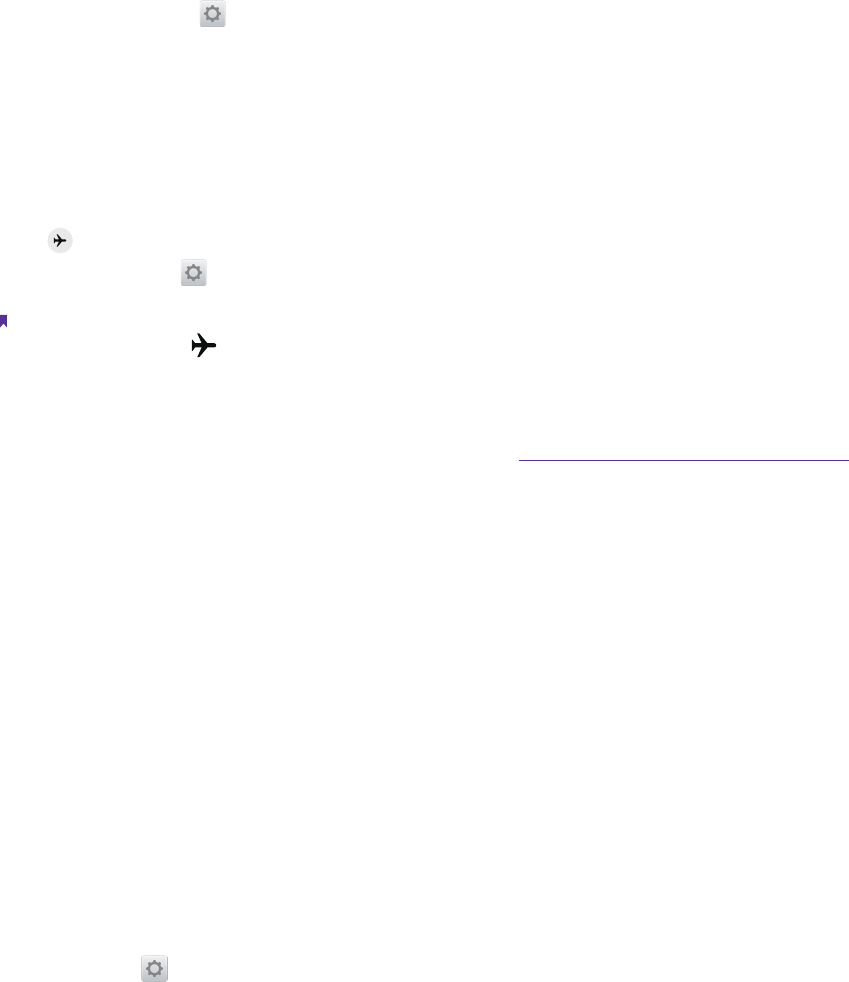
Airplane mode
To avoid interference, please enable airplane mode or power off your phone when you are on board a plane.
After you enable airplane mode, you will not be able to make or receive calls, use mobile data. However, you
will still be able to play music, watch videos, and use applications that do not require an Internet connection.
Use any of the following methods to enable or disable airplane mode:
• Use the shortcut switch: Swipe down from the status bar to open the Quick Settings Panel, and then toggle
the Airplane mode switch.
• Go to Settings: Go to Settings -> More connection settings and then then toggle the Airplane mode
switch.
Note:
When airplane mode is on, will be displayed in the status bar.
Tethering & portable hotspot
Tap to configure tethering & portable hotpot options to share your phone’s mobile Internet with other devices
(such as phones, tablets, or computers). For more information, see Share your mobile data with other devices.
VPN
A VPN (virtual private network) is a secure connection that allows you to send and receive data across shared or
public networks. You can use a VPN to connect to your company network and email server. Tap VPN -> Add
VPN and follow the onscreen instructions to use it.
Cast
Mirror your screen to a larger display device when playing games or sharing content with others. Ensure that
your device is connected to the same LAN network as your display device or set-top box. Then tap Cast and
follow the onscreen instructions to use it.
Printing
Make sure your printer and phone connect to the same LAN network. Then tap Printing and your printer will
display on the screen, and then follow the onscreen instructions to use.
17. 5 Sounds & vibration
Change the incoming call and message ringtones or set the system alert sound and vibration effects. On the
Home screen, tap Settings -> Sounds & vibration to configure the following settings:
• Volume: Tap and drag the slider to adjust the ring, media and alarm volume. If you have pressed Ring/silent
switch button to silent mode, ring volume can’t be adjusted.
• Vibrate: If Vibrate on ring is enabled, your phone will vibrate to alert you of incoming calls and messages.
If Vibrate on silent is enabled, your phone will vibrate when you receive an incoming call or message even
though your phone is under silent mode.
• Ringtones and alerts: Tap SIM 1 ringtone/SIM 2 ringtone to select ringtone for SIM1 and SIM2; tap SMS
alerts to select SIM tones; tap Other notification tones to choose a preset ringtone as the notification tone
for emails and other notifications.

66Chapter 17 . Settings
• System feedback: Toggle the switches to enable or disable dial pad touch tones/lock sounds/touch sounds/
vibration on tap.
17. 6 Notification manager
1. On the Home screen, tap Settings -> Notification manager.
2. Tap All apps to make all apps display on the screen. Then tap the app icons one by one enter their
detailed setting screen:
• Switch on/off Allow notifications to enable/disable notifications for the application.
• Switch on Show silently and then the app will not make sound, vibrate, or peek these notifications
into view on the current screen. (This function only works when you switch on Allow notifications.)
• Switch on Treat as priority and then the app’s notification will continue to interrupt when Do not
disturb is set to Priority Only. (This function only works when you switch on Allow notifications and
switch off Show silently.)
3. Tap All apps -> Blocked to quickly view the apps you switch off Allow notifications; tap All apps ->
Shown silently to quickly view the apps you switch on Show silently; tap All apps -> Priority to quickly
view the apps you switch on Treat as priority:
4. Tap -> Lock screen notification and toggle the switch to enable/disable turning on the screen when
notifications are received; tap -> Show system to enable displaying your system apps on the screen.
If you enabled the device protection (pattern, PIN or password), you can choose the display way of
notification when the screen is locked:
1 ) Show all notification content.
2 ) Hide sensitive notification content.
3 ) Don’t show notifications at all.
Note:
If you choose None or Swipe for screen lock, your phone will show all notification content by default.; tap -> Show
system to enable displaying your system apps on the screen.
17. 7 Do not disturb
When Do not disturb is enabled, calls and alerts will be silenced except the items you set sa priority, and
will appear in the status bar.
On the Home screen, tap Settings -> Do not disturb, you can:
Manually enable Do not disturb
Switch on Manual to enable Do not disturb mode immediately. You can also swipe down from the status bar
to open the Quick Settings Panel, and then tap Do not disturb.
Scheduledly enable Do not disturb
Switch on Scheduled and set the start time, end time and repeat for using Do not disturb mode.
Set exceptions for Do not disturb
Tap Do not disturb -> Priority only -> Priority only allows and you can:
• Set priority for Reminders and Events: Switch on Reminders and Events to set priority for Reminders and
Events. Then tap Messages/Calls to configure who can call or message you; switch on Repeat callers to
allow notifications when the same person calls a second time within a 15-minute period.
• Only allow alarm to send notifications: Tap Do not disturb -> Alarms only to only allow alarm to send
notifications when enabling Do not disturb.
• Disable any notifications: Tap Do not disturb -> Total silence to disable any notifications.