TRENDNET TEW429UB 11g Wireless USB 2.0 Adapter w/ Hotspot Detector User Manual UG TEW 429UB b1
TRENDNET, INC. 11g Wireless USB 2.0 Adapter w/ Hotspot Detector UG TEW 429UB b1
UserManual.wiki
>
TRENDNET
>
TEW429UB User Manual
Users Manual
Navigation menu
Upload a User Manual
Namespaces
Wiki Guide
HTML
PDF
Info
Views
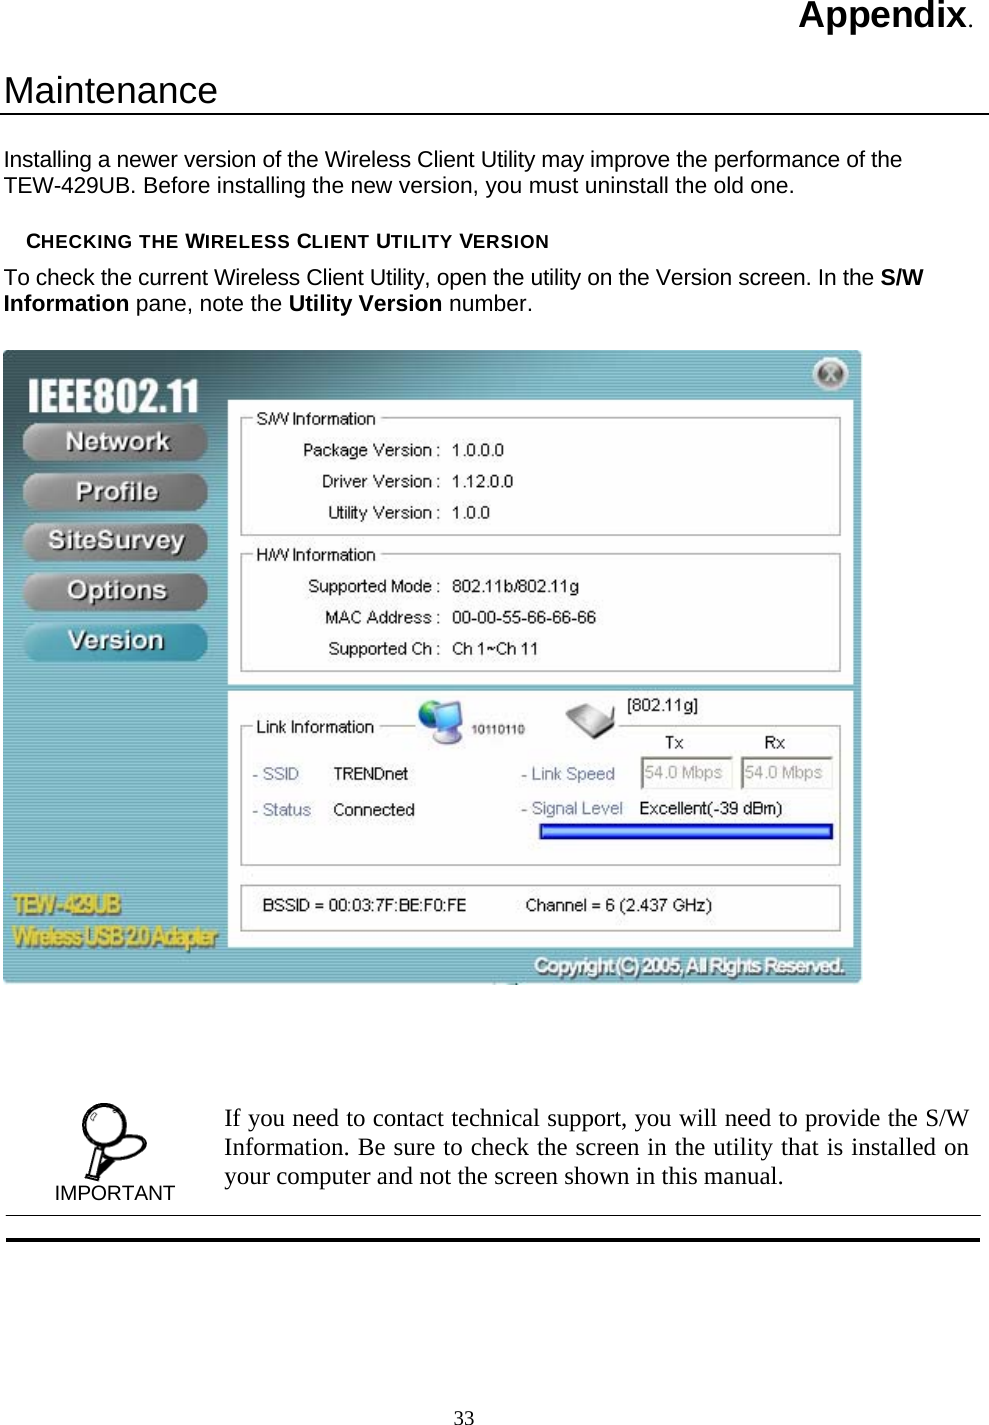
User Manual
Discussion / Help
Navigation
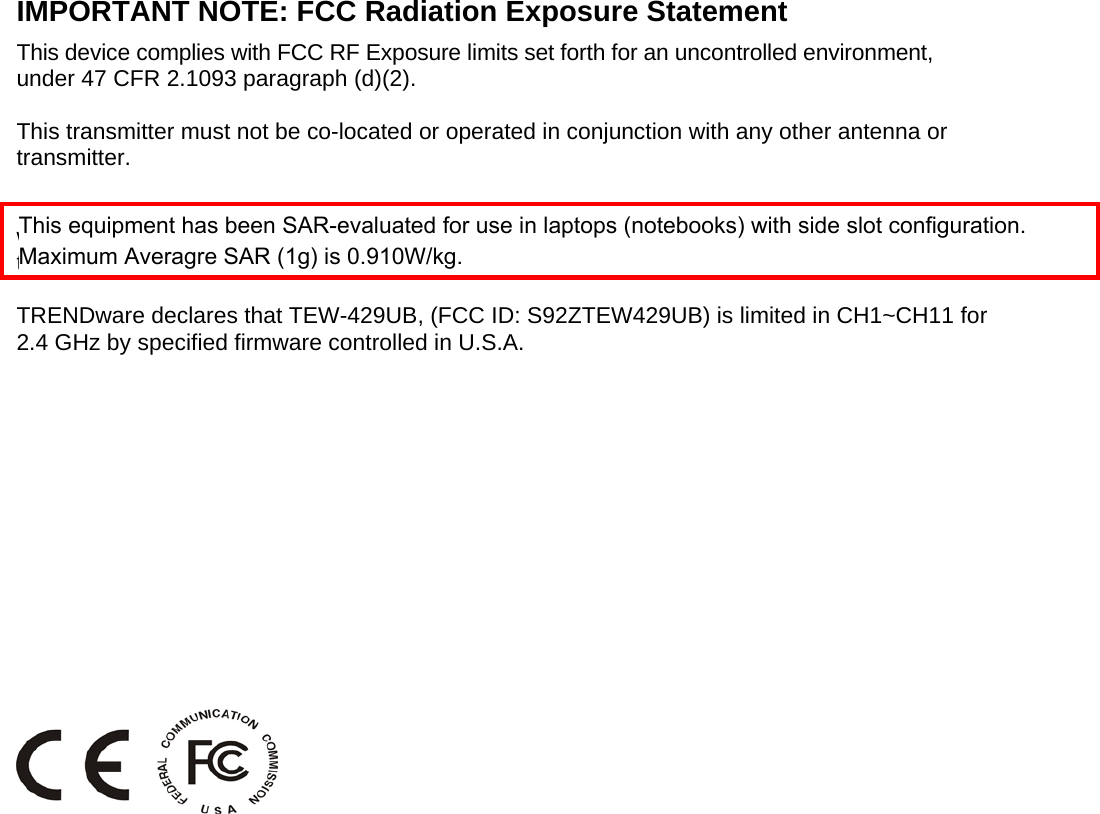
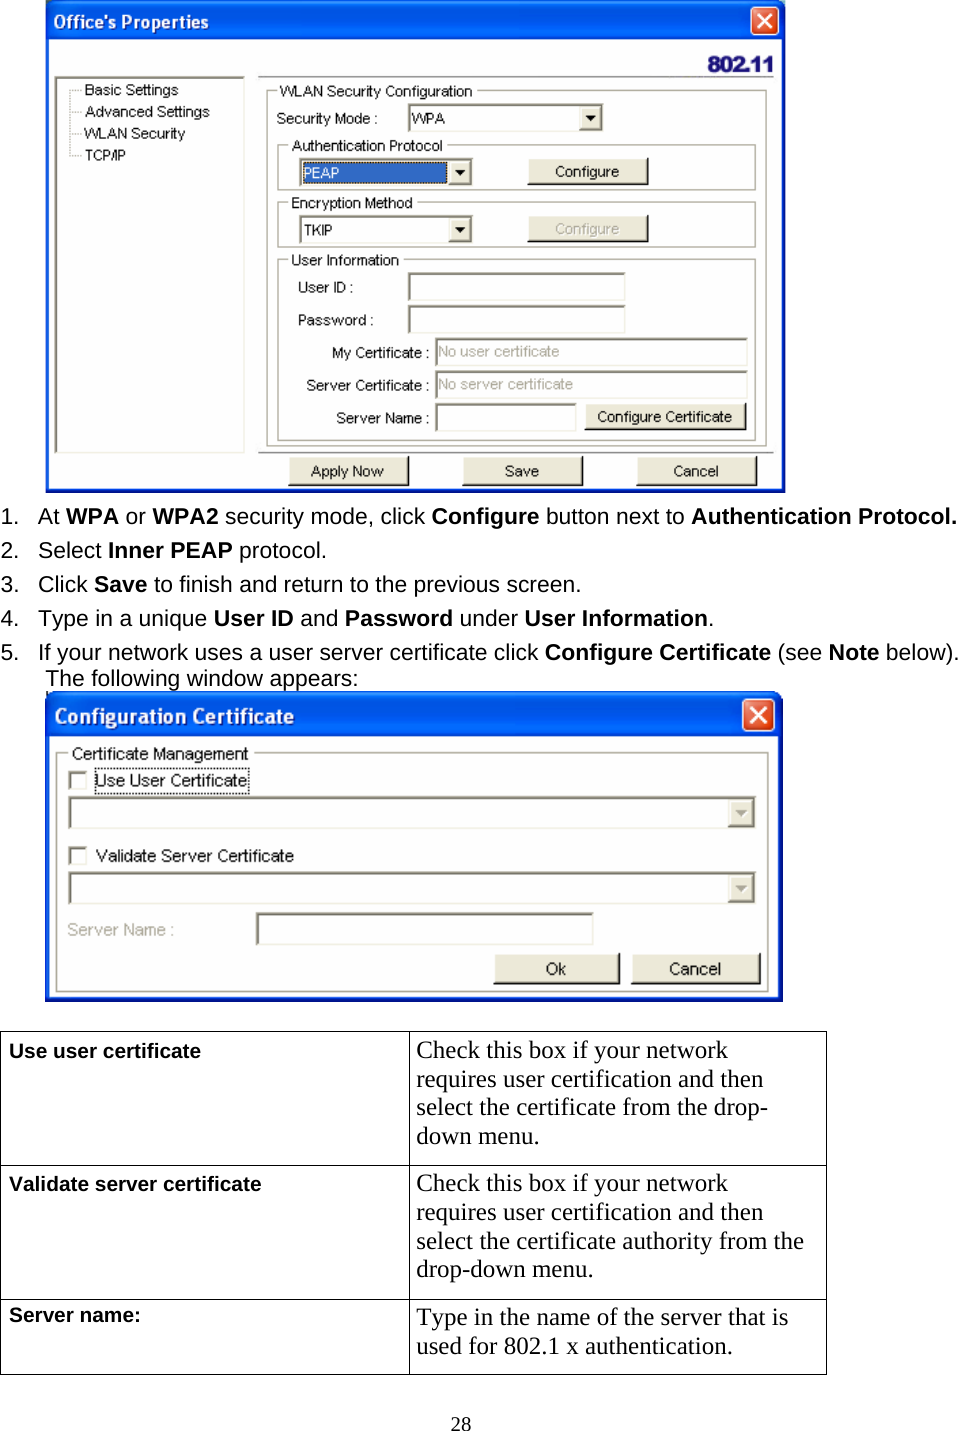
![14 LCD Icons The illustration below shows the icons in the LCD. All the icons will not necessarily appear together as shown here. Fully charged and Recharging icons would appear during charging process only. Finding a Hot Spot Refer to the following to find a hot spot. 3. Switch Power to ON. The TEW-429UB boots and searches for hot spots. 4. Press Next to scroll the available hot spots. Accessing a Hot Spot 5. Connect the TEW-429UB to your computer and open the Wireless Client Utility. 6. Open the SiteSurvey screen and select the hot spot you want to access. 1 SSID: Displays the SSID of the current connection. Scrolls horizontally for longer names. 2 Channel: Displays the channel number of the current connection. 3 Found: Displays the number of connections found. Up to 16 connections can be monitored. 4 Power: Indicates the battery status: low; fully charged; recharging. Press and hold the Seek button to scroll through the three modes: [S]; [F]; and [D]. Scan results are ranked in order of signal strength. Only lists open hot spots ranked in order of signal strength. 5 Scan mode: Continually refreshes details of the selected hot spot. Allows you to lock on and monitor the signal strength as you move around. 6 Security Displays the security settings of the network: [WEP]/[WPA] security enabled; security disabled. 7 Signal Strength Displays the signal strength (five levels) and radio band: [G]/[B] 802.11g/b. 7 3 2 6 4 5 1](https://usermanual.wiki/TRENDNET/TEW429UB/User-Guide-585240-Page-20.png)