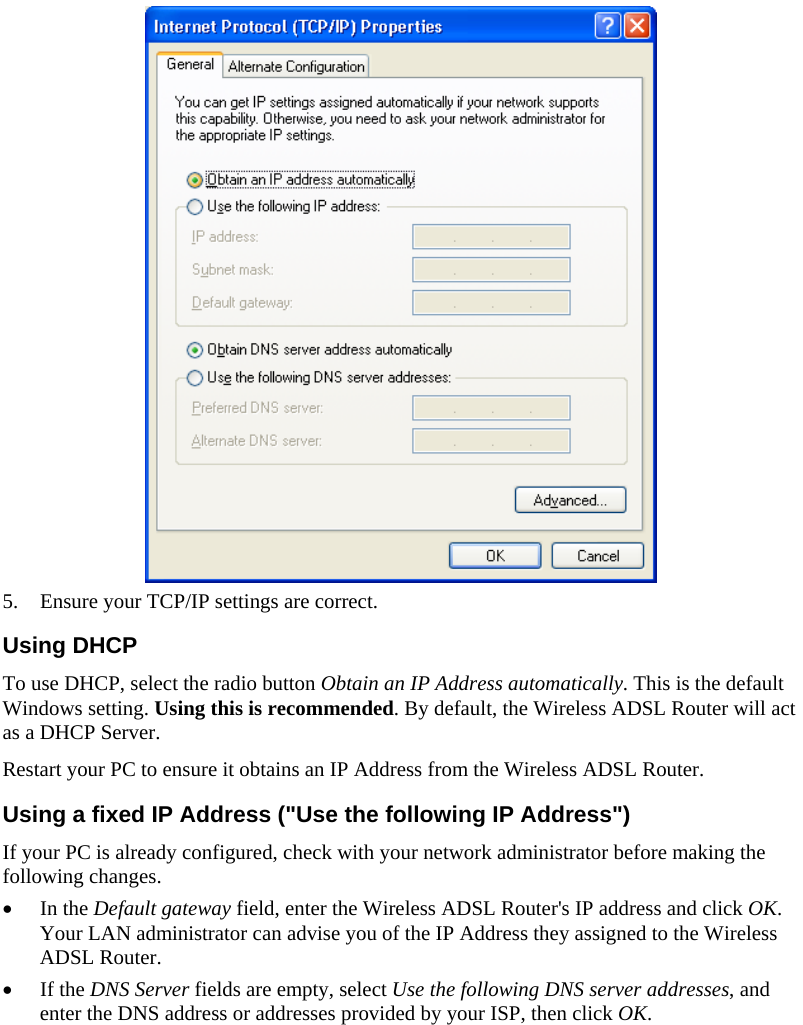
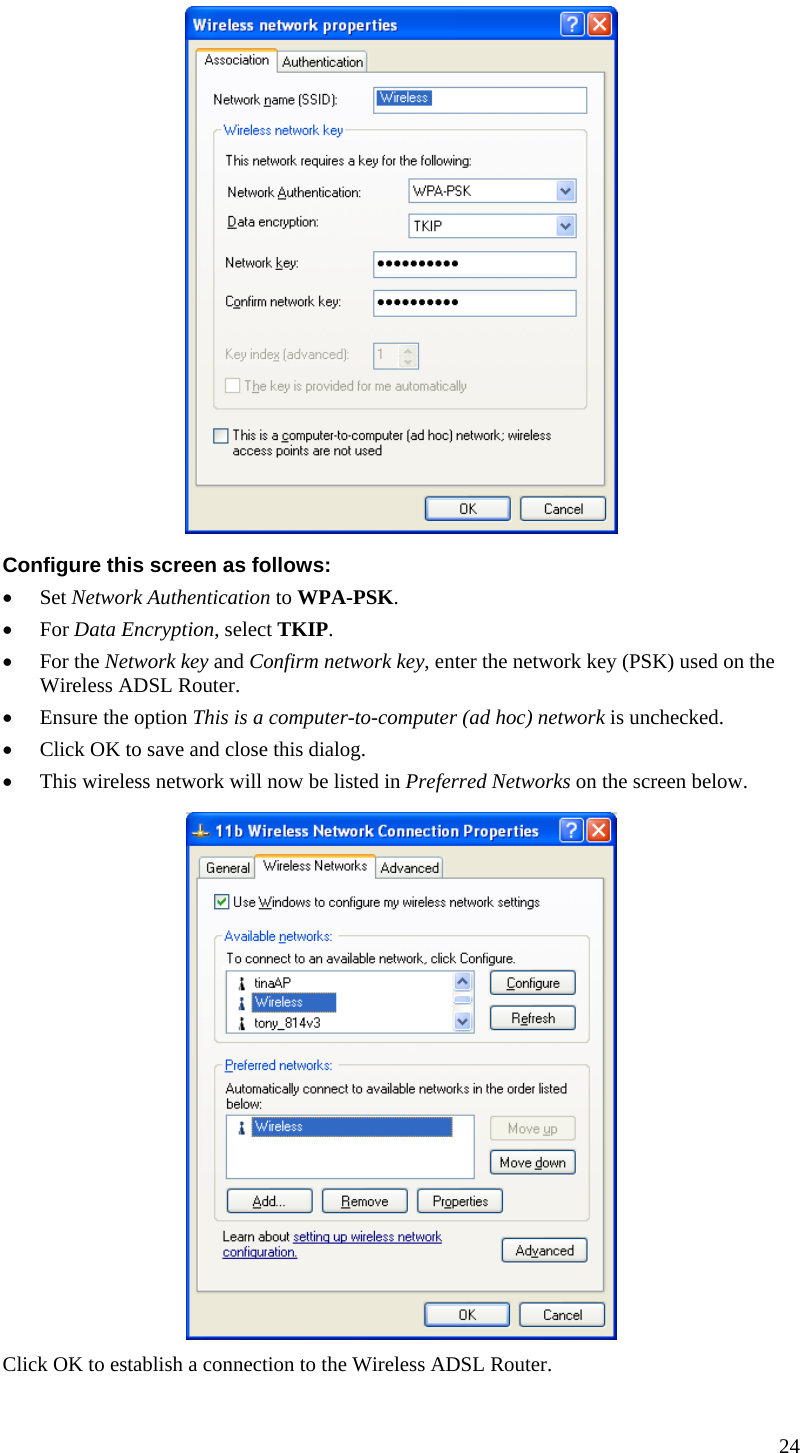
TRENDNET TEW635-657 802.11N Wireless ADSL Router User Manual Wireless ADSL VPN Router
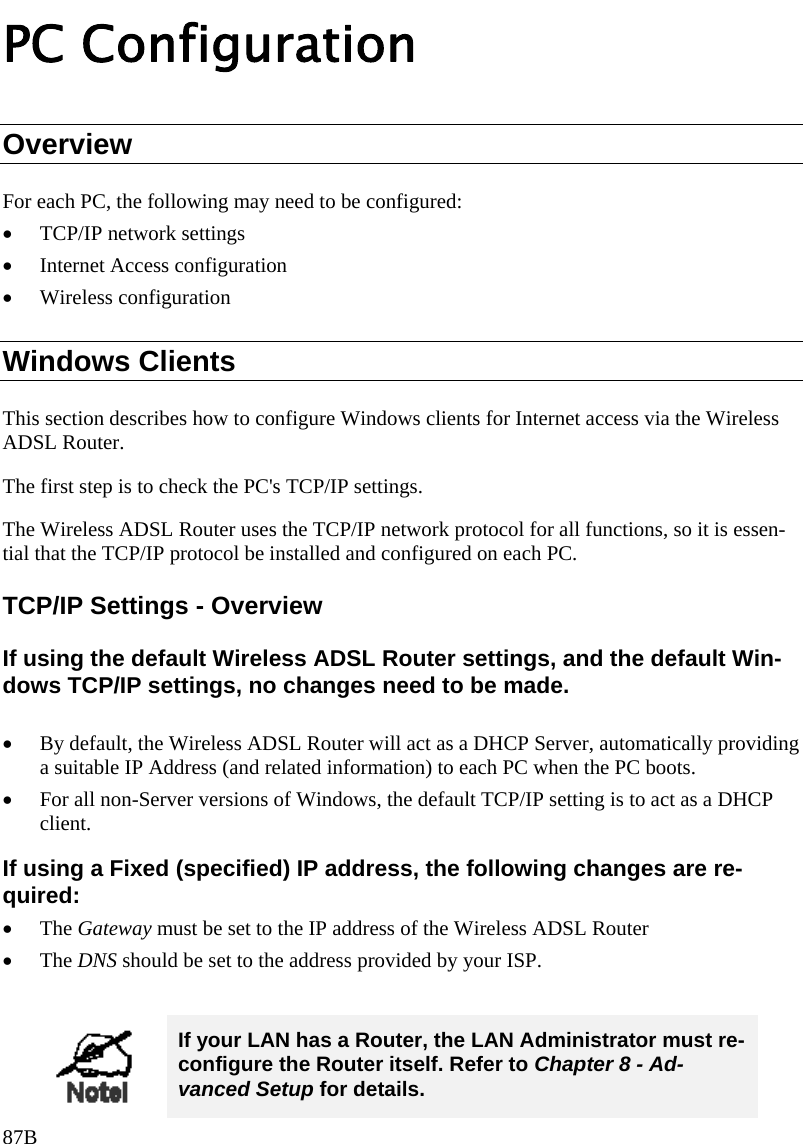
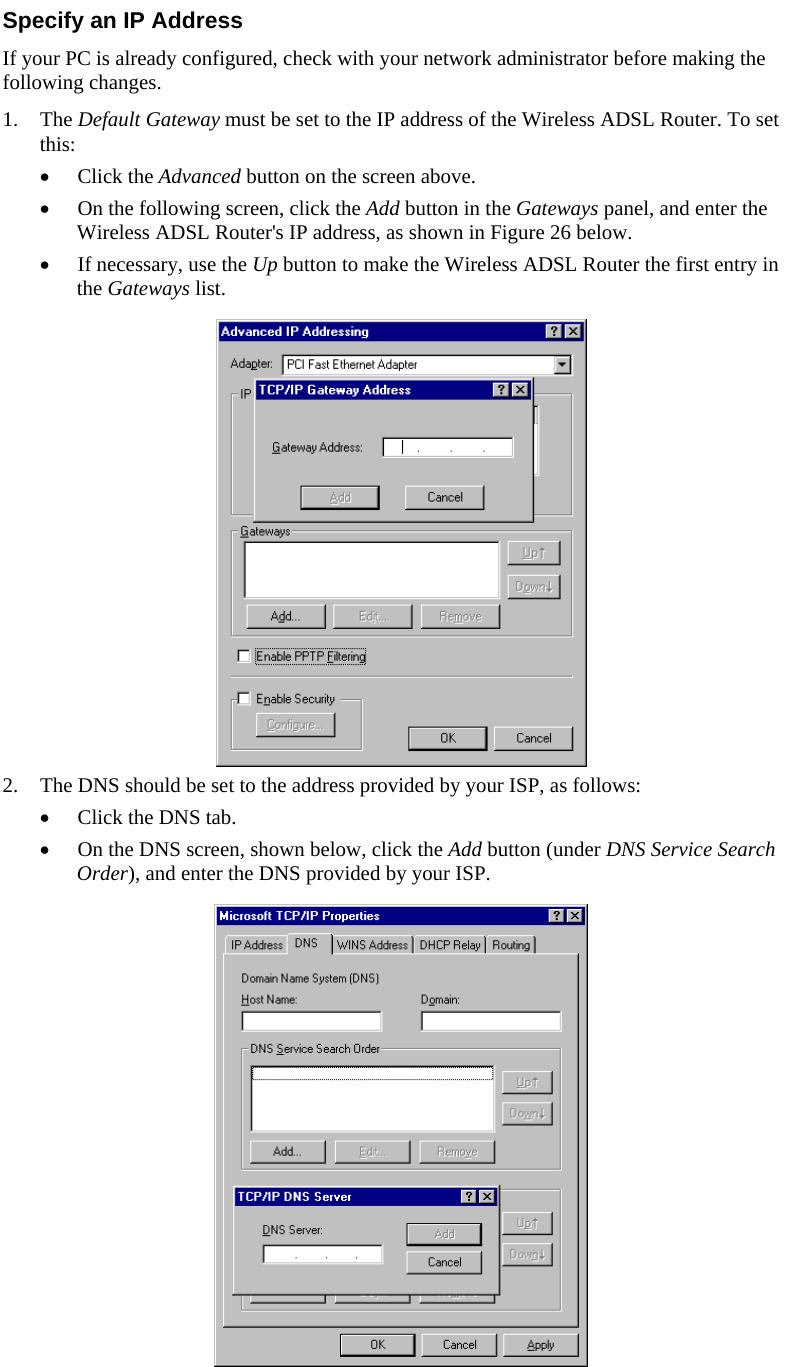
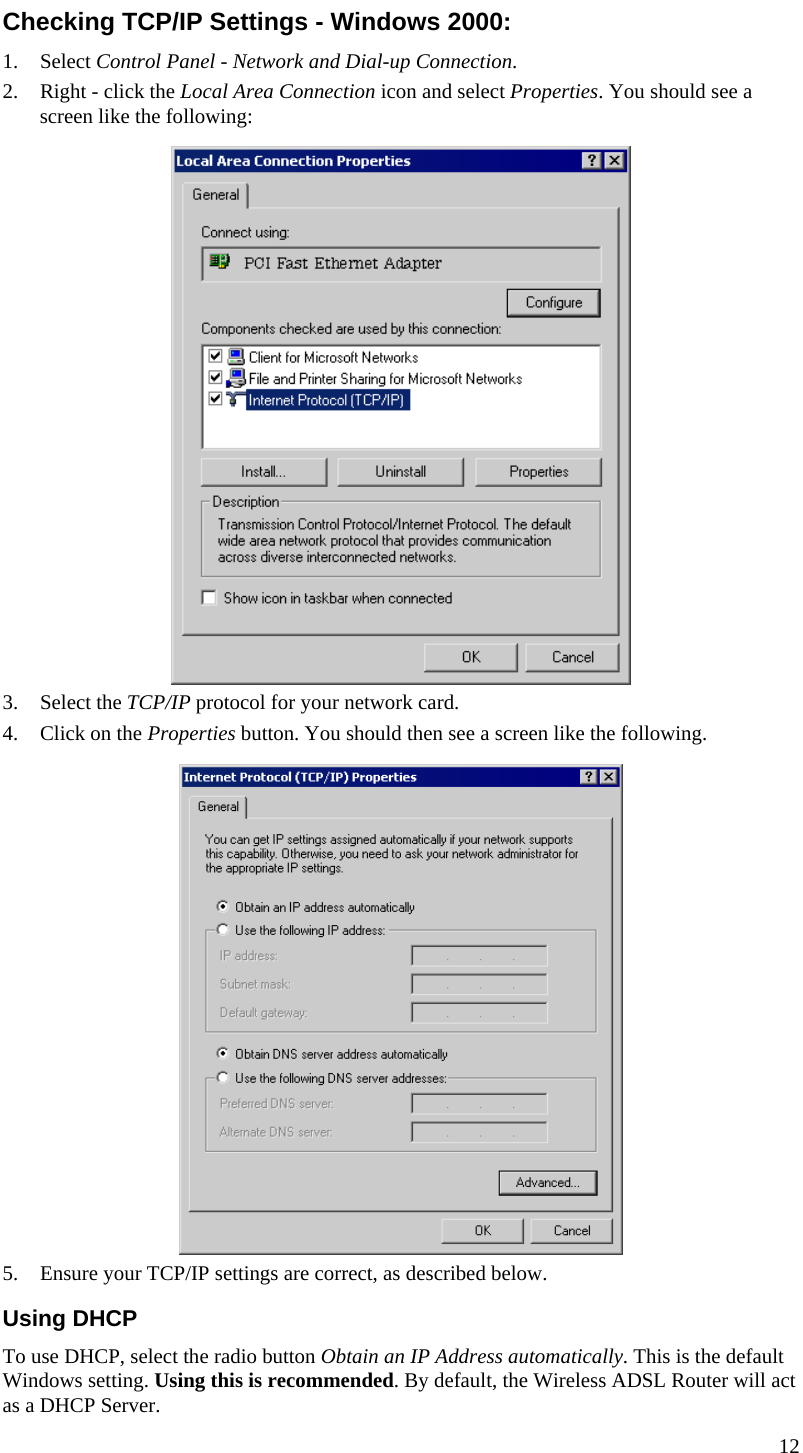
TRENDNET, Inc. 802.11N Wireless ADSL Router Wireless ADSL VPN Router
TRENDNET >
Contents
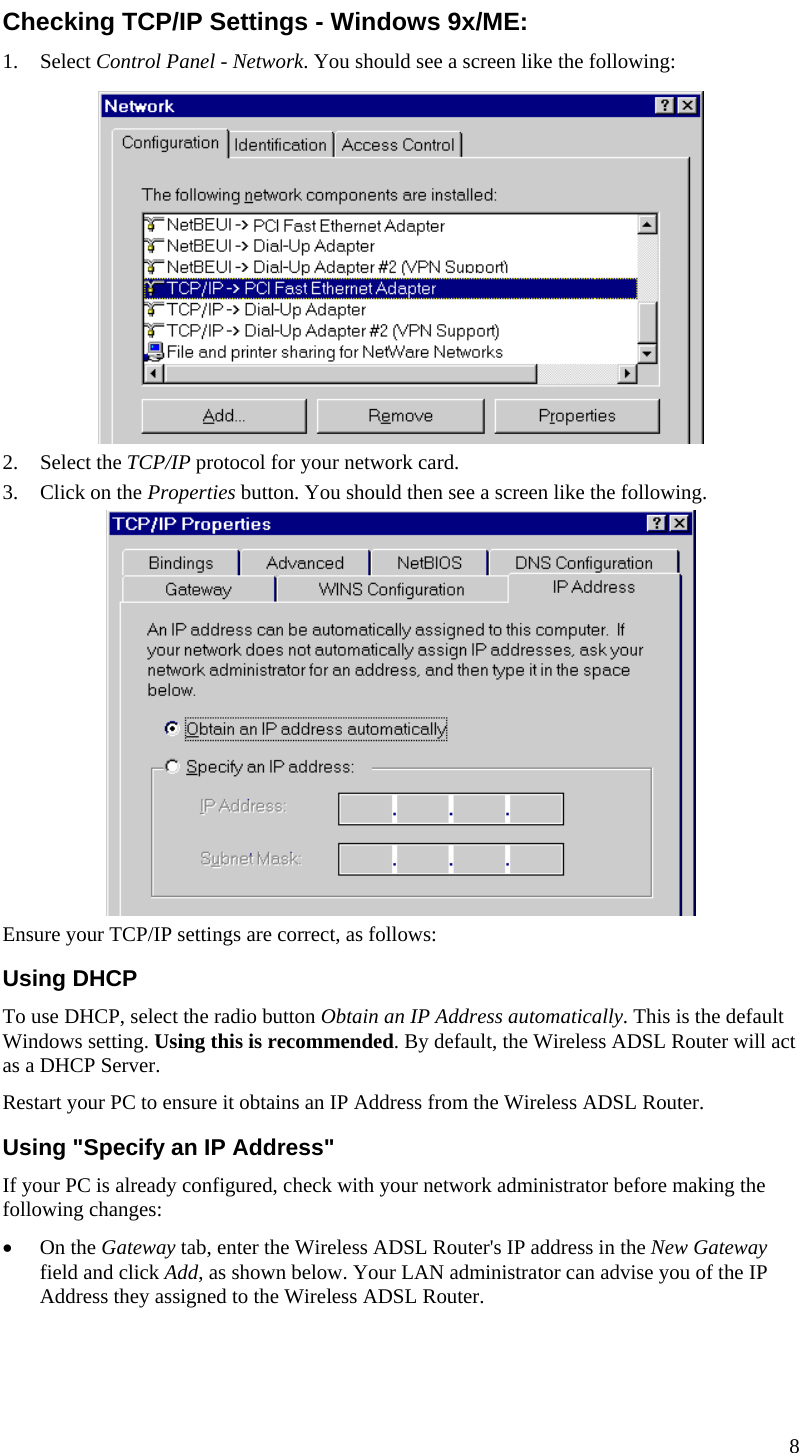
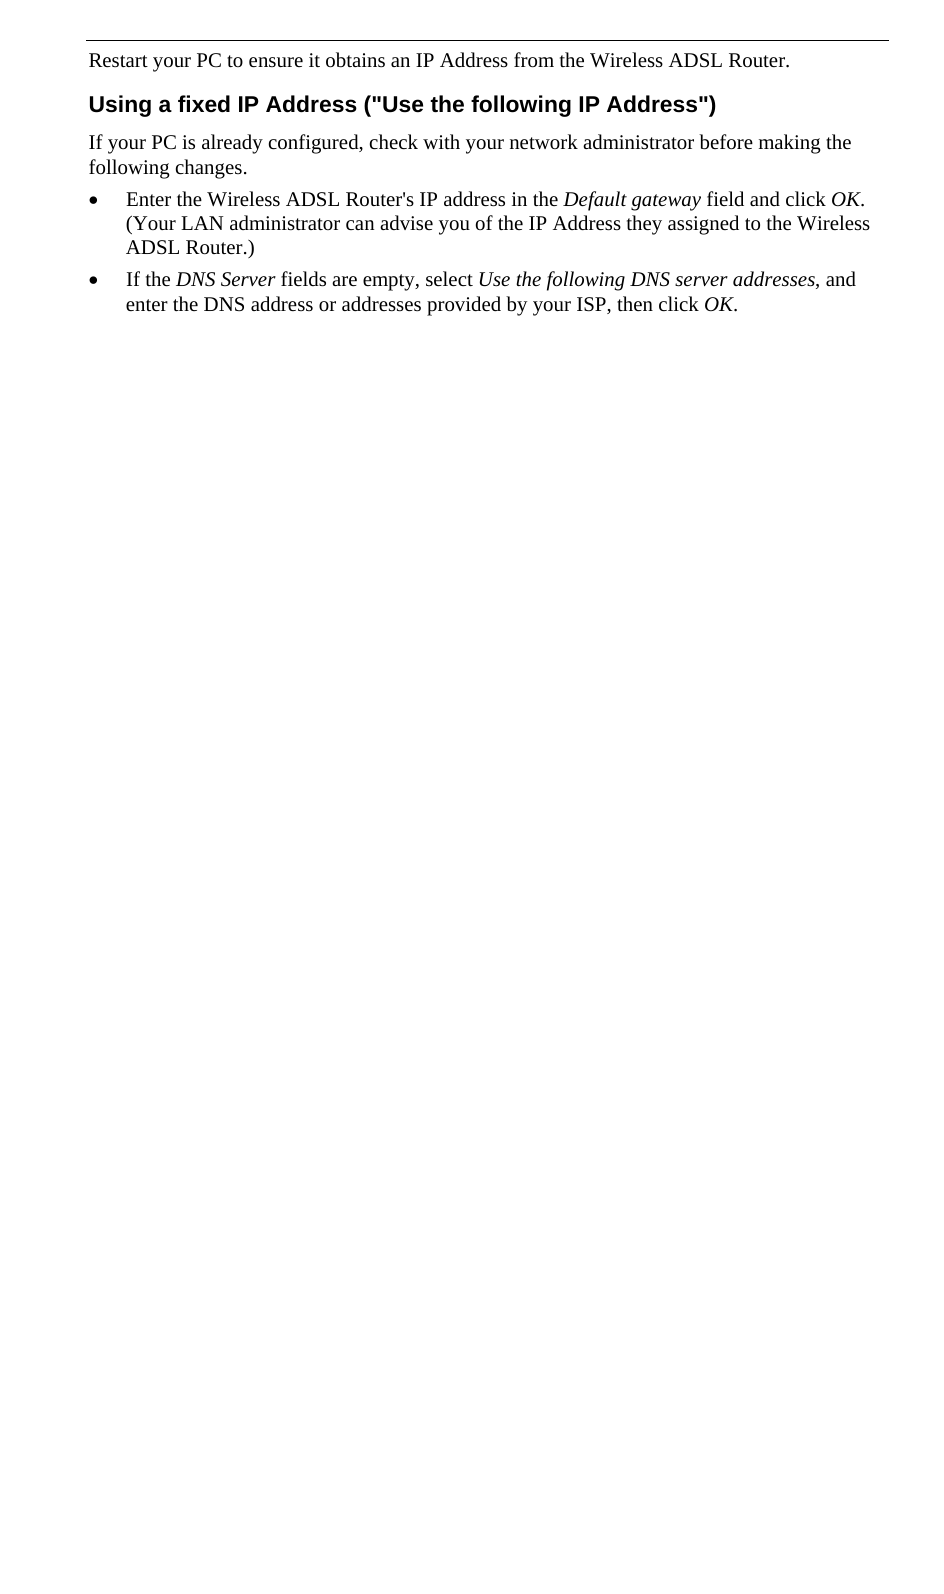
- 1. 635 user manual 1
- 2. 635 user manual 2
- 3. 657 user manual 1
- 4. 657 user manual 2
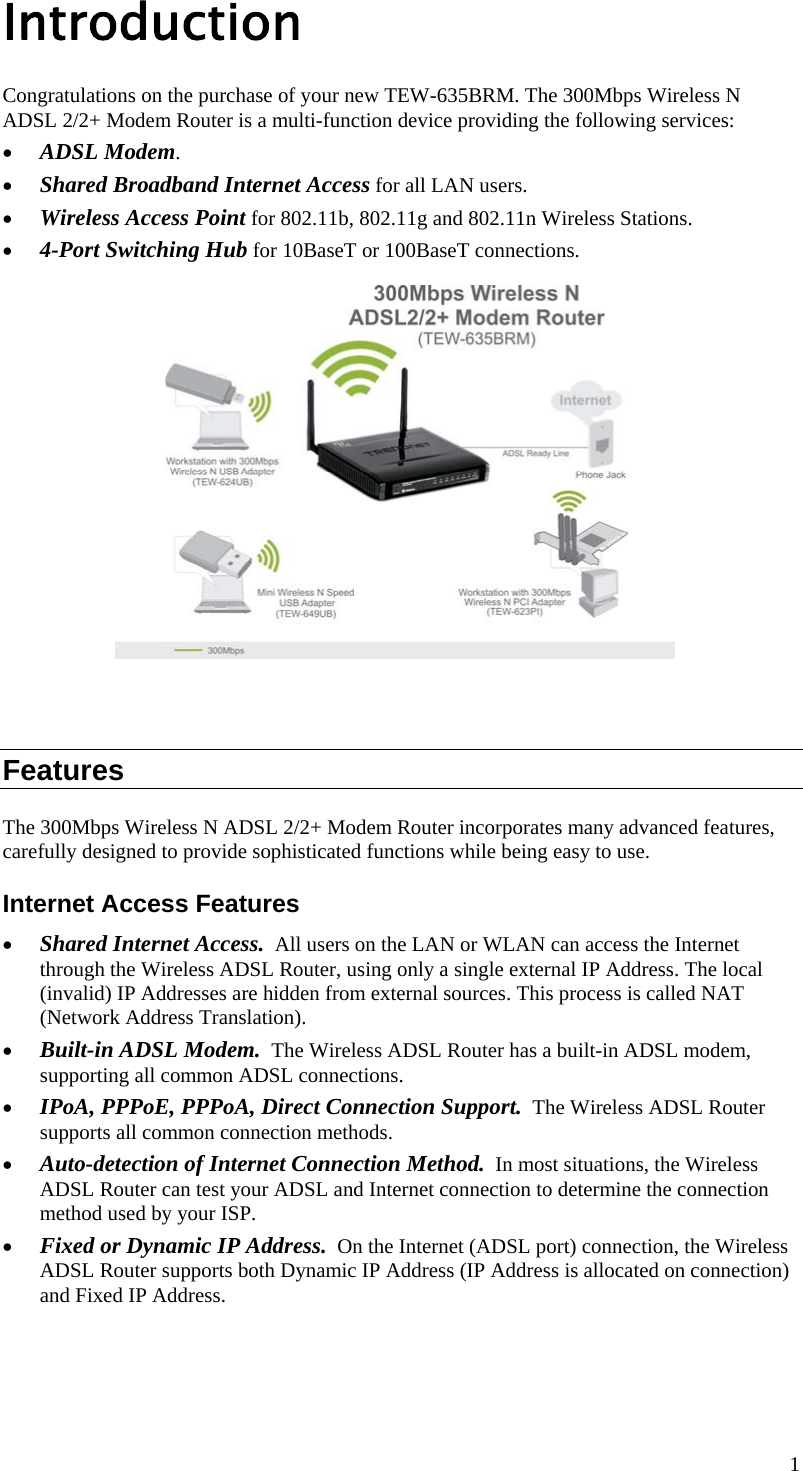
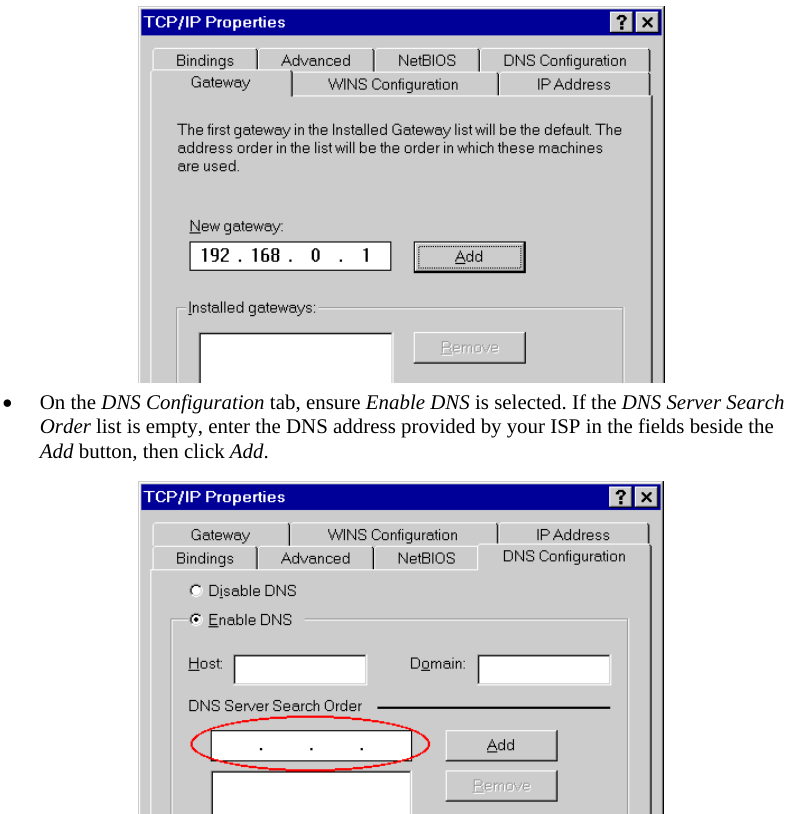
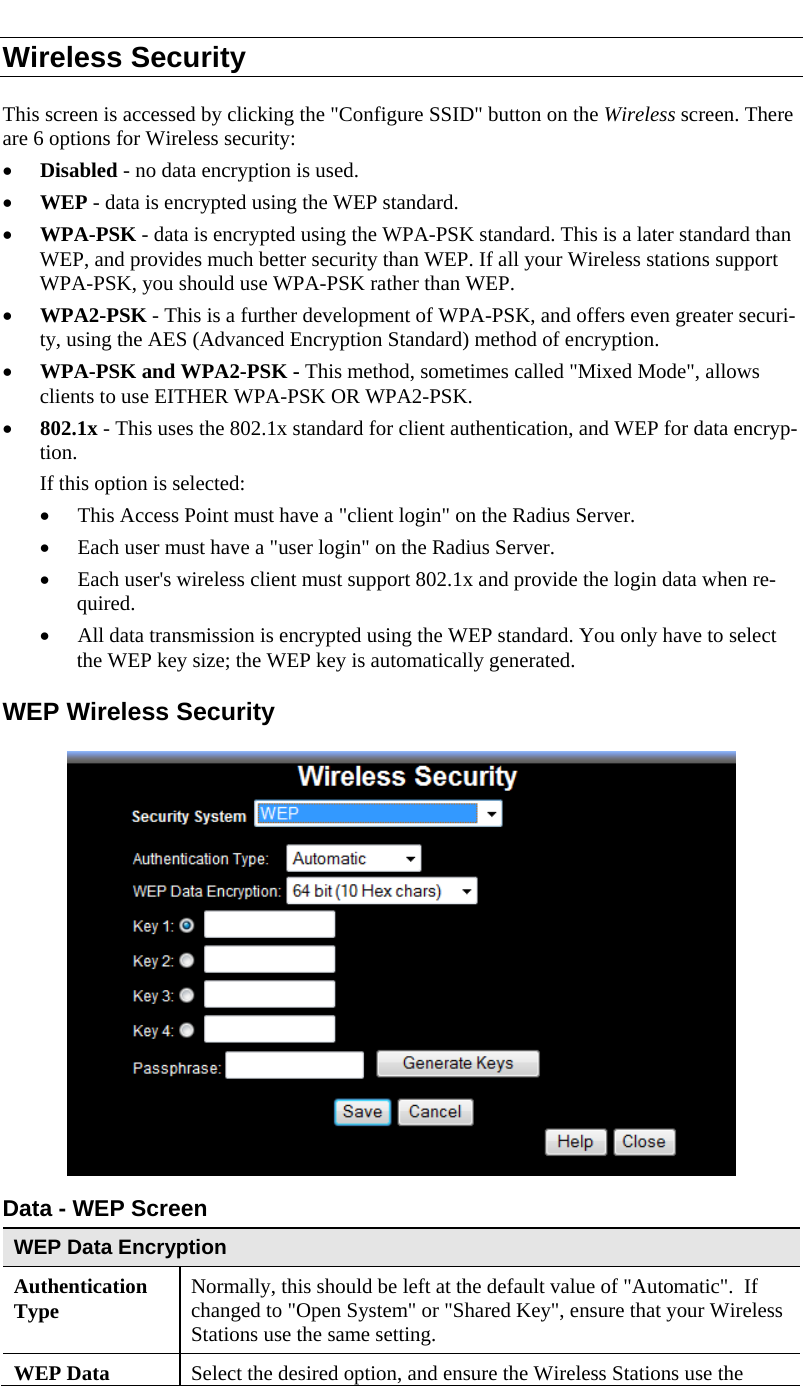
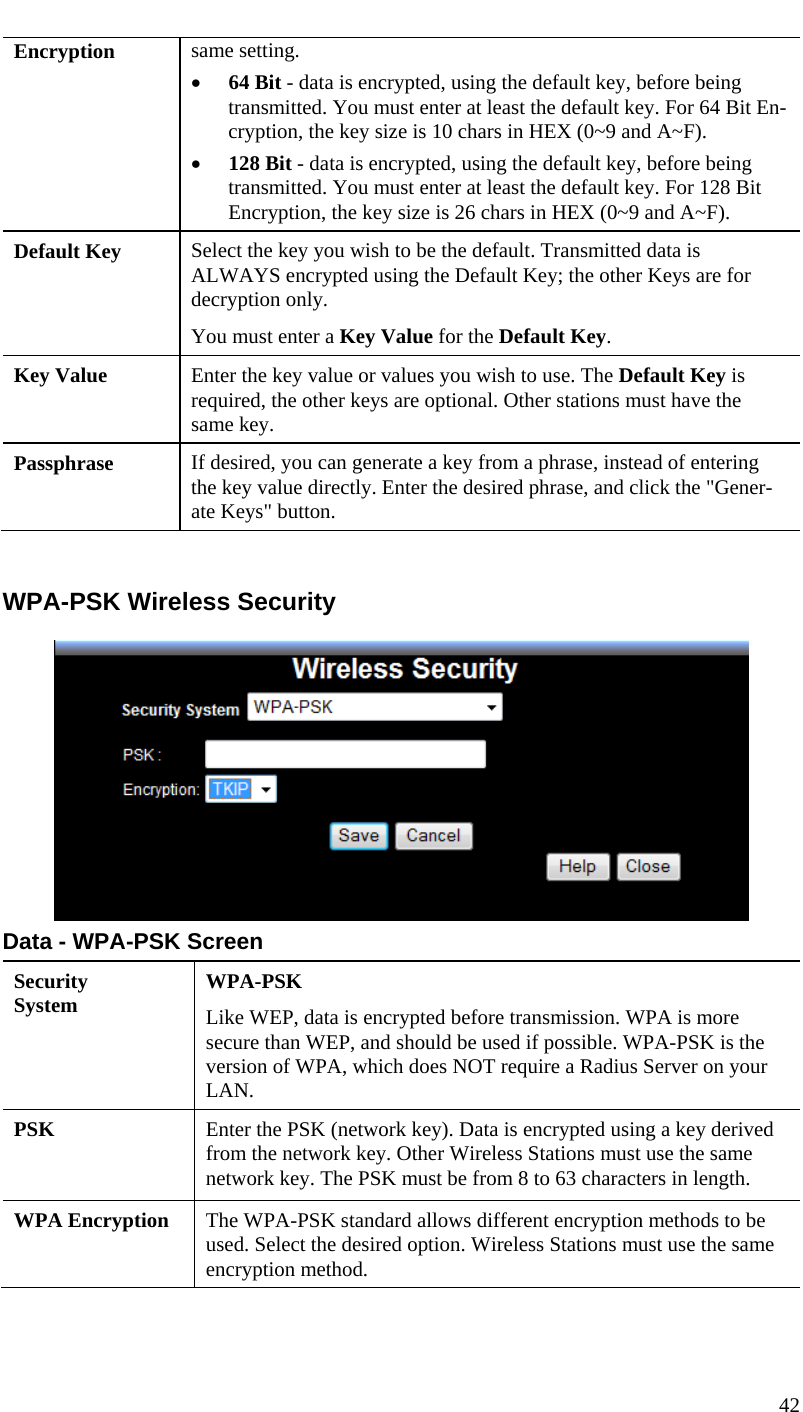
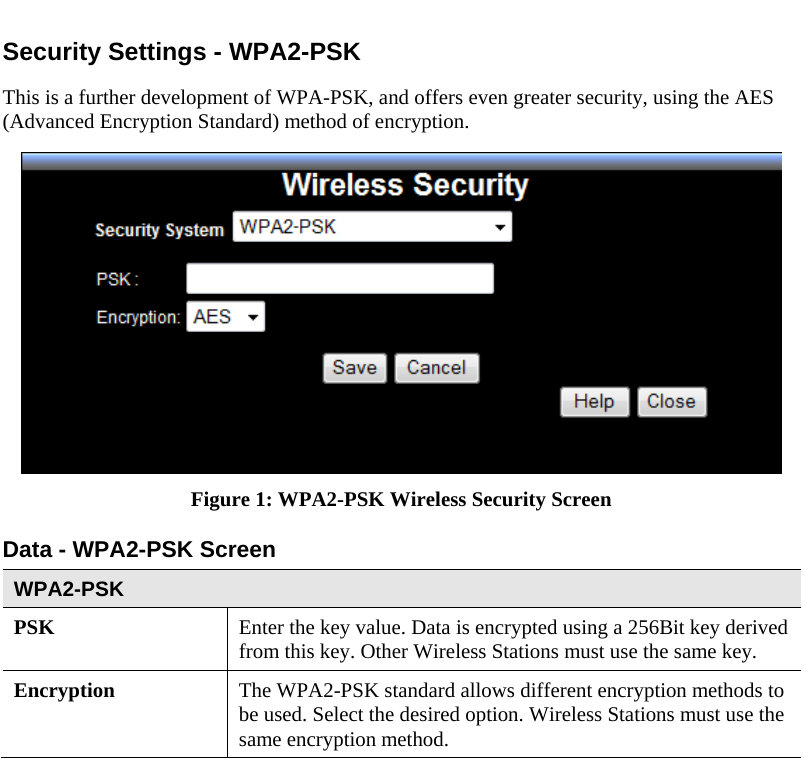
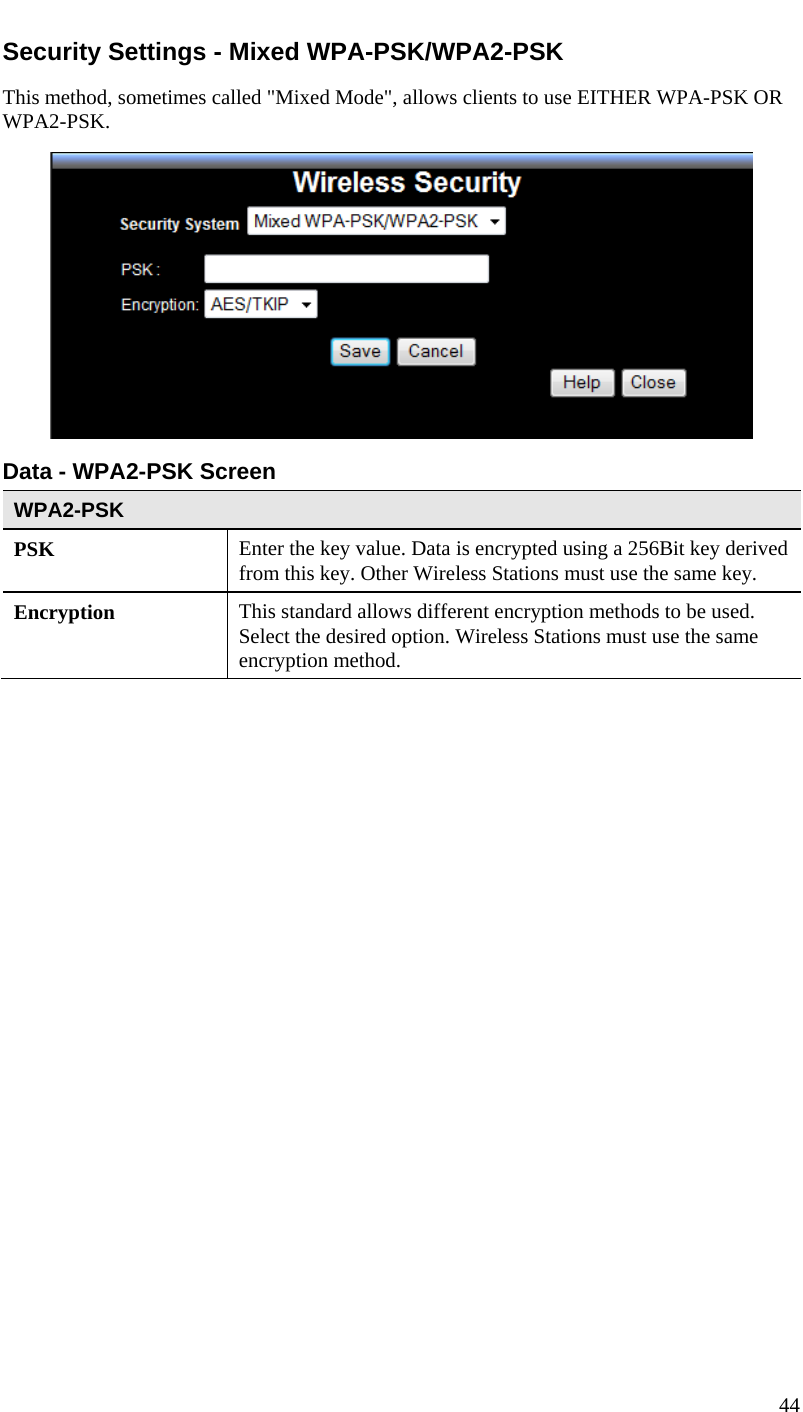
635 user manual 1