TRENDNET TEW821DAPV2 (1) AC1200 Dual Band PoE Indoor Wireless Access Point (2) AC1200 Dual Band PoE+ Wireless Controller Kit User Manual test 3
TRENDNET, Inc. (1) AC1200 Dual Band PoE Indoor Wireless Access Point (2) AC1200 Dual Band PoE+ Wireless Controller Kit test 3
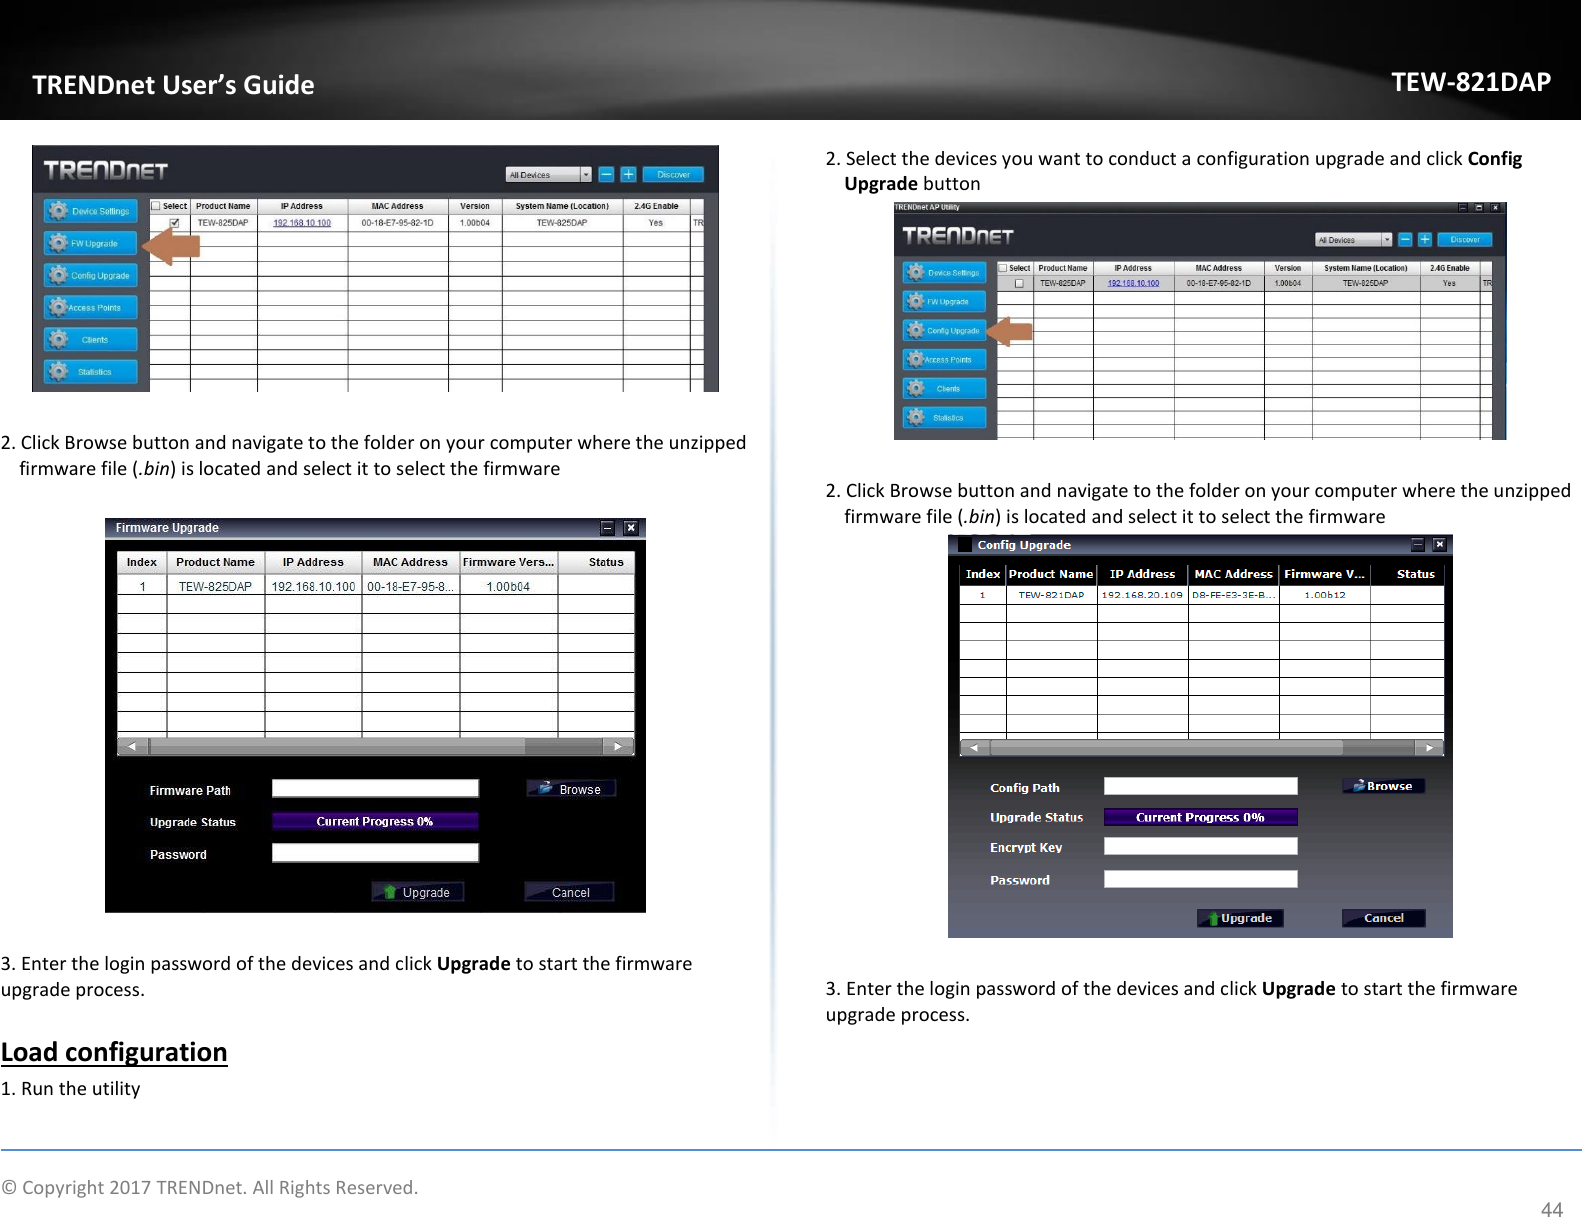
TRENDNET >
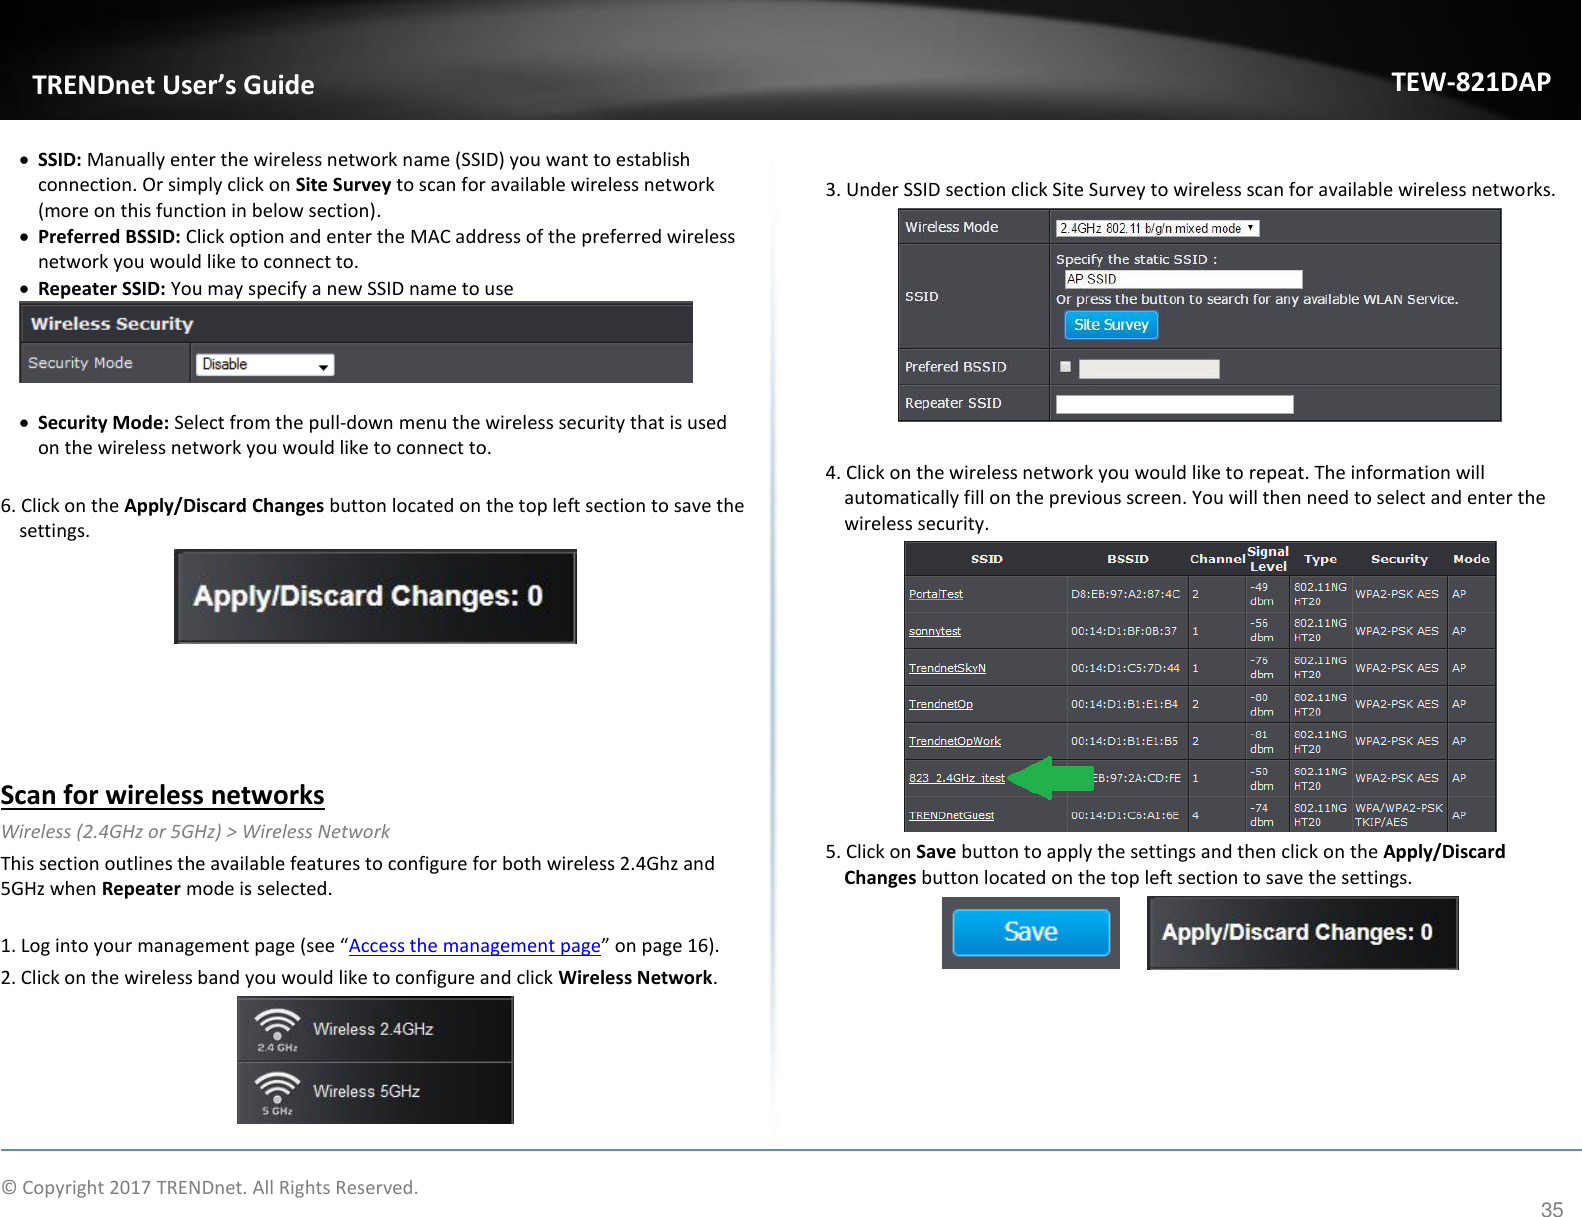
Users Manual