TandD RTR5W Data Collector User Manual
TandD Corporation Data Collector
UserManual.wiki
>
TandD
>
RTR5W User Manual
User Manual
Navigation menu
Upload a User Manual
Namespaces
Wiki Guide
HTML
PDF
Info
Views
User Manual
Discussion / Help
Navigation
![ŪŪSoftware User's Agreement ɡEscape Clauses-T and D Corporation does not guarantee the operation of ThermoRecorder for Windows-T and D Corporation shall not accept any responsibility for any damage whether direct or indirect that results from the usage of ThermoRecorder for Windows.-Specifi cations of ThermoRecorder for Windows may be subject to change and service may be terminated without advance notice to the user. In such a case, T&D Corporation shall not be responsible for any damages, whether direct or indirect, from the inability to use RTR-5W for Windows.-T and D Corporation has no obligation to correct any defects found in Thermo Recorder for Windows.ɡCopyright-All copyrights for RTR-5W for Windows, including all of the programs and all related documents, are the sole property of T and D Corporation-The reprinting or redistribution for commercial purposes whether in part or in whole, in magazines or as a part of any product is strictly forbidden without the expressed consent of T&D Corporation. Any inquires concerning commercial redistribution should be directed to the Sales Department of T&D Corporation.-Please do not attempt to make any changes or modifi cations to RTR-5W for Windows.*RTR-5W consists of the following applications: [RTR-5W for Windows], [Network Settings Utility], [Temperature /Humidity Graph], [Multi-Scale Graph], [Event Viewer] and [RTR-5W web Viewer]](https://usermanual.wiki/TandD/RTR5W/User-Guide-644312-Page-3.png)

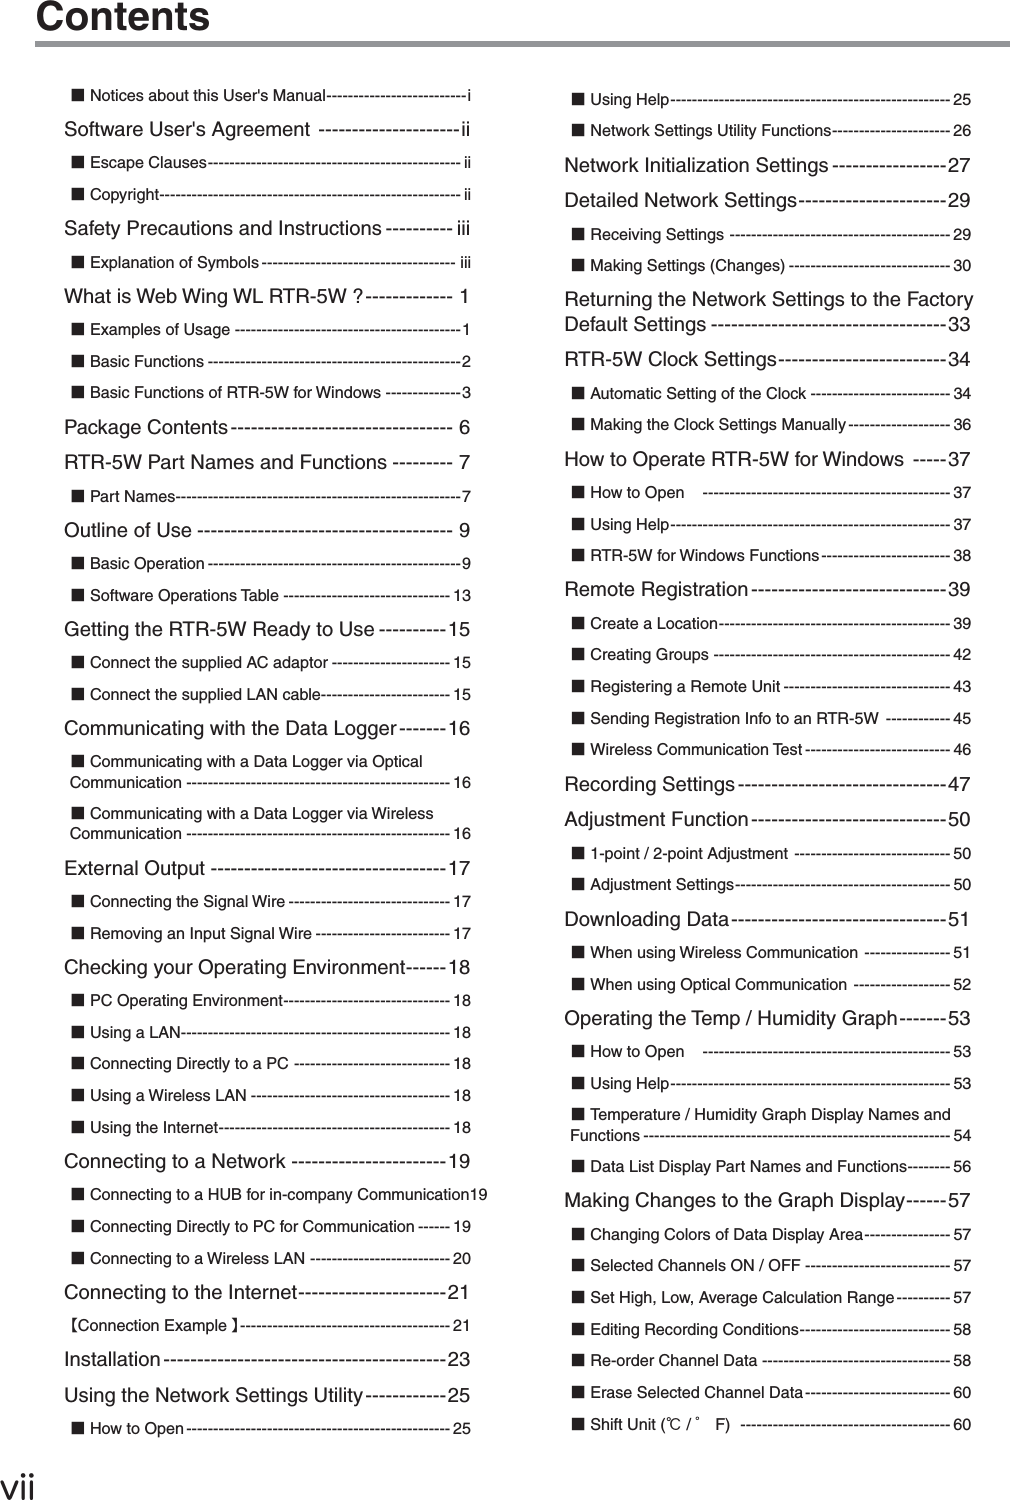
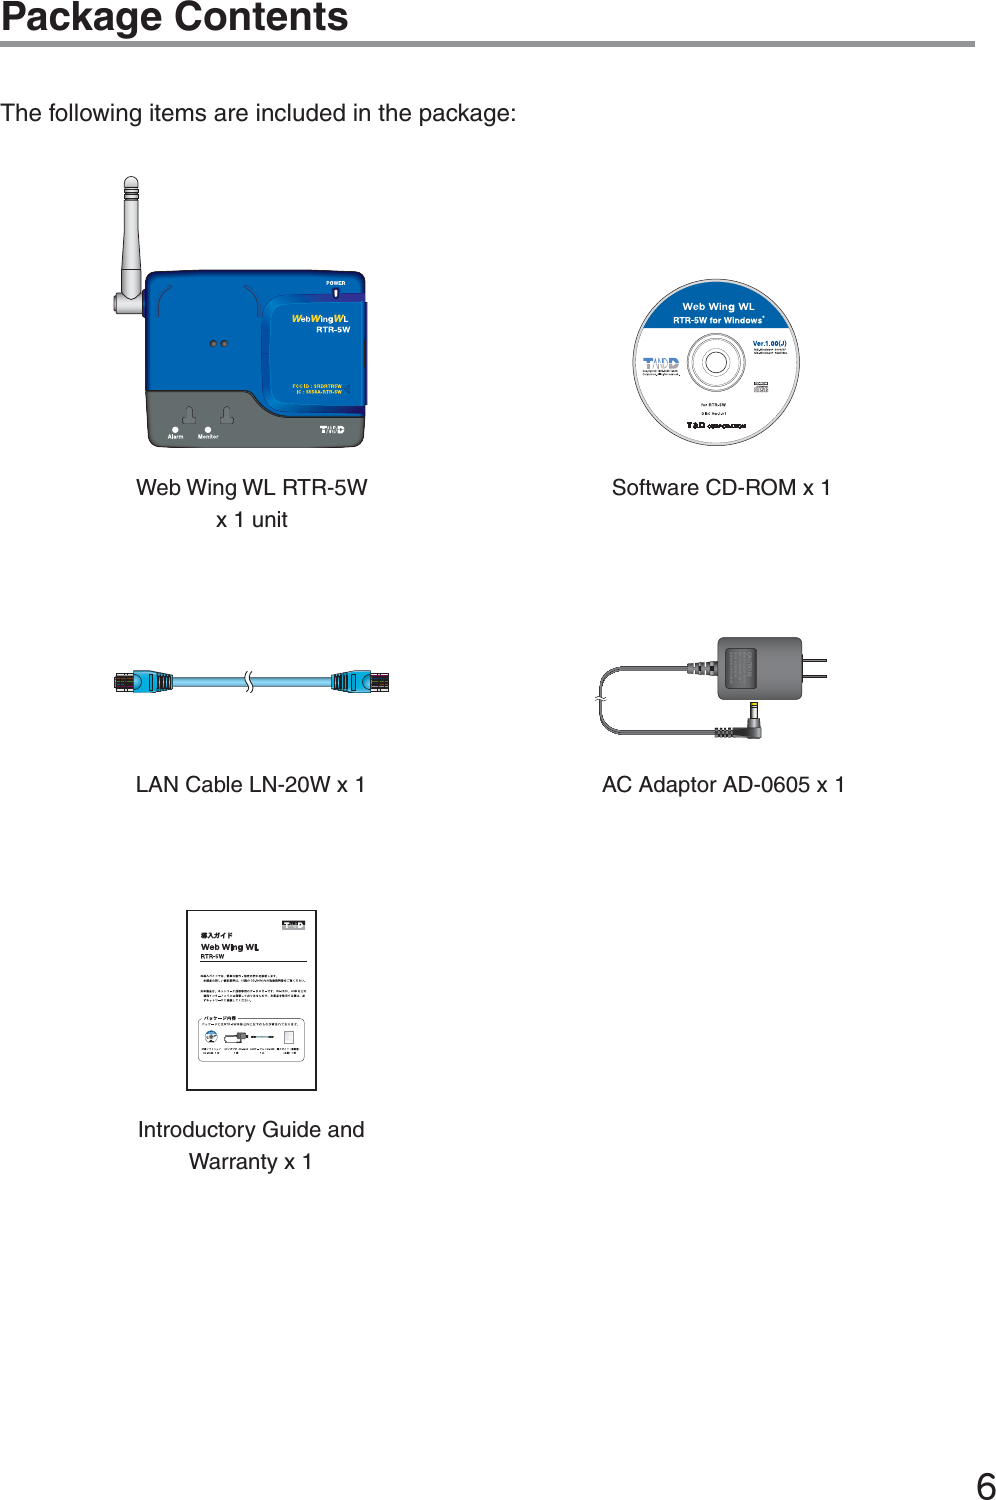
![IJWhat is Web Wing WL RTR-5W ?The RTR-5W not only serves as a base station for the wireless downloading of recorded data from our compact waterproof Wireless Communication RTR-5 Series Data Loggers, but, moreover, the [Web Wing WL RTR-5W] serves as a network base station that allows you to monitor and view current readings and gather recorded data via LAN or Internet connection. ŐŧŧŪŤŦ2̜.@/: ̥ABC3̯DEF4̹GHI5̈́JKL6͉MNO7͘PQRS8͞TUV9ͣWXYZ:লζȜ ικ1ܱͩͬͭ·ςͺHILDഩ࡙㧨㧪ŎŢŪŭœŕœĮĶŘōłŏœŰŶŵŦų ŊůŵŦųůŦŵɡExamples of Usage-Recording measurements taken from various measuring instruments such as fl ow meters, power meters, and analyzers. -Data recording of moving objects and rotating objects on a production line. -Temperature an humidity management in high humidity environments such as brewing and crop cultivation.-Measurement in places where wiring is diffi cult or impossible. *The RTR-5W is designed solely for network communication.It does not include any RS-232 or USB communication interface. To make use of this product you must connect it to a network.Moreover, in order to use this product via the Internet you will need other devices (such as a router) and must fi rst make necessary arrangements with a provider for a line and get a fi xed IP address, domain, etc.... *When making settings in an RTR-5W without any settings already made (when purchased or after resetting), it is necessary to carry out these settings using a wired LAN connection. After having made all the necessary settings via the wired connection, it is possible to use a wireless LAN connection.](https://usermanual.wiki/TandD/RTR5W/User-Guide-644312-Page-10.png)
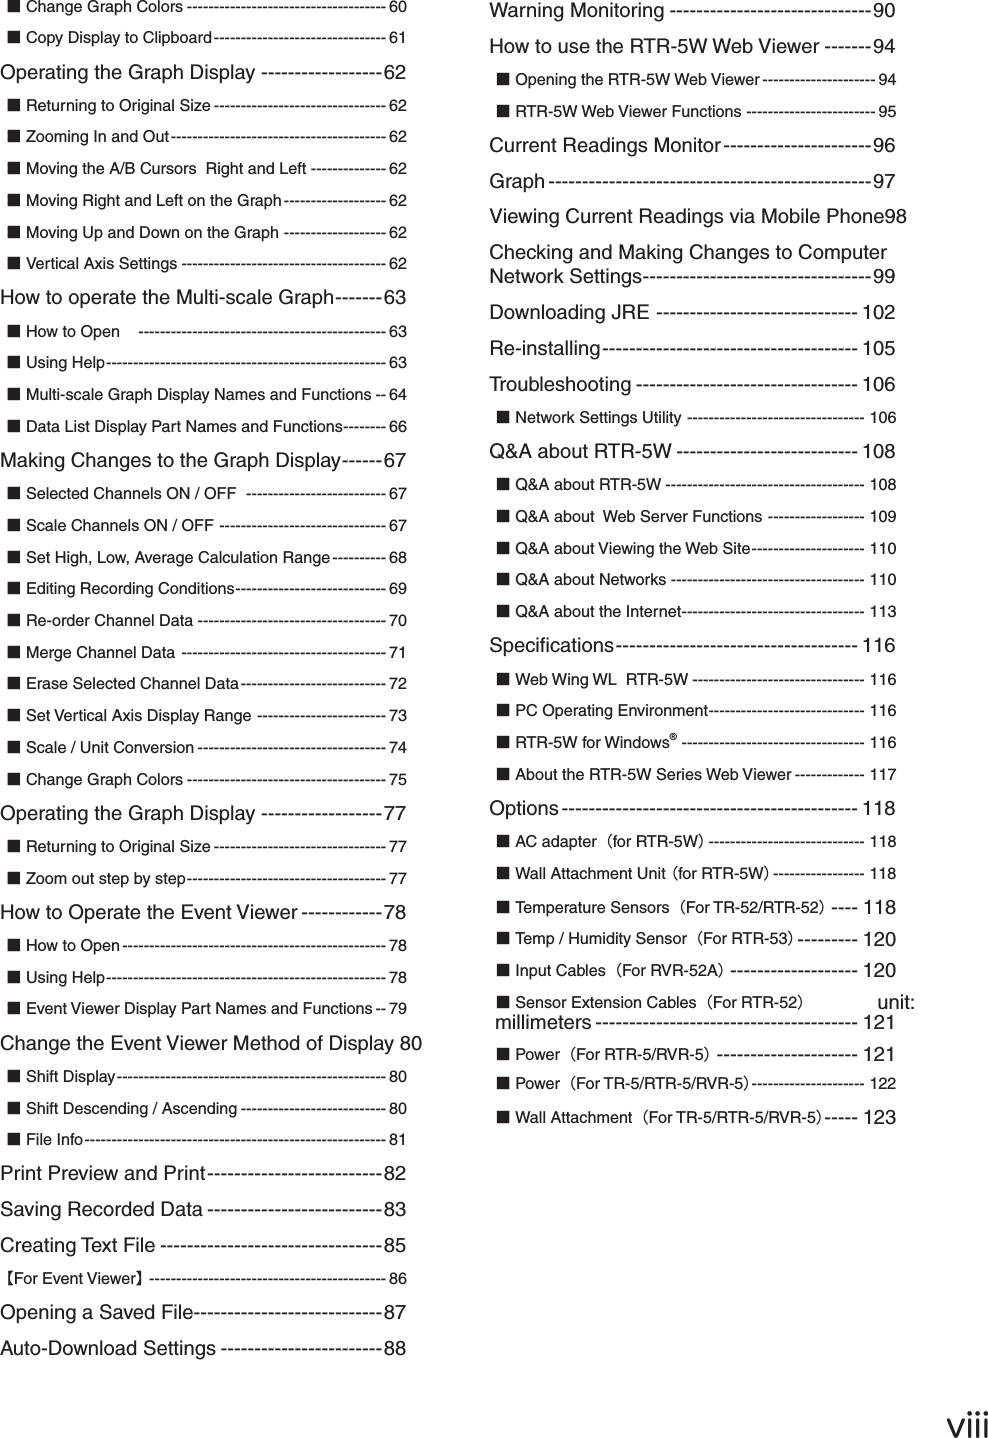
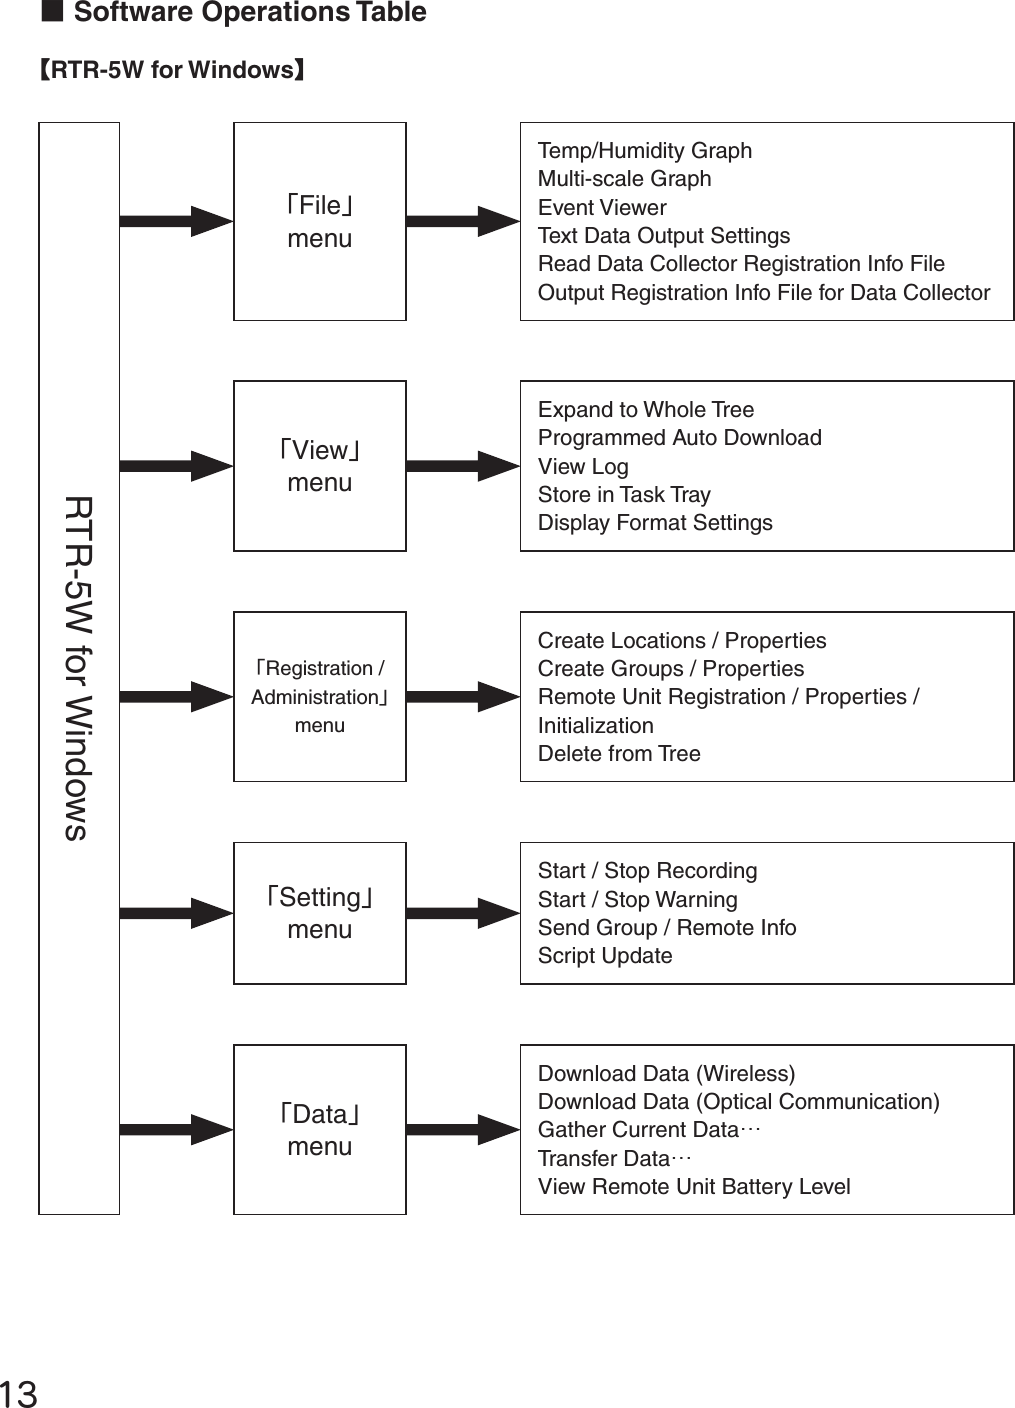
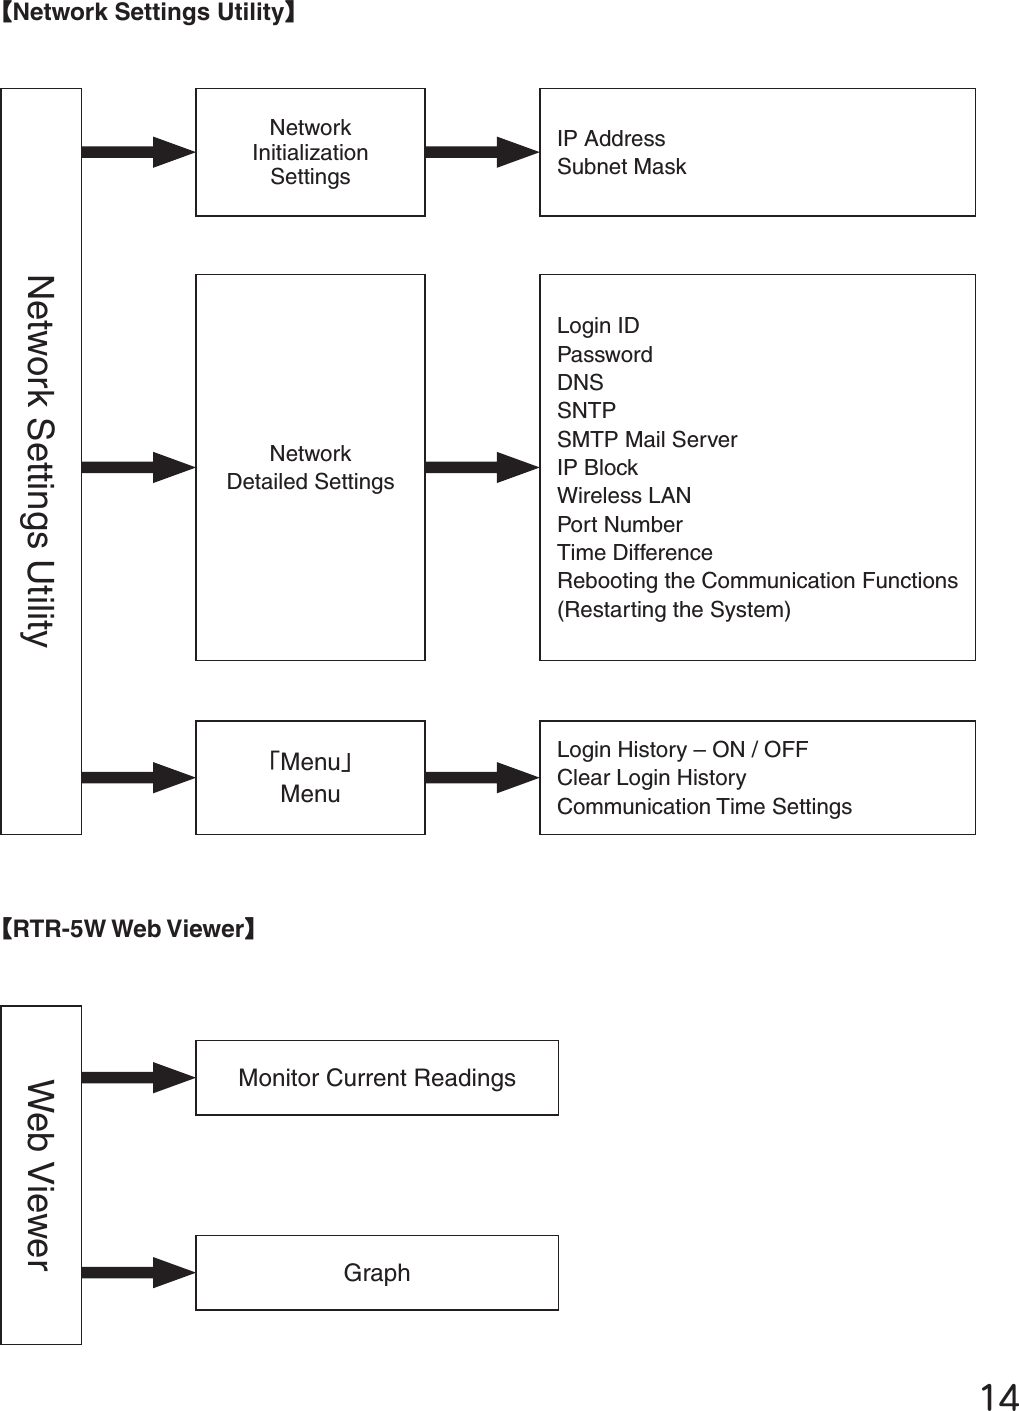
![ĴɡBasic Functions of RTR-5W for WindowsThe software is made up of the following 5 applications: [Network Settings Utility], [RTR-5W for Windows], [Temperature /Humidity Graph], [Multi-Scale Graph] and [Event Viewer]. Also, by using your web browser to access RTR-5W, it is possible to view data via the Internet.*Only compatible with Internet Explorer Ver.6 or higher using Windows 2000 / XPȺNetwork Settings UtilityȻMake the necessary network settings for RTR-5W.Network Initialization SettingsSettings for helping to connect a RTR-5W to a network.Detailed Network SettingsMake detailed Network settings here.ȺRTR-5W for WindowsȻMake all necessary settings in order to communicate with RTR-51/52/53ȂRVR-52AA Data Loggers via the RTR-5W Base Station.For each RTR-5W it is possible to create one tree, and in that tree register Remote Units for communication. Remote RegistrationRegister any logger in the RTR-5 Series as a Remote Unit; also possible to register in Groups for easy management. Recording SettingsBy setting the recording interval, the recording start time and the recording mode, recording will begin at the set date and time. Downloading Recorded DataDownload recorded data from the RTR-5W to a computer and create fi les.Also, by making Auto-Download settings, it is possible to gather from Remote Units at a set interval of time or at a set time of day. Warning MonitoringIf a measurement exceeds the set limit, a notifi cation can be sent via e-mail from the RTR-5W to your computer or cellular phone.Also, because there is a built-in external output terminal, it is possible to connect to an external device, such an alarm or light, so that a notifi cation of a warning can be seen or heard onsite. Gathering Current DataGather and view current measurement readings from the selected Remote Unit(s). Transfer DataThe RTR-5W retrieves and stores data at a set regular interval.This stored data is transferred for display.](https://usermanual.wiki/TandD/RTR5W/User-Guide-644312-Page-12.png)
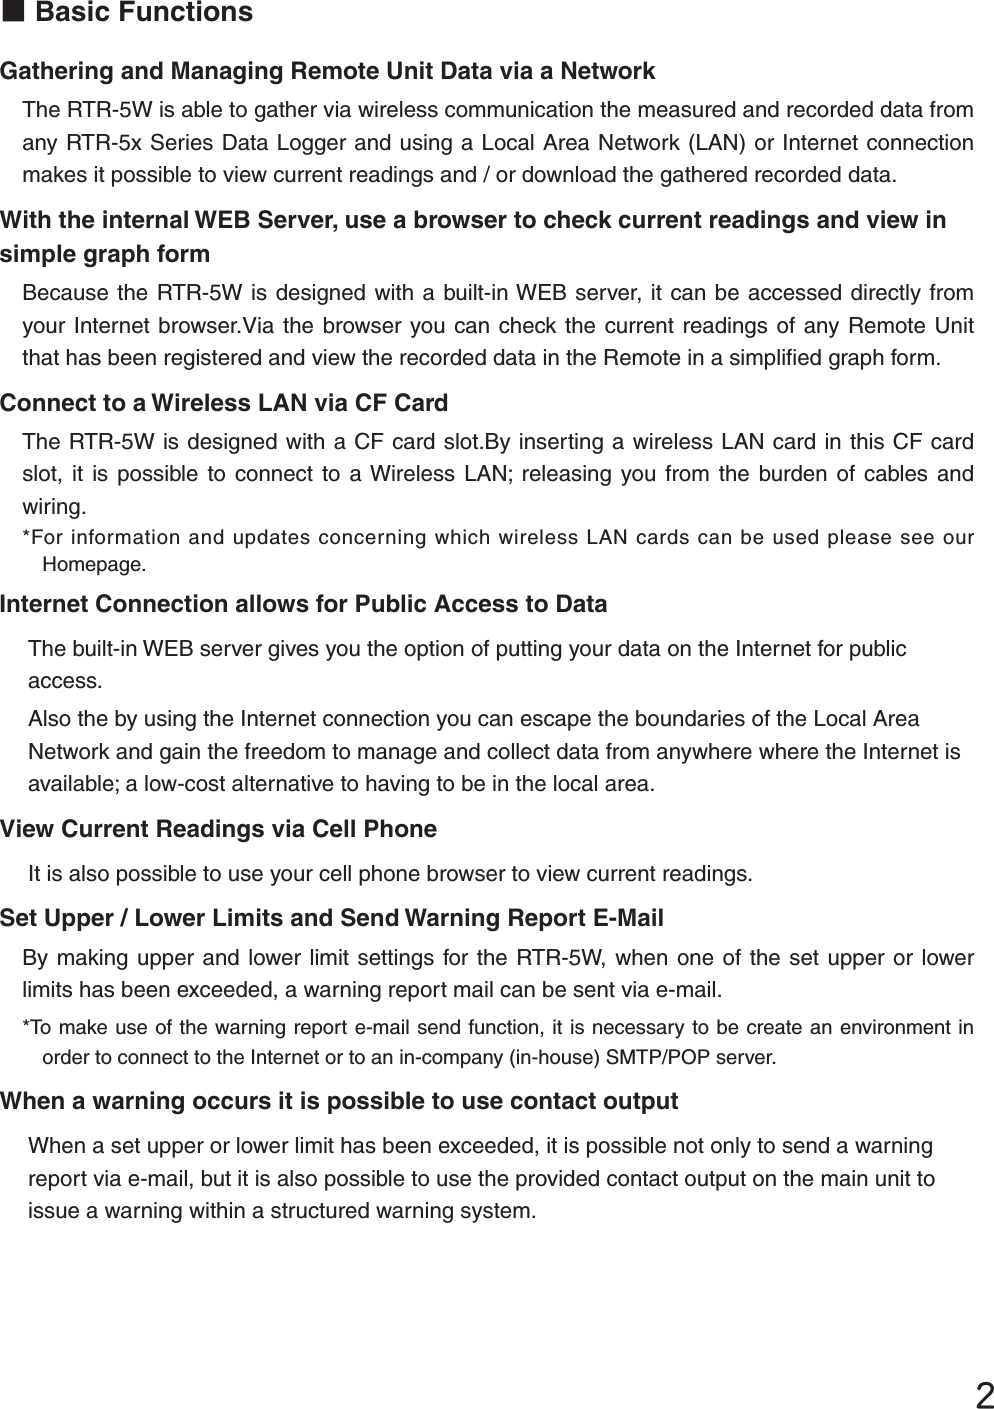
![ĶȺEvent ViewerȻView and print Event data recorded with the RVR-52A Data Logger.View ListUp to 64 channels of downloaded data can be viewed in one list. Print Preview and PrintPrinting can be carried out after checking the preview window. Creating Text FileIt is possible to convert the data for a specifi ed range (time period) to common text fi le format (CSV type format), so that it can be exported to spreadsheet software such as Excel or Lotus.ȺRTR-5W Web ViewerȻUse your browser to monitor current readings and view data graphs. Monitor Current ReadingsThe RTR-5W communicates with Remote Units at a set regular interval and then stores the gathered readings. The most recent measurement will be displayed. It is also possible to view via a cell phone browser. GraphThe graph displayed in the browser will be the same graph that is shown upon opening [Transfer Data] in [RTR-5W for Windows].](https://usermanual.wiki/TandD/RTR5W/User-Guide-644312-Page-14.png)
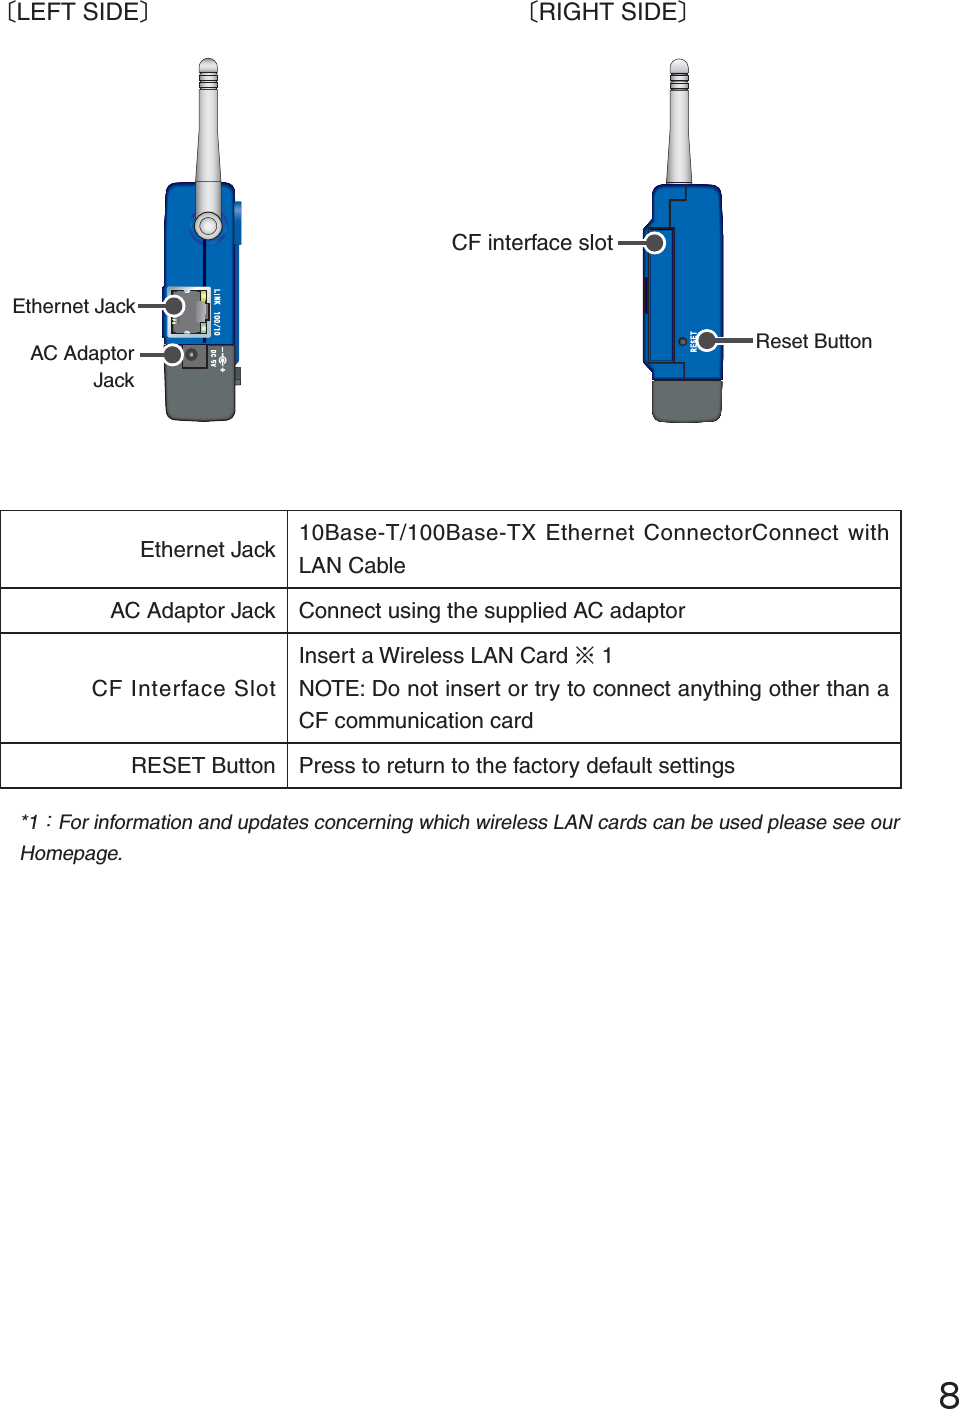
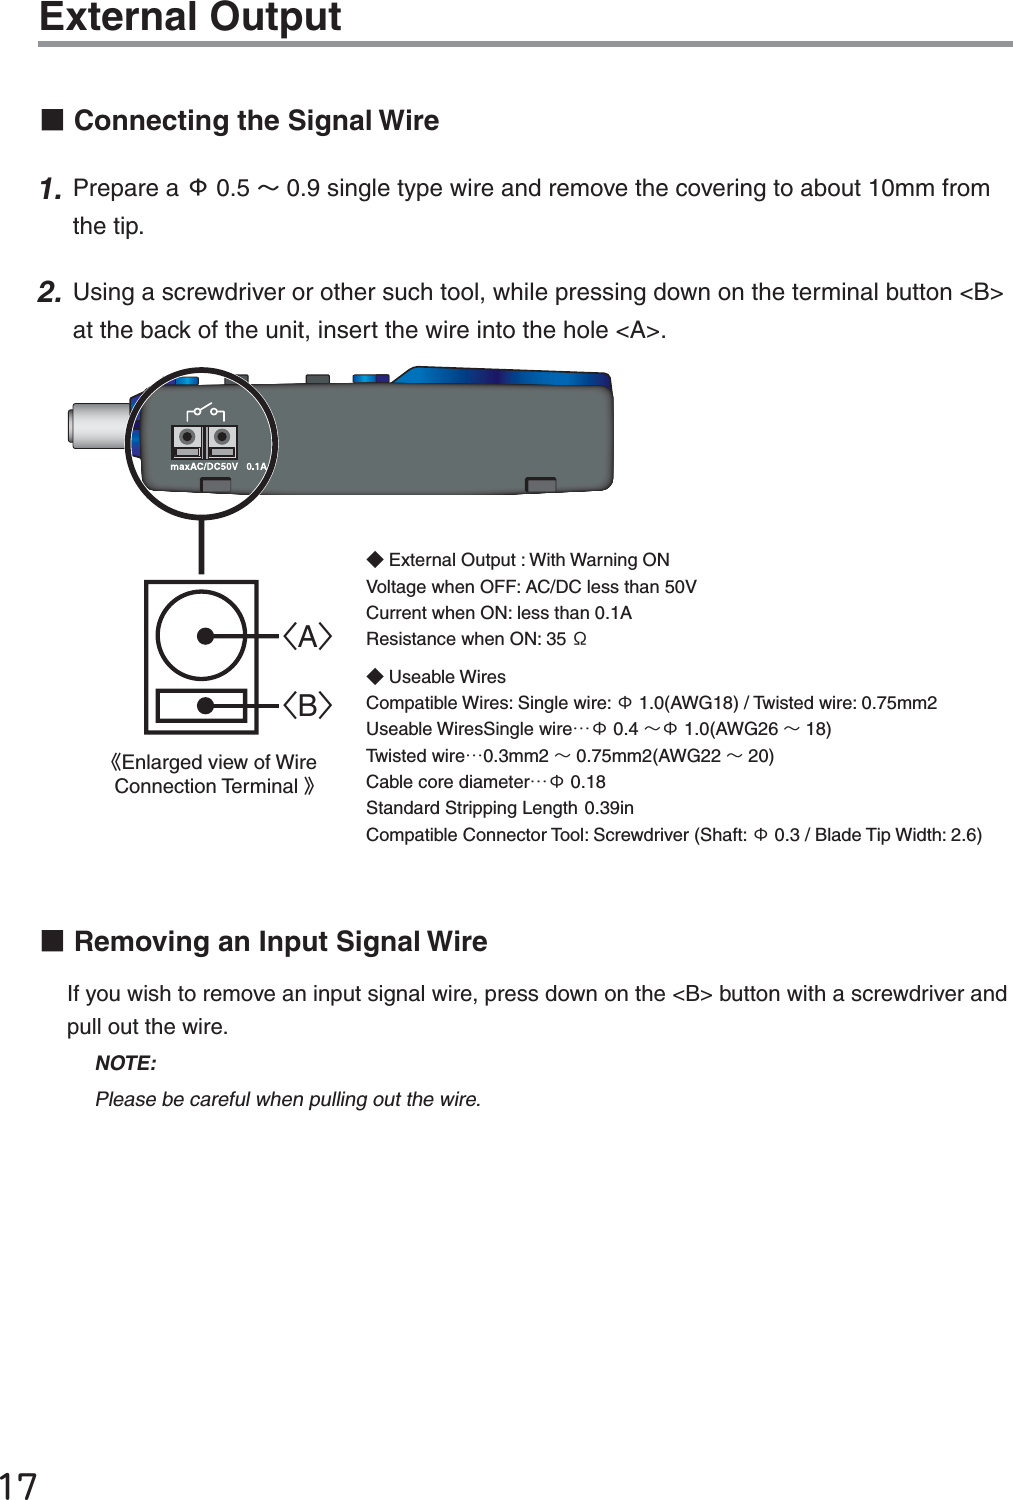
![ĸRTR-5W Part Names and FunctionsɡPart NamesȬFRONTȭOptical Communication AreaPOWER LED While the power is ON, the lamp will be on.Alarm LED When a warning occurs, the lamp will blink.Monitor LED While wireless communication is occurring with a Remote Unit, the lamp will blink.Optical ommunication AreaWhen you wish to communicate directly, not by wireless, with a data logger (Remote Unit), it is necessary to place the logger (Remote Unit) face down on this area for communication to occur. ȬBottomȭExternal Output Terminal External Output Terminal Connect to an alarm buzzer or light to notify locally of the occurrence of a warning. [Conditions for Output to be switched ON]It switches to ON when a warning is received from at least one Remote Unit.](https://usermanual.wiki/TandD/RTR5W/User-Guide-644312-Page-16.png)
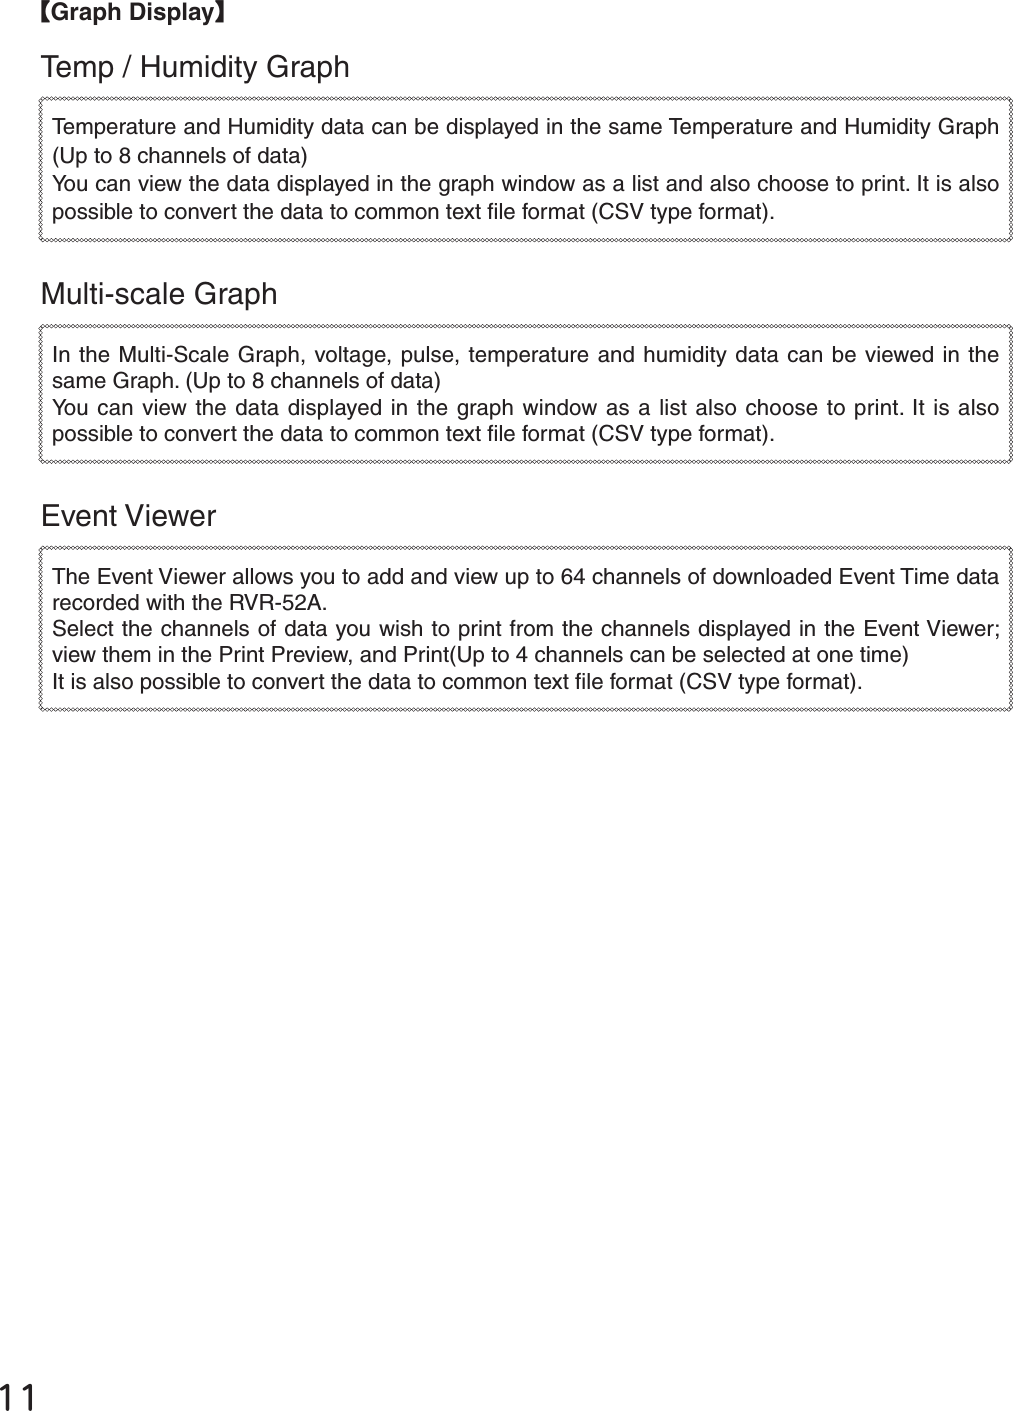
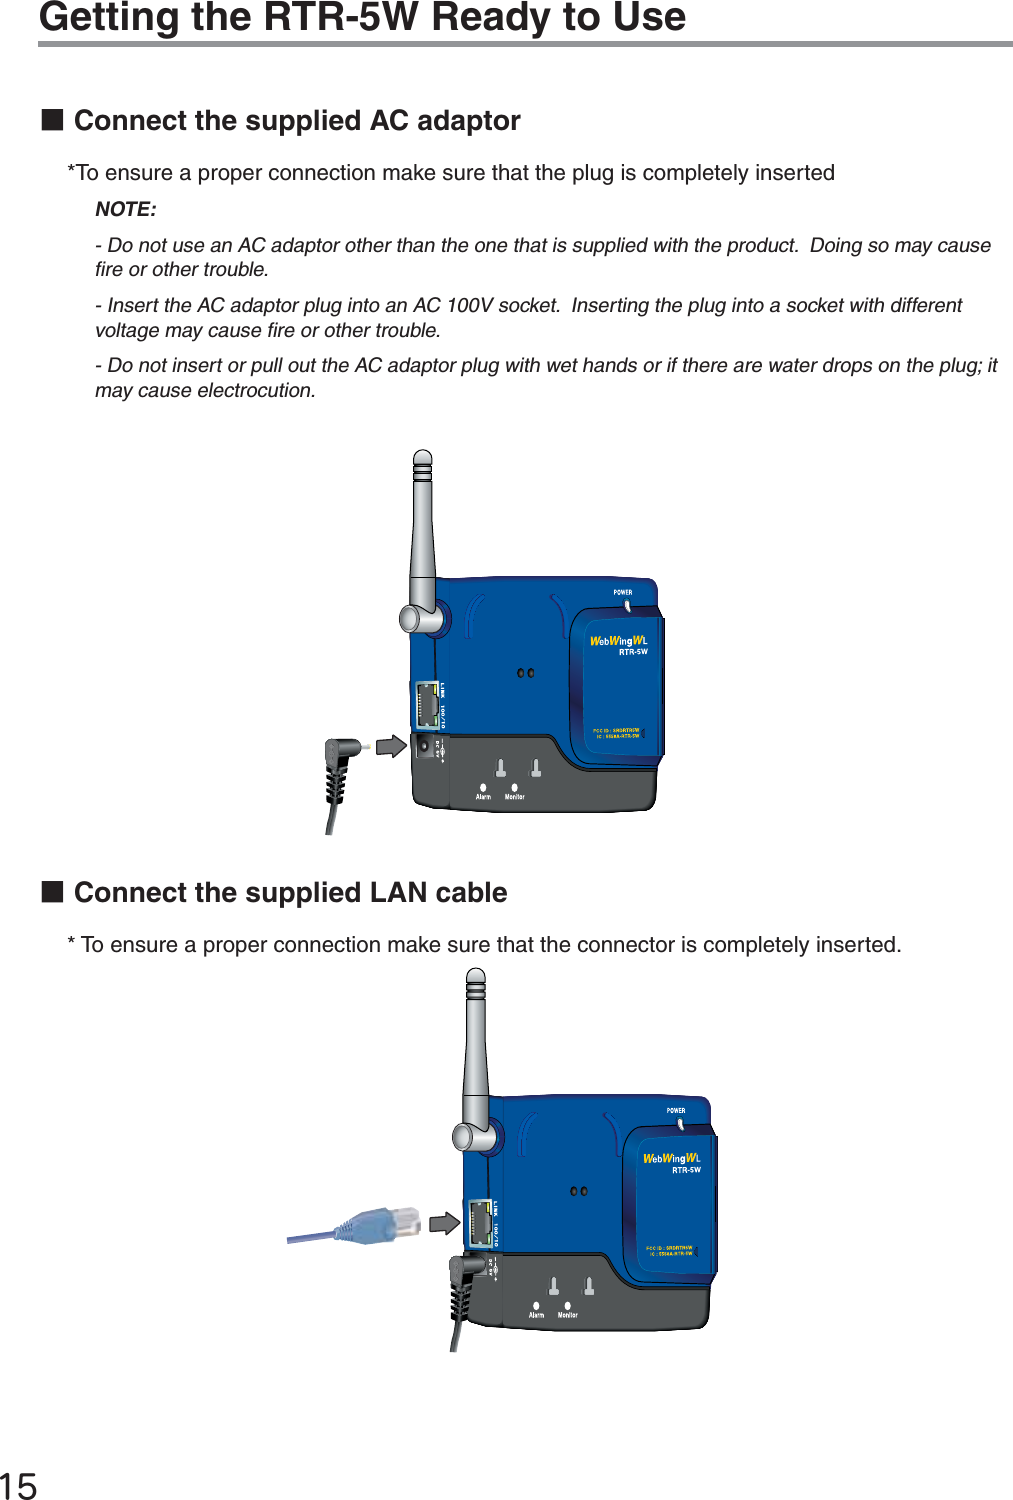
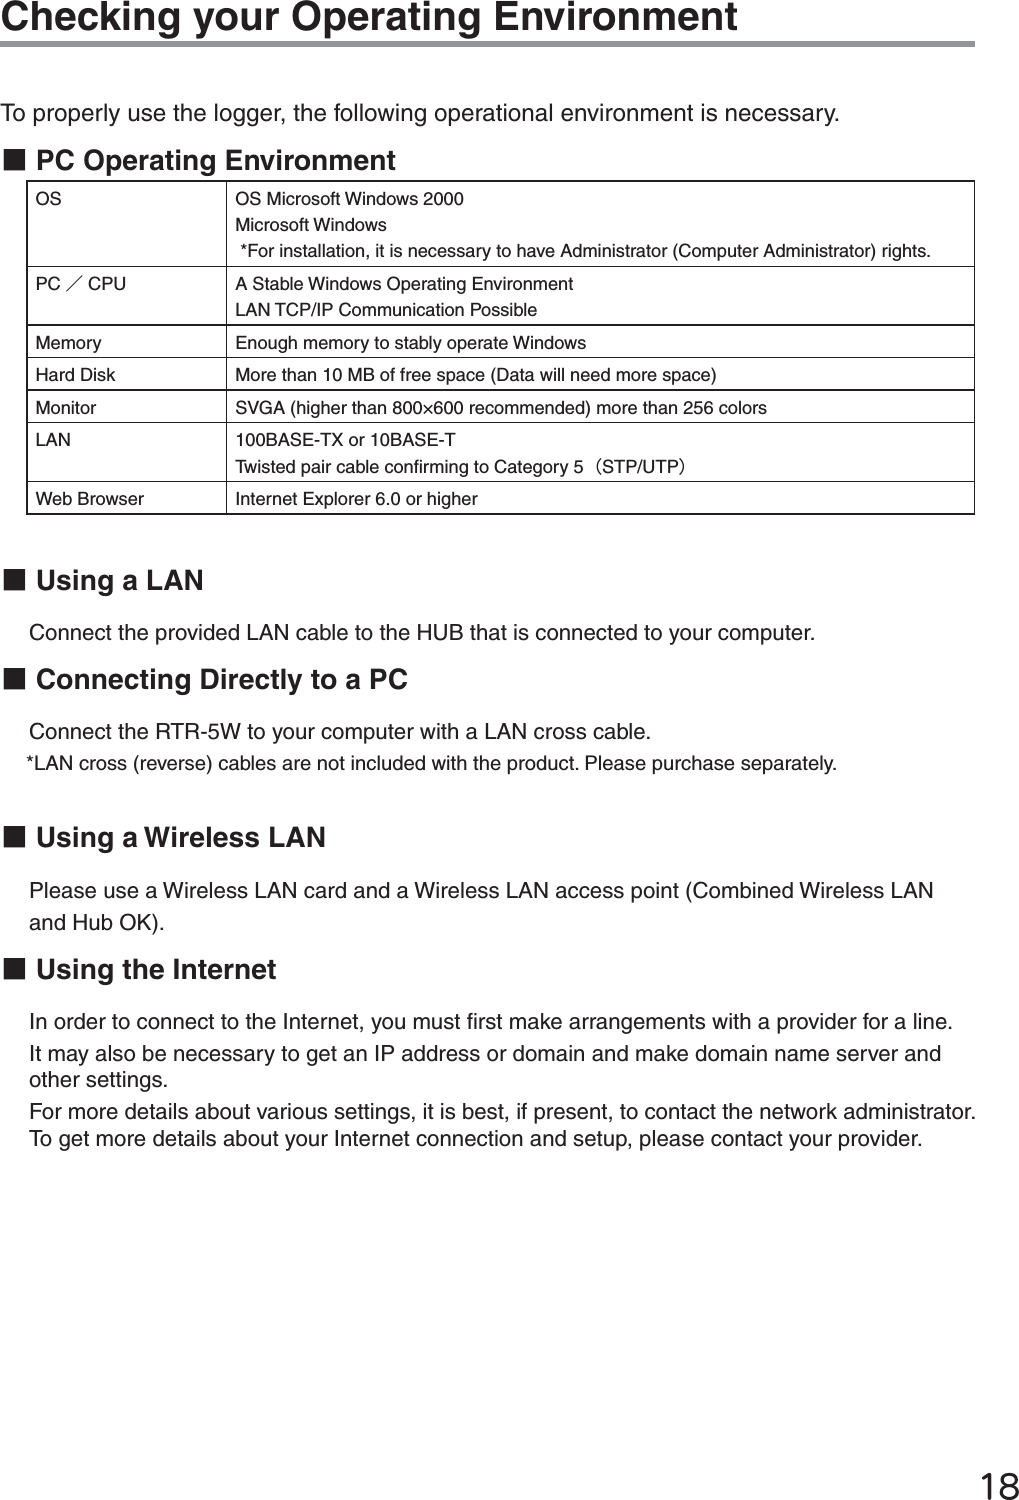
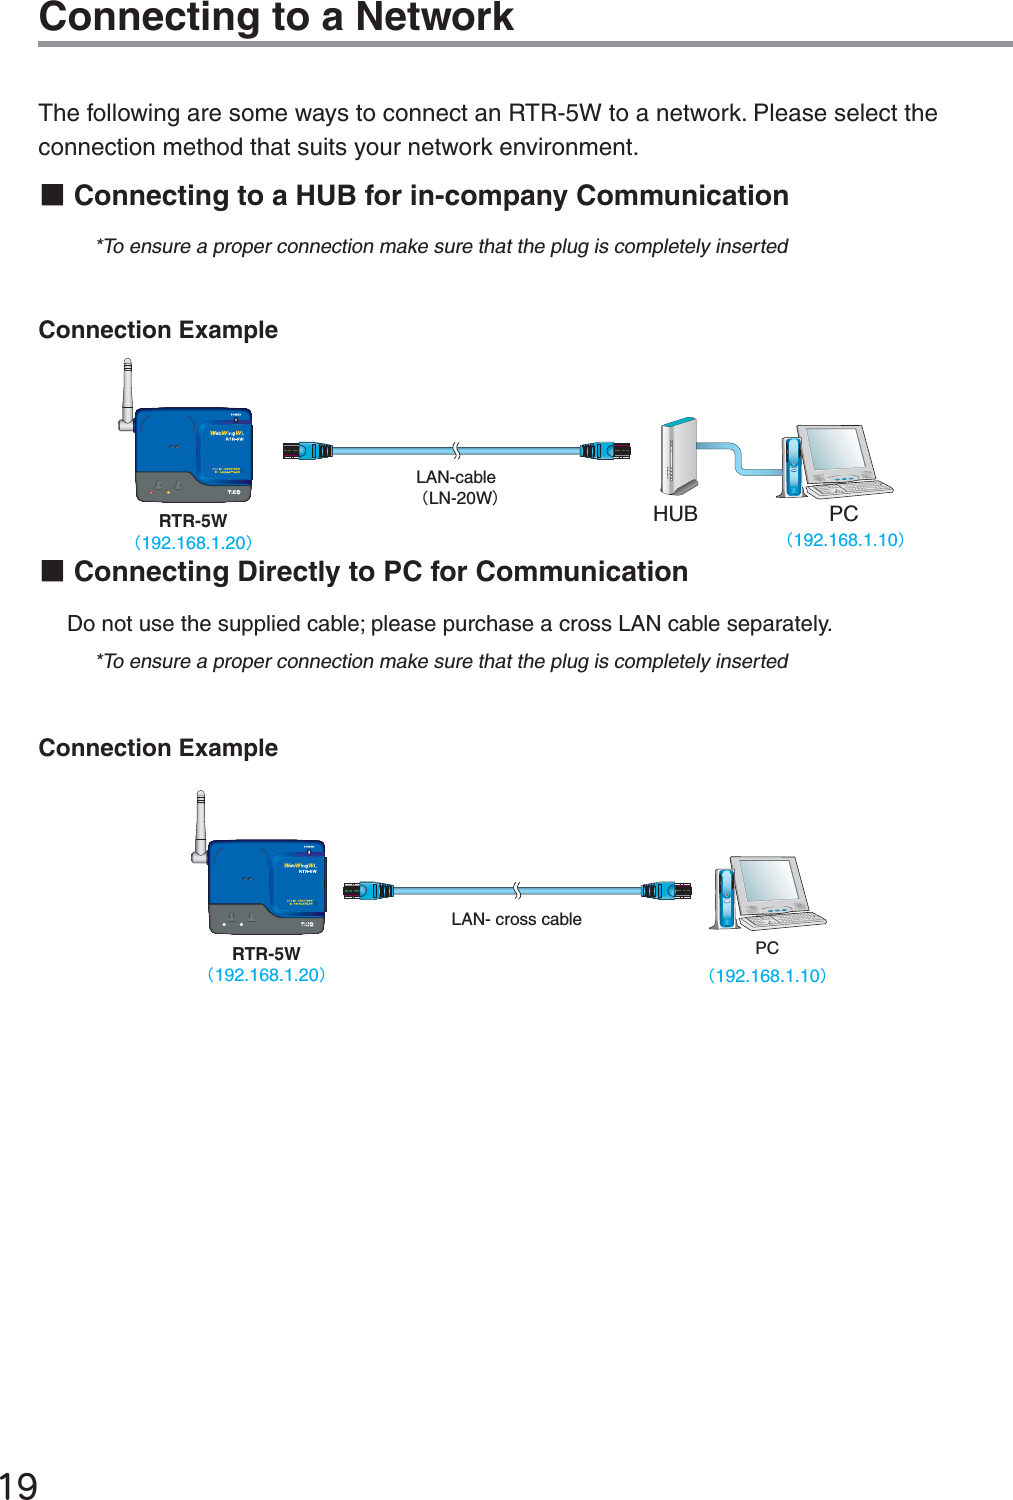
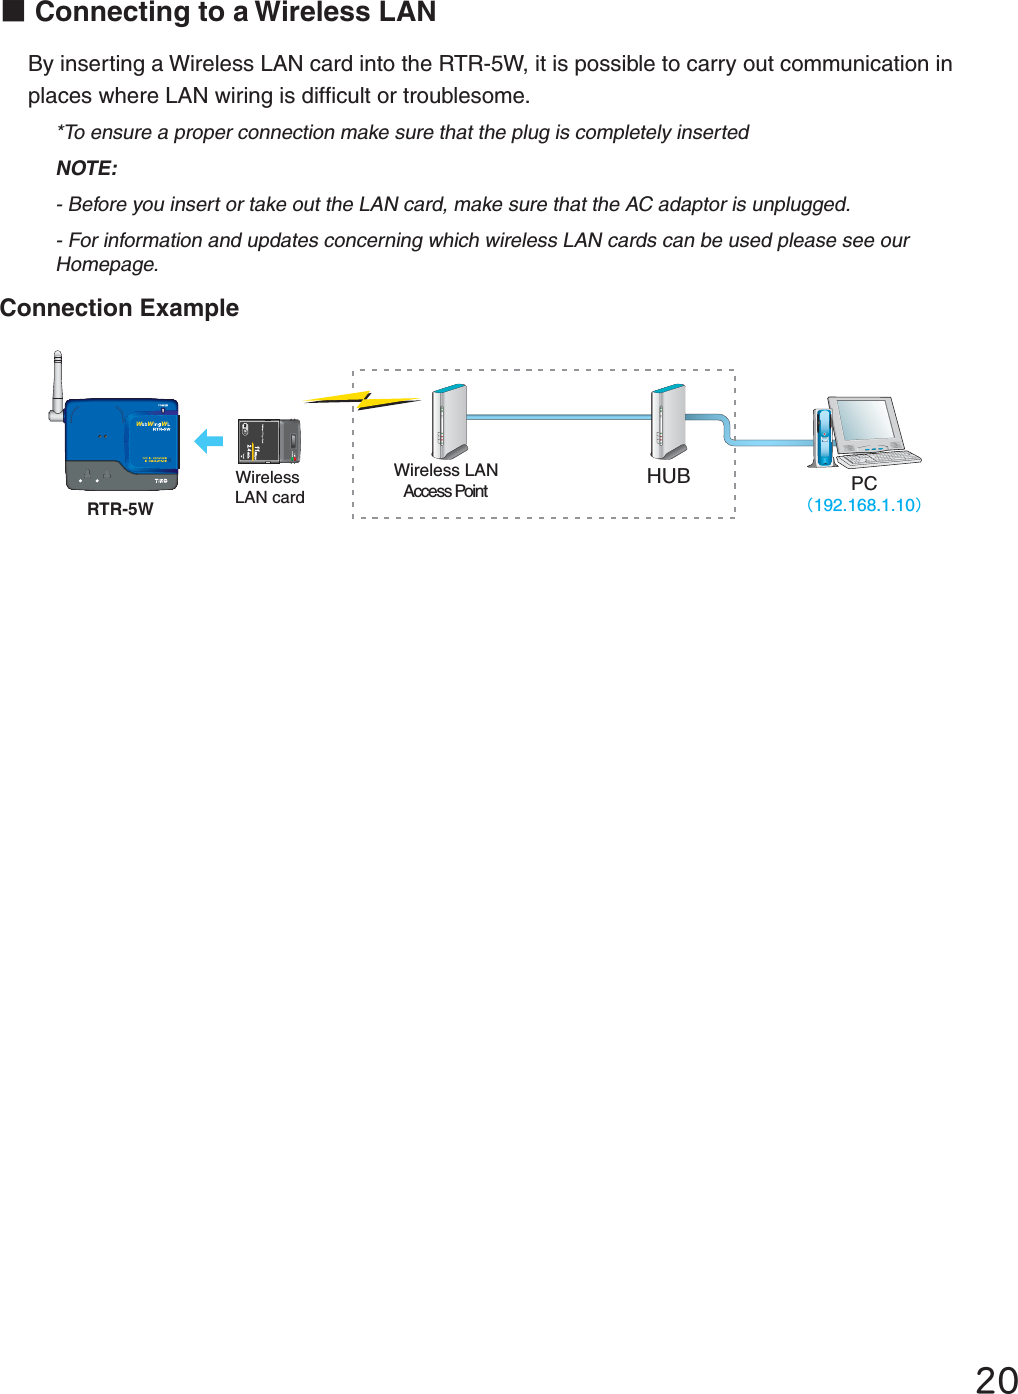
![ĺOutline of UseɡBasic OperationȺGetting ReadyȻ1.Prepare the Data Loggers you wish to use as Remote Units.Get the units ready for measuring by connecting the proper sensors and installing the proper batteries.2.Getting the RTR-5W Ready to UseGet the unit ready for communication by connecting the network cable and AC adaptor. 3.Checking your Operating EnvironmentYou also need to check your computer and network setup and be sure to prepare any necessary devices like routers to enable connection to your access point4.Connecting to a NetworkConnect the RTR-5W to the desired network.See p. 19-20 for connection examples of how to connect directly to your computer or use a router.*Even if you are planning to use a wireless LAN, it is necessary to make the initial settings via a wired connection. 5.Install [RTR-5W for Windows]To enable set up, install the supplied software [RTR-5W for Windows] into your computer.By installing RTR-5W, all of the following applications will be installed: [RTR-5W for Windows] for setting up Remote Units, making recording settings and other operational settings, [Network Settings Utility] for making network settings, and [Temperature /Humidity Graph], [Multi-Scale Graph], [Event Viewer] for viewing various types of recorded data.](https://usermanual.wiki/TandD/RTR5W/User-Guide-644312-Page-18.png)
![IJıȺInitialization SettingsȻ1.Network Initialization Settings Ȥfrom the Network Settings UtilityTo connect to a network, it is necessary to enter an IP address and Subnet Mask that are appropriate for your network. Under Network Initialization Settings make the appropriate settings for your ȨIP addressȩ and ȨSubnet Maskȩ. More detailed settings can be made in [Detailed Network Settings] 2.Remote Unit RegistrationȤ from RTR-5W for Windows In order to carry out wireless communication between an RTR-5W base station and a Remote Unit, please register Data Loggers as Remote Units as follows1. Create a Location 2. Create Group(s) 3. Register Remote Unit(s)Up to 64 Remote Units can be registered to one Location. ȺBasic OperationsȻ1. Recording SettingsȤ from RTR-5W for Windows By setting the Recording Interval, the Recording Start Date / Time and the Recording Mode, recording will begin at the set date and time. 2. Download Data Ȥfrom RTR-5W for Windows Data recorded in the Remote Unit will be downloaded and saved in your computer as a data fi le. Downloaded temperature and humidity data can be viewed in [Temp /Humidity Graph], downloaded Voltage, Pulse and Temp / Humidity data can be viewed in [Multi-scale Graph] and downloaded Event data can be viewed using [Event Viewer].](https://usermanual.wiki/TandD/RTR5W/User-Guide-644312-Page-19.png)
![IJijȺOther FunctionsȻWarning Monitoring SettingsȤ from RTR-5W for Windows Monitoring at each Location for warnings is carried out and if any of the gathered data exceeds the set limit, a notifi cation can be sent via e-mail to your computer or cellular phone.Also, because there is a built-in external output terminal, it is possible to connect to an external device, such an alarm or light, so that a notifi cation of a warning can be seen or heard onsite. If the RTR-5W is not connected to the Internet, warning report e-mail cannot be sent.Auto Download Settings Ȥfrom RTR-5W for Windows The downloading of data can be set to be automatically carried out at a specifi ed time or at a set interval of time. For Auto download to occur at a set time, it is necessary for RTR-5W for Windows to be open. Gather Current DataȤfrom RTR-5W for Windows RTR-5W communicates with Remote Units to gather and display the current measurement readings.Also, by setting a communication interval, the current readings will be continuously gathered and displayed at that interval. If you are using RVR-52A to record Pulse Data, the current reading will be displayed as the average of recorded readings during the set recording interval. If you are recording the time of an Event, the current reading will show HI or LO (Rising Edge or Falling Edge.)Transfer DataȤ from RTR-5W for Windows The RTR-5W retrieves and stores data at a regular interval set in [Location (RTR-5W) Properties].This stored data is transferred and displayed for each Remote Unit. * Event Data recorded with RVR-52A cannot be viewed in this manner.Monitor Current ReadingsȤRTR-5W Web ViewerThe RTR-5W retrieves and stores data at a regular interval set in [Location (RTR-5W) Properties].The most recent measurement reading(s) can be viewed in the browser. GraphȤRTR-5W Web ViewerThe graph displayed in the browser will be the same graph that is shown upon opening [Transfer Data] in [RTR-5W for Windows]](https://usermanual.wiki/TandD/RTR5W/User-Guide-644312-Page-21.png)
![IJķCommunicating with the Data LoggerIt is possible to communicate between an RTR-5W base station and Data Loggers RTR-51/52/53ȆRVR-52A by two methods: [Wireless Communication] and [Optical Communication].ɡCommunicating with a Data Logger via Optical CommunicationOptical communication can be carried out by placing an RTR-51/52/53 or RVR-52A Data Logger face down on the RTR-5W so that the optical communication areas meet. *To make measuring mode changes in an RVR-52A, use via optical communication when registering a Remote Unit. Optical Communication AreaPlace a Data Logger face down on the RTR-5WɡCommunicating with a Data Logger via Wireless CommunicationCommunication is carried out with the RTR-51/52/53ȆRVR-52A Data Loggers via special short wave wireless communication In order to carry out Wireless Communication, use the supplied software [RTR-5W for Windows] to register the Data Loggers as Remote Units of the RTR-5W Base Station. 7ITHINM*The wireless communication range, if unobstructed and direct, is about 100 meters [330 ft].](https://usermanual.wiki/TandD/RTR5W/User-Guide-644312-Page-25.png)
![ijIJConnecting to the InternetIn order to connect the RTR-5W to the Internet you must fi rst set up an Internet connection environment by making arrangements with a provider for a line and get a global IP address and domain. Also, if necessary, make all domain name server and / or router settings. For more details about various settings, it is best, if present, to contact the network administrator. To get more details about a global IP address and domain, please contact your provider.The following are examples of connection methods. Please select the connection method that suits your network environment. ȺConnection Example ȻɡUsing the RTR-5W on the Internet).4%2.%40ROVIDER2OUTER -ODEMԘԙHTTPԚԚ2427㧔㧕0#ӱIn order to access the RTR-5W from your browser, enter the Global IP address that has been assigned to the RTR-5W in your browser’s URL bar following [http://]ӲThe RTR-5W will be called via a router or the Internet provider .ӳThe RTR-5W which received the access request will return data to the computer which sent the access request. ɡUsing a Domain Name (ex: rtr-5w.net)).4%2.%40ROVIDER-ODEM2OUTER2427㧔㧕$.33ERVERԘԙHTTPRTRWNET0#ԚԚӱIn order to access the RTR-5W from your browser, enter the Domain Name (Ex rtr-5w.net)that has been assigned to the RTR-5W in your browser’s URL bar following [http://].ӲThe Domain Name that was entered in the URL bar is converted by the DNS server into an IP address and the RTR-5W is called. ӳThe RTR-5W which received the access request will return data to the computer which sent the access request.](https://usermanual.wiki/TandD/RTR5W/User-Guide-644312-Page-30.png)