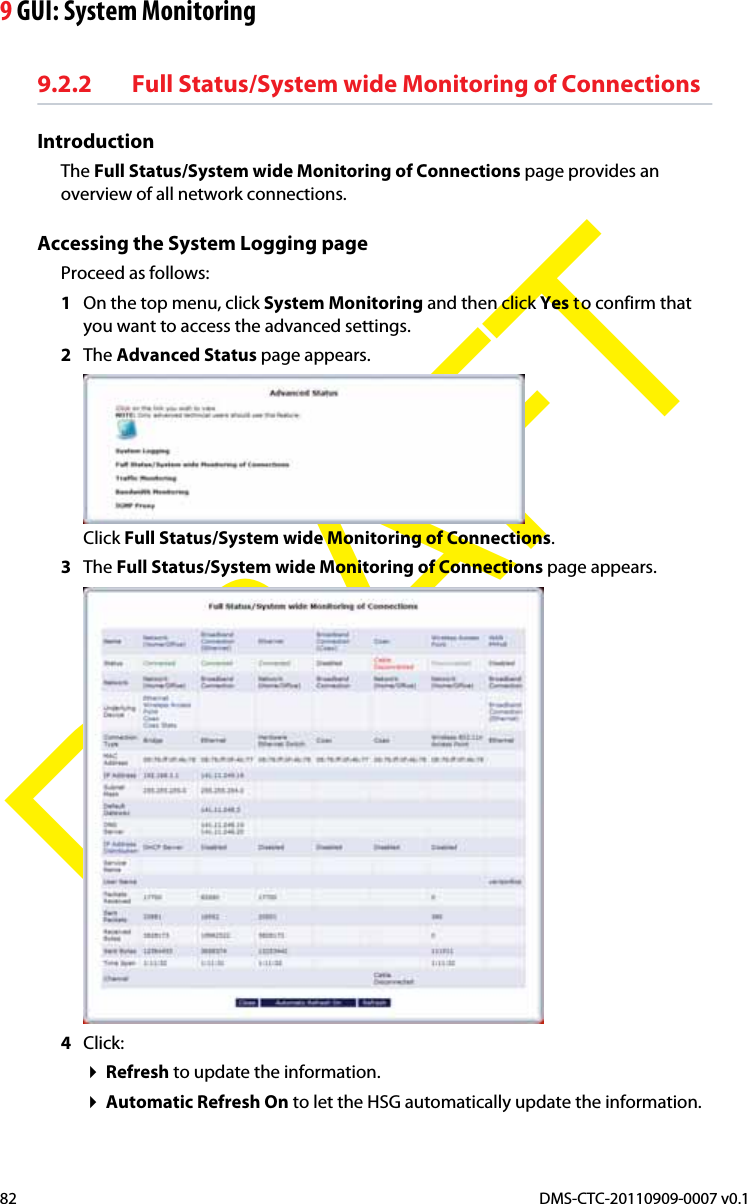
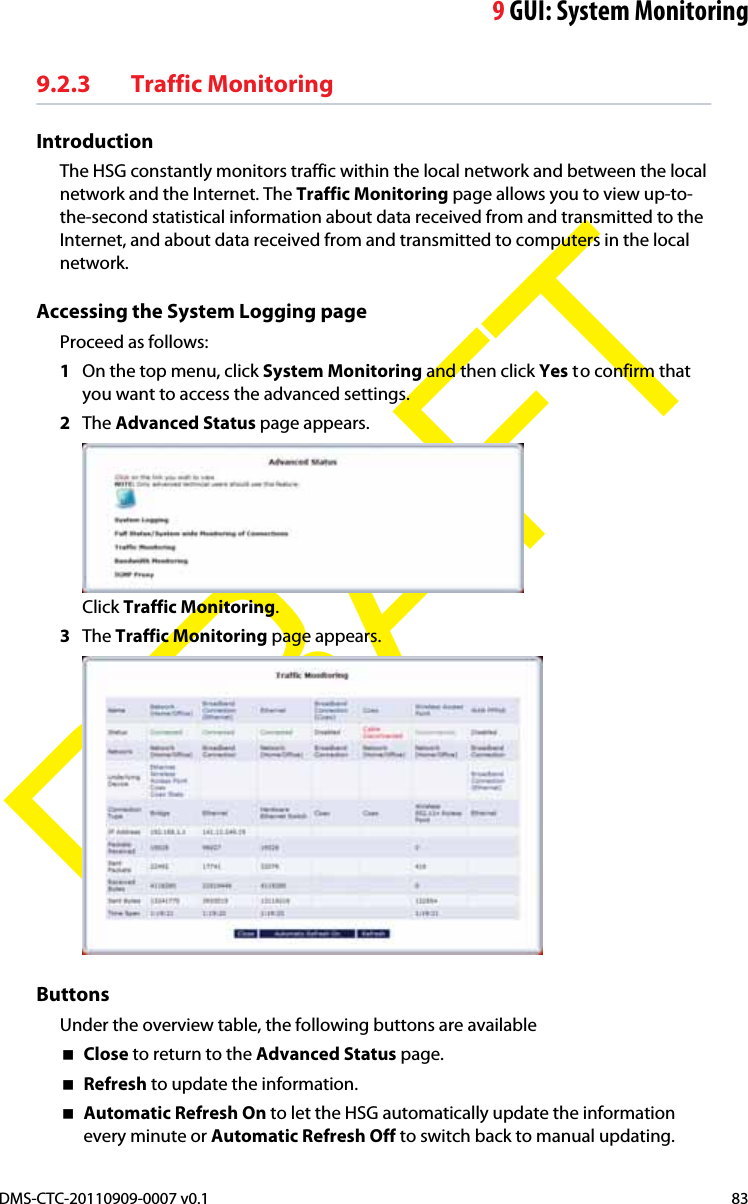
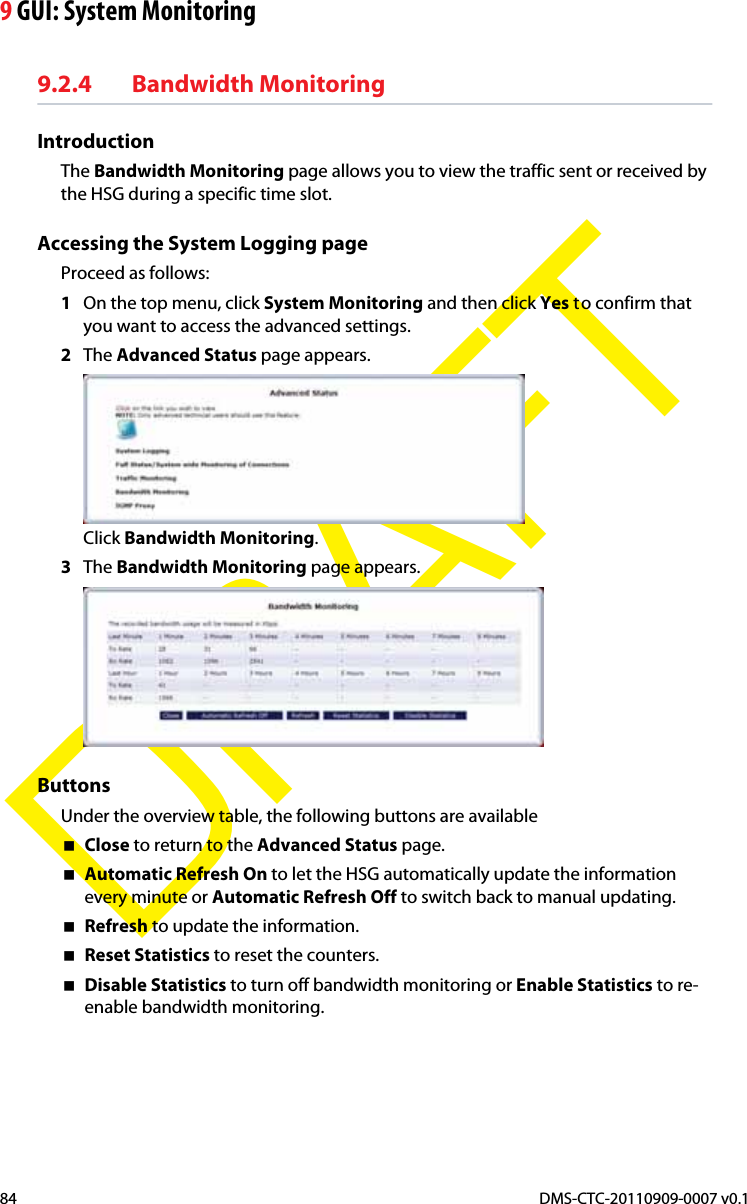
Technicolor Delivery Technologies Belgium TG790 Home Service Gateway User Manual
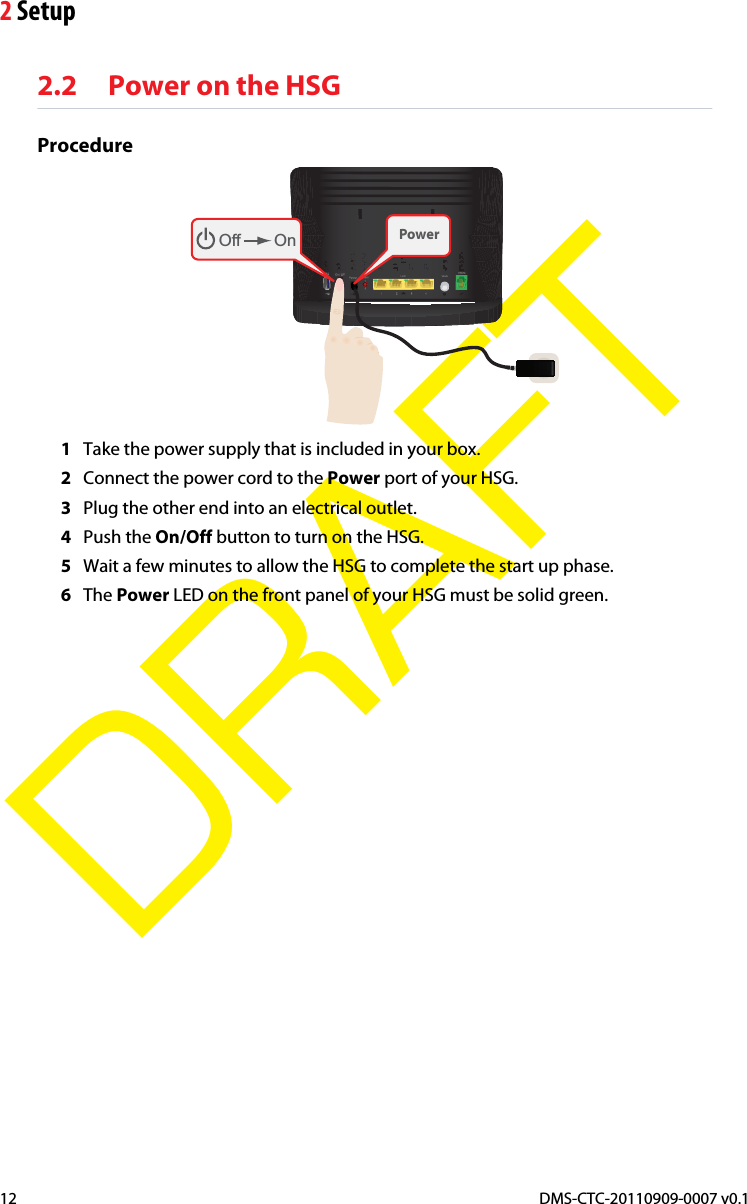
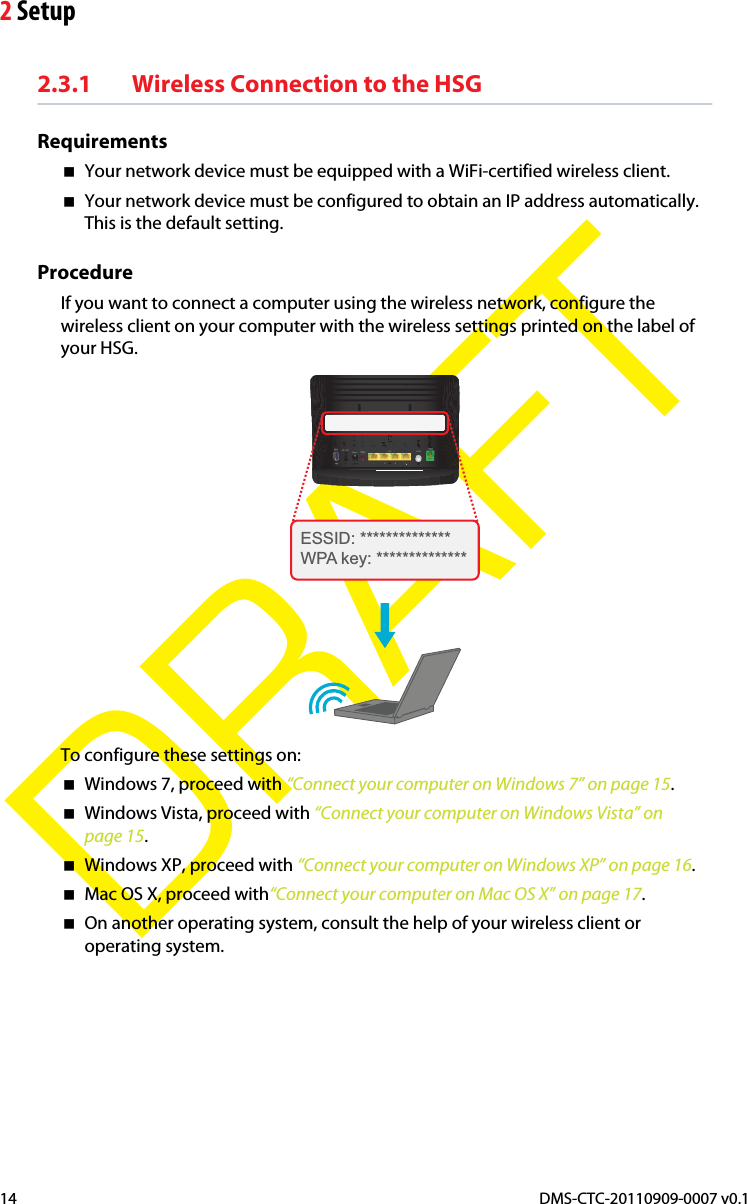
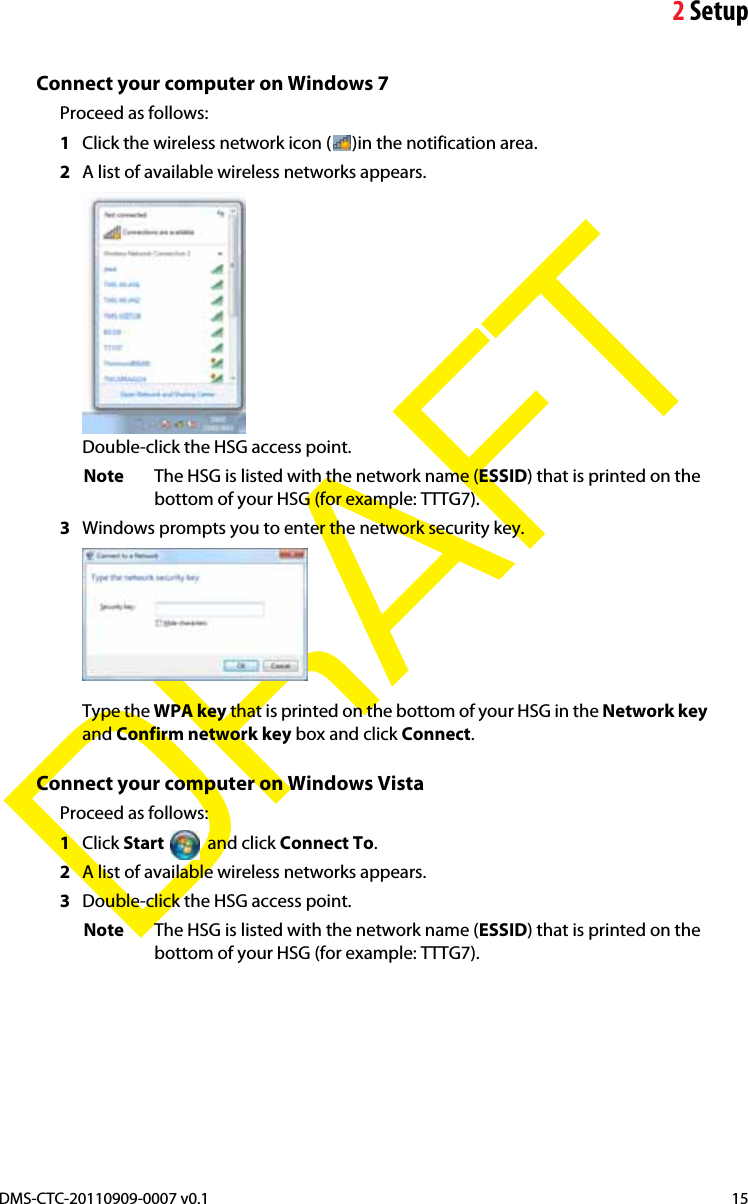
Technicolor Delivery Technologies Belgium Home Service Gateway
UserManual.wiki
>
Technicolor Delivery Technologies Belgium
>
TG790 User Manual
>
User Manual (Operation)
Contents
1.
User Manual (Operation)
2.
User Manual (Statement)
User Manual (Operation)
Navigation menu
Upload a User Manual
Namespaces
Wiki Guide
HTML
PDF
Info
Views
User Manual
Discussion / Help
Navigation


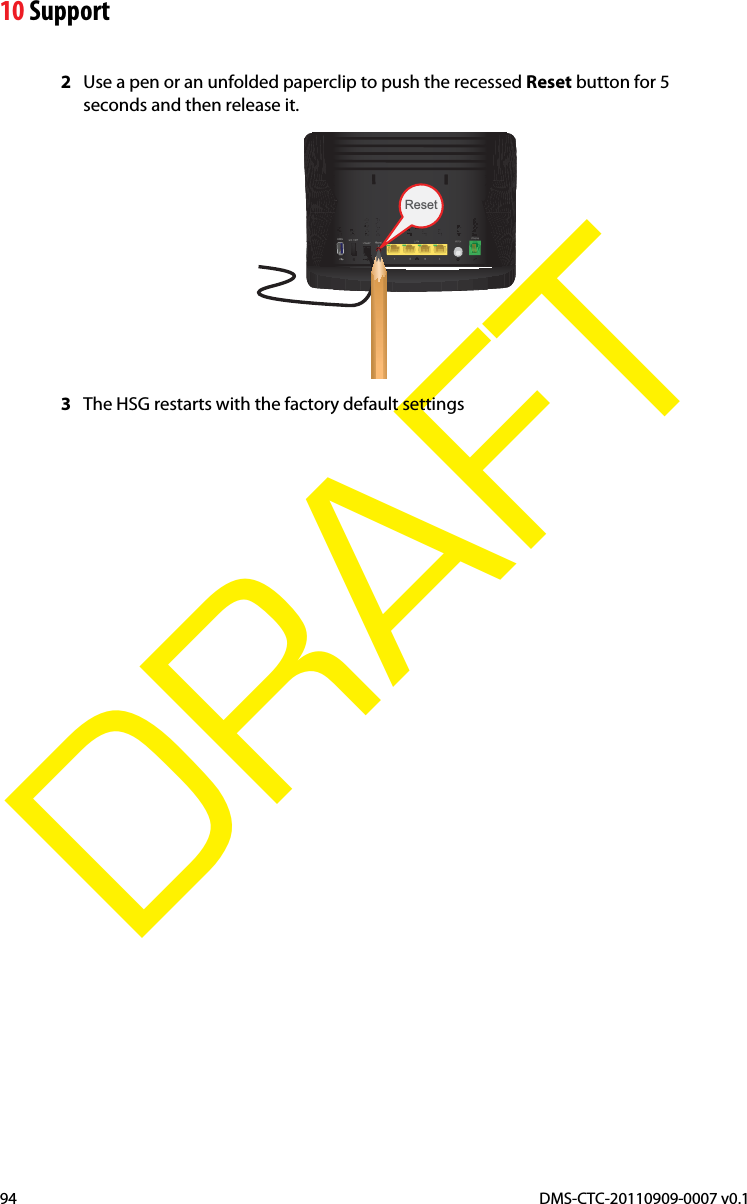
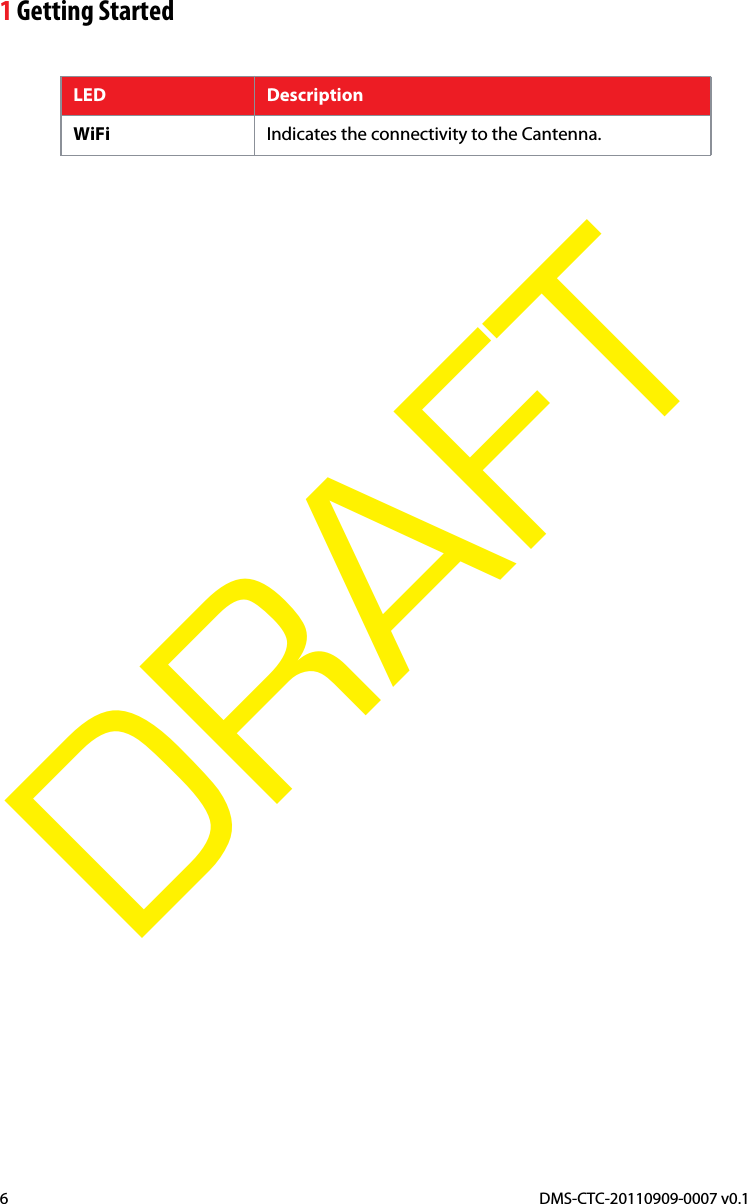
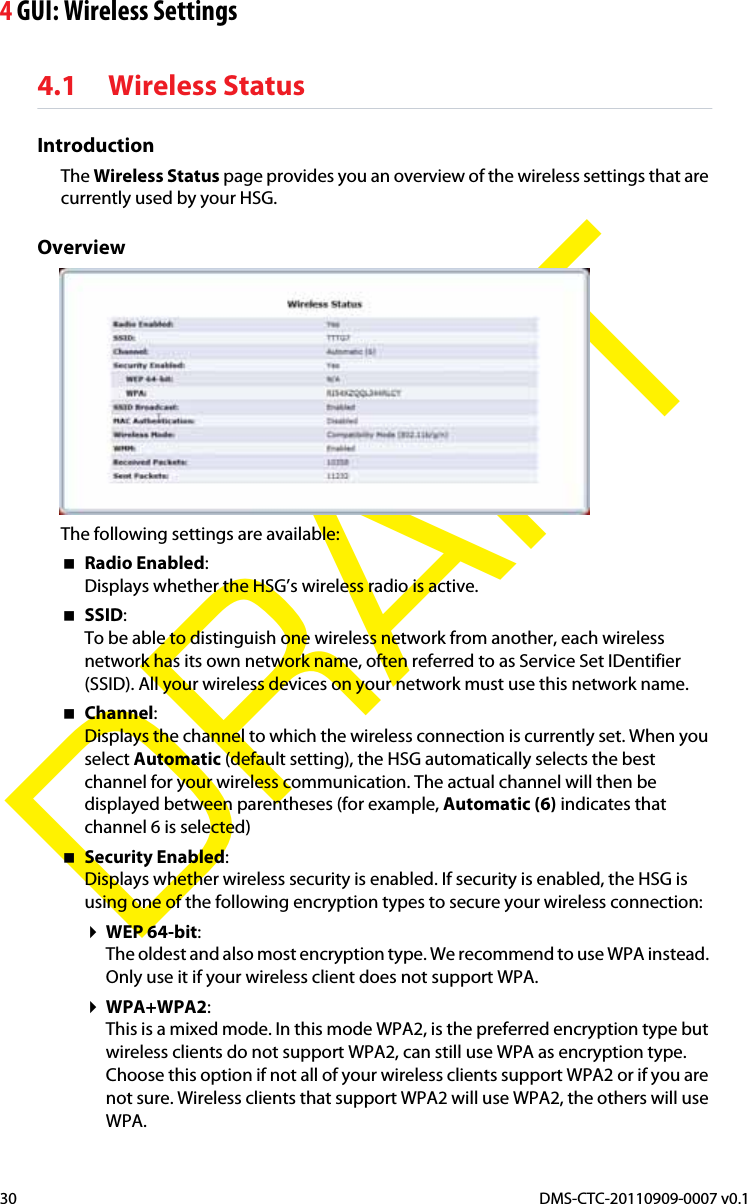
![1Getting StartedDMS-CTC-20110909-0007 v0.1 5DRAFT1.2.1 Front PanelStatus LEDs WPS buttonComponentsOn the front panel of your HSG, you can find:The Status LEDs:These Status LEDs allow you to check the state of the services offered by the HSG.WPS button:The WPS button allows you to add new wireless clients to your local network in a swift and easy way, without the need to enter any of your wireless settings (network name, wireless key, encryption type).Status LEDsOn the front panel of your HSG, you can find the following items:LED DescriptionPower Indicates the power status of the HSG.Internet Indicates the connectivity to the Cantenna.Phone [1-2] Indicates the connectivity to the phone connected to the HSG.Wireless Indicates whether wireless is enabled on your HSG.USB Indicates the connectivity of the connected USB devices.Ethernet Indicates the connectivity to the connected Ethernet devices.](https://usermanual.wiki/Technicolor-Delivery-Technologies-Belgium/TG790.User-Manual-Operation/User-Guide-1562071-Page-11.png)


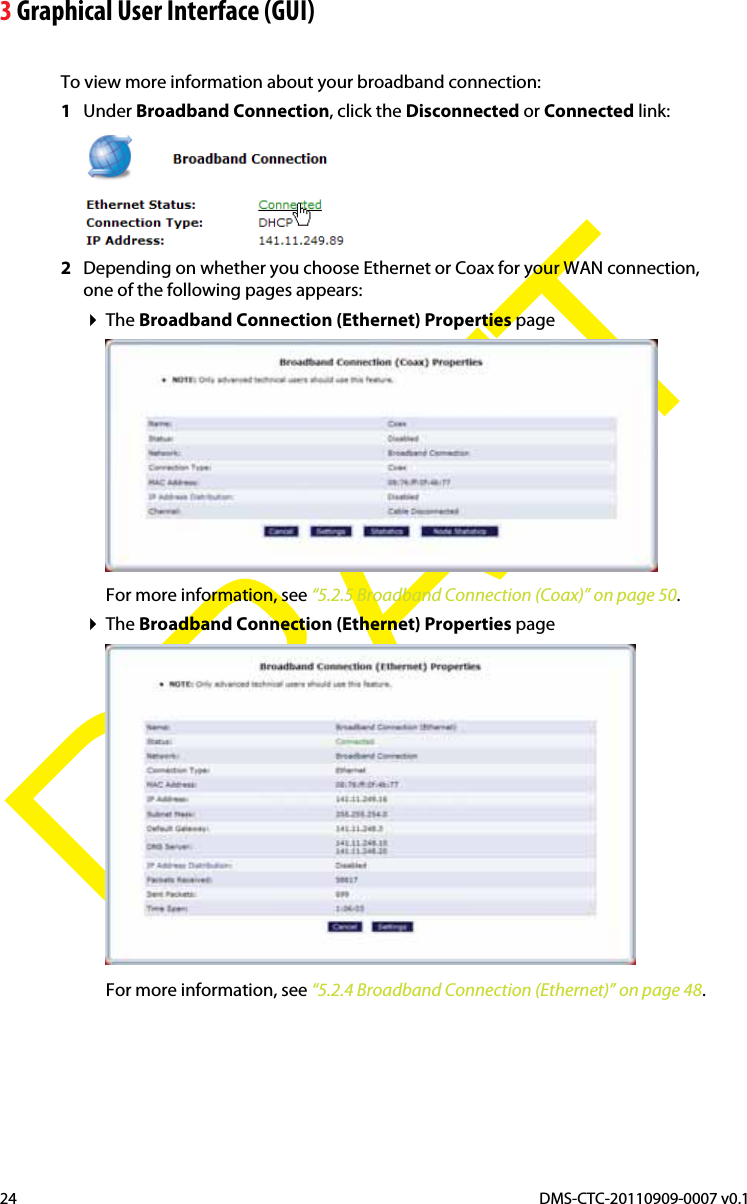
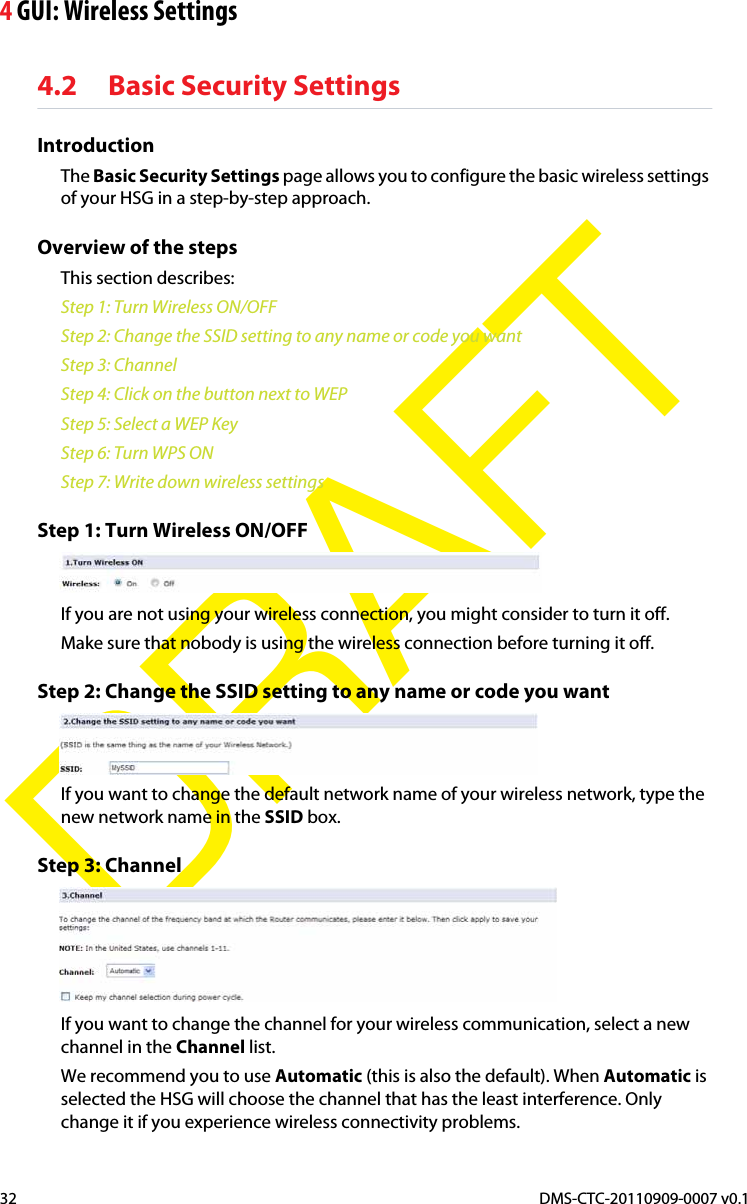

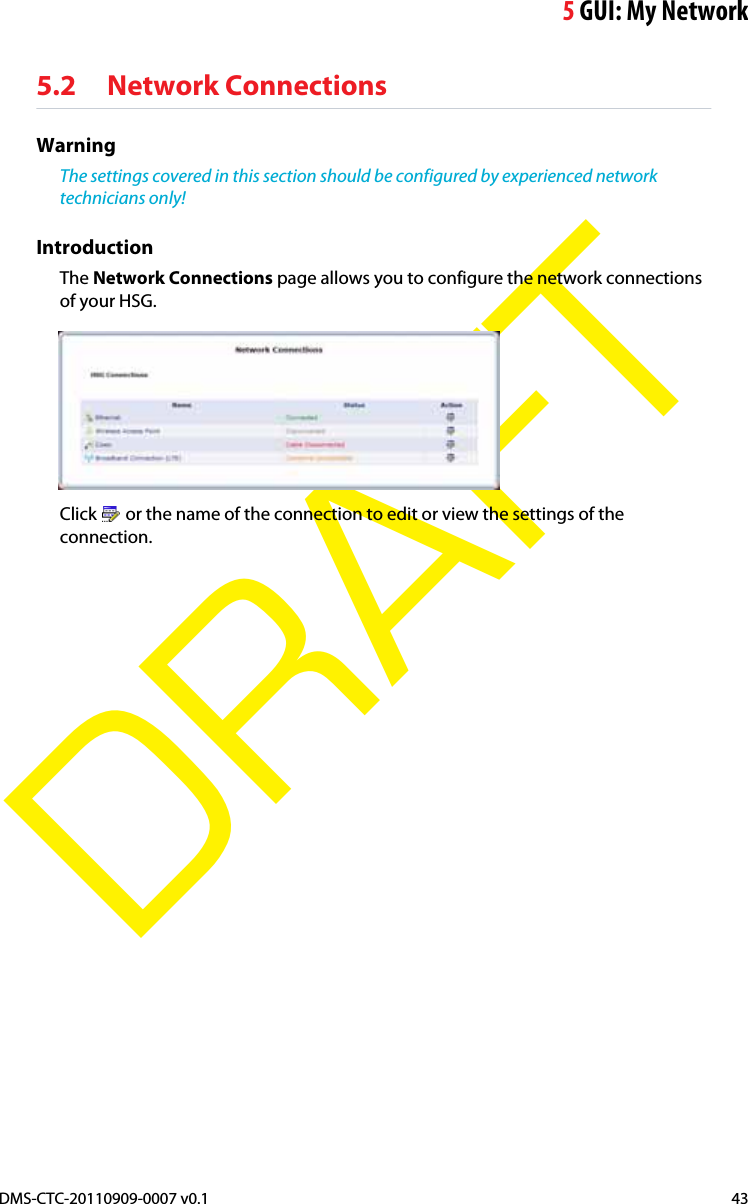
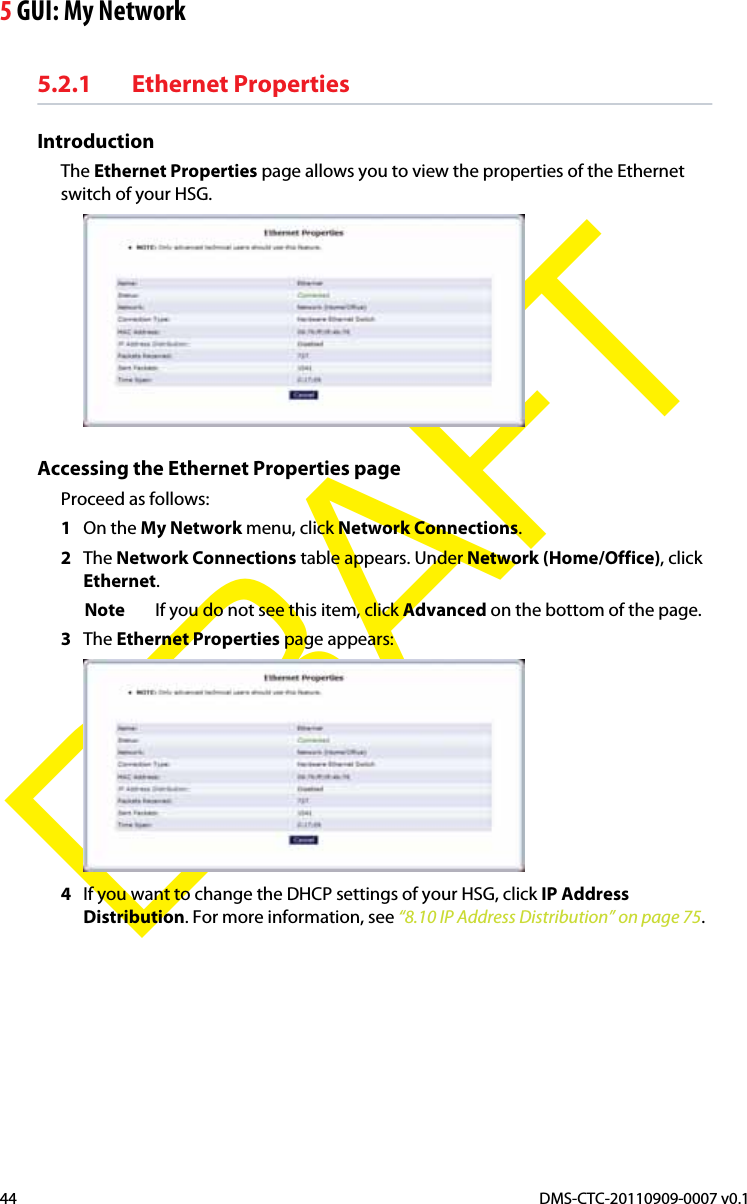
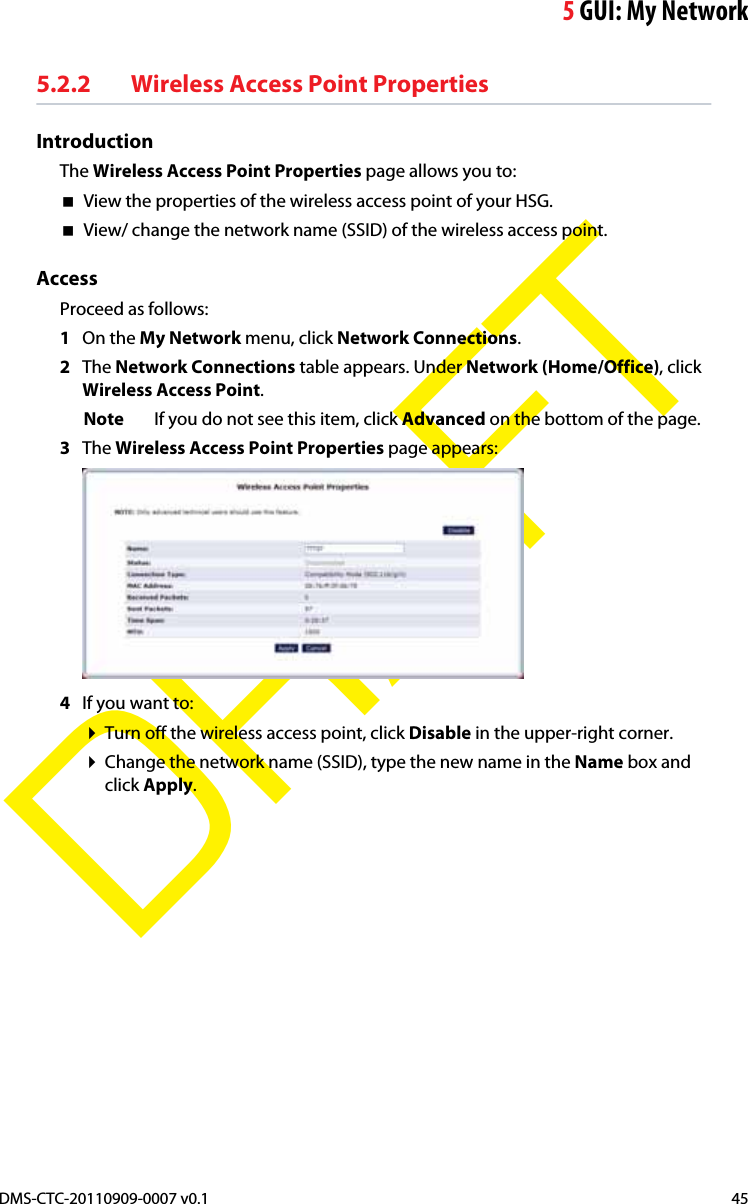

![5 GUI: My NetworkDMS-CTC-20110909-0007 v0.148DRAFT5.2.4 Broadband Connection (Ethernet)IntroductionThe Broadband Ethernet connection connects the HSG Router to the Internet using an Ethernet cable.The Broadband Connection (Ethernet) Properties page allows you to view/change the settings of this connection.Accessing the Broadband Connection (Ethernet) Properties pageProceed as follows:1On the My Network menu, click Network Connections.2The Network Connections table appears. Click Broadband Connection (Ethernet) Properties.3The Broadband Connection (Ethernet) Properties page appears.PropertiesThe following properties are available:Status:Displays the status of the Ethernet connection (for example, “Down”, “Connected”).Network:Select the type of connection being configured from the drop-down list (options: Network [Home/Office], Broadband Connection, or DMZ).Connection Type:Displays the type of connection. Since this is an Ethernet Connection, “Ethernet” is displayed. Physical Address Displays the physical address of the network card used for the network.MAC Address:Displays the unique hardware address of this interface.IP Address:The local IP address of the HSG and its DHCP server.](https://usermanual.wiki/Technicolor-Delivery-Technologies-Belgium/TG790.User-Manual-Operation/User-Guide-1562071-Page-54.png)