Tecom Co GR2512 WiFi 2/1-port ATA router User Manual WiFi Router quick user guide 070530
Tecom Co Ltd WiFi 2/1-port ATA router WiFi Router quick user guide 070530
UserManual.wiki
>
Tecom Co
>
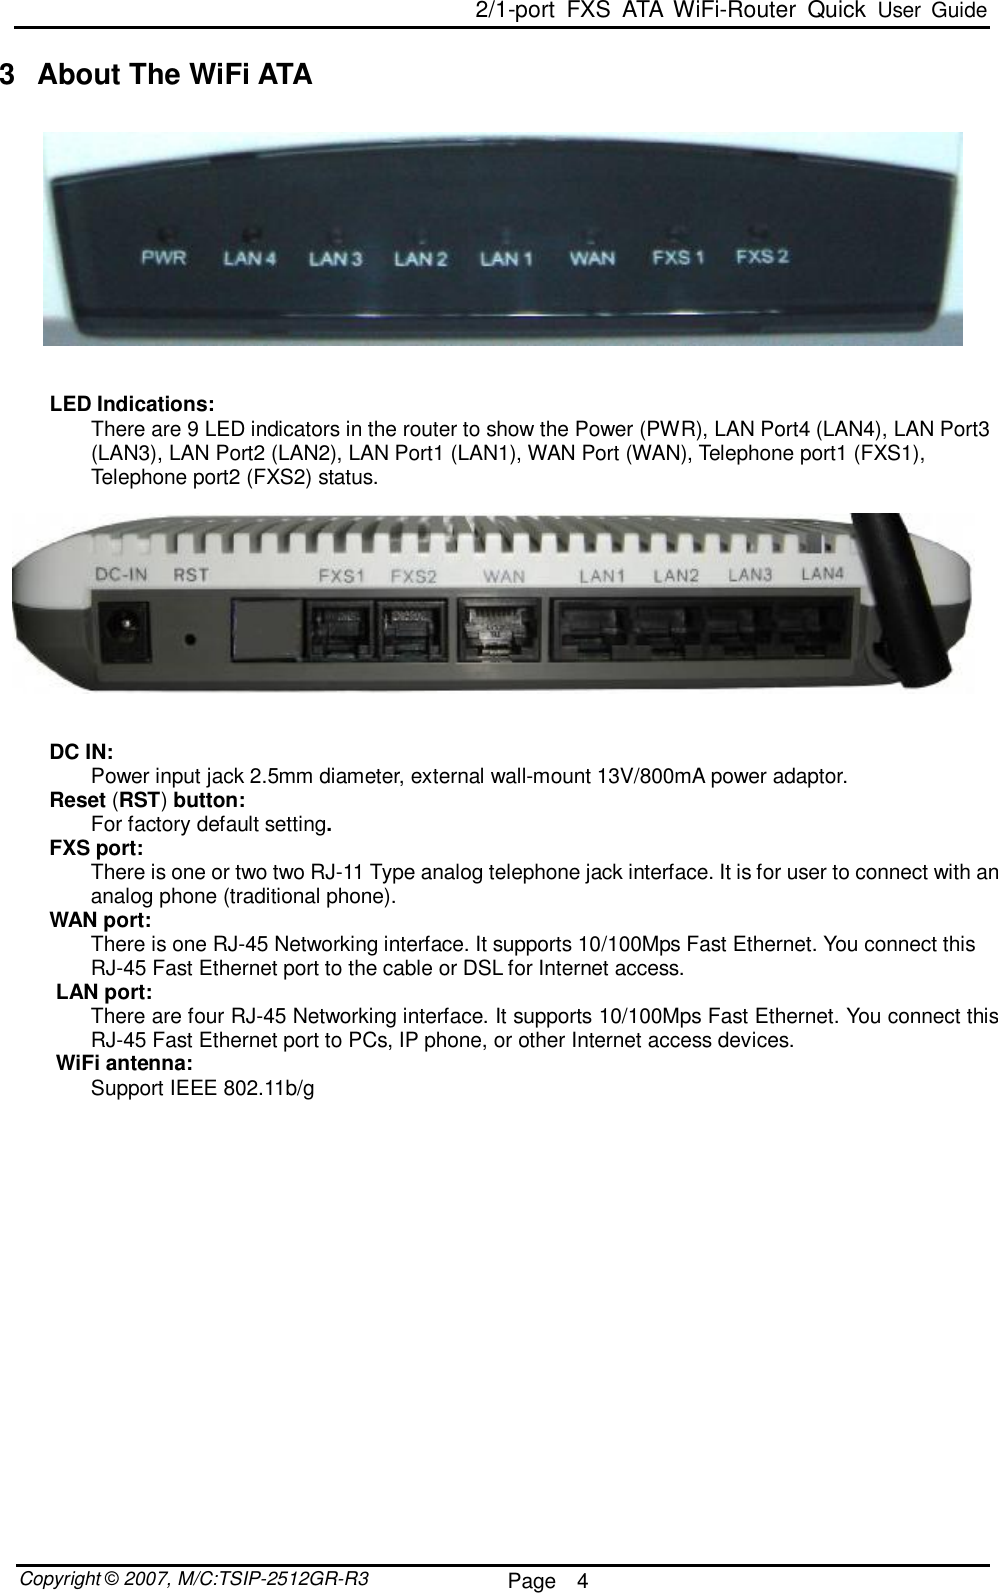
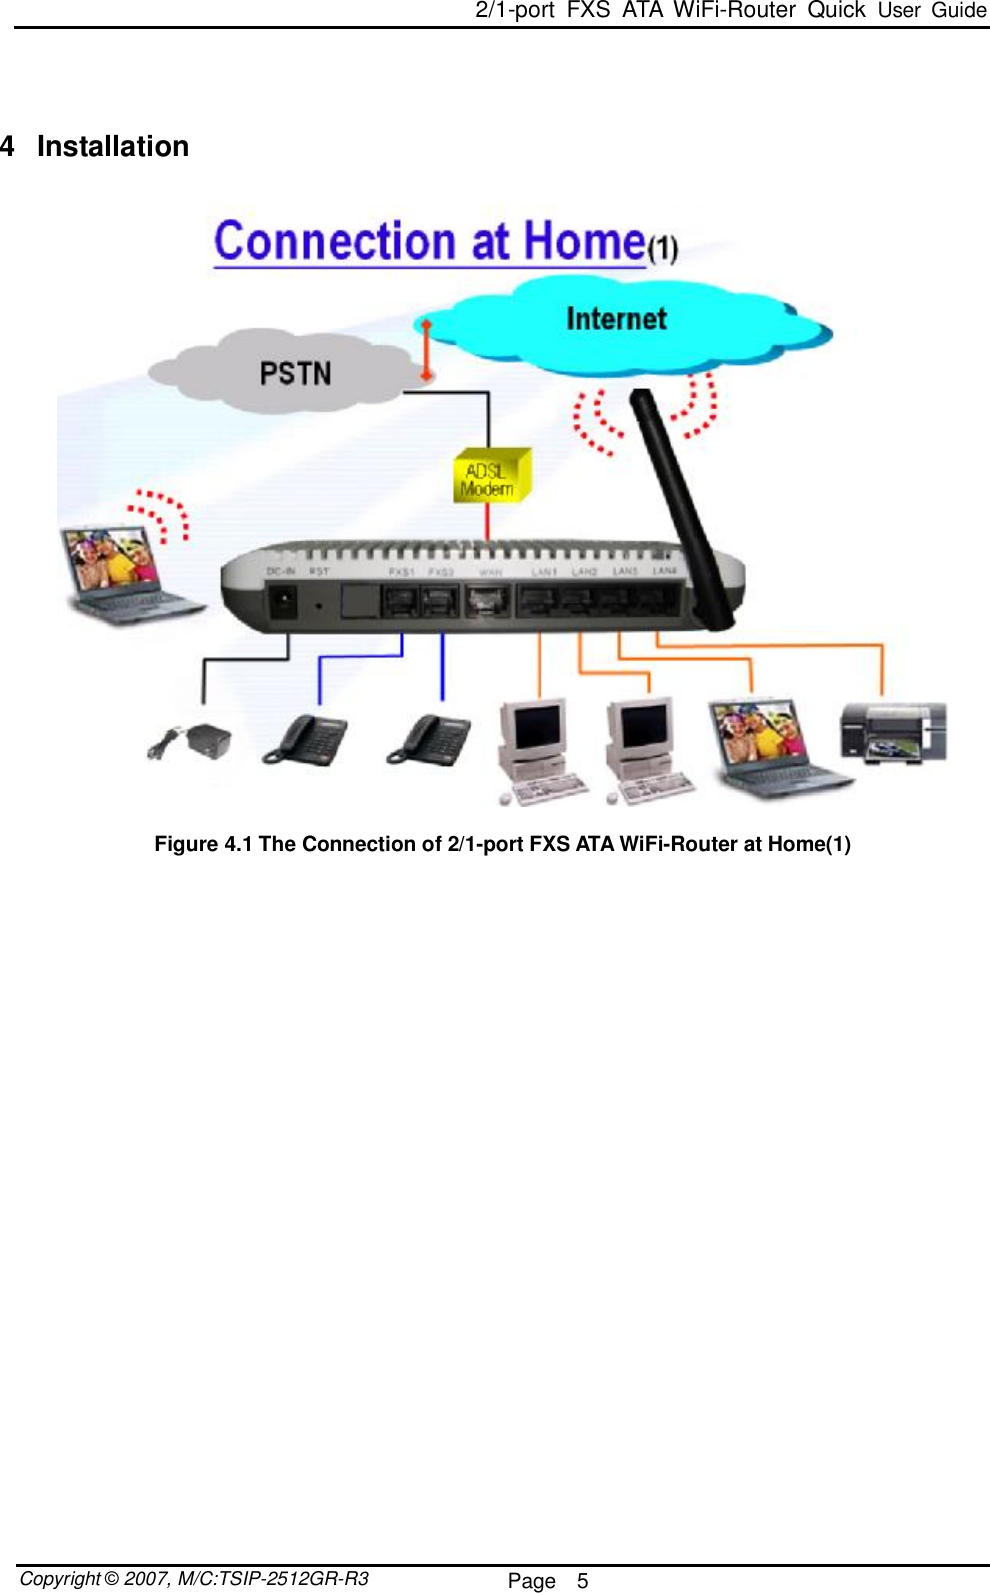
GR2512 User Manual
Users Manual
Navigation menu
Upload a User Manual
Namespaces
Wiki Guide
HTML
PDF
Info
Views
User Manual
Discussion / Help
Navigation
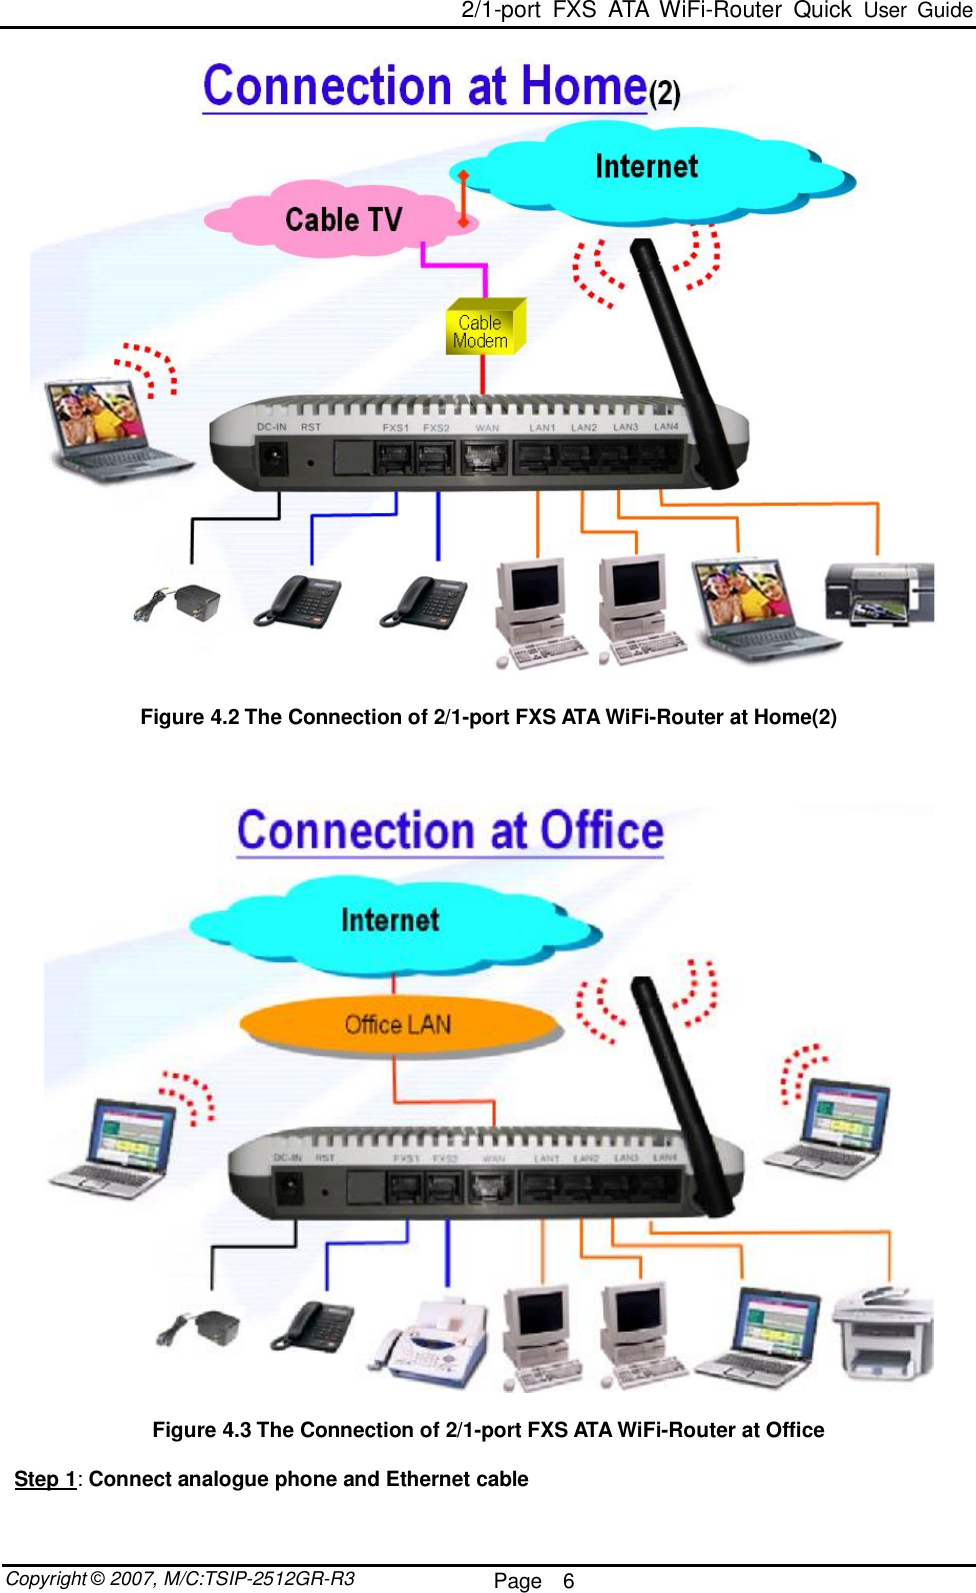
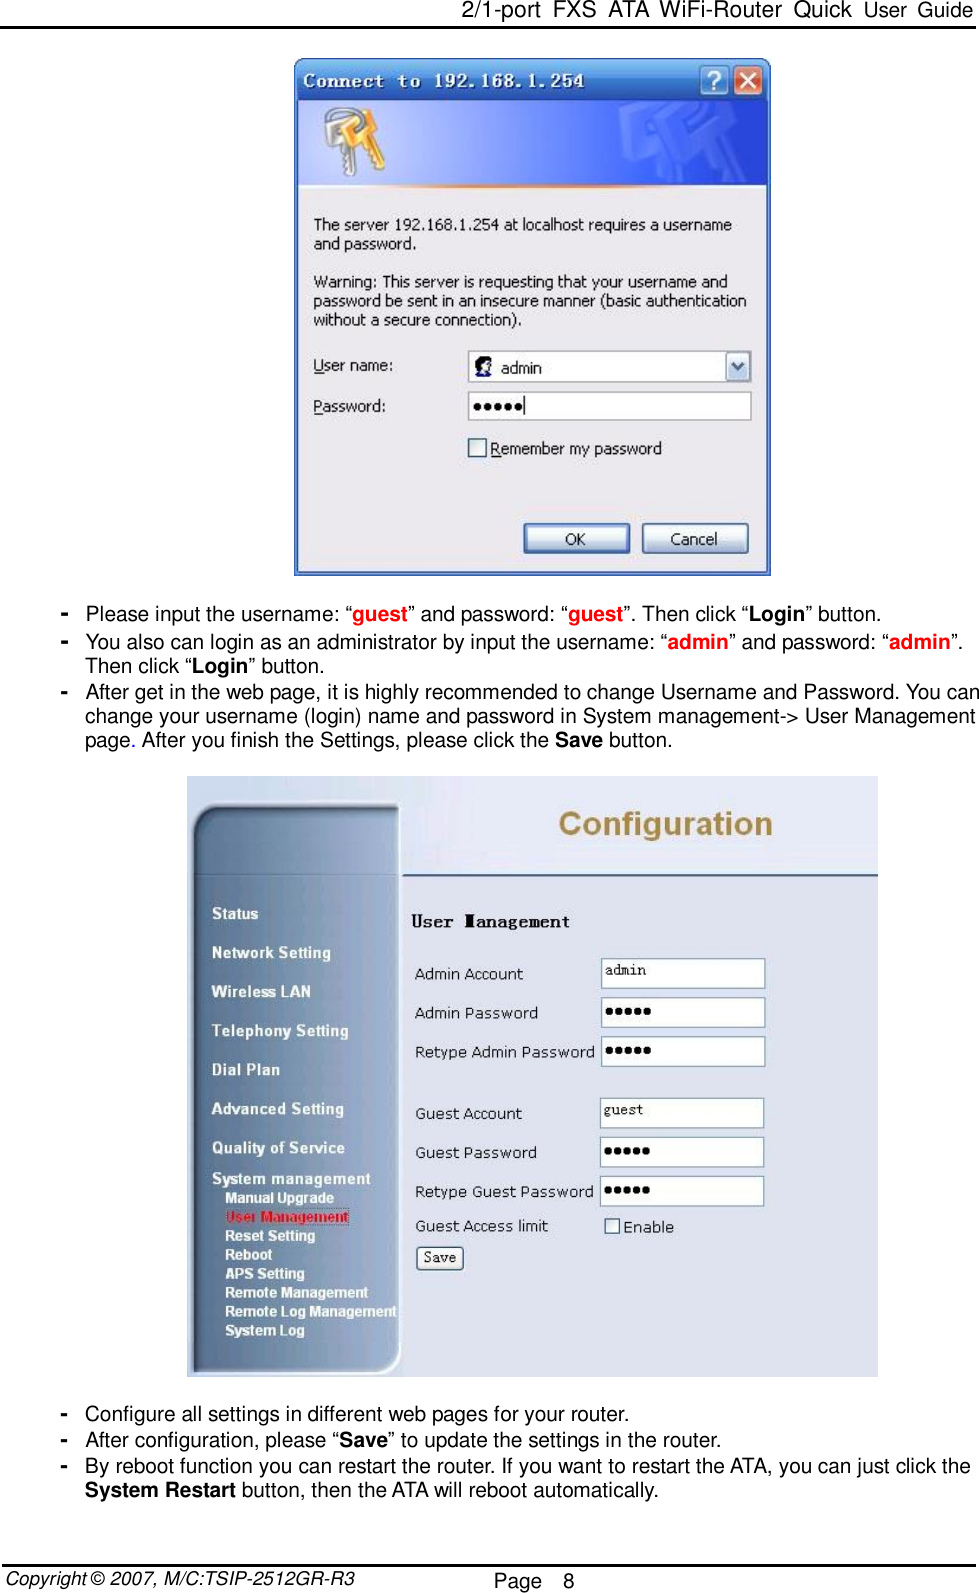
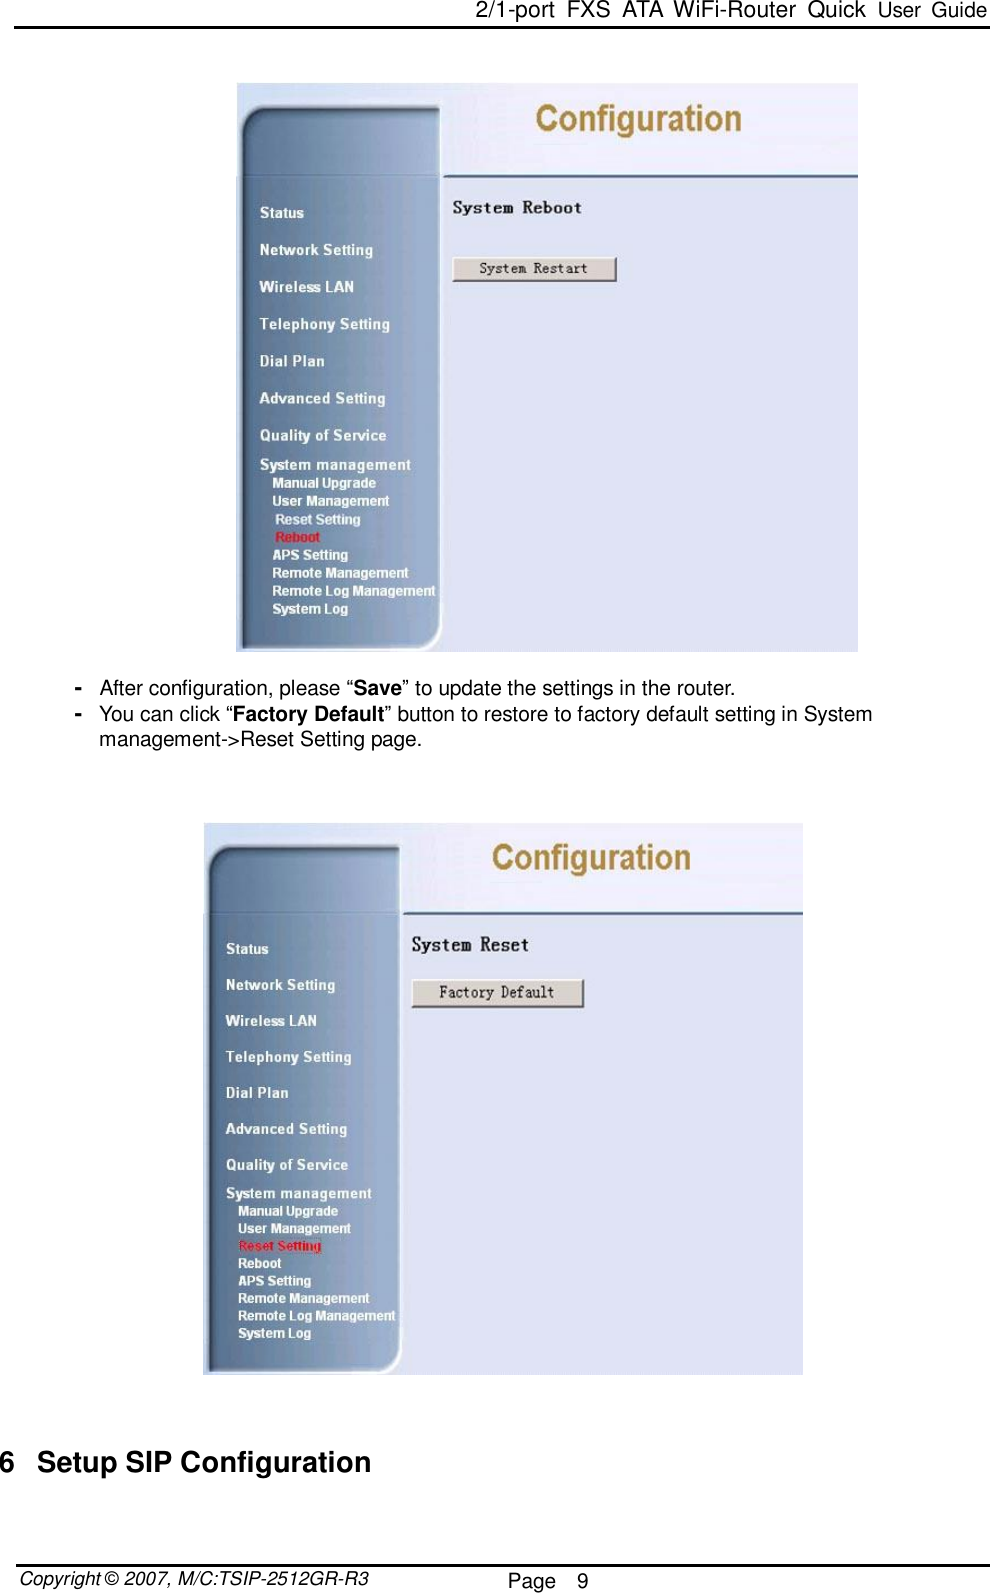
![2/1-port FXS ATA WiFi-Router Quick User Guide Copyright © 2007, M/C:TSIP-2512GR-R3 Page 7 Please refer to the figure Fig.4.1 ~ 4.3 above. Then please connect one analogue phones to FXS1 port. And then use an Ethernet cable (CAT-5) to connect the WAN port to the broadband network end (e.g. an ADSL modem, a cable modem, or a router etc). Step 2: Connect power With the power adaptor in the product package, please plug its power cord to the rear panel of 2/1-port FXS ATA WiFi-Router. Then plug the power plug to the wall outlet. You will see that the LEDs on 2/1-port FXS ATA WiFi-Router are turned on. [Note]: The RST button is used for: Reset to factory default values – when WiFi-Router is in ready mode, press this button longer than 5 seconds. Reboot the system – when WiFi-Router is in ready mode, press this button less than 5 seconds. Step 3: Configure network and register account Please refer to Chapter 5 to configure the network well and successfully register your account. Check if the 2/1-port FXS ATA WiFi-Router works by pickup an analogue phone, if there is a dialing tone, and then dial several numbers to see whether the phone is responsive. Step 4: Connect LAN port Please refer to the figure Fig.4.1 ~ 4.3 above. And then use an Ethernet cable (CAT-5) to connect one of the four LAN ports on the Router to PC, notebook, printer, router, or hub. Step 5: Connect to WiFi Router Please refer to Chapter 8 to connect a PC or notebook to 2/1-port FXS ATA WiFi-Router well. The PC or notebook should can browser the Internet fine. 5 Setup WiFi-Router Thru Web Browser The router provides a built-in web server. You can connect your PC to the LAN port. And you can use web browser (like Microsoft IETM) to configure the router. For the factory default setting, please follow the steps below for configuration. - First please connect your pc to LAN port and configure your IP to the 192.168.1.xxx network segment. - Then input the IP address http://192.168.1.254/ in the web browser. - You will access to the router and get the Login page.](https://usermanual.wiki/Tecom-Co/GR2512/User-Guide-838593-Page-8.png)
![2/1-port FXS ATA WiFi-Router Quick User Guide Copyright © 2007, M/C:TSIP-2512GR-R3 Page 11 - Step 1. Hook flash the phone, then you can hear the dial tone, dial the numbers you want to call and press “#” to call out. - Step 2. If you hear busy tone after hooking flash the phone, it means you can’t dial a second call now. You just need to hook down the phone. - Step 3. If you hear ring tone after hooking down the phone, pick up it to release a call, or you can ignore it. It will automatically stop when the remote hang up this call. Answer a second call during a call When you are talking to someone, you may hear call waiting tone. This means a second call is coming. You have 3 different choices as below: [Hang up the current line to accept the incoming line] - Hook down the phone to hang up the current line. - Then you hear the ring tone. - Hook off the phone to answer the second call. [Hold the current line to accept the incoming line] - Hook flash (which means quickly hook down and then hook off the phone) the phone, and then you can accept the second call and hold the first call. The one who was held will hear nothing from you. - To switch between the two calls, you just need to hook flash the phone. - To end the second call or the second calling party hangs up, you just need to hang up the phone. - Then you will hear the phone is ringing, pick the phone to continue the first call. [Ignore the second call] - To ignore the second call, you just need to do nothing to continue the first call. Make a transfer When you are talking to one person and holding another person, you may want them to talk to each other without your attending. Please follow the steps below: - Step 1. Call first person and talk with him/her. - Step 2. Hold the call by hook flash and dial the second person’s phone number and press “#” to call out. - Step 3. After the second person pick up the phone, you can just press “#” to transfer. They can talk to each other. Make a 3-way conference - Call the first person you want to invite to the conference. - After he/she pick up the phone, hold the call by hook flash. - Dial the second person’s phone number you want to invite to the conference. - After the second person pick up the phone, you press”*” to make you 3 talk to each other. For more operations, please refer to the User’s Manual or Administrator Guide. 8 Wireless function Connect to WiFi Router use wireless connection - Step 1. Make sure wireless function of your PC or notebook has been enabled. - Step 2. Search wireless connection, if you find a wireless connection named “2/1-port WiFi-Router”; double click to connect to router. - Step 3. If the wireless icon in the status bar shows connecting ok, your PC or notebook has already connected to the WiFi Router.](https://usermanual.wiki/Tecom-Co/GR2512/User-Guide-838593-Page-12.png)