Tersus GNSS TC20 TC20 Controller User Manual
Tersus GNSS Inc. TC20 Controller
User Manual
Sales & Technical Support:
sales@tersus-gnss.com & support@tersus-gnss.com
More details, please visit www.tersus-gnss.com

User Manual for Tersus TC20 Controller v1.0
1
Table of Content
Table of Content.......................................................................................................................1
List of Figures........................................................................................................................... 2
List of Tables.............................................................................................................................2
Revision History....................................................................................................................... 3
1. Introduction...........................................................................................................................4
1.1 Overview......................................................................................................................... 4
1.2 Specification...................................................................................................................5
2. General Operation............................................................................................................... 6
2.1 Starting to use TC20 Controller...................................................................................6
2.2 Insert the SIM card and T-Flash card.........................................................................7
2.3 T-Flash card................................................................................................................... 9
2.4 Using of Touch Screen...............................................................................................10
2.5 Home Screen operations........................................................................................... 10
2.6 Extend the battery life.................................................................................................22
3. Terminology........................................................................................................................23

User Manual for Tersus TC20 Controller v1.0
2
List of Figures
Figure 1.1 The overlook of TC20 Controller – Yellow................................................................4
Figure 1.2 The overlook of TC20 Controller – Red....................................................................4
Figure 2.1 Four sides of TC20 controller.....................................................................................6
Figure 2.2 Remove the back cover.............................................................................................. 7
Figure 2.3 Take off the back cover............................................................................................... 7
Figure 2.4 Put the SIM card in the holder................................................................................... 8
Figure 2.5 Insert T-Flash card.......................................................................................................8
Figure 2.6 Insert the back cover................................................................................................... 9
Figure 2.7 Select USB function.................................................................................................. 10
Figure 2.8 Home screen.............................................................................................................. 11
Figure 2.9 Main screen................................................................................................................ 12
Figure 2.10 List of applications...................................................................................................12
Figure 2.11 Choose the application to be dragged................................................................. 13
Figure 2.12 Drag the icon to the area........................................................................................13
Figure 2.13 Release hand and icon is added.......................................................................... 14
Figure 2.14 Tap the icon to be deleted......................................................................................14
Figure 2.15 Hold and drag the icon........................................................................................... 15
Figure 2.16 The object becomes gray.......................................................................................15
Figure 2.17 The shortcut is deleted........................................................................................... 15
Figure 2.18 Home screen............................................................................................................16
Figure 2.19 WALLPAPER & WIDGETS.................................................................................... 17
Figure 2.20 Select wallpaper...................................................................................................... 17
Figure 2.21 Set wallpaper........................................................................................................... 18
Figure 2.22 Home screen with new wallpaper......................................................................... 18
Figure 2.23 Locked home screen...............................................................................................19
Figure 2.24 Slide up..................................................................................................................... 19
Figure 2.25 Unlocked home screen...........................................................................................20
Figure 2.26 Status bar on the screen........................................................................................ 20
Figure 2.27 Message board........................................................................................................ 21
Figure 2.28 Settings interface.....................................................................................................21
Figure 2.29 Recently used applications.................................................................................... 22
List of Tables
Table 1 TC20 technical specification.........................................................................................5

User Manual for Tersus TC20 Controller v1.0
3
Revision History
Version
Revision Date
Change summary
1.0
20181224
Initial Release
User Manual for Tersus TC20 Controller v1.0
4
1. Introduction
This chapter mainly introduces the overview and specification of the Tersus TC20 Controller.
1.1 Overview
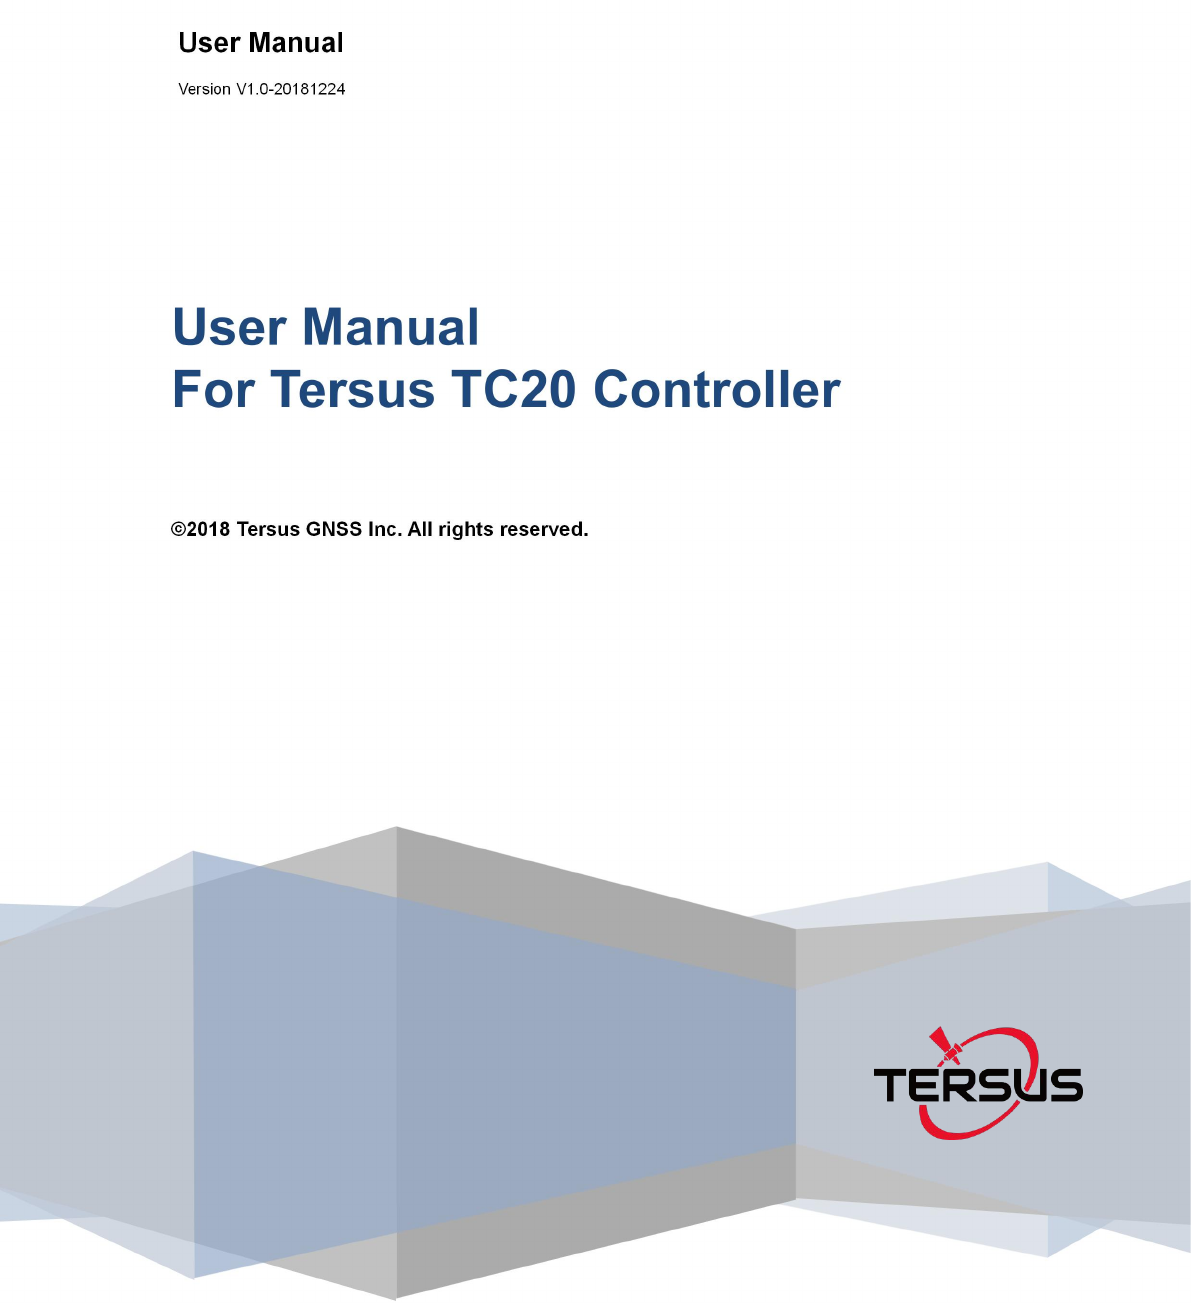
The Tersus TC20 Controller is a rugged smart phone with design of 4.3'' touch screen and an
alphanumerical keypad. Equipped with powerful processor, it is perfect to adapt with Tersus
Survey software. With professional IP67 rating, it is robust and reliable for harsh operating
conditions.
Figure 1.2 The overlook of TC20 Controller –
Red
Figure 1.1 The overlook of TC20 Controller –
Yellow
User Manual for Tersus TC20 Controller v1.0
5
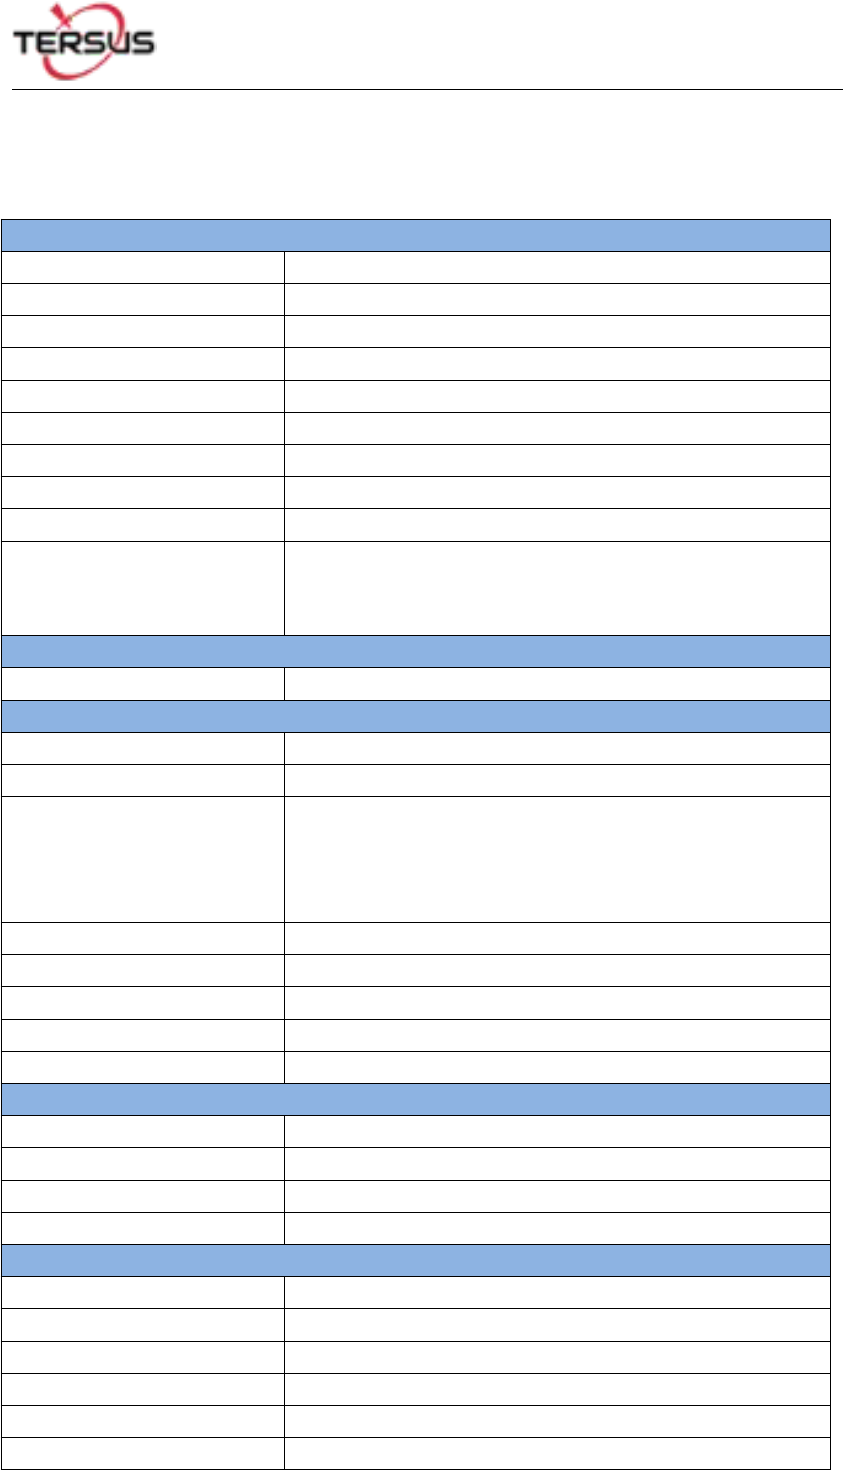
1.2 Specification
Table 1 TC20 technical specification
System
Operating System
Android 6.0
CPU
MTK MT6735 Quad-Core 1.3GHz
Memory
2GB RAM + 16GB ROM
External Flash
T-Flash , up to 64GB
Keypad Backlight
White
LCD
4.3"
Touch Screen
Capacitive Touch Screen
Camera
8M pixel, Auto Focus
Flash Light
High light Flash LED
Language
47 languages including Chinese, English, Filipino, French,
Italian, Japanese, Korean, Malay, Portuguese, Romanian,
Russian, Spanish, Turkish, etc.
GNSS
Signals supported
A-GPS
Communication
Wi-Fi
IEEE 802.11b/g/n
Cellular Mode
Dual SIM Dual Standby
SIM1 & SIM2
FDD-LTE 2500MHz to 2570MHz
TDD-LTE 2555MHz to 2655MHz
WCDMA 850 / 1900 MHz
GSM 850 / 1900MHz
Bluetooth
V4.1
USB
Micro USB for charging and data (OTG)
Audio Jack
3.5mm Audio Jack for Audio
NFC
Standard
Sensors
G-Sensor, Compass, Barometer, Light-Sensor, Gyro
Electrical
Power
5V DC, 1.0A
Battery
6500 mAh
Battery Life
10 hours call, 720 hours standby
Charging Time
4.5 hours (5V 2A input), 8 hours (5V 1A input)
Physical
Dustproof & Waterproof
IP-67
Shock
0.8m drop onto concrete
Dimension
210mmx87mmx31mm
Weight
495g (include battery)
Operating Temperature
-30 ℃ ~ +55 ℃
Storage Temperature
-30 ℃~ +65 ℃
User Manual for Tersus TC20 Controller v1.0
6
2. General Operation
This chapter introduces how to use Tersus TC20 Controller.
2.1 Starting to use TC20 Controller
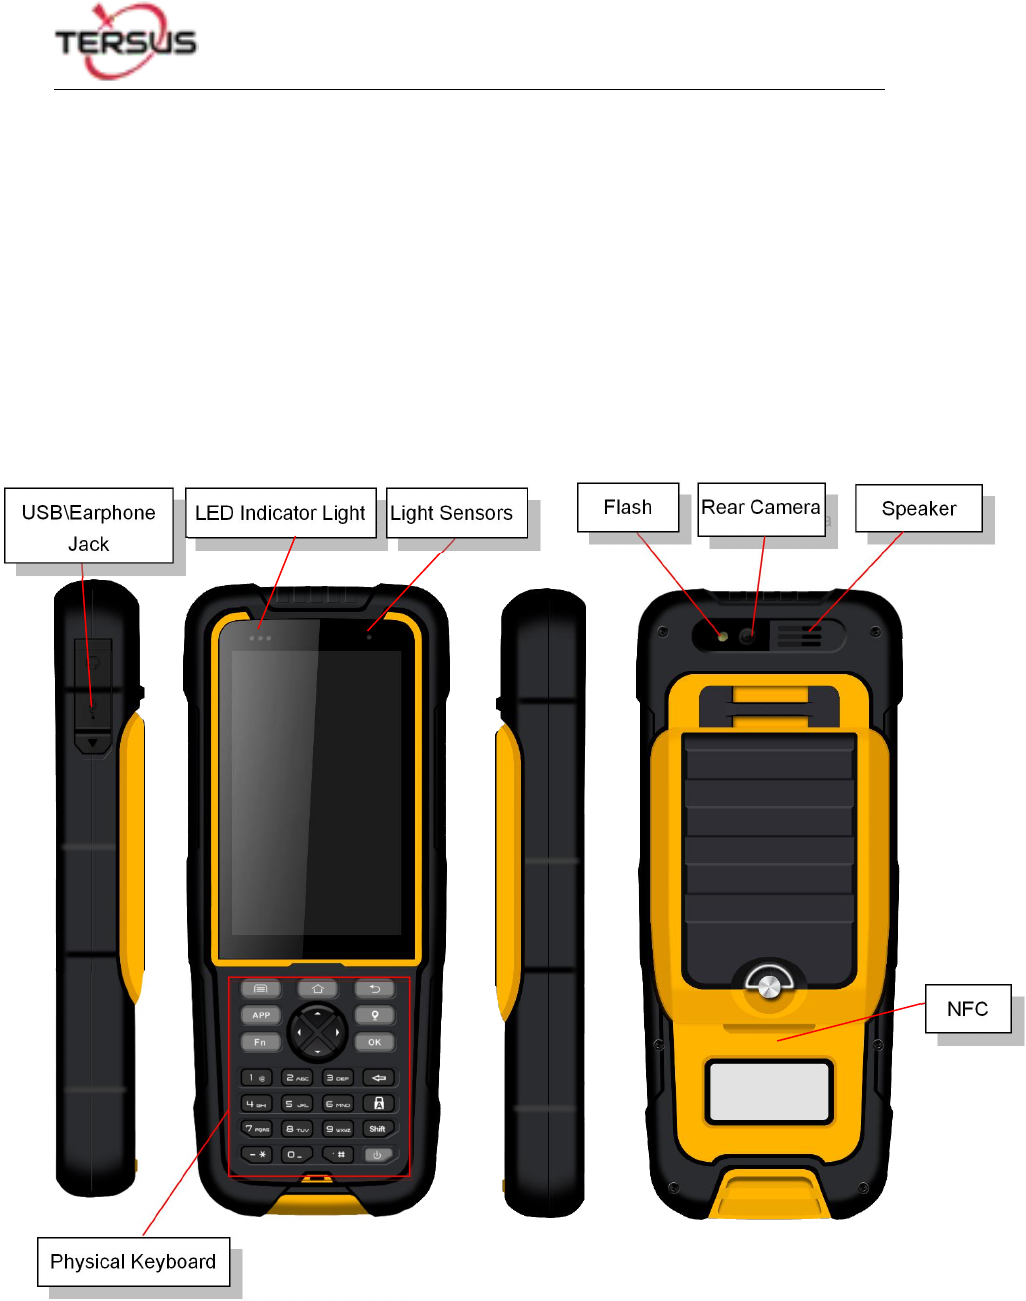
Power on: Press and hold the power button for 3 seconds
Power off: Press and hold the power button for 3 seconds, select ‘power off’ in the menu
option.
Menu Key: Select to show the available menu in current screen.
Home Key: Return to home screen. To view recent application, press and hold the home key.
Back Key: Return to previous screen.
Volume Key: Adjust the volume of the ringtone.
Reset Key: Shut down the phone when phone is abnormal.
Camera key: Short press to enter camera in home screen. Long press the key to open torch
Figure 2.1 Four sides of TC20 controller
User Manual for Tersus TC20 Controller v1.0
7
2.2 Insert the SIM card and T-Flash card
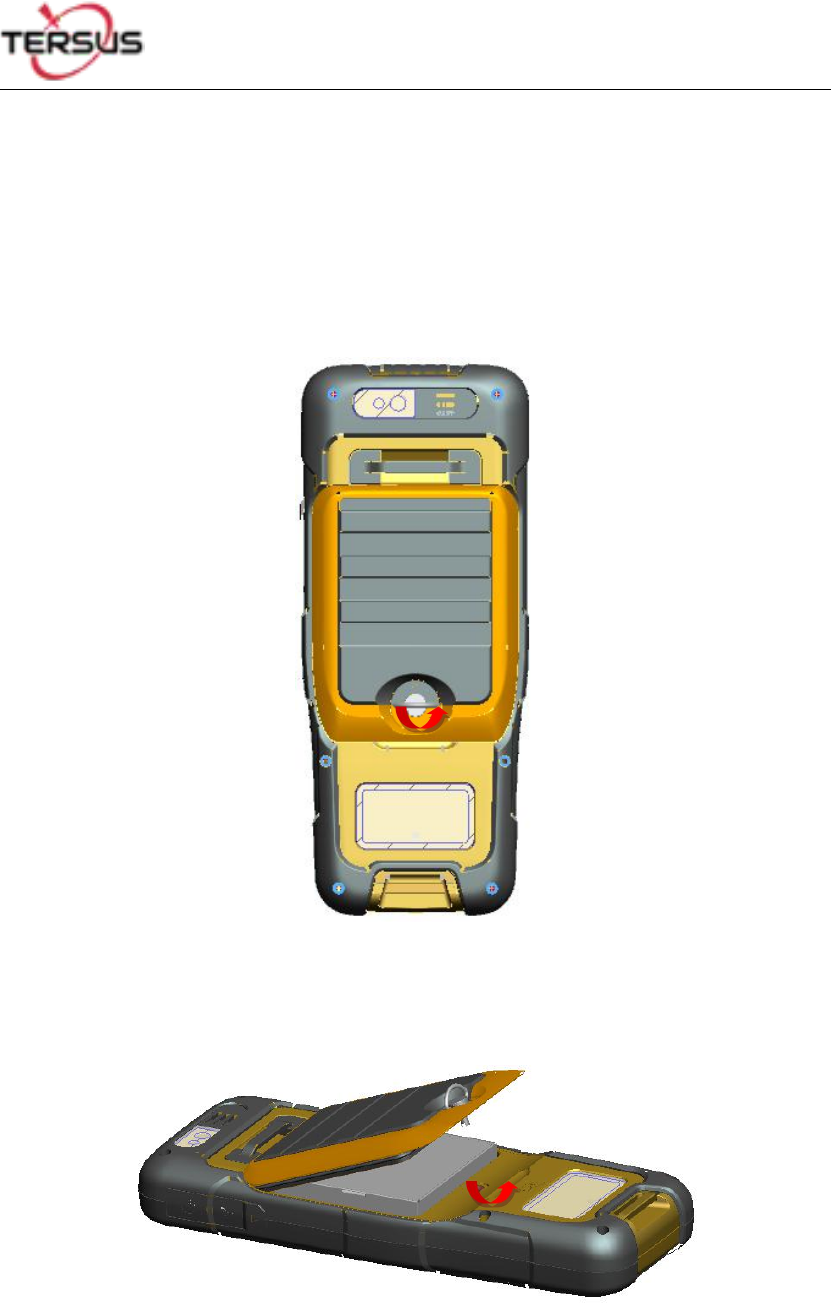
1. Remove the back cover: Loosen the screws on the back side – to rotate the screws
anti-clockwise until open the bake cover as shown in Figure 2.2.
Figure 2.2 Remove the back cover
2. Take off the back cover: Remove the back cover by lifting it up from the bottom part as
shown in Figure 2.3.
Figure 2.3 Take off the back cover
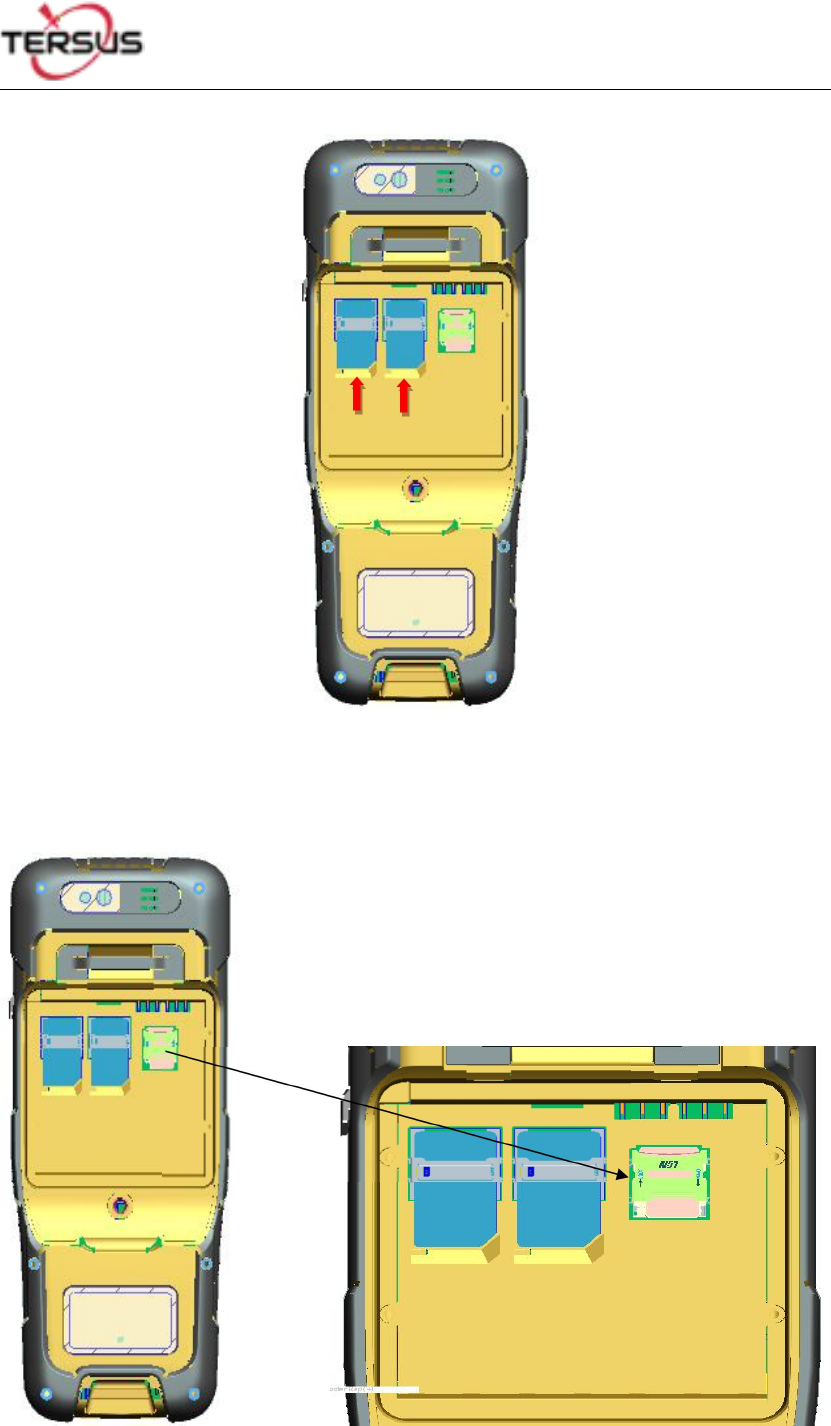
3. Put the SIM Card in the holder: Put the SIM card into the slot touching the SIM contacts
of the phone as shown in Figure 2.4.
User Manual for Tersus TC20 Controller v1.0
8
Figure 2.4 Put the SIM card in the holder
4. Insert T-Flash card: Open T-Flash card holder and insert T-Flash card into the slot, then
close T-Flash card holder as shown in Figure 2.5.
Figure 2.5 Insert T-Flash card
User Manual for Tersus TC20 Controller v1.0
9
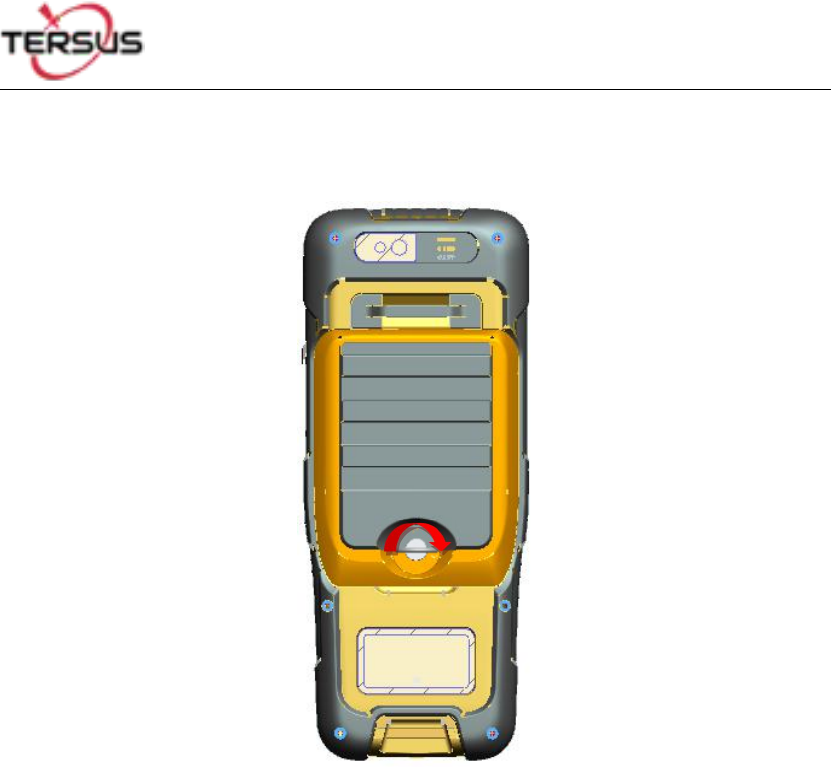
5. Insert the back cover: Insert the back cover and rotate screws clockwise to lock the back
cover as shown in Figure 2.6.
Figure 2.6 Insert the back cover
Note: Please power off the phone before plug in or pull out the SIM card.
2.3 T-Flash card
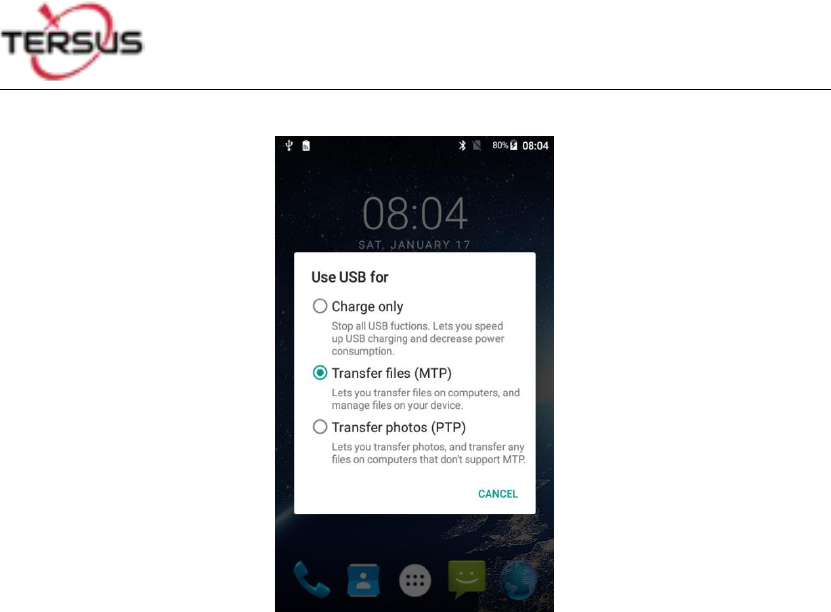
1. Connect USB, turn on USB storage.
It automatically pops up USB connected interface after connecting USB, and then click
Turn on USB storage to use the T-Flash as USB storage.
User Manual for Tersus TC20 Controller v1.0
10
Figure 2.7 Select USB function
2.4 Using of Touch Screen
Single Click: To select an icon. For example, click dial to open the keypad which will be
displayed on the screen.
Double Click: To zoom-in or zoom-out. For example, to zoom-in or out of a photo, click
twice when viewing a photo or browsing on the internet.
Hold: Click and hold the screen, icon or input box to get more operation options.
1)Long-Time Click a picture in the gallery list interface, the status bar prompts to select a
picture, you select to share or delete.
2)Long-Time Click the blanks of home screen to add home screen shortcut.
3)Long-Time Click the blanks of home screen wallpaper sources can be selected.
Drag the screen: You can drag the screen to view more applications which are not
displayed in one screen.
Scratch the screen: A screen of information cannot be displayed scratch scrolling display
hidden information.
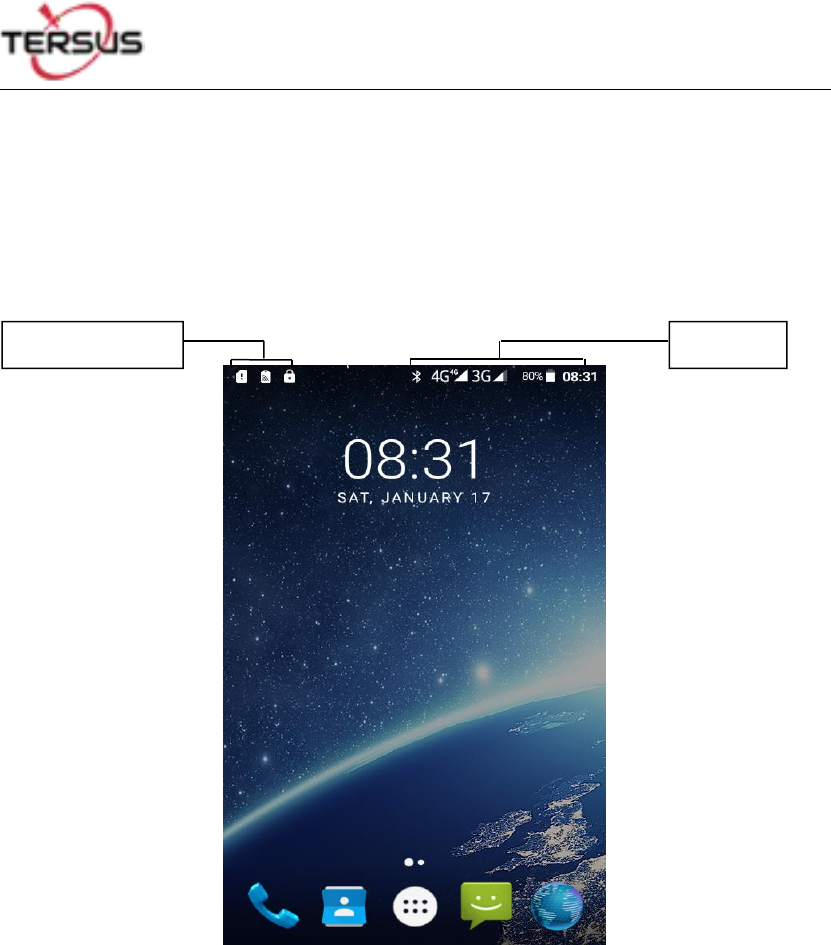
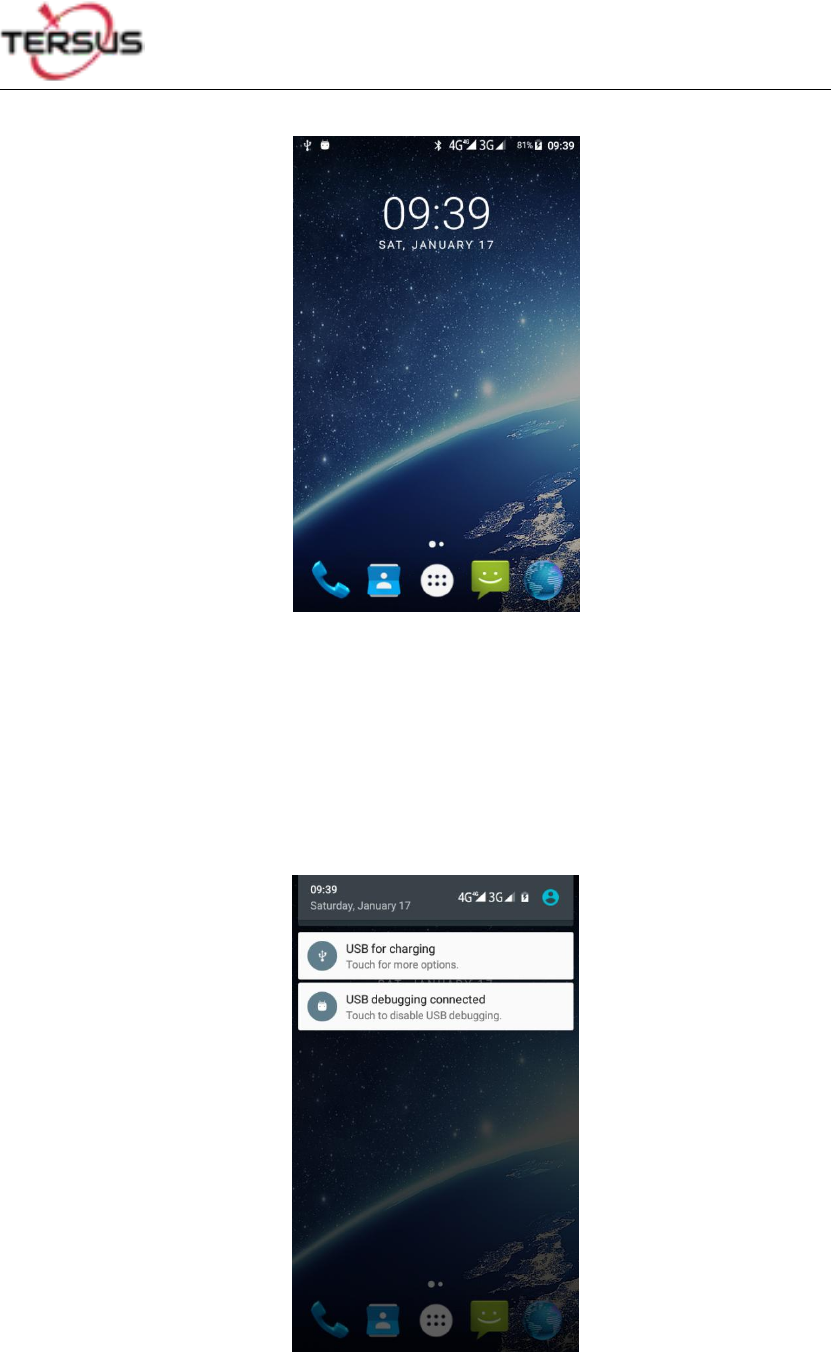
2.5 Home Screen operations
You can use various functions of the phone screen through the touch screen. Click the icons to
User Manual for Tersus TC20 Controller v1.0
11
open the applications. View all applications by clicking an application tab.
The phone has a default screen. You can add multiple screens. After adding multiple screens,
about scratching the screen to switch the screen between each other, and at any point of a
long blank screen to add widgets, wallpaper settings, enter the settings.
Figure 2.8 Home screen
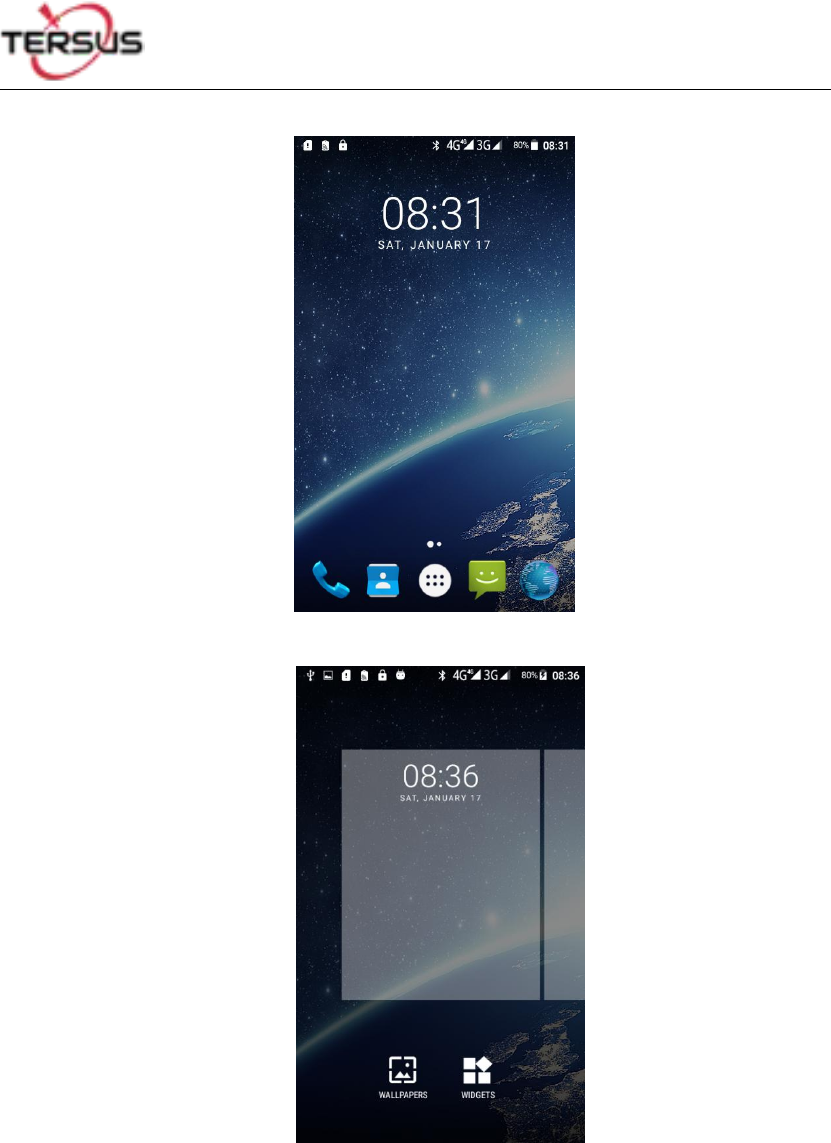
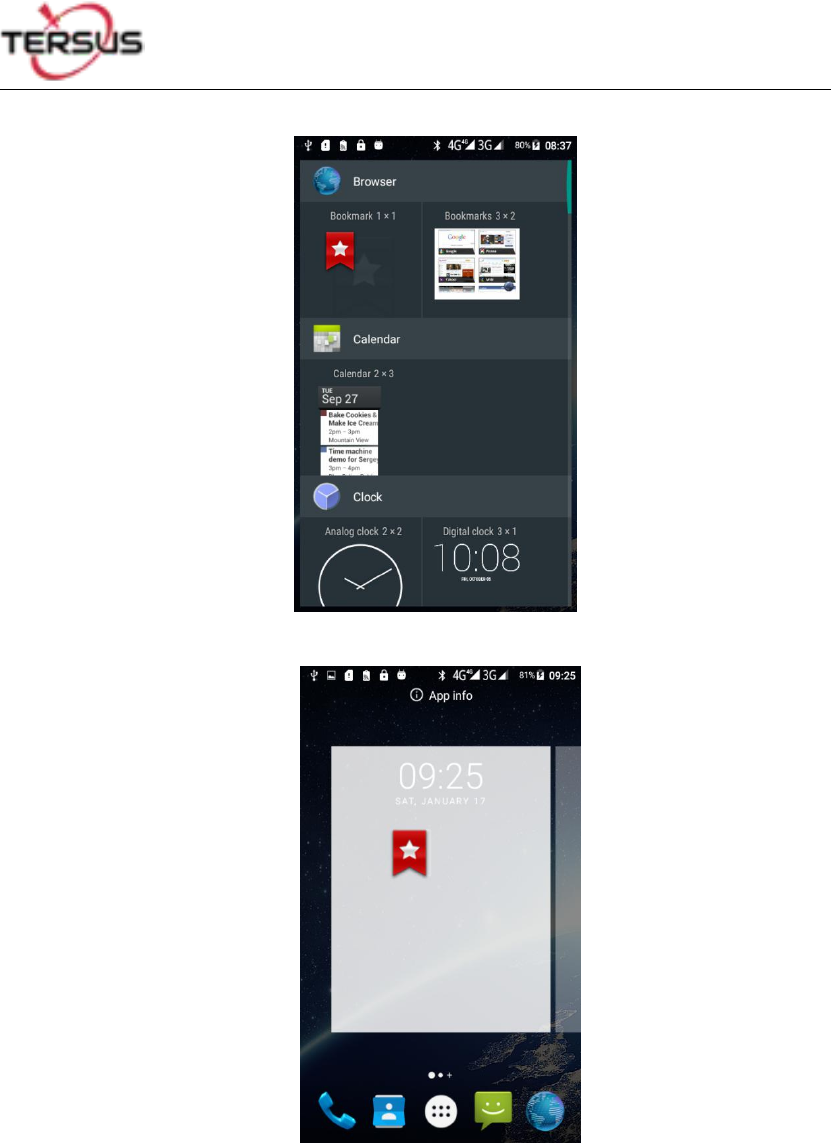
◆Create shortcuts and widgets
Click the main screen and then Pop-up list of application. Hold and click the application icon
which you want to add a shortcut. Interface blue transparent box will pop up analog screen
area. Drag the application icon to the area you want to place, release the hand that add. To
add widgets the same way as add a shortcut. Applications and widgets interface switching
mode, you can click application and widget or slide the screen. As shown the following figure:
Status
Message Board
User Manual for Tersus TC20 Controller v1.0
12
Figure 2.9 Main screen
Figure 2.10 List of applications
User Manual for Tersus TC20 Controller v1.0
13
Figure 2.11 Choose the application to be dragged
Figure 2.12 Drag the icon to the area
User Manual for Tersus TC20 Controller v1.0
14
Figure 2.13 Release hand and icon is added
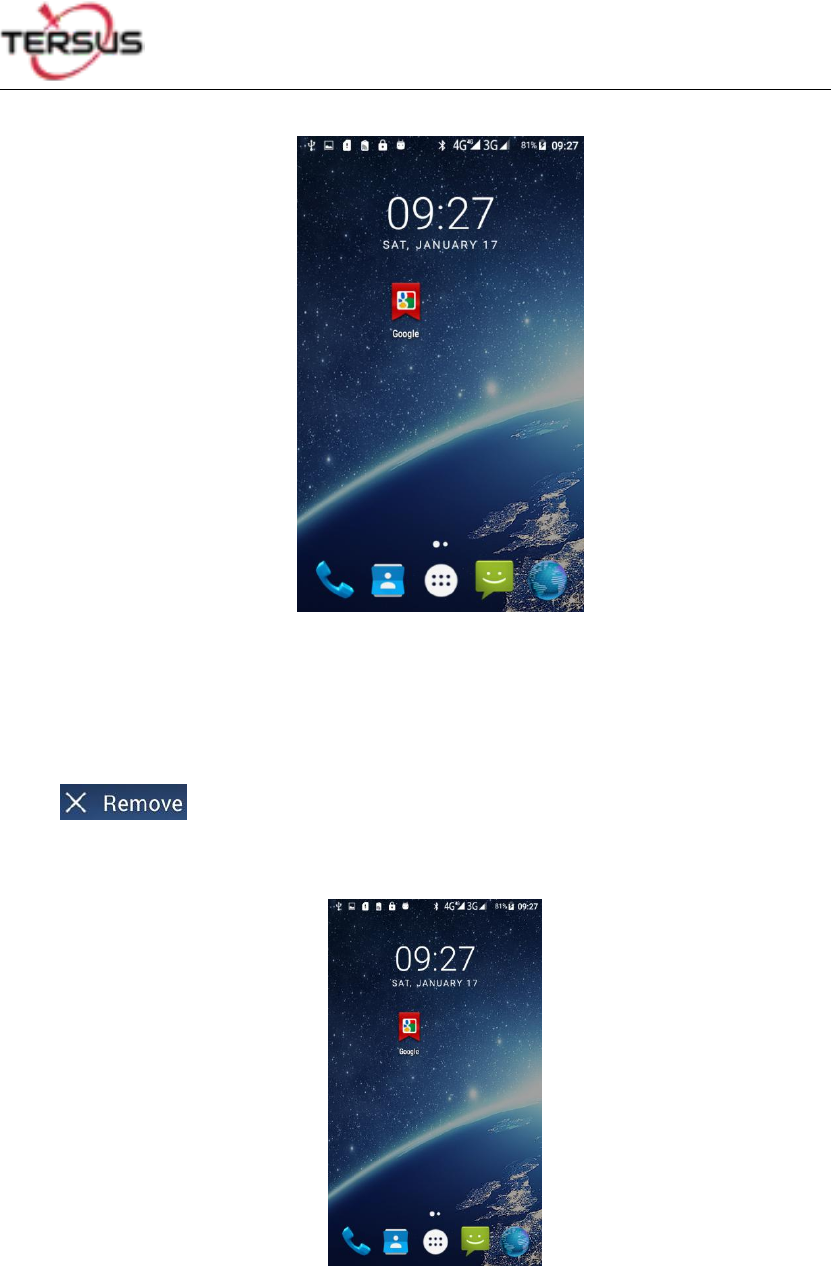
◆Delete the shortcuts and widgets
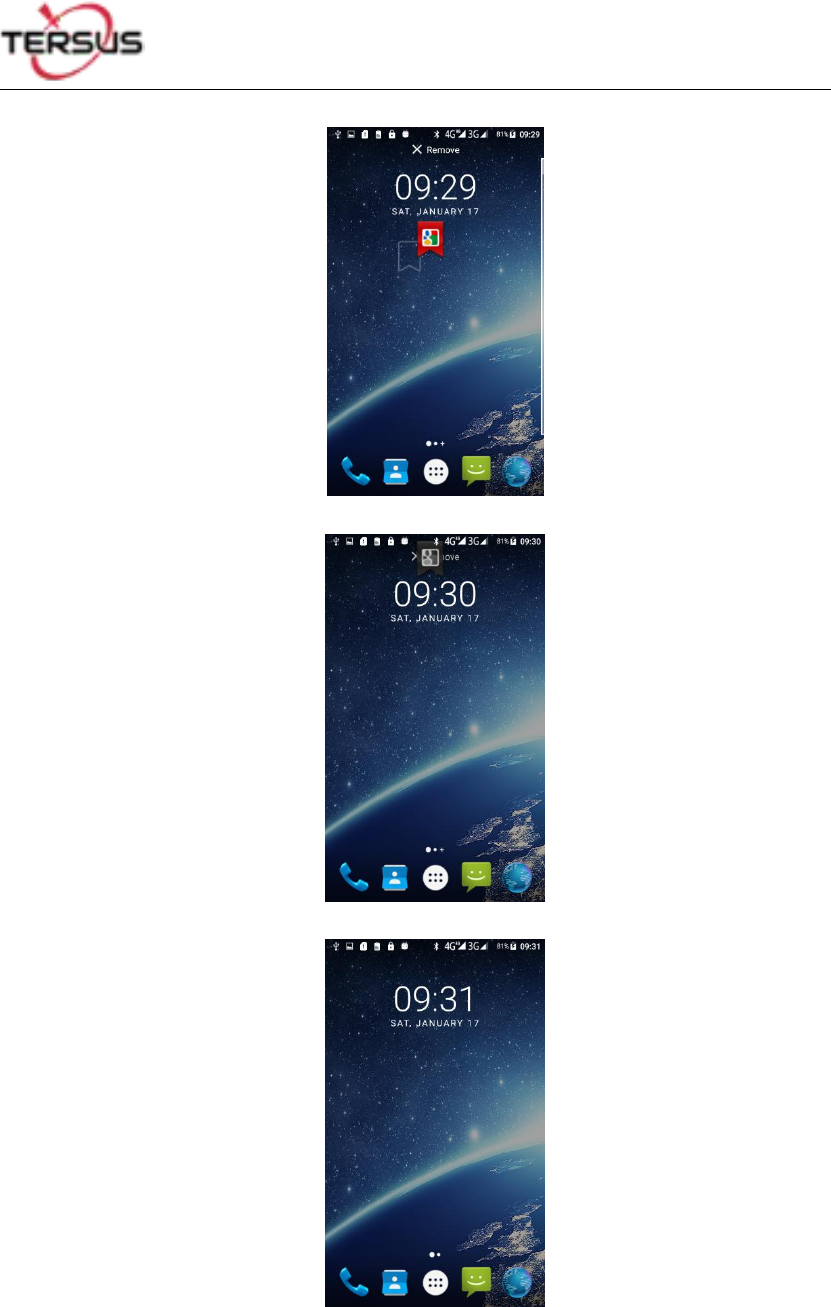
To delete an object, tap and hold the object, then drag it towards the top of the
screen . When the object become gray let go of it and the selected object will be
deleted.
Figure 2.14 Tap the icon to be deleted
User Manual for Tersus TC20 Controller v1.0
15
Figure 2.15 Hold and drag the icon
Figure 2.16 The object becomes gray
Figure 2.17 The shortcut is deleted
◆Lock the screen
Lock the phone in order to avoid useless operation and to save the battery by press the power
button.
User Manual for Tersus TC20 Controller v1.0
16
The phone will automatically lock when it is not being used for some time.
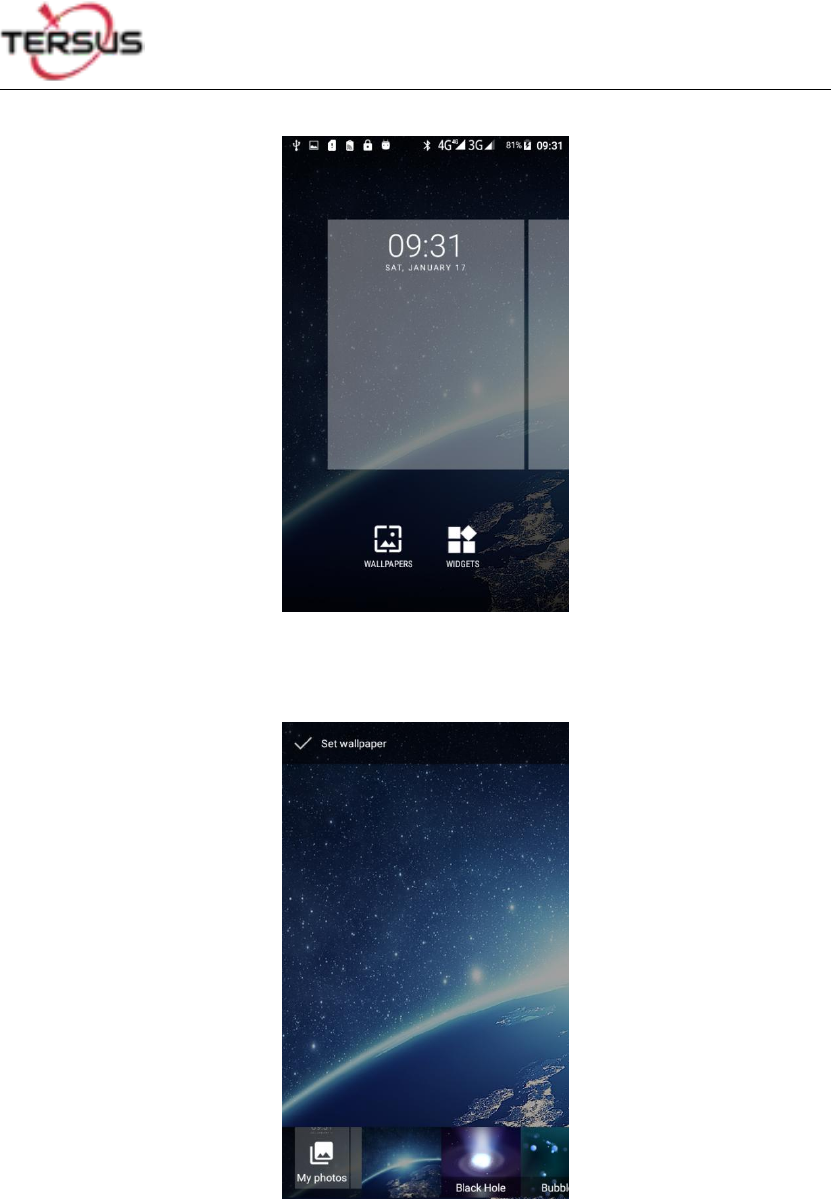
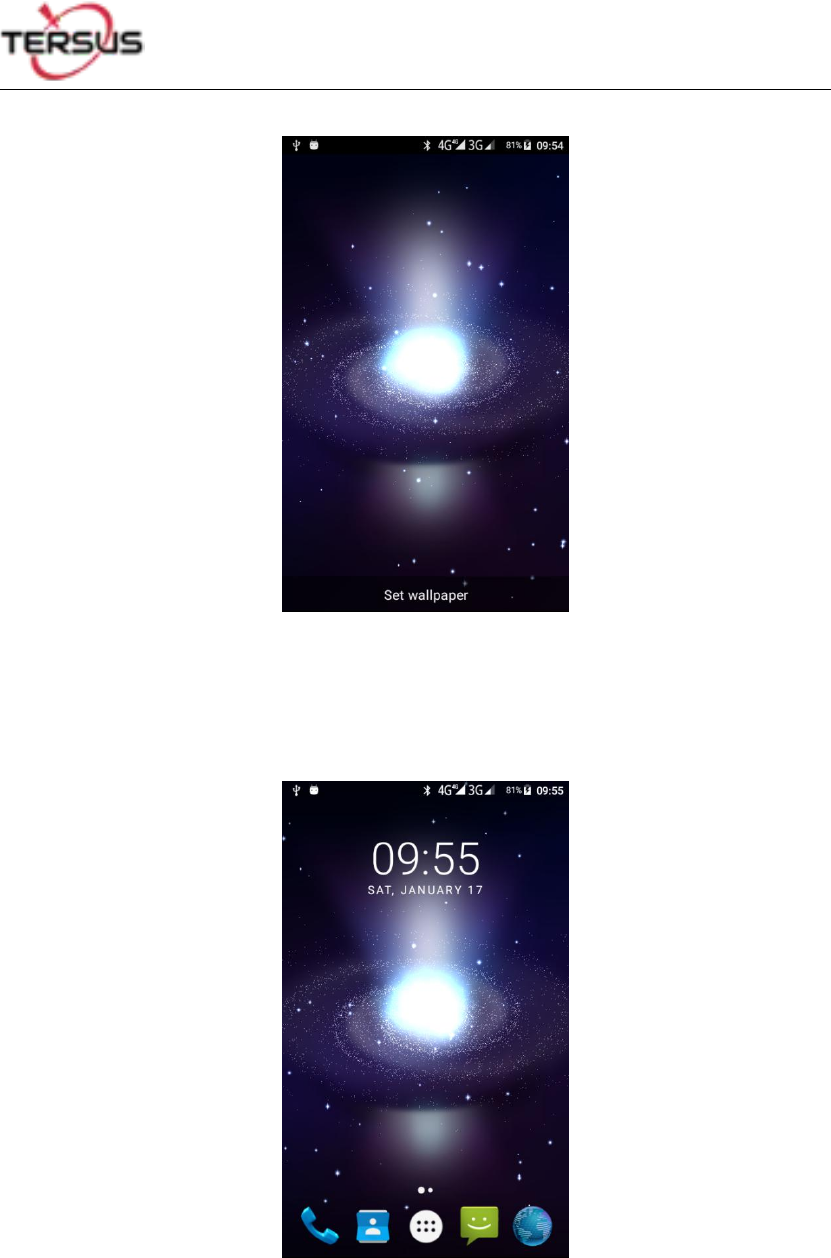
◆Set wallpaper
◆Long press Home screen pop-up "wallpaper" and "widgets" button. Click the "wallpaper"
button to enter the setup screen wallpaper. Slide the bottom of the screen wallpaper zoom
view can be switched wallpaper. After Select to set wallpaper, Click "Set wallpaper" that
wallpaper setting is completed. As shown the following figure:
Figure 2.18 Home screen
User Manual for Tersus TC20 Controller v1.0
17
Figure 2.19 WALLPAPER & WIDGETS
Figure 2.20 Select wallpaper
User Manual for Tersus TC20 Controller v1.0
18
Figure 2.21 Set wallpaper
Figure 2.22 Home screen with new wallpaper
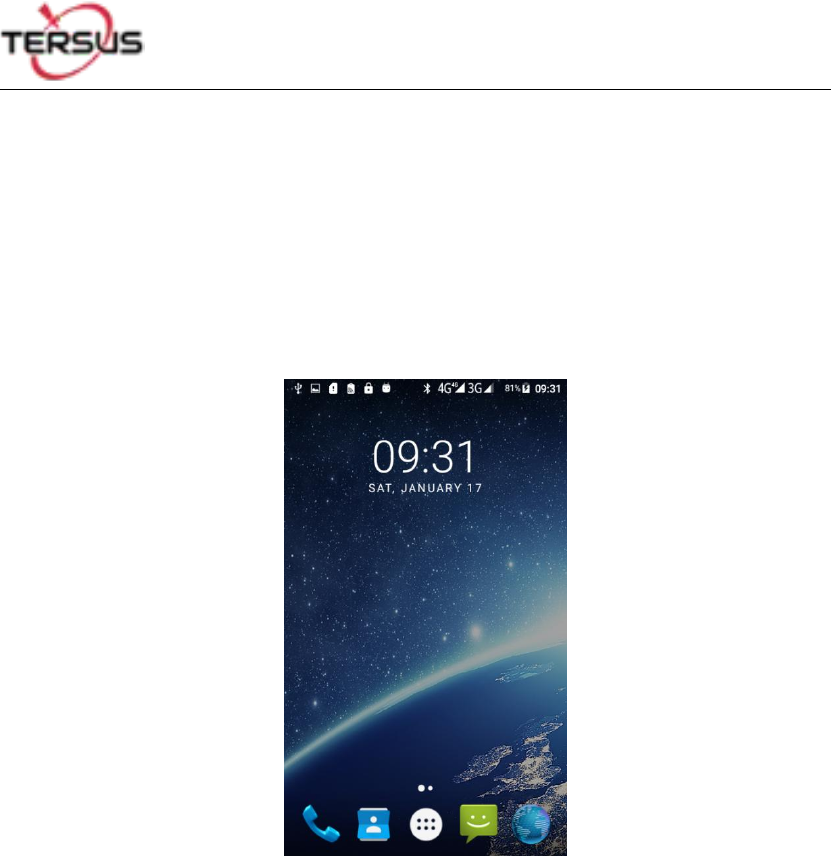
◆Unlock the phone
Press the power button to enter the unlocking interface, then slide up and unlock.
User Manual for Tersus TC20 Controller v1.0
19
Figure 2.23 Locked home screen
Figure 2.24 Slide up
User Manual for Tersus TC20 Controller v1.0
20
Figure 2.25 Unlocked home screen
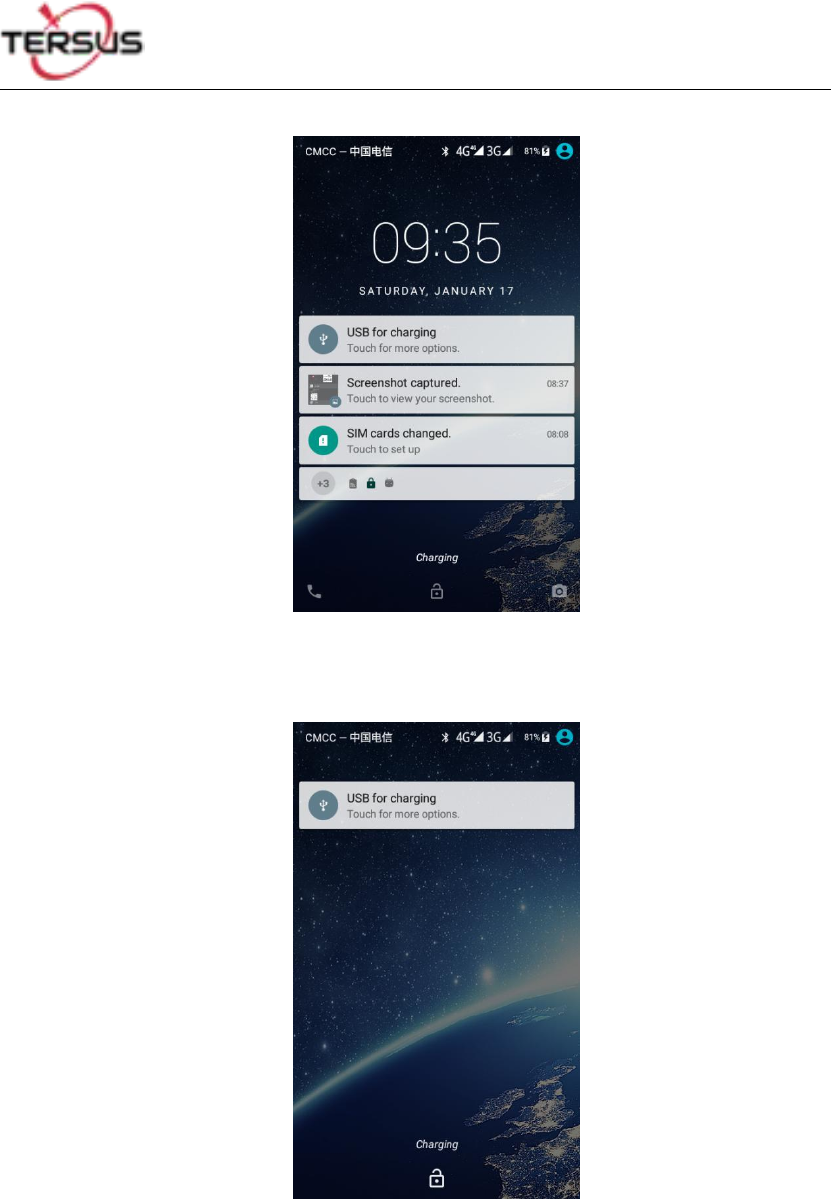
◆Message board
Drag the status bar of any screen can open the message board. Click the icon in the upper
right corner to bring up the settings interface and various parameters setting interface. As
shown the following figure:
Figure 2.26 Status bar on the screen

User Manual for Tersus TC20 Controller v1.0
21
Figure 2.27 Message board
Figure 2.28 Settings interface
◆Manage applications
Install applications: Found in the file manager to install the software (. APK), then follow the
prompts step by step installation
Uninstall application: Enter Settings->Apps->Downloaded, then will be able manage and
remove installed applications.
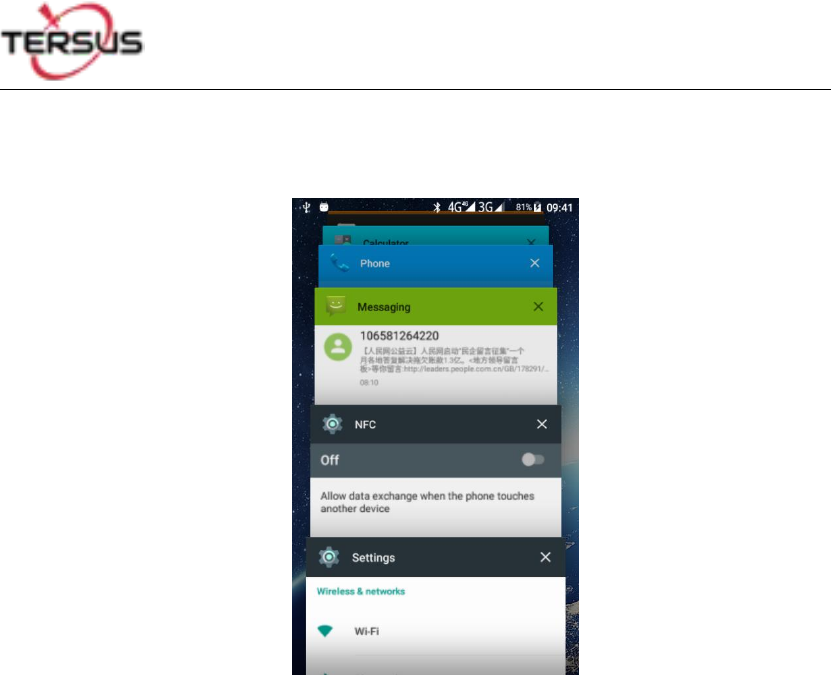
◆Recently used applications
User Manual for Tersus TC20 Controller v1.0
22
Press and hold the home key, the screen will display a window which shows your recently
used applications. Click the icon to open the application.
Figure 2.29 Recently used applications
2.6 Extend the battery life
Some functions may use up more power, which eventually shorten the battery life. You could:
Close all the wireless connection when not in use Bluetooth, Wi-Fi or GPS.
Reduce the brightness and shorten the screen timeout to save battery, or press power key
to shut down the screen when the phone is not in use.
Close any automatically synchronized applications such as Email, calendar, contacts and
other.
Some applications which are downloaded could also shorten the battery life.

User Manual for Tersus TC20 Controller v1.0
23
3. Terminology
DC
Direct Current
GNSS
Global Navigation Satellite System
GPS
Global Positioning System
LED
Light Emitting Diode
SIM
Subscriber Identification Module
USB
Universal Serial BUS
Proprietary Notice
All Information in this document is subject to change without notice and does not reflect the
commitment on Tersus GNSS Inc. No part of this manual may be reproduced or transmitted by
all means without authorization of Tersus GNSS Inc. The software described in this document
must be used in terms of the agreement. Any modification without permission from Tersus
GNSS Inc. is not allowed.

User Manual for Tersus TC20 Controller v1.0
24
FCC Statement
Any Changes or modifications not expressly approved by the party responsible for
compliance could void the user’s authority to operate the equipment.
This device complies with part 15 of the FCC Rules. Operation is subject to the following
two conditions: (1) This device may not cause harmful interference, and
(2) This device must accept any interference received, including interference that may
cause undesired operation.
RF warning for Portable device:
The device has been evaluated to meet general RF exposure requirment. The device
can be used in portable exposure condition without restriction.
Note: This equipment has been tested and found to comply with the limits for a Class B
digital device, pursuant to part 15 of the FCC Rules. These limits are designed to
provide reasonable protection against harmful interference in a residential installation.
This equipment generates, uses and can radiate radio frequency energy and, if not
installed and used in accordance with the instructions, may cause harmful interference
to radio communications. However, there is no guarantee that interference will not
occur in a particular installation. If this equipment does cause harmful interference to
radio or television reception, which can be determined by turning the equipment off and
on, the user is encouraged to try to correct the interference by one or more of the
following measures:
—Reorient or relocate the receiving antenna.
—Increase the separation between the equipment and receiver.
—Connect the equipment into an outlet on a circuit different from that to which the
receiver is connected.
—Consult the dealer or an experienced radio/TV technician for help.
RF Exposure Information (SAR) :
FCC RF Exposure Information and Statement The SAR limit of USA (FCC) is 1.6 W/kg
averaged over one gram of tissue. Device types: TC20 Controller (FCC ID: 2AMDJ-TC20 )
has also been tested against this SAR limit. The device was test for typical body-worn
operations and head face up operations . keep the decice at least 10mm from the face and
5mm from the body,The use of belt clips, holsters and similar accessories should not contain
metallic components in its assembly. The use of accessories that do not satisfy these
requirements may not comply with FCC RF exposure requirements, and should be avoided.
For handheld operating condition, SAR meets with FCC limit 4.0W/kg.