The Singing Machine SML650 Groove Mini - Disco Light MP3+G Karaoke System with Voice Changer effects User Manual D7E9BACF20312E706466
The Singing Machine Company, Inc. Groove Mini - Disco Light MP3+G Karaoke System with Voice Changer effects D7E9BACF20312E706466
Contents
- 1. Users Manual-1
- 2. Users Manual-2
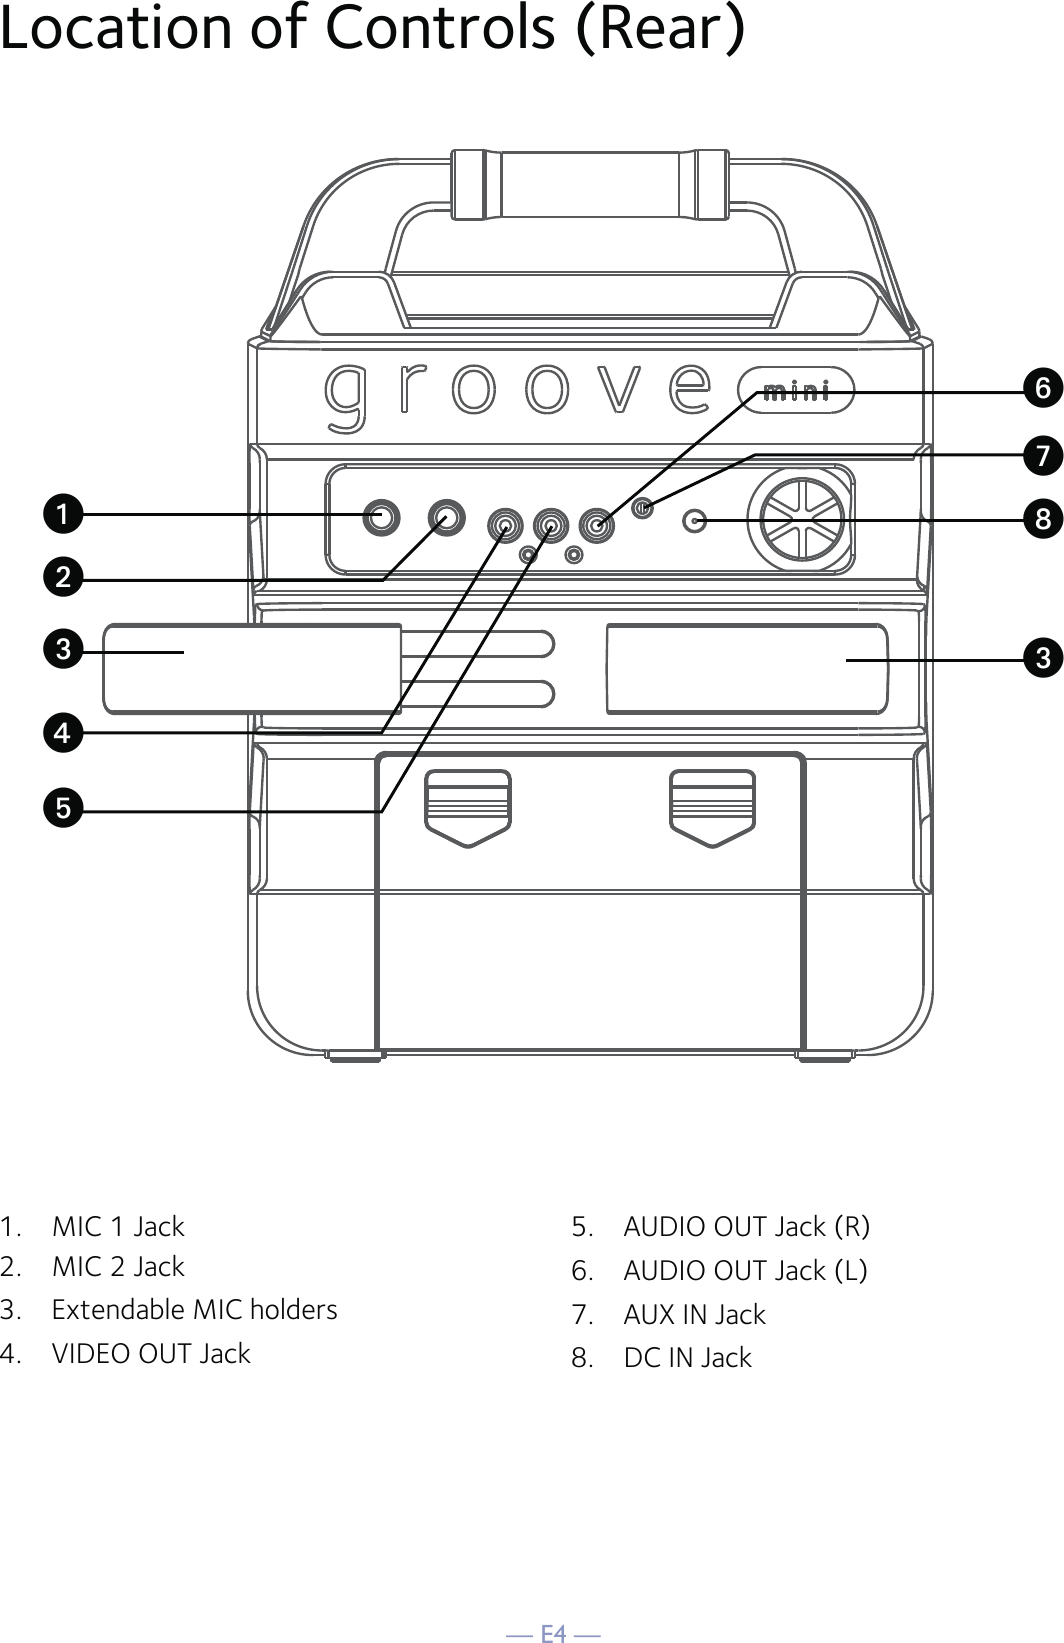
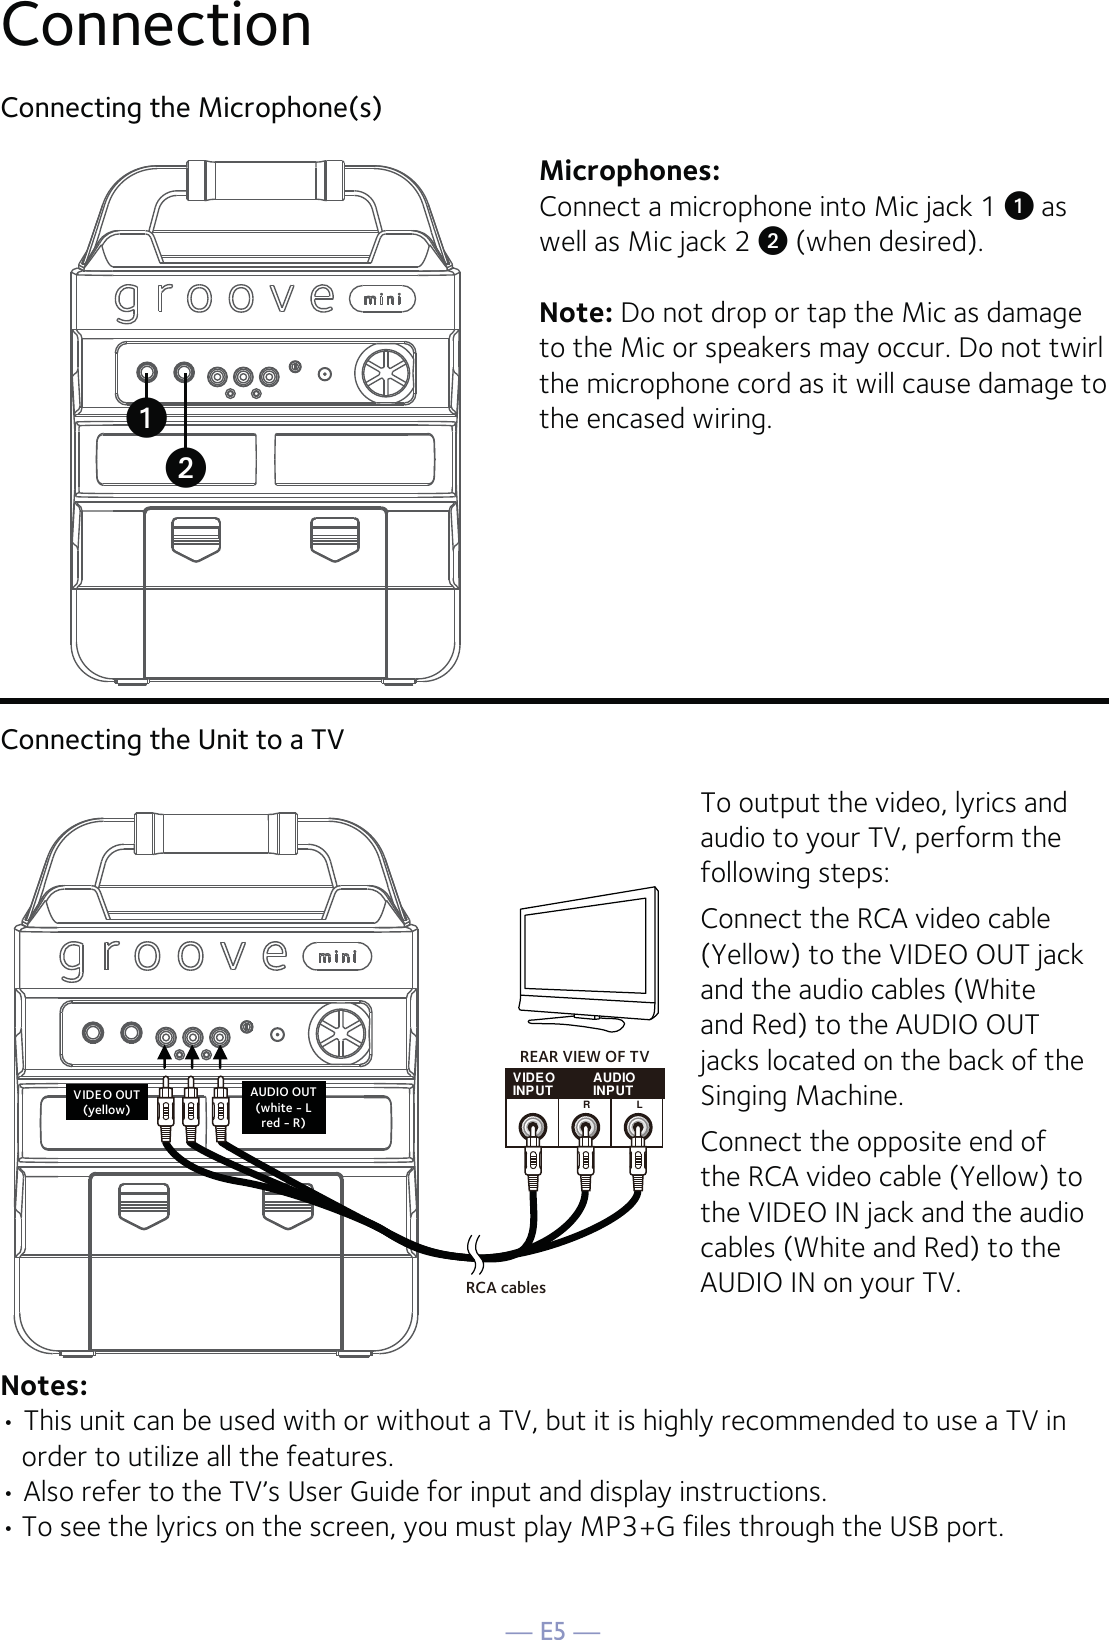
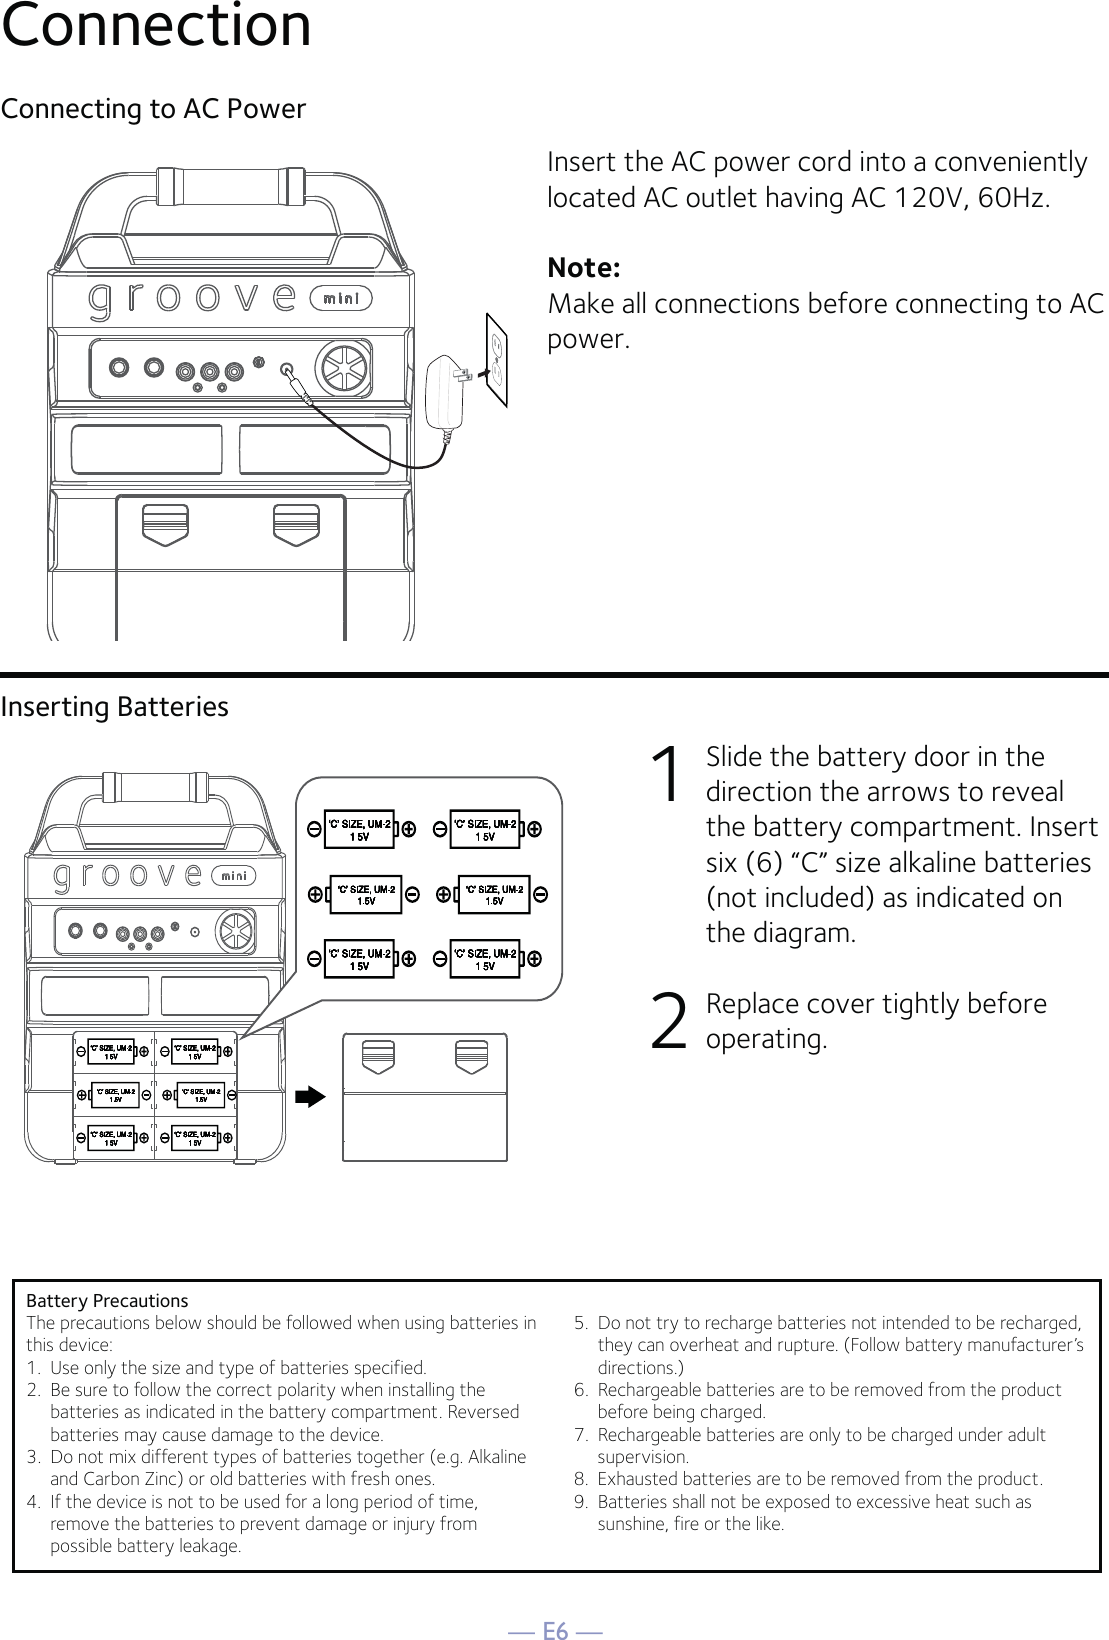
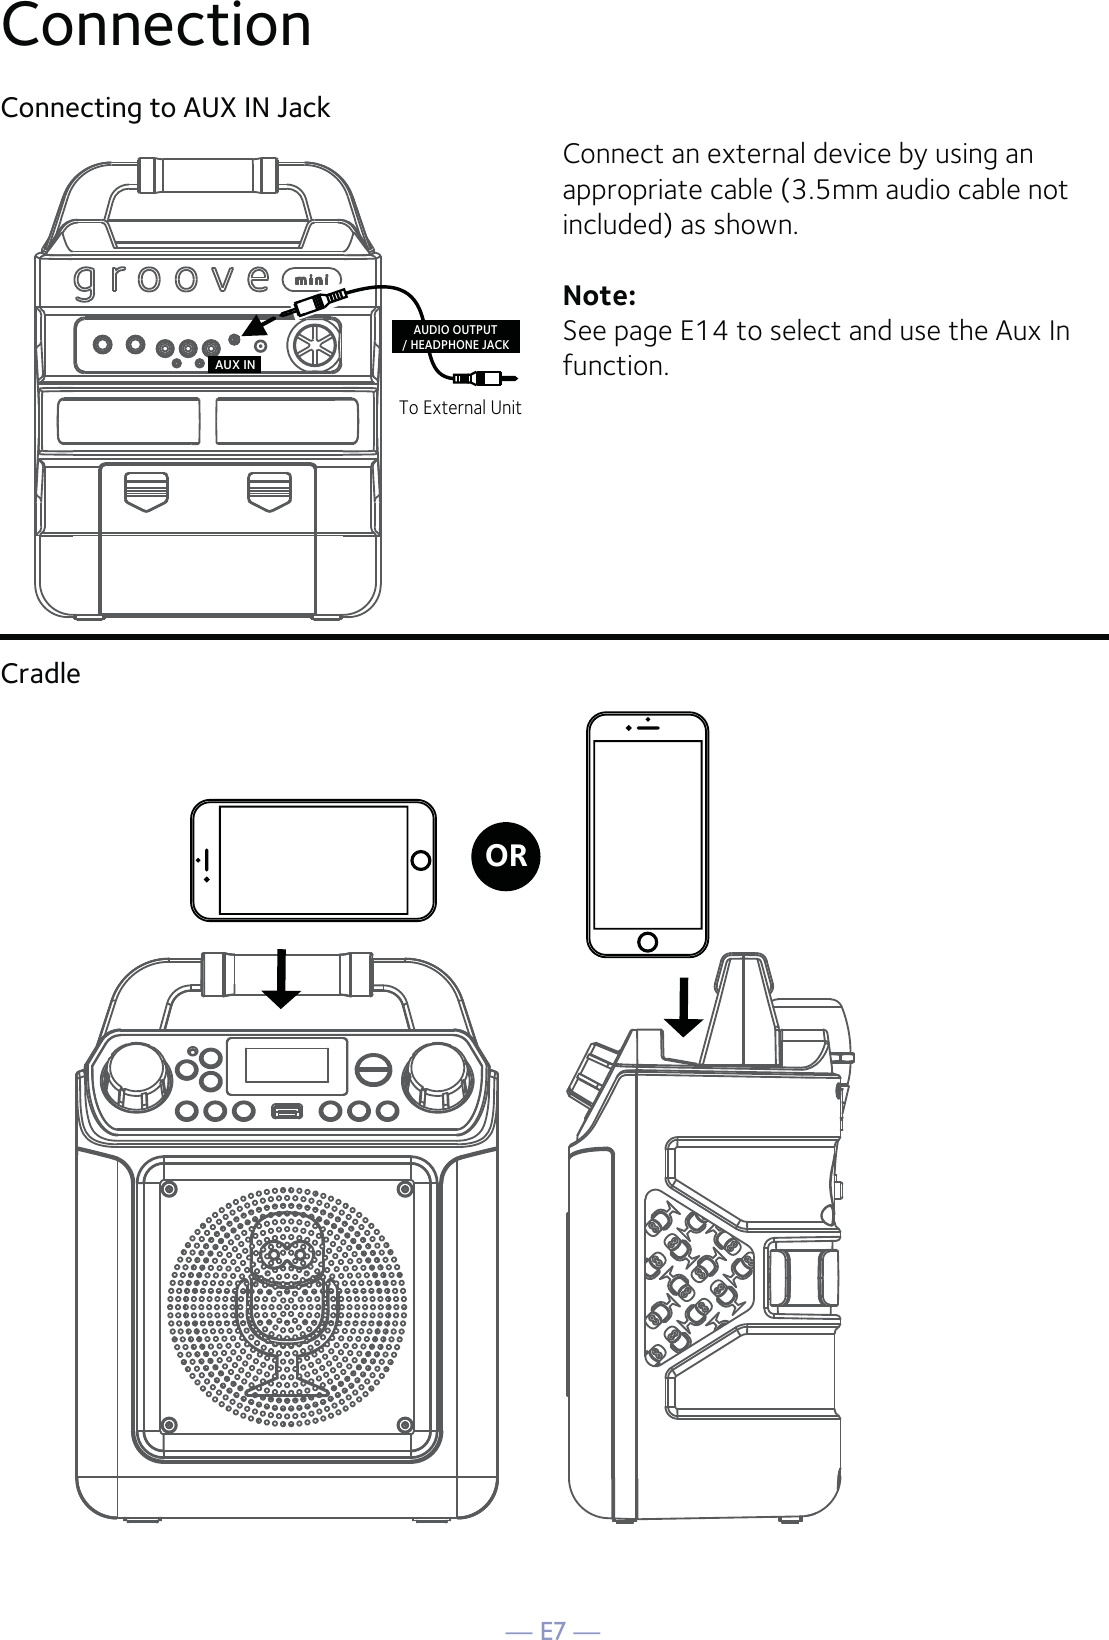
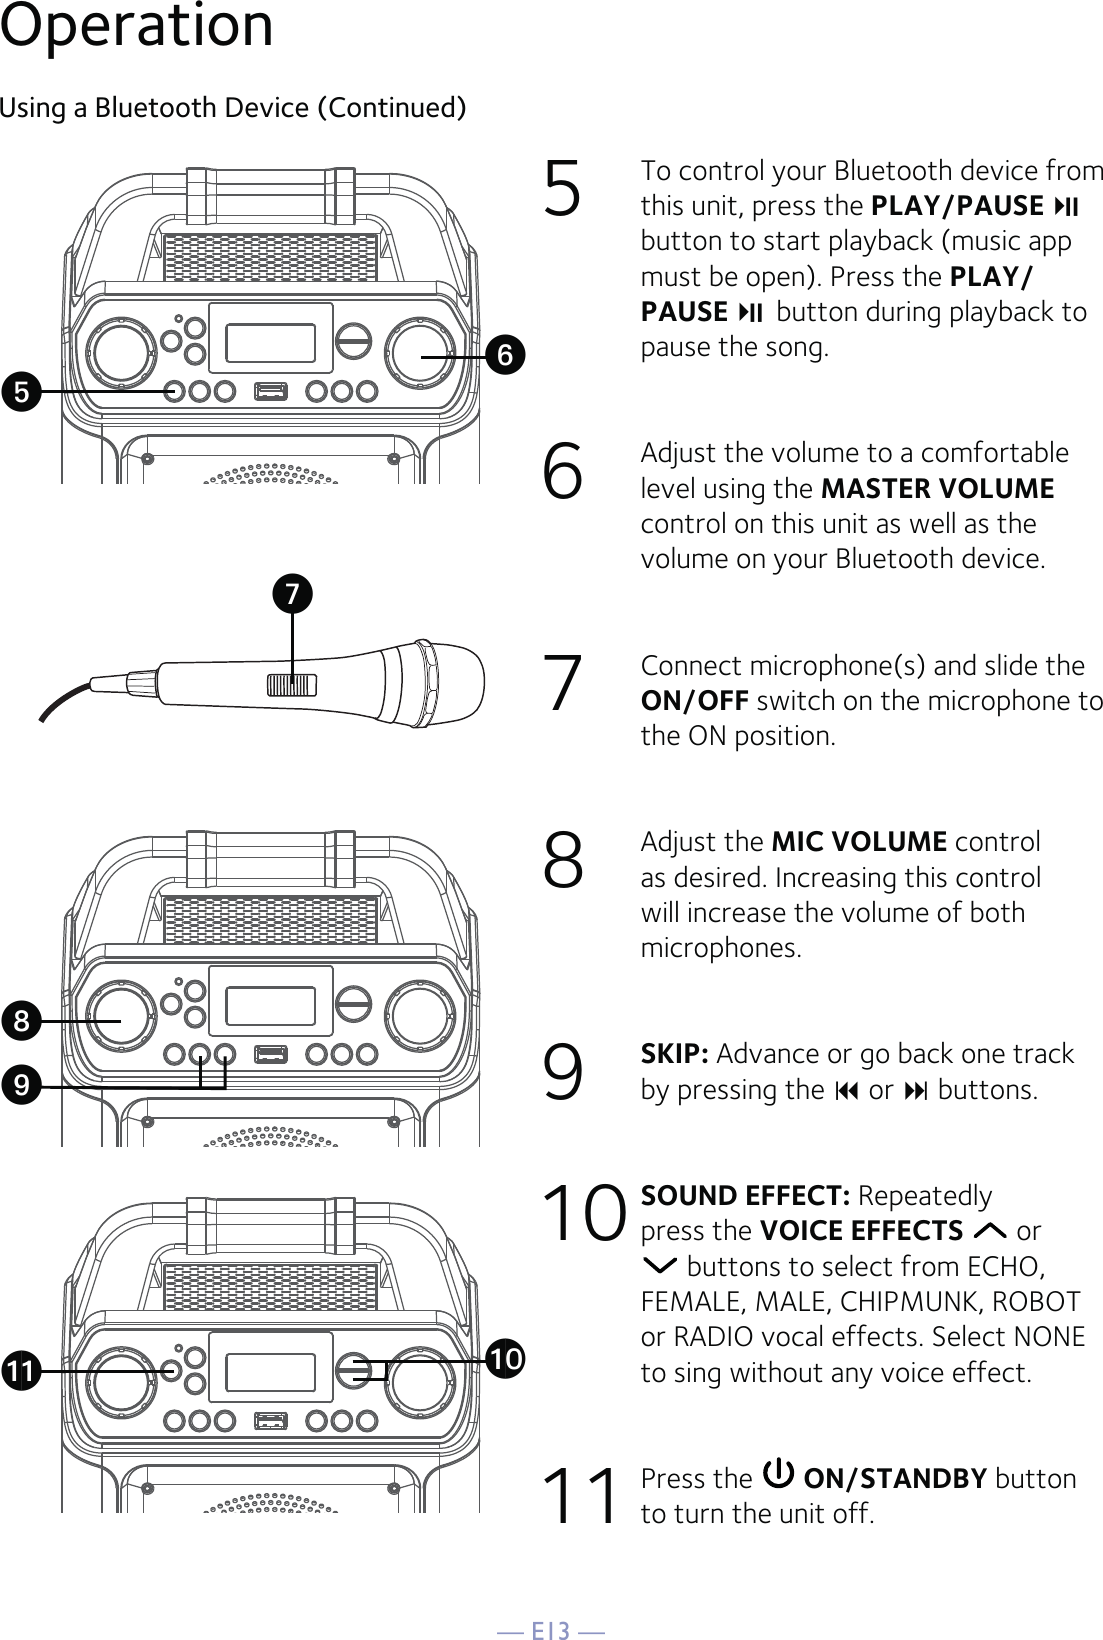
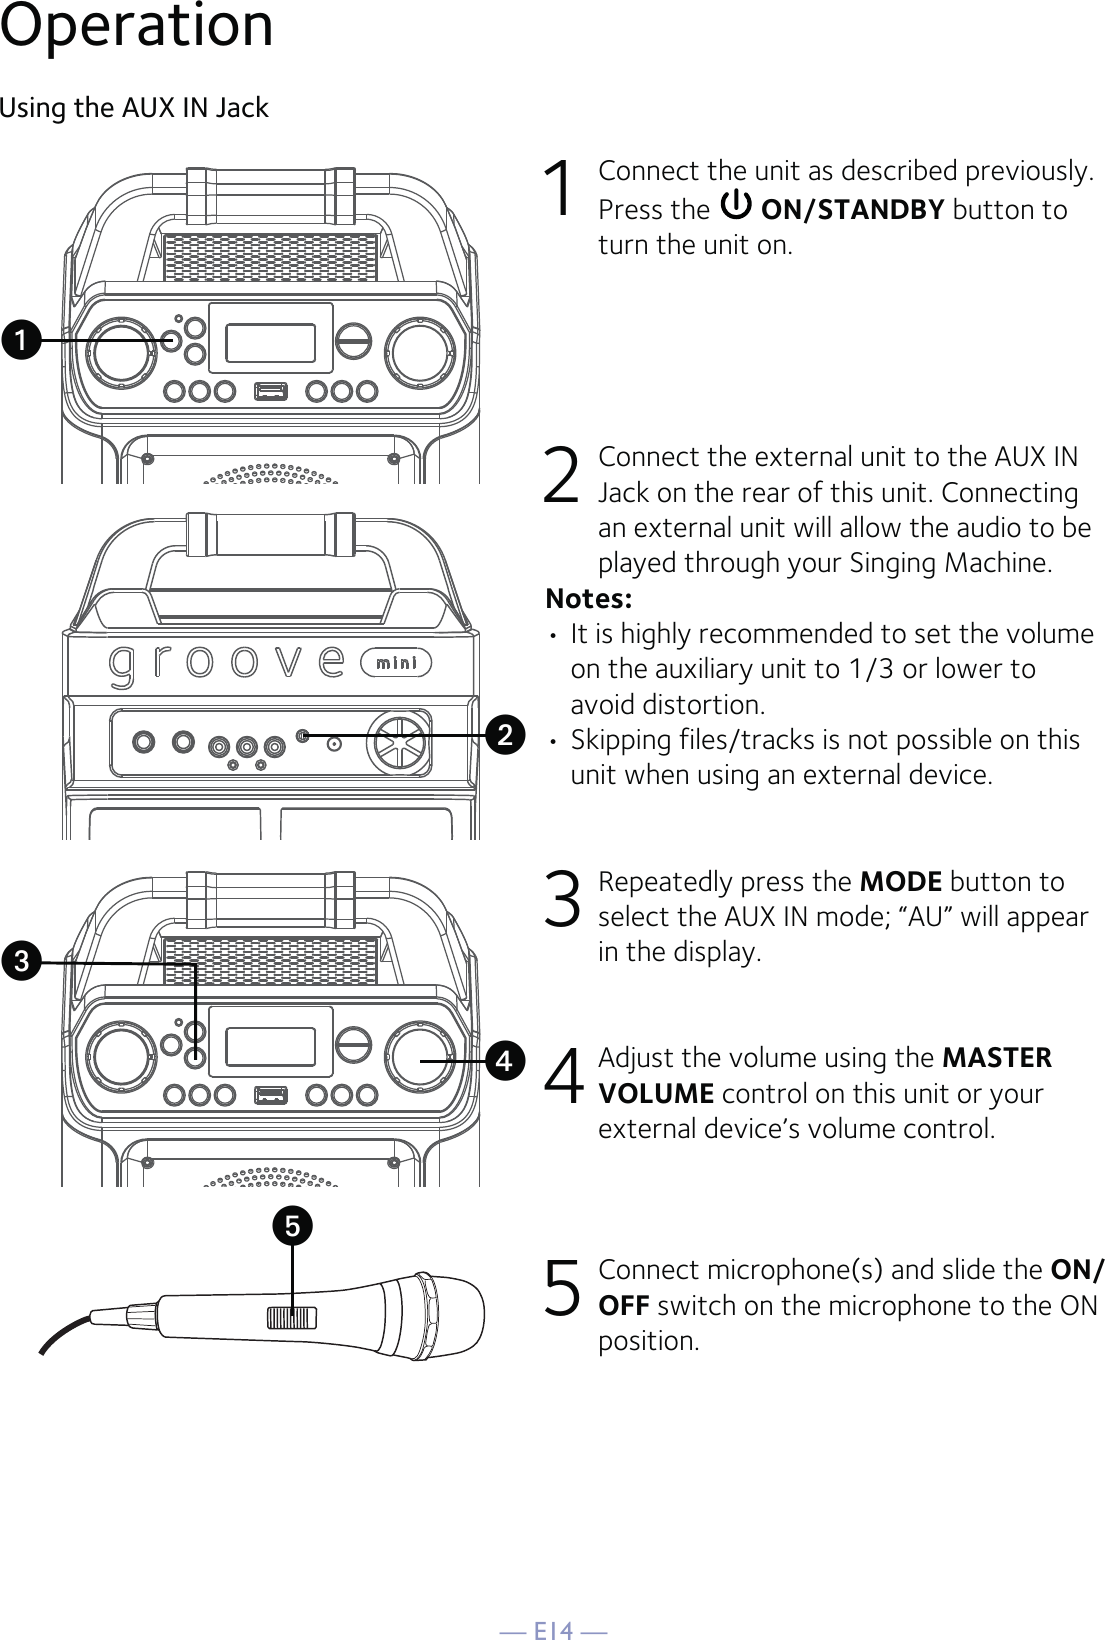
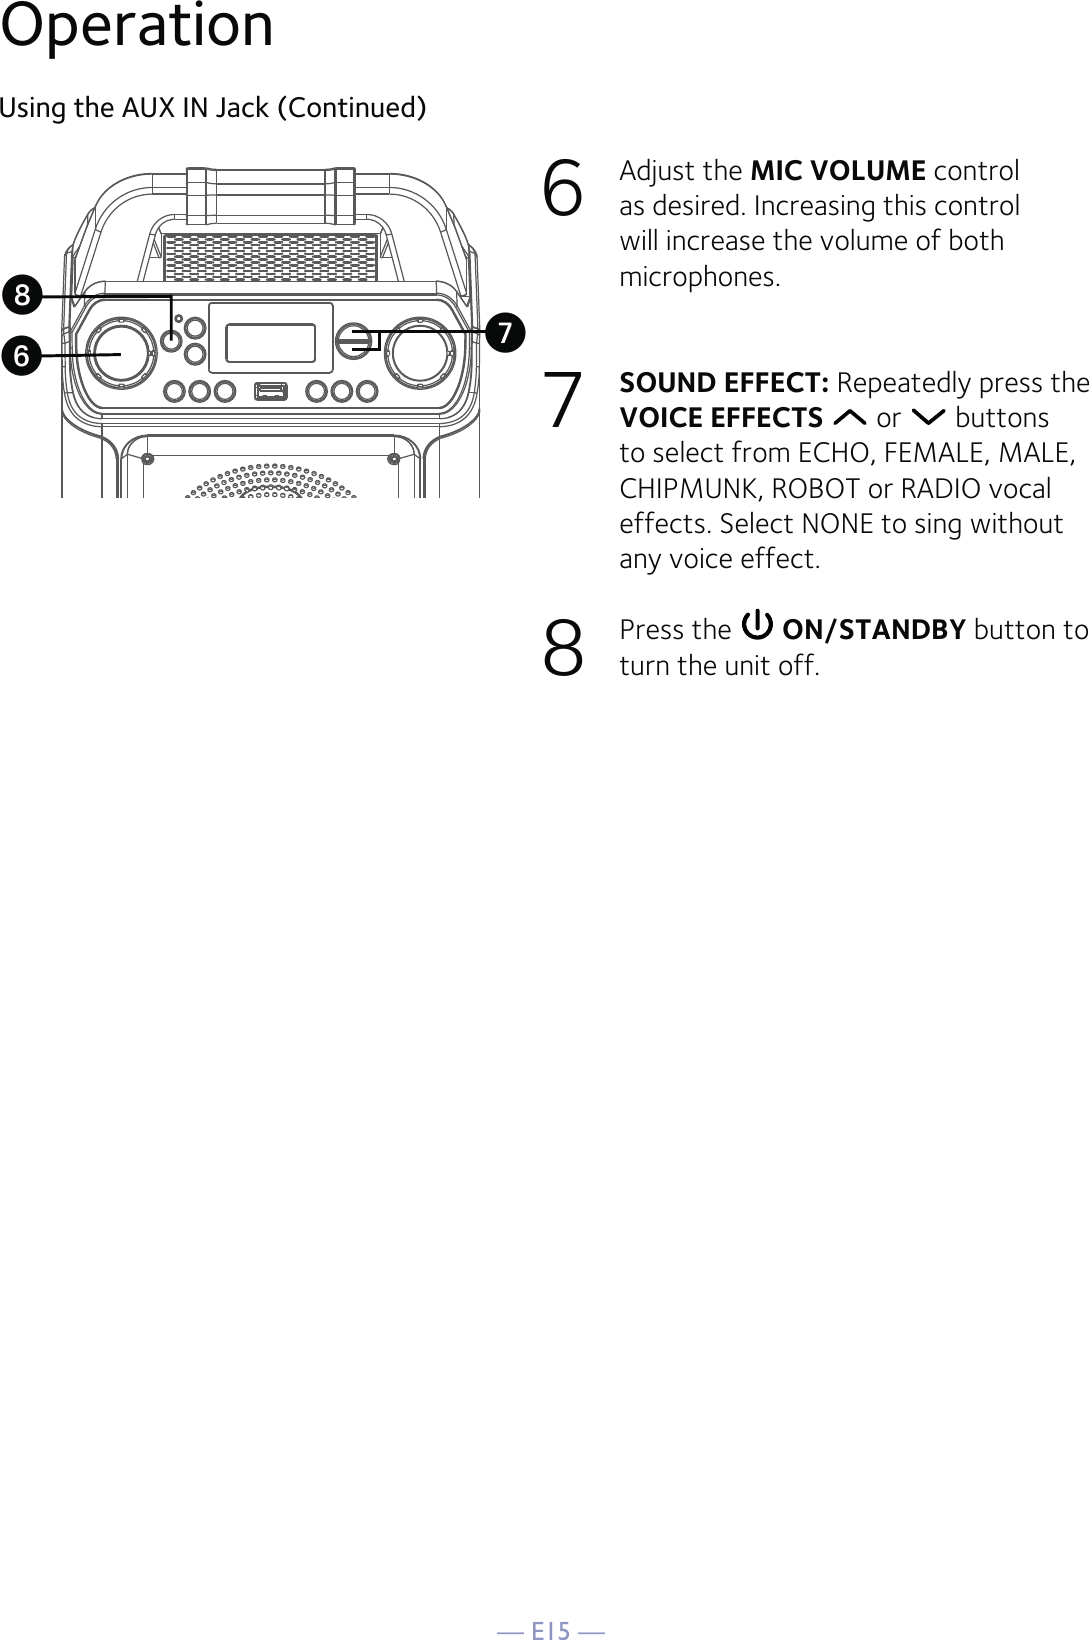
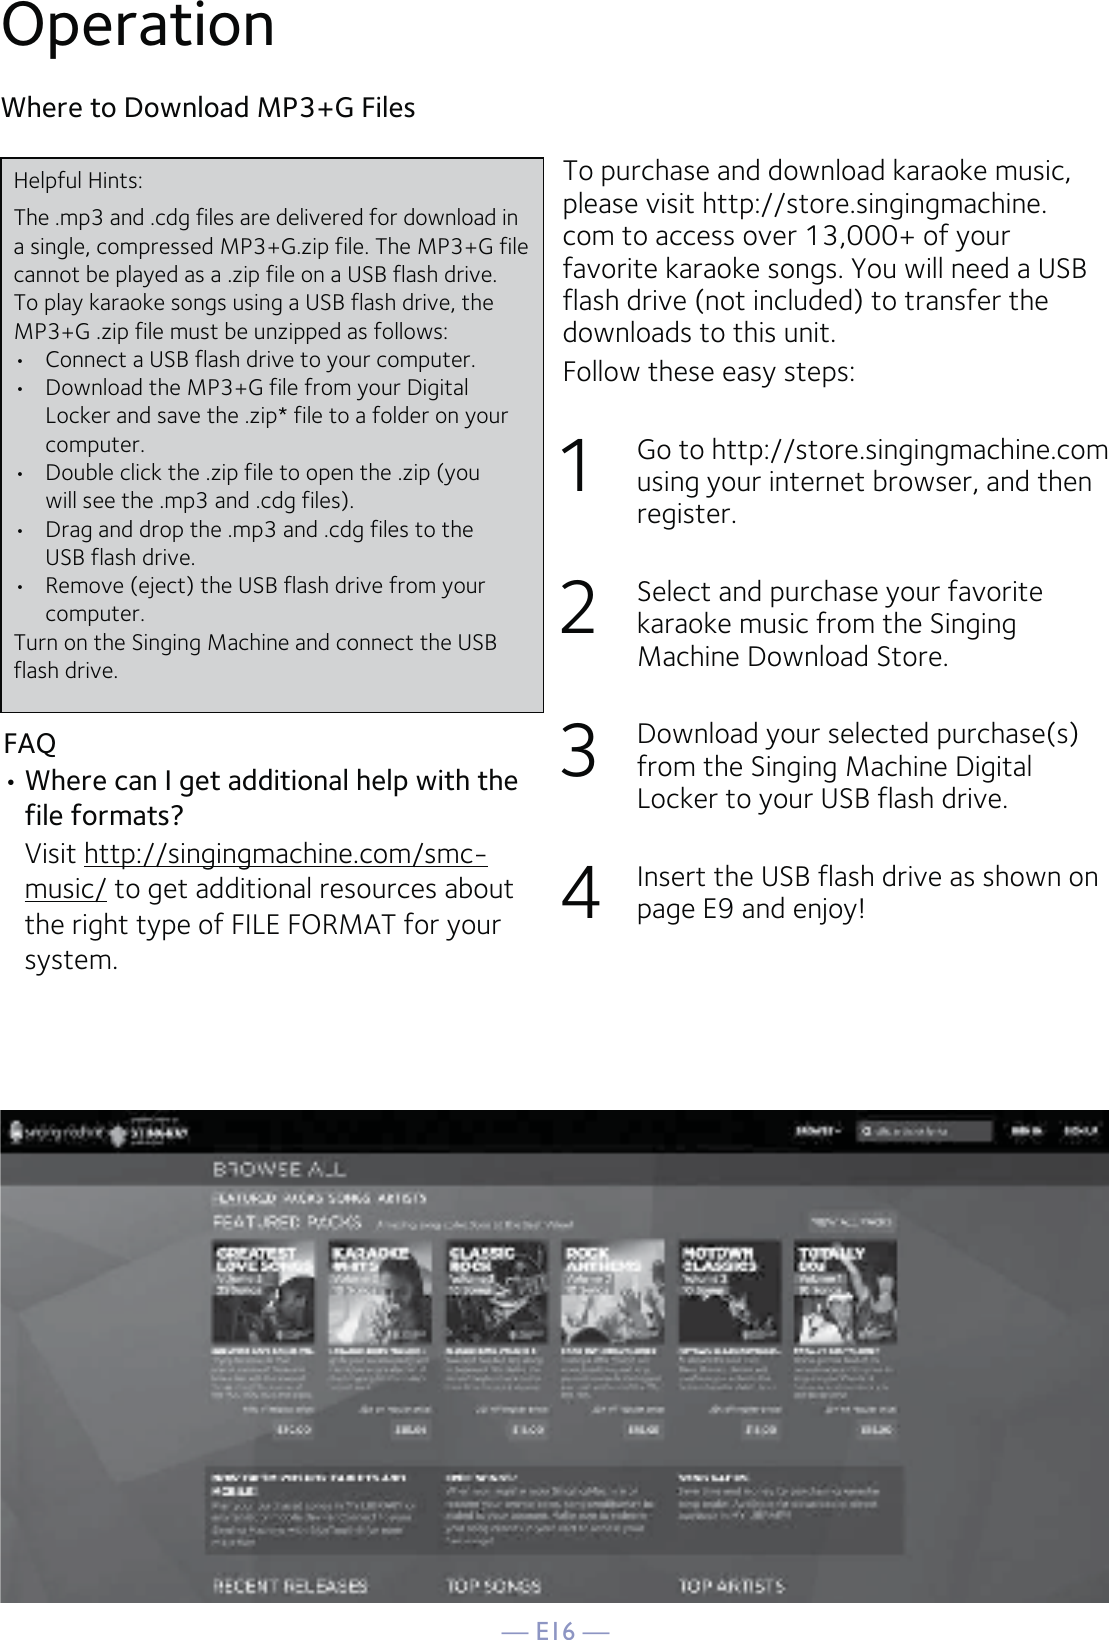
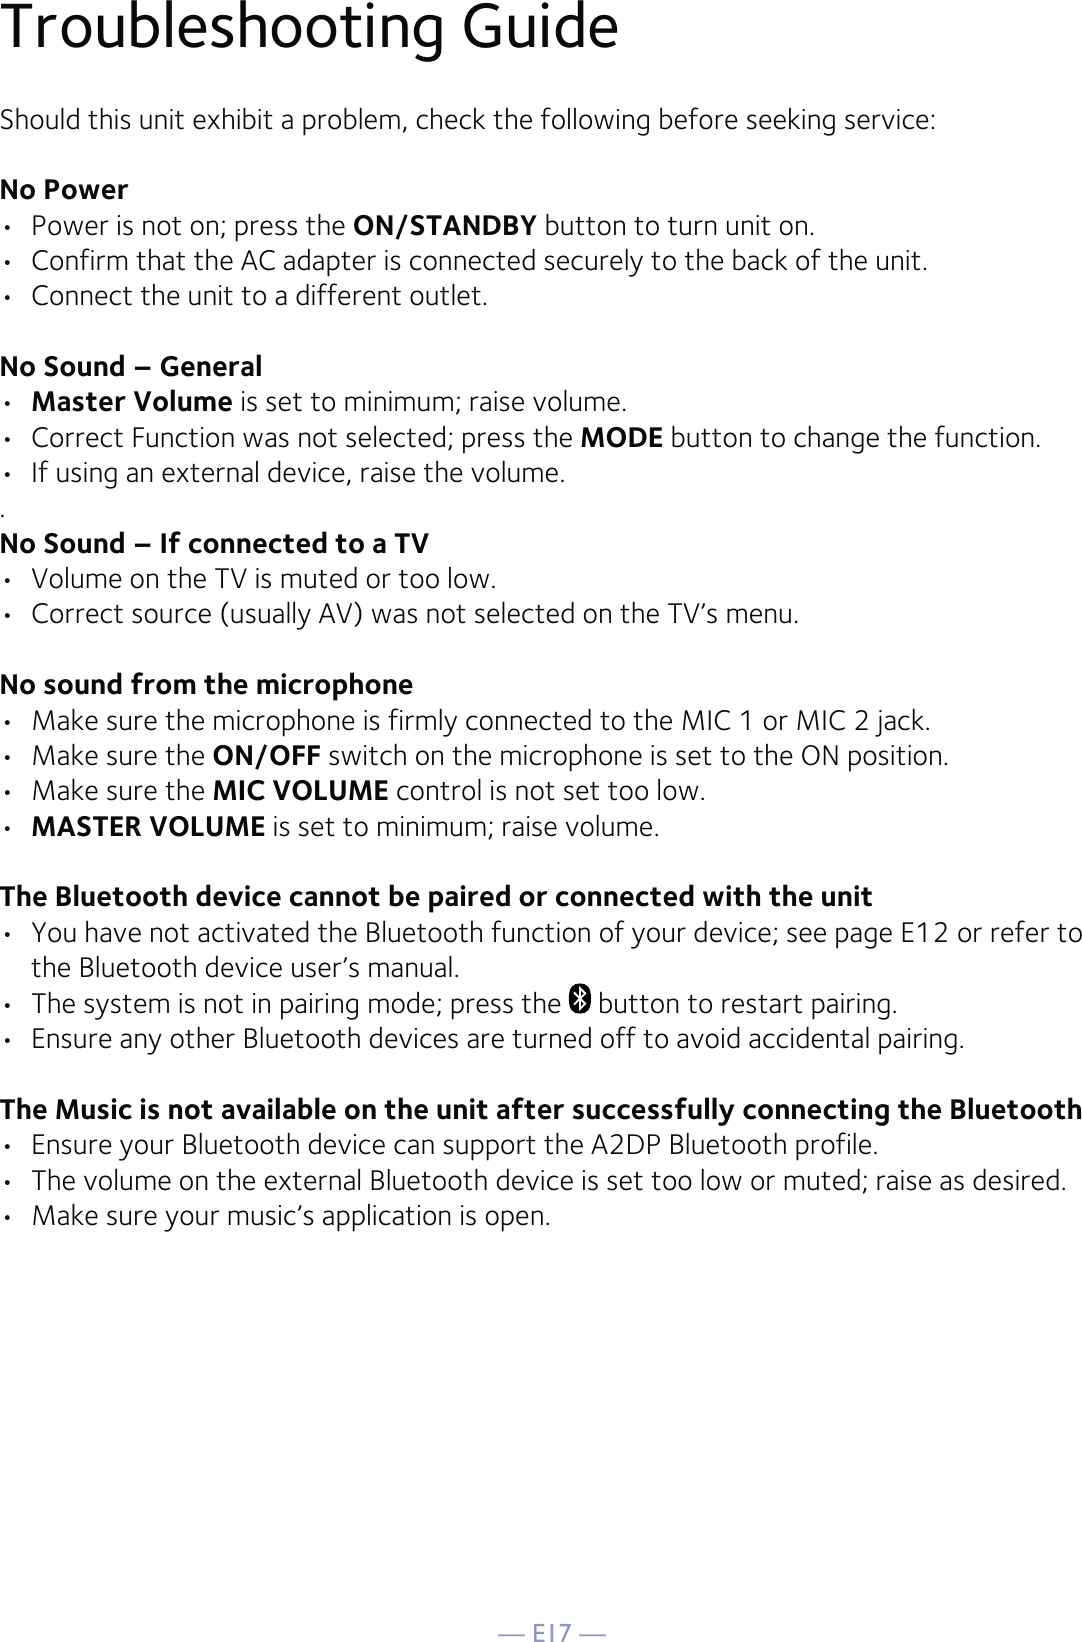
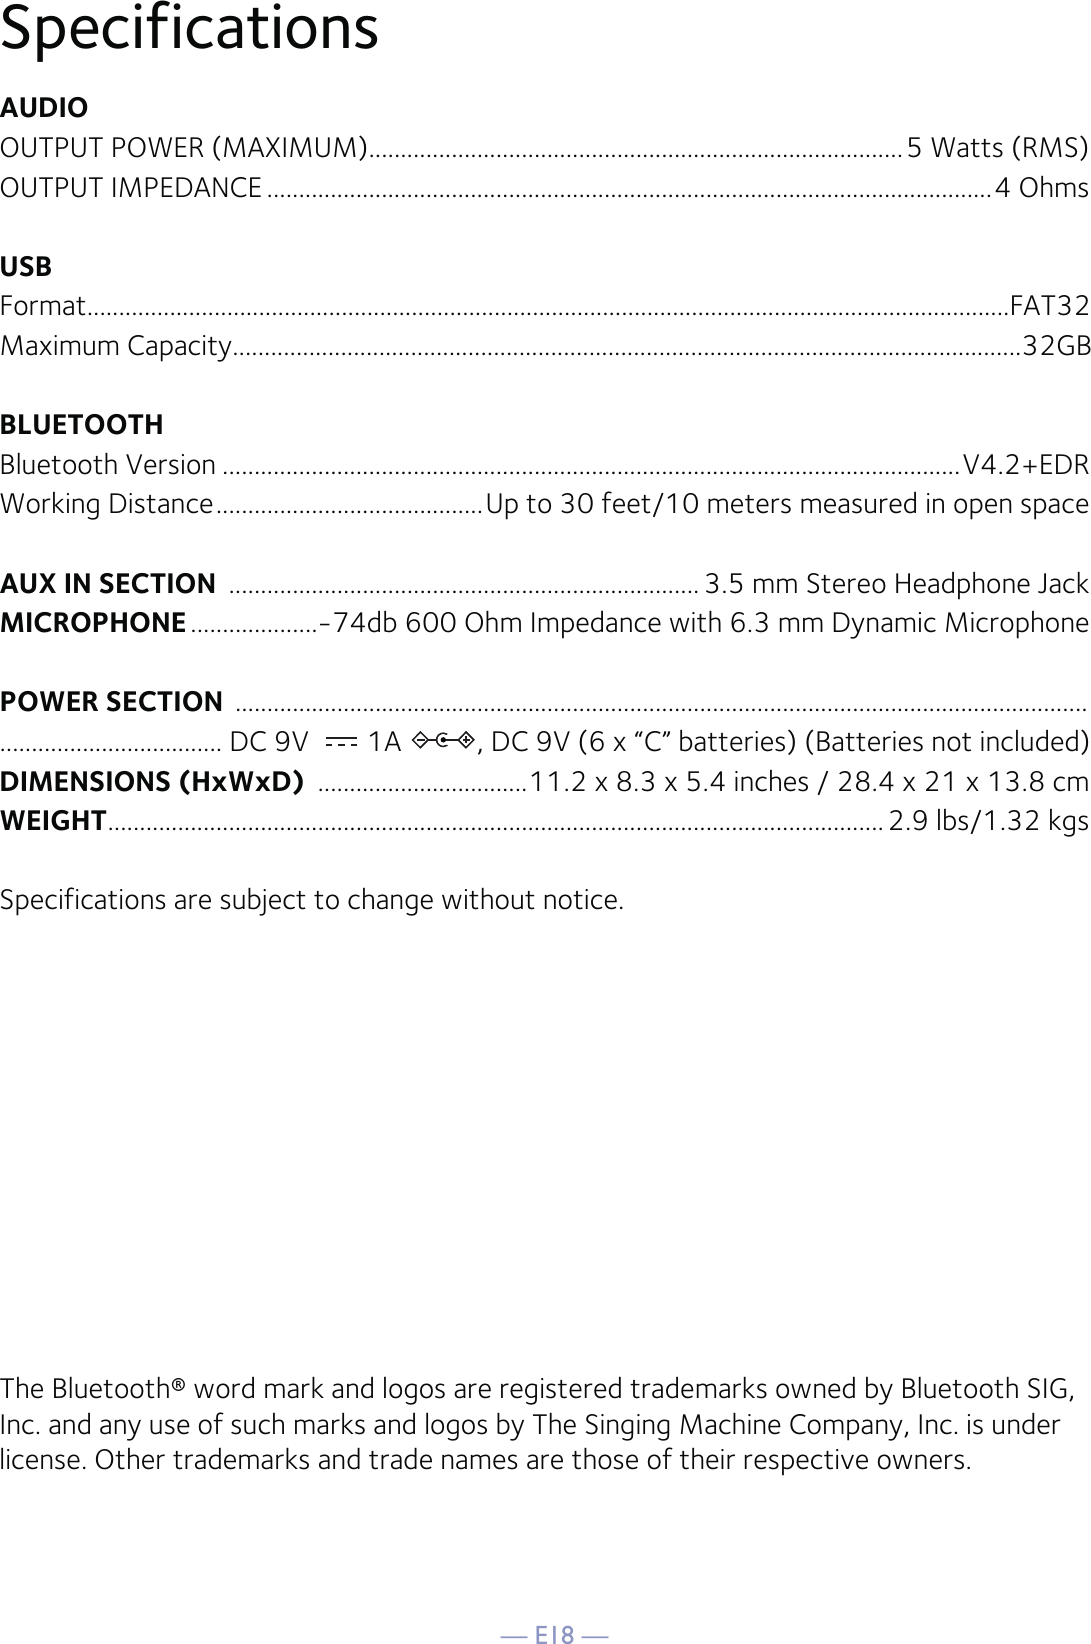
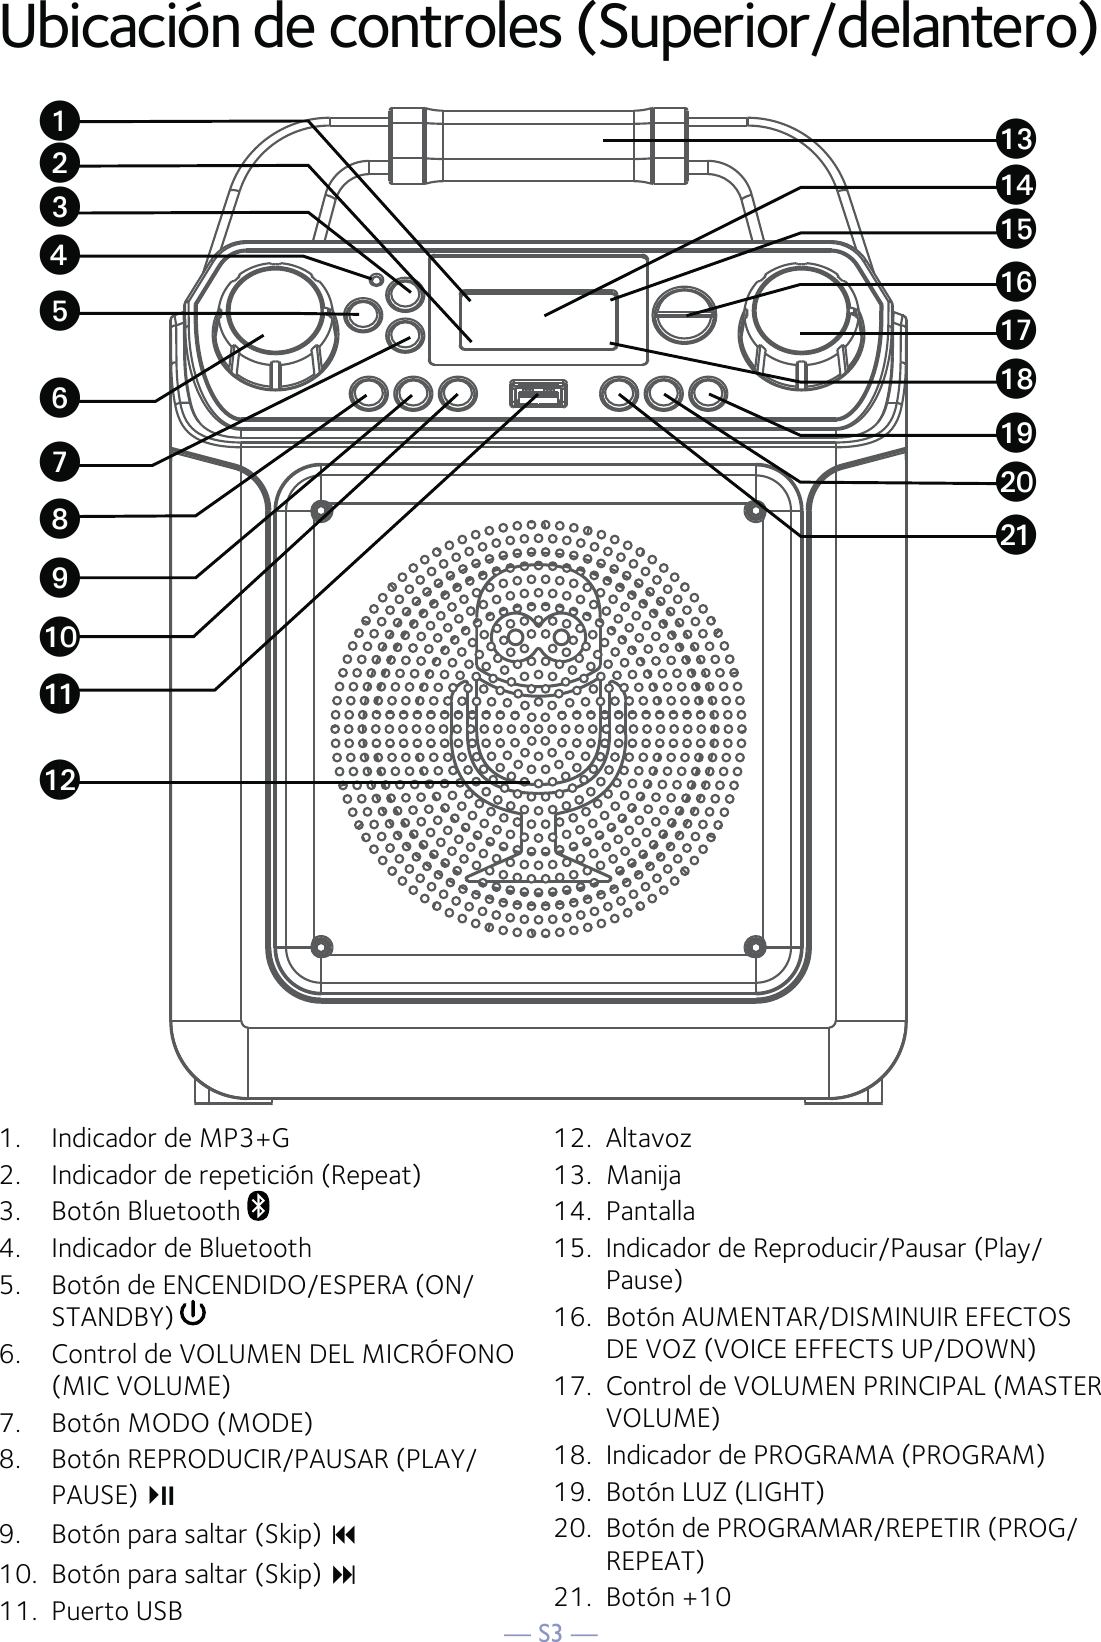
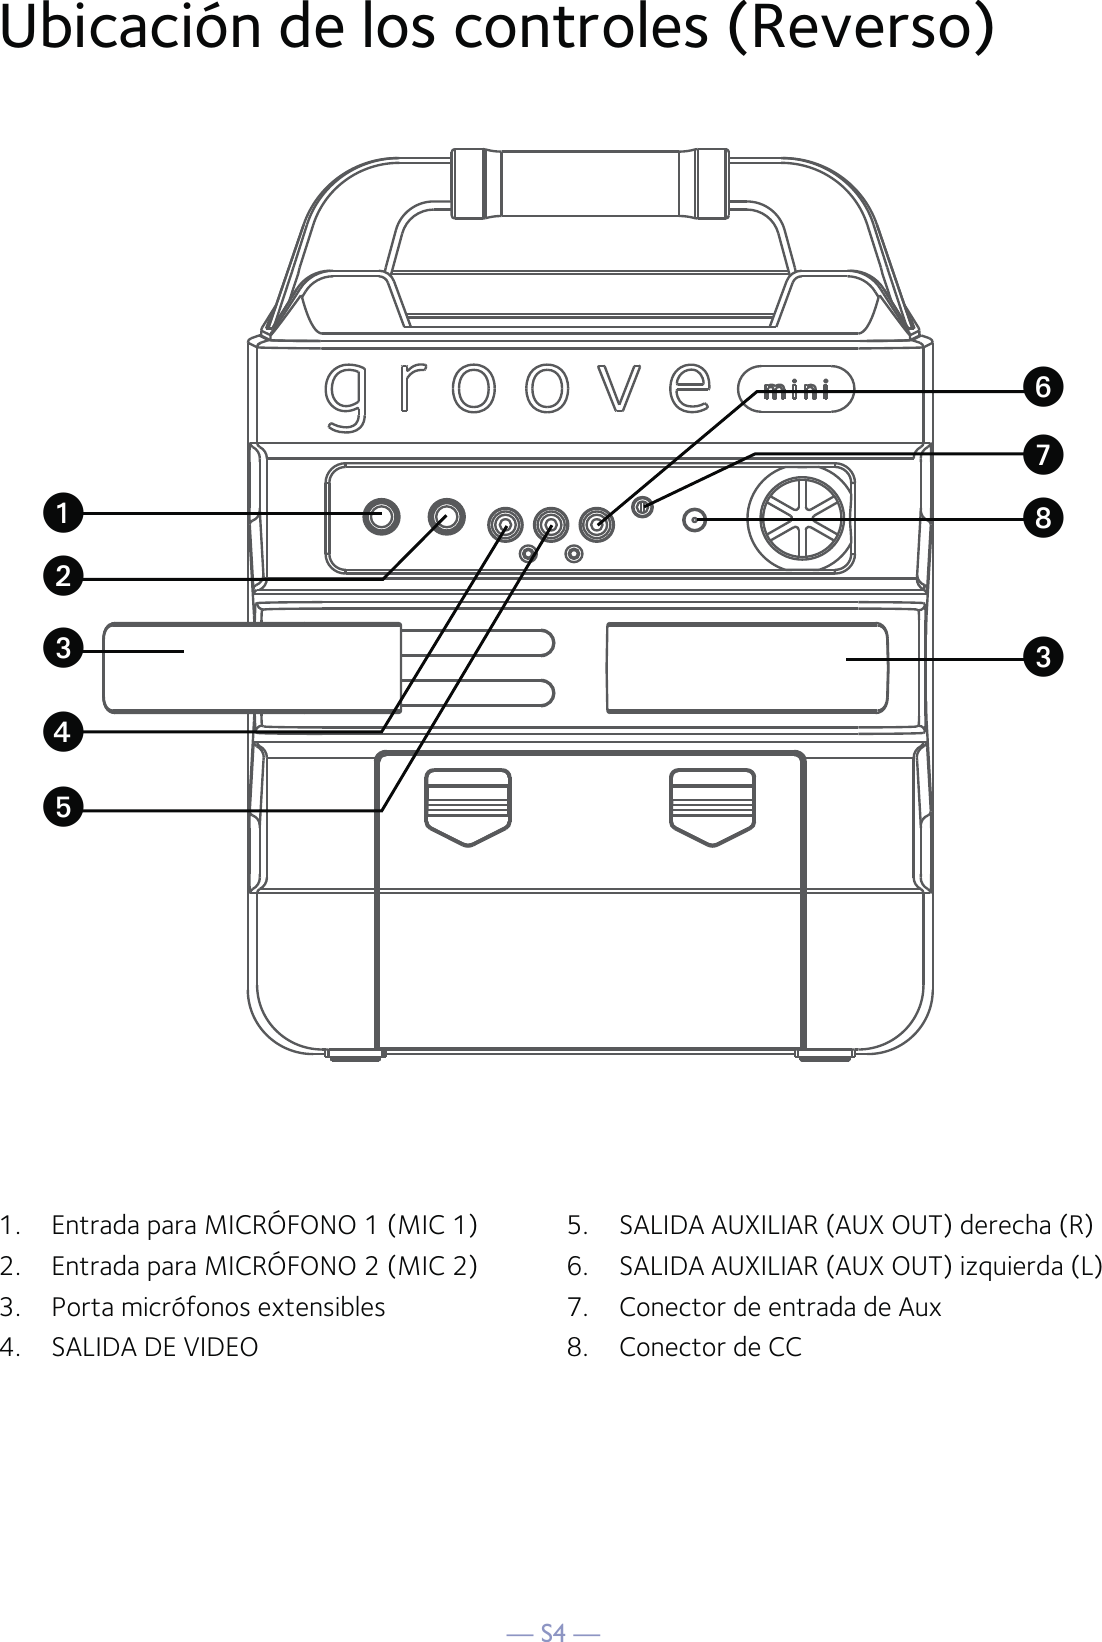
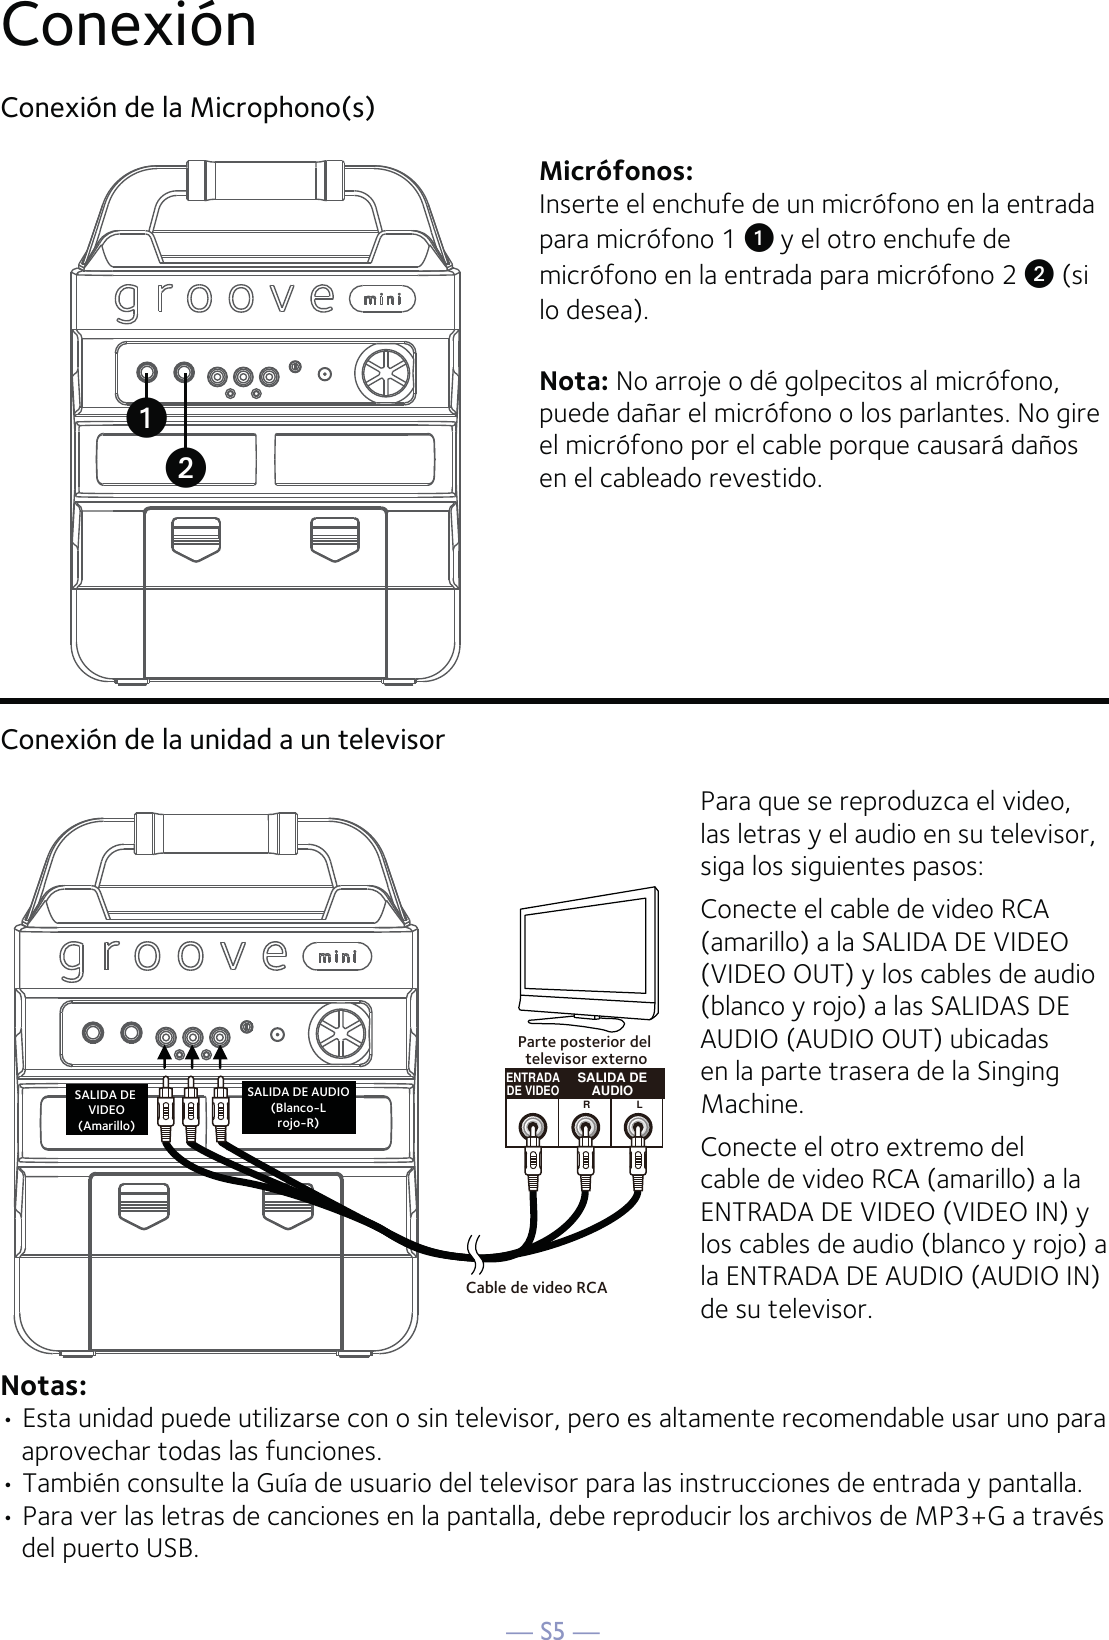
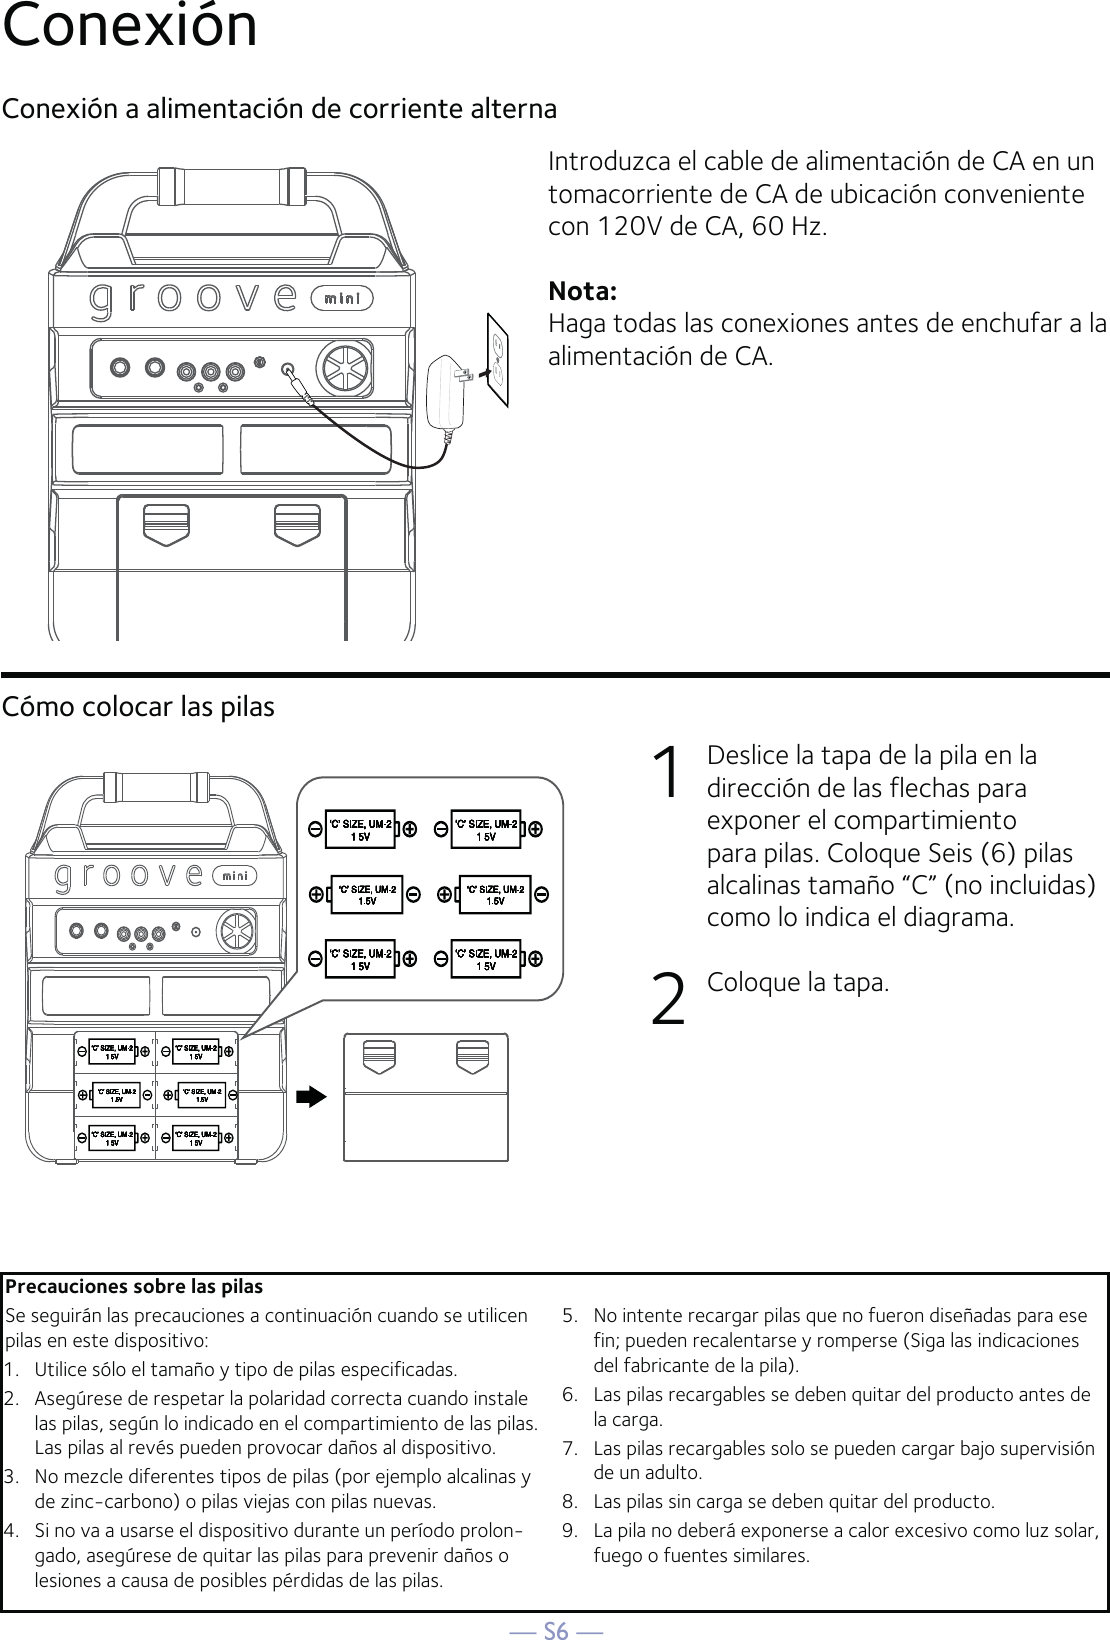
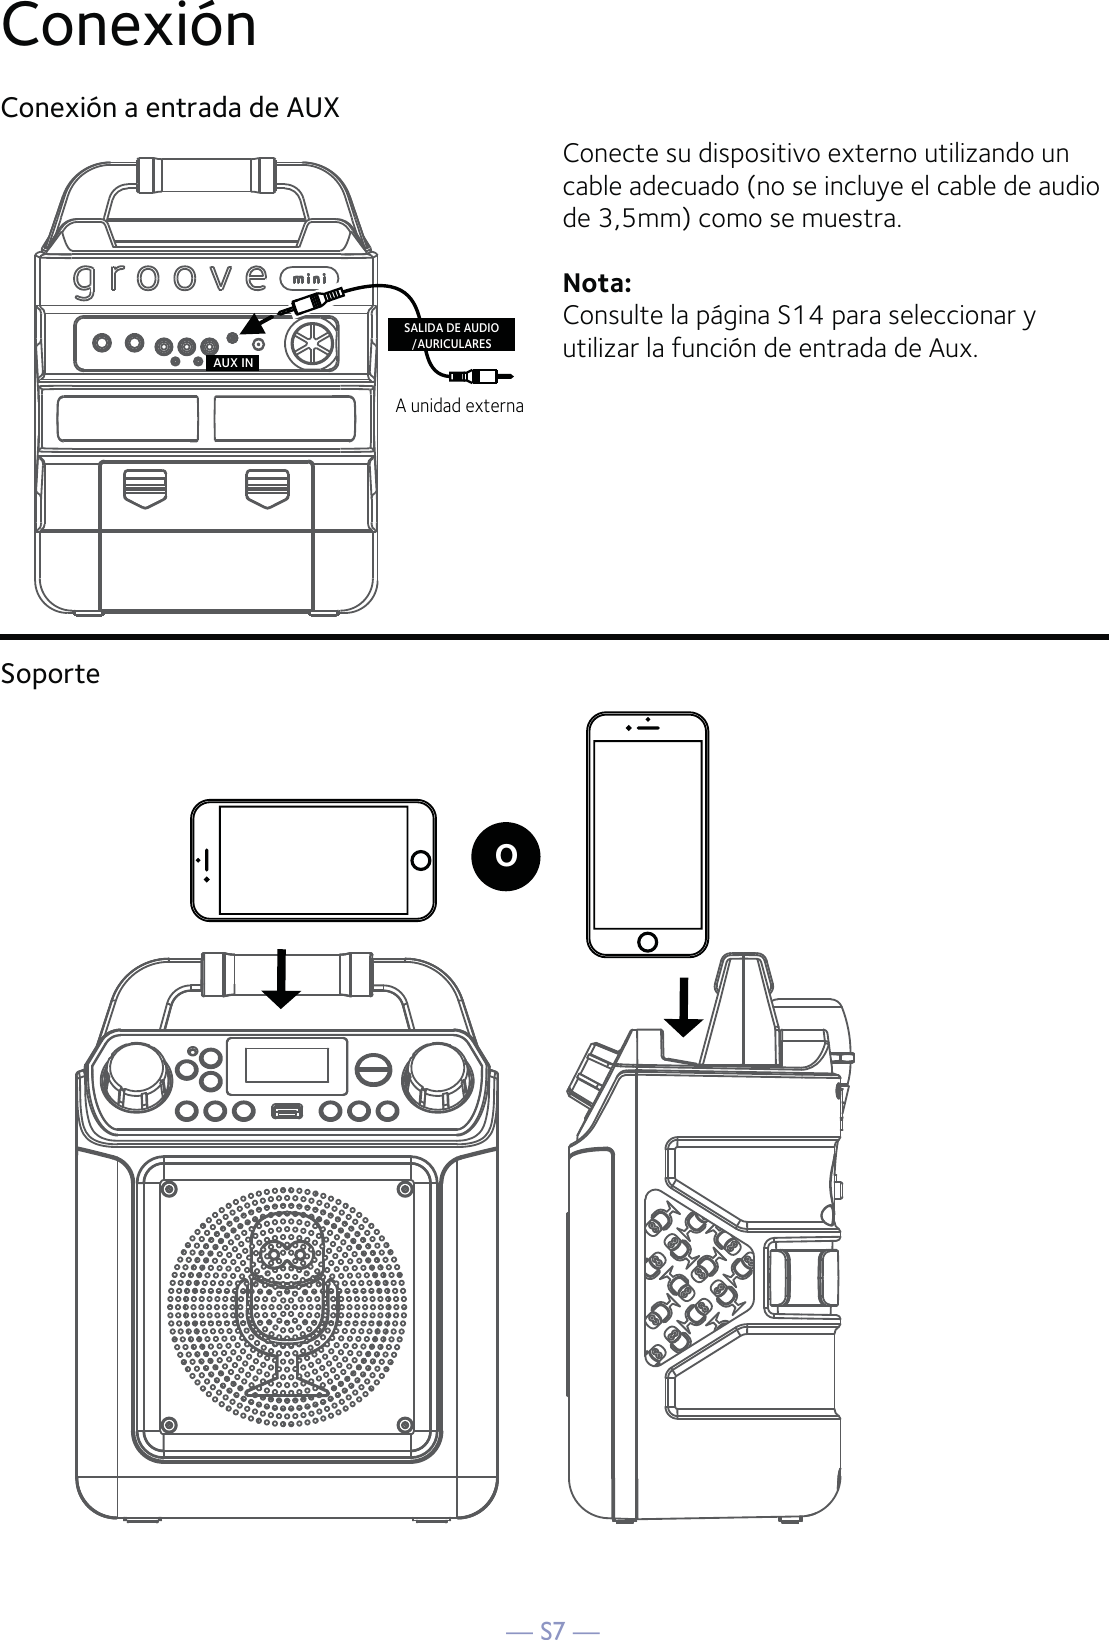
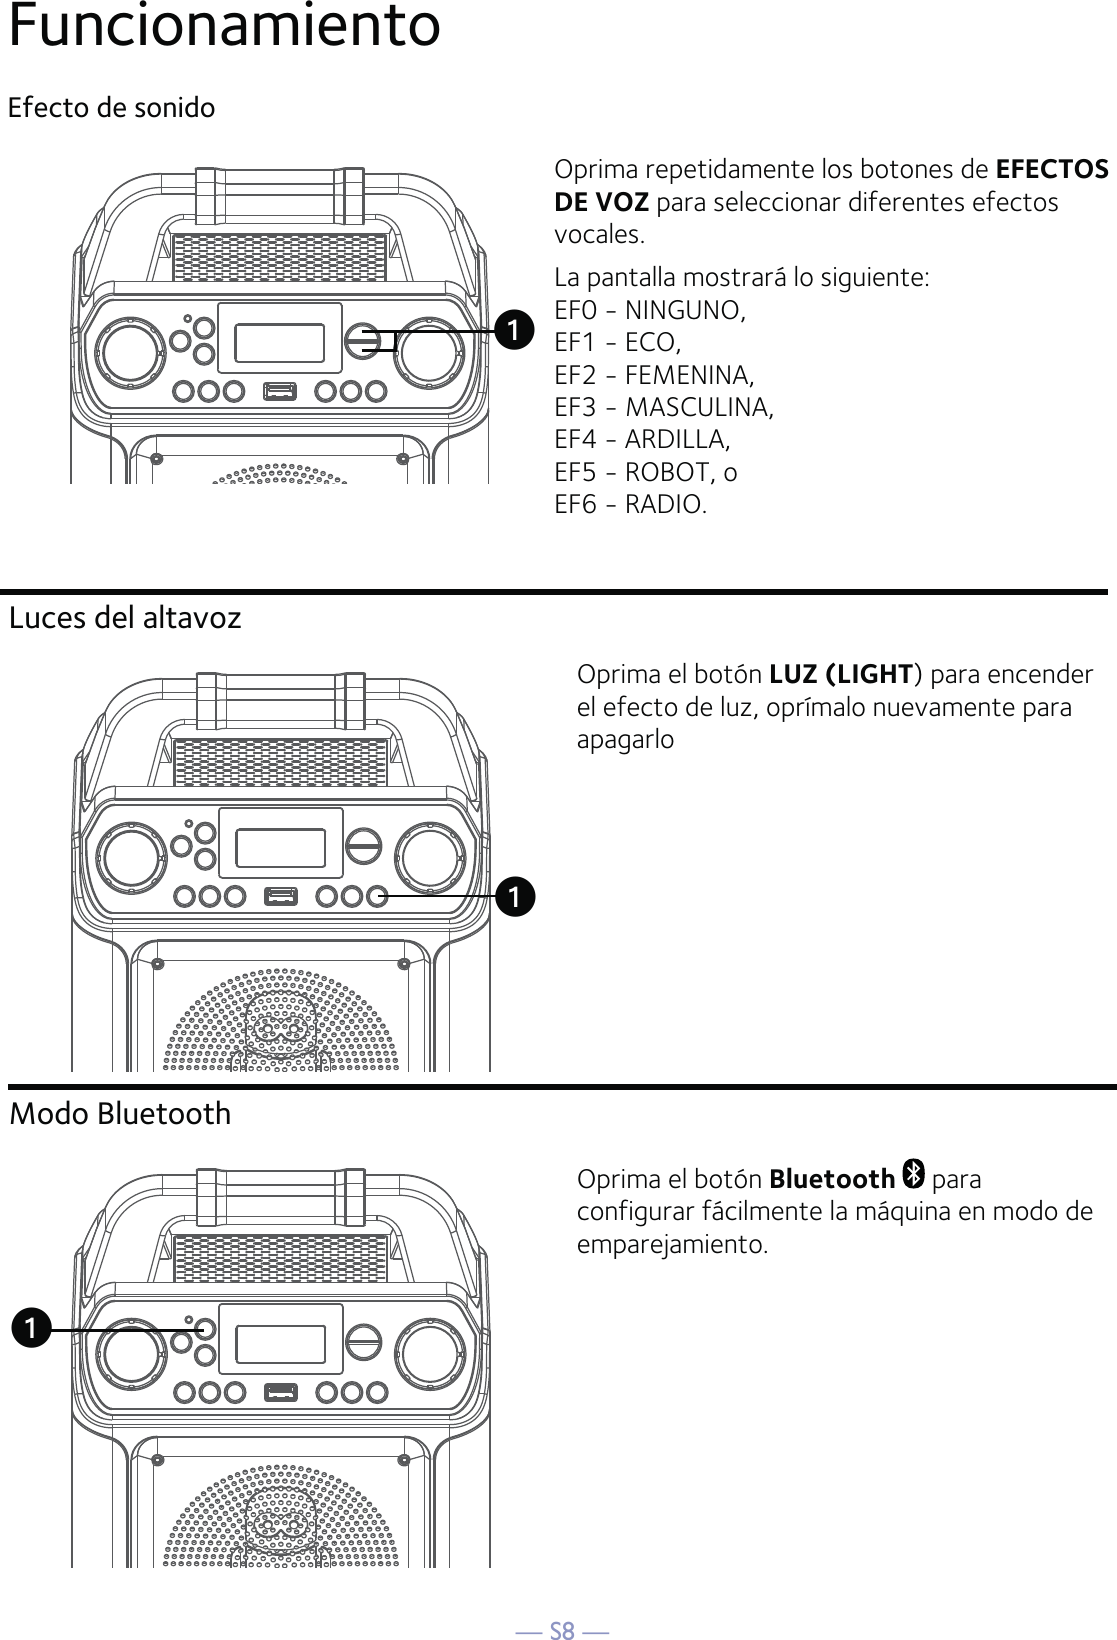
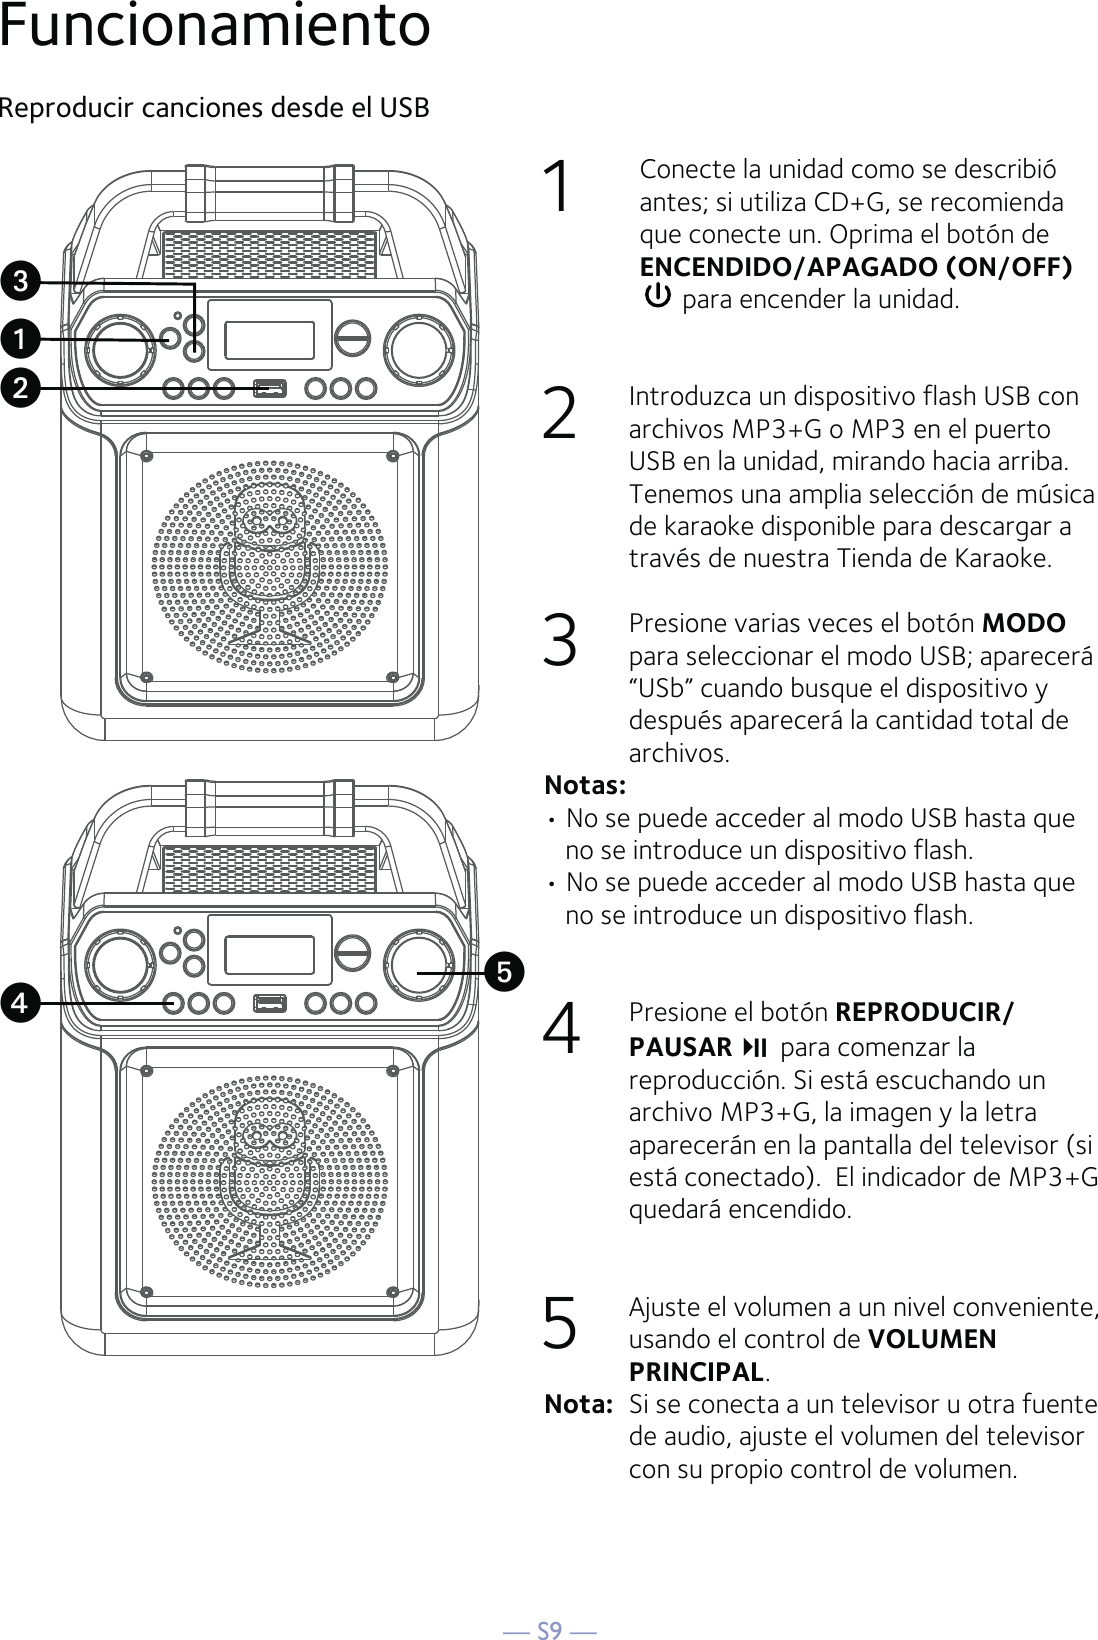
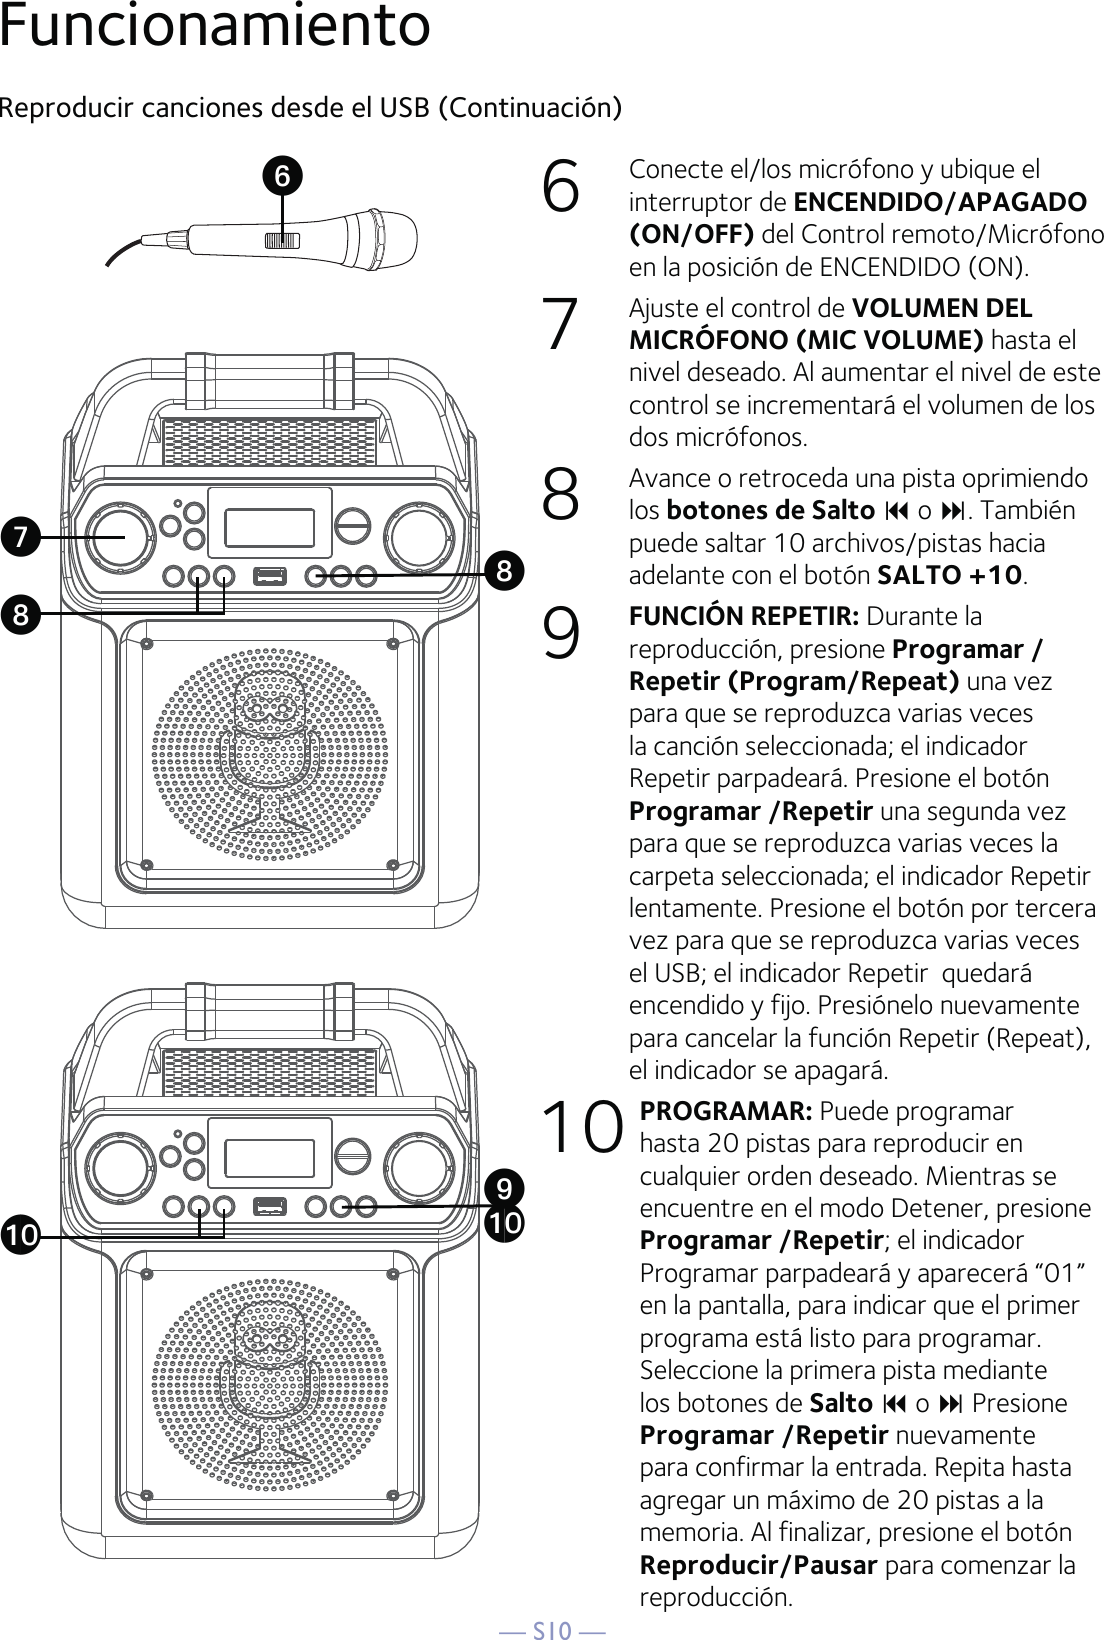
Users Manual-1