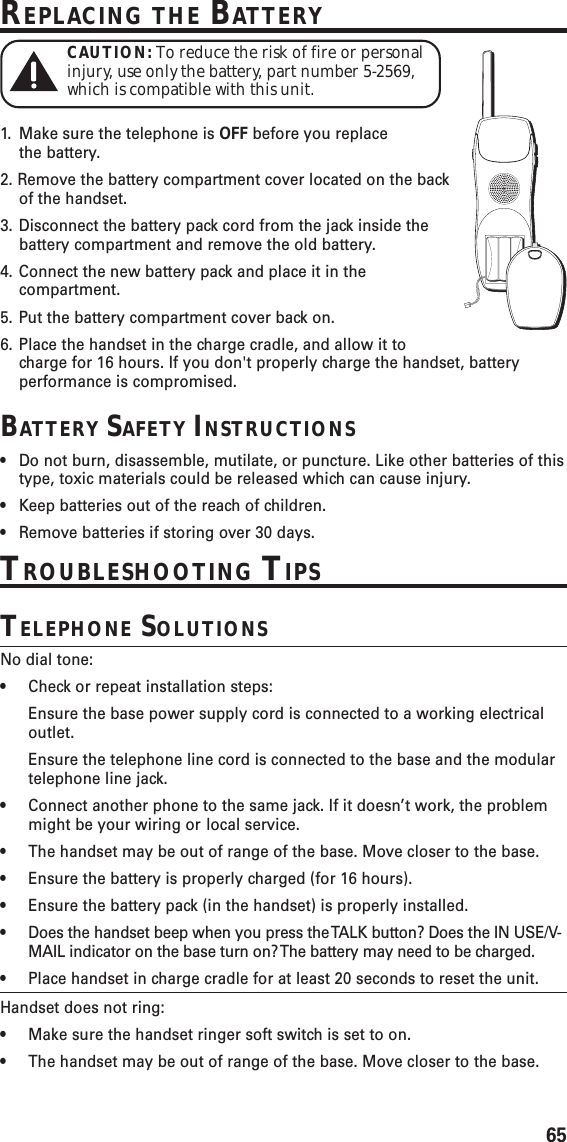
Thomson 2-1115A 2.4GHz SINGLE-LINE SPREAD SPECTRUM CORDLESS PHONE User Manual 21115 DOM IB E 0
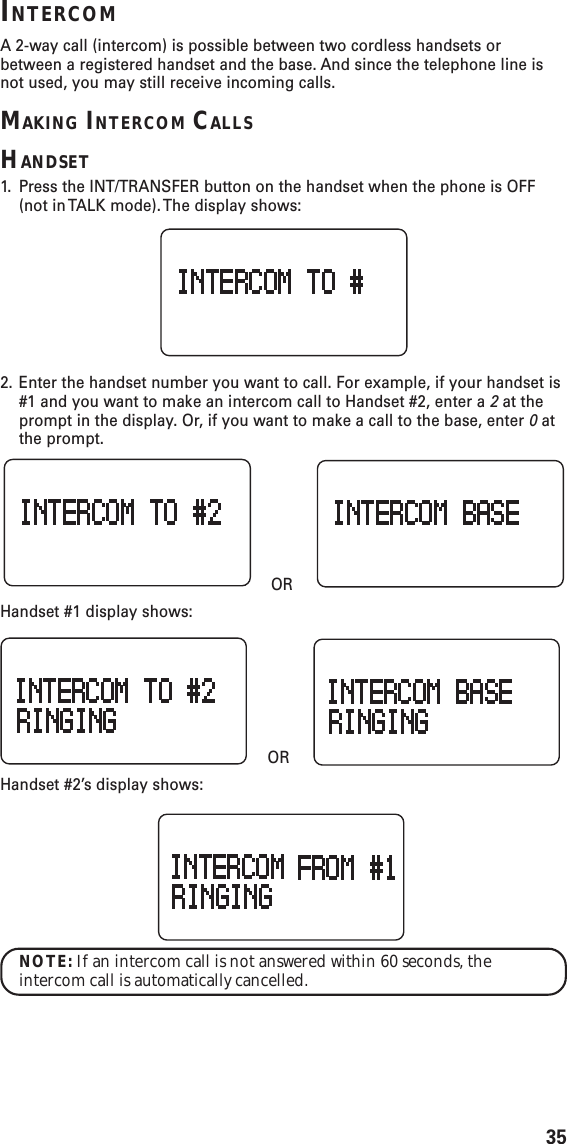
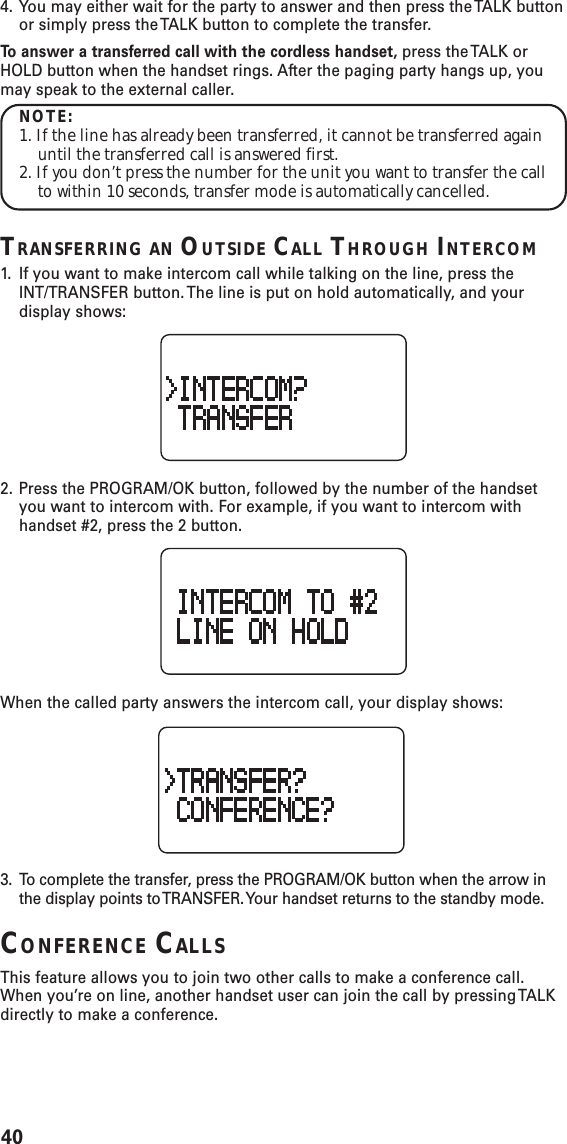
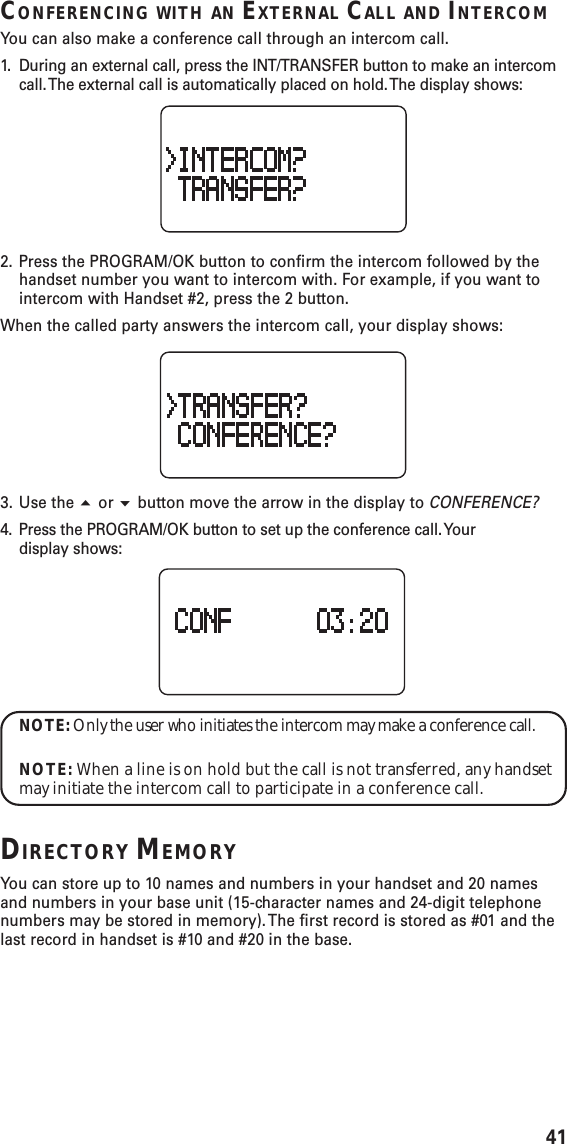
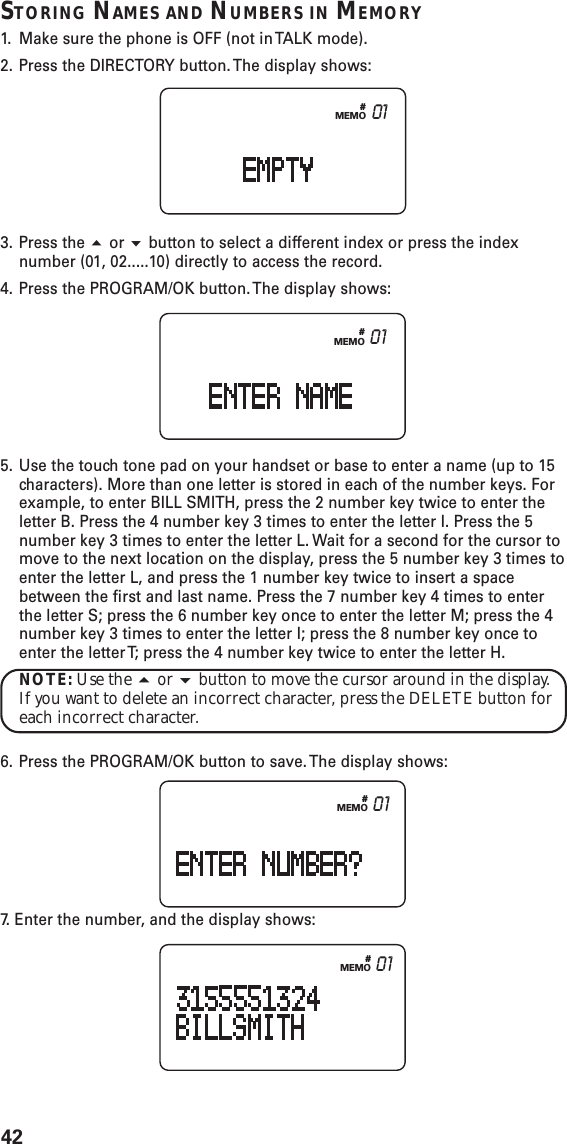
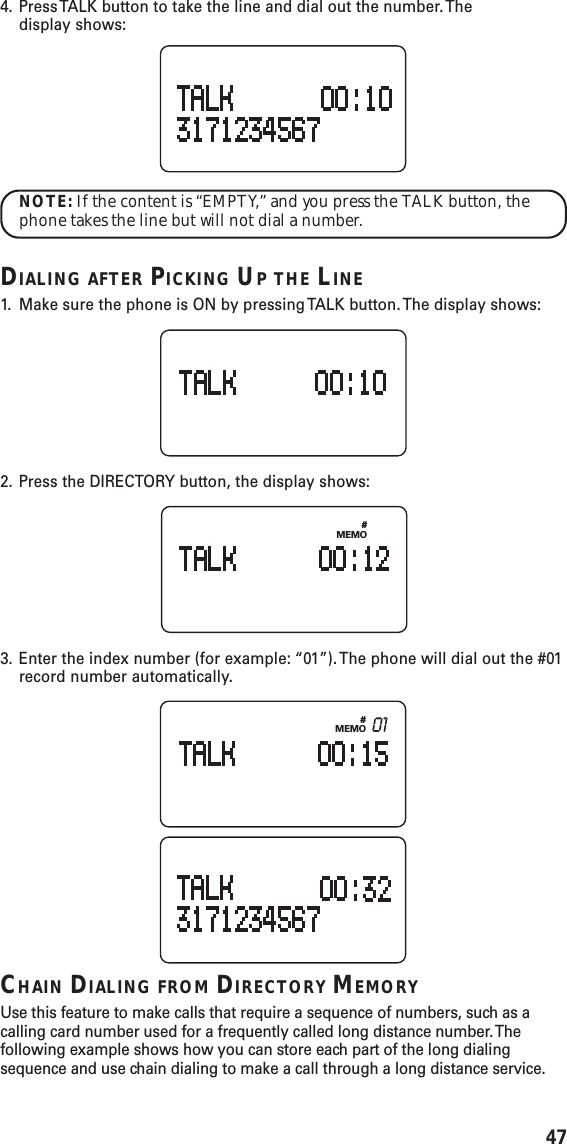
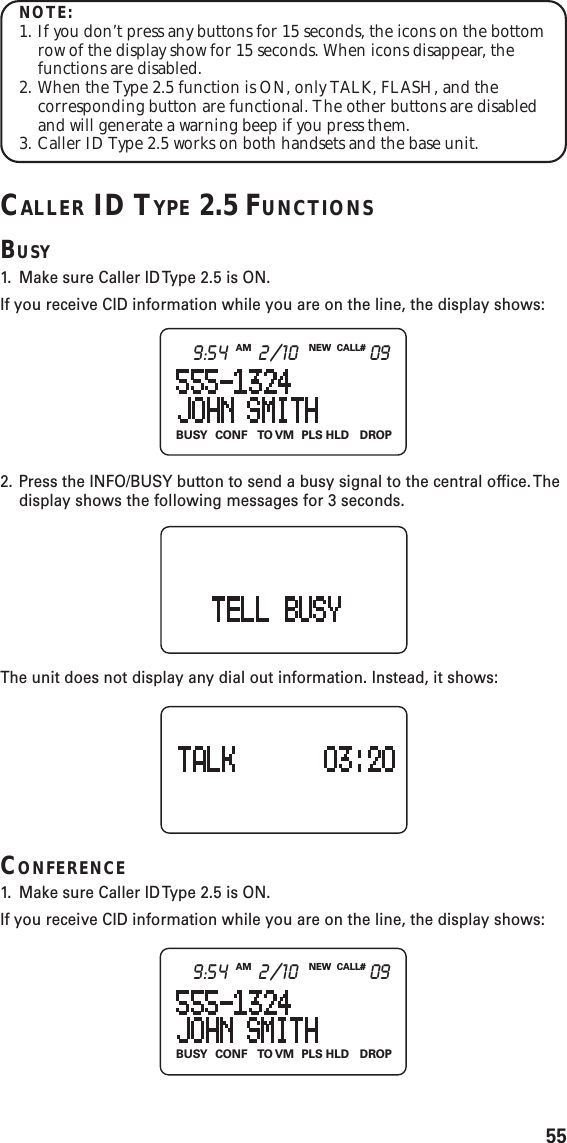
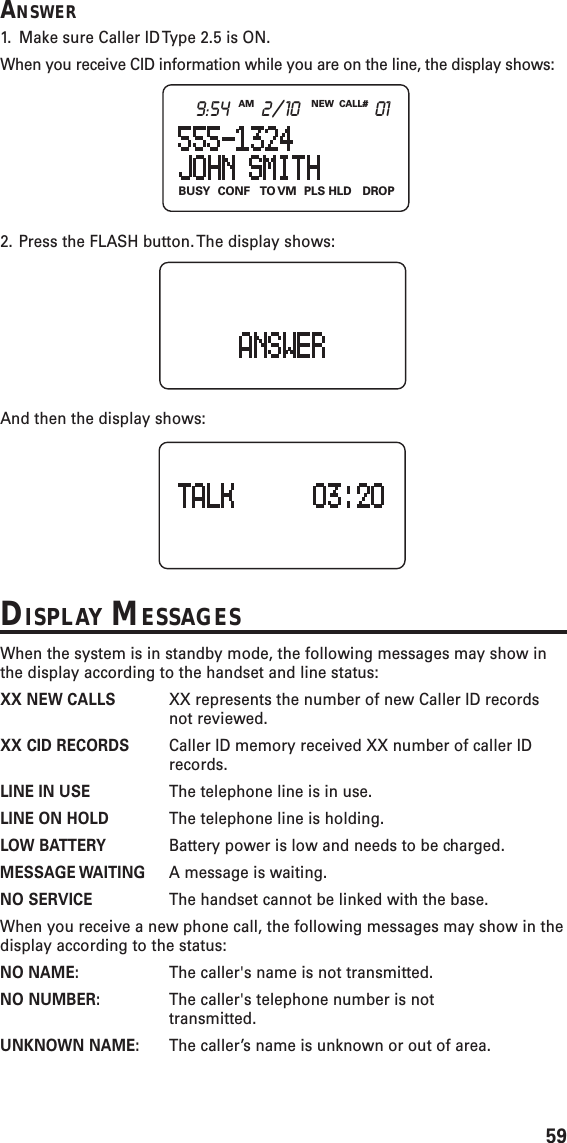
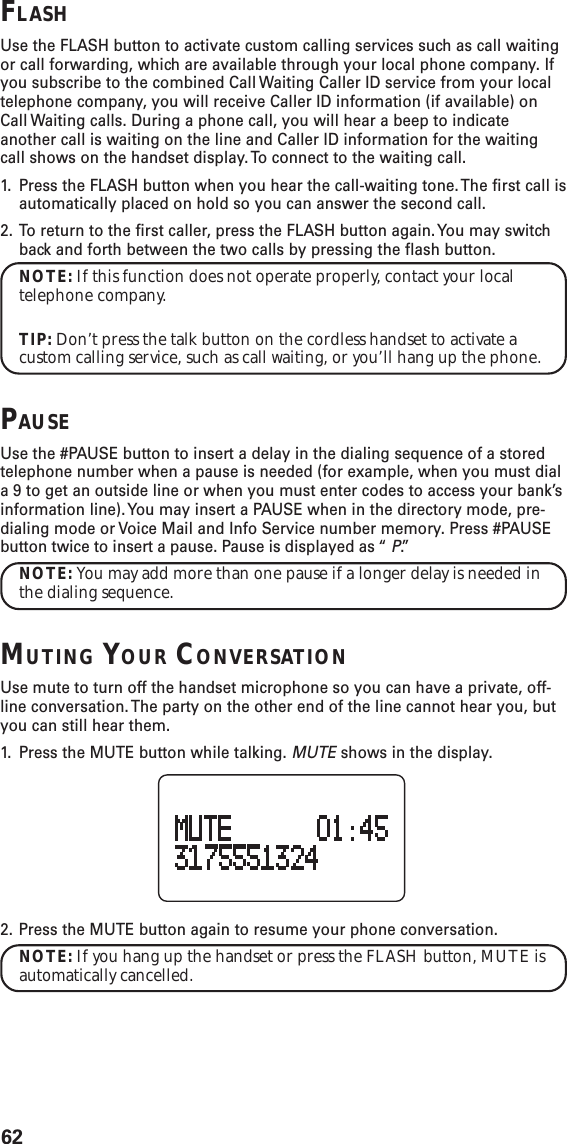
Thomson Inc. 2.4GHz SINGLE-LINE SPREAD SPECTRUM CORDLESS PHONE 21115 DOM IB E 0
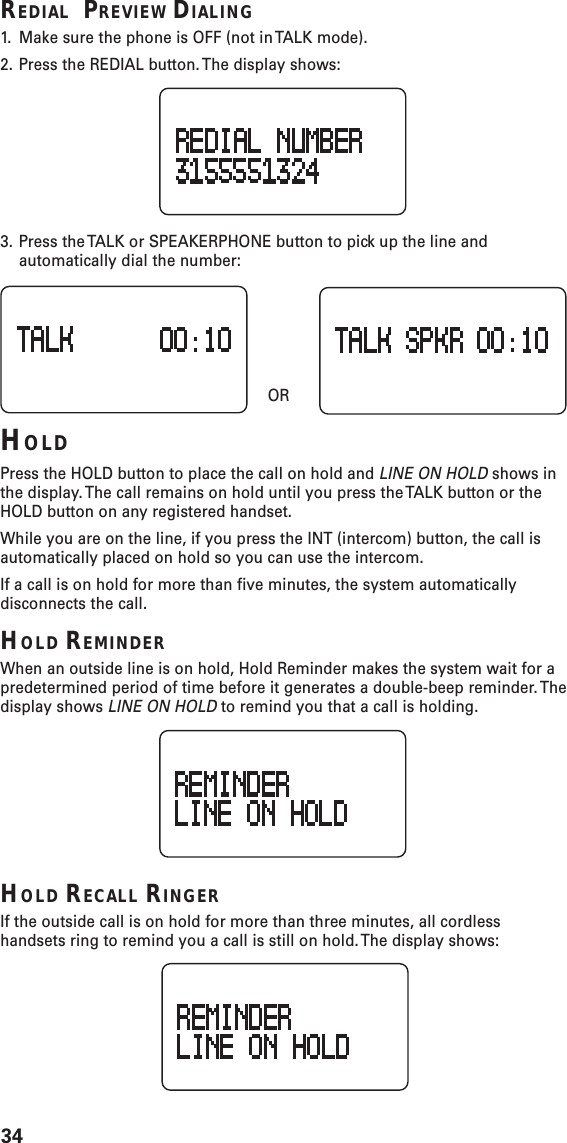
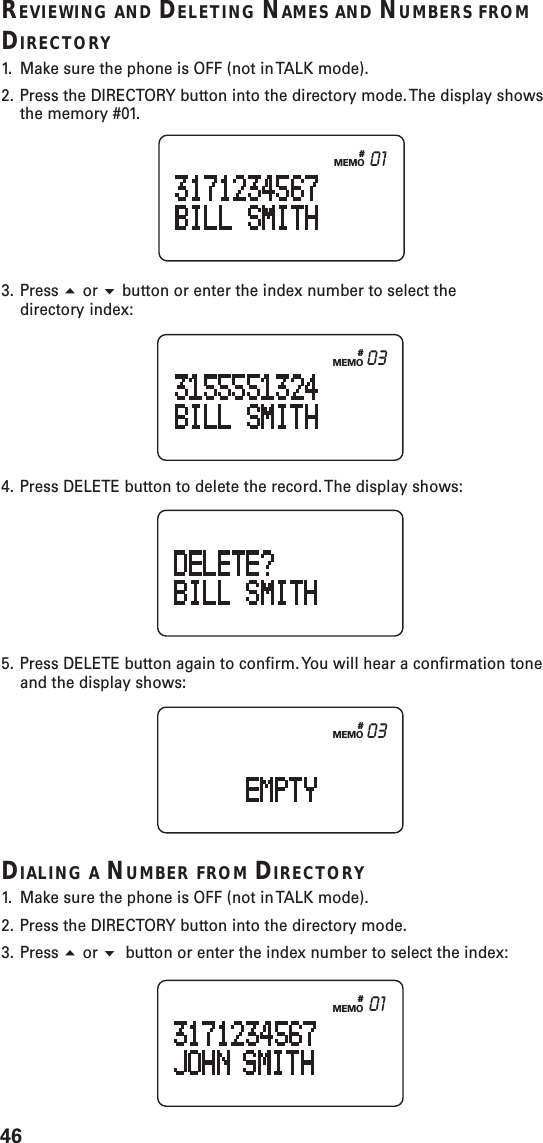
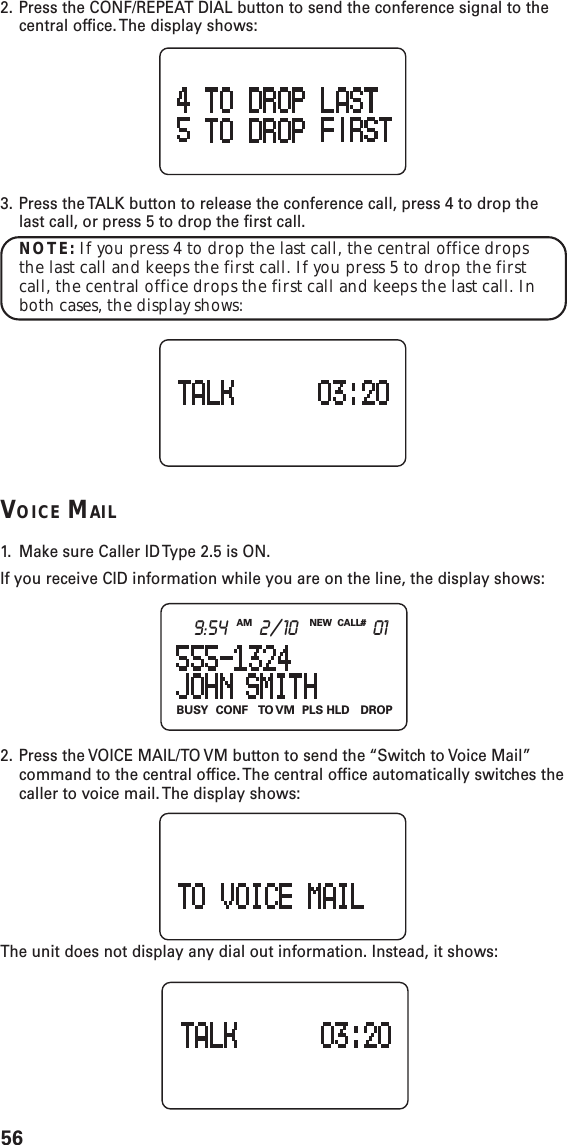
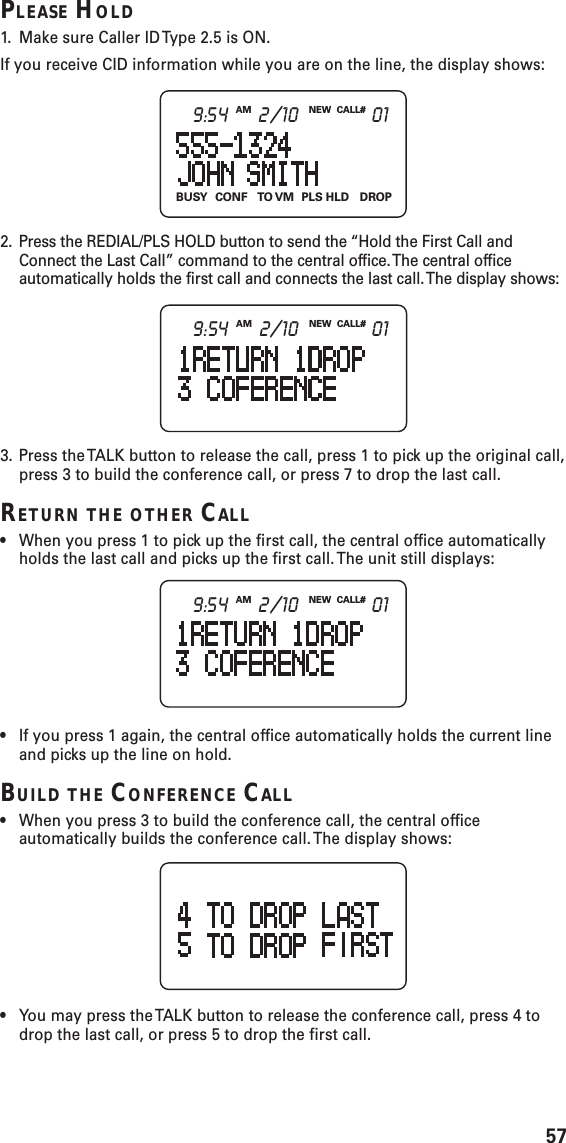
Thomson >
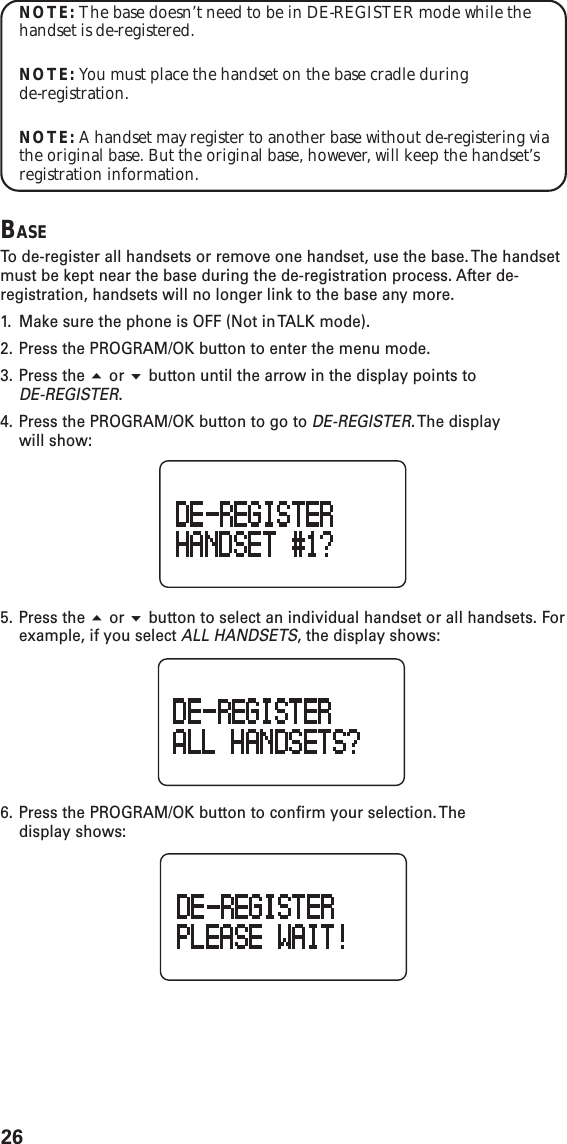
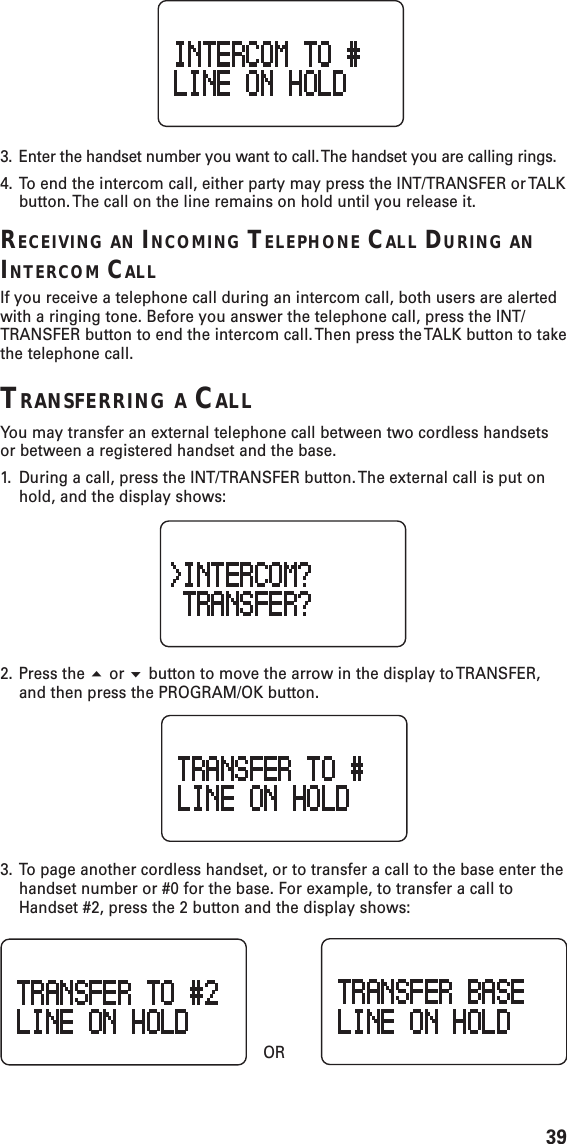
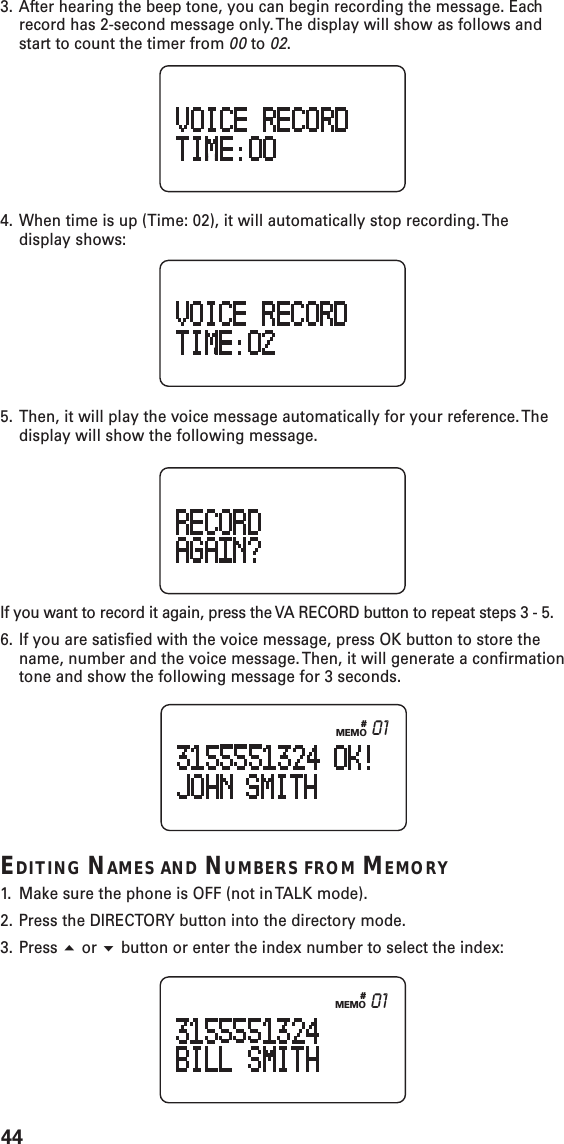
Contents
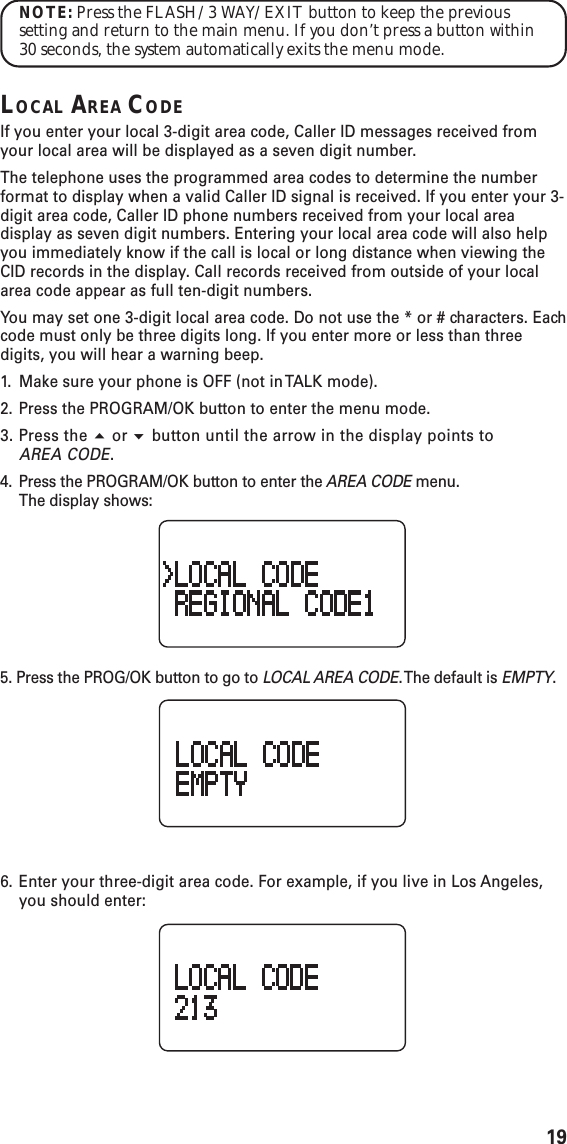
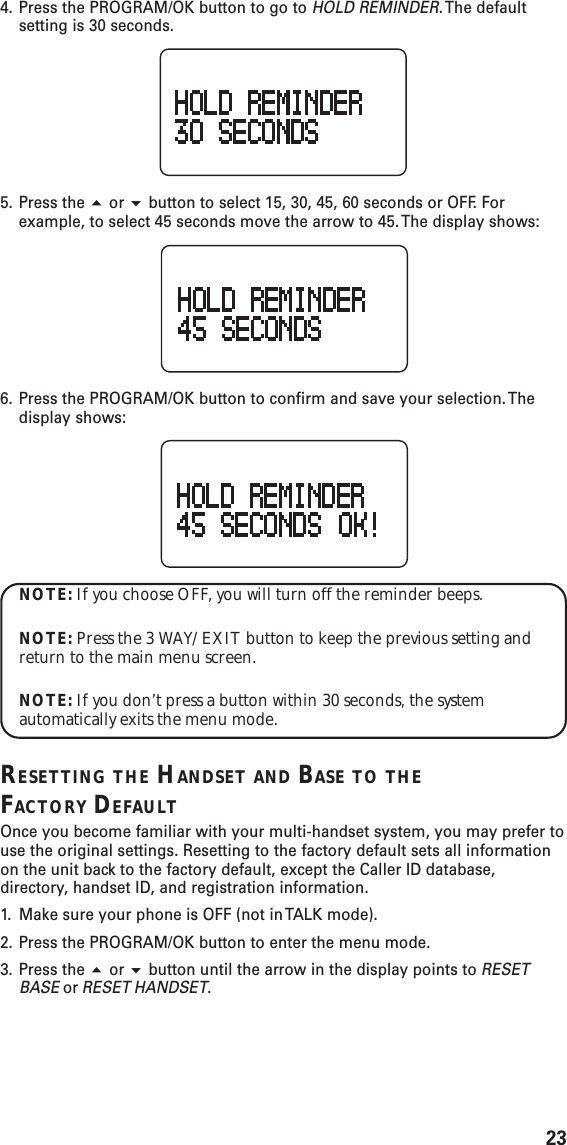
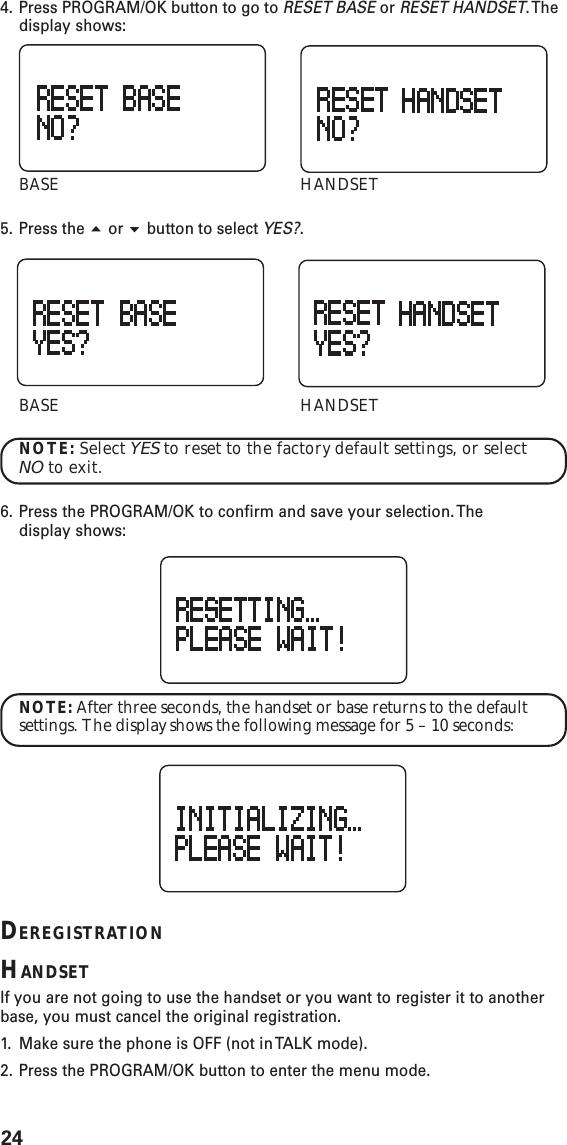
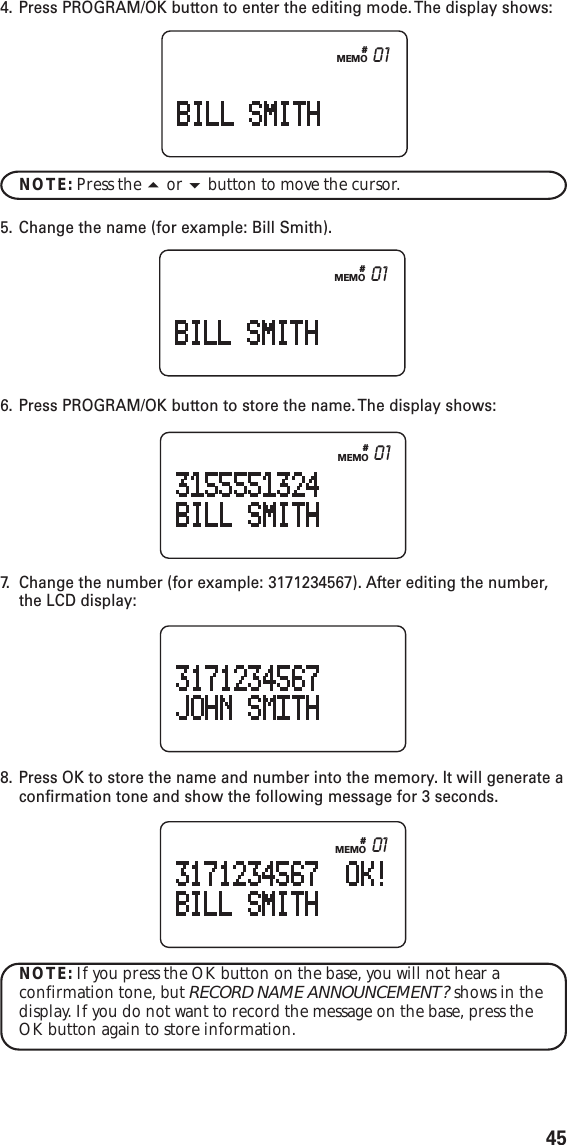
- 1. USERS MANUAL
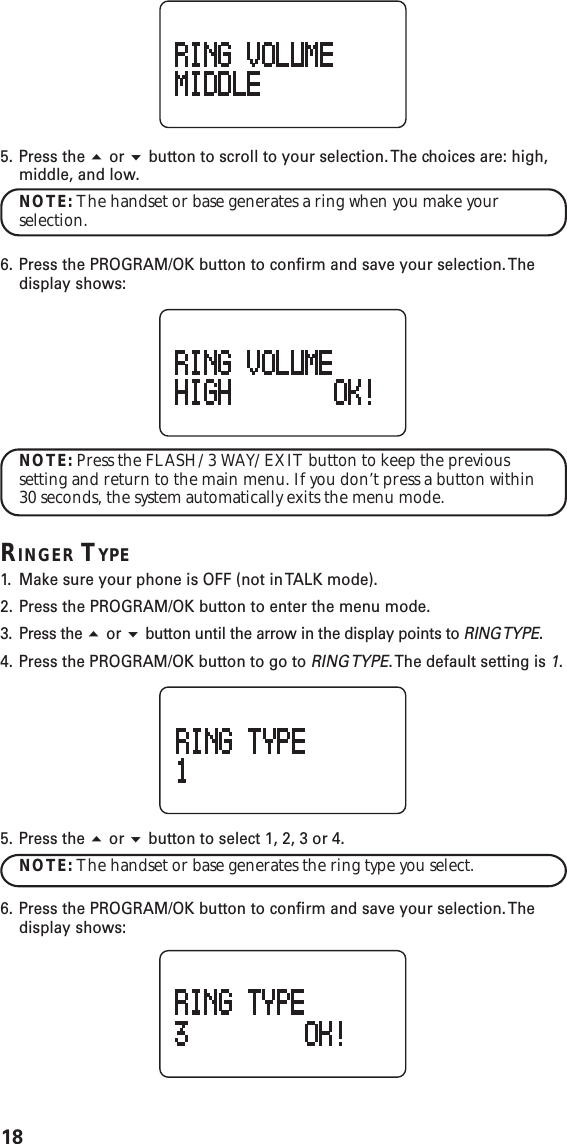
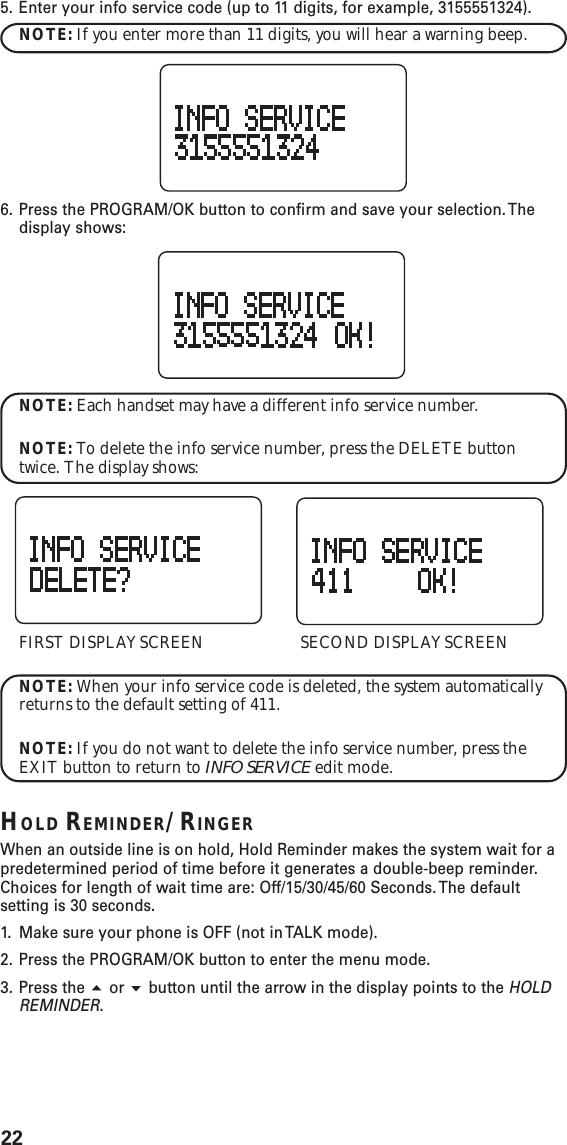
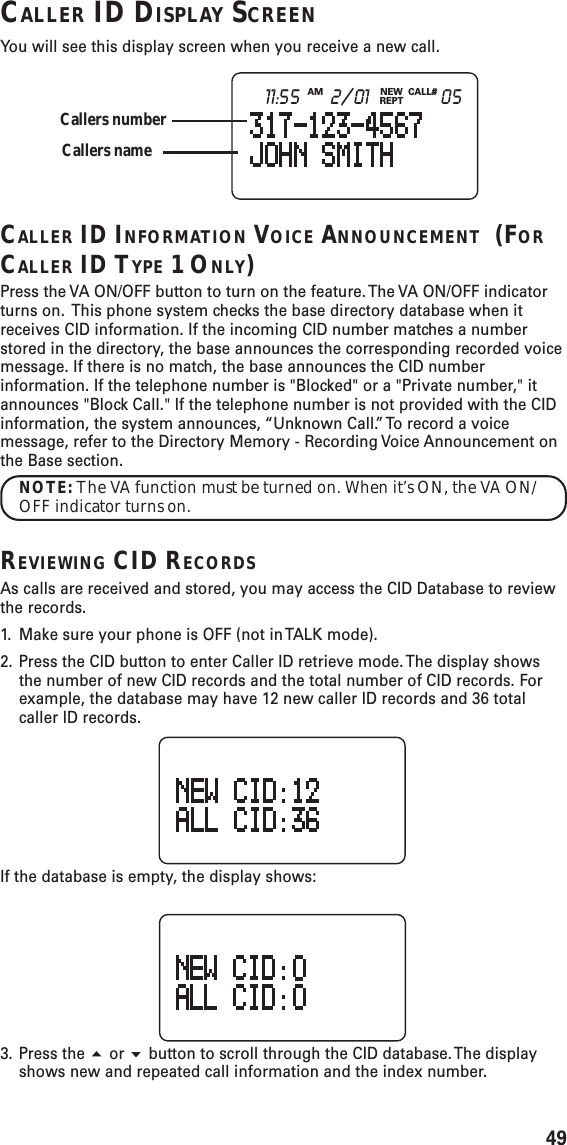
- 2. USERS MANUAL REVISED PAGE 3
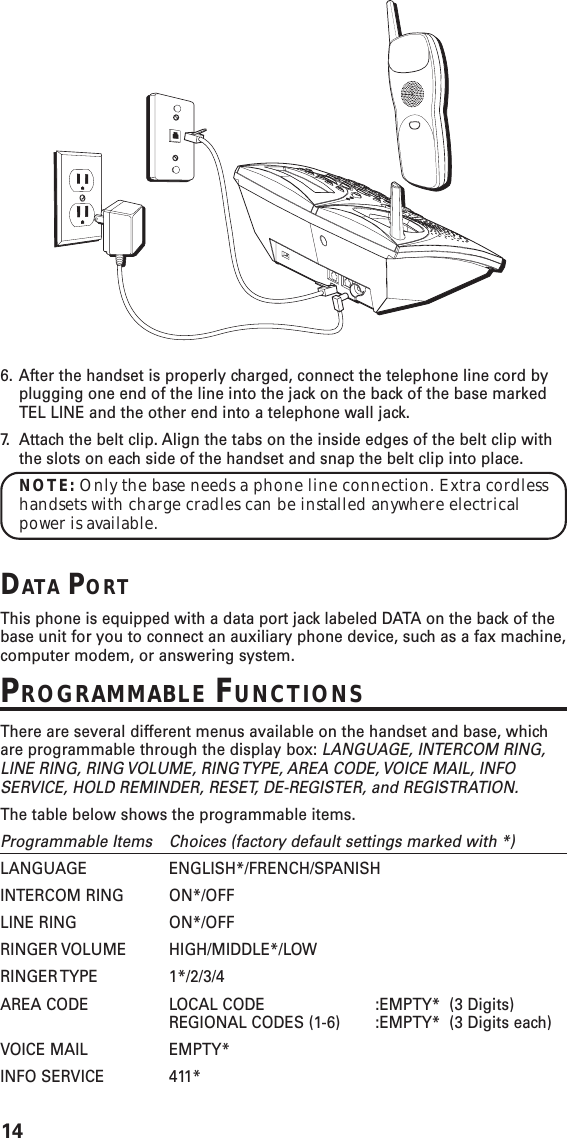
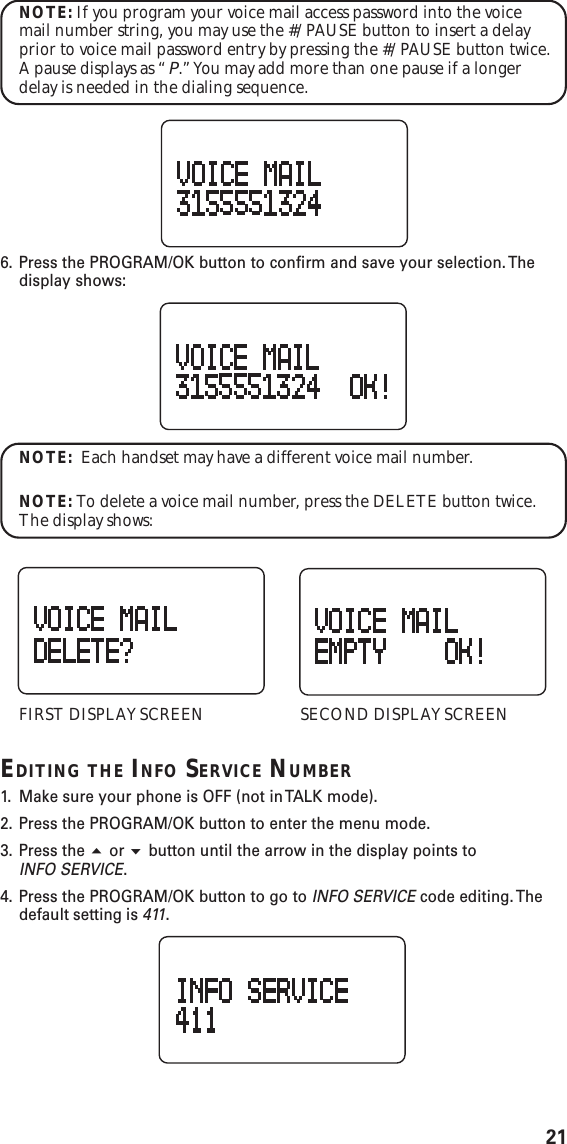
USERS MANUAL