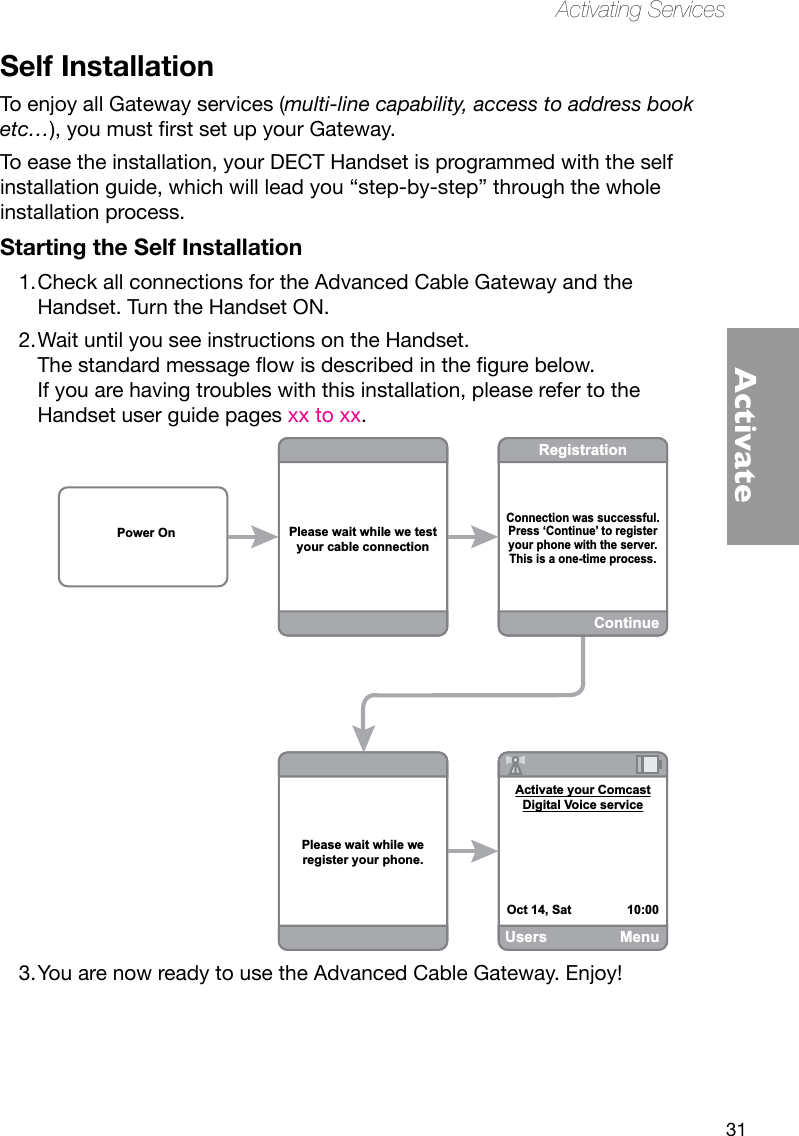
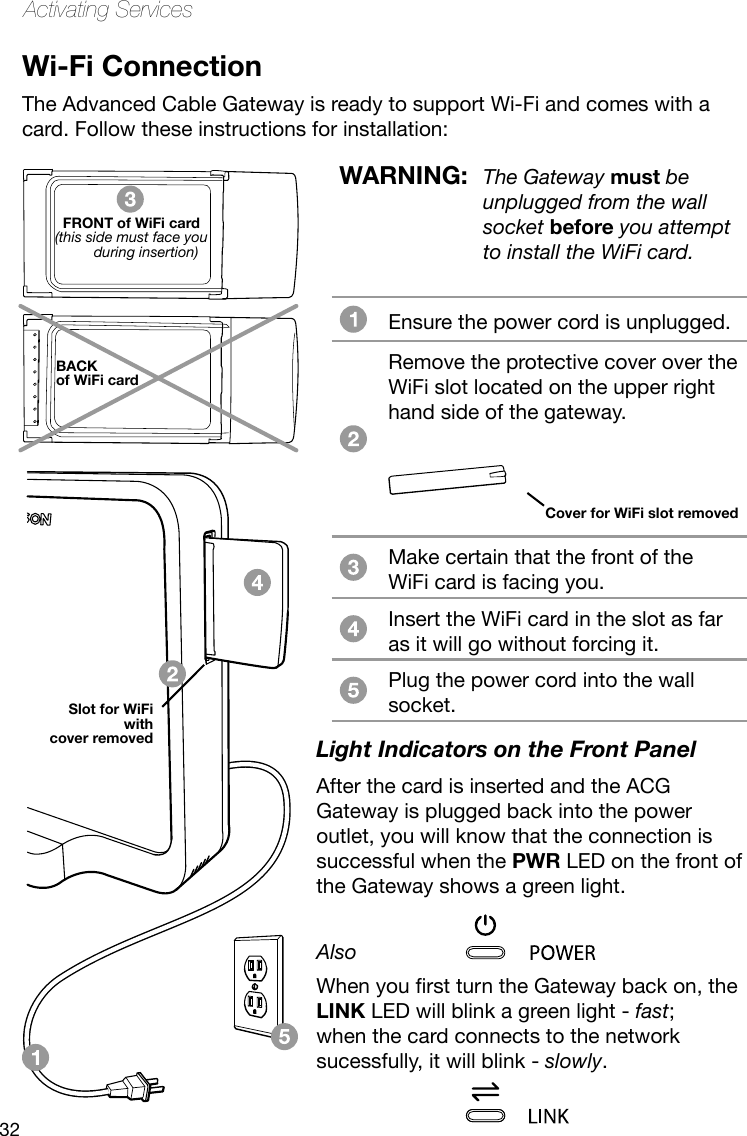
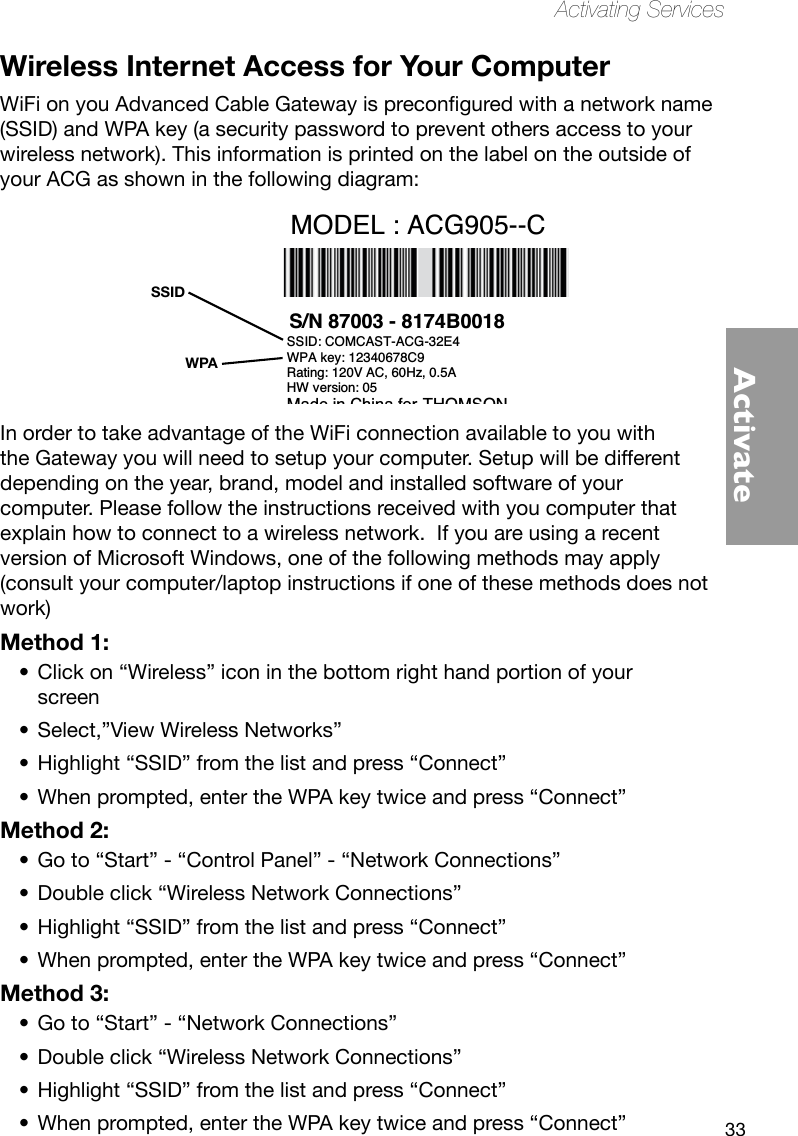
Thomson 2-8358AH 1.9DECT COLOR DISPLAY (128X128), HANDSFREE HANDSET PLUS CHARGER User Manual USERS MANUAL 1
Thomson Inc. 1.9DECT COLOR DISPLAY (128X128), HANDSFREE HANDSET PLUS CHARGER USERS MANUAL 1
Thomson >
Contents
- 1. USERS MANUAL 1
- 2. USERS MANUAL 2
- 3. USERS MANUAL 3
- 4. USERS MANUAL 4
- 5. USERS MANUAL 5
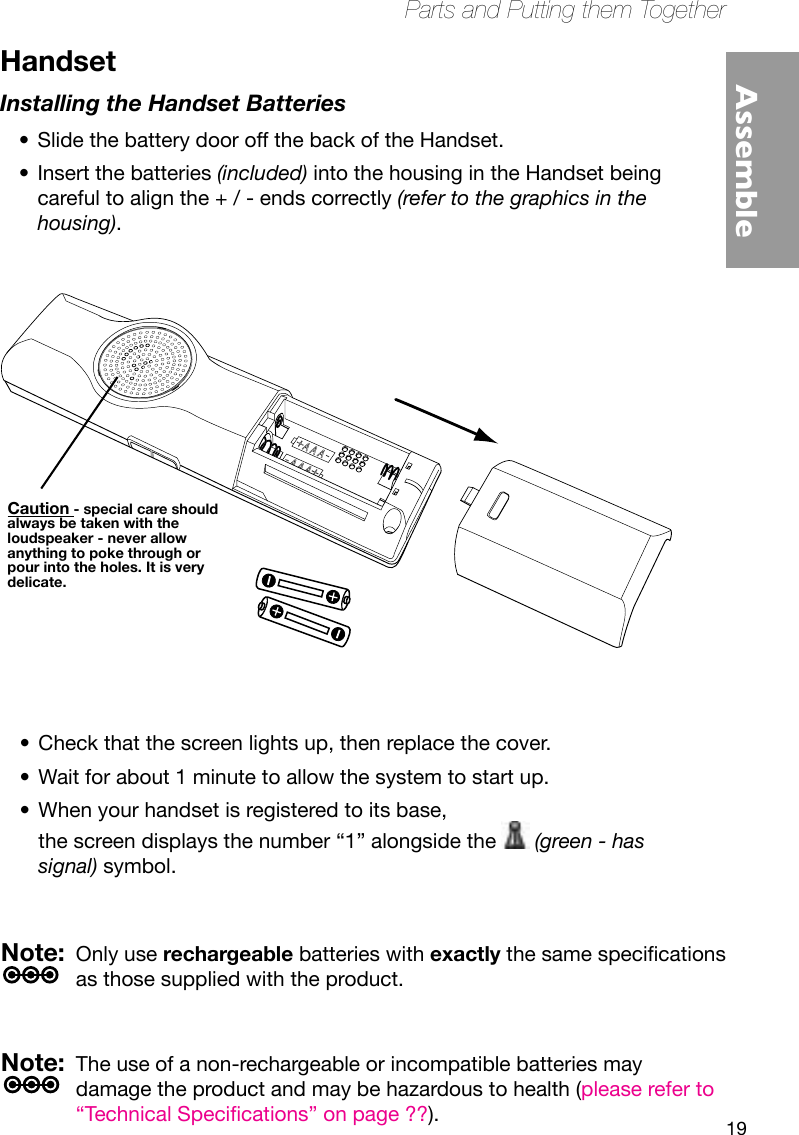
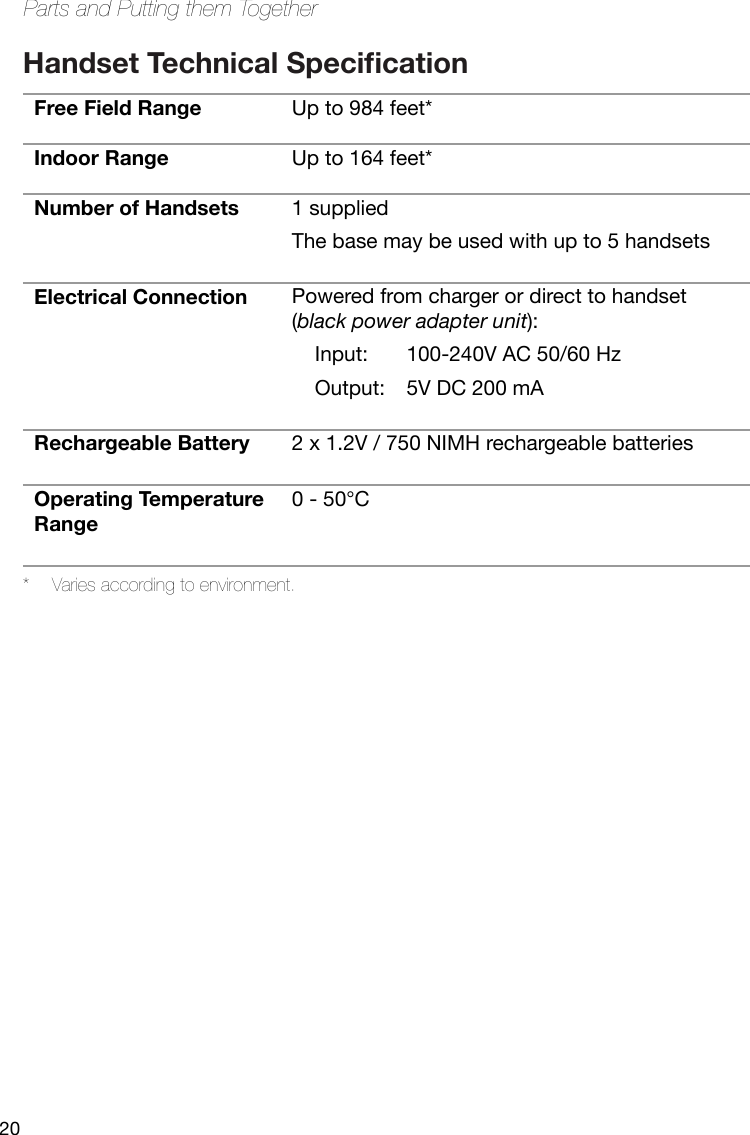
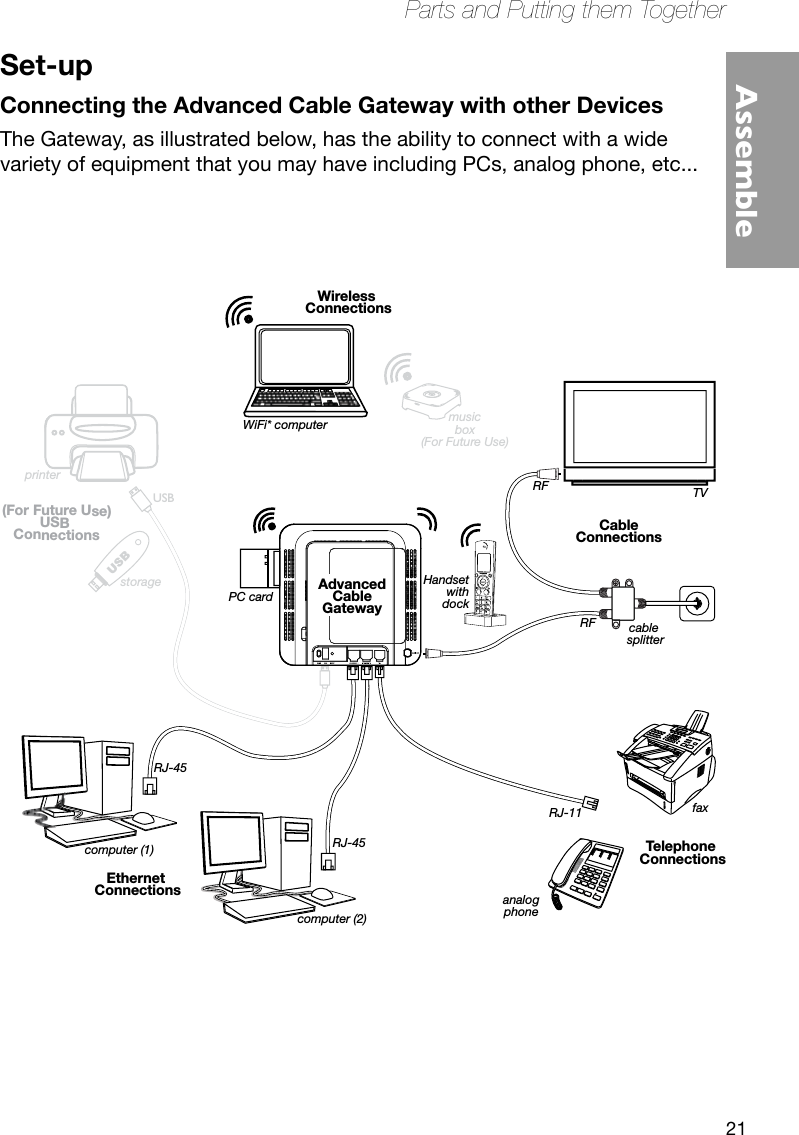
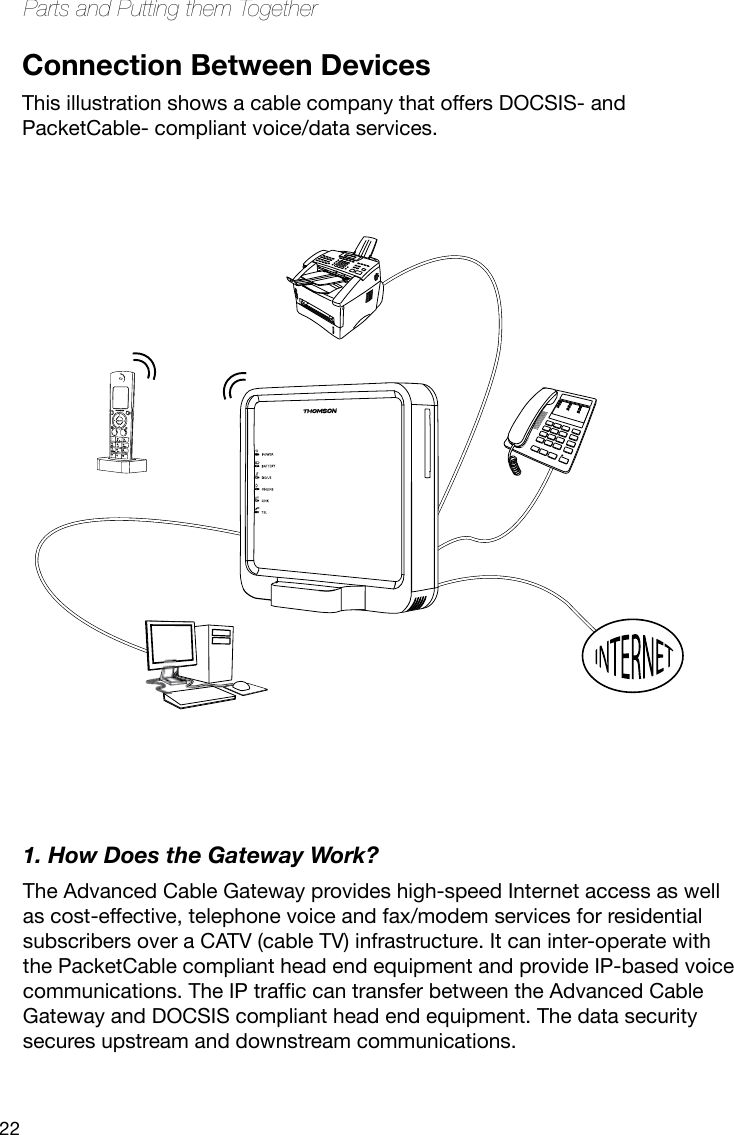
USERS MANUAL 1