Toshiba Fax Machine Dp120F Service Manual DP120F/DP125F OPERATOR'S For Internet Function
2014-12-13
: Toshiba Toshiba-Fax-Machine-Dp120F-Service-Manual-129126 toshiba-fax-machine-dp120f-service-manual-129126 toshiba pdf
Open the PDF directly: View PDF ![]() .
.
Page Count: 121 [warning: Documents this large are best viewed by clicking the View PDF Link!]
- INTERNET FACSIMILE DP120F/DP125F OPERATOR'S MANUAL
- NOTICE TO USERS
- NOTICE TO USERS
- CONTENTS
- INTRODUCTION
- BASIC FUNCTIONS
- SETUP
- LISTS AND REPORTS
- TROUBLESHOOTING
- TECHNICAL WORD REFERENCE

INTERNET FACSIMILE
OPERATOR’S MANUAL

1
Please read through this manual before using the machine. After reading it, be certain to keep it so that you may refer to it whenever necessary.
U. S. A.
WARNING FCC Notice: Part 15
This terminal has been tested and found to comply with the limits for a Class A
digital device, pursuant to Part 15 of the FCC Rules. These limits are designed to
provide reasonable protection against harmful interference when the equipment is
operated in a commercial environment. This equipment generates, and can radiate
radio frequency energy and, if not installed and used in accordance with this guide,
may cause harmful interference to radio communications. Operation of this terminal
in a residential area is likely to cause harmful interferences in which case the user
will be required to correct the interference at his/her own expense.
WARNING FCC Notice: Part 68
This equipment complies with Part 68 of the FCC Rules. On the rear of this
equipment is a label that contains, among other information, the FCC Registration
Number and ringer equivalence number (REN) for this equipment. If requested, this
information must be provided to the telephone company.
The REN is used to determine the quantity of devices that may be connected to the
telephone line. Excessive REN’s on the telephone line may result in the devices not
ringing in response to an incoming call. In most, but not all areas, the sum of the
REN’s should not exceed five (5.0). To be certain of the number of devices that may
be connected to the line, as determined by the total REN’s contact the telephone
company to determine the maximum REN for the calling area.
If your facsimile machine causes harm to the telephone network, the telephone com-
pany will notify you in advance that temporary discontinuance of service may be
required. But if advance notice is not practical, you will be notified as soon as
possible, also, you will be advised of your right to file a complaint with the FCC if you
believe it is necessary.
The telephone company may make changes in its facilities, equipment, operations, or
procedures that could affect the operation of the equipment. If this happens, the
telephone company will provide advance notice in order for you to make the
necessary modifications in order to maintain uninterrupted service.
If you experience trouble with this facsimile machine, please contact
TOSHIBA AMERICA BUSINESS SOLUTIONS, INC.
Electronic Imaging Division
2 Musick, Irvine, CA 92618-1631
NOTICE TO USERS
for repair/warranty information. If the trouble is causing harm to the telephone
network, the telephone company may request you remove the equipment from the
network, until the problem is resolved.
The equipment may not used on coin service provided by the telephone network,
connection to Party Line Service is subject to state tariffs. (Contact the state public
utility commission, or corporation commission for information.)
This device is equipped with a USOC RJ11C connector.
THE TELEPHONE CONSUMER PROTECTION ACT: The Telephone Consumer
Protection Act of 1991 makes it unlawful for any person to use a computer or other
electronic device to send any message via a telephone fax machine unless such a
message clearly contains in a margin at the top or bottom of each transmitted page or
on the first page of the transmission, the date and time it is sent and an identification of
the business or other entity, or other individual sending the message and the
telephone number of the sending machine or such business, other entity, or individual.
In order to program this information into your fax machine, you should complete the
setup procedures listed for station ID number and name on pages 42 and 43 in this
manual.
This equipment is hearing aid compatible.

2
Canada
NOTICE: The Industry Canada label identifies certified equipment. This certi-
fication means that the equipment meets telecommunications network protective,
operational and safety requirements as prescribed in the appropriate Terminal
Equipment Technical Requirements document(s). The Department does not guaran-
tee the equipment will operate to the user's satisfaction.
Before installing this equipment, users should ensure that it is permissible to
connect a facsimile to the facilities of their local telecommunications company.
The equipment must also be installed using an acceptable method of connection.
The customer should be aware that compliance with the above conditions may not
prevent degradation of service in some situations.
Repairs to certified equipment should be coordinated by a representative designated
by the supplier. Any repairs or alterations made by the user to this equipment, or
equipment malfunctions, may give the telecommunications company cause to request
the user to disconnect the equipment.
Users should ensure for their own protection that the electrical ground connections of
the power utility, telephone lines and internal metallic water pipe system, if present,
are connected together. This precaution may be particularly important in rural areas.
CAUTION: Users should not attempt to make such connections themselves, but
should contact the appropriate electric inspection authority, or electrician, as appropri-
ate.
The Ringer Equivalence Number of your facsimile is 0.3
NOTICE: The Ringer Equivalence Number (REN) assigned to each terminal
device provides an indication of the maximum number of terminals allowed to be
connected to a telephone interface. The termination on an interface may consist of any
combination of devices subject only to the requirement that the sum of the Ringer
Equivalence Numbers of all the devices does not exceed 5.
TOSHIBA OF CANADA LIMITED
Office Product Group
191 McNABB STREET
MARKHAM, ONTARIO L3R 8H2
NOTICE TO USERS
AVIS: L’étiquette d’lndustrie Canada identifie le marériel homologué. Cette étiquette
certifie que le matériel est conforme aux normes de protection, d’exploitation et de
sécurité des réseaux de télécommunications, comme le prescrivent les documents
concernant les exigences techniques relatives au matériel terminal. Le Ministére
n’assure toutefois pas que le matériel fonctionnera à la satisfaction de l’utilisateur.
Avant d’installer ce matériel, l’utilisateur doit s’assurer qu’il est permis de le raccorder
aux installations de l’entreprise locale de télécommunication. Le matériel doit
également être installé en suivant une méthode acceptée de raccordement. L’abonné
ne doit pas oublier qu’il est possible que la conformité aux conditions énoncées ci-
dessus n’empêche pas la dégradation du service dans certaines situations.
Les réparations de matériel homologué doivent être coordonnées par un représentant
désigné par le fournisseur. L’entreprise de télécommunications peut demander à
l’utilisateur de débrancher un appareil à la suite de réparations ou de modifications
effectuées par l’utilisateur ou à cause de mauvais fonctionnement.
Pour sa propre protection, l’utilisateur doit s’assurer que tous les fils de mise à la terre
de la source d’énergie électrique, des lignes téléphoniques et des canalisations d’eau
métalliques, s’il y en a, sont raccordés ensemble. Cette précaution est
particulièrement importante dans les régions rerales.
Avertissement: L’utilisateur ne doit pas tenter de faire ces raccordements luimême; il
doit avoir recours à un service d’inspection des installations électriques, ou à un
électricien, selon le cas.
L’indice d’equivalence de la sonnerie de ce matériel 0.3
AVIS: L’indice d’équivalence de la sonnerie (IES) assigné à chaque dispositif
terminal indique le nombre maximal de terminaux qui peuvent être raccordés à une
interface. La terminaison d’une interface téléphonique peut consister en une
combinaison de quelques dispositifs, à la seule condition que la somme d’indices
d’équivalence de la sonnerie de tous les dispositifs n’excède pas 5.

3
INTRODUCTION
BASIC
FUNCTIONS
SETUP
LIST AND
REPORTS
TROUBLE-
SHOOTING
TECHNICAL WORD
REFRENCE
CONTENTS
NOTICE TO USERS ................................................................ 1
NOTICE TO USERS ................................................................ 2
INTRODUCTION ........................................................... 5
FEATURES.............................................................................. 5
Before Connecting the Machine to Internet ............................................ 6
Internet FAX Transmission Overview..................................................... 7
FACSIMILE UNIT DESCRIPTION ........................................... 9
Rear View ............................................................................................... 9
Operation Panel...................................................................................... 9
BASIC FUNCTIONS.................................................... 10
RECEIVE E-MAIL ................................................................. 10
Automatic Receiving Mode .................................................................. 10
Manual Receiving Mode ....................................................................... 10
Receiving from SMTP Server .............................................................. 10
Output Print Format for Receiving E-mail ............................................ 11
SEND E-MAIL ....................................................................... 13
Sending E-mail by Direct Input ............................................................ 13
Sending E-mail by Searching E-mail Addresses ................................. 16
Sending E-mail by One Touch Dialing .................................................. 20
Sending E-mail by Abbreviated Dialing ................................................ 21
Multi-Key Quick Broadcast Transmission ............................................ 23
AUTOMATIC TELEPHONE DIALING REGISTRATION ........ 25
Abbreviated Dialer Registration ........................................................... 25
Modify/Delete the Abbreviated Dial Number ........................................ 35
One Touch Dialer Registration ............................................................. 37
Modify/Delete the One Touch Key ........................................................ 47
Group Number Registration ................................................................. 49
SETUP......................................................................... 53
SETUP FLOW ....................................................................... 53
TCP/IP CONFIGURATION .................................................... 54
BootP/DHCP Setting ............................................................................ 54
IP Address Setting ............................................................................... 55
Subnetmask Setting ............................................................................. 56
Default Gateway Setting ....................................................................... 57
Host Name Setting ............................................................................... 58
E-MAIL ACCOUNT SETUP .................................................. 59
E-mail Address Setting ........................................................................ 60
Error E-mail Forward Address Setting ................................................. 61
Receive Mode Setting .......................................................................... 62
POP Server Address Setting ............................................................... 63
POP Time Setting................................................................................. 64
POP Login Name Setting ..................................................................... 65
POP Password Setting ......................................................................... 66
SMTP Server Address Setting............................................................. 67
E-MAIL PROPERTIES SETUP ............................................. 68
Print Text Body Setting ......................................................................... 69
Body Page Limit Setting ....................................................................... 70
Send Disposition Setting ...................................................................... 71
Print Header Setting ............................................................................. 72
Print E-mail Error Setting ..................................................................... 73
Print DSN Setting ................................................................................. 74
Print Disposition Setting ...................................................................... 75
Request DSN Setting ........................................................................... 76
Confirmation Timer Setting .................................................................. 77
Set Confirmation Time Setting ............................................................. 78
MSG Size Limit Setting ........................................................................ 79
ONRAMP GATEWAY SETUP ............................................... 80
Setting Up a Relay Box with E-mail Address ....................................... 80
OFFRAMP GATEWAY SETUP ............................................. 85
Offramp Gateway, Offramp Gateway Overview ................................... 85
How to send a document using Offramp Gateway ............................... 86
Setting Up for Offramp Gateway .......................................................... 86
E-mail to FAX Gateway Setting ............................................................ 87
Gateway Print Setting .......................................................................... 88
Gateway Security Setting ..................................................................... 89
ADDITIONAL FUNCTIONS SETUP ...................................... 90
FTP Server Login Name Setting .......................................................... 90
FTP Server Login Password Setting .................................................... 91
LAN FAX Setting .................................................................................. 92
IPX/SPX Protocol Setting..................................................................... 93
Frame Type Setting .............................................................................. 94

4
LIST OF REPORTS .................................................. 95
E-MAIL NOTIFICATION REPORTS PRINT FORMAT ......... 95
DSN Report .......................................................................................... 95
MDN Report .......................................................................................... 96
Alert Report .......................................................................................... 97
LIST AND REPORT PRINT FORMAT
AND PRINTING PROCEDURE ........................................... 98
Transmission/Reception Journal (Communication Journal) .................... 98
Memory Transmission Report ................................................................ 99
Reservation List .................................................................................. 100
Multi-Address Transmission Report ..................................................... 101
Preset Dialing Number Lists ................................................................ 102
Aphabetical Sort List ..................................................................... 102
Abbreviated Dial Number List ......................................................... 103
Group Number List ......................................................................... 104
One Touch Number List .................................................................. 105
Function List ....................................................................................... 106
Menu List ............................................................................................ 108
Power Failure List ................................................................................ 110
TROUBLESHOOTING............................................ 111
Error Message .................................................................................... 111
Error Code Printed on Report .............................................................. 115
TECHNICAL WORD REFERENCE ....................... 117

5
The Internet Fax Kit enables your machine to transmit the document through the
Internet or Intranet. This enables the machine to transmit the document as an E-mail
between other Internet Fax machines and computers.
NOTE:
• The machine must be connected to the E-mail server in the local area
network to use the Internet Fax functions. Ensure that your E-mail server is
connected with the machine in the local area network.
• The parallel port is disabled when the Internet Fax kit is installed in the
machine.
This machine can do the following after connecting to the Internet:
Send a document as an E-mail through the Internet:
This machine can send a document as an E-mail through the Internet. The
scanned image is transferred to the TIFF-FX images and sent as attached file of an E-
mail.
Automatic receiving and manual receiving of an E-mail:
This machine can automatically or manually check the email server to see whether an
E-mail has been delivered. If an E-mail has been received, the machine will print out
the E-mail.
73 one touch key to E-mail:
The remote party’s E-mail address data can be registered to a one touch key. E-
mail options can be registered for each address.
300 abbreviated dial numbers to E-mail:
E-mail addresses can be assigned to 300 abbreviated dial numbers in the range
from No. 001 to 999.
Multi-address transmission to E-mail:
Transmissions of the same document to multiple E-mail addresses (up to 373
addresses) are possible using one operation sequence, in which preset abbreviated
dial numbers (300), and one touch dial keys (73) can be used. When the multi-key
is specified, key pad dialing of up to 1000 digits, or 100 locations, is also possible.
Relay transmission to E-mail (Onramp Gateway Transmission):
The DP120F/DP125F can serve as a relay station in relay transmission transac-
tions to E-mail address end stations.
INTRODUCTION - FEATURES
Offramp Gateway Transmission:
The DP120F/DP125F can be used as a Hub Station to forward E-mails from your
client computer or Internet Fax machine to the any facsimiles through the public
switched telephone network.
Error E-mail Transmission:
E-mails that cannot be printed by the machine can be forwarded to another E-mail
address.
Supporting DSN (Delivery Status Notification:)
Transmission result is retreived from received DSN message and stored into Activity
Report as a transmission report. This machine automatically print the DSN message.
Supporting MDN (Message Disposition Notification:)
An MDN request is added in the mail header of E-mails. If the machine receives the
image data which exceeds the capability of this machine, the machine responds with
a failure in the MDN message back to the original sender.
Additional Functions:
Enables users to configure the FTP (File Transfer Protocol) login name and the
password for TOSHIBA Viewer, the server address of the ImageVision2000/
SmartLink, and frame type for the Novell communication.
6
Before Connecting the Machine to Internet
Before connecting to the network, read this section to understand the Internet Fax
functions.
POP and SMTP
The available functions depend on whether this machine is setup to use the POP or
SMTP for retrieving E-mail from a mail server.
POP (Post Office Protocol) and SMTP (Simple Mail Transfer Protocol):
“SMTP” is a server protocol for sending E-mail messages between servers.
Usually the E-mail systems that transfer E-mails over the Internet use SMTP to
send messages from one server to another. Then the E-mail message can be
retrieved with an E-mail client using either “POP” or “IMAP”. “POP” is a protocol
used to retrieve E-mail from a mail server.
When this machine uses POP for the Receive Mode:
This machine works as a POP client. Similar to most e-mail applications, this
machine uses POP for receiving an E-mail message and SMTP for sending an
E-mail message.
When this machine uses SMTP for the Receive Mode:
This machine works as one of the mail servers. The machine can transfer an E-
mail message in the SMTP transmission.
The following table shows the available functions according to the type of the
protocols set for the Receive Mode.
If the use of the Offramp Gateway function is not necessary, it is recommended
that the Receive Mode is set to “POP” because some settings will be required to be
set on the mail server if the Receive Mode is set to “SMTP”. For more information
about the Offramp Gateway function, see “OFFRAMP GATEWAY SETUP” on page
85.
Precaution for Internet Transmission
Transmissions using the Internet Fax function are the same as E-mail transmissions.
Before you start to use the Internet Fax function, it is recommended that you read this
section and understand the precautions for Internet Transmission.
• The Internet Fax sends a document to the email server of Internet and it does not
send via the PSTN alike regular facsimile transmissions.
• An error mail is sent back from the mail server when the E-mail document fails to
be forwarded to the recipient.
• An error mail is sometimes not sent back even if the E-mail has failed.
• Internet transmission has low security. It is recommended that you use regular
facsimile transmission when a contidential document is sent.
• It may take a considerable amount of time for the recipient to receive the document
because of the line traffic in the Internet.
• If the document being transmitted has a large amount of data it may not be
successfully sent due to the configuration of the E-mail Server.
Confirmed E-mail Server
The following table shows the list of E-mail servers supported with the Internet Fax kit.
Fucntions Receive Mode
POP SMTP
Send a document as an E-mail Yes Yes
Automatic receiving of an E-mail Yes Yes
Manual receiving of an E-mail Yes No
One Touch Keys to E-mail Yes Yes
Abbreviated Dial Numbers to E-mail Yes Yes
Multi-address transmission to E-mail Yes Yes
Relay Transmission to E-mail (Onramp Gateway) Yes Yes
Offramp Gateway No Yes
Error E-mail Transmission Yes Yes
* Products names in this manual are the trademarks or registered trademarks of their respective companies.
NOTE:
The mail server listed above may, or may not be used depending on your environ-
ment.
Server Name Version
1 Sendmail 8.9.1
Qpopper 3.0.2
2 Sendmail 8.9.3
Qpopper 3.0.2
3 Microsoft Exchange 5.5
4 Qmail 1.03
5 LotusDomino 5.0.1a(Intl)
7
Internet Fax Transmission Overview
The following is an overview of the various transmissions that can be performed using
the Internet Fax function.
Internet Fax to Internet Fax
The machine can send a document to another Internet Fax machine through the
Internet or Intranet. The document is sent as an E-mail to the Internet Fax
machine.
Internet Fax to/from Client Computers
The machine can send a document to client computers through the Internet or
Intranet. The client computers can send the E-mail to the machine as well.
NOTE:
• The client computer receives TIFF-FX images when the machine sends a
document using the Internet Fax function.
• The machine can only print out text files and TIFF-FX images. When sending
E-mail from the client computer to this machine using the E-mail application,
files other than text or TIFF-FX images cannot be sent.
8
Onramp Gateway Transmission
Using the Internet Fax function, E-mail addresses can be assigned to the ITU-T
Mailbox in this machine. Therefore, ITU-T F-code compliant facsimiles can send
documents to the ITU-T Mailbox in this machine and this machine can forward
the received document to E-mail recipients assigned to the Mailbox using the
relay function.
➤P80 ONRAMP GATEWAY SETUP
NOTE:
• Documents sent as an Internet Fax will be received as a TIFF-FX image on the
client computer.
Offramp Gateway Transmission
The machine can forward received E-mail documents to any facsimile through
the public telephone line using Offramp Gateway transmission. If another
Internet Fax machine or client computer sends a document to the Internet Fax
machine through the Internet or Intranet, then the Internet Fax machine can for-
ward the document to another facsimile through the public switched telephone
network.
➤P85 OFFRAMP GATEWAY SETUP
NOTE:
• To operate in this transmission, the machine must be set up to enable SMTP
transmission. It is also required to configure the some settings on the mail
server of your network.
• Documents sent as an Internet Fax will be received as a TIFF-FX image on the
client computer.
Internet Fax Transmission Overview - continued
9
- FACSIMILE UNIT DESCRIPTION
Rear View
10BASE-T/100BASE-TX I/F
Connection for the 10BASE-T
or 100BASE-TX cable to an
Ethernet network.
Amber Indicator
The indicator that blinks
while data is being
communicated.
Green Indicator
The indicator that lights while
the network interface card is
properly connected to the
network.
Operation Panel
CHECK E-MAIL
Used to receive an E-mail
immediately.
E-MAIL ADDRESS Key
Used to program E-mail addresses when
programming One Touch Key or
Abbreviated Numbers. By pressing this
key prior to a transmission, an E-mail
address can be entered for an Internet Fax
transmission.
10
BASIC FUNCTIONS - RECEIVE E-MAIL
The methods to receive an E-mail vary according to the type of
protocols used for receiving an E-mail.
When “POP” is selected for the Receive Mode, the following receiv-
ing methods are available:
•Auto Receive
The machine accesses the E-mail server at specified intervals to
check whether any E-mail has been delivered. If an E-mail has
been delivered, the machine will automatically retrieve and print
out the E-mail.
•Manual Receive
When the CHECK E-MAIL button is pressed, the machine manu-
ally accesses the E-mail server to check whether any E-mail has
been delivered. If an E-mail has been delivered, the machine
receives and prints out the E-mail.
See “Receiving from SMTP Server” for SMTP transmission.
Printing of a received E-mail depends on the following settings:
• Print Text Body (See page 69)
• Body Page Limit (See page 70)
• Print Header (See page 72)
• Print E-mail Error (See page 73)
Users can set up these items to specify how the machine should
perform when receiving an E-mail.
Available Format:
The machine can only print the TIFF-FX images and the text
data. If the received E-mail contains files that are not the
TIFF-FX images or text data, the machine will display an error
message on the LCD Display.
However, the machine is able to print the E-mail except the parts
in unknown format, or forward this E-mail to another E-mail ad-
dress.
If you want to print the E-mail except the parts in unknown format,
set up “Print E-mail Error” (See page 73).
If you want to forward the E-mail to another E-mail address when
an error occurs, set up “Error E-mail Forward Address” (See
page 61).
To automatically receive E-
mails from the E-mail server,
set up the “POP Time”.
See the section “POP Time
Setting” at “SETUP - E-MAIL
ACCOUNT SETUP” (Page 64).
To manually receive E-mails
from the E-mail server, press:
CHECK E-MAIL
NOW SEARCHING
>
STOP TO CANCEL
“>” mark moves from left to
right. This mark continually
moves until searching is com-
pleted.
When the E-mail has been re-
ceived, the following screen ap-
pears and starts printing.
MAY-12-00 FRI11:59AM
RESIDUAL MEMORY 99%
PRINTING
When no E-mail has been re-
ceived, the following screen
apears.
MAY-12-00 FRI11:59AM
NO EXIST E-MAIL
If any other error messages are
displayed, see “TROUBLE-
SHOOTING.”
Automatic
Receiving Mode
Manual
Receiving Mode
Once an E-mail to this machine
is delivered through the Internet,
this machine will automatically
retrieve E-mail from the SMTP
server using the SMTP trans-
mission.
When the Receive Mode is set
to SMTP, the sub-domain for
this machine must be assigned
at the SMTP server to receive
E-mail or enable the Offramp
Gateway transmission. In this
case, this machine works as
one of the E-mail servers.
When the SMTP server re-
ceives an E-mail intended for
the sub-domain of this machine,
the SMTP server will transfer
the E-mail to this machine using
the SMTP transmission. If an E-
mail is sent to the E-mail adress
of this Internet Fax machine, it
will them print the E-mail out.
NOTE:
When the Receive Mode is
set to SMTP. machine can-
not retrieve an E-mail from
the mail server manually.
Please refer to “OFFRAMP
GATEWAY SETUP” on page
85 for further details.
Receiving from
SMTP Server

11
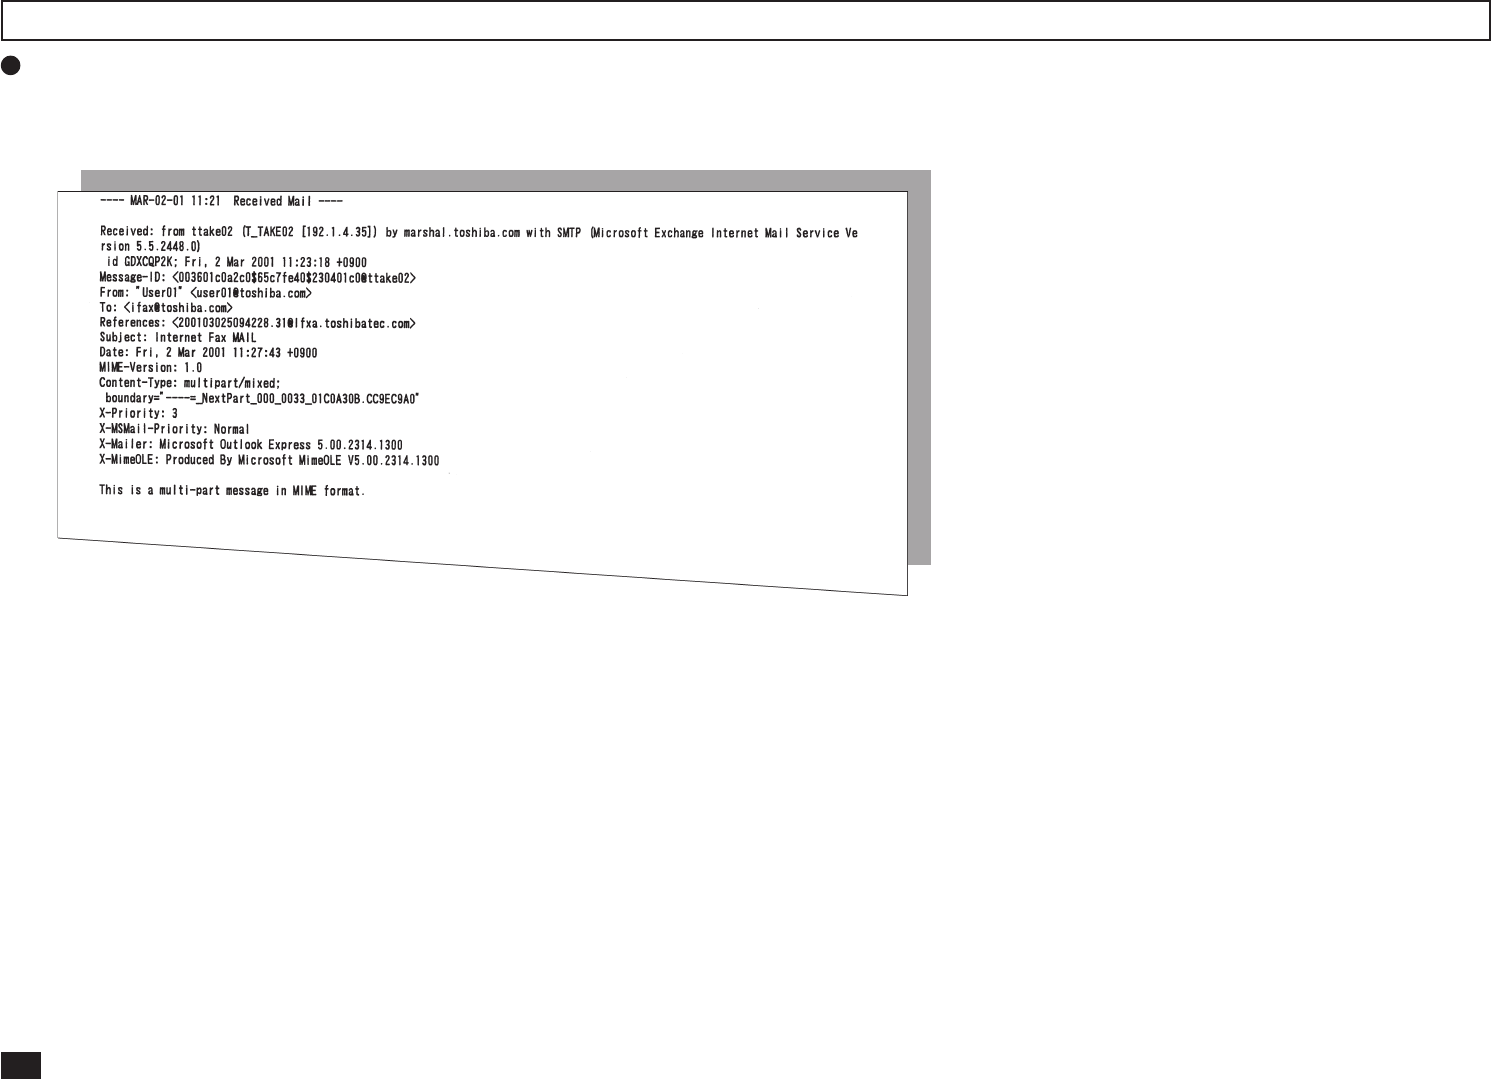
Output Print Format for Receiving E-mail
Text Body Output
This output is printed when the Print Text Body is set to ON or the E-mail has only the text body section and no attached image files.
➤P69 SETUP - E-MAIL PROPERTIES SETUP - Print Text Body Setting
Sender name and address
Recipients Lists
Date and time of the E-mail
message was sent
Subject of the E-mail
message
Body of the message
When an Internet Fax message
(or E-mail message) is received,
the following output may be
printed in addition to the origi-
nals (scanned data).
• Text Body
• Header
The Text Body and the Header
of the received message is
printed according to the set-
tings of the E-mail properties
on your machine.
12
Header Output
This output is printed when the Print Header is set to ON.
➤P72 SETUP - E-MAIL PROPERTIES SETUP - Print Header Setting
Output Print Format for Receiving E-mail - continued
13
- SEND E-MAIL
The machine can send an E-mail using the following methods.
•Direct Input
Input the E-mail address directly to send a document.
•Search E-mail Address
Search an E-mail address from the local phonebook and histories to send a document.
•One Touch Dialing
Send a document to the E-mail address that is assigned to a One Touch key.
•Abbreviated Dialing
Send a document to the E-mail address that is assigned to an Abbreviated Dial Number.
•Group Broadcast Transmission
Send a document to E-mail addresses and fax numbers that are assigned to Group Number. The E-
mail addresses and the fax numbers can be assigned to a Group Number, so that this feature allows
you to send a document to multiple remote parties that inclued both E-mail addresses and fax
numbers in a single operation. To operate this dial method, refer to the DP120F/DP125F Operator’s
Manual.
•Multi-key Quick Broadcast Transmission
This Multi-key Quick Broadcast Transmission allows you to send a document to a combination of
the following numbers without pre-programming a group. By using this method, you can send a
document to both E-mail addresses and fax numbers in a single operation.
• Abbreviated Dial Numbers
• One Touch Dial Keys
• Search E-mail Address
• Direct Input
When the document is sent to an E-mail address, the document is converted to TIFF-FX images.
E-mail Notification Reports printed after sending an E-mail
•DSN Report is printed when “Print DSN” is set to ON and the mail server successfully replied
to your DSN request. See “DSN Report” on page 95 for a sample and descriptions.
•MDN Report is printed when “Print Disposition” is set to ON and the recipient successfully
received your mail to reply to your MDN request. See “MDN Report” on page 96 for a sample
and descriptions.
•Alert Report is printed when “Confirm. Timer” is set to ON and the machine cannot success-
fully receive the MDN requested from a recipient. See “Alert Report” on page 97 for a sample and
descriptions.
These are printed according to the E-mail properties and the environments of the recipients. For futher
details of related E-mail properties settings, see “E-MAIL PROPERTIES SETUP” on page 68.
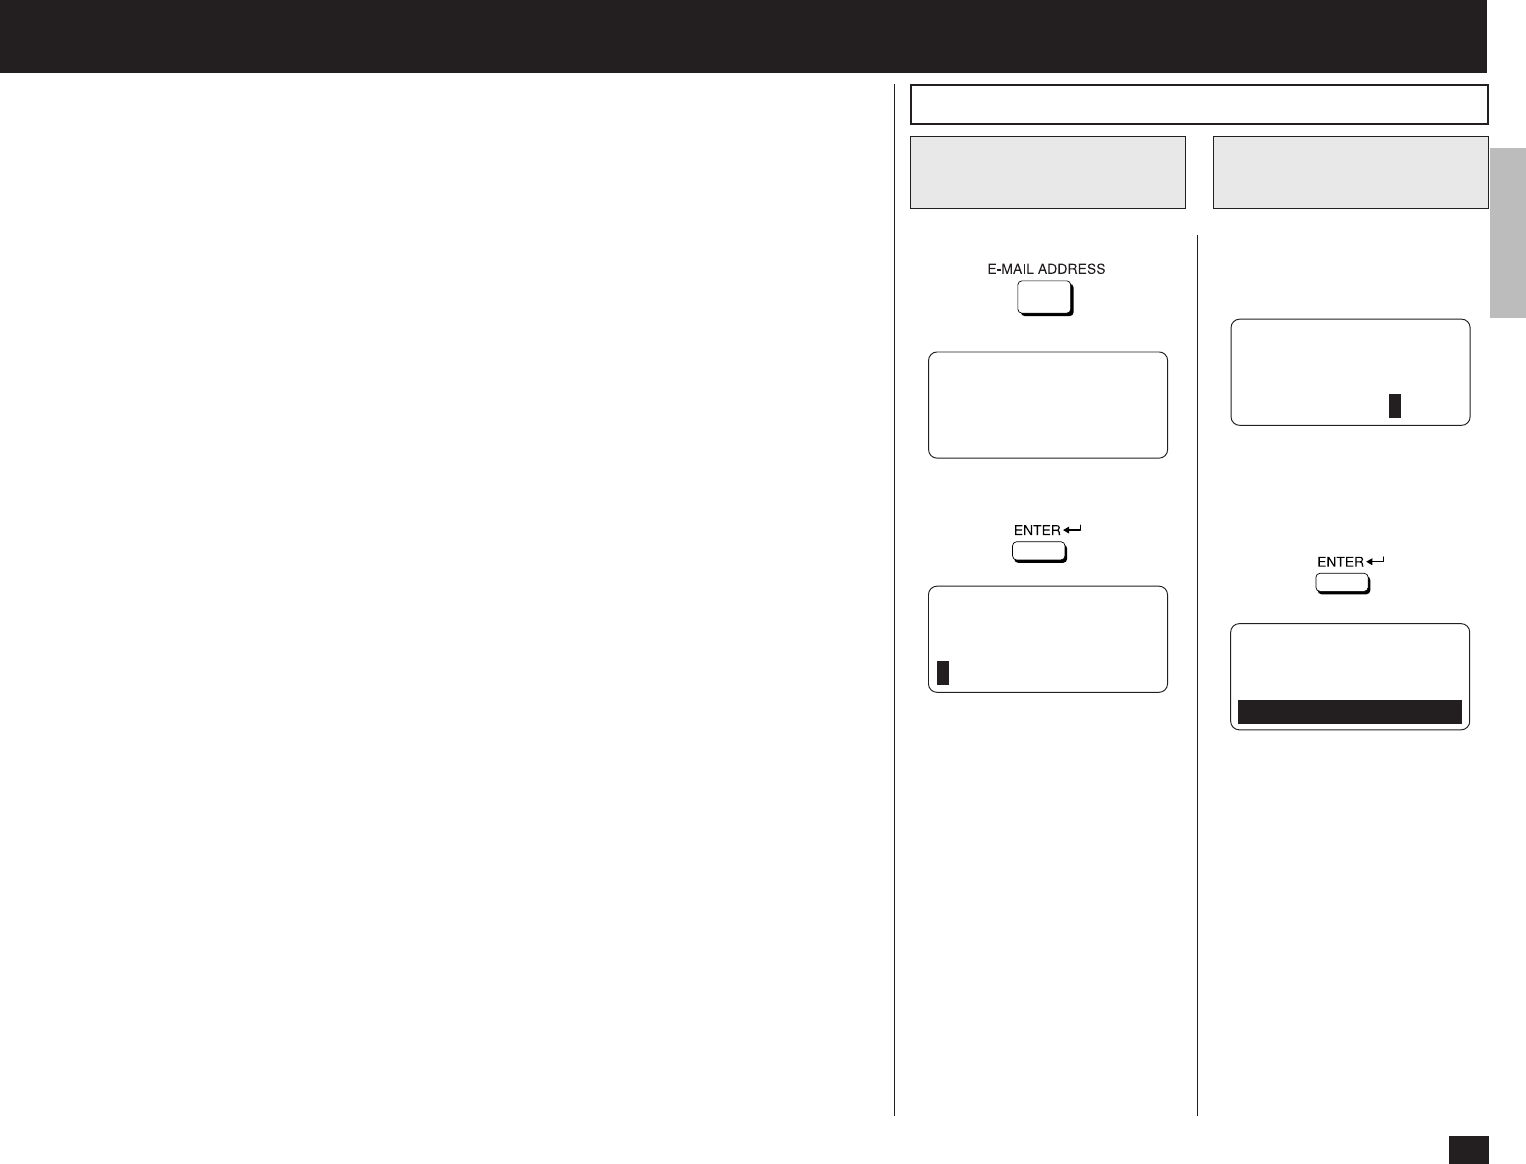
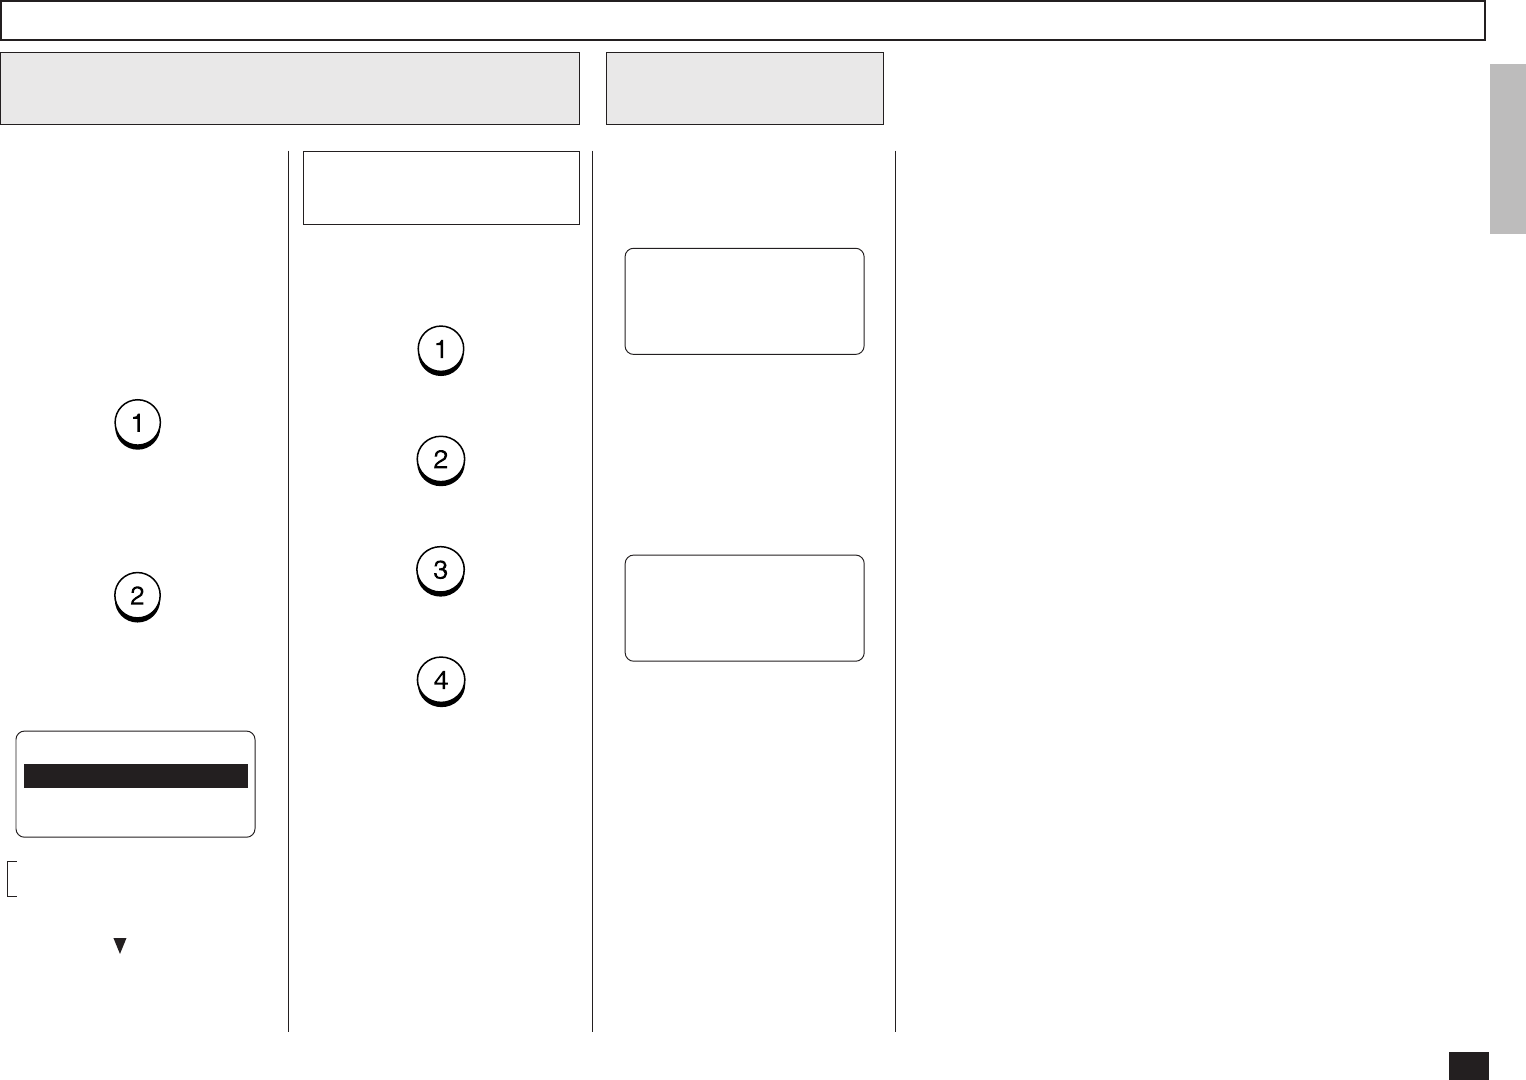
Press:
Display INTERNET-
FAX SEND Menu
1
Enter the E-mail ad-
dress
2
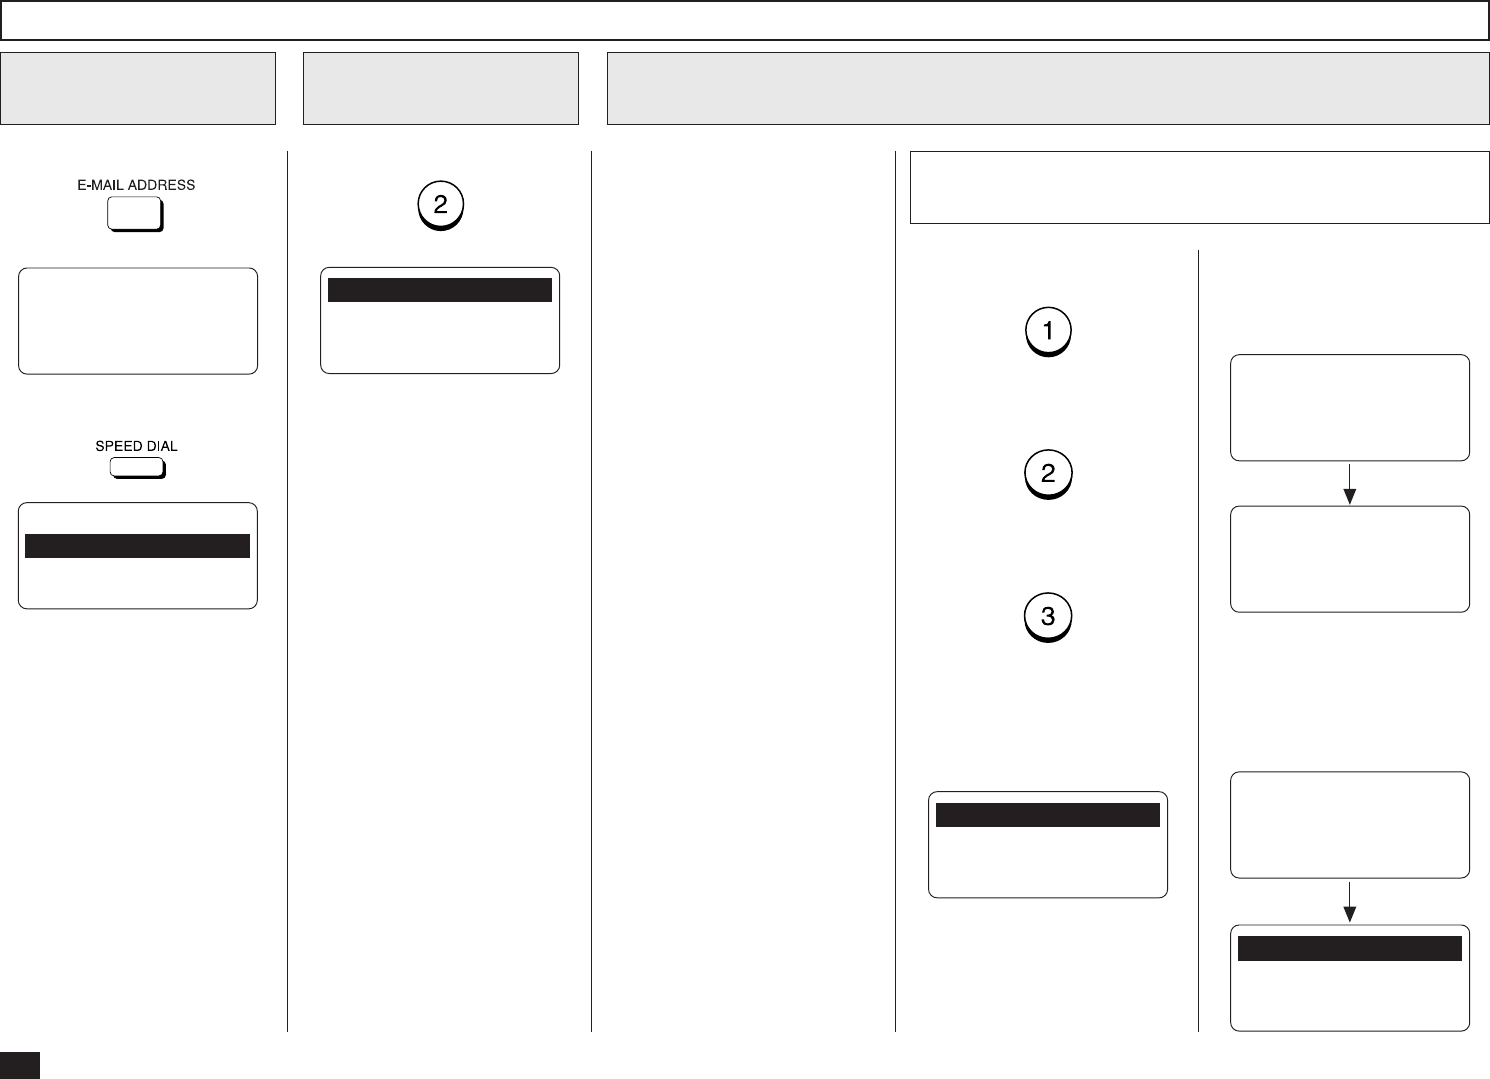
Sending E-mail by Direct Input
PRESS SPEED DIAL,
ONE TOUCH KEY OR
ENTER TO ENTER
E-MAIL ADDRESS
Then press:
INTERNET-FAX SEND
E-MAIL ADDRESS:
INTERNET-FAX SEND
E-MAIL ADDRESS:
xx@toshiba.com
Enter the E-mail address using
the Keyboard and the Dial Key-
pad.
DO YOU KNOW RECEIVER
RESOLUTION?
1.YES
2.NO
When the E-mail address is
displayed correctly on the LCD
display, press:
14
Sending E-mail by Direct Input - continued
If you know the resolution ca-
pability of the recipient ma-
chine, press:
If you do not know the resolu-
tion capability of the recipient
machine, press:
PRESS MODE KEY
ON CONTROL PANEL
THEN PRESS ENTER
When “1.YES” is selected, the
following screen appears. Con-
tinue to Step 3a.
When “2.NO” is selected, the
following screen appears. Skip
to Step 5.
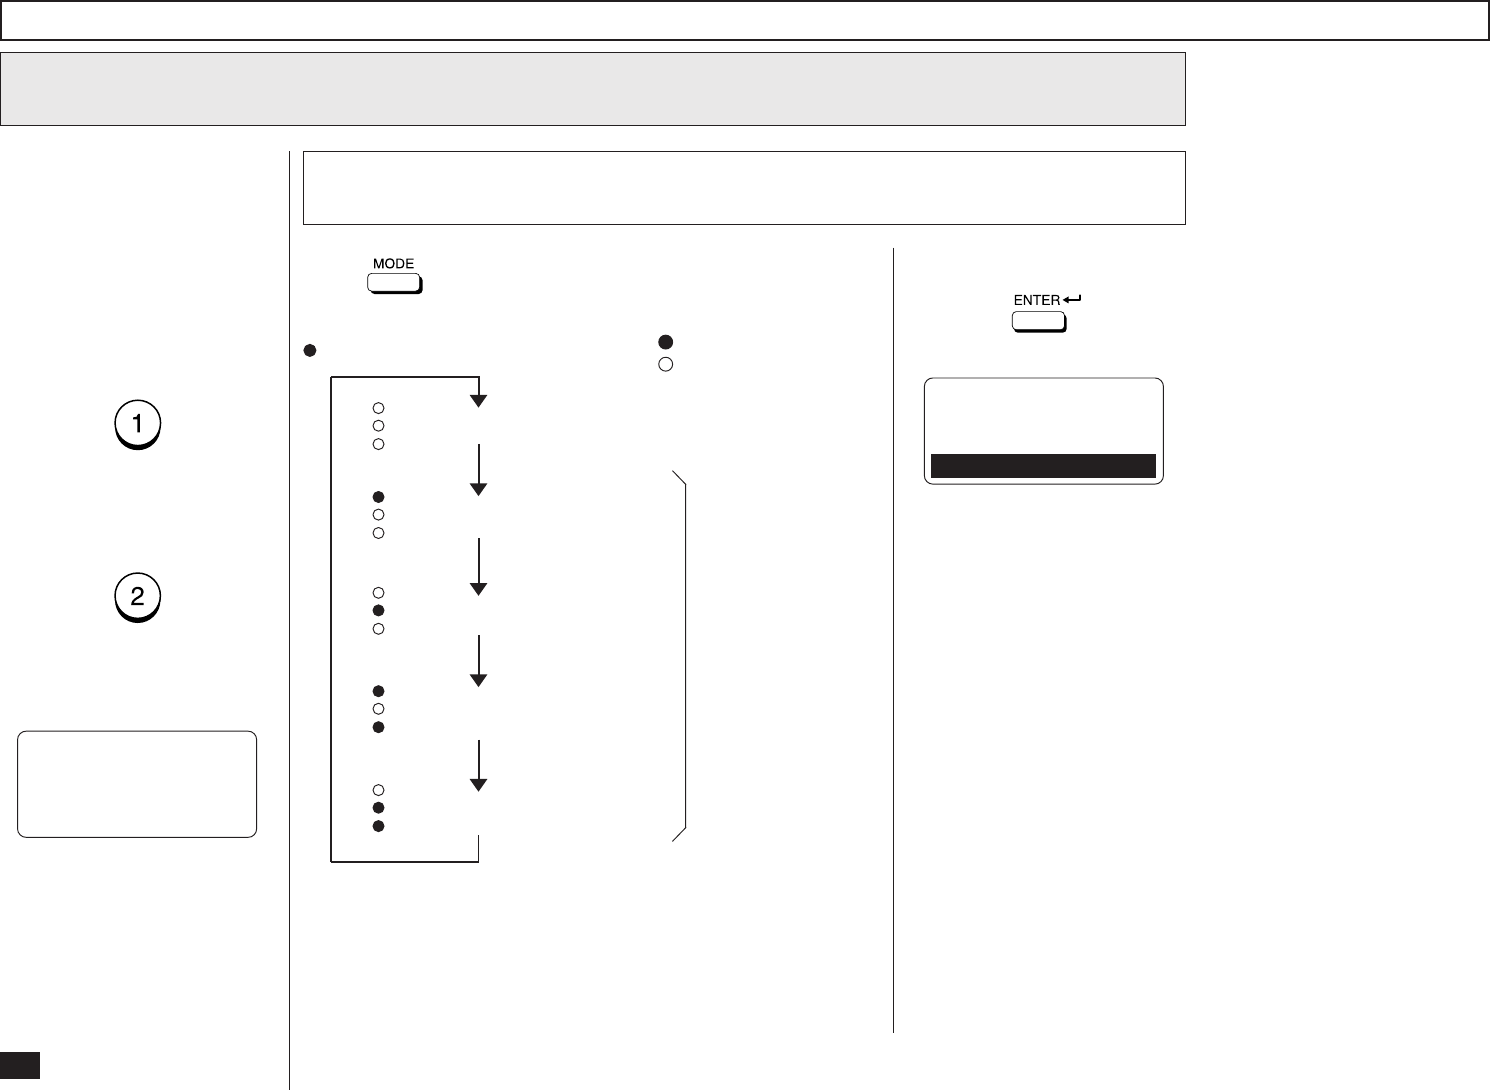
Press until the required resolution mode is indicated by
the appropriate LED.
Resolution Setting
3a
This setting will allow you to
specify the resolution for the
documents you are sending, if
you know the resolution capa-
bility of the recipient machine.
Select the Resolution
3
Ultra-Fine Mode
Standard Mode (when all the lamps are extinguished)
Fine Mode
Each corresponding
lamp is illuminated.
Ultra-Fine Halftone Mode
Fine Halftone Mode
The mode changes as follows:
*When Ultra-Fine is selected, the DF120F/DP125F will scan all
documents at 406 dots/inch horizontal x 391 lines/inch vertical.
Depending on the capabilities of the remote facsimile receiving
this document, the document may be transmitted by the
DF120F/DP125F at Ultra-Fine resolution (406 dots/inch hori-
zontal x 391 lines/inche vertical) or it may be transmitted at
Super Fine (203 dots/inch horizontal x 391 lines/inch vertical).
)
: illuminated
: extinguished
(
FINE
U-FINE
HALFTONE
FINE
U-FINE
HALFTONE
FINE
U-FINE
HALFTONE
FINE
U-FINE
HALFTONE
FINE
U-FINE
HALFTONE
Then press:
DO YOU KNOW RECEIVER
COMPRESSION?
1.YES
2.NO
15
Sending E-mail by Direct Input - continued
Compression Setting
4a
Select the desired Compres-
sion.
Press:
(for MH)
(for MR)
(for MMR)
(for JBIG)
NOTE:
If you do not know the
receiver’s capabilities for
the compression type, se-
lect “MH”.
Select the Compression
4
Scan the document
5
Your machine will automatically
start scanning the document
into memory (if enabled).
If the document is not loaded in
the Document Tray, the follow-
ing screen is displayed.
LOAD DOCUMENT
SCANNING INTO MEMORY
FILE NUMBER= 007
RESIDUAL MEMORY 98%
SCANNING PAGE : 003
After scanning, the machine
starts transmission.
Load the document in the
Document Tray. Then your
machine will automatically
starts scanning the document.
If you know the compression
capability of the recipient ma-
chine, press:
If you do not know the com-
pression capability of the re-
cipient machine, press:
When “1.YES” is selected, the
following screen appears. Con-
tinue to Step 3a.
When “2.NO” is selected, the
following screen appears. Skip
to Step 5.
This setting will allow you to
specify the compression for the
documents you are sending, if
you know the compression ca-
pability of the recipient ma-
chine.
These items are outside the
LCD frame. To view them,
use the [ ] scroll key.
COMPRESSION
1.MH
2.MR
3.MMR ↓
4.JBIG
16
Sending E-mail by Searching E-mail Addresses
Press:
Display the SPEED
DIAL Menu
1
Select SPEED DIAL
2
PRESS SPEED DIAL,
ONE TOUCH KEY OR
ENTER TO ENTER
E-MAIL ADDRESS
Then press:
Press:
1.LOCAL ADDRESS
2.RECEPTION HISTORY
3.SENT HISTORY
SPEED DIAL
1.ABB. NUMBERS
2.SPEED DIAL
Searching for an E-mail address
3
To select the Local Addresses,
press:
To select the Reception His-
tory, press:
To select the Sent History,
press:
When “1.LOCAL ADDRESSES”
is selected, the following
screen appears. Continue to
the next step.
Select the search category
3a
This operation searches for an
E-mail address and sends the
documents to the E-mail ad-
dress.
You can search for an E-mail
address in the following catego-
ries.
Local Addresses:
You can search for an E-mail
address that is assigned to
Abbreviated Dial Numbers
or One Touch Dial Keys.
Reception History:
You can search for an E-mail
address which the machine
has received the E-mails
from.
Sent History:
You can search for an E-mail
address that the machine
has sent the E-mails to.
1.SEARCH NAME
2.SEARCH E-MAIL ADDR
3.ALL
When “2.RECEPTION HIS-
TORY” is selected, the follow-
ing screen appears. Skip to
Step 3c.
Searching ends.
RECEPTION HISTORY
[STOP]:TO PREVIOUS
001@toshiba.com
[ ] 00001/00050
RECEPTION HISTORY
NOW SEARCHING
When “2.RECEPTION HIS-
TORY” is selected but no E-
mail addresses are in the list,
the display indicates the follow-
ing screen and returns to the
first screen in this step.
↑↓
After 2 seconds:
1.LOCAL ADDRESSES
2.RECEPTION HISTORY
3.SENT HISTORY
RECEPTION HISTORY
E-MAIL ADDRESS:
--------------------
17
Sending E-mail by Searching E-mail Addresses - continued
Searching for an E-mail address - continued
3
Select the search
category - continued
3a
When “3.SENT HISTORY” is
selected, the following screen
appears. Skip to Step 3d.
SENT HISTORY
[STOP]:TO PREVIOUS
001@toshiba.com
[ ] 00001/00050
SENT HISTORY
NOW SEARCHING
When “3.SEND HISTORY” is
selected but no E-mail ad-
dresses are in the list, the dis-
play indicates the following
screen and returns to the first
screen in this step.
1.LOCAL ADDRESSES
2.RECEPTION HISTORY
3.SENT HISTORY
SENT HISTORY
E-MAIL ADDRESS:
--------------------
Search from Local Adressess
3b
You can search for an E-mail
address from the Local Ad-
dresses using the following
method.
Search Name:
You can search for an E-mail
address by the ID name.
Search E-mail Addr:
You can search for an E-mail
address by its specific ad-
dress.
All:
You can list all E-mail ad-
dresses that have been reg-
istered as Abbreviated Dial
Numbers and One Touch
Dial Keys.
3b-1 Select the search method
To select Search Name, press:
To select Search E-mail Addr,
press:
To select All, press:
When “1.SEARCH NAME” is
selected, the following screen
appears. Continue to the next
step.
SEARCH NAME
NAME (20 MAX):
When “2.SEARCH E-MAIL
ADDR” is selected, the follow-
ing screen appears. Skip to
Step 3b-4.
SEARCH E-MAIL
E-MAIL ADDRESS:
When “3.ALL” is selected but
no E-mail address can be
matched, the display indicates
the following screen and returns
to the first screen in this step.
After 2 seconds:
1.SEARCH NAME
2.SEARCH E-MAIL ADDR
3.ALL
ALL ADDRESS
E-MAIL ADDRESS:
--------------------
When “3.ALL” is selected, the
following screen appears. Skip
to Step 3b-6.
After 2 seconds:
ALL ADDRESS
NOW SEARCHING
↑↓
ALL ADDRESS
[STOP]:TO PREVIOUS
001@toshiba.com
[ ] 00001/00050
Searching ends.
After 2 seconds:

18
Sending E-mail by Searching E-mail Addresses - continued
Searching for an E-mail address - continued
3
Search from Local Adressess - continued
3d
3b-2 Enter the Search Name
Enter the character(s) associ-
ated with the ID name of Abbre-
viated Dial Numbers or One
Touch Dial Keys using the Key-
board and the Dial Keypad.
Searching ends.
SEARCH NAME
NOW SEARCHING
NAME (20 MAX):
toshiba
SEARCH NAME
[STOP]:TO PREVIOUS
New York Toshiba
[ ] 00001/00015
Then press:
The machine starts to search
the ID names.
SEARCH NAME
NAME (20 MAX):
Toshiba
When no ID name can be
matched, the display indicates
the following screen and returns
to the first screen in this step.
After 2 seconds:
SEARCH NAME
NAME (20 MAX):
--------------------
↑↓
Locate the screen of the de-
sired ID name using the follow-
ing scroll keys.
(for the previous screen)
(for the next screen)
SEARCH NAME
NAME (20 MAX):
Toshiba
3b-3 Select the ID Name
Then press:
Skip to Step 4.
3b-4 Enter the Search E-mail Address
Enter the character(s) associ-
ated with the E-mail address
assigned to Abbreviated Dial
Numbers or One Touch Dial
Keys using the Keyboard and
the Dial Keypad.
Searching ends.
SEARCH E-MAIL
NOW SEARCHING
E-MAIL ADDRESS:
toshiba
SEARCH E-MAIL
[STOP]:TO PREVIOUS
001@toshiba.com
[ ] 00001/00015
Then press:
The machine starts to search
the E-mail addresses.
SEARCH E-MAIL
E-MAIL ADDRESS:
toshiba
When no E-mail address can
be matched, the display indi-
cates the following screen and
returns to the first screen in this
step.
After 2 seconds:
SEARCH E-MAIL
E-MAIL ADDRESS:
--------------------
↑↓
SEARCH E-MAL
E-MAIL ADDRESS:
toshiba
SEARCH NAME
[STOP]:TO PREVIOUS
001
[ ] 00001/00015
SEARCH NAME
[STOP]:TO PREVIOUS
002
[ ] 00002/00015
↑↓
↑↓
NOTE:
The machine searches all
ID names that include the
search name entered and
applicable to the case.
NOTE:
The machine searches all
E-mail addresses that in-
clude the search name en-
tered and applicable to the
case.
19
Sending E-mail by Searching E-mail Addresses - continued
Searching for an E-mail address - continued
3
Search from Local Adressess - continued
3b
Locate the screen of the de-
sired E-mail address using the
following scroll keys.
(for the previous screen)
(for the next screen)
3b-5 Select the E-mail
address
SEARCH E-MAIL
[STOP]:TO PREVIOUS
001@toshiba.com
[ ] 00001/00015
SEARCH E-MAIL
[STOP]:TO PREVIOUS
002@toshiba.com
[ ] 00002/00015
↑↓
Then press:
Skip to Step 4.
Select from Reception
History
3c
Locate the screen of the de-
sired E-mail address using the
following scroll keys.
(for the previous screen)
(for the next screen)
RECEPTION HISTORY
[STOP]:TO PREVIOUS
001@toshiba.com
[ ] 00001/00015
RECEPTION HISTORY
[STOP]:TO PREVIOUS
002@toshiba.com
[ ] 00002/00015
↑↓
↑↓
Then press:
Skip to Step 4.
Locate the screen of the de-
sired E-mail address using the
following scroll keys.
(for the previous screen)
(for the next screen)
3b-6 Select the E-mail
address
ALL ADDRESS
[STOP]:TO PREVIOUS
001@toshiba.com
[ ] 00001/00015
ALL ADDRESS
[STOP]:TO PREVIOUS
002@toshiba.com
[ ] 00002/00015
↑↓
↑↓
Then press:
Skip to Step 4.
Select from Sent
History
3c
Locate the screen of the de-
sired E-mail address using the
following scroll keys.
(for the previous screen)
(for the next screen)
SENT HISTORY
[STOP]:TO PREVIOUS
001@toshiba.com
[ ] 00001/00015
SENT HISTORY
[STOP]:TO PREVIOUS
002@toshiba.com
[ ] 00002/00015
↑↓
↑↓
Then press:
Skip to Step 4.
Scan the document
4
Your machine will automatically
start scanning the document
into memory (if enabled).
If the document is not loaded in
the Document Tray, the follow-
ing screen is displayed.
LOAD DOCUMENT
SCANNING INTO MEMORY
FILE NUMBER= 007
RESIDUAL MEMORY 98%
SCANNING PAGE : 003
After scanning, the machine
starts transmission.
Load the document in the
Document Tray. Then your
machine will automatically
starts scanning the document.
20
If you have assigned an E-mail
address to a One Touch key,
you can send a document to the
E-mail address by pressing the
corresponding One Touch key.
Sending E-mail by One Touch Dialing
Press:
One Touch Dialing
for E-mail
1
PRESS SPEED DIAL,
ONE TOUCH KEY OR
ENTER TO ENTER
E-MAIL ADDRESS
Then select the desired One
Touch key from 01 to 73.
Example: One Touch key 01
The One Touch key number
and the ID name appear on the
LCD display for about 2 sec-
onds.
ONE TOUCH= 01
NEWYORK OFFICE
Scan the document
2
Your machine will automatically
start scanning the document
into memory (if enabled).
If the document is not loaded in
the Document Tray, the follow-
ing screen is displayed.
LOAD DOCUMENT
SCANNING INTO MEMORY
FILE NUMBER= 007
RESIDUAL MEMORY 98%
SCANNING PAGE : 003
After scanning, the machine
starts transmission.
Load the document in the
Document Tray. Then your
machine will automatically
starts scanning the document.
NOTE:
When the One Touch key
pressed is not programmed
with an E-mail address, the
message “NUMBER NOT
LISTED” is displayed for 2
seconds and then the dis-
play returns to the Standby
Mode.
21
If you have assigned an E-mail
address to an Abbreviated Dial
Number, you can send a docu-
ment to the E-mail address by
entering the corresponding Ab-
breviated Dial Number. Press:
Display the SPEED
DIAL Menu
1
Select ABB. NUM-
BERS
2
PRESS SPEED DIAL,
ONE TOUCH KEY OR
ENTER TO ENTER
E-MAIL ADDRESS
Then press:
Press:
SPEED DIAL
1.ABB. NUMBERS
2.SPEED DIAL
ABB. NUMBER =(1-999)
Enter the ABB.
Number
3
Enter the Abbreviated Dial
Number (1 to 999) assigned to
the desired destination.
NOTE:
When an incorrect number
is entered, use to de-
lete preceding digits, or
press once to start
over.
Example of Abbreviated Dial
Number, 10:
ABB. NUMBER =(1-999)
10
Sending E-mail by Abbreviated Dialing
When the correct number is
displayed, press:
Press the START
Key Tray
4
ABB. NUMBER= 10
LONDON OFFICE
NOTE:
When the number entered
(within the range of 1
through 999) is not pro-
grammed with an E-mail ad-
dress, the message “NOT
AN EMAIL ADDRESS” is
displayed for 2 seconds and
then the display returns to
the Standby Mode.
The One Touch key or Abbrevi-
ated Dial Number and the name
of the party will appear on the
LCD display for about 2 sec-
onds.

22
Sending E-mail by Abbreviated Dialing - continued
Scan the document
5
Your machine will automatically
start scanning the document
into memory (if enabled).
If the document is not loaded in
the Document Tray, the follow-
ing screen is displayed.
LOAD DOCUMENT
SCANNING INTO MEMORY
FILE NUMBER= 007
RESIDUAL MEMORY 98%
SCANNING PAGE : 003
After scanning, the machine
starts transmission.
Load the document in the
Document Tray. Then your
machine will automatically
starts scanning the document.
23
This Multi-key Quick Broadcast
Transmission allows you to
send a document to a combina-
tion of the following numbers
without pre-programming a
group.
• Abbreviated Dial Numbers
• One Touch Dial Keys
• Search E-mail Address
• Direct Input
NOTE:
By using this method, you
can send a document to
both E-mail addresses and
fax numbers in a single op-
eration. To send a docu-
ment to fax number using
this feature, refer to the
DP120F/DP125F Operator’s
Manual.
Enter the E-mail address of the
remote party using any of the
four dialing methods.
• One Touch Key Dialing
... See page 19
• Abbreviated Dialing
... See page 20
• Search E-mail Address
... See page 15
• Direct Input
... See page 12
A screen like the one below is
displayed.
Load the document face down
in the Document Tray.
Press:
Multi-Key Quick Broadcast Transmission
Load the Document
1
Press the MULTI
Key
2
MAY-17-00 WED11:49
RESIDUAL MEMORY 100%
ENTER TEL NUMBER MULTI GROUP 000
ENTER TEL NUMBER,
E-MAIL, SPEED DIAL
OR ONE TOUCH KEY
After 2 seconds:
MULTI GROUP 000
ABB NBR= 154
INFORMATION BUREAU
MULTI GROUP 001
[↑] TO PREVIOUS
ENTER MORE OR
PRESS [START]
NOTE:
If you select the same entry
twice, you are prompted to
delete or retain that second
entry.
Repeat this step until the fac-
simile numbers of all the de-
sired remote parties are en-
tered.
When the E-mail addresses of
all the desired remote parties
are entered, go to Step 5.
To cancel or modify the E-mail
addresses already being pro-
grammed to a Manual Group
Dial, go to Step 4.
Enter the E-mail Address
3
Press:
PRESS SPEED DIAL,
ONE TOUCH KEY OR
ENTER TO ENTER
E-MAIL ADDRESS
24
You can cancel or modify the
Manual Group Dial Number reg-
istered in this facsimile.
Select the number you want to
delete or modify using
or , and press:
Multi-Key Quick Broadcast Transmission - continued
MULTI GROUP
1.CANCEL
2.MODIFY
3.RETAIN
To select “1.CANCEL,” go to
Step 4a.
To select “2.MODIFY,” go to
Step 4b.
To select “3.RETAIN,” go to
Step 4c.
To cancel the existing number,
press:
(to CANCEL)
To modify the existing number,
press:
(to MODIFY)
Cancel the Existing
Number
4a
Select the CANCEL or MODIFY Facsimile Number
4
MULTI GROUP
ABB NBR= 154
CANCELLED
Return to Step 3.
Modify the Existing
Number
4b
MULTI GROUP
ABB.NUMBER= (1-999)
Go to Step 3 for the E-mail ad-
dress entry.
To retain the existing number,
press:
(to RETAIN)
Retain the Existing
Number
4c
MULTI GROUP 001
[↑] TO PREVIOUS
ENTER MORE
OR PRESS START
Press:
Press the START
Key
5
Standby Mode screen
When document scan-
ning is completed:
SCANNING INTO MEMORY
JOB NUMBER= 002
FREE MEMORY : 98%
SCANNING PAGE : 003
Return to Step 3.
25
- AUTOMATIC TELEPHONE DIALING REGISTRATION
E-mail addresses can be assigned to Abbreviated Dial Numbers and One Touch Keys. The numbers
are used for Abbreviated Dial E-mail transmission, One Touch E-mail transmission, and Group E-mail
transmission. Once the addresses are assigned, the following features allow you to send documents
to frequently sent addresses by pressing a few keys.
•Abbreviated Dial Numbers
This machine can store up to 300 E-mail addresses and 16-digit facsimile numbers with associ-
ated 20-character ID names. This information is stored into Abbreviated Dial Numbers labeled
from 001 to 999.
•One Touch Keys
This machine can store up to 73 E-mail addresses and 16-digit facsimile numbers with associated
20-character ID names. This information is stored into One Touch Dial Numbers labeled from 01
to 99.
•Group Numbers
This machine can store up to 50 Broadcast Groups of Abbreviated Dial Numbers and One Touch
Dial keys with associated 20-character location ID names. This information is stored into One
Touch Dial Numbers labeled from 0001 to 1999.
Important Note:
The total number of available destinations will vary depending upon the amount of information
stored in each Abbreviated Dial Number, One Touch Key, and Group Number.
You can register an E-mail address as an Abbreviated Dial Number or a One Touch Key by:
• Directly entering an E-mail address.
• Searching an E-mail address that has already been stored in the Abbreviated Dial Numbers or
One Touch Keys or from the send/receive histories, and modifying it.
View the “50-73” Flip Panel to
select the desired Function Key.
Press:
To select “ABB. NUMBERS”,
press:
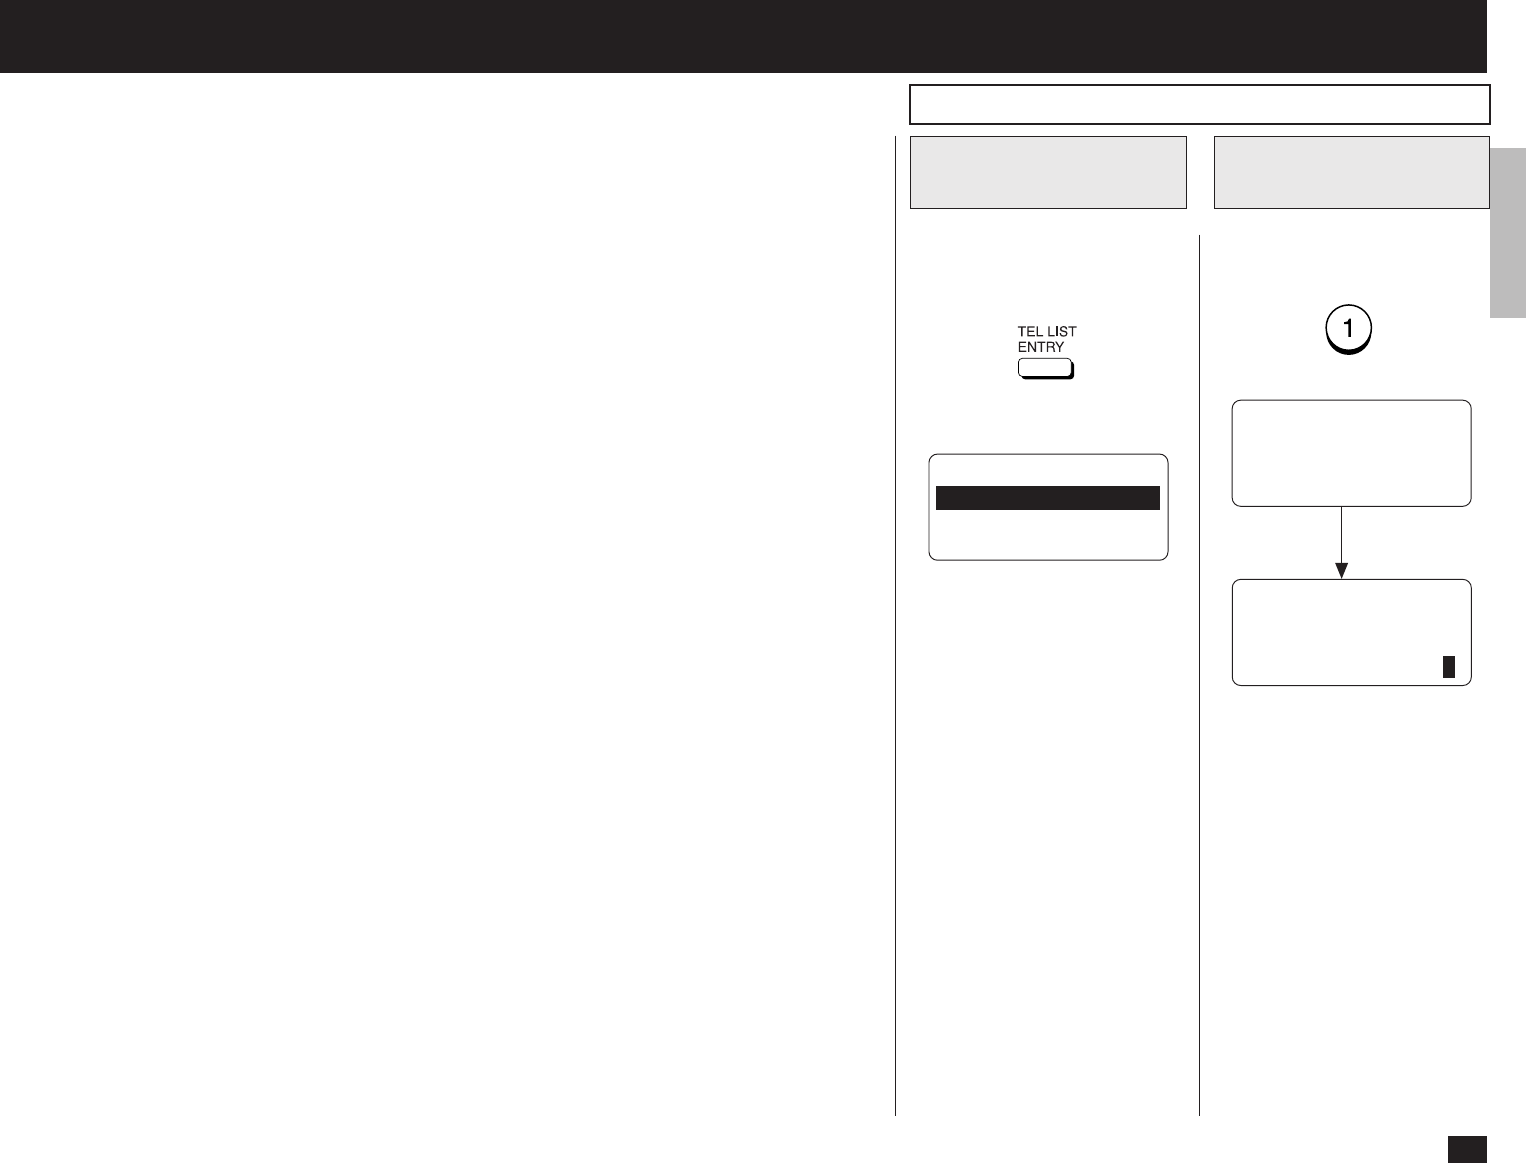
Display the TEL
LIST ENTRY Menu
1
Display the ABB.
NUMBERS Menu
2
TEL LIST ENTRY
1.ABB. NUMBERS
2.GROUP NUMBERS
3.ONE TOUCH KEYS
Upon entering
the first number:
ENTER ABB. NUMBER
OR PRESS
[BACK]:TO PREVIOUS
[STOP]:TO COMPLETE
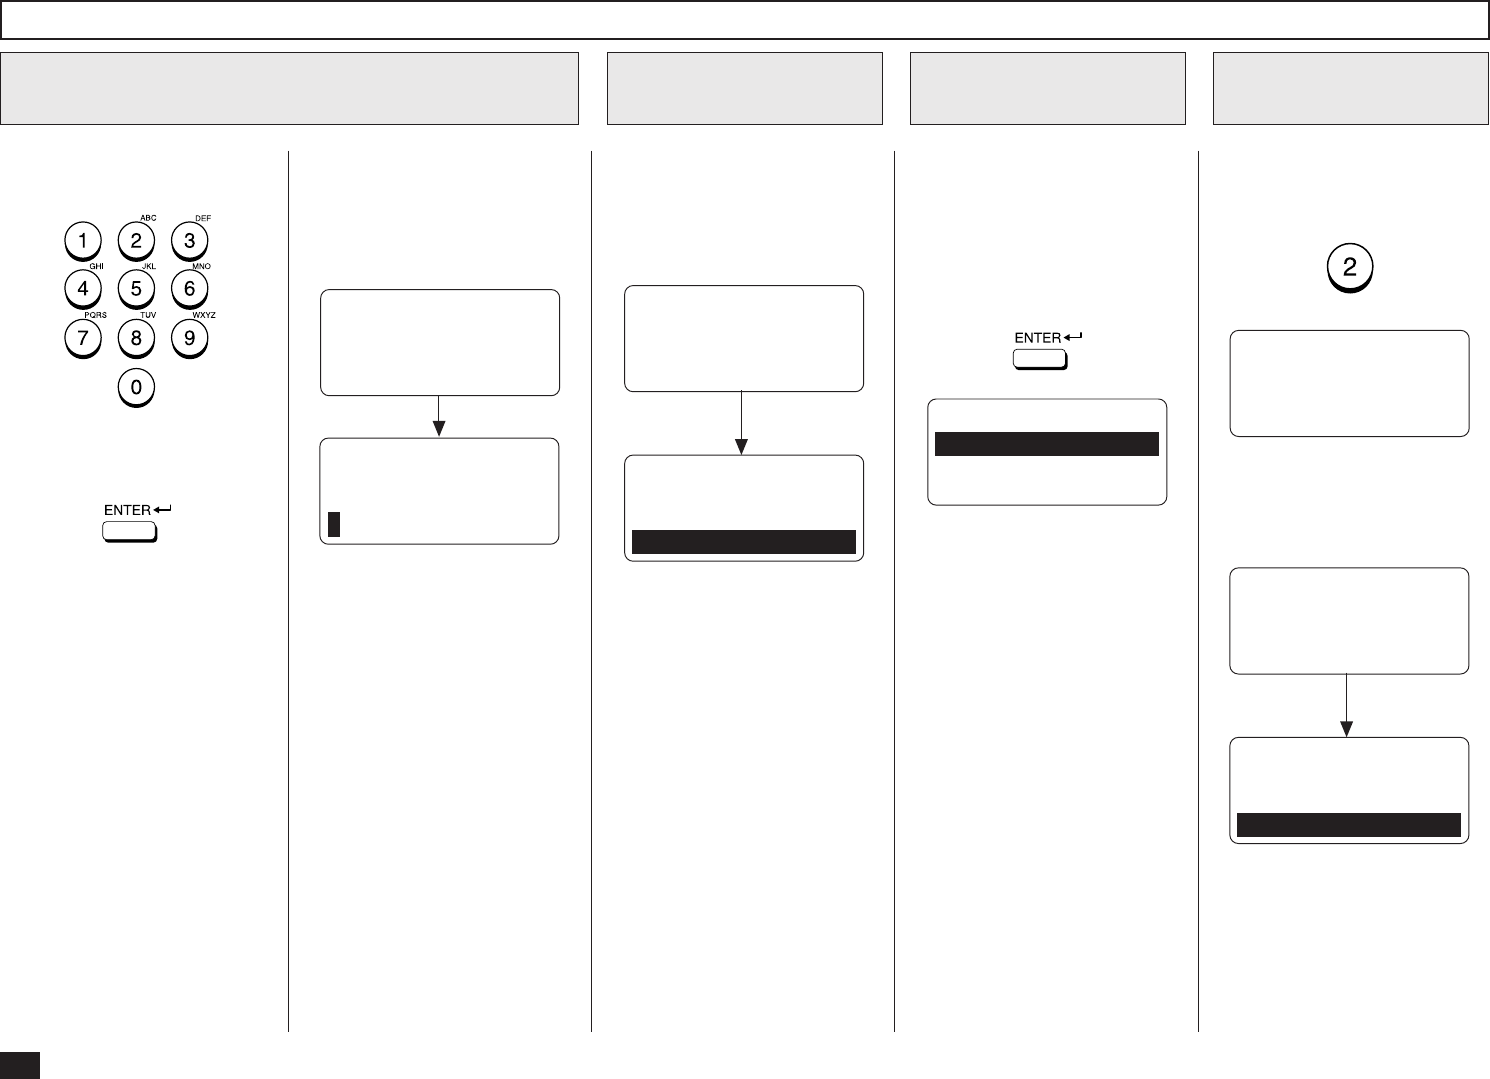
ABB. NUMBER ENTRY
ABB. NUMBER =(1-999)
1
Abbreviated Dialer Registration
26
Enter an Abbreviated Dial Num-
ber from 1 to 999.
Make sure that the 3-digit num-
ber (001 to 999) appears cor-
rectly, then press:
NOTE:
Any leading zero (0) can be
omitted from the Abbreviated
Dial Number.
ABB. NBR= 001
ID NAME =(MAX20)
After 2 seconds:
Enter an ABB. Dial Number
3
ENTER NAME
ID NAME =(MAX20)
If the ABB. Dial Number you
entered has not been previ-
ously registered, the following
screen will be displayed. Skip
to Step 5.
If the ABB. Dial Number you
entered has been previously
registered, continue to the next
step.
If the selected Abbreviated Dial
Number has been previously
registered, the following infor-
mation will be displayed on the
LCD display.
When a Preset ABB.
Dial Number is Active
4
After 2 seconds:
ABB. NUMBER ENTRY
ALREADY ASSIGNED
ABB. NUMBER = 001
NEW YORK OFFICE
See the section “Modify/Delete
the Abbreviated Dial Number”
and continue the operation.
Enter the Location ID name of
the remote party to be as-
signed to the current Abbrevi-
ated Dial Number.
When the name is displayed
correctly on the LCD display,
press:
Enter the Location
ID Name
5
ABB. NUMBER ENTRY
1.CANCEL
2.MODIFY
3.RETAIN
ABB. NBR= 001
1.TEL NUMBER
2.E-MAIL
To register an E-mail address
for the Abbreviated Dial Num-
ber, Press:
Select the type
6
Abbreviated Dialer Registration - continued
PRESS SPEED DIAL FOR
ADDRESS SEARCH OR
ENTER TO ENTER
E-MAIL ADDRESS
If the E-mail address is already
assigned to this Abbreviated
Dial Number, the following
screen appears.
After 2 seconds:
E-MAIL ADDRESS
ALREADY ASSIGNED
001@toshiba.com
See the section “Modify/Delete
the Abbreviated Dial Number”
and continue the operation.
E-MAIL ADDRESS
1.CANCEL
2.MODIFY
3.RETAIN
27
To input an E-mail address di-
rectly, press:
To input an E-mail address by
modifying the searched E-mail
address, press:
Select the input E-mail
address method
7
ENTER E-MAIL ADDRESS
E-MAIL ADDRESS:
Searching for an E-mail address
8
Abbreviated Dialer Registration - continued
When is pressed, the
ENTER E-MAIL ADDRESS
screen appears. Skip to Step
10.
When is pressed, the
following screen appears. Con-
tinue to the next step.
To select the Local Addresses,
press:
To select the Reception His-
tory, press:
To select the Sent History,
press:
When “1.LOCAL ADDRESSES”
is selected, the following
screen appears. Continue to
the next step.
Select the search category
8a
This operation is to search an
E-mail address and modify it to
a new E-mail address.
You can search an E-mail ad-
dress in the following catego-
ries.
Local Addresses:
You can search an E-mail
address that is assigned to
Abbreviated Dial Numbers
or One Touch Dial Keys.
Reception History:
You can search an E-mail
address which the machine
has received E-mails from.
Sent History:
You can search an E-mail
address which the machine
has sent the E-mails to.
1.LOCAL ADDRESSES
2.RECEPTION HISTORY
3.SENT HISTORY
1.SEARCH NAME
2.SEARCH E-MAIL ADDR
3.ALL
When “2.RECEPTION HIS-
TORY” is selected, the follow-
ing screen appears. Skip to
Step 8c.
Searching ends.
RECEPTION HISTORY
[STOP]:TO PREVIOUS
001@toshiba.com
[ ] 00001/00050
RECEPTION HISTORY
NOW SEARCHING
When “2.RECEPTION HIS-
TORY” is selected but no E-
mail address can be matched,
the display indicates the follow-
ing screen and returns to the
first screen in this step.
↑↓
After 2 seconds:
1.LOCAL ADDRESSES
2.RECEPTION HISTORY
3.SENT HISTORY
RECEPTION HISTORY
E-MAIL ADDRESS:
--------------------
When “3.SENT HISTORY” is
selected, the following screen
appears. Skip to Step 8d.
Searching ends.
SENT HISTORY
[STOP]:TO PREVIOUS
001@toshiba.com
[ ] 00001/00050
SENT HISTORY
NOW SEARCHING
When “3.SEND HISTORY” is
selected but no E-mail address
can be matched, the display in-
dicates the following screen and
returns to the first screen in this
step.
↑↓
After 2 seconds:
1.LOCAL ADDRESSES
2.RECEPTION HISTORY
3.SENT HISTORY
SENT HISTORY
E-MAIL ADDRESS:
--------------------

28
Abbreviated Dialer Registration - continued
Searching for an E-mail address - continued
8
Search from Local Adresses
8b
You can search an E-mail ad-
dress from the Local Ad-
dresses using the following
method.
Search Name:
You can search an E-mail
address by the ID name.
Search E-mail Addr:
You can search an E-mail
address by the specific ad-
dress.
All:
You can list all E-mail ad-
dresses that have been reg-
istered as Abbreviated Dial
Numbers and One Touch
Dial Keys.
8b-1 Select the search method
To select Search Name, press:
To select Search E-mail Addr,
press:
To select All, press:
When “1.SEARCH NAME” is
selected, the following screen
appears. Continue to the next
step.
SEARCH NAME
NAME (20 MAX):
When “2.SEARCH E-MAIL
ADDR” is selected, the follow-
ing screen appears. Skip to
Step 8b-4.
SEARCH E-MAIL
E-MAIL ADDRESS:
When “3.ALL” is selected but
no E-mail address can be
matched, the display indicates
the following screen and returns
to the first screen in this step.
After 2 seconds:
1.SEARCH NAME
2.SEARCH E-MAIL ADDR
3.ALL
ALL ADDRESS
E-MAIL ADDRESS:
--------------------
When “3.ALL” is selected, the
following screen appears. Skip
to Step 8b-6.
After 2 seconds:
ALL ADDRESS
NOW SEARCHING
↑↓
ALL ADDRESS
[STOP]:TO PREVIOUS
001@toshiba.com
[ ] 00001/00050
29
Abbreviated Dialer Registration - continued
Searching for an E-mail address - continued
8
Search from Local Addresses - continued
8d
8b-2 Enter the Search Name
Enter the character(s) associ-
ated with the ID name of Abbre-
viated Dial Numbers or One
Touch Dial Keys using the Key-
board and the Dial Keypad.
Searching ends.
SEARCH NAME
NOW SEARCHING
NAME (20 MAX):
00
SEARCH NAME
[STOP]:TO PREVIOUS
001
[ ] 00001/00015
Then press:
The machine starts to search
the ID names.
SEARCH NAME
NAME (20 MAX):
00
When no ID name can be
matched, the display indicates
the following screen and returns
to the first screen in this step.
After 2 seconds:
SEARCH NAME
NAME (20 MAX):
--------------------
↑↓
Locate the screen of the de-
sired ID name using the follow-
ing scroll keys.
(for the previous screen)
(for the next screen)
SEARCH NAME
NAME (20 MAX):
00
8b-3 Select the Search
Name
Then press:
Skip to Step 9.
8b-4 Enter the Search E-mail Address
Enter the character(s) associ-
ated with the E-mail address
assigned in Abbreviated Dial
Numbers or One Touch Dial
Keys using the Keyboard and
the Dial Keypad.
Searching ends.
SEARCH E-MAIL
NOW SEARCHING
E-MAIL ADDRESS:
toshiba
SEARCH E-MAIL
[STOP]:TO PREVIOUS
001@toshiba.com
[ ] 00001/00015
Then press:
The machine starts to search
the E-mail addresses.
SEARCH E-MAIL
E-MAIL ADDRESS:
toshiba
When no E-mail address can
be matched, the display indi-
cates the following screen and
returns to the first screen in this
step.
After 2 seconds:
SEARCH E-MAIL
E-MAIL ADDRESS:
--------------------
↑↓
SEARCH E-MAL
E-MAIL ADDRESS:
toshiba
SEARCH NAME
[STOP]:TO PREVIOUS
001
[ ] 00001/00015
SEARCH NAME
[STOP]:TO PREVIOUS
002
[ ] 00002/00015
↑↓
↑↓
NOTE:
The machine searches all
ID names that include the
search name entered and
applicable to the case.
NOTE:
The machine searches all
E-mail addresses that in-
clude the search name en-
tered and applicable to the
case.

30
Abbreviated Dialer Registration - continued
Searching for an E-mail address - continued
8
Search from Local Addresses - continued
8b
Locate the screen of the de-
sired E-mail address using the
following scroll keys.
(for the previous screen)
(for the next screen)
8b-5 Select the E-mail
address
SEARCH E-MAIL
[STOP]:TO PREVIOUS
001@toshiba.com
[ ] 00001/00015
SEARCH E-MAIL
[STOP]:TO PREVIOUS
002@toshiba.com
[ ] 00002/00015
↑↓
↑↓
Then press:
Skip to Step 9.
Select from Reception
History
8c
Locate the screen of the de-
sired E-mail address using the
following scroll keys.
(for the previous screen)
(for the next screen)
RECEPTION HISTORY
[STOP]:TO PREVIOUS
001@toshiba.com
[ ] 00001/00015
RECEPTION HISTORY
[STOP]:TO PREVIOUS
002@toshiba.com
[ ] 00002/00015
↑↓
↑↓
Then press:
Skip to Step 9.
Locate the screen of the de-
sired E-mail address using the
following scroll keys.
(for the previous screen)
(for the next screen)
8b-6 Select the E-mail
address
ALL ADDRESS
[STOP]:TO PREVIOUS
001@toshiba.com
[ ] 00001/00015
ALL ADDRESS
[STOP]:TO PREVIOUS
002@toshiba.com
[ ] 00002/00015
↑↓
↑↓
Then press:
Skip to Step 9.
Select from Sent
History
8c
Locate the screen of the de-
sired E-mail address using the
following scroll keys.
(for the previous screen)
(for the next screen)
SENT HISTORY
[STOP]:TO PREVIOUS
001@toshiba.com
[ ] 00001/00015
SENT HISTORY
[STOP]:TO PREVIOUS
002@toshiba.com
[ ] 00002/00015
↑↓
↑↓
Then press:
Skip to Step 9.
Enter the E-mail ad-
dress
9
ENTER E-MAIL ADDRESS
E-MAIL ADDRESS:
001@toshiba.com
Enter or modify the E-mail ad-
dress to be assigned to the
current Abbreviated Dial Num-
ber using the Keyboard and the
Dial Keypad.
DO YOU KNOW RECEIVER
CAPABILITY?
1.YES
2.NO
When the E-mail address is
displayed correctly on the LCD
display, press:

31
Abbreviated Dialer Registration - continued
If you know the capability of
the recipient machine, press:
If you do not know the capabil-
ity of the recipient machine,
press:
RECEIVER CAPABILITY
1.DONE
2.RESOLUTION
3.COMPRESSION
When “1.YES” is selected, the
following screen appears. Con-
tinue to the next step.
10
Select Receiver Capability
When “2.NO” is selected, the
following screen appears. Skip
to Step 11.
E-MAIL OPTIONS?
1.YES
2.NO
To designate a specific resolu-
tion of the documents sent to
this E-mail address, select
RESOLUTION by pressing:
Resolution Setting
10b
RESOLUTION
1.200x100
2.200x200
3.200x400 ↓
4.400x400
These items are outside the
LCD frame. To view them,
use the [ ] scroll key.
Select the desired Resolution.
Press:
(for 200x100)
(for 200x200)
(for 200x400)
(for 400x400)
The display returns to the first
screen in Step 10. Select the
next option. If you have set up
the Receiver Capability, Skip to
Step 10d.
Select the Receiver
Capability
10a
This setting will allow you to
specify one or more following
Receiver Capabilities for the
Abbreviated Dial Number you
are registering, if you know the
capabilities of the recipient ma-
chine.
Resolution:
Selected to specify the
resolution of images to be
sent. This resolution is set
to “200x200” as a default
setting.
Compression:
Selected to specify the type
of compression applied to
images to be sent.

32
Abbreviated Dialer Registration - continued
10
Select Receiver Capability - continued
Complete the Receiver
Capability Setup
10d
If you have completed the de-
sired Receiver Capability set-
ting for this Abbreviated Dial
Number, select DONE by
pressing:
E-MAIL OPTIONS?
1.YES
2.NO
11
Select E-mail Options
To set up the E-mail Options,
press:
To skip the E-mail Options,
press:
E-MAIL OPTIONS
1.DONE
2.DELAYED COMM.
3.TX REPORT
When “1.YES” is selected, the
following screen appears. Con-
tinue to the next step.
When “2.NO” is selected, the
following screen appears. Skip
to Step 12.
Select the E-mail
Options
11a
Compression Setting
10c
Select the desired Compres-
sion.
Press:
(for MH)
(for MR)
(for MMR)
(for JBIG)
The display returns to the first
screen in Step 10. If you have
done so to set up the Receiver
Capability, Skip to Step 10d.
This setting will allow you to
specify one or more following
E-mail Options for the Abbrevi-
ated Dial Number you are regis-
tering.
Delayed Communication:
Default=off
Selected to program a
transmission start time.
Confirmation Report:
Default=off
Selected to print a confirma-
tion report after each trans-
mission.
To designate a specific com-
pression of the documents sent
to this E-mail address, select
COMPRESSION by pressing:
These items are outside the
LCD frame. To view them,
use the [ ] scroll key.
COMPRESSION
1.MH
2.MR
3.MMR ↓
4.JBIG
ABB. NBR= 001
1.TEL NUMBER
2.E-MAIL
3.COMPLETE
NOTE:
If you do not know the
receiver’s capabilities for
the compression type, se-
lect “MH”.

33
11
Select E-mail Options - continued
Abbreviated Dialer Registration - continued
DELAYED COMM.
TIME =23:30
DELAYED COMM.
TIME =HH:MM
23:30
Enter the desired transmission
start time in either 12-hour or
24-hour format depending on
the machine setup. (Example:
23:30 in the 24-hour format).
Then press:
Displayed for 2 seconds
The display returns to the first
screen in Step 11. Select the
next Option or skip to Step 11d
if you have completed the E-
mail Options setting.
Delayed Communication Setting
11b
To designate a specific time to
start the transmission of the
job using this Abbreviated Dial
Number, press:
DELAYED COMM.
TIME =HH:MM
:
To print a Confirmation Report
automatically after sending
documents using this Abbrevi-
ated Dial Number, select:
CONFIRMATION REPORT
1.ON
2.OFF
To enable a Confirmation Re-
port, press:
To disable a Confirmation Re-
port, press:
The display returns to the first
screen in Step 11. If you have
completed the E-mail Options
setting, continue to the next
step.
Confirmation Report
Setting
11c Complete the E-mail
Options Setup
11d
If you have completed the de-
sired E-mail Options setting for
this Abbreviated Dial Number,
select DONE by pressing:
ABB. NBR= 001
1.TEL NUMBER
2.E-MAIL
3.COMPLETE

34
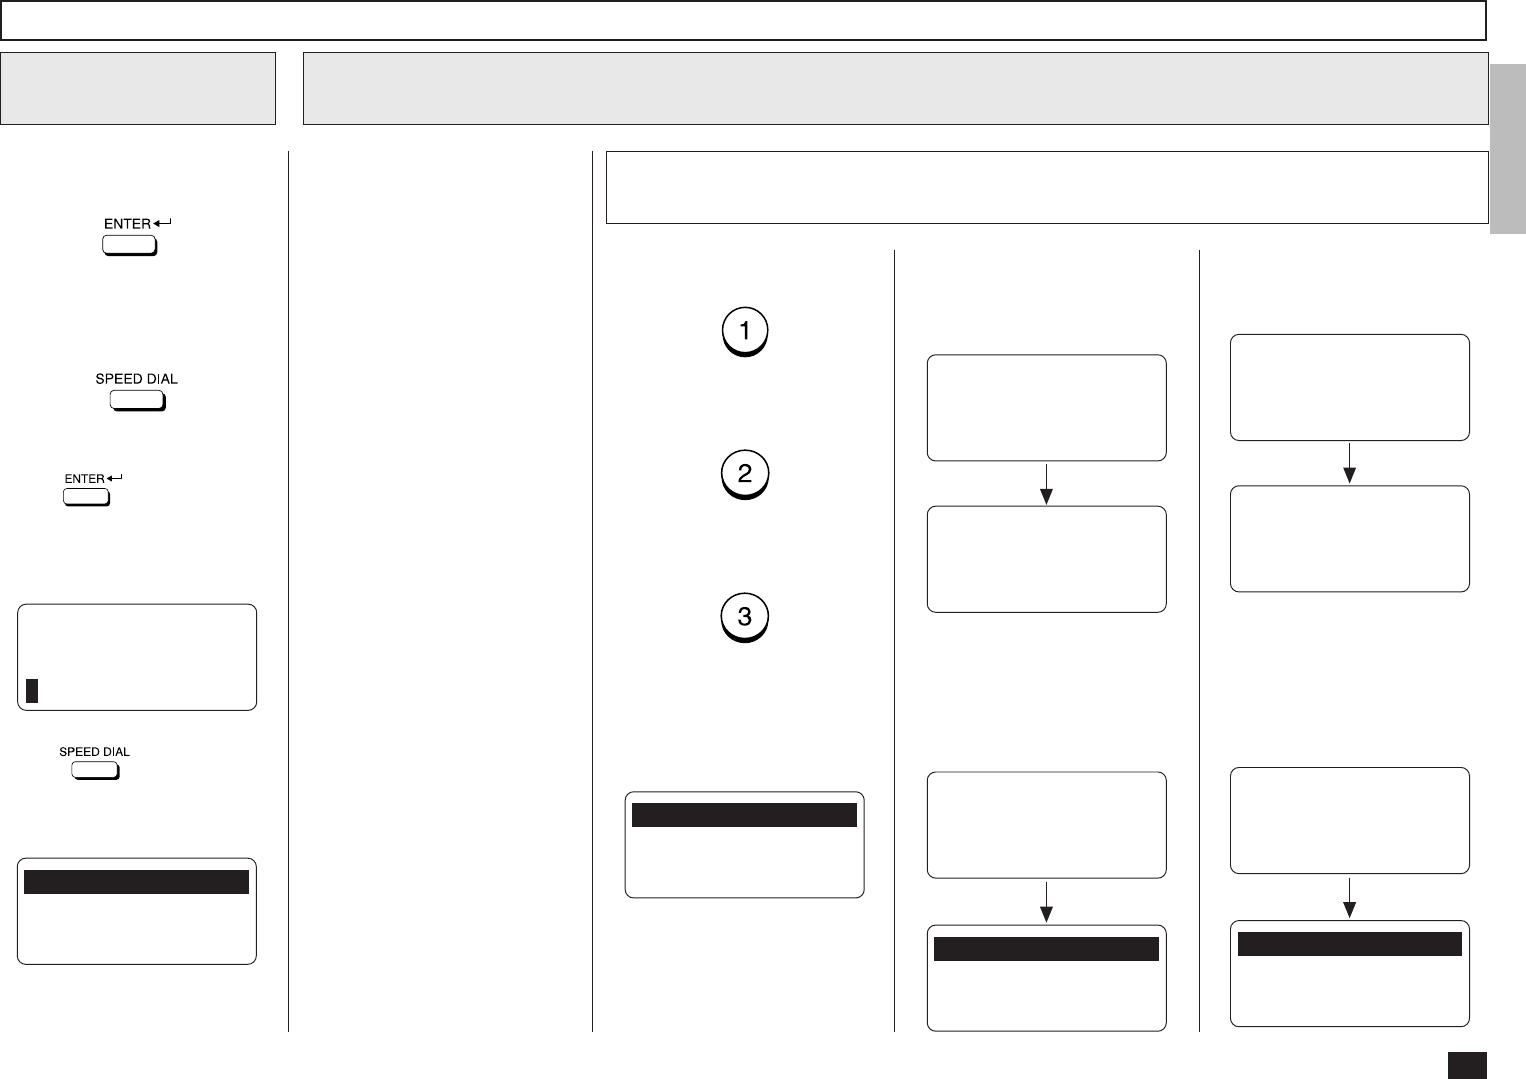
To assign this Abbreviated Dial
Number to a One Touch Key,
press the desired One Touch
Key (Example: One Touch Key
01).
If the desired One Touch Key
has been previously linked to
another Abbreviated Dial Num-
ber or preset with a separate
One Touch number, one of the
following screens will be dis-
played.
One Touch key has been as-
signed to an Abbreviated Num-
ber:
To CANCEL the existing link or
One Touch assignment and re-
turn to Step 10a, press:
To RETAIN the existing link or
One Touch assignment and re-
turn to Step 10a, press:
Returns to Step 10a.
Assign the Abbreviated Dial Number to a One Touch Key
13
Assign the
One Touch Key
10a
Returns to Step 2.
Press to exit the Menu
Operation mode and return to
the Standby Mode.
ONE TOUCH= 01
ALREADY ASSIGNED
ABB. NBR= 003
SMITH’S OFFICE
ONE TOUCH= 01
ALREADY ASSIGNED
ONE TOUCH= 01
WEST REGION CENTER
After 2 seconds:
One Touch key has been as-
signed with an Individual Phone
Number:
ABB. NBR= 001
PRESS ONE TOUCH KEY
TO ENTER OR
[ENTER]:TO SKIP
ONE TOUCH= 01
CANCEL ?
1.CANCEL
2.RETAIN
ABB. NBR= 001
ONE TOUCH= 01
L.A. OFFICE
REGISTERED
ENTER ABB. NUMBER
OR PRESS
[BACK]:TO PREVIOUS
[STOP]:TO COMPLETE
After 2 seconds:
Use a Preassigned One Touch Key
10b
Assign the Abbreviated Dial Number to a One Touch Key
12
Complete the ABB. registration
If you have completed the reg-
istration for this Abbreviated
Dial Number, select COM-
PLETE by pressing:
ABB. NBR= 001
PRESS ONE TOUCH KEY
TO ENTER OR
[ENTER]:TO SKIP
If you want to assign this Ab-
breviated Dial Number to a One
Touch Key, continue to the
next step.
Abbreviated Dialer Registration - continued
If you do not want to assign
this Abbreviated Dial Number
to a One Touch Key, press:
The display returns to the
screen in Step 2.
Press to exit the Menu
Operation mode and return to
the Standby Mode.
NOTE:
If you want to edit or cancel
the registration of this Ab-
breviated Dial Number,
press .
After 2 seconds:
E-MAIL ADDRESS
ALREADY ASSIGNED
001@toshiba.com
See the section “Modify/De-
lete the Abbreviated Dial
Number” and continue the
operation.
E-MAIL ADDRESS
1.CANCEL
2.MODIFY
3.RETAIN

35
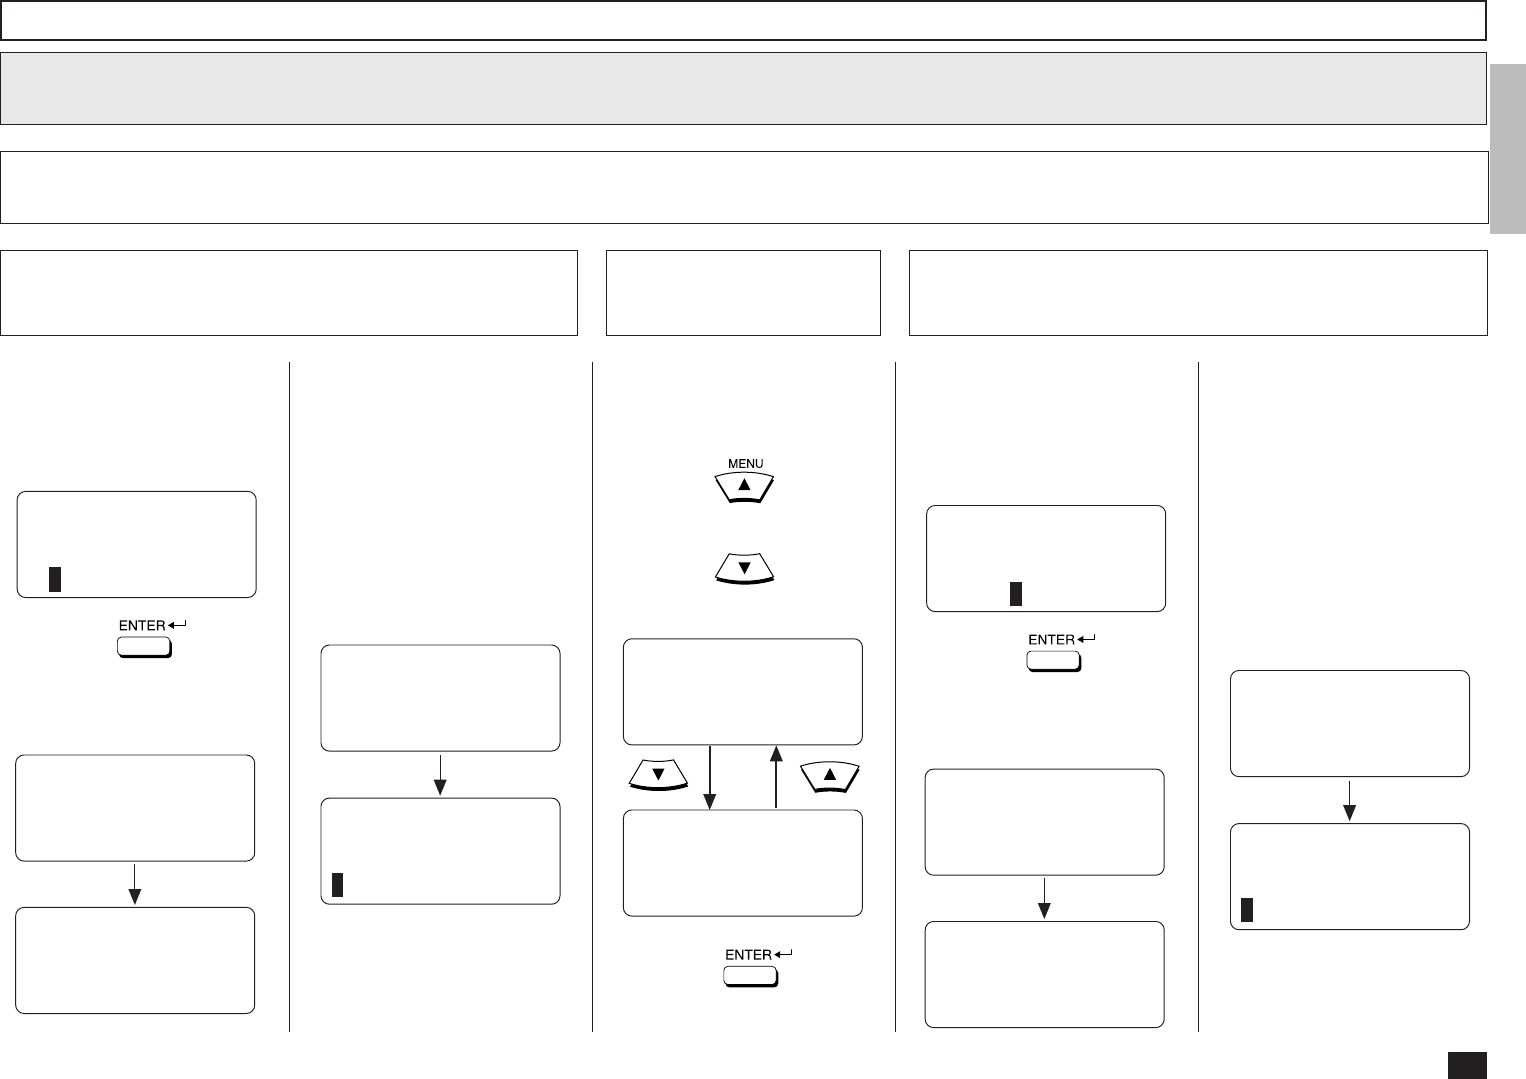
View the “50-73” Flip Panel to
select the desired Function
Key.
Press:
To select “ABB. NUMBERS”,
press:
Display the TEL
LIST ENTRY Menu
1
Display the ABB.
NUMBERS Menu
2
TEL LIST ENTRY
1.ABB. NUMBERS
2.GROUP NUMBERS
3.ONE TOUCH KEYS
Upon entering
the first number:
ENTER ABB. NUMBER
OR PRESS
[BACK]:TO PREVIOUS
[STOP]:TO COMPLETE
ABB. NUMBER ENTRY
ABB. NUMBER =(1-999)
1
Modify/Delete the Abbreviated Dial Number
Enter the Abbreviated Dial
Number that you want to
modify or delete from 1 to 999.
Make sure that the 3-digit num-
ber (001 to 999) appears cor-
rectly, then press:
NOTE:
Any leading zero (0) can be
omitted from the Abbreviated
Dial Number.
The following screen will be
displayed.
Enter the ABB. Dial
Number
3
Change the ABB. Information
4
After 2 seconds:
ABB. NUMBER ENTRY
ALREADY ASSIGNED
ABB. NUMBER = 001
NEW YORK OFFICE
ABB. NUMBER ENTRY
1.CANCEL
2.MODIFY
3.RETAIN
To cancel (or delete) the con-
tents stored in the Abbreviated
Dial Number, press:
(to CANCEL)
After 2 seconds:
You can cancel, modify, or re-
tain Abbreviated Dial Numbers
registered in this facsimile.
•CANCEL
Deletes the information
stored in the selected Ab-
breviated Dial Number. It
will also remove the number
from all associated Group
Dialing Directories.
•MODIFY
Allows you to change the
remote facsimile number
and/or associated Location
ID name. This selection is
recommended if the location
is used in Group Dialing Di-
rectories.
•RETAIN
Retains the selected Abbre-
viated Dial Number informa-
tion without modification.
ABB. NUMBER ENTRY
ABB. NUMBER = 001
CANCELLED
ENTER ABB. NUMBER
OR PRESS
[BACK]:TO PREVIOUS
[STOP]:TO COMPLETE
Return to Step 2.
Press to exit the Menu
Operation mode and return to
the Standby Mode.
Cancel the ABB. Dial
Information
4a

36
Modify/Delete the Abbreviated Dial Number - continued
Change the ABB. Information - continued
4
To change the E-mail address
or the ID Name currently as-
signed to this Abbreviated Dial
Number, press:
(to MODIFY)
The ID Name currently as-
signed is displayed on the bot-
tom row.
If you do not wish to change
the Abbreviated Dial Number
information, press:
(to RETAIN)
Return to Step 3 to select a
different Abbreviated Dial Num-
ber or press to return to
the Standby Mode.
ENTER ABB. NUMBER
OR PRESS
[BACK]:TO PREVIOUS
[STOP]:TO COMPLETE
Modify the ABB. Dial Information
4b Retain the Current
ABB. Dial Information
4c
ABB. NBR= 001
ID NAME =(MAX20)
ENTER NAME
ID NAME =(MAX20)
XXXXXX
After 2 seconds:
Rename the Location ID name
of the remote party to be as-
signed to the current Abbrevi-
ated Dial Number.
When the name is displayed
correctly on the LCD display,
press:
ABB. NBR= 001
1.TEL NUMBER
2.E-MAIL
3.COMPLETE
If you continue to modify the E-
mail address and other options,
press:
If you want to complete the
modification, press:
When you select “2.E-MAIL”,
the following screen appears.
After 2 seconds:
E-MAIL ADDRESS
ALREADY ASSIGNED
001@toshiba.com
E-MAIL ADDRESS
1.CANCEL
2.MODIFY
3.RETAIN
Go to Step 7 in the section of
“Abbreviated Dialer Registra-
tion” and continue the opera-
tion.
To continue modifying the E-
mail address and other options,
press:
PRESS SPEED DIAL FOR
ADDRESS SEARCH OR
ENTER TO ENTER
E-MAIL ADDRESS
When you select “3.COM-
PLETE”, the following screen
appears.
ABB. NBR= 001
PRESS ONE TOUCH KEY
TO ENTER OR
[ENTER]:TO SKIP
Go to Step 12 in the section of
“Abbreviated Dialer Registra-
tion” and continue the opera-
tion.
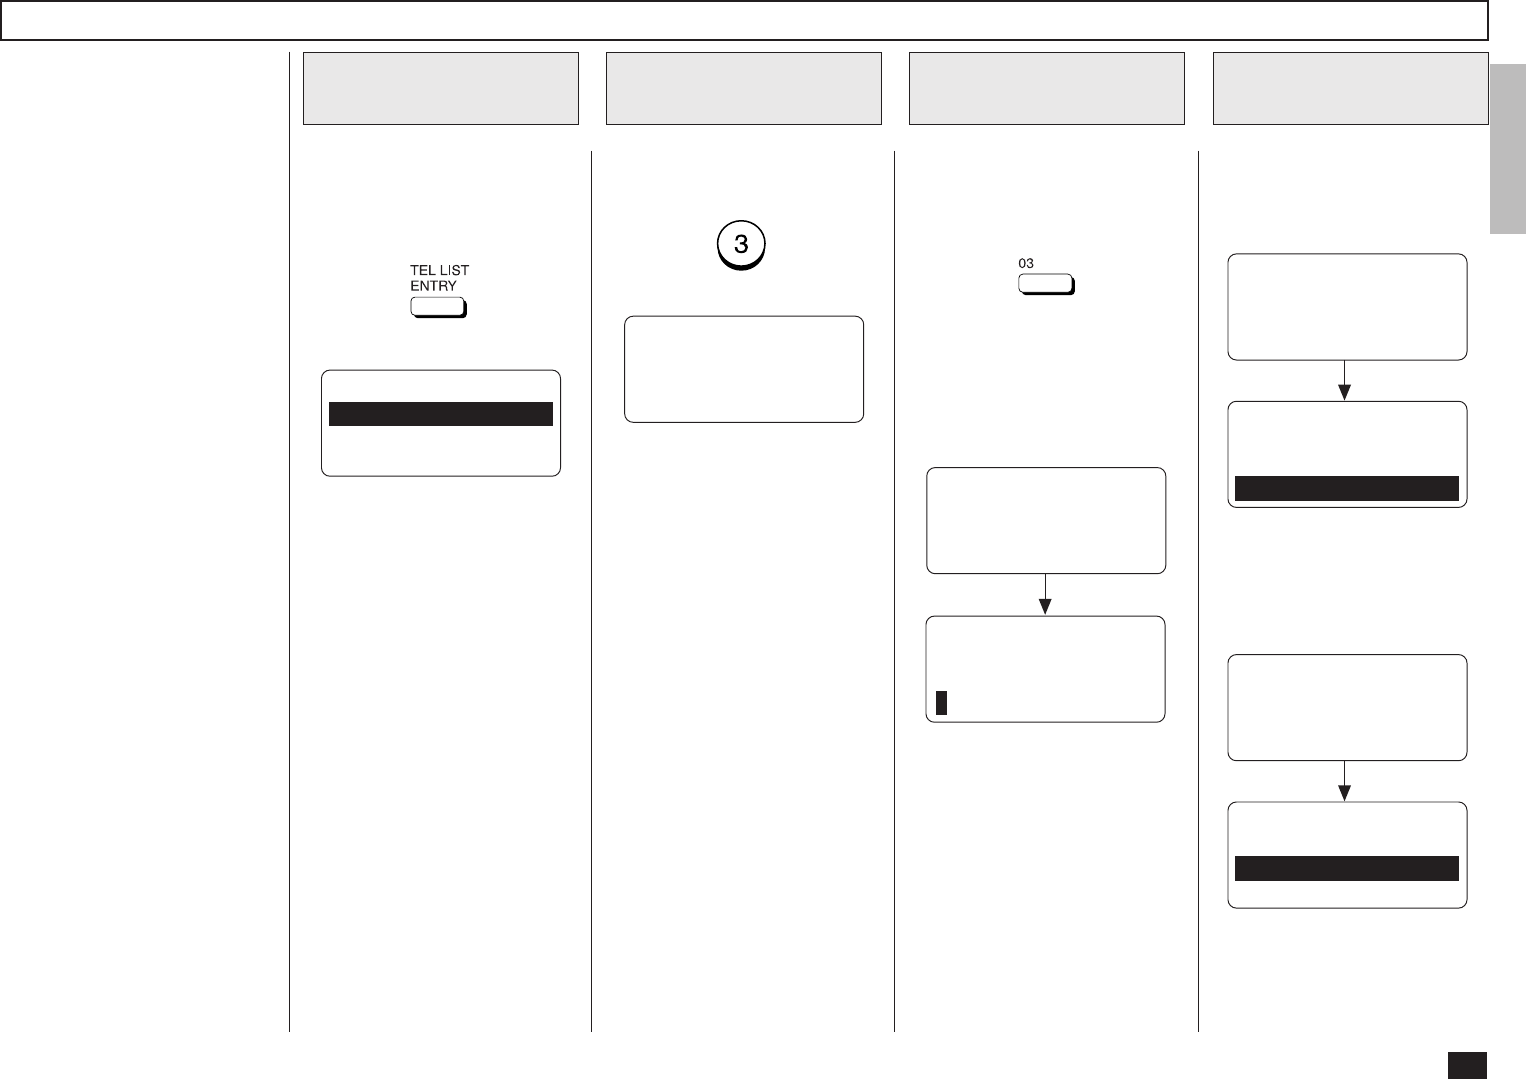
37
View the “50-73” Flip Panel to
select the desired Function
Key.
Press:
Display the TEL
LIST ENTRY Menu
1
Display the ONE
TOUCH KEYS Menu
2
TEL LIST ENTRY
1.ABB. NUMBERS
2.GROUP NUMBERS
3.ONE TOUCH KEYS
One Touch Dialer Registration
This machine provides up to 73
One Touch Dial keys. Keys 1
to 49 are accessible with the
Flip Panel in the “01-49” view.
Keys 50 to 73 are accessible
with the Flip Panel in the “50-
73” view.
Press the desired One Touch
key.
Example: One Touch key 03
If the One Touch key has not
been used and the following
menu is displayed, skip to Step
5.
Select a One Touch
Location
3
ONE TOUCH= 03
ID NAME =(MAX20)
ENTER NAME
ID NAME =(MAX20)
After 2 seconds:
When the E-mail address is as-
signed to this One Touch key,
the following screen is dis-
played.
When a Preset One
Touch is Active
4
ONE TOUCH = 03
ALREADY ASSIGNED
ONE TOUCH = 03
FRISCO OFFICE
After 2 seconds:
ONE TOUCH KEY ENTRY
1.CANCEL
2.MODIFY
3.RETAIN
See the section “Modify/Delete
the One Touch Key” and con-
tinue the operation.
To select “ONE TOUCH
KEYS”, press:
PRESS ONE TOUCH KEY
OR PRESS
[BACK]:TO PREVIOUS
[STOP]:TO COMPLETE
When the Abbreviated Dial
Number is assigned to this One
Touch key, the following
screen is displayed.
ONE TOUCH= 03
ALREADY ASSIGNED
ABB. NUMBER = 001
NEWYORK OFFICE
After 2 seconds:
ONE TOUCH KEY ENTRY
1.CANCEL
2.RETAIN
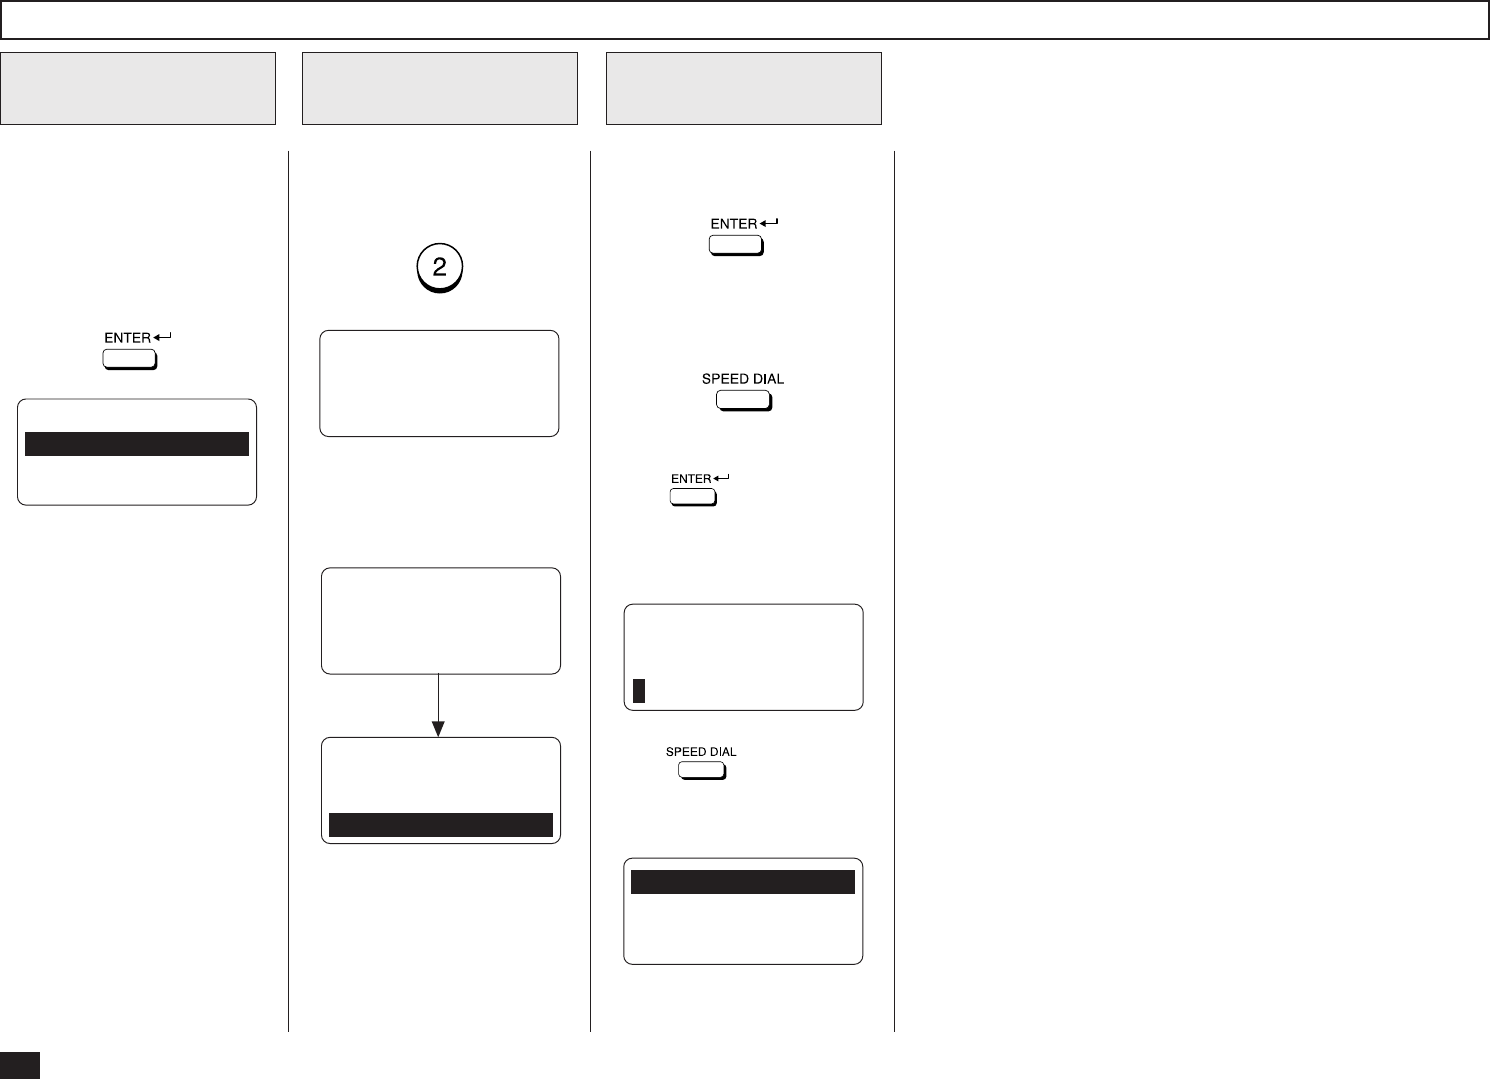
38
Enter the Location ID name of
the remote party to be as-
signed to the current One
Touch key.
When the name is displayed
correctly on the LCD display,
press:
Enter the Location
ID Name
5
ONE TOUCH = 03
1.TEL NUMBER
2.E-MAIL
To select to register an E-mail
address for the One Touch
key, Press:
Select the type
6
One Touch Dialer Registration - continued
PRESS SPEED DIAL FOR
ADDRESS SEARCH OR
ENTER TO ENTER
E-MAIL ADDRESS
To input an E-mail address di-
rectly, press:
To input an E-mail address by
modifying the searched E-mail
address, press:
Select the input E-mail
address method
7
ENTER E-MAIL ADDRESS
E-MAIL ADDRESS:
When is pressed, the
ENTER E-MAIL ADDRESS
screen appears. Skip to Step
10.
When is pressed, the
following screen appears. Con-
tinue to the next step.
1.LOCAL ADDRESSES
2.RECEPTION HISTORY
3.SENT HISTORY
If the E-mail address is already
assigned to this One Touch
key, the following screen ap-
pears.
After 2 seconds:
E-MAIL ADDRESS
ALREADY ASSIGNED
001@toshiba.com
See the section “Modify/Delete
the One Touch Key” and con-
tinue the operation.
E-MAIL ADDRESS
1.CANCEL
2.MODIFY
3.RETAIN
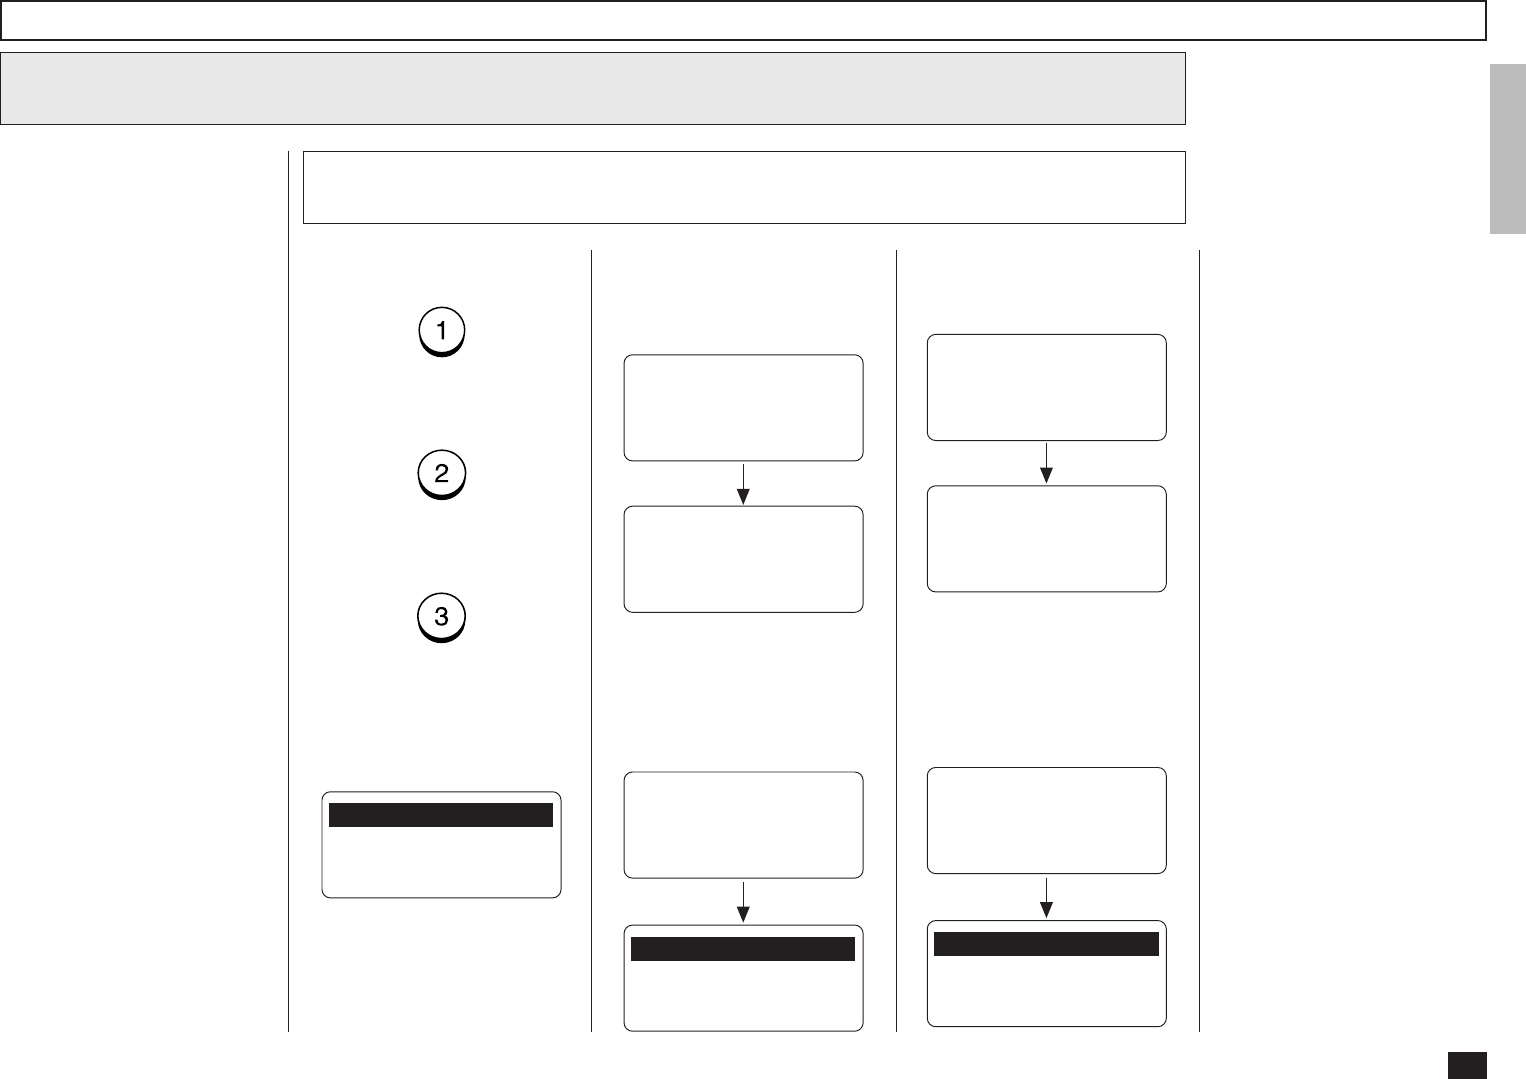
39
Searching for an E-mail address
8
One Touch Dialer Registration - continued
To select the Local Addresses,
press:
To select the Reception His-
tory, press:
To select the Sent History,
press:
When “1.LOCAL ADDRESSES”
is selected, the following
screen appears. Continue to
the next step.
Select the search category
8a
This operation is to search for
an E-mail address and modify it
to a new E-mail address.
You can search for an E-mail
address in the following catego-
ries.
Local Addresses:
You can search for an E-mail
address that is assigned to
Abbreviated Dial Numbers
or One Touch Dial Keys.
Reception History:
You can search for an E-mail
address which the machine
has received the E-mails
from.
Sent History:
You can search for an E-mail
address which the machine
has sent E-mails to.
1.SEARCH NAME
2.SEARCH E-MAIL ADDR
3.ALL
When “2.RECEPTION HIS-
TORY” is selected, the follow-
ing screen appears. Skip to
Step 8c.
Searching ends.
RECEPTION HISTORY
[STOP]:TO PREVIOUS
001@toshiba.com
[ ] 00001/00050
RECEPTION HISTORY
NOW SEARCHING
When “2.RECEPTION HIS-
TORY” is selected but no E-
mail address can be matched,
the display indicates the follow-
ing screen and returns to the
first screen in this step.
↑↓
After 2 seconds:
1.LOCAL ADDRESSES
2.RECEPTION HISTORY
3.SENT HISTORY
RECEPTION HISTORY
E-MAIL ADDRESS:
--------------------
When “3.SENT HISTORY” is
selected, the following screen
appears. Skip to Step 8d.
Searching ends.
SENT HISTORY
[STOP]:TO PREVIOUS
001@toshiba.com
[ ] 00001/00050
SENT HISTORY
NOW SEARCHING
When “3.SEND HISTORY” is
selected but no E-mail address
can be matched, the display in-
dicates the following screen
and returns to the first screen
in this step.
↑↓
After 2 seconds:
1.LOCAL ADDRESSES
2.RECEPTION HISTORY
3.SENT HISTORY
SENT HISTORY
E-MAIL ADDRESS:
--------------------

40
One Touch Dialer Registration - continued
Searching for an E-mail address - continued
8
Search from Local Adressess
8b
You can search for an E-mail
address from the Local Ad-
dresses using the following
method.
Search Name:
You can search for an E-mail
address by the ID name.
Search E-mail Addr:
You can search for an E-mail
address by the E-mail ad-
dress.
All:
You can list all E-mail ad-
dresses that have been reg-
istered as Abbreviated Dial
Numbers and One Touch
Dial Keys.
8b-1 Select the search method
To select Search Name, press:
To select Search E-mail Addr,
press:
To select All, press:
When “1.SEARCH NAME” is
selected, the following screen
appears. Continue to the next
step.
SEARCH NAME
NAME (20 MAX):
When “2.SEARCH E-MAIL
ADDR” is selected, the follow-
ing screen appears. Skip to
the Step 8b-4.
SEARCH E-MAIL
E-MAIL ADDRESS:
When “3.ALL” is selected but
no E-mail address can be
searched, the display indicates
the following screen and re-
turns to the first screen in this
step.
After 2 seconds:
1.SEARCH NAME
2.SEARCH E-MAIL ADDR
3.ALL
ALL ADDRESS
E-MAIL ADDRESS:
--------------------
When “3.ALL” is selected, the
following screen appears. Skip
to Step 8b-6.
After 2 seconds:
ALL ADDRESS
NOW SEARCHING
↑↓
ALL ADDRESS
[STOP]:TO PREVIOUS
001@toshiba.com
[ ] 00001/00050
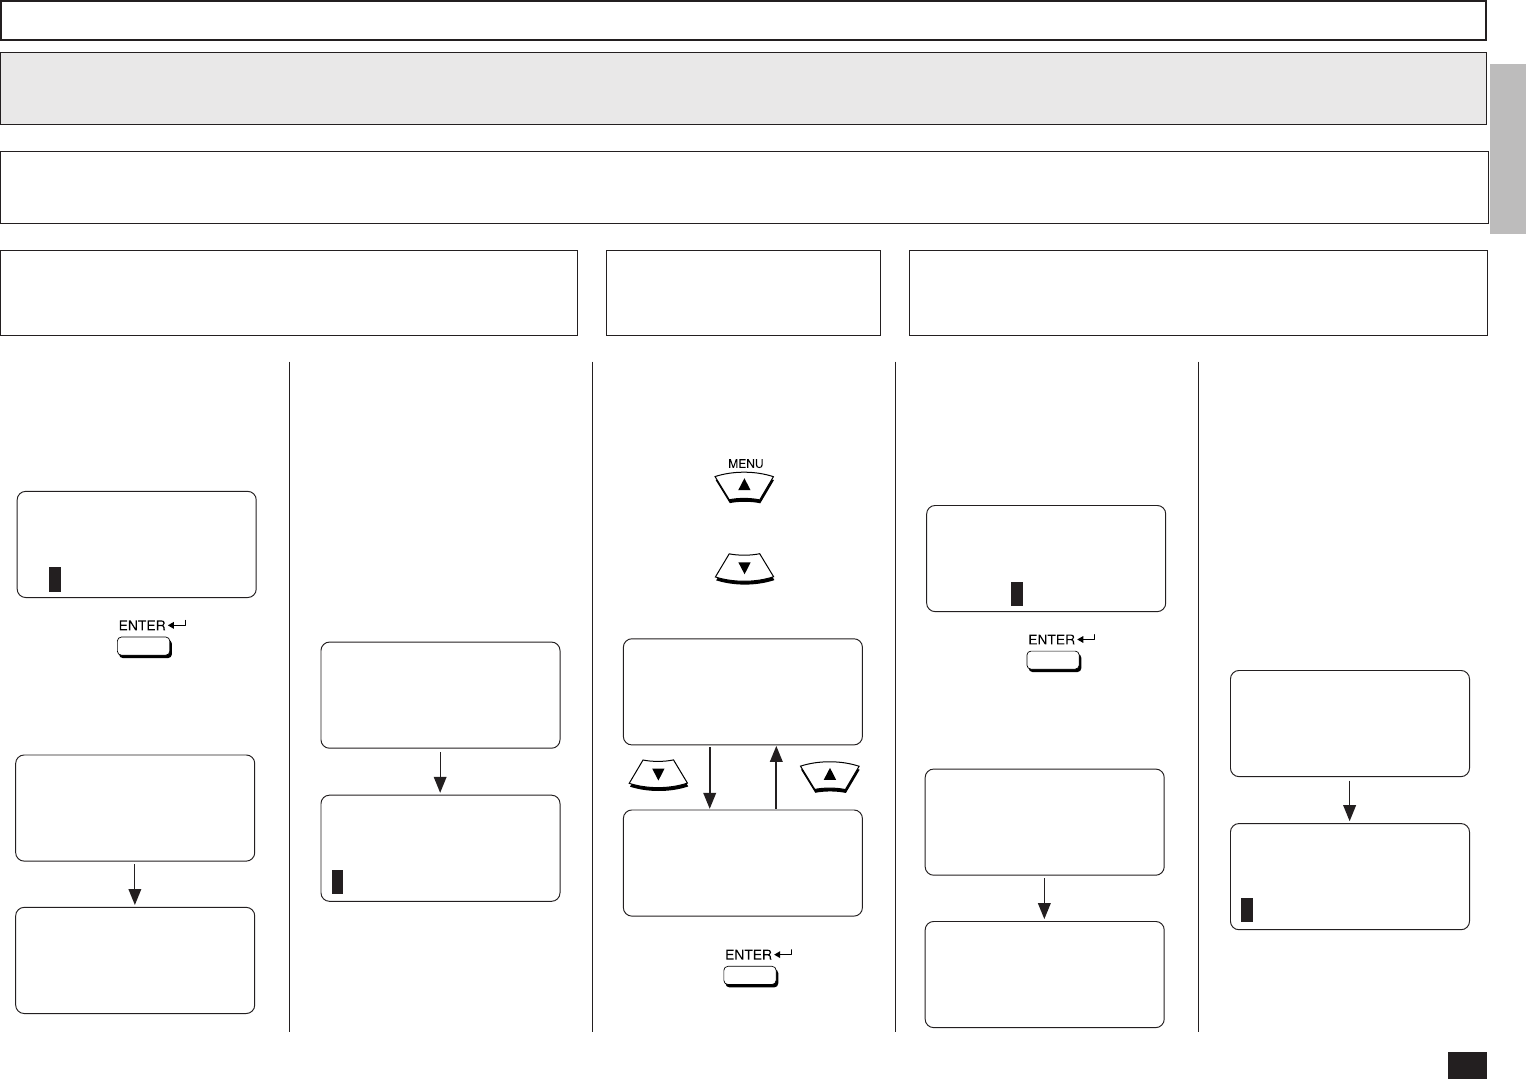
41
One Touch Dialer Registration - continued
Searching for an E-mail address - continued
8
Search from Local Adressess - continued
8d
8b-2 Enter the Search Name
Enter the character(s) associ-
ated with the ID name of Abbre-
viated Dial Numbers or One
Touch Dial Keys using the Key-
board and the Dial Keypad.
Searching ends.
SEARCH NAME
NOW SEARCHING
NAME (20 MAX):
00
SEARCH NAME
[STOP]:TO PREVIOUS
001
[ ] 00001/00015
Then press:
The machine starts to search
the ID names.
SEARCH NAME
NAME (20 MAX):
00
When no ID name can be
matched, the display indicates
the following screen and returns
to the first screen in this step.
After 2 seconds:
SEARCH NAME
NAME (20 MAX):
--------------------
↑↓
Locate the screen of the de-
sired ID name using the follow-
ing scroll keys.
(for the previous screen)
(for the next screen)
SEARCH NAME
NAME (20 MAX):
00
8b-3 Select the Search
Name
Then press:
Skip to Step 9.
8b-4 Enter the Search E-mail Address
Enter the character(s) associ-
ated with the E-mail address
assigned to Abbreviated Dial
Numbers or One Touch Dial
Keys using the Keyboard and
the Dial Keypad.
Searching ends.
SEARCH E-MAIL
NOW SEARCHING
E-MAIL ADDRESS:
toshiba
SEARCH E-MAIL
[STOP]:TO PREVIOUS
001@toshiba.com
[ ] 00001/00015
Then press:
The machine starts to search
the E-mail addresses.
SEARCH E-MAIL
E-MAIL ADDRESS:
toshiba
When no E-mail address can
be matched, the display indi-
cates the following screen and
returns to the first screen in this
step.
After 2 seconds:
SEARCH E-MAIL
E-MAIL ADDRESS:
--------------------
↑↓
SEARCH E-MAL
E-MAIL ADDRESS:
toshiba
SEARCH NAME
[STOP]:TO PREVIOUS
001
[ ] 00001/00015
SEARCH NAME
[STOP]:TO PREVIOUS
002
[ ] 00002/00015
↑↓
↑↓
NOTE:
The machine searches all
ID names that include the
search name entered and
applicable to the case.
NOTE:
The machine searches all
E-mail addresses that in-
clude the search name en-
tered and matched the
case.
42
One Touch Dialer Registration - continued
Searching for an E-mail address - continued
8
Search from Local Adressess - continued
8b
Locate the screen of the de-
sired E-mail address using the
following scroll keys.
(for the previous screen)
(for the next screen)
8b-5 Select the E-mail
address
SEARCH E-MAIL
[STOP]:TO PREVIOUS
001@toshiba.com
[ ] 00001/00015
SEARCH E-MAIL
[STOP]:TO PREVIOUS
002@toshiba.com
[ ] 00002/00015
↑↓
↑↓
Then press:
Skip to Step 9.
Select from Reception
History
8c
Locate the screen of the de-
sired E-mail address using the
following scroll keys.
(for the previous screen)
(for the next screen)
RECEPTION HISTORY
[STOP]:TO PREVIOUS
001@toshiba.com
[ ] 00001/00015
RECEPTION HISTORY
[STOP]:TO PREVIOUS
002@toshiba.com
[ ] 00002/00015
↑↓
↑↓
Then press:
Skip to Step 9.
Locate the screen of the de-
sired E-mail address using the
following scroll keys.
(for the previous screen)
(for the next screen)
8b-6 Select the E-mail
address
ALL ADDRESS
[STOP]:TO PREVIOUS
001@toshiba.com
[ ] 00001/00015
ALL ADDRESS
[STOP]:TO PREVIOUS
002@toshiba.com
[ ] 00002/00015
↑↓
↑↓
Then press:
Skip to Step 9.
Select from Sent
History
8c
Locate the screen of the de-
sired E-mail address using the
following scroll keys.
(for the previous screen)
(for the next screen)
SENT HISTORY
[STOP]:TO PREVIOUS
001@toshiba.com
[ ] 00001/00015
SENT HISTORY
[STOP]:TO PREVIOUS
002@toshiba.com
[ ] 00002/00015
↑↓
↑↓
Then press:
Skip to Step 9.
Enter the E-mail ad-
dress
9
Enter or modify the E-mail ad-
dress to be assigned to the
current One Touch key using
the Keyboard and the Dial Key-
pad.
DO YOU KNOW RECEIVER
CAPABILITY?
1.YES
2.NO
When the E-mail address is
displayed correctly on the LCD
display, press:
ENTER E-MAIL ADDRESS
E-MAIL ADDRESS:
001@toshiba.com
43
One Touch Dialer Registration - continued
If you know the capability of
the recipient machine, press:
If you do not know the capabil-
ity of the recipient machine,
press:
RECEIVER CAPABILITY
1.DONE
2.RESOLUTION
3.COMPRESSION
When “1.YES” is selected, the
following screen appears. Con-
tinue to the next step.
10
Select Receiver Capability
When “2.NO” is selected, the
following screen appears. Skip
to Step 11.
E-MAIL OPTIONS?
1.YES
2.NO
To designate a specific resolu-
tion of the documents sent to
this E-mail address, select
RESOLUTION by pressing:
Resolution Setting
10b
RESOLUTION
1.200x100
2.200x200
3.200x400
4.400x400
These items are outside the
LCD frame. To view them,
use the [ ] scroll key.
Select the desired Resolution.
Press:
(for 200x100)
(for 200x200)
(for 200x400)
(for 400x400)
The display returns to the first
screen in Step 10. Select the
next option. If you have set up
the Receiver Capability, Skip to
Step 10d.
Select the Receiver
Capacity
10a
This setting will allow you to
specify one or more following
Receiver Capabilities for the
One Touch key you are regis-
tering, if you know the capabili-
ties of the recipient machine.
Resolution:
Selected to specify the
resolution of images to be
sent. This resolution is set
to “200x200” as a default
setting.
Compression:
Selected to specify the type
of compression applied to
images to be sent.
44
One Touch Dialer Registration - continued
10
Select Receiver Capability - continued
Complete the Receiver
Capability Setup
10d
If you have completed the de-
sired Receiver Capability set-
ting for this One Touch key,
select DONE by pressing:
E-MAIL OPTIONS?
1.YES
2.NO
11
Select E-mail Options
To set up the E-mail Options,
press:
To skip the E-mail Options,
press:
E-MAIL OPTIONS
1.DONE
2.DELAYED COMM.
3.TX REPORT
When “1.YES” is selected, the
following screen appears. Con-
tinue to the next step.
When “2.NO” is selected, the
following screen appears. Skip
to Step 12.
Select the E-mail
Options
11a
Compression Setting
10c
Select the desired Compres-
sion.
Press:
(for MH)
(for MR)
(for MMR)
(for JBIG)
The display returns to the first
screen in Step 10. If you have
done so to set up the Receiver
Capability, Skip to Step 10d.
This setting will allow you to
specify one or more following
E-mail Options for the One
Touch key you are registering.
Delayed Communication:
Default=off
Selected to program a
transmission start time.
Confirmation Report:
Default=off
Selected to print a confirma-
tion report after each trans-
mission.
To designate a specific com-
pression of the documents sent
to this E-mail address, select
COMPRESSION by pressing:
These items are outside the
LCD frame. To view them,
use the [ ] scroll key.
COMPRESSION
1.MH
2.MR
3.MMR ↓
4.JBIG
ONE TOUCH = 03
1.TEL NUMBER
2.E-MAIL
3.COMPLETE
NOTE:
If you do not know the
receiver’s capabilities for
the compression type, se-
lect “MH”.
45
11
Select E-mail Options - continued
One Touch Dialer Registration - continued
DELAYED COMM.
TIME =23:30
DELAYED COMM.
TIME =HH:MM
23:30
Enter the desired transmission
start time in either 12-hour or
24-hour format depending on
the machine setup. (Example:
23:30 in the 24-hour format).
Then press:
Displayed for 2 seconds
The display returns to the first
screen in Step 11. Select the
next Option or skip to Step 11d
if you have completed the E-
mail Options setting.
Delayed Communication Setting
11b
To designate a specific time to
start the transmission of the
job using this One Touch key,
press:
DELAYED COMM.
TIME =HH:MM
:
To print a Confirmation Report
automatically after sending
documents using this One
Touch key, select:
CONFIRMATION REPORT
1.ON
2.OFF
To enable a Confirmation Re-
port, press:
To disable a Confirmation Re-
port, press:
The display returns to the first
screen in Step 11. If you have
completed the E-mail Options
setting, continue to the next
step.
Confirmation Report
Setting
11c Complete the E-mail
Options Setup
11d
If you have completed the de-
sired E-mail Options setting for
this One Touch key, select
DONE by pressing:
ONE TOUCH = 03
1.TEL NUMBER
2.E-MAIL
3.COMPLETE

46
12
Complete the One Touch Key registration
If you have completed the reg-
istration for this One Touch
key, select COMPLETE by
pressing:
ONE TOUCH = 03
L.A. OFFICE
REGISTERED
One Touch Dialer Registration - continued
NOTE:
If you want to edit or cancel
the registration of this One
Touch key, press .
After 2 seconds:
E-MAIL ADDRESS
ALREADY ASSIGNED
001@toshiba.com
See the section “Modify/De-
lete the One Touch Key”
and continue the operation.
E-MAIL ADDRESS
1.CANCEL
2.MODIFY
3.RETAIN
PRESS ONE TOUCH KEY
OR PRESS
[BACK]:TO PREVIOUS
[STOP]:TO COMPLETE
After 2 seconds:
Returns to Step 2.
Press to exit the Menu
Operation mode and return to
the Standby Mode.
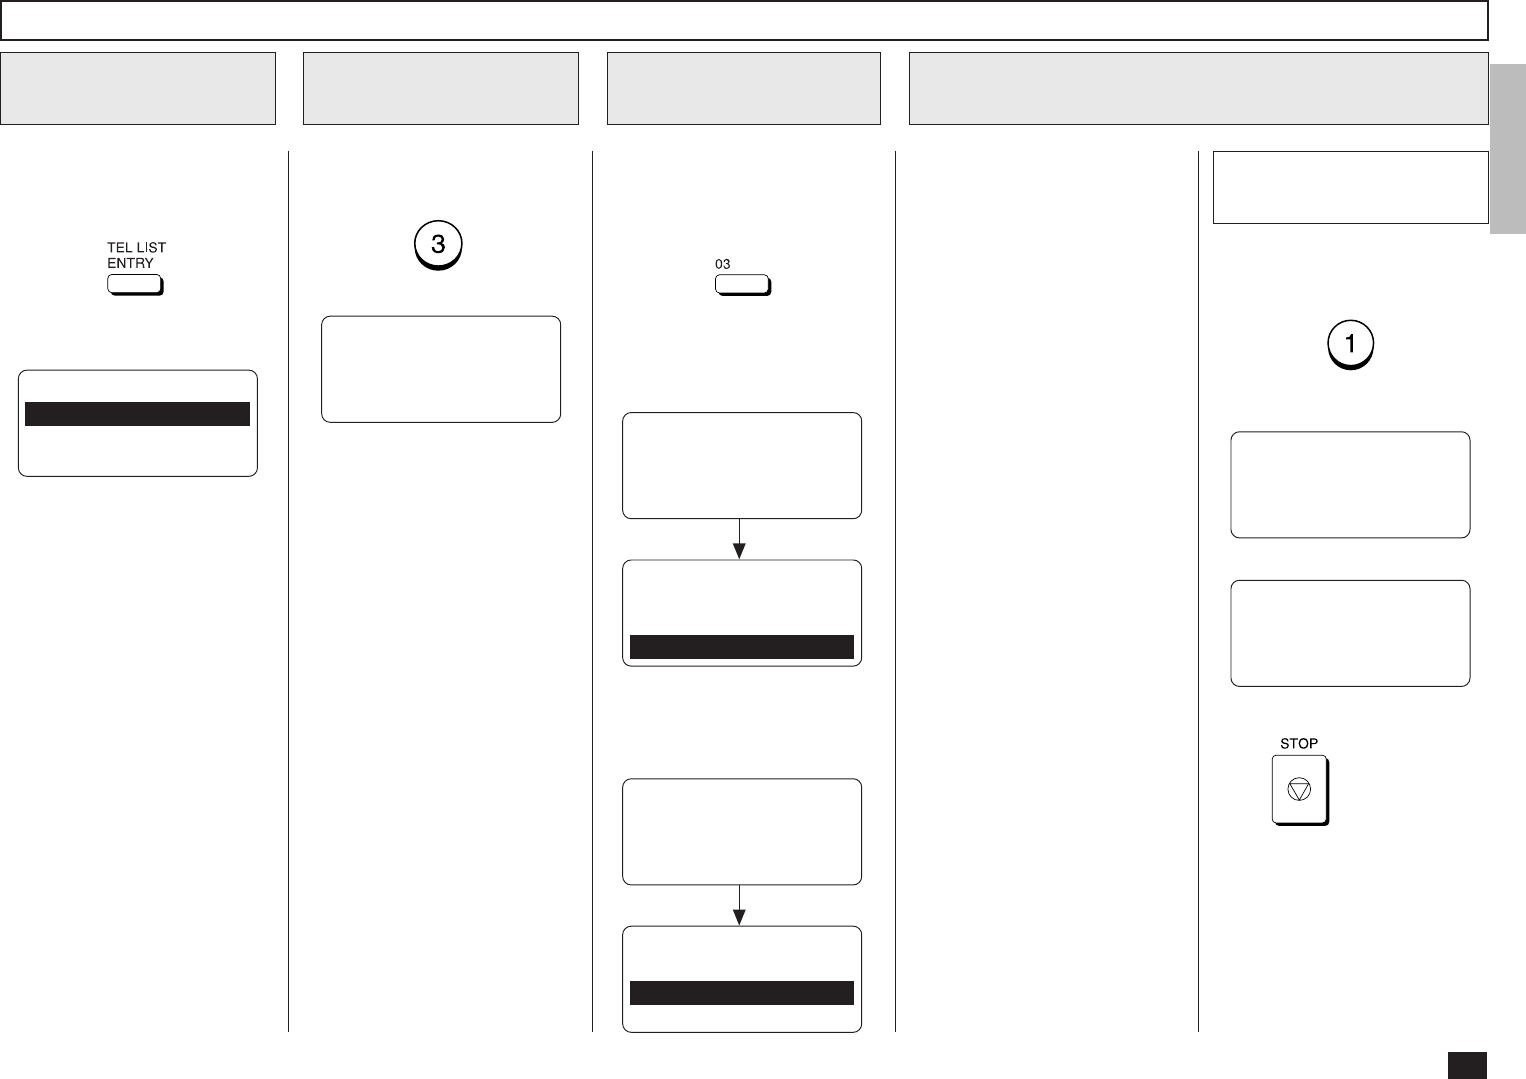
47
View the “50-73” Flip Panel to
select the desired Function Key.
Press:
Display the TEL
LIST ENTRY Menu
1
Display the ONE
TOUCH KEY Menu
2
TEL LIST ENTRY
1.ABB. NUMBERS
2.GROUP NUMBERS
3.ONE TOUCH KEYS
Modify/Delete the One Touch Key
Select a One Touch
Location
3
Change the One Touch Key Information
4
To select “ONE TOUCH
KEYS”, press:
PRESS ONE TOUCH KEY
OR PRESS
[BACK]:TO PREVIOUS
[STOP]:TO COMPLETE
Press the One Touch key that
you want to modify or delete.
Example: One Touch key 03
To cancel (or delete) the One
Touch key assignment, press:
(to CANCEL)
You can cancel or retain the
One Touch key once registered
in the facsimile.
•CANCEL
Deletes the information
stored in the selected One
Touch key. It will also re-
move the number from all
associated Group Dialing
Directories.
•MODIFY
Allows you to change the
remote facsimile number
and/or associated Location
ID name. This selection is
recommended if the location
is used in Group Dialing Di-
rectories.
•RETAIN
Retains the selected One
Touch key information with-
out modification.
Cancel the One Touch
Assignment
4a
ONE TOUCH KEY ENTRY
ONE TOUCH= 03
CANCELLED
ENTER ONE TOUCH KEY
OR PRESS
[BACK]:TO PREVIOUS
[STOP]:TO COMPLETE
Return to Step 2.
Press to exit the Menu
Operation mode and return to
the Standby Mode.
ONE TOUCH = 03
ALREADY ASSIGNED
ONE TOUCH = 03
FRISCO OFFICE
After 2 seconds:
ONE TOUCH KEY ENTRY
1.CANCEL
2.MODIFY
3.RETAIN
When the Abbreviated Dial
Number is assigned to this One
Touch key, the following
screen is displayed.
ONE TOUCH= 03
ALREADY ASSIGNED
ABB. NUMBER = 001
NEWYORK OFFICE
After 2 seconds:
ONE TOUCH KEY ENTRY
1.CANCEL
2.RETAIN
When the E-mail address is as-
signed to this One Touch key,
the following screen is dis-
played.
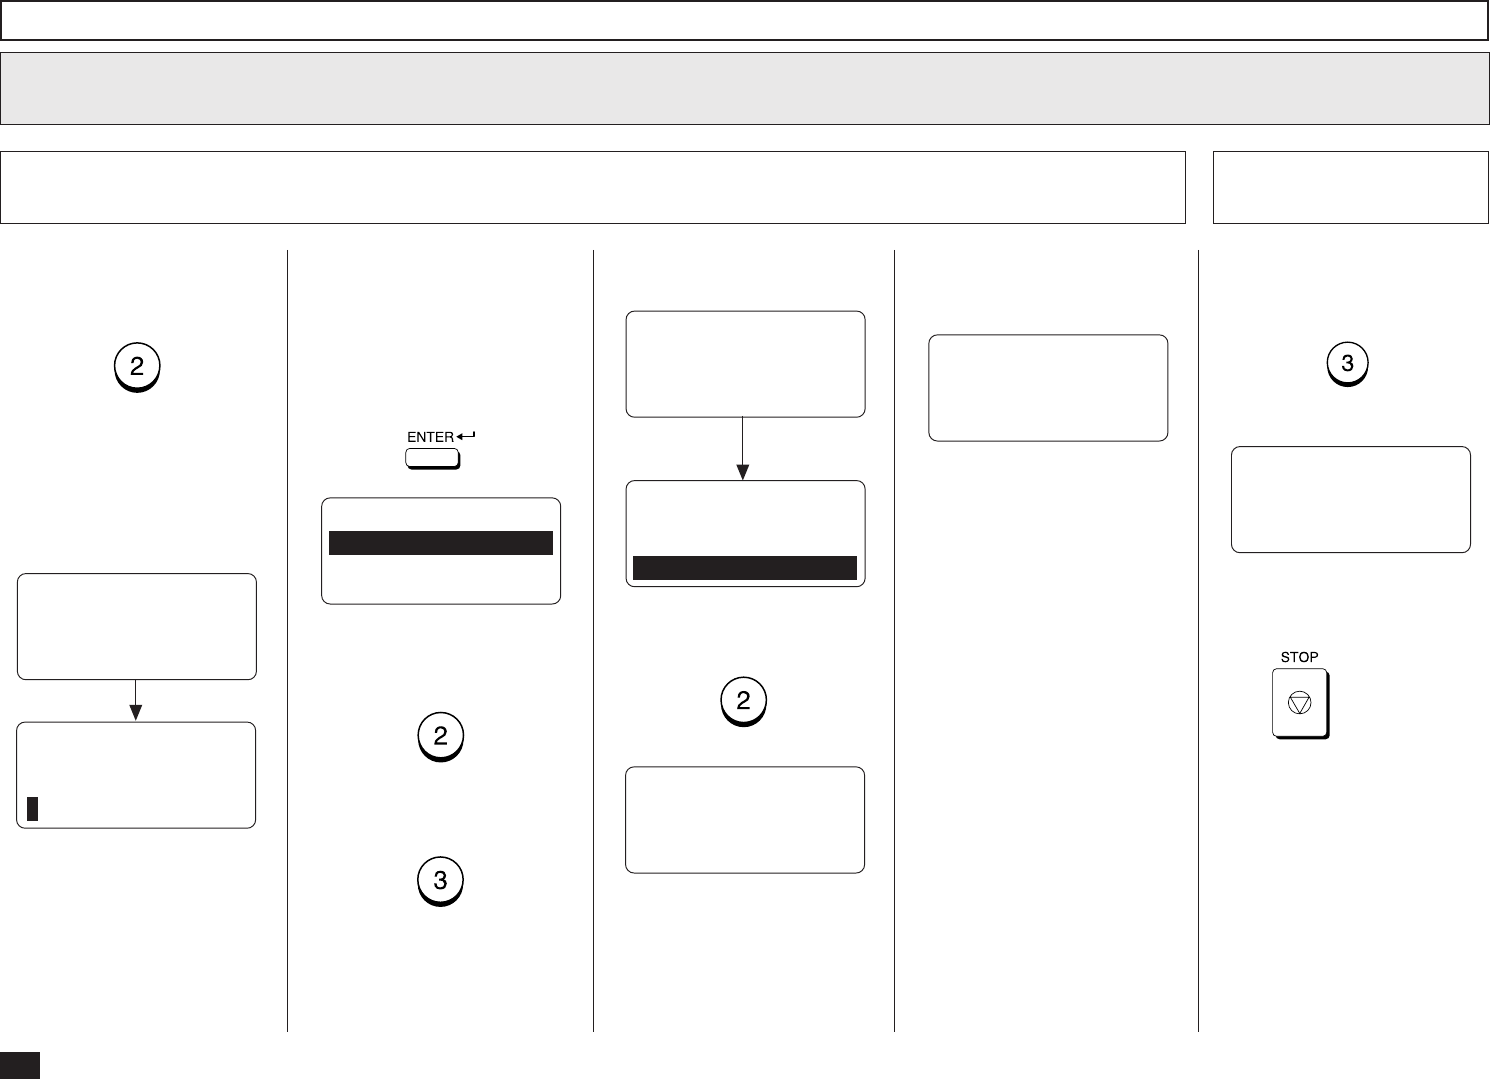
48
Modify/Delete the One Touch Key - continued
Change the One Touch Key Information - continued
4
To change the E-mail address
or ID Name currently assigned
to this One Touch key, press:
(to MODIFY)
The ID Name currently as-
signed is displayed on the bot-
tom row.
If you do not wish to change
the One Touch key informa-
tion, press:
(to RETAIN)
Return to Step 3 to select a
different One Touch key or
press to return to the
Standby Mode.
PRESS ONE TOUCH KEY
OR PRESS
[BACK]:TO PREVIOUS
[STOP]:TO COMPLETE
Modify the One Touch Key Information
4b Retain the Current
ABB. Dial Information
4c
ONE TOUCH = 03
ID NAME =(MAX20)
ENTER NAME
ID NAME =(MAX20)
XXXXXX
After 2 seconds:
Rename the Location ID name
of the remote party to be as-
signed to the current One
Touch key.
When the name is displayed
correctly on the LCD display,
press:
ONE TOUCH = 03
1.TEL NUMBER
2.E-MAIL
3.COMPLETE
If you continue to modify the E-
mail address and other options,
press:
If you want to complete the
modification, press:
When you select “2.E-MAIL”,
the following screen appears.
After 2 seconds:
E-MAIL ADDRESS
ALREADY ASSIGNED
001@toshiba.com
E-MAIL ADDRESS
1.CANCEL
2.MODIFY
3.RETAIN
Go to Step 7 in the section of
“One Touch Dialer Registration”
and continue the operation.
To continue modifying the E-
mail address and other options,
press:
PRESS SPEED DIAL FOR
ADDRESS SEARCH OR
ENTER TO ENTER
E-MAIL ADDRESS
When you select “3.COM-
PLETE”, the following screen
appears.
ABB. NBR= 001
PRESS ONE TOUCH KEY
TO ENTER OR
[ENTER]:TO SKIP
Go to Step 12 in the section of
“One Touch Dialer Registration”
and continue the operation.

49
View the “50-73” Flip Panel to
select the desired Function Key.
Press:
Enter a Group Number (1 to
1999).
Example: 1
To select “GROUP NUM-
BERS,” press:
Group Number Registration
Display the TEL
LIST ENTRY Menu
1
Display the GROUP
NUMBERS Menu
2
Enter a Group Number
3
TEL LIST ENTRY
1.ABB. NUMBERS
2.GROUP NUMBERS
3.ONE TOUCH KEYS
ENTER GROUP NUMBER
OR PRESS
[BACK]:TO PREVIOUS
[STOP]:TO COMPLETE
ENTER NAME
GROUP NAME =(MAX20)
GROUP NUMBER= 0001
GROUP NAME =(MAX20)
If the number entered is al-
ready registered as a Group
Number, you will receive an
LCD prompt like the one below.
To select “1.CANCEL,” go to
Step 4a.
To select “2.MODIFY,” go to
Step 4b.
To select “3.RETAIN,” go to
Step 4c.
GROUP NBR ENTRY
GROUP NBR =(1-1999)
1
Then press:
Displayed for 2 seconds
The display changes to the fol-
lowing for character entry (go to
Step 5).
After 2 seconds:
GROUP NBR ENTRY
ALREADY ASSIGNED
GROUP NUMBER= 0001
OREGON GRP
GROUP NBR ENTRY
1.CANCEL
2.MODIFY
3.RETAIN
E-mail addresses can be as-
signed to the Group Numbers.
You can send a document to
multiple remote stations in a sin-
gle operation. This is referred to
as Group Dialing or Multi-ad-
dress Transmission.
It is useful to preset address-
es, to which Multi-address
Transmissions are often per-
formed, in a group. To make a
Multi-address Transmission
easier, you can assign such a
group to a One Touch key.
The preset groups can also be
used as groups for Multi-polling
Receptions.
You can register up to 50
Broadcast Groups using any
combination of Group Numbers
from 1 to 1999 (no duplications
allowed). You may also assign
each group an optional name
of up to 20 characters.
Each group can contain any
combination of the 300 Abbre-
viated and/or 73 One Touch di-
als and can be assigned to a
One Touch key.
NOTE:
The E-mail addresses and
the fax numbers can be as-
signed to the same Group
Number. To assign the fax
number to a Group Number,
refer to the DP120F/
DP125F Operator’s Manual.
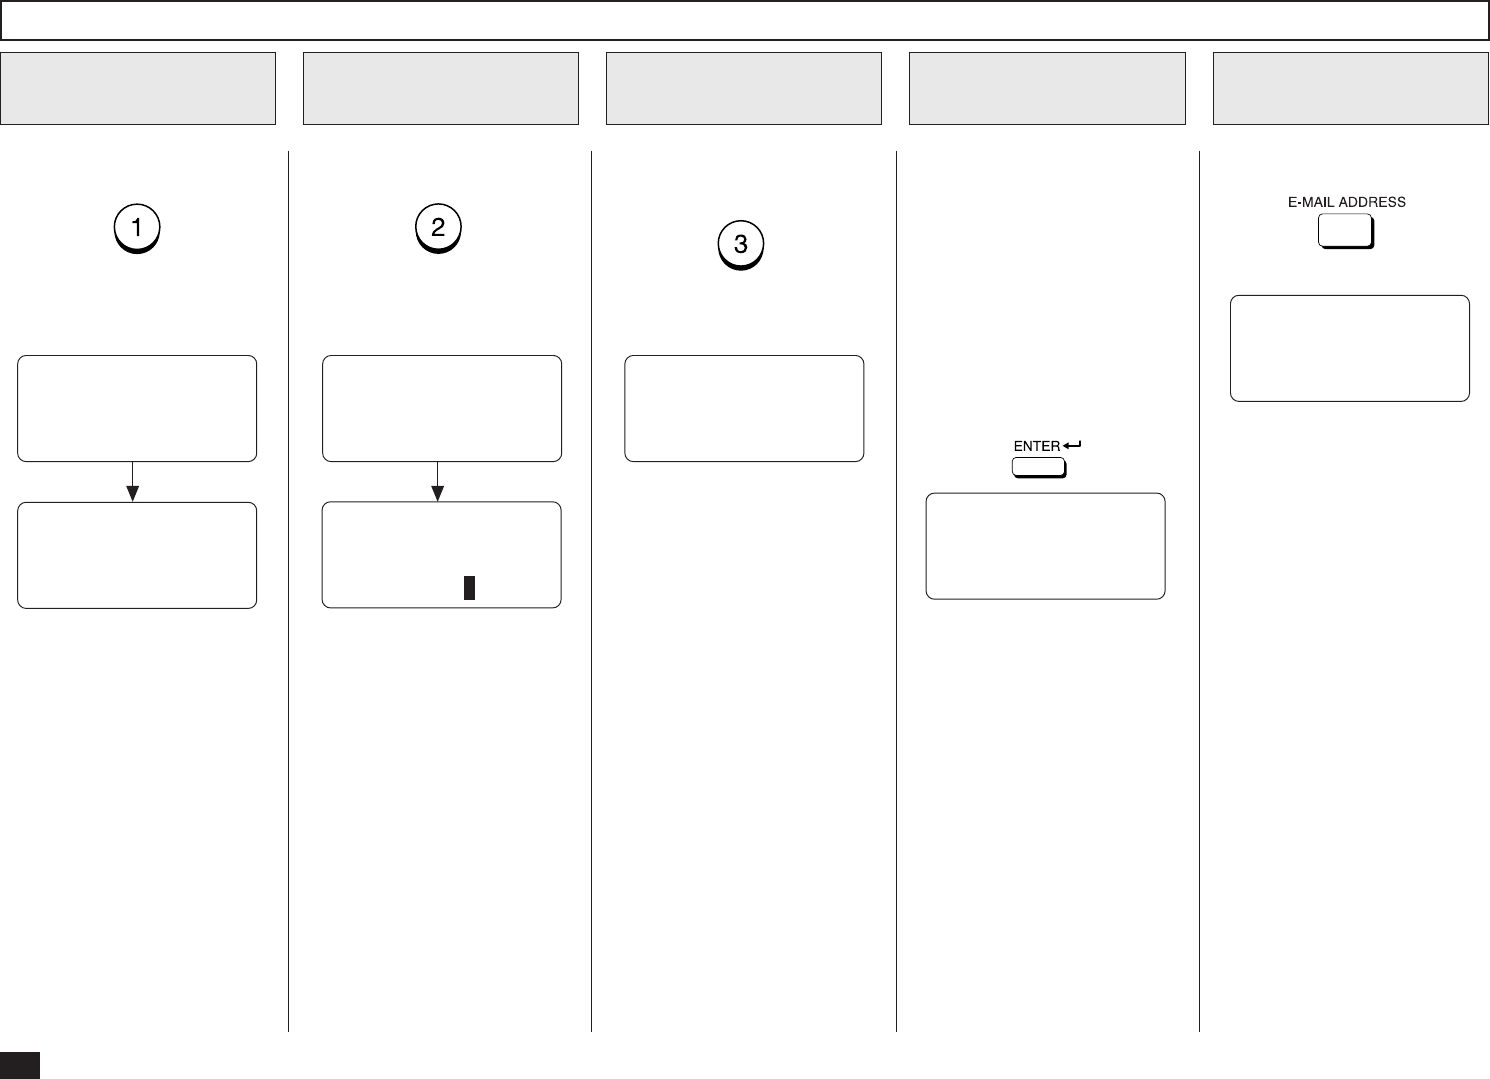
50
To cancel the existing Group,
press:
(to CANCEL)
To change the existing Group,
press:
(to MODIFY)
Go to Step 5 for the Group
Name entry.
To retain the existing Group,
press:
(to RETAIN)
Enter the Group Name (com-
prised of up to 20 characters)
associated with the Group
Number using the Keyboard
and the Keypad.
(When no name is entered in
this step, no name will be given
to the Group Number.)
When the name is displayed
correctly on the LCD display,
press:
Group Number Registration - continued
Enter the Group
Name
5
Retain the Existing
Group
4c
Cancel the Existing
Group
4a
Modify the Existing
Group
4b
The current Group Name is dis-
played.
Skip to Step 5.
ENTER GROUP NUMBER
OR PRESS
[BACK]:TO PREVIOUS
[STOP]:TO COMPLETE
GROUP NUMBER= 0001
ENTER SPEED DIAL, OT
OR E-MAIL KEY
ENTER TO COMPLETE
Return to Step 3.
Enter a Remote
Station
6
Press:
After 2 seconds:
GROUP NUMBER= 0001
GROUP NAME =(MAX20)
ENTER NAME
GROUP NAME =(MAX20)
COLORADO GRP
After 2 seconds:
GROUP NBR ENTRY
GROUP NUMBER= 0001
CANCELLED
ENTER GROUP NUMBER
OR PRESS
[BACK]:TO PREVIOUS
[STOP]:TO COMPLETE
Return to Step 3.
GROUP NUMBER= 0001
ENTER ABB. NBR OR OT
[ENTER] TO COMPLETE
NOTE:
The E-mail addresses and
the fax numbers can be as-
signed to the same Group
Number. To assign the fax
number to a Group Number,
refer to the DP120F/
DP125F Operator’s Manual.
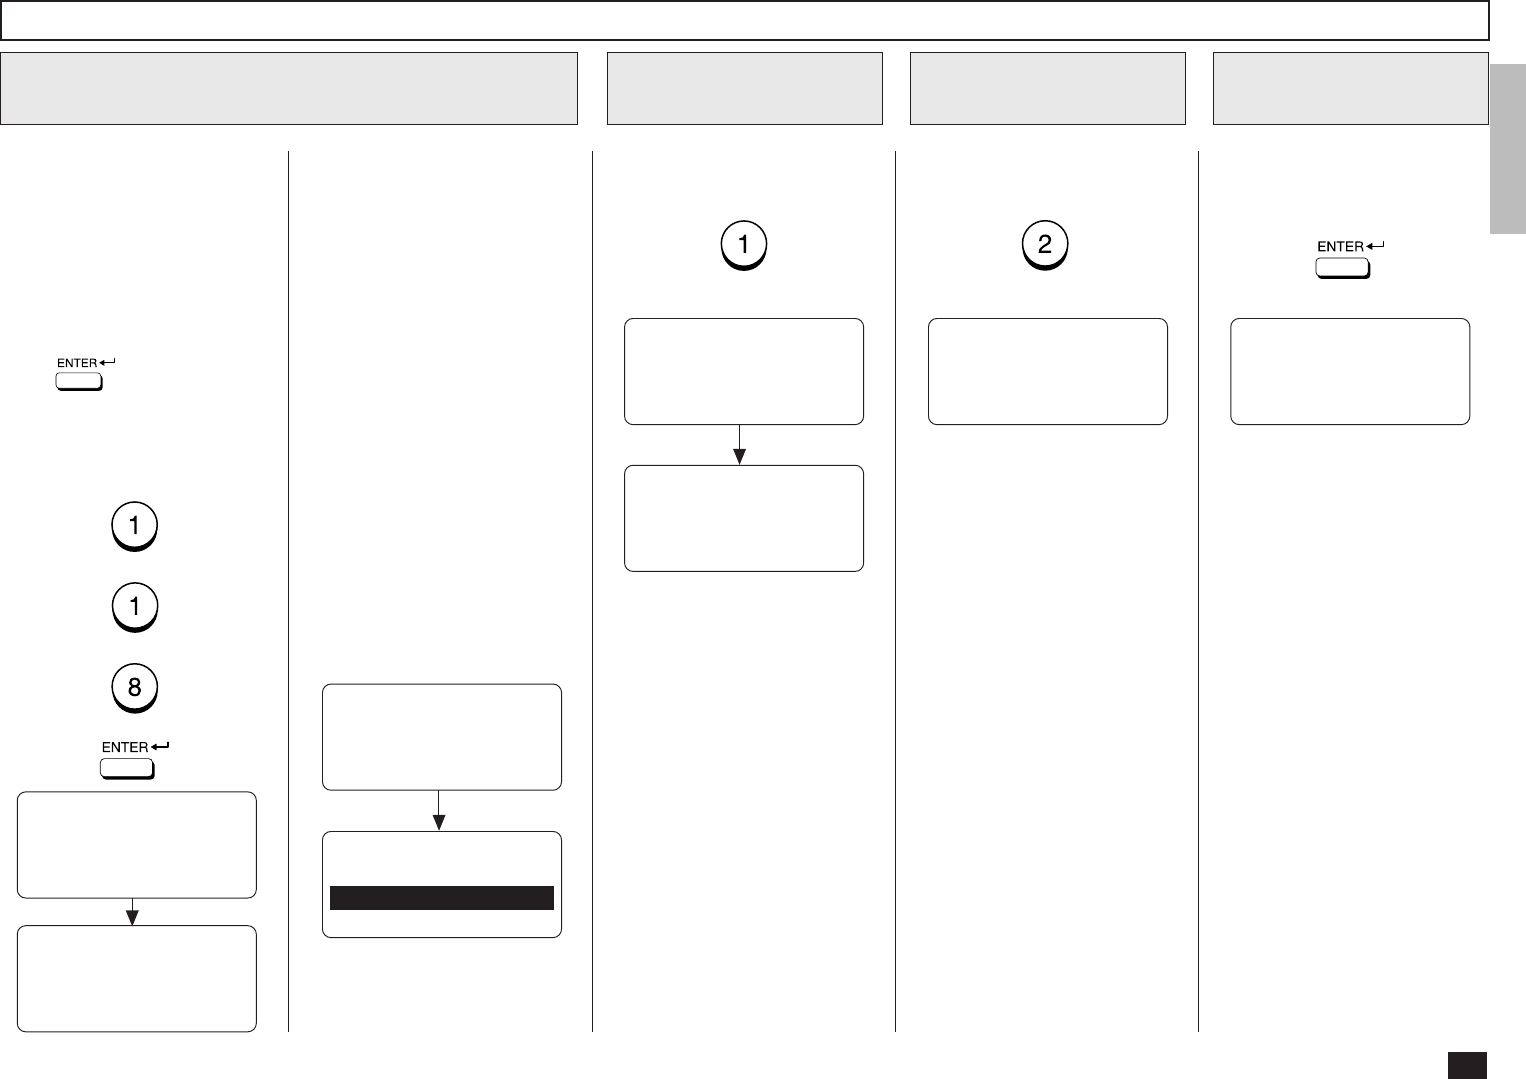
51
Group Number Registration - continued
Repeat this step until all of the
required remote station ad-
dresses are entered. Then go to
Step 8.
NOTE:
• When the entered Abbrevi-
ated Dial Number or One
Touch key has not been
registered with an E-mail
address, the display shows
the message “NO ENTRY.”
Then returns to Step 5.
• When the entered Abbrevi-
ated Dial Number or One
Touch key is already as-
signed in this group, the dis-
play shows the screens be-
low.
Go to Step 7a or Step 7b.
To delete the existing remote
station from this group, press:
(to CANCEL)
To retain this remote station in
this group, press:
(to RETAIN)
When all the stations neces-
sary for this group are entered
in Step 6, press:
Cancel the Group
Number Setting
7a
Retain the Group
Number Setting
7b
Complete Group
Station Entries
8
GROUP NUMBER= 0001
ALREADY ASSIGNED
ABB. NBR= 118
DENVER OFFICE
ABB. NBR= 118
CANCEL ?
1.CANCEL
2.RETAIN
After 2 seconds:
After 2 seconds:
GROUP NUMBER= 0001
ABB. NBR= 118
CANCELLED
GROUP NUMBER= 0001
ENTER ABB. NBR OR OT
[ENTER]:TO COMPLETE
Return to Step 6.
GROUP NUMBER= 0001
ENTER ABB. NBR OR OT
[ENTER]:TO COMPLETE
Return to Step 6.
GROUP NUMBER= 0001
PRESS ONE TOUCH KEY
TO ENTER OR
[ENTER]:TO SKIP
Enter a Remote Station - continued
6
Enter the E-mail addresses of
the remote stations to be pre-
set in the group.
If a remote station is assigned
to a One Touch key, press the
One Touch key.
If a remote station is assigned
to an Abbreviated Dial Num-
ber, enter the number then
press .
Example:
Abbreviated Dial Number
118 (preset as DENVER
OFFICE):
+
+
+
After 2 seconds:
GROUP NUMBER= 0001
ABB. NBR= 118
DENVER OFFICE
GROUP NUMBER= 0001
ABB. NBR= 118
ENTER ABB. NBR OR OT
[ENTER] TO COMPLETE
52
To skip assigning this group to
a One Touch key, press:
If the selected One Touch key
is already linked to or regis-
tered with any data, the follow-
ing is displayed.
To RETAIN, press:
Group Number Registration - continued
ENTER GROUP NUMBER
OR PRESS
[BACK]:TO PREVIOUS
[STOP]:TO COMPLETE
Return to Step 3.
Press to display the previ-
ous screen in Menu Screen
mode.
Press to complete the
Group Setting operation and re-
turn to the Standby Mode.
ONE TOUCH= 01
ALREADY ASSIGNED
ABB. NBR= 003
SMITH’S OFFICE
ONE TOUCH= 01
CANCEL ?
1.CANCEL
2.RETAIN
After 2 seconds:
To select “1.CANCEL” (to can-
cel the existing link or preset
data of this One Touch key),
press:
GROUP NUMBER= 0001
PRESS ONE TOUCH KEY
TO ENTER OR
[ENTER]:TO SKIP
Returns to Step 9.
GROUP NUMBER= 0001
PRESS ONE TOUCH KEY
TO ENTER OR
[ENTER]:TO SKIP
Returns to Step 9.
Assign a One Touch Key
9
To assign this group to a One
Touch key, press the desired
One Touch key.
Example: One Touch key 35.
After 2 seconds:
GROUP NUMBER= 0001
ONE TOUCH KEY= 35
COLORADO GRP
REGISTERED
ENTER GROUP NUMBER
OR PRESS
[BACK]:TO PREVIOUS
[STOP]:TO COMPLETE
Returns to Step 3.
Press to display the pre-
vious screen in Menu Screen
mode.
Or,
press to complete the
Group Setting operation and re-
turn to the Standby Mode.
53
The following table describes the Initial Setup Flow according to your conditions or
needs.
To use the functions, the network configuration for this machine must be set up
correctly. For the values of the network configuration, contact to your network
administrator.
TCP/IP Configuration Setup
The items and the parameter values for the TCP/IP Configuration Setup differs
whether the IP address of this machine is obtained from a DHCP server or assigned
manually.
➤P54 TCP/IP CONFIGURATION SETUP
NOTE:
When you want to set to SMTP for the Receive Mode, the IP address must be
assigned manually.
••
••
•BootP/DHCP
Set to enable or disable the BootP/DHCP whether obtaining the IP address from
the DHCP server. When the TCP/IP settings of this machine are provided by the
DHCP server, set this to ON. Set this to OFF the BootP/DHCP when you want
to assign the TCP/IP settings manually.
••
••
•IP Address
Assign the IP address of this machine. Do not set this when the IP address is
obtained from the DHCP server. The machine uses the IP address here even if
the BootP/DHCP is set to be enabled.
••
••
•Subnetmask
Assign the Subnetmask if required.
••
••
•Default Gateway
Assign the Default Gateway address when the machine is used in the network
through a router.
••
••
•Host Name
Set the name of this machine. This name is used as the sender name for E-
mails.
SETUP - SETUP FLOW
E-mail Account Setup
The items and the parameter values for the E-mail Account Setup differs whether
the machine uses POP or SMTP for the Receive Mode. Available functions vary
according to the type of the Receive Mode. For further details, refer to “INTRO-
DUCTION - FEATURES”.
➤P59 E-MAIL ACCOUNT SETUP
NOTE:
When the IP address is obtained from the DHCP server, the Receive Mode
cannot be set to SMTP.
E-mail Properties Setup
You can also configure the E-mail properties. After the machine is set up, it is
recommended to configure the E-mail properties to use Internet Fax features.
➤P68 E-MAIL PROPERTIES SETUP
Onramp Gateway Setup
In order to use the Onramp Gateway Transmission, you must set some configura-
tions correctly.
➤P80 ONRAMP GATEWAY SETUP
Offramp Gateway Setup
In order to use the Offramp Gateway Transmission, you must set some configura-
tions correctly.
➤P85 OFFRAMP GATEWAY SETUP
Additional Functions Setup
The setup functions for Novell and Network utilities (FTP) become available when
the Internet Fax Kit is fitted, though they are not used for Internet Fax setup.
➤P90 ADDITIONAL FUNCTIONS SETUP
Item Use DHCP Server Assign IP Address
BootP/DHCP Set to ON Set to OFF
IP Address Not required Required
Subnetmask Not required Required if necessary
Default Gateway Not required Required if necessary
Host Name Required Required
Item POP SMTP
E-mail Address Required Required
Error E-mail Forward Address Required Required
Receive Mode Set to POP SMTP
POP Server Address Required Not required
POP Time Required Not required
POP Login Name Required Not required
POP Password Required Not required
SMTP Server Address Required Required
54
- TCP/IP CONFIGURATION
This section describes the pro-
cedures to configure the TCP/
IP for the Network Interface
Card to connect to the Internet.
Press:
+
+
+
+
Display the TCP/IP
Menu
1
Display the
BOOTP/DHCP Menu
2
BOOTP/DHCP
1.ON
2.OFF
01.DONE
02.BOOTP/DHCP
03.IP ADDRESS
04.SUBNET MASK ↓
05.DEFAULT GATEWAY
06.HOST NAME
Press:
+
Select the BootP/
DHCP Mode
3
OPERATION COMPLETED
Enable or Disable the BootP/
DHCP function.
(for ON-Enable)
(for OFF-Disable)
Displayed for 2 seconds
The display returns to Step 1.
Continue to set another item, or
press + to select
“1.DONE” to exit the Menu Op-
eration mode and return to the
Standby Mode.
When “1.DONE” is selected,
the Network Interface Card
starts initializing. Wait for few
minutes until the Network Inter-
face Card completes initializ-
ing.
BootP/DHCP Setting
55
IP Address Setting
Press:
+
+
+
+
Display the TCP/IP
Menu
1
Enter the IP address
3
Display the
IP ADDRESS Menu
2
01.DONE
02.BOOTP/DHCP
03.IP ADDRESS
04.SUBNET MASK
05.DEFAULT GATEWAY
06.HOST NAME
Press:
+
Enter the IP address. OPERATION COMPLETED
When the correct IP address is
displayed, press:
IP ADDRESS
000.000.000.000
IP ADDRESS
172.016.110.110
Displayed for 2 seconds
The display returns to Step 1.
Continue to set another item, or
press + to select
“1.DONE” to exit the Menu Op-
eration mode and return to the
Standby Mode.
When “1.DONE” is selected,
the Network Interface Card
starts initializing. Wait for few
minutes until the Network Inter-
face Card completes initializ-
ing.
NOTE:
• “000.000.000.000” can-
not be assigned for the
IP address.
• The second 8-digit num-
ber and third 8-digit num-
ber cannot be set to
“000”.
i.e: xxx.000.xxx.xxx
xxx.xxx.000.xxx
56
Subnetmask Setting
Press:
+
+
+
+
Display the TCP/IP
Menu
1
Display the SUBNET
MASK Menu
2
01.DONE
02.BOOTP/DHCP
03.IP ADDRESS
04.SUBNET MASK
05.DEFAULT GATEWAY
06.HOST NAME
Press:
+
SUBNET MASK
000.000.000.000
Enter the Subnetmask
3
Enter the Subnetmask. OPERATION COMPLETED
When the correct Subnetmask
is displayed, press:
SUBNET MASK
255.255.000.000
Displayed for 2 seconds
The display returns to Step 1.
Continue to set another item, or
press + to select
“1.DONE” to exit the Menu Op-
eration mode and return to the
Standby Mode.
When “1.DONE” is selected,
the Network Interface Card
starts initializing. Wait for few
minutes until the Network Inter-
face Card completes initializ-
ing.
NOTE:
“000.000.000.000” and
“255.255.255.255” cannot
be assigned for the
Subnetmask.
57
Default Gateway Setting
Press:
+
+
+
+
Display the TCP/IP
Menu
1
Display the DEFAULT
GATEWAY Menu
2
01.BOOTP/DHCP
02.IP ADDRESS
03.SUBNET MASK
04.DEFAULT GATEWAY ↓
05.HOST NAME
Press:
+
DEFAULT GATEWAY
000.000.000.000
Enter the Default Gateway address
3
Enter the Default Gateway ad-
dress. OPERATION COMPLETED
When the correct Default Gate-
way address is displayed,
press:
DEFAULT GATEWAY
255.000.000.000
Continue to set another item, or
press + to select
“1.DONE” to exit the Menu Op-
eration mode and return to the
Standby Mode.
When “1.DONE” is selected,
the Network Interface Card
starts initializing. Wait for few
minutes until the Network Inter-
face Card completes initializ-
ing.
Displayed for 2 seconds
The display returns to Step 1.
58
Host Name Setting
Press:
+
+
+
+
Display the TCP/IP
Menu
1
Display the HOST
NAME Menu
2
01.BOOTP/DHCP
02.IP ADDRESS
03.SUBNET MASK
04.DEFAULT GATEWAY ↓
05.HOST NAME
Press:
+
HOST NAME
(MAX 254:)
Enter the Host Name
3
Enter the Host Name using the
Keyboard and Numeric Key-
pad.
OPERATION COMPLETED
When the correct Subnetmask
is displayed, press:
HOST NAME
(MAX 254:)
XXXXXX
Displayed for 2 seconds
The display returns to Step 1.
Continue to set another item, or
press + to select
“1.DONE” to exit the Menu Op-
eration mode and return to the
Standby Mode.
When “1.DONE” is selected,
the Network Interface Card
starts initializing. Wait for few
minutes until the Network Inter-
face Card completes initializ-
ing.
This item is outside the
LCD frame. To view them,
use the [ ] scroll key.

59
- E-MAIL ACCOUNT SETUP
This section describes the procedures to set E-mail account infor-
mation on the machine so that you can send and receive E-mails
with this machine.
NOTE:
Before you set up the E-mail account information, your E-mail
account must be created on the E-mail server. Please confirm
the following information before configuring the E-mail settings
in your machine.
• Ask your administrator for your E-mail account information.
• The machine is connected with the E-mail server in the local
area network.
The available transmission vary according to the type of the Re-
ceive Mode: POP or SMTP.
The machine can do the following when using POP for the Re-
ceive Mode:
••
••
•Internet Fax to Internet Fax
••
••
•Internet Fax to/from Client Computers
••
••
•Onramp Gateway Transmission
The machine can do the following when using SMTP for the
Receive Mode:
••
••
•Internet Fax to Internet Fax
••
••
•Internet Fax to/from Client Computers
••
••
•Onramp Gateway Transmission
••
••
•Offramp Gateway Transmission
NOTE:
Please see “INTRODUCTION - Internet Fax Transmission
Overview” on page 7 for the descriptions for each transmission
method.
The items you should set up vary according to your Incoming E-mail server type.
When this machine uses POP for the Receive Mode:
••
••
•E-mail address
••
••
•Error E-mail forward address
••
••
•Receive mode
••
••
•POP server address
••
••
•POP time
••
••
•POP login name
••
••
•POP password
••
••
•SMTP server address
When this machine uses SMTP for the Receive Mode:
••
••
•E-mail address
••
••
•Error E-mail forward address
••
••
•Receive mode
••
••
•SMTP server address
NOTE:
Some configuration of the mail server will be required in order to use the machine for the Offramp
Gateway transmission. For further details, refer to “OFFRAMP GATEWAY SETUP” on page 85.
60
E-mail Address Setting
Press:
+
+
+
+
Display the
E-MAIL Menu
1
01.E-MAIL ADDRESS
02.ERR EMAIL FW ADDR
03.RECEIVE MODE
04.POP SERVER ADDR ↓
05.POP TIME
06.POP LOGIN NAME
07.POP PASSWORD
08.SMTP SERVER ADDR
This sets the E-mail address of
the machine. Display the E-MAIL
ADDRESS Menu
2
Press:
+
E-MAIL ADDRESS
(MAX 256:)
Enter the E-mail address
3
Enter the E-mail address using
the Keyboard and Numeric
Keypad.
When the correct E-mail ad-
dress is displayed, press:
E-MAIL ADDRESS
(MAX 256:)
xxx@toshiba.com
The display returns to Step 1.
When the Receive Mode
is set to POP
3a
When the Receive Mode is set
to POP, go to Step 3a.
When the Receive Mode is set
to SMTP, go to Step 3b.
When the correct E-mail ad-
dress is displayed, press:
The display returns to Step 1.
E-MAIL ADDRESS
(MAX 256:)
xxx@host1.toshiba.com
When the Receive Mode
is set to SMTP
3b
When the Receive Mode is set
to SMTP, the domain of your
E-mail address becomes a
name added the sub-address
for this machine and domain
name of the SMTP server.
You can use any username for
the E-mail address.
NOTE:
The sub-address of this
machine is set in the SMTP
server by the network ad-
ministrator. Please ask
your network administrator
for more details.
Enter the E-mail address using
the Keyboard and Numeric
Keypad. For example:
sub-address: host1
Domain: toshiba.com
“username@host1.toshiba.com”.
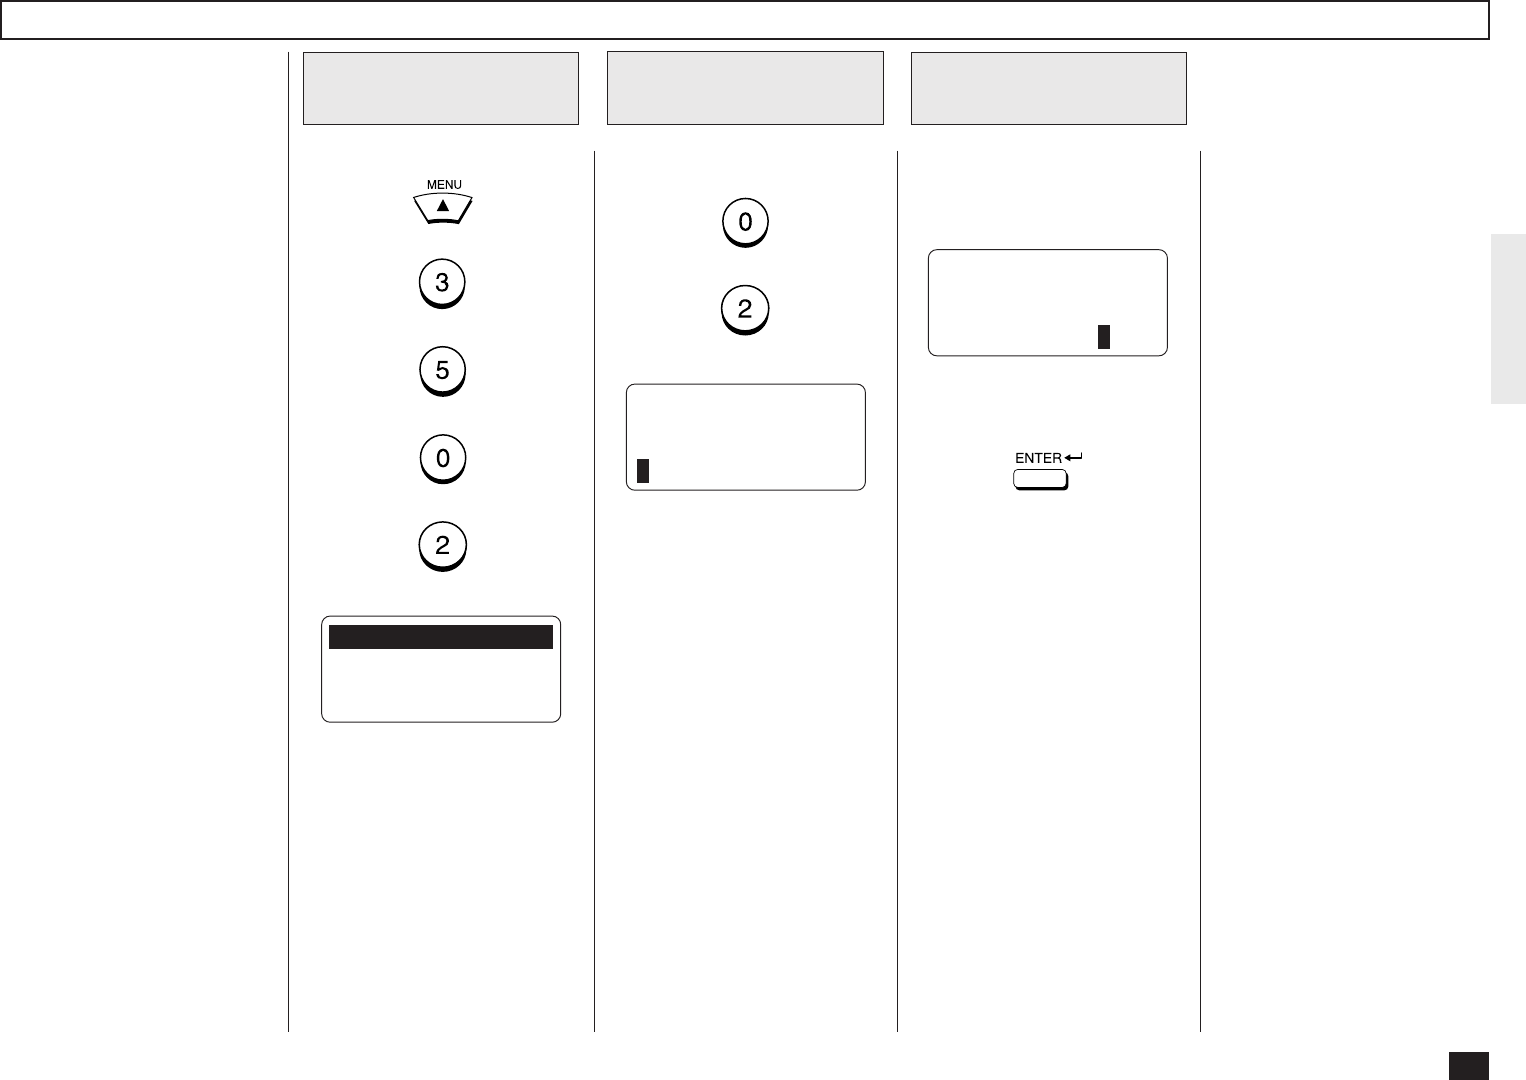
61
Error E-mail Forward Address Setting
Press:
+
+
+
+
Display the
E-MAIL Menu
1
01.E-MAIL ADDRESS
02.ERR EMAIL FW ADDR
03.RECEIVE MODE
04.POP SERVER ADDR ↓
05.POP TIME
06.POP LOGIN NAME
07.POP PASSWORD
08.SMTP SERVER ADDR
This sets the E-mail address to
forward the received E-mail
when an error occurs and the
machine cannot print the E-
mail.
NOTE:
The machine recognizes an
error if the E-mail contains
files of other than text format
or TIFF-FX format. The ma-
chine can forward this E-mail
to another E-mail address
when this happens. It is rec-
ommended to set the ad-
dress to forward the E-mail
to a personal computer be-
cause personal computers
are normally be able to view
the files.
Display the E-MAIL
ADDRESS Menu
2
Press:
+
ERR EMAIL FW ADDRESS
(MAX 256:)
Enter the E-mail ad-
dress
3
Enter the E-mail address using
the Keyboard and Numeric
Keypad.
When the correct E-mail ad-
dress is displayed, press:
ERR EMAIL FW ADDRESS
(MAX 256:)
xxx@toshiba.com
The display returns to Step 1.
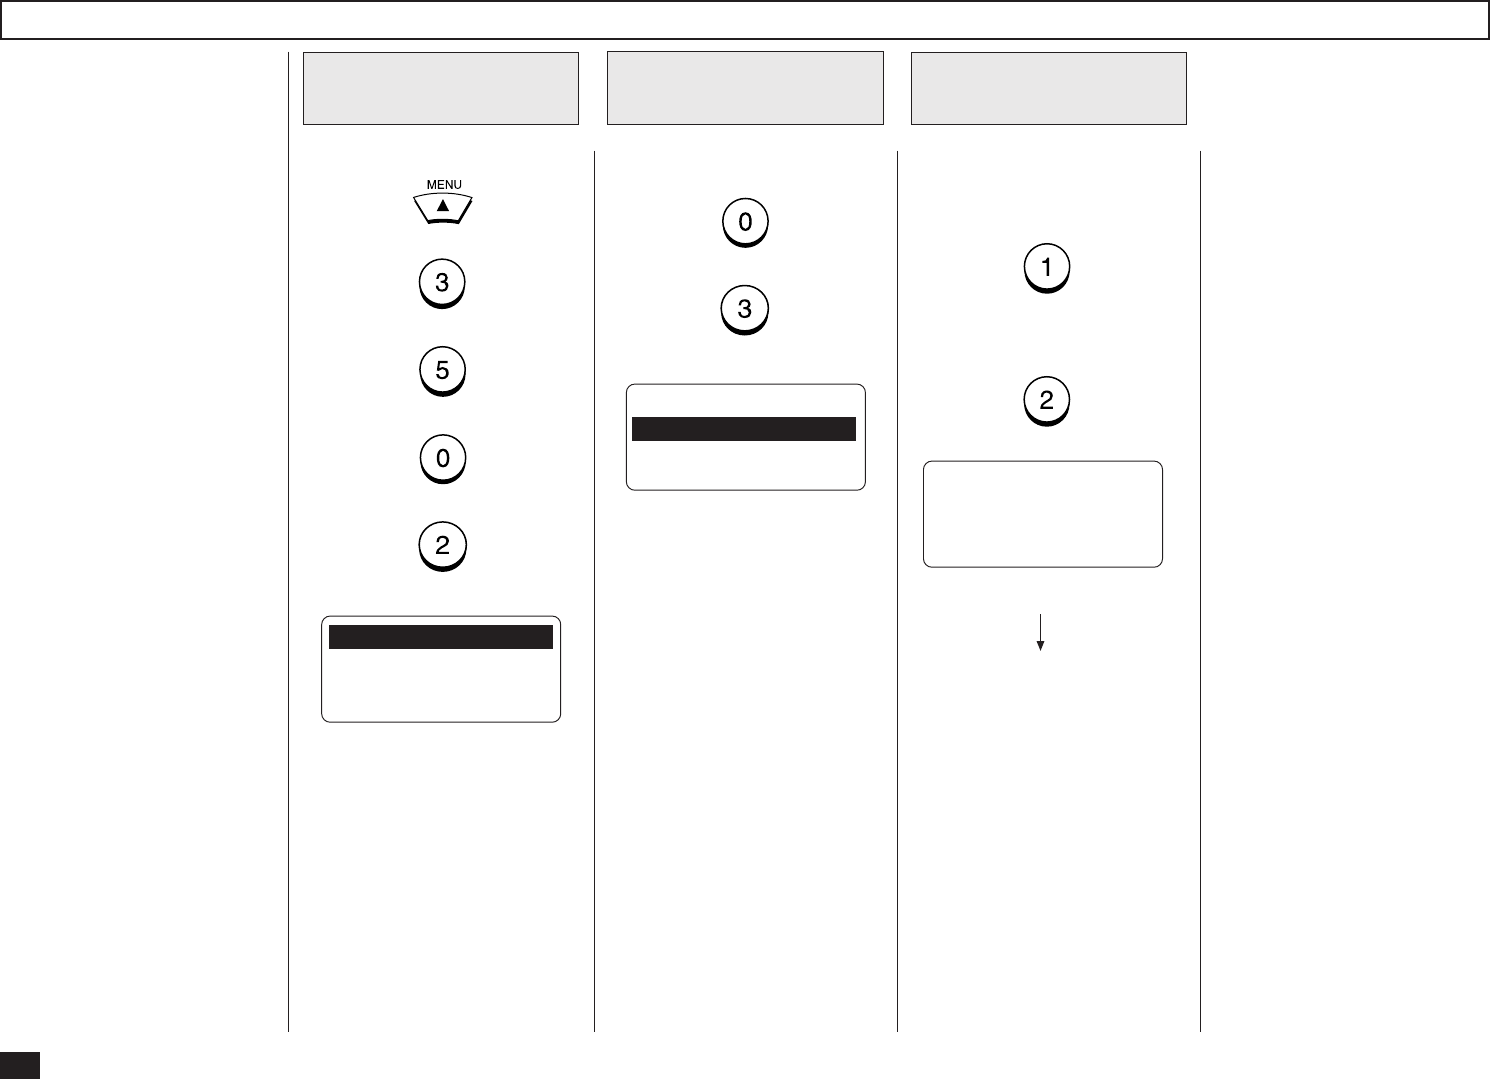
62
Receive Mode Setting
Press:
+
+
+
+
Display the
E-MAIL Menu
1
01.E-MAIL ADDRESS
02.ERR EMAIL FW ADDR
03.RECEIVE MODE
04.POP SERVER ADDR ↓
05.POP TIME
06.POP LOGIN NAME
07.POP PASSWORD
08.SMTP SERVER ADDR
This sets the type of protocols
used for receiving E-mail.
NOTE:
To perform the Offramp
Gateway transmission, the
Receive Mode must set to
“SMTP”.
See “OFFRAMP GATE-
WAY SETUP” on page 85
for further details.
Display the RE-
CEIVE MODE Menu
2
Press:
+
Select the Receive
Mode
3
RECEIVE MODE
1.POP
2.SMTP
OPERATION COMPLETED
Select the Receive Mode.
To select the POP server,
press:
To select the SMTP server,
press:
Displayed for 2 seconds
The display returns to Step 1.
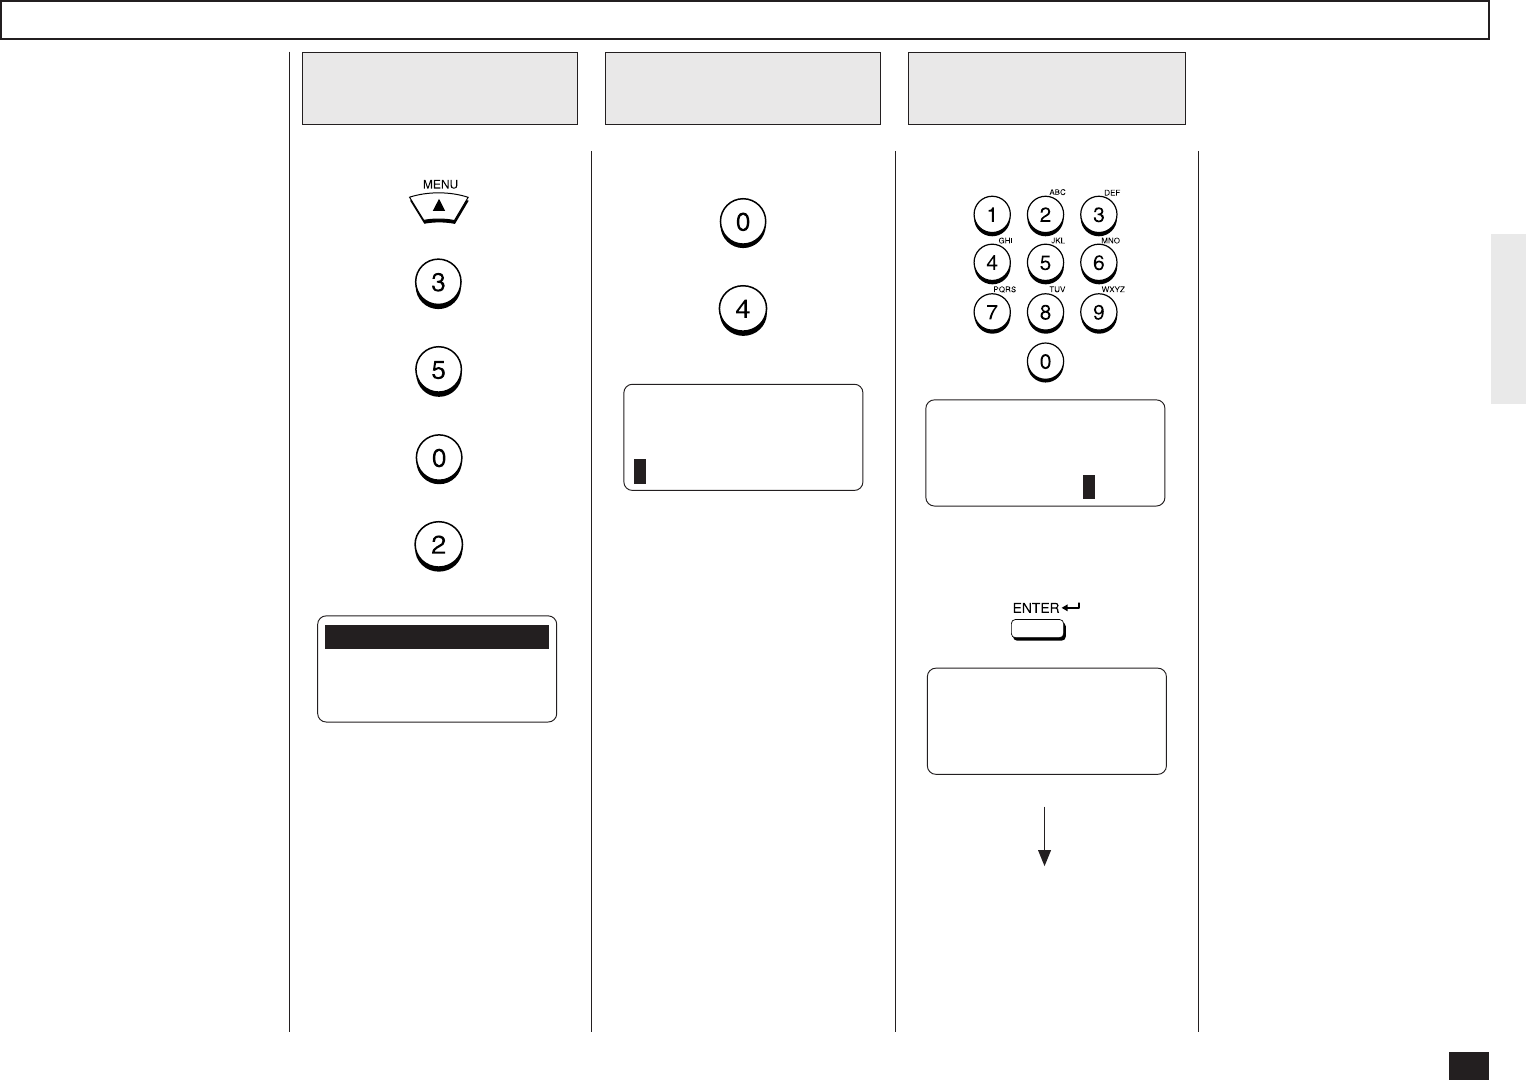
63
POP Server Address Setting
Display the E-MAIL
Menu
1
Display the POP
SERVER ADDR Menu
2
Press:
+
POP SERVER ADDRESS
000.000.000.000
Enter the POP
server address
3
Enter the POP server address.
OPERATION COMPLETED
When the correct POP server
address is displayed, press:
POP SERVER ADDRESS
172.016.110.120
Displayed for 2 seconds
The display returns to Step 1.
This sets the IP address of the
POP server. This must be set
when “POP” is selected in “Re-
ceive Mode.”
Press:
+
+
+
+
01.E-MAIL ADDRESS
02.ERR EMAIL FW ADDR
03.RECEIVE MODE
04.POP SERVER ADDR ↓
05.POP TIME
06.POP LOGIN NAME
07.POP PASSWORD
08.SMTP SERVER ADDR
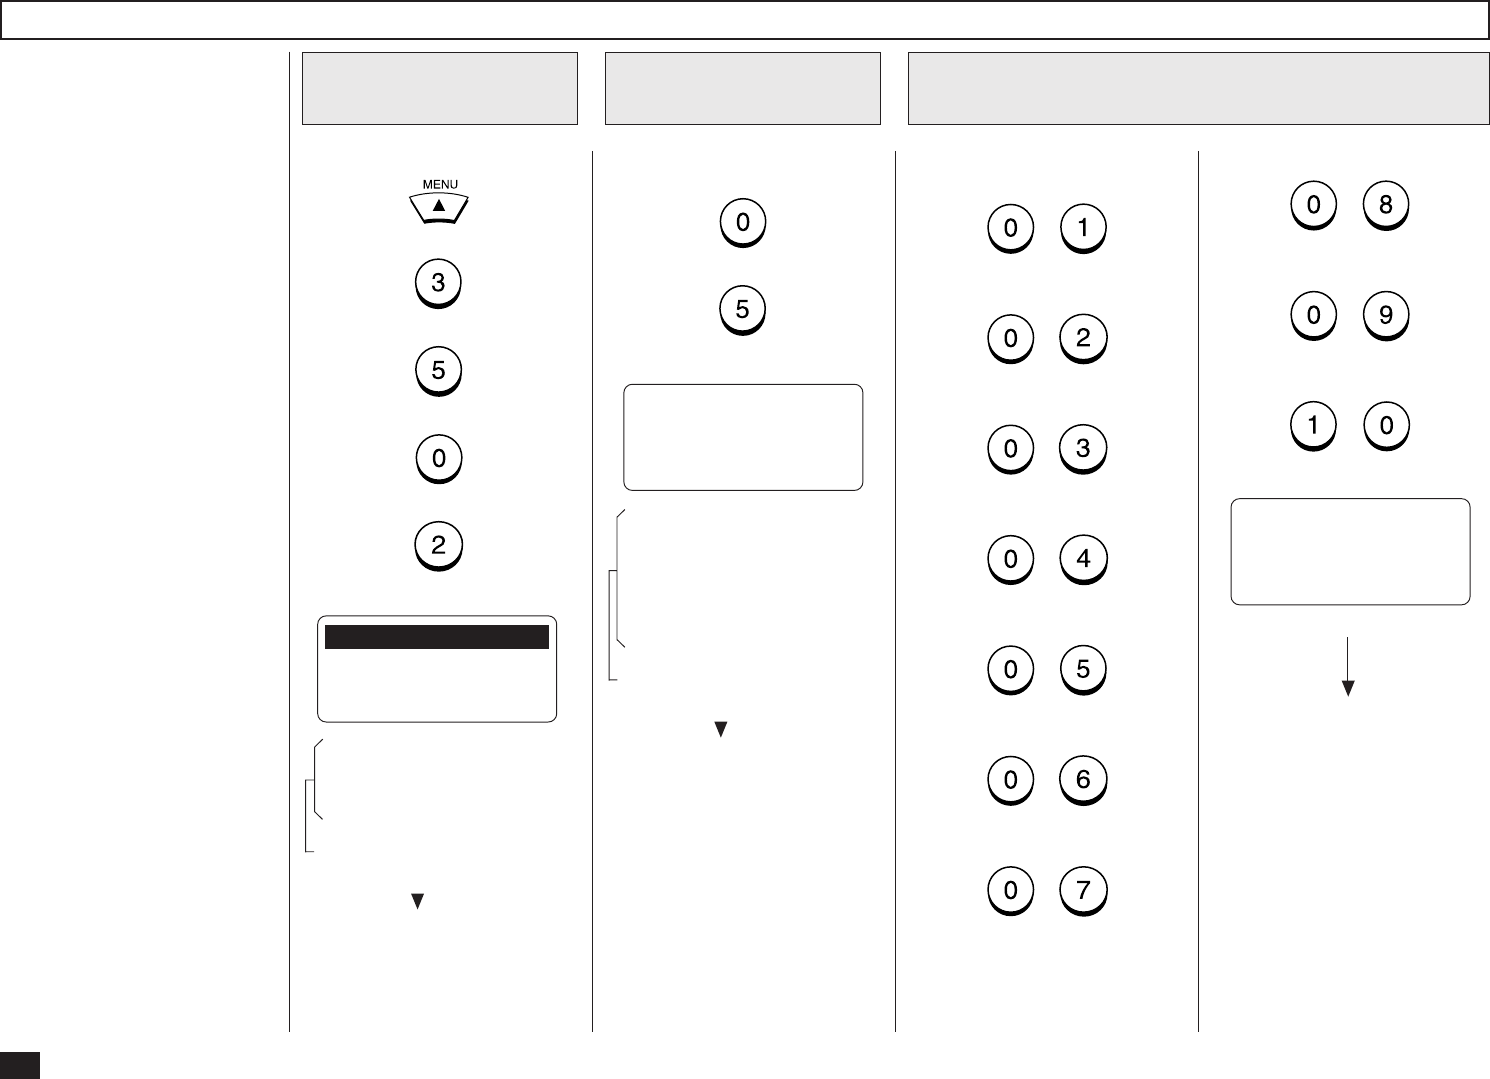
64
POP Time Setting
Display the E-MAIL
Menu
1
Display the POP
TIME Menu
2
Press:
+
POP TIME
01.1MIN
02.2MINS
03.5MINS ↓
04.10MINS
05.30MINS
06.1HR
07.2HRS
08.6HRS
09.12HRS
10.24HRS
Select the POP Time
3
Select the desired POP Time.
Press:
+
(for 1MIN)
+
(for 2MINS)
+
(for 5MINS)
+
(for 10MINS)
+
(for 30MINS)
+
(for 1HR)
+
(for 2HRS)
OPERATION COMPLETED
This sets the time interval to
check whether or not new E-
mail has been received at the
POP server. This setting is
valid when “POP” is selected in
“Receive Mode.”
“10MINS” is selected as the
default setting.
Press:
+
+
+
+
01.E-MAIL ADDRESS
02.ERR EMAIL FW ADDR
03.RECEIVE MODE
04.POP SERVER ADDR ↓
05.POP TIME
06.POP LOGIN NAME
07.POP PASSWORD
08.SMTP SERVER ADDR
These items are outside the
LCD frame. To view them,
use the [ ] scroll key.
These items are outside the
LCD frame. To view them,
use the [ ] scroll key.
Displayed for 2 seconds
The display returns to Step 1.
+
(for 6HRS)
+
(for 12HRS)
+
(for 24HRS)

65
POP Login Name Setting
Press:
+
+
+
+
Display the
E-MAIL Menu
1
01.E-MAIL ADDRESS
02.ERR EMAIL FW ADDR
03.RECEIVE MODE
04.POP SERVER ADDR ↓
05.POP TIME
06.POP LOGIN NAME
07.POP PASSWORD
08.SMTP SERVER ADDR
This sets the user name to log
in the POP server. This must
be set when “POP” is selected
in “Receive Mode.”
NOTE:
The user name to log in the
POP server is provided by
the administrator of the E-
mail server. Ask your ad-
ministrator for the user
name if you do not know it.
Display the POP
LOGIN NAME Menu
2
Press:
+
POP LOGIN NAME
(MAX 32:)
public
Enter the POP Login
Name
3
Enter the POP Login Name us-
ing the Keyboard and Numeric
Keypad.
When the correct POP Login
Name is displayed, press:
POP LOGIN NAME
(MAX 32:)
xxxx
The display returns to Step 1.
These items are outside the
LCD frame. To view them,
use the [ ] scroll key.
NOTE:
“public” is set as the default
POP login name.
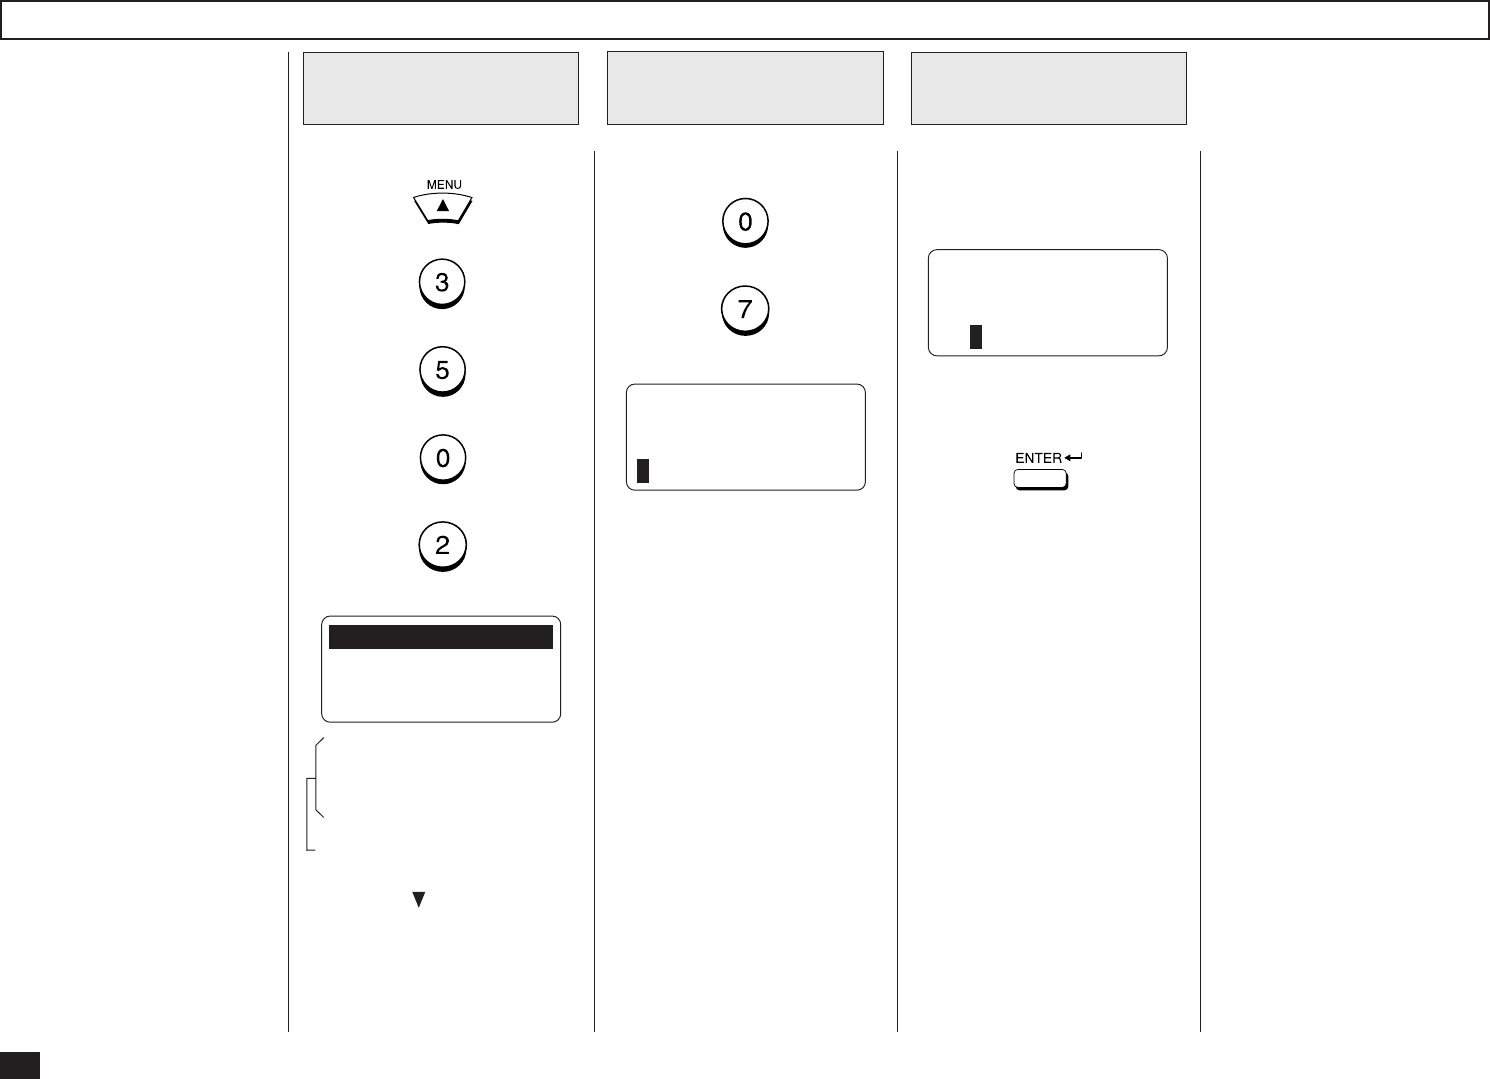
66
POP Password Setting
Press:
+
+
+
+
Display the
E-MAIL Menu
1
01.E-MAIL ADDRESS
02.ERR EMAIL FW ADDR
03.RECEIVE MODE
04.POP SERVER ADDR ↓
05.POP TIME
06.POP LOGIN NAME
07.POP PASSWORD
08.SMTP SERVER ADDR
This sets the password to log
in the POP server. This must
be set when “POP” is selected
in “Receive Mode.”
NOTE:
The password to log in the
POP server is provided by
the administrator of the E-
mail server. Ask your ad-
ministrator for the password
if you do not know it.
Display the POP
PASSWORD Menu
2
Press:
+
POP PASSWORD
(MAX 32:)
pass
Enter the POP Pass-
word
3
Enter the POP Password using
the Keyboard and Numeric
Keypad.
When the correct POP Pass-
word is displayed, press:
POP PASSWORD
(MAX 32:)
xxxx
The display returns to Step 1.
These items are outside the
LCD frame. To view them,
use the [ ] scroll key.
NOTE:
“pass” is set as the default
POP Password.

67
SMTP Server Address Setting
Display the E-MAIL
Menu
1
Display the SMTP
SERVER ADDR Menu
2
Press:
+
SMTP SERVER ADDRESS
000.000.000.000
Enter the POP
server address
3
Enter the SMTP server ad-
dress.
OPERATION COMPLETED
When the correct SMTP server
address is displayed, press:
SMTP SERVER ADDRESS
172.016.110.120
Displayed for 2 seconds
This sets the IP address of the
SMTP server which is used for
an Outgoing E-mail server.
NOTE:
When “SMTP” is selected in
“Receive Mode”, the ma-
chine also retrieves E-mails
from the SMTP server as-
signed here using SMTP
transmission. In this case,
this machine works as one of
the mail servers.
Press:
+
+
+
+
01.E-MAIL ADDRESS
02.ERR EMAIL FW ADDR
03.RECEIVE MODE
04.POP SERVER ADDR ↓
05.POP TIME
06.POP LOGIN NAME
07.POP PASSWORD
08.SMTP SERVER ADDR
These items are outside the
LCD frame. To view them,
use the [ ] scroll key. The display returns to Step 1.
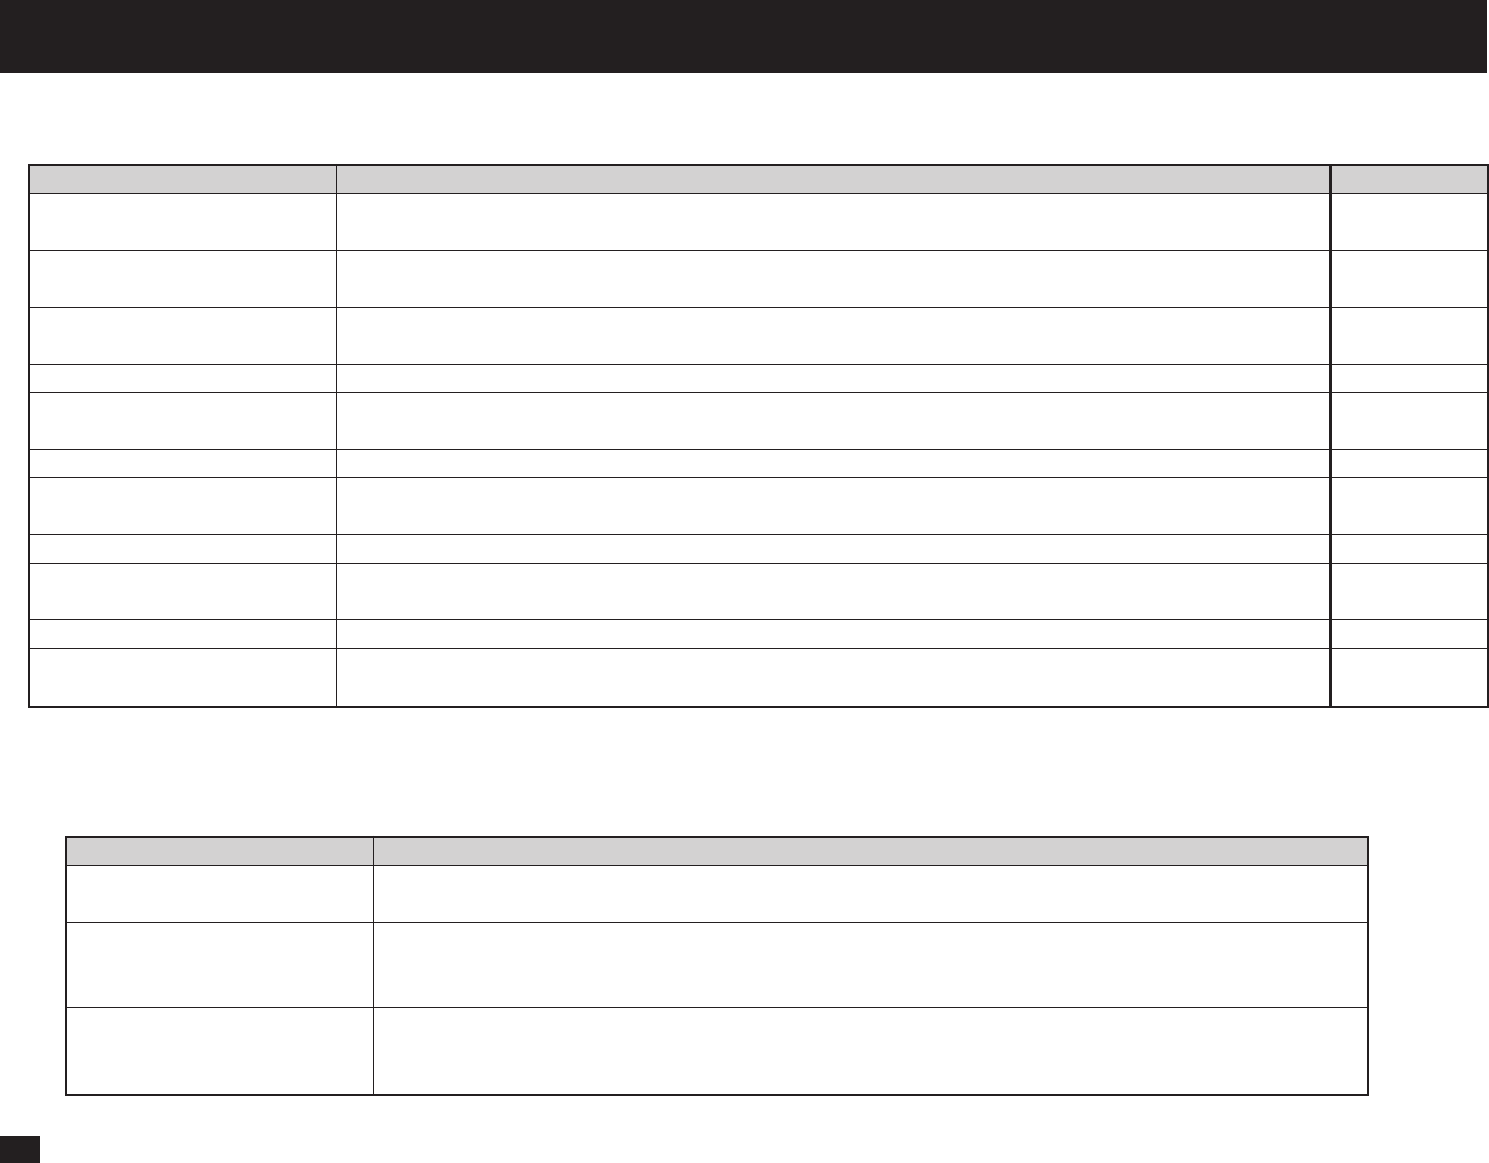
68
- E-MAIL PROPERTIES SETUP
This section describes the procedures to set the E-mail properties on how the machine activates the Internet Fax function. The following table describes the E-mail
properties that can be set up. See the following sections for more information about each item.
Properties Name Description
Print Text Body This is to set On or Off for printing the body section of the received E-mail. However, when the received E-mail
has only the body section, the body section is printed even if this is set to Off.
Body Page Limit This is to set the maximum number of the pages to be printed when receiving an E-mail. If the number of the
pages to be printed exceeds the limit, the machine interrupts the printing.
Send Disposition This is to set On or Off for replying to the MDN request when receiving the documents from other machines
using the Internet Fax function.
Print Header This is to set On or Off for printing the header section of the received E-mail.
Print E-mail Error This is to set On or Off for printing only the items that can be printed normally when an error occurs. The items
that machine recognizes to be erroneous are not printed.
Print DSN This is to set On or Off for printing the DSN.
Print Disposition This is to set On or Off for printing the MDN replied from a recipient that informs you the message successfully
received by a recipient.
Request DSN This is to set On or Off for sending the DSN request.
Confirm. Timer This is to set On or Off for printing the alert report if the machine does not receive the MDN reply from a
recipient in the time interval set in "Set Confirm. Time."
Set Confirm. Time This is to set the time interval to wait for the MDN reply before printing the alert report.
MSG Size Limit This is to set the maximum size for sending documents using the Internet Fax function. If the size of
documents exceeds the maximum size, the machine sends the documents separately.
Default
On
5
OFF
ON
ON
OFF
ON
ON
ON
15MINS
2.0MBYTE
NOTE:
There are also the E-mail properties related to the Offramp Gateway function. When you set the Receive Mode to “SMTP”, you can addtionally configure the following
items. For further details, see “OFFRAMP GATEWAY SETUP” on page 85.
Properties Name Description
E-mail to FAX Gateway This sets the machine to allow forwarding the document that is received by the Offramp Gate-way transmission.
(See page 87.)
Gateway Print This sets whether to print the document sent from the Inter-net FAX machine using the Offramp Gateway
transmis-sion. The machine prints the document before forwarding it to the facsimile, so that you can confirm
what is sending using the Offramp Gateway. (See page 88.)
Gateway Security This sets whether to check the fax number where the docu-ment is sent before allowing the Offramp Gateway. If
the fax number of the facsimile is not registered as One Touch dials or Abbreviated dials, the machine does not
allow the Offramp Gateway for this document. (See page 89.)

69
Print Text Body Setting
Press:
+
+
Display the E-MAIL
Menu
1
01.PRINT TEXT BODY
02.BODY PAGE LIMIT
03.SEND DISPOSITION
04.PRINT HEADER ↓
05.PRINT E-MAIL ERR
06.PRINT DSN
07.PRINT DISPOSITION
08.REQUEST DSN
09.EMAIL TO FAX GTWY
10.GATEWAY PRINT
11.GATEWAY SECURITY
12.CONFIRM. TIMER
13.SET CONFIRM. TIME
14.MSG SIZE LIMIT
This sets whether or not the
body section of the received E-
mail is printed
NOTE:
When the Internet Fax func-
tion is used only between
other DP120F/DP125Fs, it
is recommended to select
OFF.
Display the PRINT
TEXT BODY Menu
2
Press:
+
PRINT TEXT BODY
1.ON
2.OFF
Enable/Disable the
Print Text Body
3
OPERATION COMPLETED
Enable or Disable the Print
Text Body function.
(for ON-Enable)
(for OFF-Disable)
Displayed for 2 seconds
The display returns to Step 1.
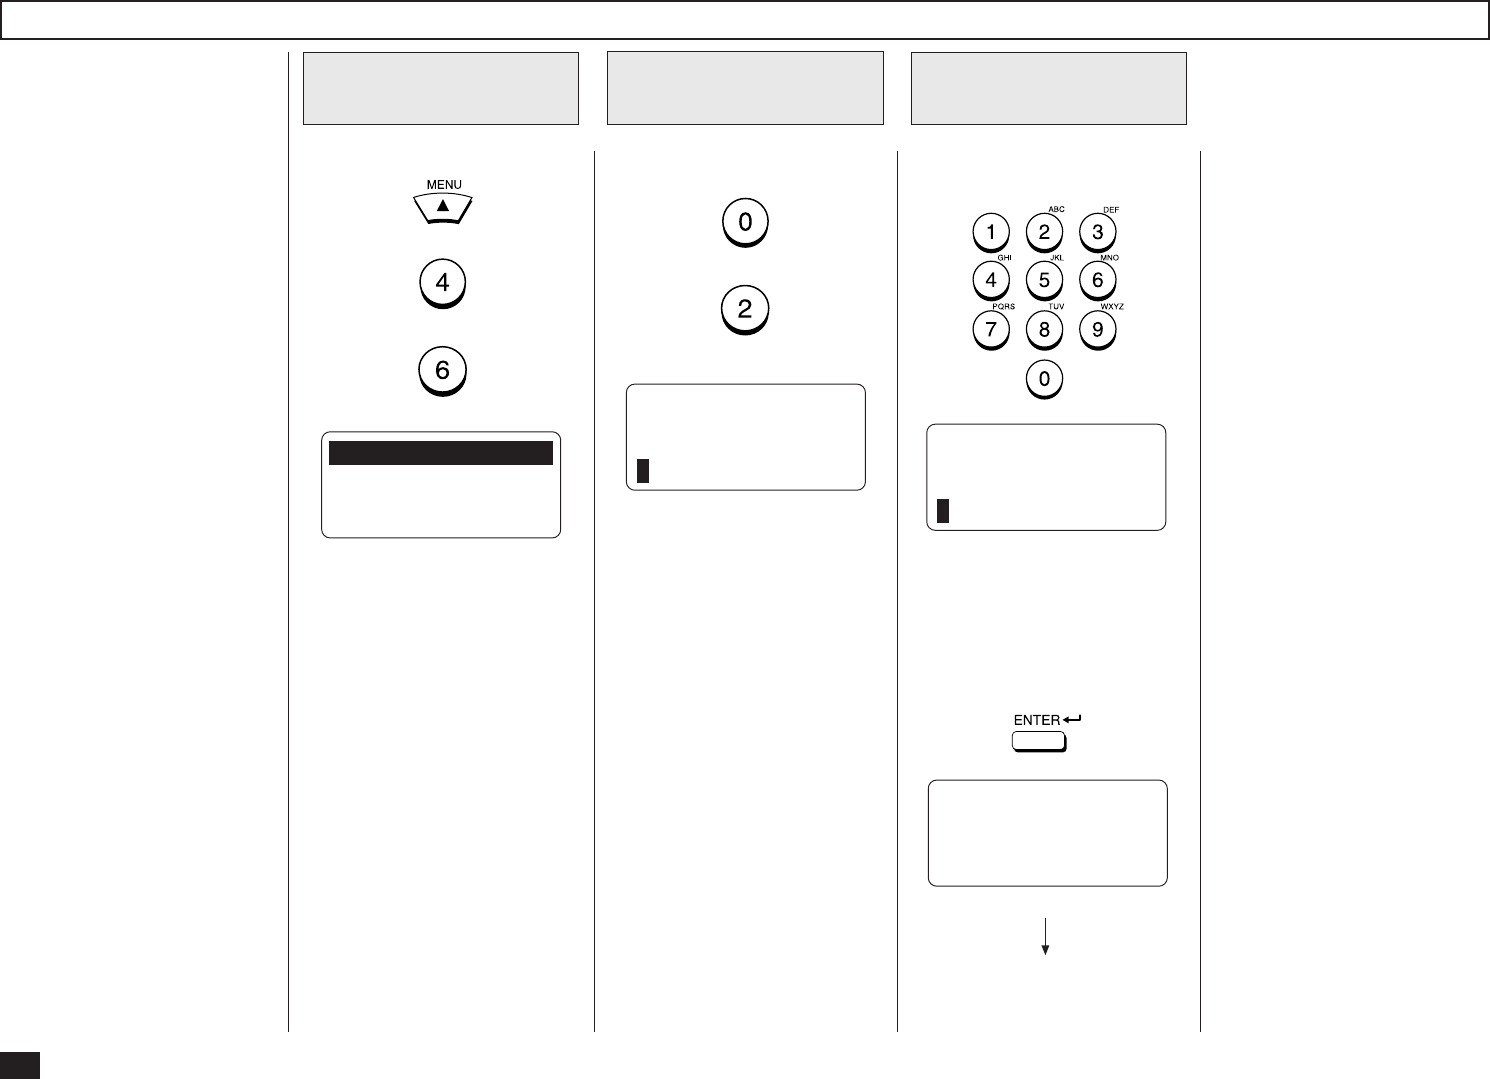
70
Body Page Limit Setting
Press:
+
+
Display the E-MAIL
Menu
1
01.PRINT TEXT BODY
02.BODY PAGE LIMIT
03.SEND DISPOSITION
04.PRINT HEADER ↓
05.PRINT E-MAIL ERR
06.PRINT DSN
07.PRINT DISPOSITION
08.REQUEST DSN
09.EMAIL TO FAX GTWY
10.GATEWAY PRINT
11.GATEWAY SECURITY
12.CONFIRM. TIMER
13.SET CONFIRM. TIME
14.MSG SIZE LIMIT
This sets the maximum
number of the pages to be
printed in the range from 1 to
99 when receiving an E-mail. If
the number of the pages to be
printed exceeds the limit, the
machine interrupts the printing.
NOTE:
The received body text data
may be garbled during
transferred through the In-
ternet. This is a known
problem with E-mail trans-
missions over the Internet.
It is recommended to select
ON to avoid printing of a
large amount of the garbled
data.
Display the BODY
PAGE LIMIT Menu
2
Press:
+
BODY PAGE LIMIT
5
Enter the number of
Body Page Limit
3
NOTE:
“5” is set as the default
Body Page Limit.
Enter the number for the Body
Page Limit.
OPERATION COMPLETED
When the correct number is
displayed, press:
BODY PAGE LIMIT
8
Displayed for 2 seconds
The display returns to Step 1.
NOTE:
The numbers in the range
from 1 to 99 can be entered.
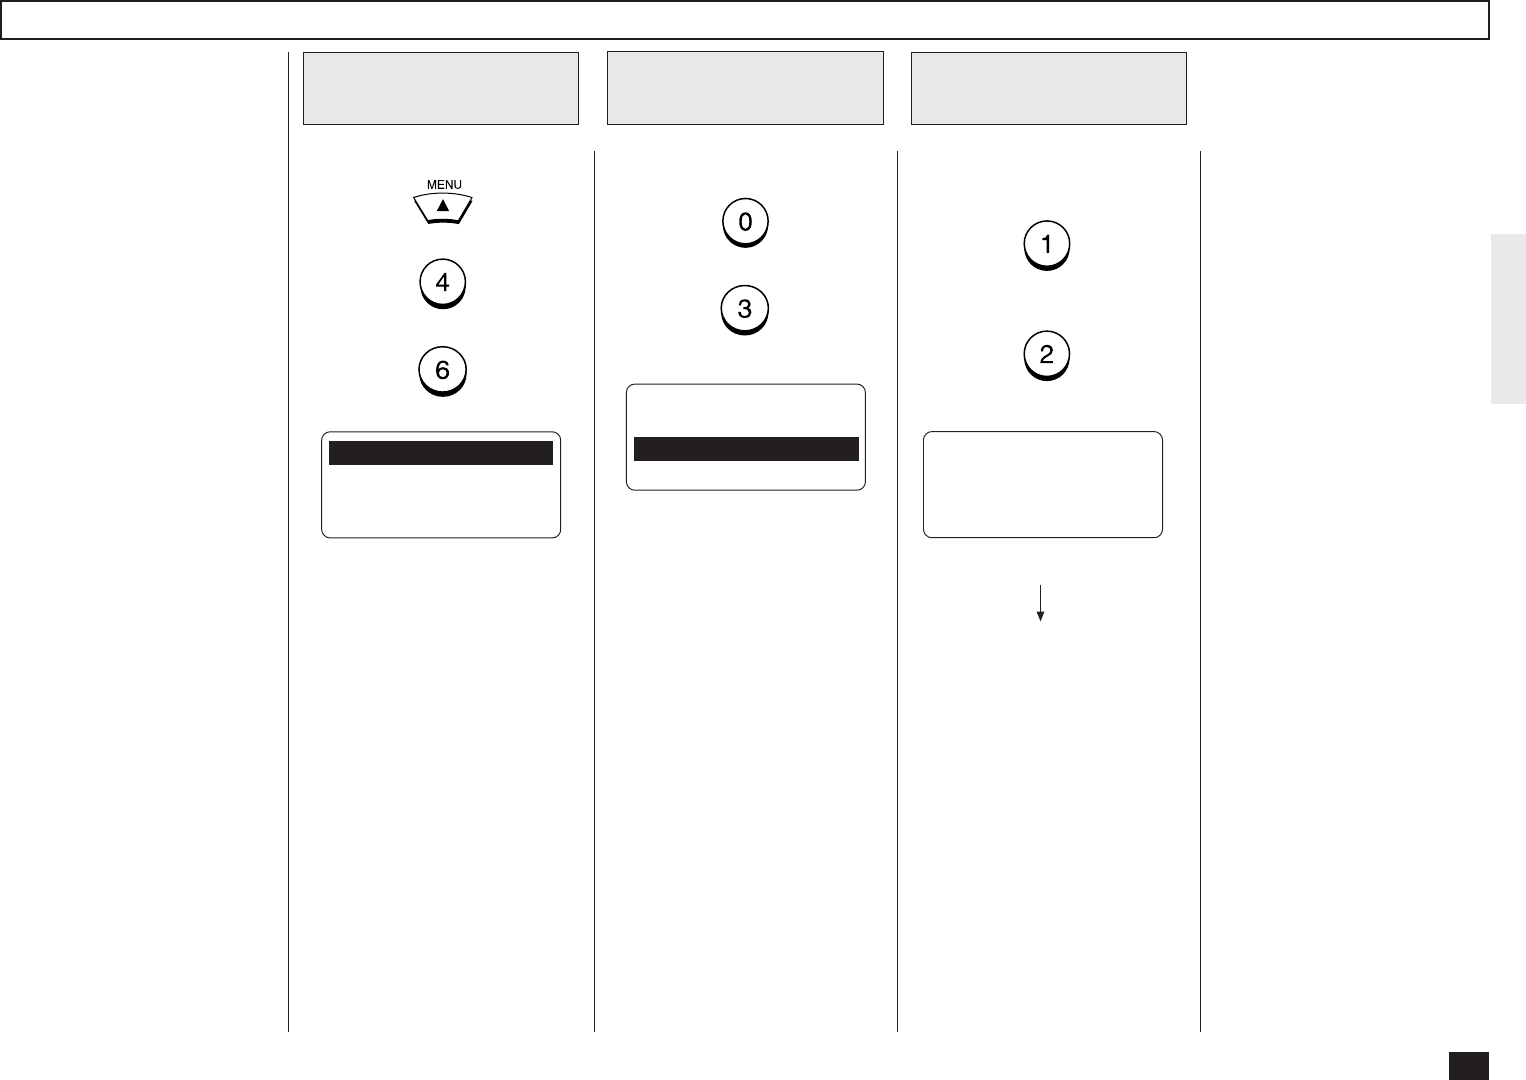
71
Send Disposition Setting
Press:
+
+
Display the E-MAIL
Menu
1
01.PRINT TEXT BODY
02.BODY PAGE LIMIT
03.SEND DISPOSITION
04.PRINT HEADER ↓
05.PRINT E-MAIL ERR
06.PRINT DSN
07.PRINT DISPOSITION
08.REQUEST DSN
09.EMAIL TO FAX GTWY
10.GATEWAY PRINT
11.GATEWAY SECURITY
12.CONFIRM. TIMER
13.SET CONFIRM. TIME
14.MSG SIZE LIMIT
This sets the reply to the MDN
request when receiving the
documents from other DP120F/
DP125F using the Internet Fax
function.
MDN, Message Disposition No-
tification, is used to notify the
sender of the disposition of a
message after it has been suc-
cessfully delivered to a recipi-
ent.
NOTE:
This function is only avail-
able when the remote unit
and the your Incoming E-
mail server support the
MDN.
Display the SEND
DISPOSITION Menu
2
Press:
+
SEND DISPOSITION
1.ON
2.OFF
Enable/Disable the
Send Disposition
3
OPERATION COMPLETED
Enable or Disable the Send
Disposition function.
(for ON-Enable)
(for OFF-Disable)
Displayed for 2 seconds
The display returns to Step 1.
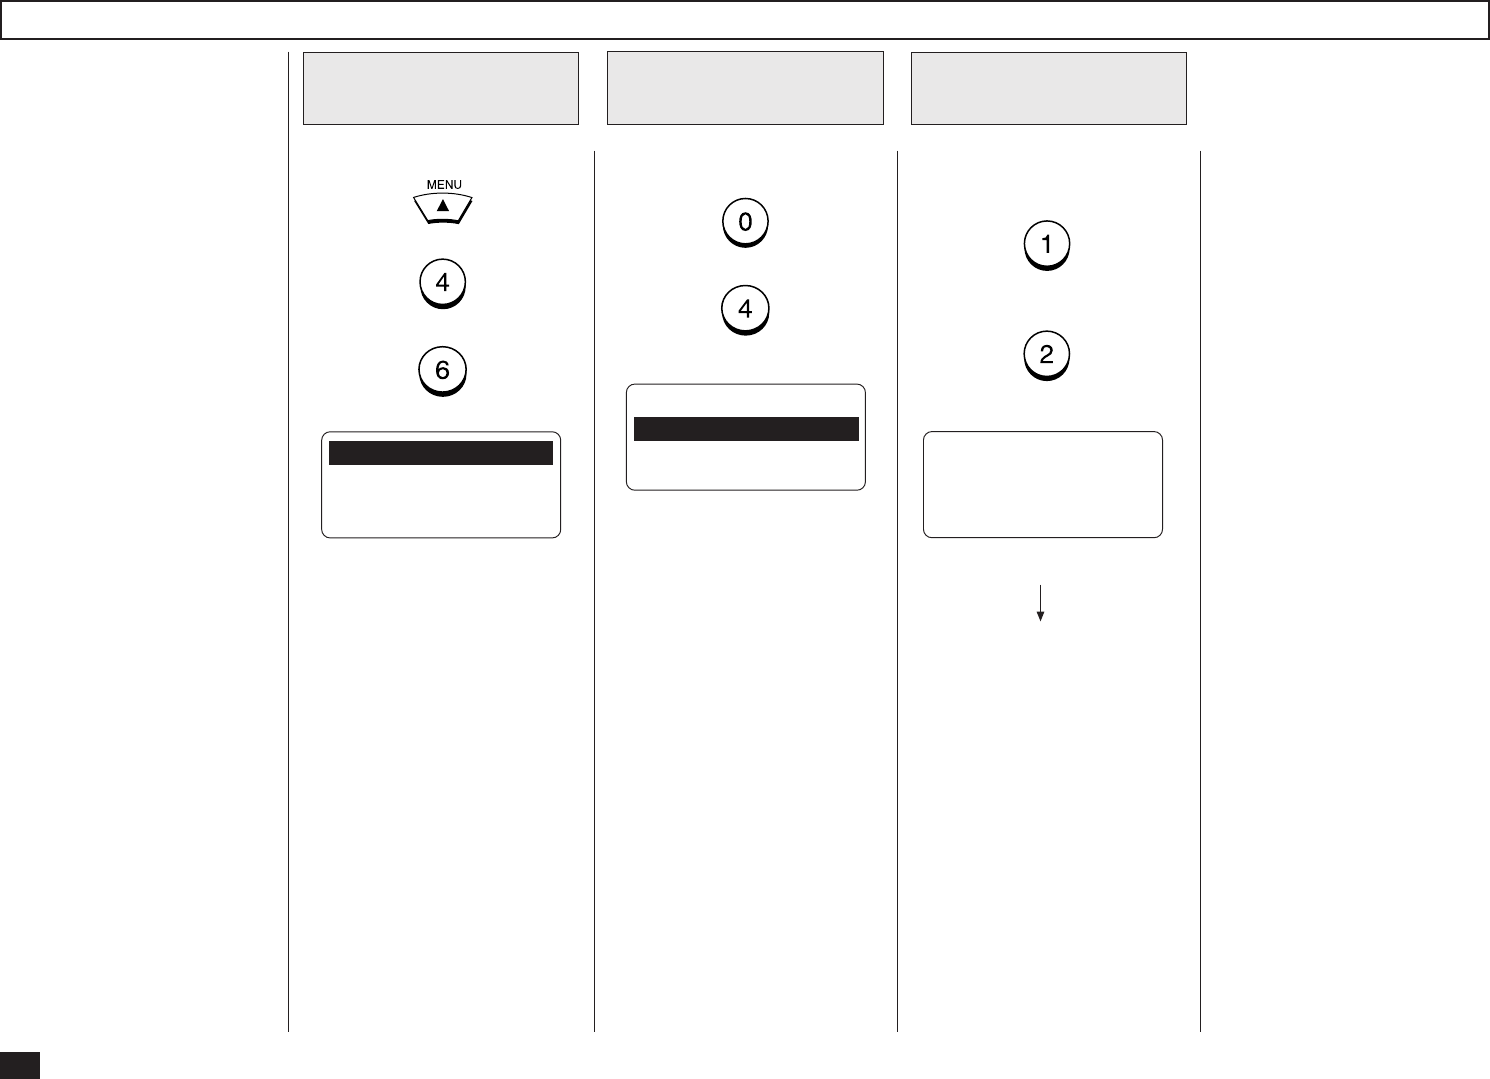
72
Print Header Setting
Press:
+
+
Display the E-MAIL
Menu
1
01.PRINT TEXT BODY
02.BODY PAGE LIMIT
03.SEND DISPOSITION
04.PRINT HEADER ↓
05.PRINT E-MAIL ERR
06.PRINT DSN
07.PRINT DISPOSITION
08.REQUEST DSN
09.EMAIL TO FAX GTWY
10.GATEWAY PRINT
11.GATEWAY SECURITY
12.CONFIRM. TIMER
13.SET CONFIRM. TIME
14.MSG SIZE LIMIT
This sets whether or not the
header section of the received
E-mail is printed.
Display the PRINT
HEADER Menu
2
Press:
+
PRINT HEADER
1.ON
2.OFF
Enable/Disable the
Print Header
3
OPERATION COMPLETED
Enable or Disable the Print
Header function.
(for ON-Enable)
(for OFF-Disable)
Displayed for 2 seconds
The display returns to Step 1.

73
Print E-mail Error Setting
Press:
+
+
Display the E-MAIL
Menu
1
01.PRINT TEXT BODY
02.BODY PAGE LIMIT
03.SEND DISPOSITION
04.PRINT HEADER ↓
05.PRINT E-MAIL ERR
06.PRINT DSN
07.PRINT DISPOSITION
08.REQUEST DSN
09.EMAIL TO FAX GTWY
10.GATEWAY PRINT
11.GATEWAY SECURITY
12.CONFIRM. TIMER
13.SET CONFIRM. TIME
14.MSG SIZE LIMIT
This sets you would like to print
only the items that can be
printed normally when an error
occurs. The items that the
machine recognize to be
erroneous are not printed.
NOTE:
• When this is set to ON,
the range of the printed
section varies according
to the settings of Print
Text Body and Print
Header.
• When this is set to OFF,
the machine interrupts
printing if any error is
found.
Display the PRINT
E-MAIL ERR Menu
2
Press:
+
PRINT E-MAIL ERR
1.ON
2.OFF
Enable/Disable the
Print E-mail Error
3
OPERATION COMPLETED
Displayed for 2 seconds
The display returns to Step 1.
These items are outside the
LCD frame. To view them,
use the [ ] scroll key.
Enable or Disable the Print E-
mail Error function.
(for ON-Enable)
(for OFF-Disable)

74
Print DSN Setting
Press:
+
+
Display the E-MAIL
Menu
1
01.PRINT TEXT BODY
02.BODY PAGE LIMIT
03.SEND DISPOSITION
04.PRINT HEADER ↓
05.PRINT E-MAIL ERR
06.PRINT DSN
07.PRINT DISPOSITION
08.REQUEST DSN
09.EMAIL TO FAX GTWY
10.GATEWAY PRINT
11.GATEWAY SECURITY
12.CONFIRM. TIMER
13.SET CONFIRM. TIME
14.MSG SIZE LIMIT
This sets whether or not the
DSN is printed when it is an-
nounced from the E-mail server
or the recipient.
DSN, Delivery Status Notifica-
tion, is used to notify the
sender of the status of the
message that has been sent.
The status, such as failed de-
livery, delayed delivery, suc-
cessful delivery, or the
gatewaying of a message into
an environment that may not
support DSNs, is notified when
an E-mail with the DSN request
is sent.
NOTE:
To receive and print the
DSNs, the DSN must be
generated by the remote E-
mail server.
Display the PRINT
DSN Menu
2
Press:
+
PRINT DSN
1.ON
2.OFF
Enable/Disable the
Print DSN
3
OPERATION COMPLETED
Displayed for 2 seconds
The display returns to Step 1.
These items are outside the
LCD frame. To view them,
use the [ ] scroll key.
Enable or Disable the Print
DSN function.
(for ON-Enable)
(for OFF-Disable)

75
Print Disposition Setting
Press:
+
+
Display the E-MAIL
Menu
1
01.PRINT TEXT BODY
02.BODY PAGE LIMIT
03.SEND DISPOSITION
04.PRINT HEADER ↓
05.PRINT E-MAIL ERR
06.PRINT DSN
07.PRINT DISPOSITION
08.REQUEST DSN
09.EMAIL TO FAX GTWY
10.GATEWAY PRINT
11.GATEWAY SECURITY
12.CONFIRM. TIMER
13.SET CONFIRM. TIME
14.MSG SIZE LIMIT
This sets whether or not the
MDN is printed when it is an-
nounced from the recipient.
The machine sends the MDN
request to the recipient in every
transmission, so that the ma-
chine receives the MDN when
the recipient supports the MDN
request.
MDN, Message Disposition No-
tification, is used to notify the
sender of the disposition of a
message after it has been suc-
cessfully delivered to a recipi-
ent.
NOTE:
The MDN may not reply
when the environment or the
recipients does not support
the MDN.
Display the PRINT
DISPOSITION Menu
2
PRINT DISPOSITION
1.ON
2.OFF
Enable/Disable the
Print Disposition
3
OPERATION COMPLETED
Displayed for 2 seconds
The display returns to Step 1.
These items are outside the
LCD frame. To view them,
use the [ ] scroll key.
Enable or Disable the Print Dis-
position function.
(for ON-Enable)
(for OFF-Disable)
Press:
+

76
Request DSN Setting
Press:
+
+
Display the E-MAIL
Menu
1
01.PRINT TEXT BODY
02.BODY PAGE LIMIT
03.SEND DISPOSITION
04.PRINT HEADER ↓
05.PRINT E-MAIL ERR
06.PRINT DSN
07.PRINT DISPOSITION
08.REQUEST DSN
09.EMAIL TO FAX GTWY
10.GATEWAY PRINT
11.GATEWAY SECURITY
12.CONFIRM. TIMER
13.SET CONFIRM. TIME
14.MSG SIZE LIMIT
This sets whether or not the
DSN is requested when send-
ing a document from the ma-
chine using the Internet FAX
function.
DSN, Delivery Status Notifica-
tion, is used to notify the
sender of the status of the
message that has been sent.
The status, such as failed de-
livery, delayed delivery, suc-
cessful delivery, or the
gatewaying of a message into
an environment that may not
support DSNs, is notified when
an E-mail with the DSN request
is sent.
NOTE:
The DSN may not reply
when the Incoming E-mail
server of the recipient does
not support or generate the
DSN. In this case, the error
logs are retained in the E-
mail server of the recipient.
These error logs may be an
obstacle to the mail server.
Therefore, it is recom-
mended to select OFF for
this function if you are not
sure that the E-mail server of
the recipient supports the
DSN.
Display the
REQUEST DSN Menu
2
Press:
+
REQUEST DSN
1.ON
2.OFF
Enable/Disable the
Request DSN
3
OPERATION COMPLETED
Displayed for 2 seconds
The display returns to Step 1.
These items are outside the
LCD frame. To view them,
use the [ ] scroll key.
Enable or Disable the Request
DSN function.
(for ON-Enable)
(for OFF-Disable)
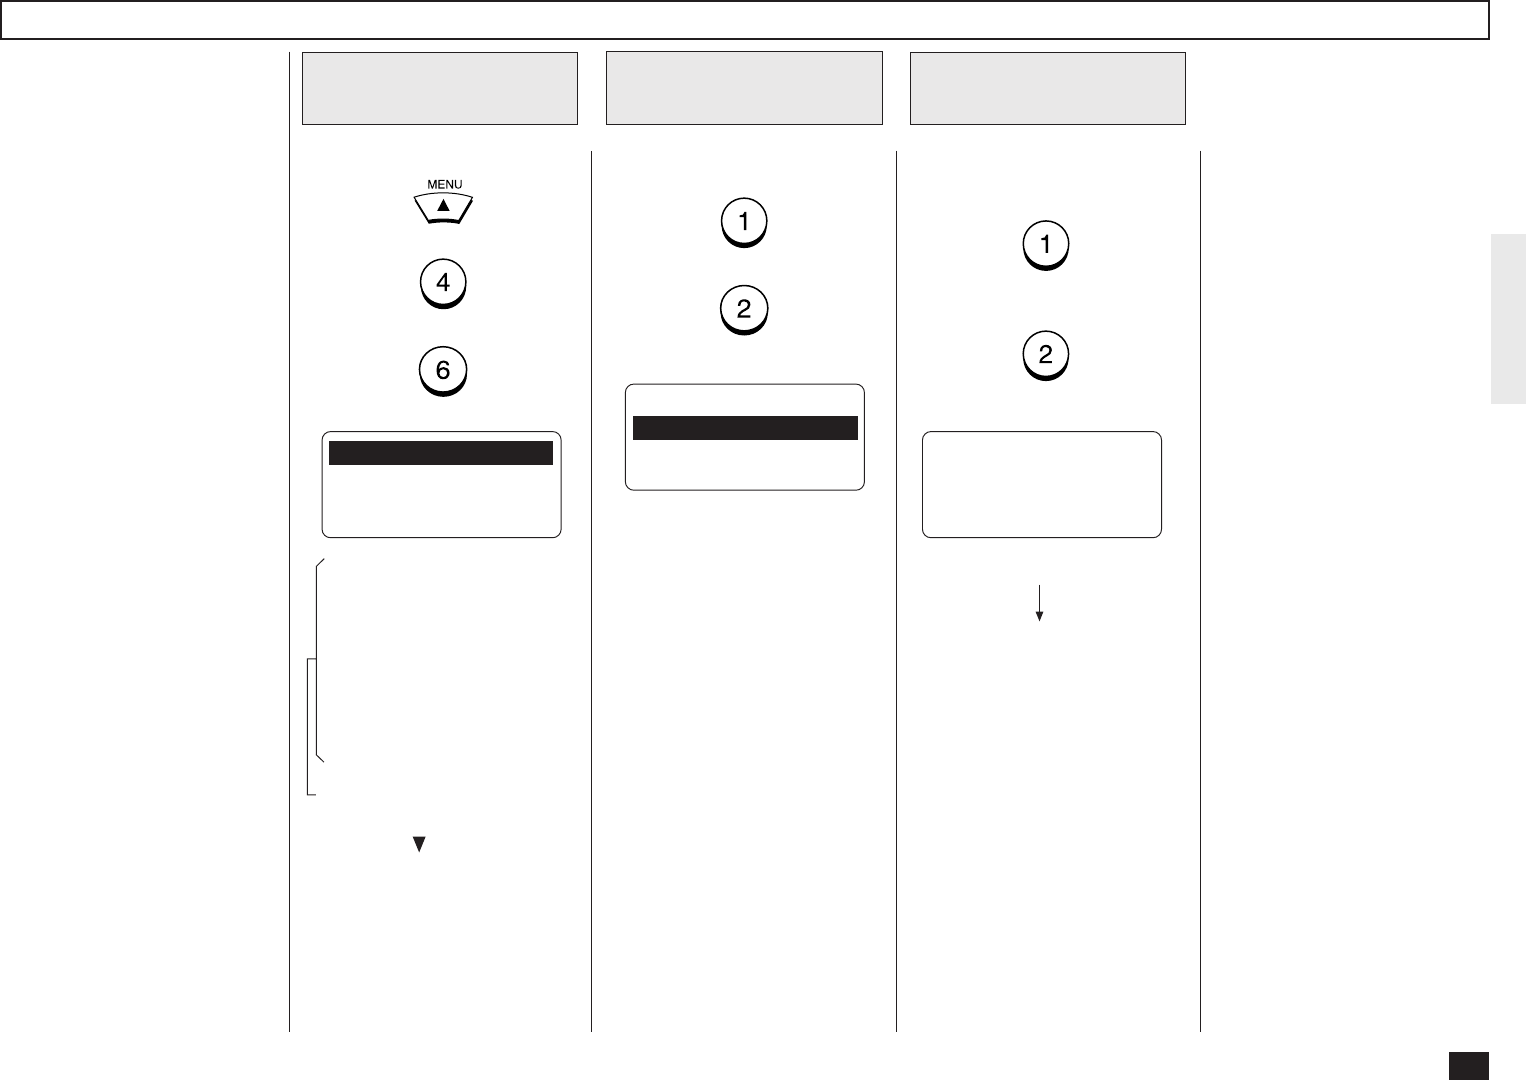
77
Confirmation Timer Setting
Display the E-MAIL
Menu
1
This sets whether or not the
alert report is printed when the
machine does not receive a
MDN reply from recepients, in
the time interval set in “Set
Confirm. Time.”
When the I-Fax message that
you sent from the machine is
not received successfully by
recepients, you cannot get any
response for the MDN. In this
case, you can print the alert re-
port tells you the machine does
not receive the MDN from the
recepients by setting this item
ON.
NOTE:
If the Incoming E-mail
server of the recipient does
not support the MDN, the
machine prints the alert re-
port whether the recipient
receives the document suc-
cessfully or not. If you are
not sure that the recipients
can reply the MDN request,
it is recommended to select
OFF.
Press:
+
+
These items are outside the
LCD frame. To view them,
use the [ ] scroll key.
01.PRINT TEXT BODY
02.BODY PAGE LIMIT
03.SEND DISPOSITION
04.PRINT HEADER ↓
05.PRINT E-MAIL ERR
06.PRINT DSN
07.PRINT DISPOSITION
08.REQUEST DSN
09.EMAIL TO FAX GTWY
10.GATEWAY PRINT
11.GATEWAY SECURITY
12.CONFIRM. TIMER
13.SET CONFIRM. TIME
14.MSG SIZE LIMIT
Display the Confirm.
Timer Menu
2
Press:
+
CONFIRMATION TIMER
1.ON
2.OFF
Enable/Disable the
Confirmation Timer
3
OPERATION COMPLETED
Displayed for 2 seconds
The display returns to Step 1.
Enable or Disable the Confir-
mation Timer function.
(for ON-Enable)
(for OFF-Disable)

78
Set Confirmation Time Setting
Display the E-MAIL
Menu
1
Display the Set Con-
firm. Time Menu
2
Press:
+
SET CONFIRM. TIME
1.15MINS
2.30MINS
3.1HR ↓
4.4HRS
5.24HRS
Select the Confir-
mation Time
3
Select the desired Confirma-
tion Time.
Press:
(for 15MINS)
(for 30MINS)
(for 1HR)
(for 4HRS)
(for 24HRS)
OPERATION COMPLETED
This sets the time interval to
wait for the MDN reply before
printing the alert report.
This setting is available when
“Confirm. Timer” is set to ON.
These items are outside the
LCD frame. To view them,
use the [ ] scroll key.
Displayed for 2 seconds
The display returns to Step 1.
Press:
+
+
These items are outside the
LCD frame. To view them,
use the [ ] scroll key.
01.PRINT TEXT BODY
02.BODY PAGE LIMIT
03.SEND DISPOSITION
04.PRINT HEADER ↓
05.PRINT E-MAIL ERR
06.PRINT DSN
07.PRINT DISPOSITION
08.REQUEST DSN
09.EMAIL TO FAX GTWY
10.GATEWAY PRINT
11.GATEWAY SECURITY
12.CONFIRM. TIMER
13.SET CONFIRM. TIME
14.MSG SIZE LIMIT
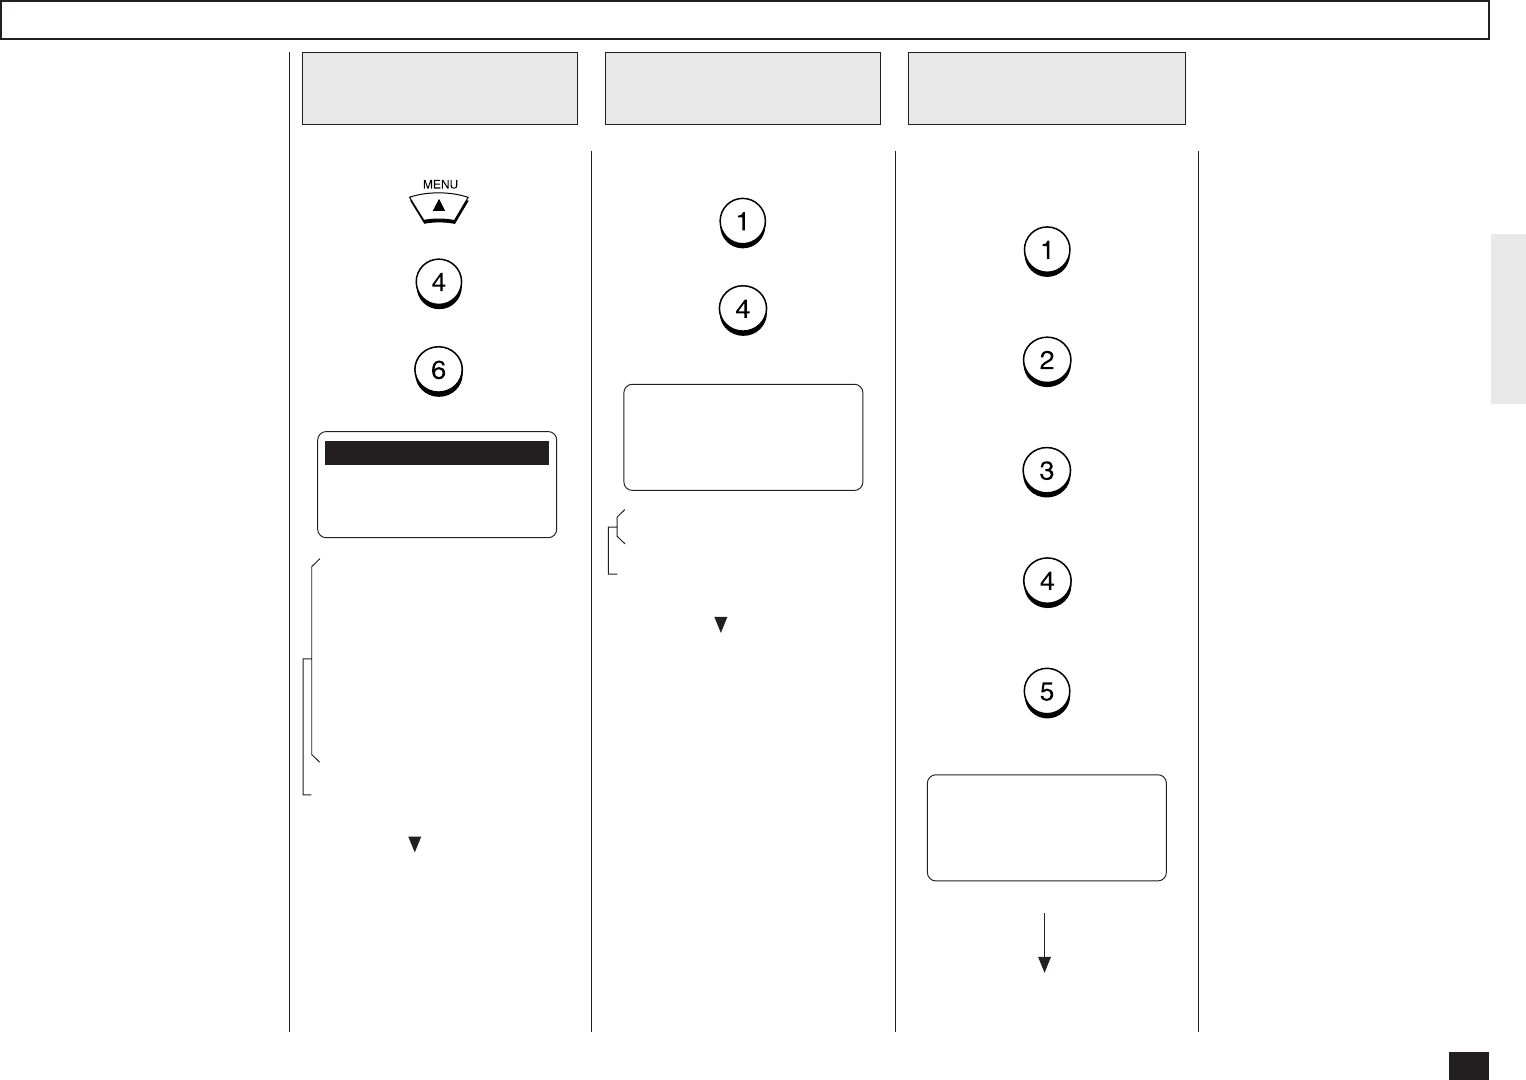
79
MSG Size Limit Setting
Display the E-MAIL
Menu
1
Display the MSG
Size Limit Menu
2
Press:
+
MSG SIZE LIMIT
1.0.5MBYTE
2.1.0MBYTE
3.1.5MBYTE ↓
4.2.0MBYTE
5.2.5MBYTE
Select the MSG
Size Limit
3
Select the desired MSG Size
Limit.
Press:
(for 0.5Mbyte)
(for 1.0Mbyte)
(for 1.5Mbyte)
(for 2.0Mbyte)
(for 2.5Mbyte)
OPERATION COMPLETED
This sets the maximum size
for sending documents using
the Internet FAX function. If
the size of documents exceeds
the maximum size, the ma-
chine sends the documents
separately.
NOTE:
The document that contains
only one page of an image
cannot be separated even if
the document size exceeds
the limit. In this case, the
machine interrupts the job.
These items are outside the
LCD frame. To view them,
use the [ ] scroll key.
Displayed for 2 seconds
The display returns to Step 1.
Press:
+
+
These items are outside the
LCD frame. To view them,
use the [ ] scroll key.
01.PRINT TEXT BODY
02.BODY PAGE LIMIT
03.SEND DISPOSITION
04.PRINT HEADER ↓
05.PRINT E-MAIL ERR
06.PRINT DSN
07.PRINT DISPOSITION
08.REQUEST DSN
09.EMAIL TO FAX GTWY
10.GATEWAY PRINT
11.GATEWAY SECURITY
12.CONFIRM. TIMER
13.SET CONFIRM. TIME
14.MSG SIZE LIMIT
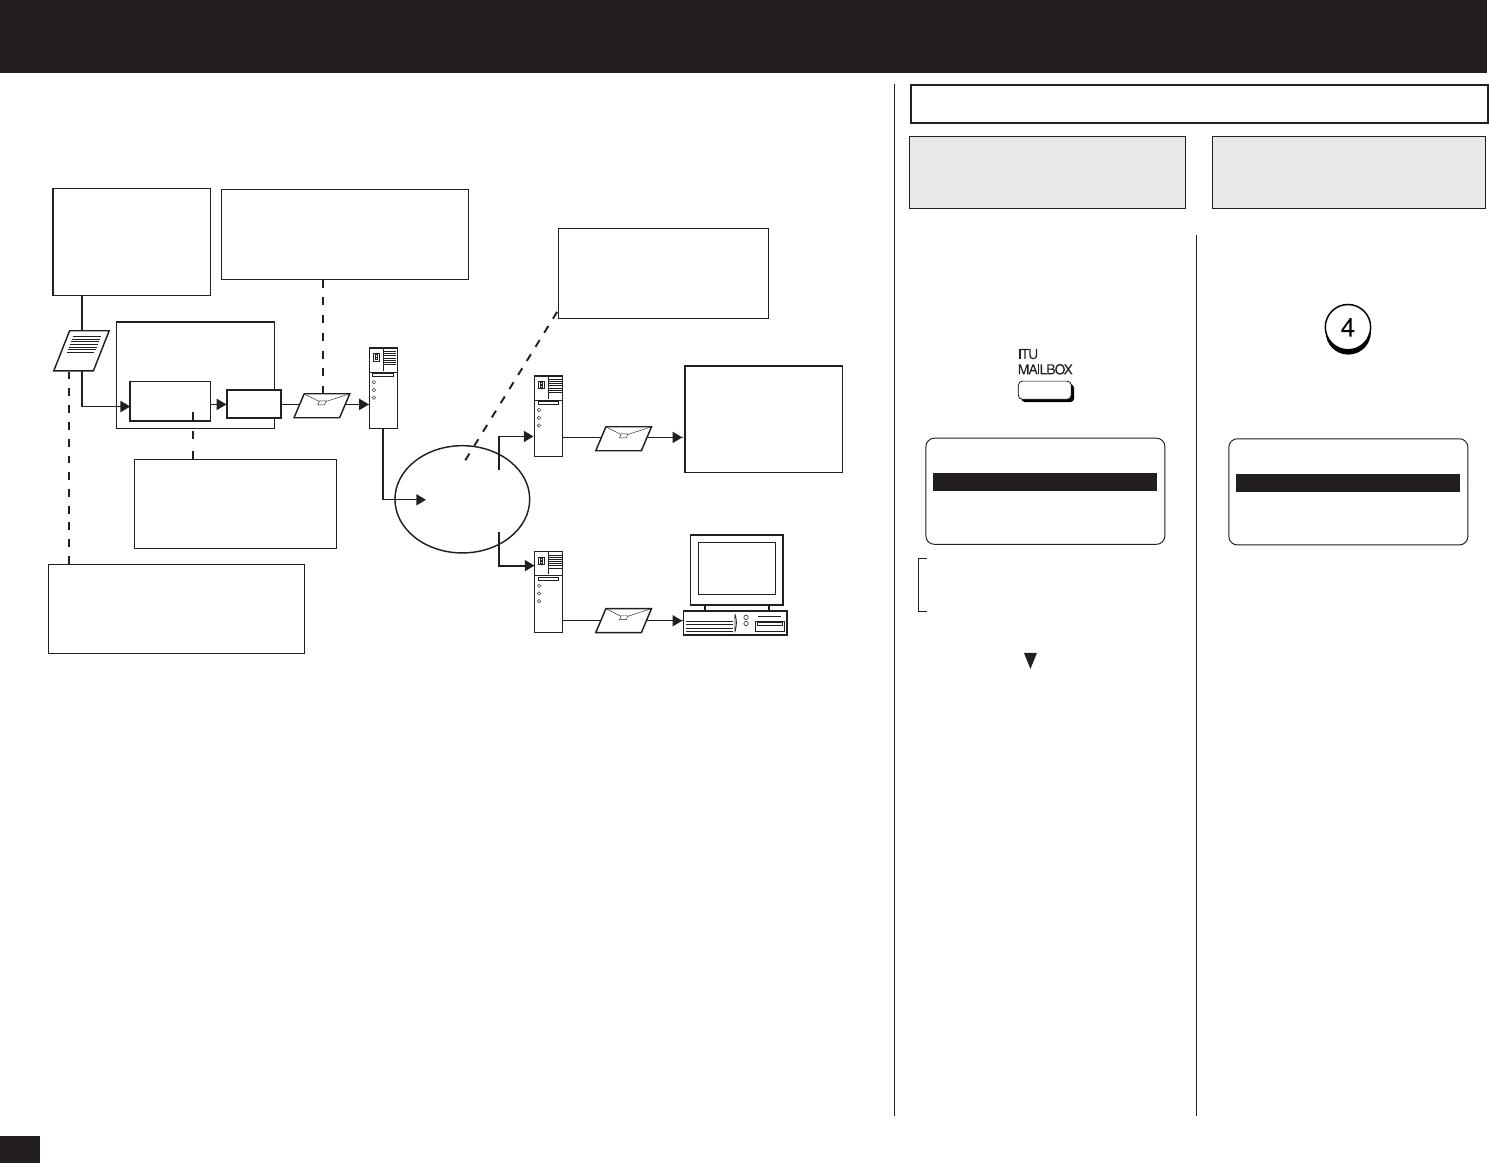
80
- ONRAMP GATEWAY SETUP
Onramp Gateway uses the relay function which is one of the ITU-T Mailbox features. The ITU-T F-
code compliant facsimiles can send the document to the Relay Mailbox in the machine and then the
DP120F/DP125F transfers the document to the E-mail addresses of other Internet Fax machines and
client computers programmed in the Relay Box.
To use this machine as the Hub Station for Onramp Gateway transmission, set up a Relay Box in the
DP120F/DP125F hub unit. Using this function, all ITU-T F-code compliant facsimiles can receive or
transmit documents to and from the DP120F/DP125F. Relay Boxes must be setup prior to utilizing
the DP120F/DP125F as a Relay Box Hub. For more information, see the section about “RELAY
TRANSMISSION” in the DP120F/125F OPERATOR’S MANUAL.
You can assign a maximum of 50 End Stations. Both E-mail addresses and facsimile numbers can
be assigned in a Relay Box. When the End Stations are the facsimile numbers, you can assign
them using Abbreviated Dial Numbers, One Touch Keys, and Group Numbers. However, when the
End Stations are E-mail addresses, you can assign them only using Abbreviated Dial Numbers and
One Touch Keys.
This section describes the procedures to assign the E-mail addresses to a Relay Box.
NOTE:
To assign the facsimile numbers to a Relay Box, see the section about “RELAY TRANSMIS-
SION” in the DP120F/125F OPERATOR’S MANUAL.
Setting Up a Relay Box with E-mail Address
Turn the Flip Panel to the “50-
73” view to select the desired
Function Key.
Press:
Select “4.BOX SETUP” by
pressing:
SETUP MAILBOX
1.COMPLETED
2.MAILBOX SETUP
3.MAILBOX DELETE
MAILBOX
1.CONFIDENTIAL
2.BULLETIN BOARD
3.RELAY ↓
4.BOX SETUP
Display the MAILBOX
Menu
1
Select SETUP &
DELETE
2
These item is outside the
LCD frame. To view them,
use the [ ] scroll key.
Relay Box
DP120F/DP125F
Mail Server
ITU-T compatible
G3 FAX
Internet FAX
machine
I-FAX
Mail Server
Personal Computer
Mail Server
Internet
3. The facsimile is converted to
an E-mail and forwarded to a
mail server through the LAN. 4. The E-mail is delivered
through the Internet,
and transferred to the
end stations.
2. The E-mail addresses
are assigned to the
end stations in the Re-
lay Box.
1. The facsimile is sent to the
Relay Box of the machine
through the public switched
telephone line.
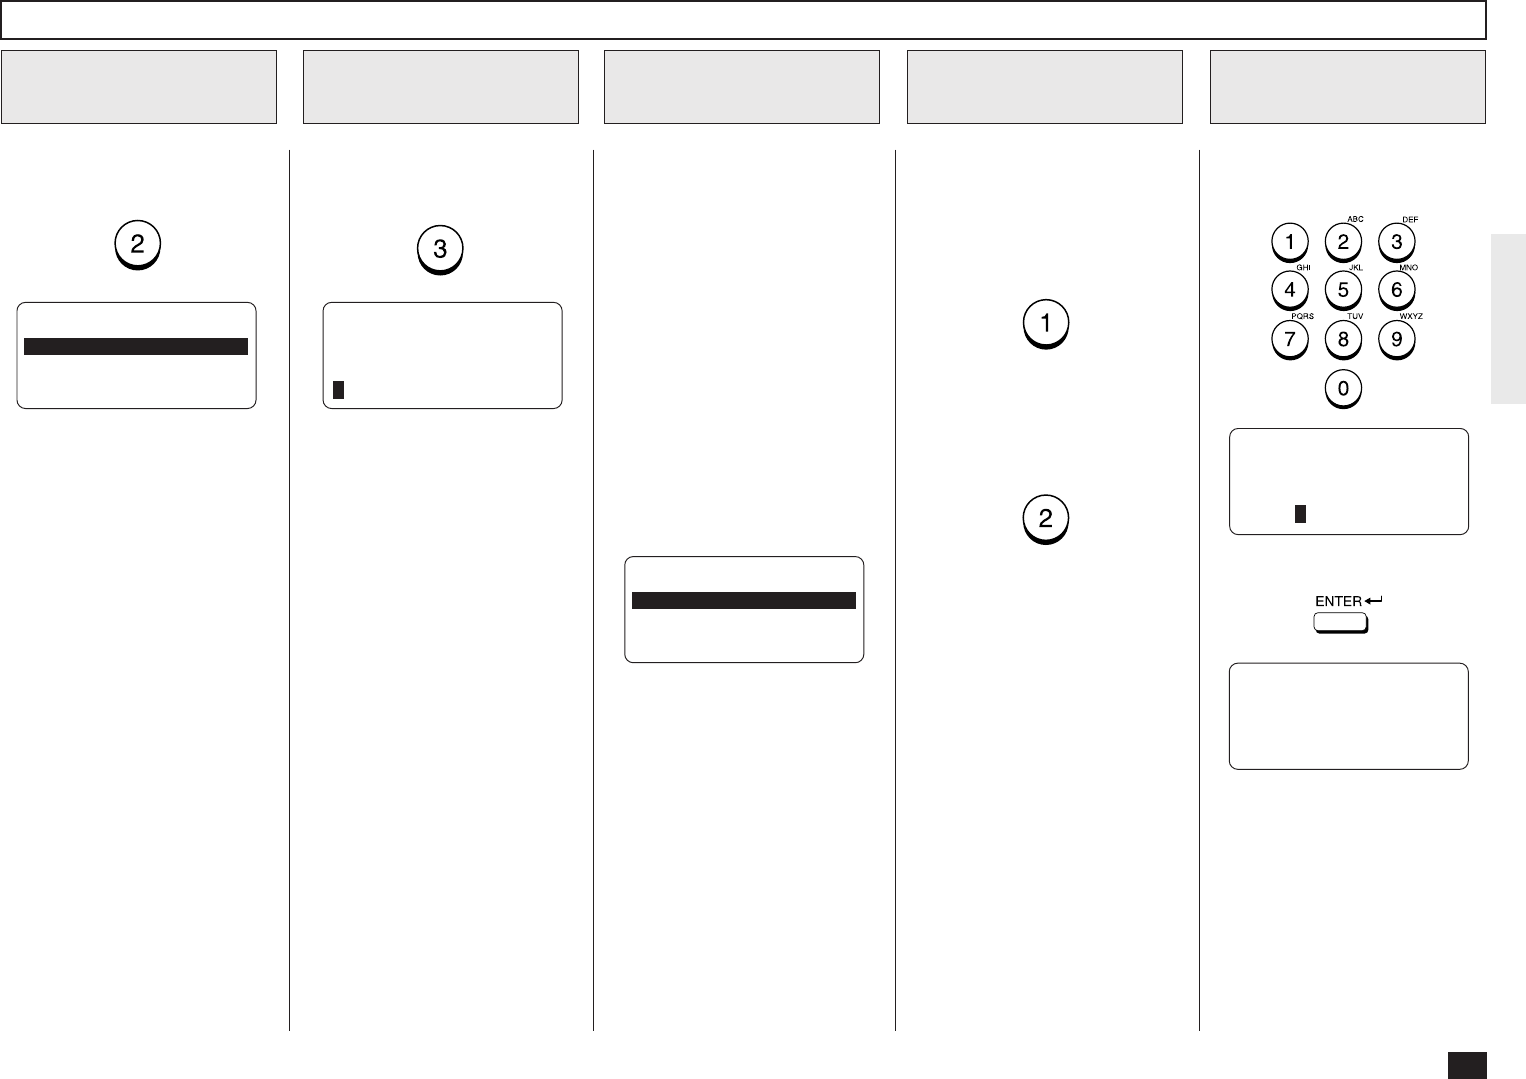
81
Select whether or not to use
the password option for this re-
lay box.
To set the password option for
this relay box, press:
Go to Step 7.
If you do not wish to set the
password option with this relay
box, press:
Go to Step 8.
Enter the password (max. 20
digits).
Enter the Box
Number
5
Select the Password
Option
6
Enter the Password
7
PROGRAM PASSWORD?
1.YES
2.NO
Then press:
ENTER PASSWORD
PASSWORD =(MAX20)
XXXXX
RELAY END NUMBER
PRESS E-MAIL KEY,
SPEED DIAL KEY OR
ONE TOUCH KEY
Select “2.MAILBOX SETUP”
by pressing:
Select MAILBOX
SETUP
3
Select the RELAY
4
MAILBOX TYPE
1.CONFIDENTIAL
2.BULLETIN BOARD
3.RELAY
Select “3.RELAY” by pressing:
ENTER NEW BOX NBR
BOX NUMBER =(MAX20)
Setting Up a Relay Box with E-mail Address - continued
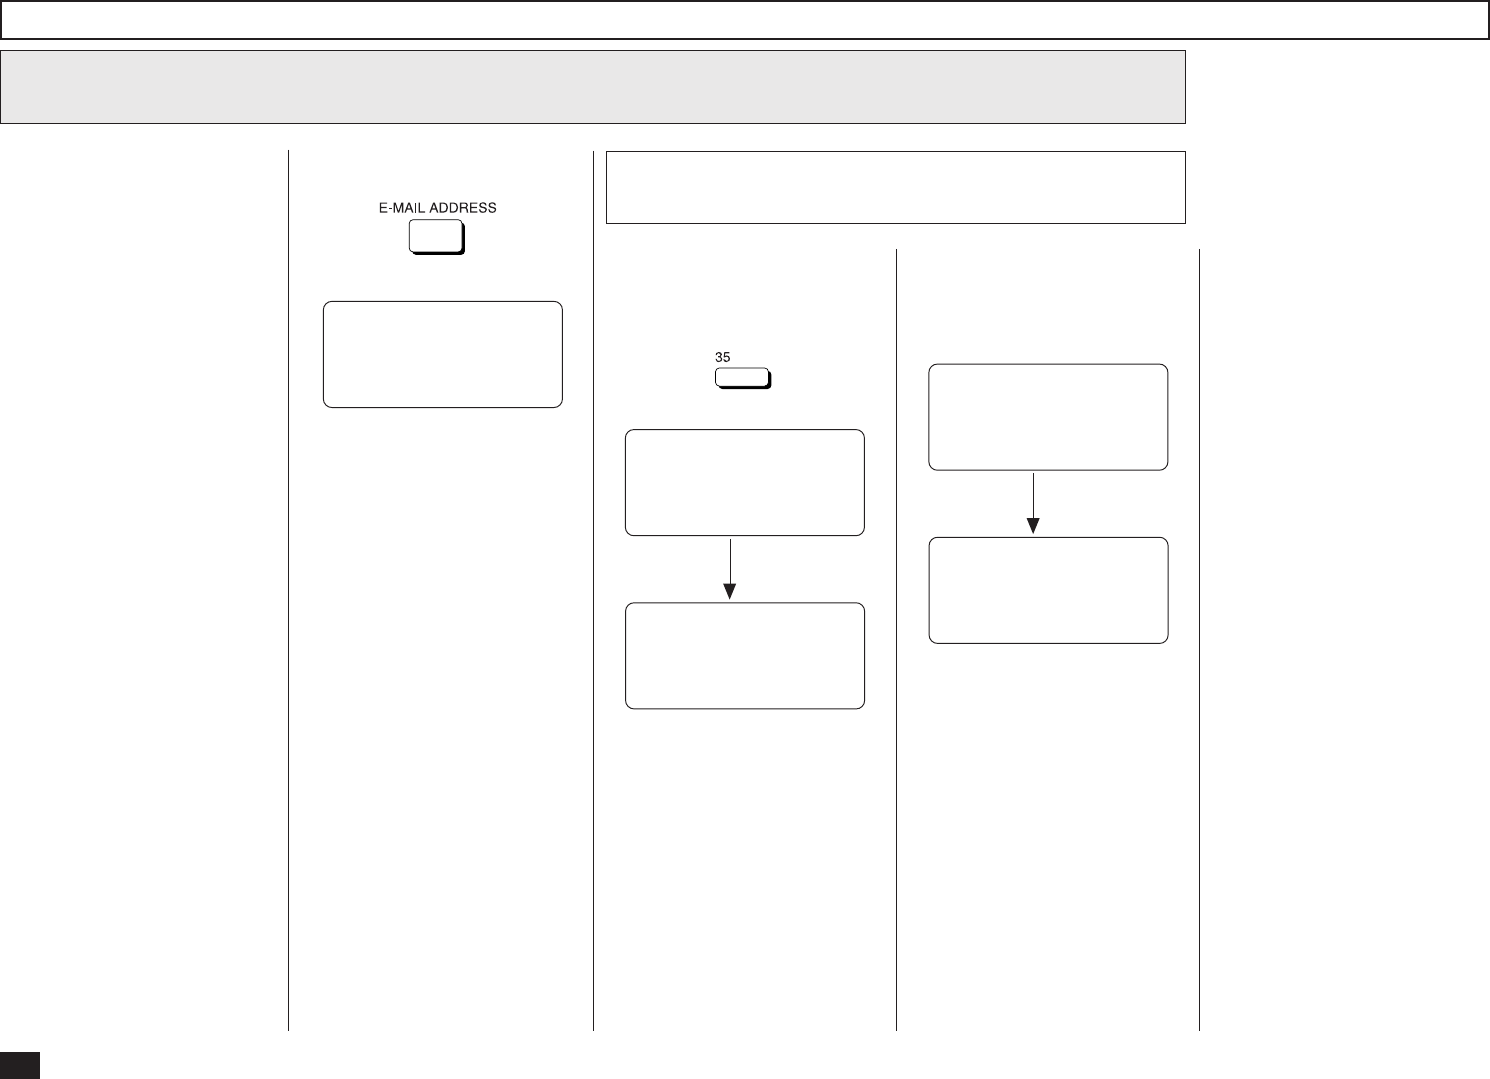
82
Setting Up a Relay Box with E-mail Address - continued
Enter the End Station
8
Repeat this step until all of the
required end stations are en-
tered. Then go to Step 9.
NOTE:
Also the facsimile numbers
can be assigned to a Relay
Box where E-mail ad-
dresses have been as-
signed. To assign the fac-
simile numbers to a Relay
Box, see the section about
“RELAY TRANSMISSION”
in the DP120F/125F
OPERATOR’S MANUAL.
Enter the One Touch Key of End Station
8a
If an end station is assigned to
a One Touch Key, press:
Example: One Touch Key 35.
Continue the operation from the
beginning of Step 8.
After 2 seconds:
RELAY END NUMBER
ONE TOUCH = 35
XXXXXX
RELAY END NUMBER
ONE TOUCH = 35
ENTER MORE OR
PRESS [START]
Press:
RELAY END NUMBER
PRESS SPEED DIAL KEY
OR ONE TOUCH KEY
NOTE:
Group Numbers cannot be
used in conjunction with E-
mail addresses in a relay
box.
Try again from the beginning of
Step 8.
After 2 seconds:
RELAY END NUMBER
ONE TOUCH = 35
NOT ENTRY
RELAY END NUMBER
PRESS E-MAIL KEY,
SPEED DIAL KEY OR
ONE TOUCH KEY
If no E-mail address is as-
signed to this One Touch key,
the following screen is dis-
played.
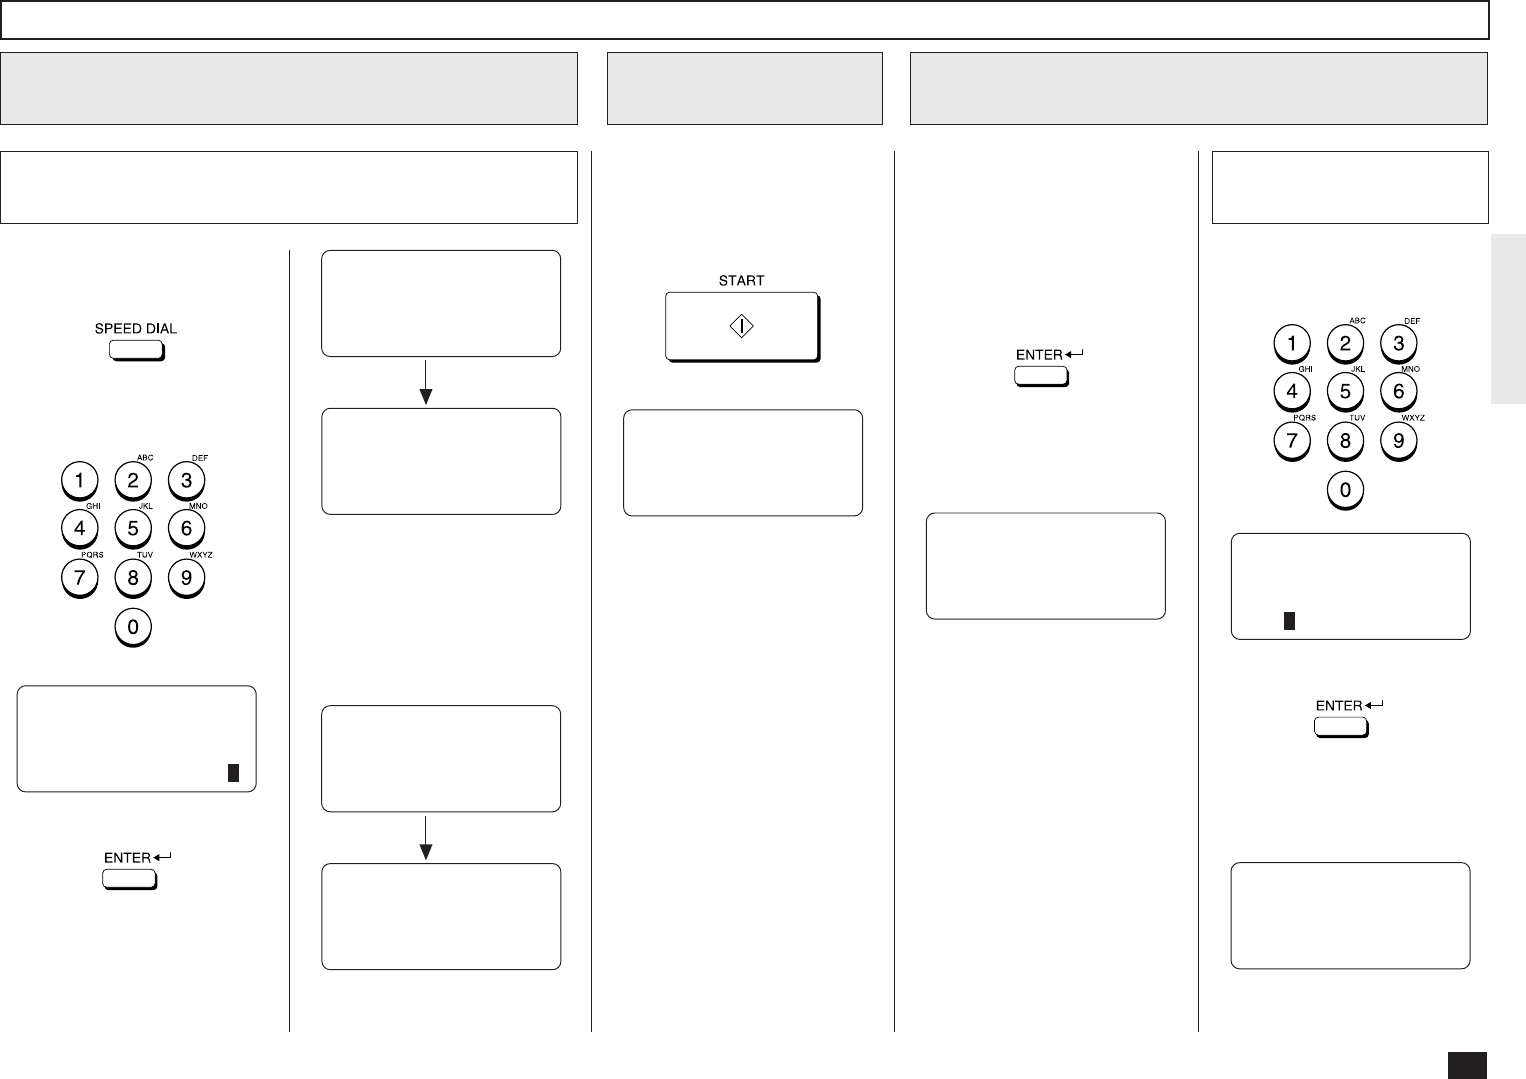
83
Setting Up a Relay Box with E-mail Address - continued
Enter the End Station - continued
8
If an Abbreviated Dial Number
is assigned to the end station,
press:
Enter the Abbreviated Dial
Number.
Enter the Abbreviated Dial Number of End Station
8b
ABB. NUMBER =(1-999)
XX
Then press:
Continue the operation from the
beginning of Step 8.
If no E-mail address is as-
signed to the Abbreviated Dial
Number, the following screen is
displayed.
After 2 seconds:
ABB. NUMBER= XXX
NOT AN EMAIL ADDRESS
RELAY END NUMBER
PRESS E-MAIL KEY,
SPEED DIAL KEY OR
ONE TOUCH KEY
Try again from the beginning of
Step 8.
After 2 seconds:
RELAY END NUMBER
ABB. NUMBER= XXX
XXXXXXXX
RELAY END NUMBER
ABB. NUMBER= XXX
ENTER MORE OR
PRESS [START]
Complete the End
Station Entry
9
When all the desired End Sta-
tion Entries (One Touch Keys
or Abbreviated Dial Numbers)
are completed under the same
Relay Box, press:
TRANSMISSION REPORT
ENTER TEL NUMBER,
SPEED DIAL KEY OR OT
ENTER TO COMPLETE
Enter the facsimile number
you want to send the relay
transmission report (relay
transmission End Stations re-
sults) to.
If you do not desire a relay
transmission report, press:
.
The following screen is dis-
played for about 2 seconds to
indicate that the Mailbox is
registered.
Enter the Number to send the Transmission
Result
10
REGISTERED
Enter the facsimile number us-
ing the Dial Keypad.
Then press:
The following screen is dis-
played for about 2 seconds to
indicate that the Mailbox is reg-
istered.
TRANSMISSION REPORT
TEL NUMBER =(MAX128)
XXXX
REGISTERED
Enter the Number Using
the Dial Keypad
10a
The display returns to the
screen in Step 2.
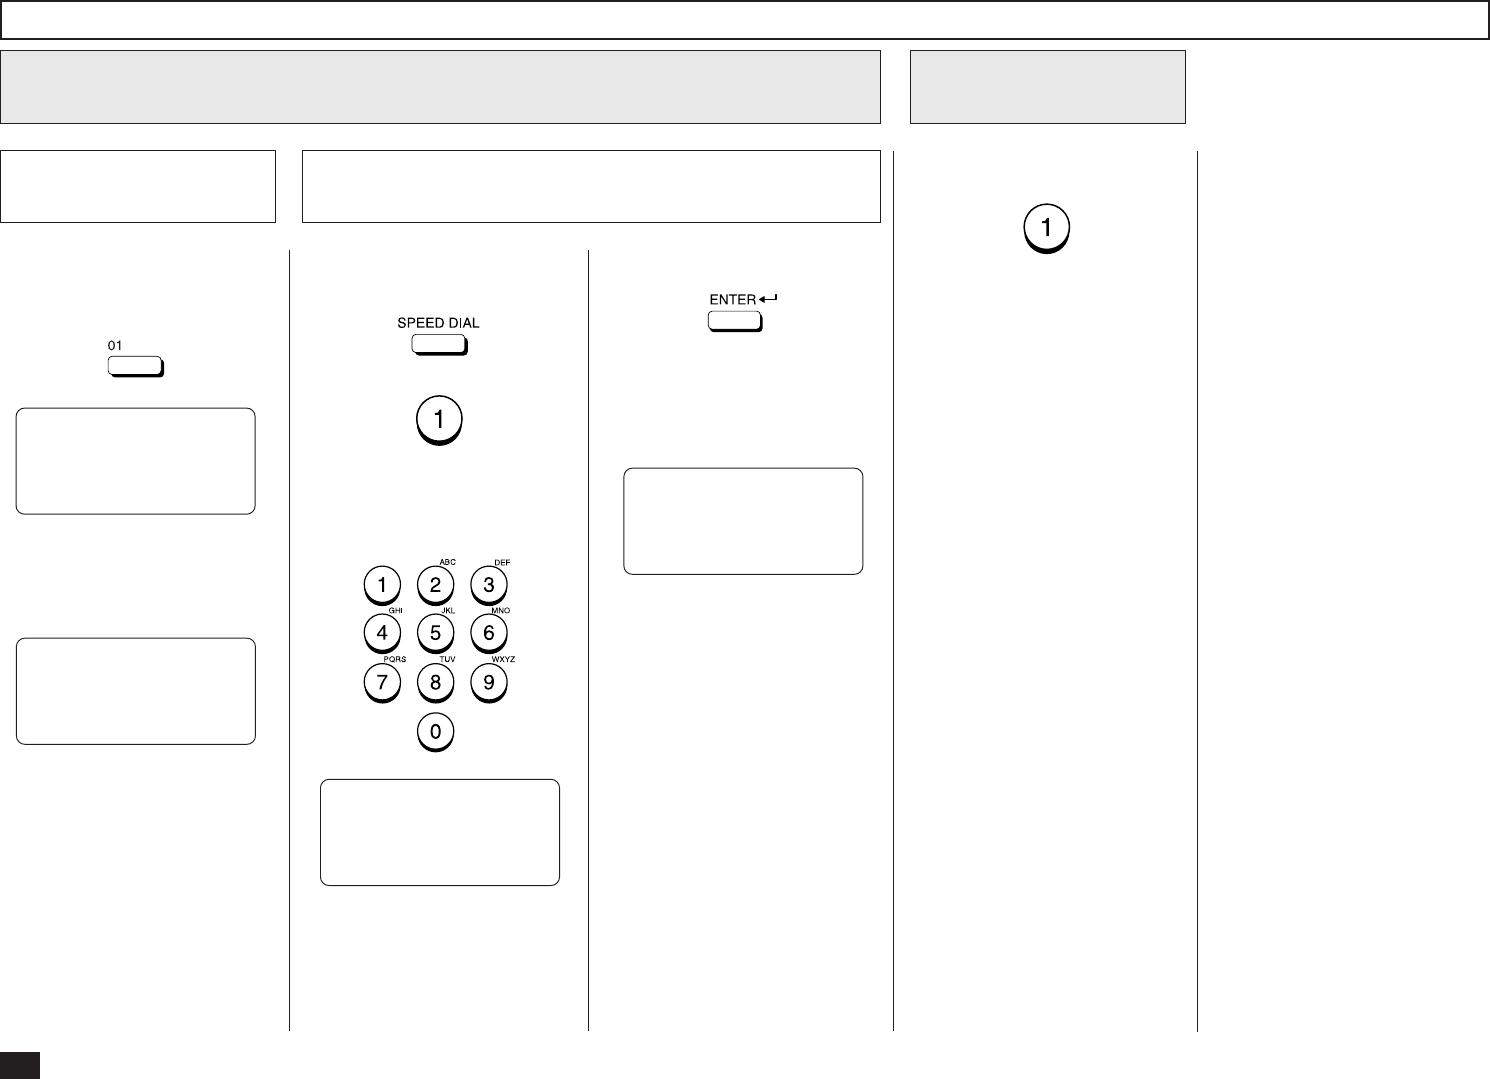
84
Setting Up a Relay Box with E-mail Address- continued
Then press:
The following screen is dis-
played for about 2 seconds to
indicate that the Mailbox is reg-
istered.
REGISTERED
Enter the Number to send the Transmission Result - continued
10
Press the desired One Touch
Key.
Example: One Touch Key 01.
The following screen is dis-
played for about 2 seconds to
indicate that the Mailbox is reg-
istered.
Press the desired Abbreviated
Dial Number.
+
Enter the Abbreviated Dial
Number.
TRANSMISSION REPORT
ONE TOUCH 01
REGISTERED
TRANSMISSION REPORT
ABB. NBR= 001
Enter the Number using
the One Touch Key
10b
The display returns to the
screen in Step 2.
Enter the Number using the Abbreviated Dial Number
10b
The display returns to the
screen in Step 2.
If you complete the Relay Box
Setup, press:
Complete the Relay
Box Setup
10
The display returns to the
Standby Mode.
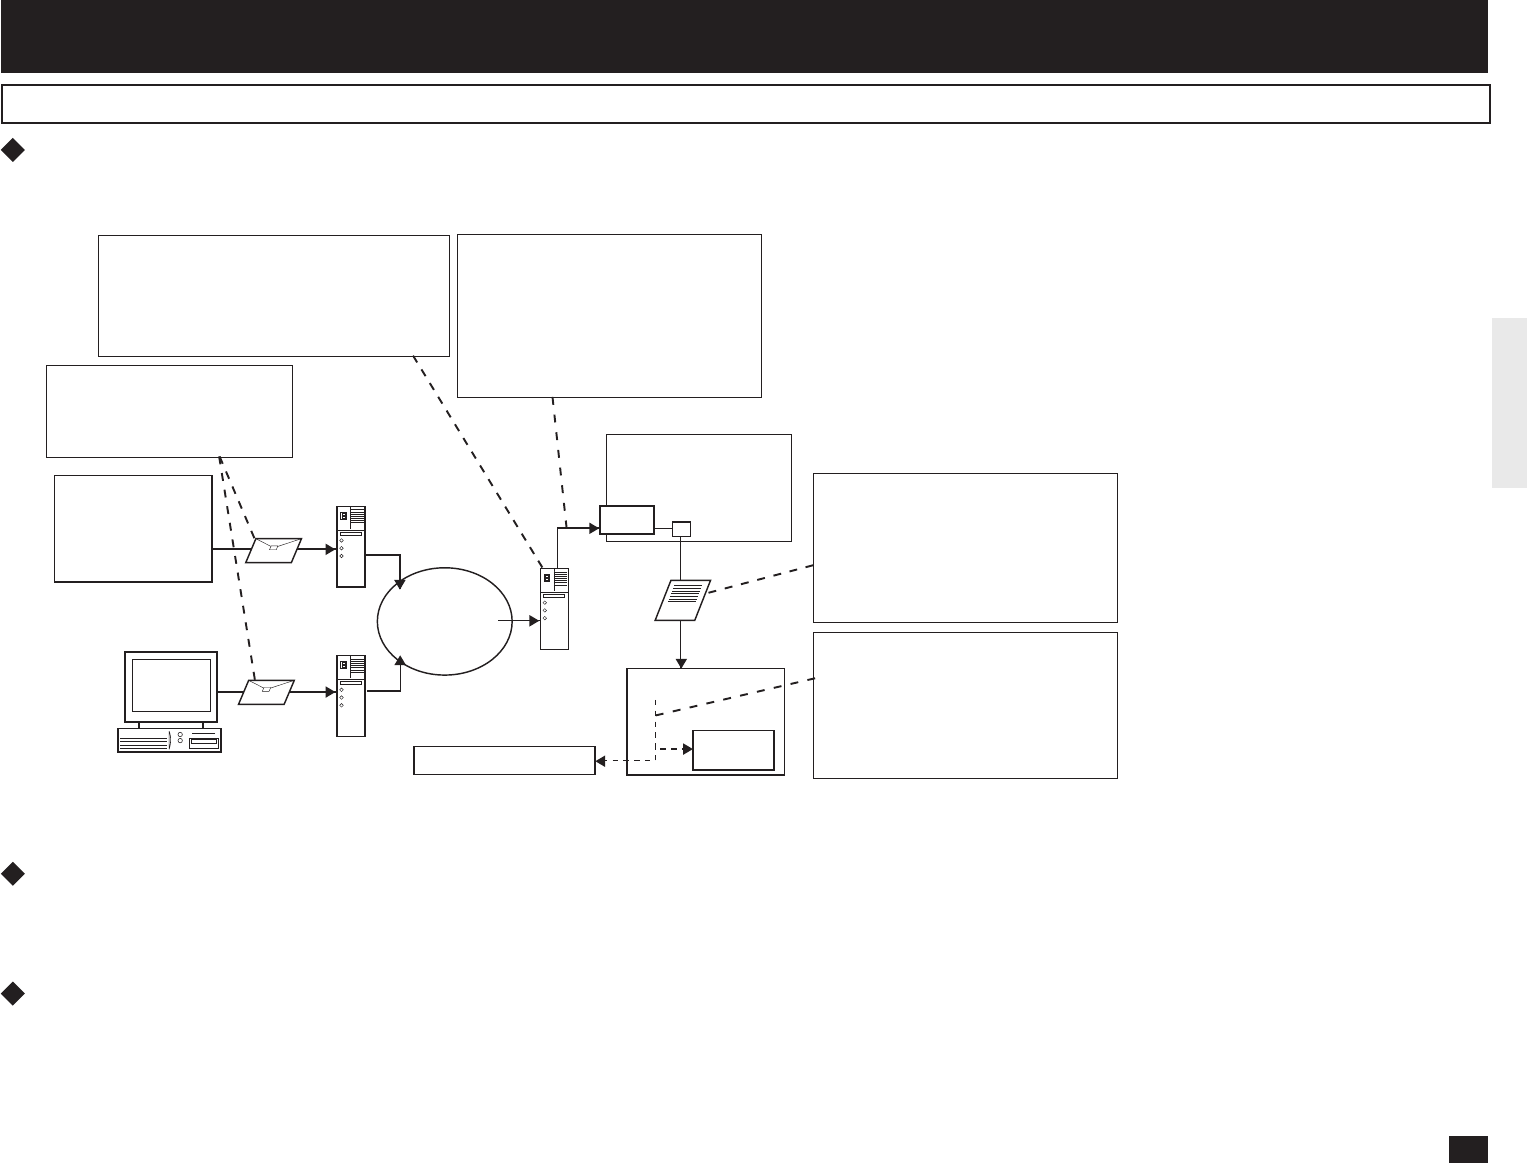
85
- OFFRAMP GATEWAY SETUP
What is a “Offramp Gateway”?
This machine can be used as a Hub Station to forward E-mails from your client computer or Internet Fax machine to the any facsimile through the public switched
telephone network.
For example, the document can be sent to the machine in a country or city through the Internet, then the document is sent from this machine to the any facsimiles through
the local public telephone line.
What is “SMTP”?
This machine uses Simple Mail Transfer Protocol (SMTP) to enable the Offramp Gateway transmission. “SMTP” is a server protocol for sending E-mail messages
between servers. Usually the E-mail systems that transfer E-mails over the Internet use the SMTP to send messages from one server to another. Therefore, when
this machine uses the SMTP to transfer E-mails, this machine works as a mail server.
How this machine can receive E-mail through SMTP?
For the DP120F/DP125F to receive transmissions in SMTP mode from the mail server, the specific domain (that relates to the DP120F/DP125F) E-mail address must
be set up on the Host mail server. To set this on the mail server, the hostname of this machine must be designated. If the hostname of this machine is designated
as “host1.toshiba.com”, it is set to transfer the E-mail to this machine when an E-mail to “xxx@host1.toshiba.com” is delivered to the Internet.
Offramp Gateway, Offramp Gateway Overview
DP120F/DP125F
(host1.toshiba.com)
Mail Server
(toshiba.com) G3 FAX
Subaddress Destination
I-FAX
Mail Server
Personal Computer
Mail Server
Internet
Internet FAX
machine
Relay Box
3. The mail server transfer the E-mail
to the machine in the SMTP trans-
mission.
NOTE: The mail server is configured to
transfer the E-mail whose for-
warding address contains
“host1.toshiba.com”.
1. The E-mail is sent to
“xxxx@host1.toshiba.com”
from the Internet Fax ma-
chine or client computer.
2. The mail server (toshiba.com) retrieves the
E-mail.
NOTE: The mail server is configured to re-
trieve the E-mail whose forwarding ad-
dress contains “host1.toshiba.com”.
4. The E-mail is converted to a fac-
simile and send to the G3 FAX
through the public switched tele-
phone network.
For more information, see “How to send
a document using Offramp Gateway”.
5. If the username section of the E-mail
address designates the fax number
and the subaddress, the facsimile is
sent to the subaddress destination.
For more information, see “How to send
a document using Offramp Gateway”.
86
Setting Up for Offramp Gateway
To setup this machine for the Offramp Gateway transmission:
E-mail Account Setup Note
E-mail Address The domain of your E-mail address becomes a name
added the sub-address for this machine and domain name
of the SMTP server. For example, if the domain name of
the mail server is “toshiba.com” and sub-address of this
machine is “host1”, the domain of the E-mail address for
this machine will be a FQDN*1 that the sub-address is
added to this domain.
[i.e. username@host1.toshiba.com] (See page 60.)
Receive Mode Set to “SMTP”. (See page 62.)
SMTP Server Address Assign the IP address of the main mail server that sup-
plies the domain for your machine. (See page 67.)
Important:
Some settings are required to be configured at the SMTP server.
• The domain name for this machine must be assigned on the main SMTP server.
• Set up the SMTP server to forward the E-mail to this machine when the SMTP server receives
an E-mail whose address contains the host name for this machine.
Ask your administrator to set up the SMTP server.
How to send a document using Offramp Gateway
Using the Offramp Gateway transmission, you can send E-mail
documents to a facsimile connected in the public switched tele-
phone network. Also, this machine supports addressing the ITU-T
Mailbox in the remote facsimile.
When you send an E-mail using the Offramp Gateway transmission,
the syntax of the Offramp-email-address must be specified correctly.
Sending to Facsimile
Offramp-email-address syntax:
FAX=xxxxxxxxx@FQDN
[“xxxxxxxxx” is the telephone number of a facsimile.]
For example when the assigned domain name (FQDN) for this
machine is “host1.toshiba.com” and the facsimile number is
“1212121212”:
i.e. FAX=1212121212@host1.toshiba.com
Sending to Subaddress
Offramp/subaddress-email-address syntax:
FAX=xxxxxxxxx/T33S=yyyy@FQDN
[“xxxxxxxxx” is the telephone number of a facsimile.]
[“yyyy” is the subaddress.]
SUPPLEMENT:
“T33S” is a syntax code to specify a subaddress. When
you send to a subaddress using the Offramp Gateway, the
facsimile number and the subaddress number is separated
with “/”.
For example when the assigned domain name (FQDN) for this
machine is “host1.toshiba.com”, the facsimile number is
“1212121212”, and the subaddress is “1234”:
i.e. FAX=1212121212/T33S=1234@host1.toshiba.com
NOTE:
Any international telephone number entry is not accepted for
the facsimile number in the Offramp-email-address.
Offramp Gateway Properties Setup Note
E-mail to FAX Gateway This sets the machine to allow forwarding the document
that is received by the Offramp Gateway transmission.
(See page 87.)
Gateway Print This sets whether to print the document sent from the
Internet FAX machine using the Offramp Gateway trans-
mission. The machine prints the document before for-
warding it to the facsimile, so that you can confirm what is
sent using the Offramp Gateway. (See page 88.)
Gateway Security This sets whether to check the fax number where the
document is being sent to before allowing the document to
be forwarded via the Offramp gateway. If the fax number
of the facsimile is not registered as One Touch dials or
Abbreviated dials, the machine does not allow the Offramp
Gateway for this document. (See page 89.)
*1 “Fully Qualified Domain Name” consists of a host name and domain name.
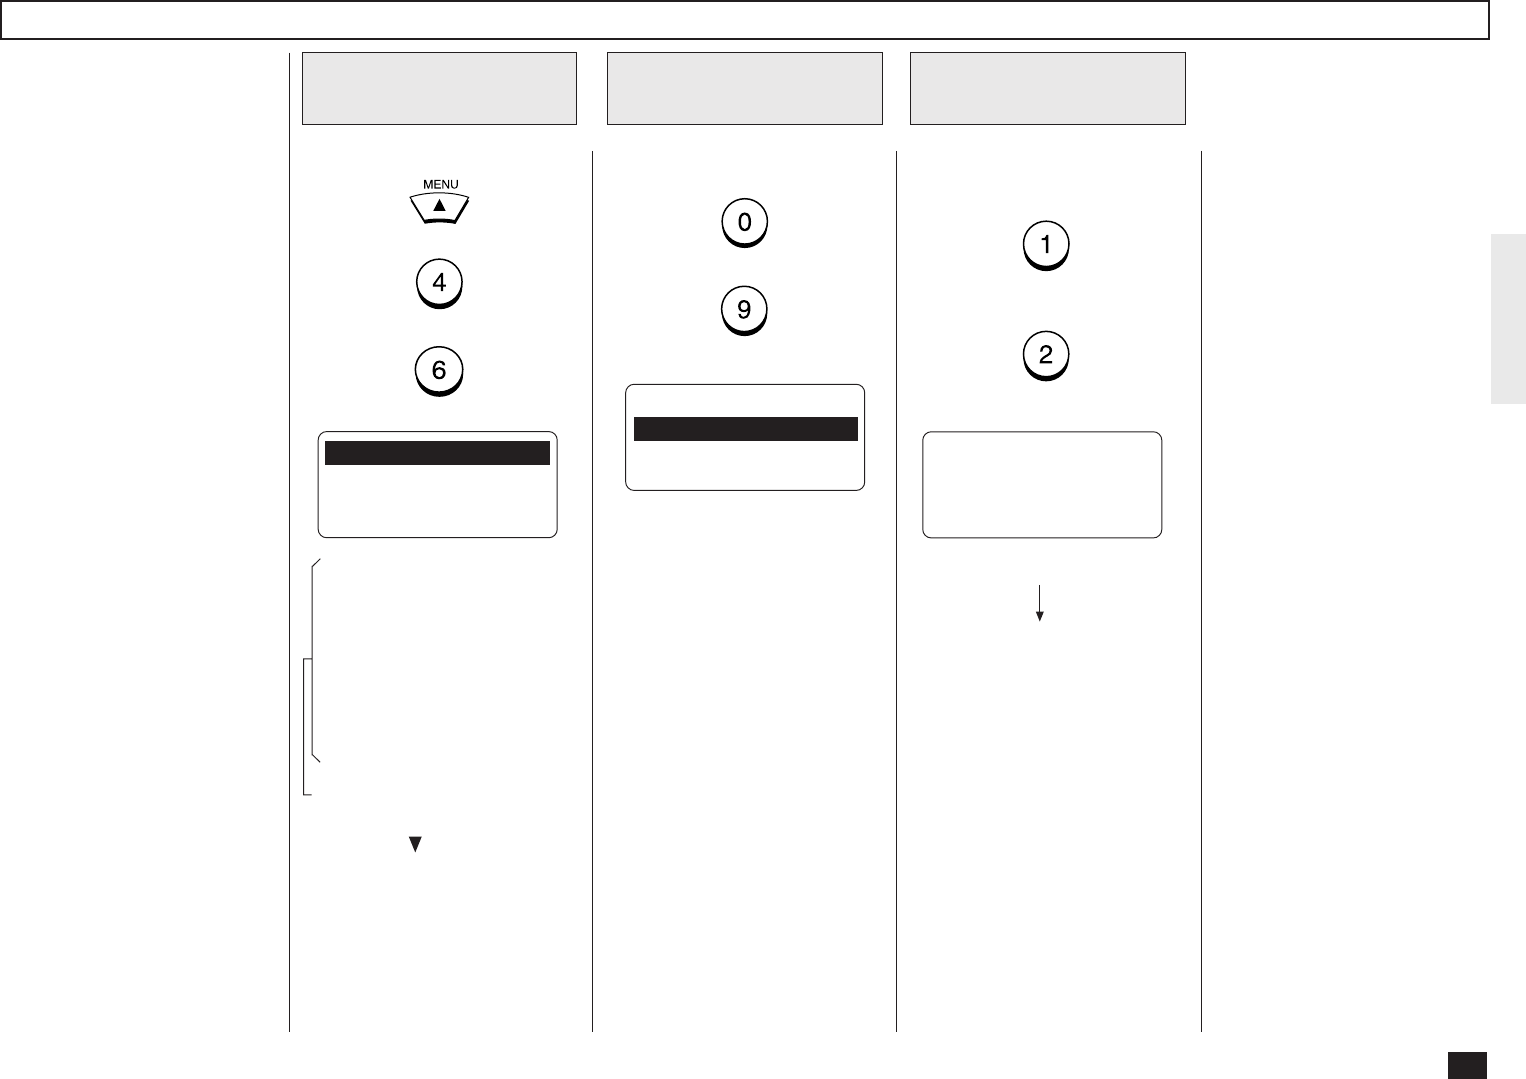
87
Display the EMAIL TO
FAX GTWY Menu
2
Press:
+
EMAIL TO FAX GTWY
1.ON
2.OFF
Enable/Disable the
EMAIL TO FAX GTWY
3
OPERATION COMPLETED
Displayed for 2 seconds
The display returns to Step 1.
Enable or Disable the E-mail to
FAX Gateway function.
(for ON-Enable)
(for OFF-Disable)
E-mail to FAX Gateway Setting
Display the E-mail
Menu
1
This sets the machine to allow
forwarding the document that is
received by the Offramp Gate-
way transmission.
If this is set to ON, it is recom-
mended to set up “Gateway
Print” and “Gateway Security”.
Press:
+
+
01.PRINT TEXT BODY
02.BODY PAGE LIMIT
03.SEND DISPOSITION
04.PRINT HEADER ↓
05.PRINT E-MAIL ERR
06.PRINT DSN
07.PRINT DISPOSITION
08.REQUEST DSN
09.EMAIL TO FAX GTWY
10.GATEWAY PRINT
11.GATEWAY SECURITY
12.CONFIRM. TIMER
13.SET CONFIRM. TIME
14.MSG SIZE LIMIT
These items are outside the
LCD frame. To view them,
use the [ ] scroll key.
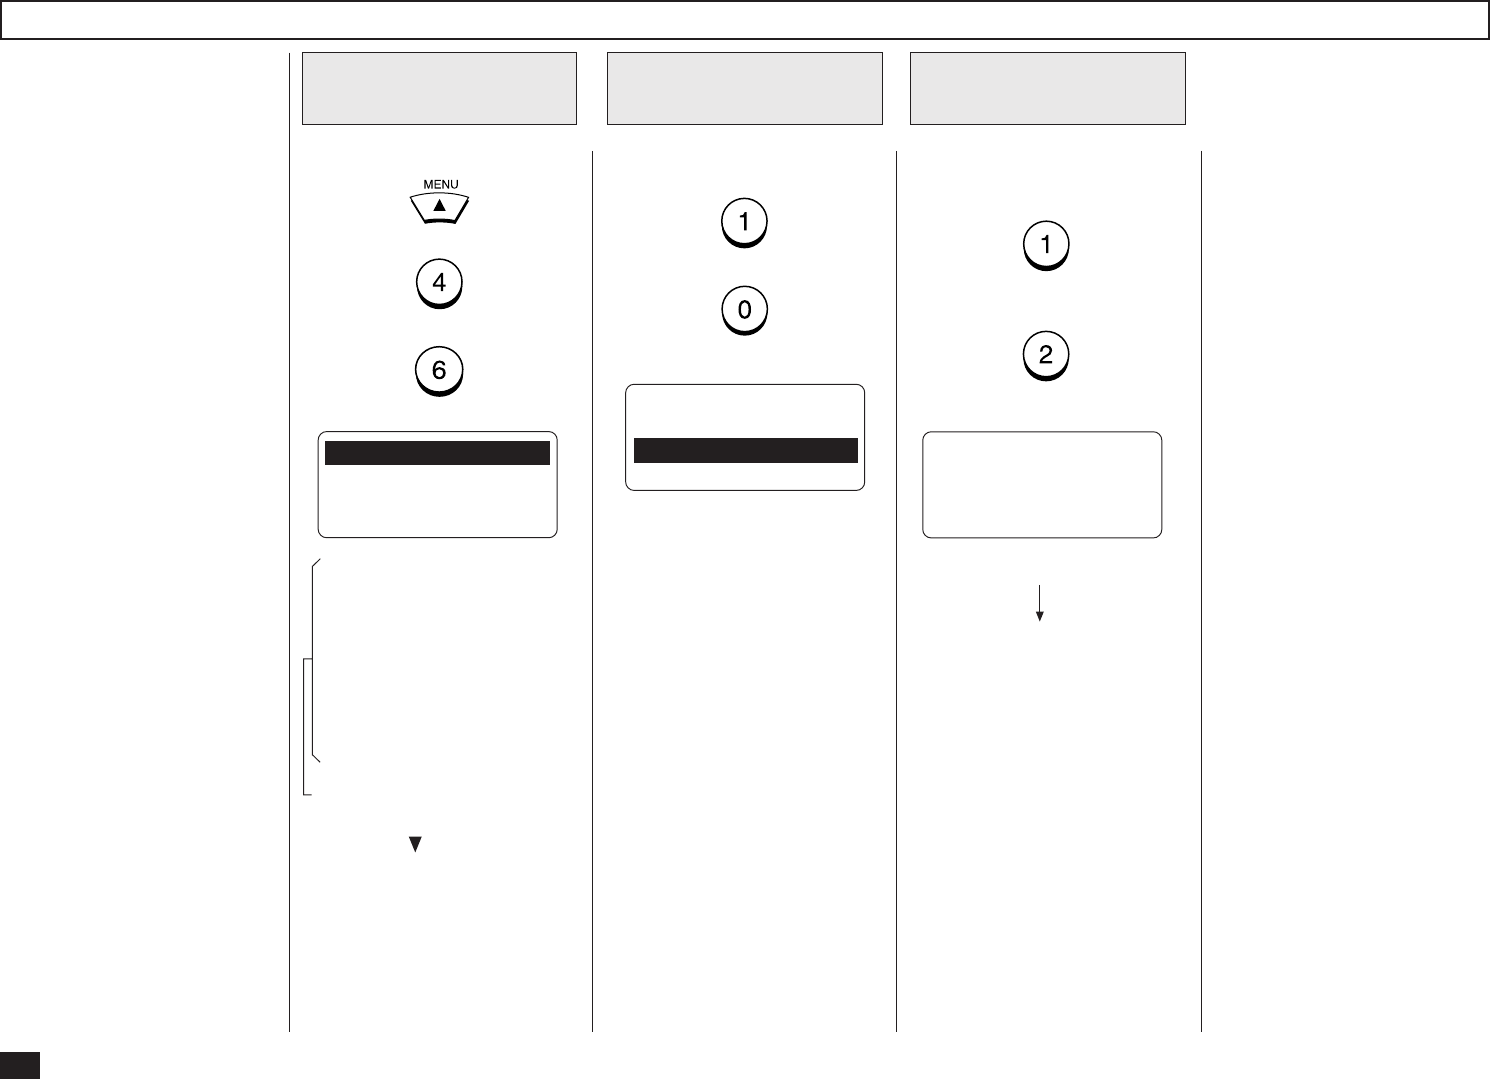
88
Display the GATE-
WAY PRINT Menu
2
Press:
+
PRINT COPY OF
DOCUMENT AT GATEWAY
1.ON
2.OFF
Enable/Disable the
Gateway Print
3
OPERATION COMPLETED
Displayed for 2 seconds
The display returns to Step 1.
Enable or Disable the Gateway
Print function.
(for ON-Enable)
(for OFF-Disable)
Gateway Print Setting
Display the E-mail
Menu
1
This sets whether to print the
E-mail that is sent to the
Offramp Gateway transmis-
sion. The machine prints the
document before forwarding it
to the facsimile, so that you
can confirm what is being sent
using the Offramp Gateway.
This setting is available when
the “E-mail to FAX GTWY” is
set to ON.
Press:
+
+
01.PRINT TEXT BODY
02.BODY PAGE LIMIT
03.SEND DISPOSITION
04.PRINT HEADER ↓
05.PRINT E-MAIL ERR
06.PRINT DSN
07.PRINT DISPOSITION
08.REQUEST DSN
09.EMAIL TO FAX GTWY
10.GATEWAY PRINT
11.GATEWAY SECURITY
12.CONFIRM. TIMER
13.SET CONFIRM. TIME
14.MSG SIZE LIMIT
These items are outside the
LCD frame. To view them,
use the [ ] scroll key.
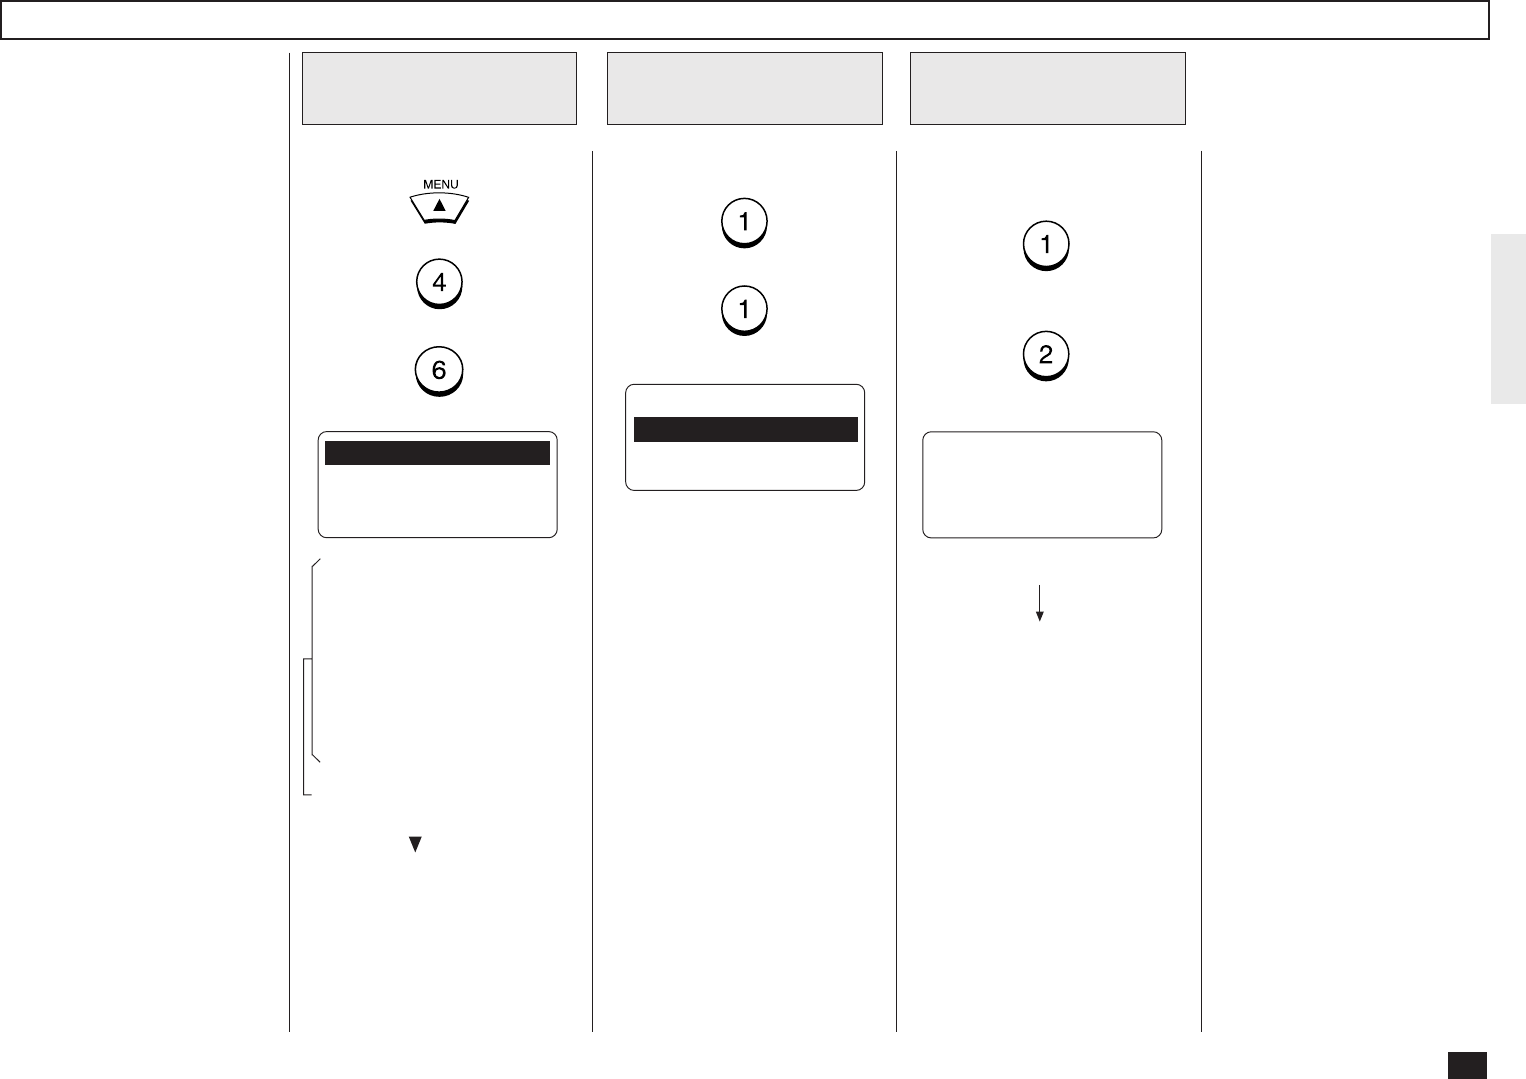
89
Display the GATEWAY
SECURITY Menu
2
Press:
+
GATEWAY SECURITY
1.ON
2.OFF
Enable/Disable the
Gateway Security
3
OPERATION COMPLETED
Displayed for 2 seconds
The display returns to Step 1.
Enable or Disable the Gateway
Security function.
(for ON-Enable)
(for OFF-Disable)
Gateway Security Setting
Display the E-mail
Menu
1
This sets whether to check the
fax number where the docu-
ment is sent before allowing
the Offramp Gateway.
If the fax number of the fac-
simile is not registered as One
Touch dials or Abbreviated di-
als, the machine does not allow
the Offramp Gateway for this
document.
This setting is available when
the “E-mail to FAX GTWY” is
set to ON.
NOTE:
Any person who knows the
sub-domain of your ma-
chine, can send documents
from another Internet Fax
machine by the Offramp
Gateway transmission re-
garding your machine as the
relay station. This item is
for setting the security for
E-mail to FAX Gateway
function.
Press:
+
+
01.PRINT TEXT BODY
02.BODY PAGE LIMIT
03.SEND DISPOSITION
04.PRINT HEADER ↓
05.PRINT E-MAIL ERR
06.PRINT DSN
07.PRINT DISPOSITION
08.REQUEST DSN
09.EMAIL TO FAX GTWY
10.GATEWAY PRINT
11.GATEWAY SECURITY
12.CONFIRM. TIMER
13.SET CONFIRM. TIME
14.MSG SIZE LIMIT
These items are outside the
LCD frame. To view them,
use the [ ] scroll key.
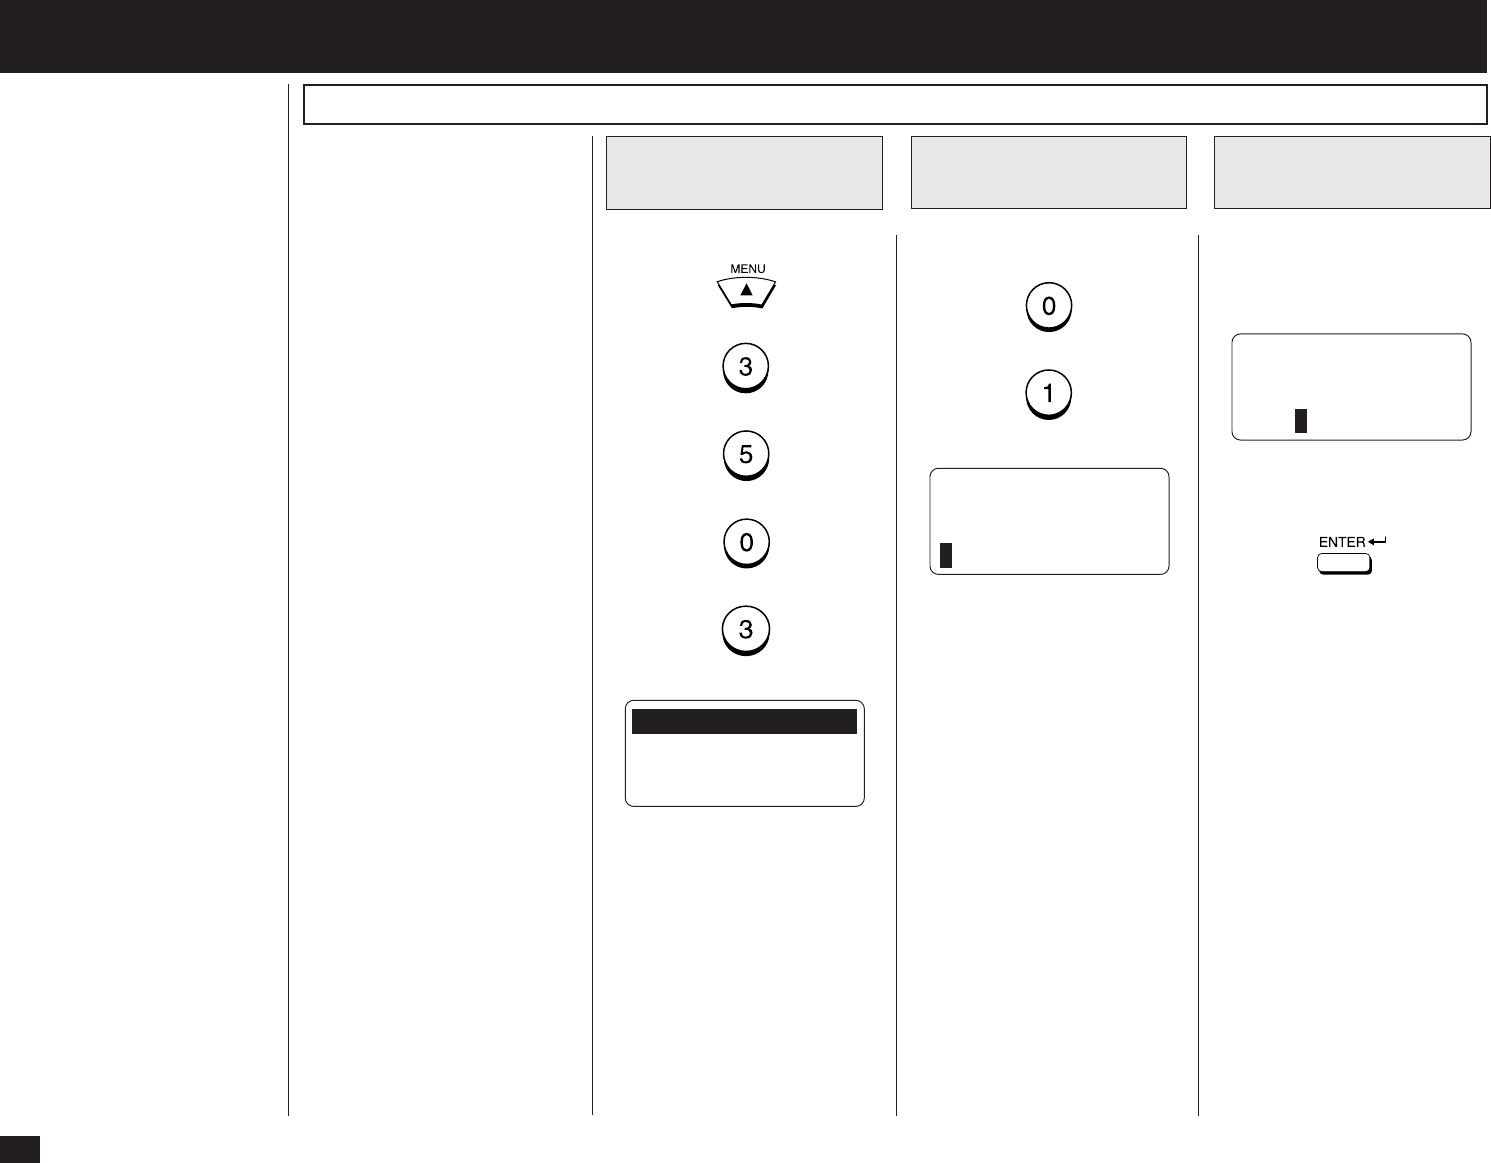
90
- ADDITIONAL FUNCTIONS SETUP
The following additional func-
tions are available when the In-
ternet Fax kit is installed to the
machine.
• FTP Server Login Name
• FTP Server Login Password
• LAN FAX
• IPX/SPX Protocol
• Frame Type
FTP Server Login Name Setting
Press:
+
+
+
+
Display the FTP
Menu
1
01.FTP SRV LOGIN NAM
02.FTP SRV LOGIN PWD
Display the FTP SRV
LOGIN NAM Menu
2
Press:
+
FTP SRV LOGIN NAME
(MAX 32:)
public
Enter the Login
Name
3
Enter the Login Name using
the Keyboard and Numeric
Keypad.
When the correct Login Name
is displayed, press:
FTP SRV LOGIN NAME
(MAX 32:)
XXXXX
The display returns to Step 1.
This allows you to set the user
name to log into the FTP server
on the machine.
The user name is required to
transmit data between a per-
sonal computer and the ma-
chine using the TOSHIBA
Viewer.
NOTE:
The “public” is assigned as
the default login name.
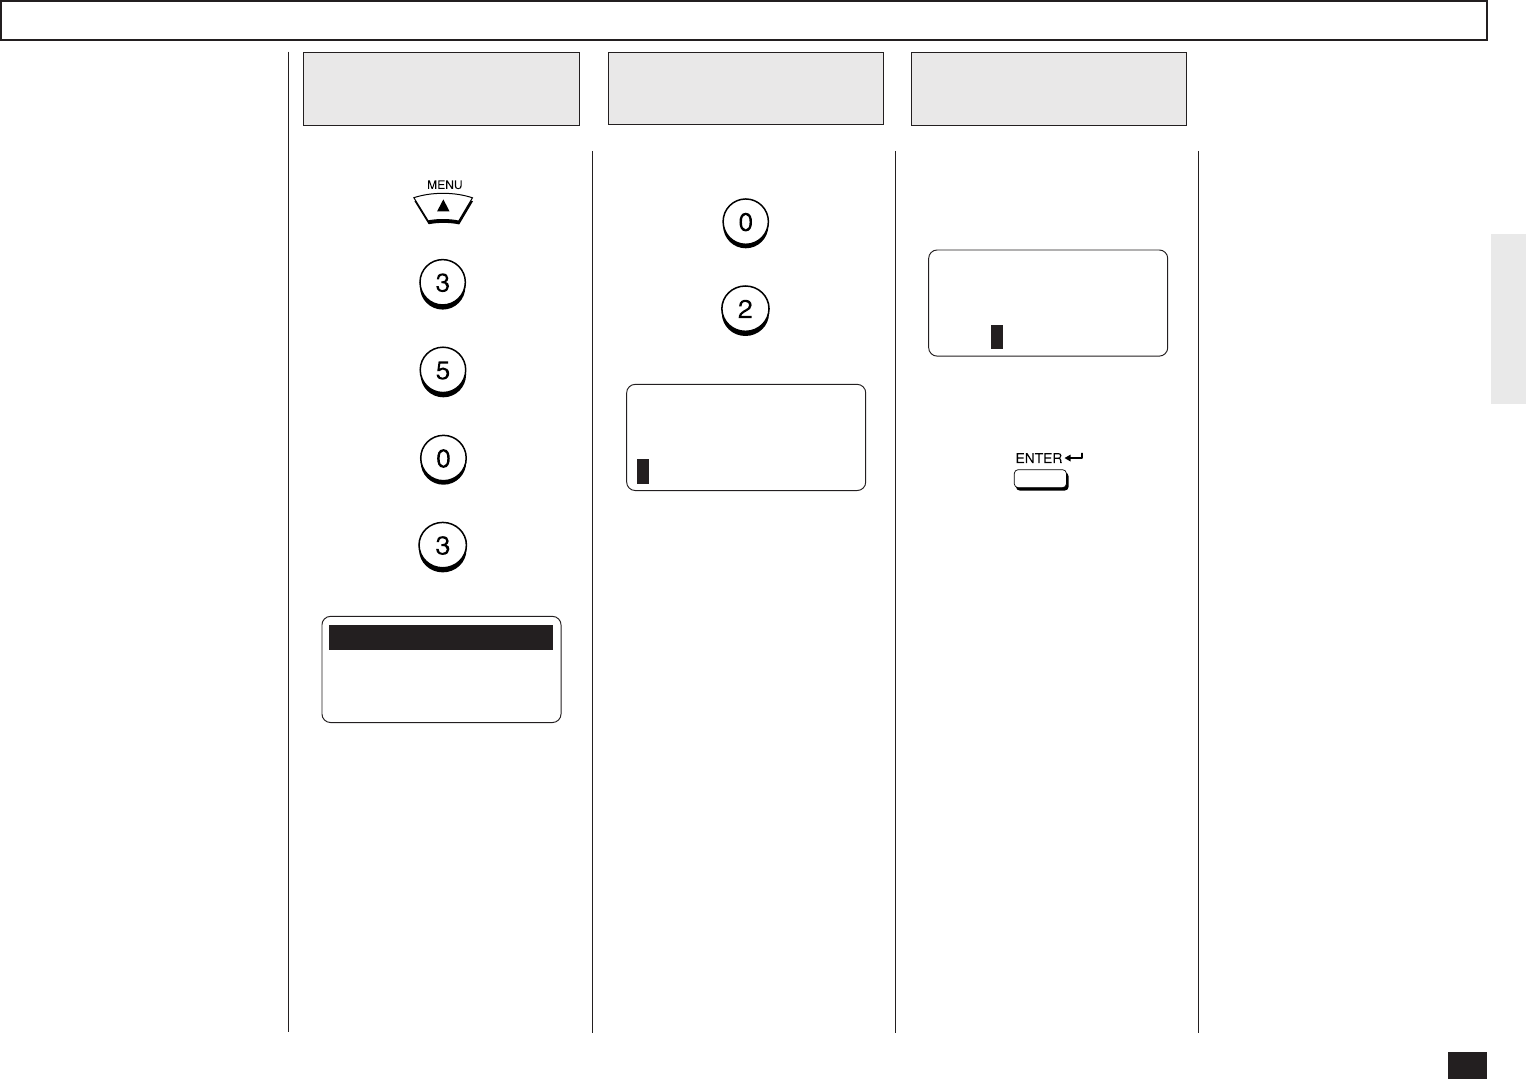
91
FTP Server Login Password Setting
Press:
+
+
+
+
Display the FTP
Menu
1
01.FTP SRV LOGIN NAM
02.FTP SRV LOGIN PWD
Display the FTP SRV
LOGIN PWD Menu
2
Press:
+
FTP SRV LOGIN PWD
(MAX 32:)
pass
Enter the Login
Password
3
Enter the Login Password us-
ing the Keyboard and Numeric
Keypad.
When the correct Login Pass-
word is displayed, press:
FTP SRV LOGIN PWD
(MAX 32:)
XXXXX
The display returns to Step 1.
This allows you to set the
password to log into the FTP
server on the machine. This
password is required to trans-
mit data between a personal
computer and the machine us-
ing the TOSHIBA Viewer.
NOTE:
The “pass” is assigned as
the default login password.
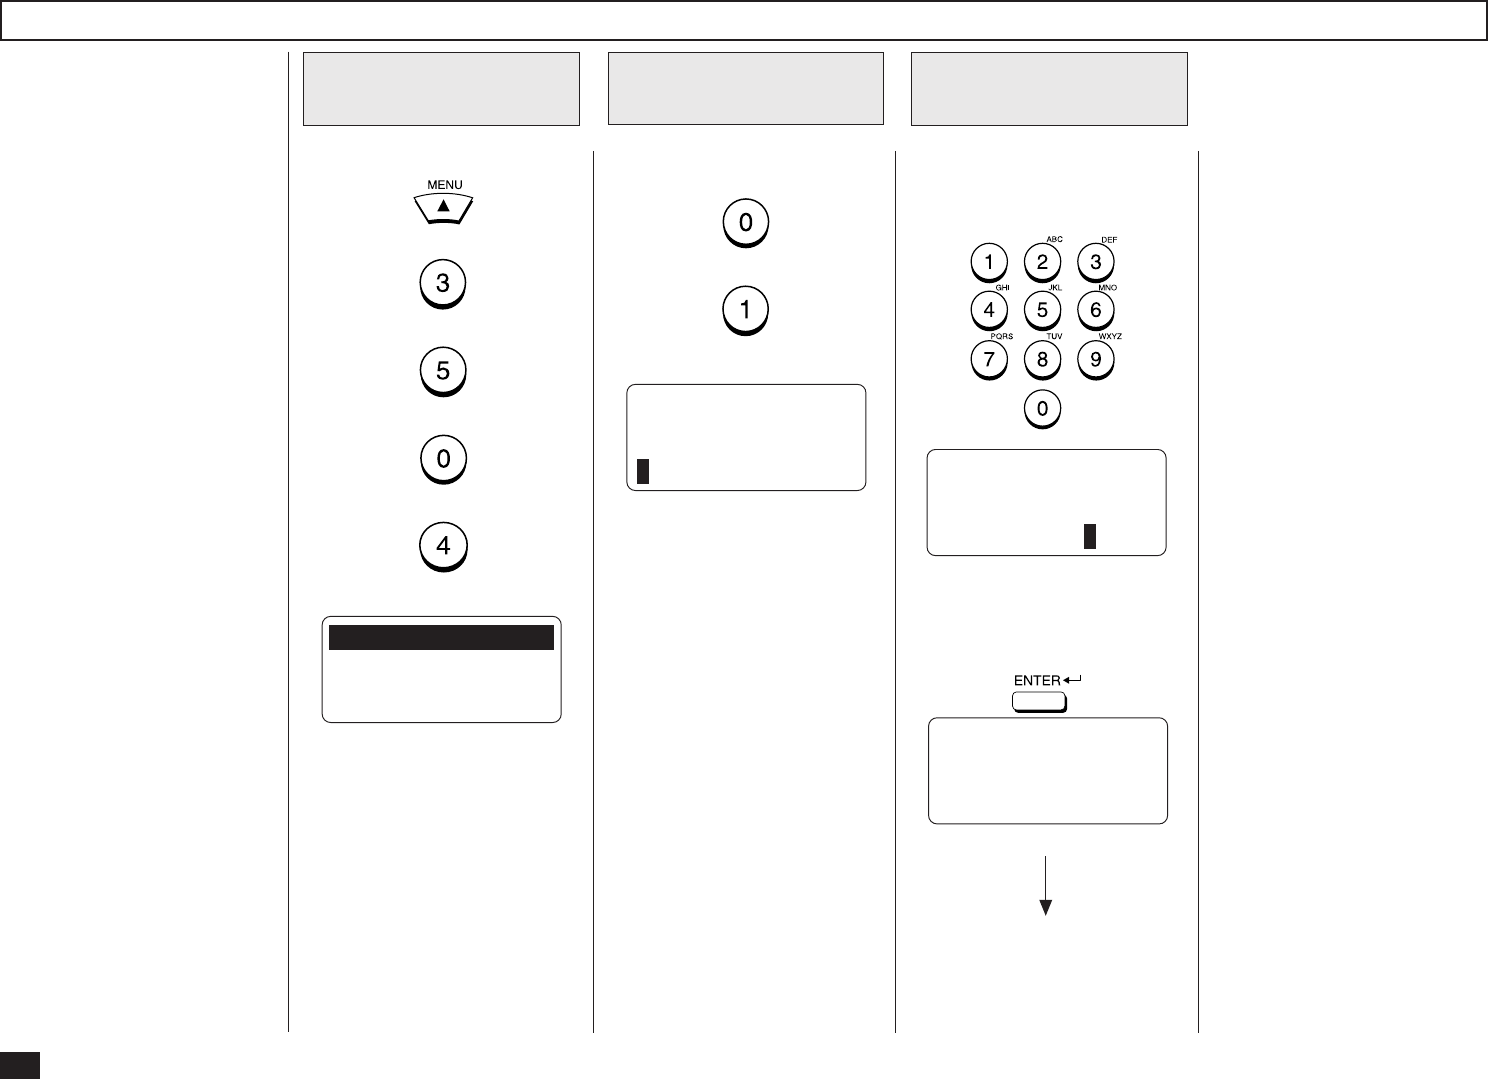
92
LAN FAX Setting
Press:
+
+
+
+
Display the LAN
FAX Menu
1
01.LAN FAX SRV ADDR
Display the LAN FAX
SERVER ADDR Menu
2
Press:
+
LAN FAX SERVER ADDR
000.000.000.000
Enter the LAN FAX
server address
3
Enter the server address of the
ImageVision2000 or SmartLink2000.
OPERATION COMPLETED
When the correct LAN FAX
server address is displayed,
press:
LAN FAX
172.016.110.124
Displayed for 2 seconds
This allows you to set the IP ad-
dress of the ImageVision2000 or
SmartLink server. Only the server
assigned here can access this ma-
chine.
The display returns to Step 1.
93
IPX/SPX Protocol Setting
Press:
+
+
+
+
Display the NETWORK
(NOVELL) Menu
1
01.DONE
02.IPX/SPX PROTOCOL
03.FRAME TYPE
Display the FRAME
TYPE Menu
2
Press:
+
Select the IPX/SPX
Protocol Mode
3
This allows you to enable or
disable the Network Interface
Card to connect using the IPX/
SPX protocol.
When the machine connects to
the NetWare server, the IPX/
SPX protocol must be set to
ON.
NOTE:
This is set to ON as a fac-
tory default.
IPX/SPX PROTOCOL
01.ON
02.OFF OPERATION COMPLETED
Enable or Disable to use the
IPX/SPX Protocol.
(for ON-Enable)
(for OFF-Disable)
Displayed for 2 seconds
The display returns to Step 1.
Continue to set another item, or
press + to select
“1.DONE” to exit the Menu Op-
eration mode and return to the
Standby Mode.
When “1.DONE” is selected,
the Network Interface Card
starts initializing. Wait for few
minutes until the Network Inter-
face Card completes initializ-
ing.
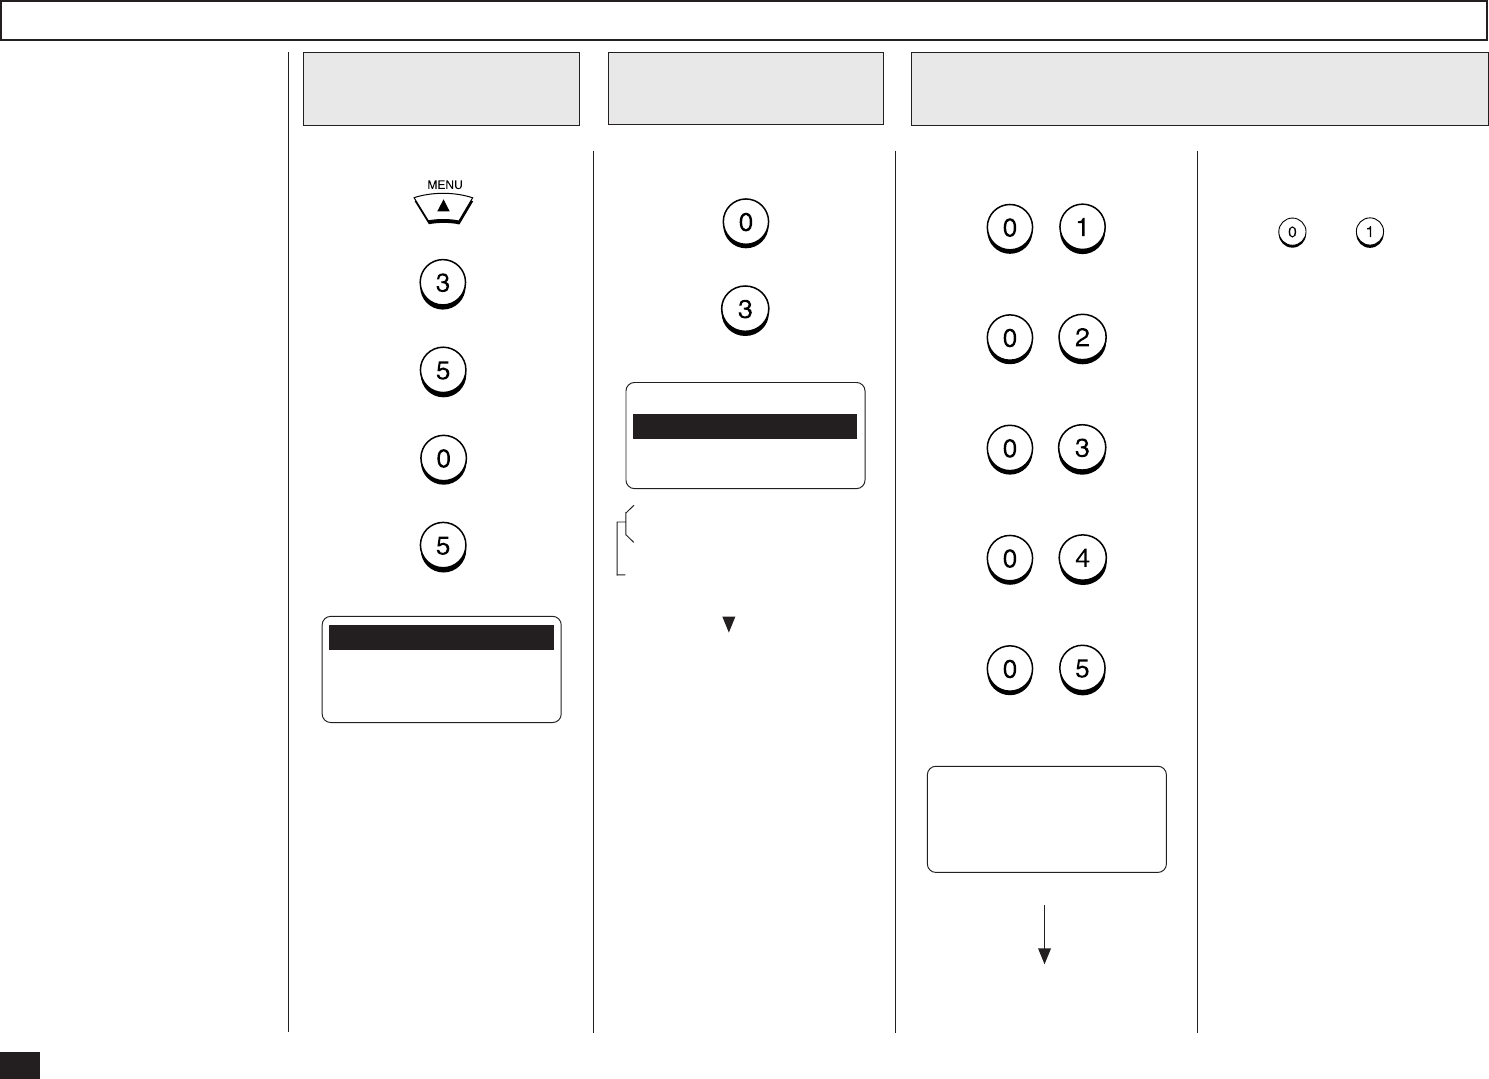
94
Frame Type Setting
Press:
+
+
+
+
Display the NETWORK
(NOVELL) Menu
1
01.DONE
02.IPX/SPX PROTOCOL
03.FRAME TYPE
Display the FRAME
TYPE Menu
2
Press:
+
Select the frame type
3
This allows you to change the
frame type of the Network In-
terface Card.
When the machine connects to
the NetWare server, the ma-
chine uses this frame type.
NOTE:
The “AUTO” is set as the
default frame type.
FRAME TYPE
01.AUTO
02.802.3
03.ETHENET II ↓
04.802.3 SNAP
05.802.2
These items are outside the
LCD frame. To view them,
use the [ ] scroll key.
Select the desired frame type.
Press:
+
(for AUTO)
+
(for 802.3)
+
(for ETHENET II)
+
(for 802.3 SNAP)
+
(for 802.2)
OPERATION COMPLETED
Displayed for 2 seconds
The display returns to Step 1.
The display returns to Step 1.
Continue to set another item, or
press + to select
“1.DONE” to exit the Menu Op-
eration mode and return to the
Standby Mode.
When “1.DONE” is selected,
the Network Interface Card
starts initializing. Wait for few
minutes until the Network Inter-
face Card completes initializ-
ing.
95
LISTS AND REPORTS - E-MAIL NOTIFICATION REPORTS PRINT FORMAT
DSN Report
This is a notification message
that the mail server has suc-
cessfully or unsuccessfully de-
livered the E-mail message to a
recipient.
Auto Print (if programmed;
see page 74):
Printing will automatically
start when the DSN mes-
sage is received from the
mail server.
NOTE:
To receive the DSN from
the mail server, you must
send an E-mail with the
DSN request. To set this
option, see page 76.
Also, the mail server of the
recipients should suppot the
DSN.
This message indi-
cates that the E-mail
was successfully
sent to the recipi-
ents.
Printing Procedure
From : System Administrator <postmaster@TOSHIBA.COM>
To : ifax <ifax@TOSHIBA.COM>
Cc :
Date : Fri, 2 Mar 2001 11:53:43 +0900
Subject : Delivered: Internet Fax MAIL
Your message
To: user01
Subject: Internet Fax MAIL
was delivered to the following recipient(s):
user01 on Fri, 2 Mar 2001 11:39:17 +0900
Successful Report of DSN
This message indi-
cates that the E-mail
was not delivered
successfully to the
recipients.
From : System Administrator <postmaster@TOSHIBA.COM>
To : ifax <ifax@TOSHIBA.COM>
Cc :
Date : Fri, 2 Mar 2001 11:53:43 +0900
Subject : Undelivered: Internet Fax MAIL
Your message
To: user01
Subject: Internet Fax MAIL
did not reach the following recipient(s):
user01@toshiba.com on Fri, 2 Mar 2001 11:39:17 +0900
The recipient name is not recognized
The MTS-ID of the original message is : c=US;a=
;p=Toshiba;I=MARSHAL0103020253GDXCQP26
MSEXCH:IMS:Toshiba:TOSHIBA.COM:MARSHAL 0 (000C05A6) Unknown
Recipient
Unsuccessful Report of DSN
96
MDN Report
This is a notification message
that the recipient has success-
fully received the E-mail mes-
sage.
Auto Print (if programmed;
see page 75):
Printing will automatically
start when the MDN mes-
sage is received from the
recipient.
NOTE:
To receive the MDN from
the recipient, you must
send an E-mail with the
MDN request. To set this
option, see page 71.
SUPPLEMENT:
The MDN will not print if the
E-mail message has not
been successfully received
by the recipient, or the recipi-
ent does not support the
MDN. In this case, you can
print the Alert Report that
tells you have not received
the MDN from the recipient.
See page 97 about the Alert
Report.
Printing Procedure
From : <ifax@toshiba.com>
To : <user01@toshiba.com>
Cc :
Date : Fri, 2 Mar 2001 11:53:43 +0900
Subject : Disposition notification (MDN): Success
Message ID : <200103025113610.43@Ifxa.toshibatec.com>
This report relates to a message you sent with the following header fields:
Message-id: <200103025113610.43@Ifxa.toshibatec.com>
To: user01@toshiba.com
Subject: Internet Fax MAIL
This is a Return Receipt for the mail that you sent to the above recipient.
The message and attached file may have been printed or saved. This is no guarantee that the
message has been read or understood.
Reporting-UA: Ifxa.toshibatec.com
Original-Recipient: rfc822;ifax@toshiba.com
Final-Recipient: rfc822;user01@toshiba.com
Original-message-ID: <200103025113610.43@Ifxa.toshibatec.com>
Disposition: automatic-action/MDN-sent-automatically;dispatched
Media-Accept-Features:(&(color=Binary)
(image-file-structure=TIFF-limited)
(| (image-coding=[MH,MR,MMR])
(& (image-coding=JBIG)
(image-coding-constrait=JBIG-T85)
(JBIG-stripe-size=128)))
(| (&(dpi=200)(dpi-xyratio=[200/100,1,200/400]))
(&(dpi=300)(dpi-xyratio=1))
(&(dpi=400)(dpi-xyratio=1))
(paper-size=[A4,legal,letter])
(MRC-mode=0)
(ua-media=stationery)

97
Alert Report
This is a alert report that the
recipient has not responsed for
the MDN.
Auto Print (if programmed;
see page 77):
Printing will automatically
start when the time interval
set has passed after the E-
mail message with MDN re-
quest has been sent.
NOTE:
This report indicates that
the you could not received
the MDN from the recipient.
This report may be printed
although the E-mail mes-
sage is successfully re-
ceived by recipients in case
the recipients do not sup-
port MDN.
Printing Procedure
MAR-02-01 11:22 F- 039 ALERT REPORT
PAGE : 001
DATE & TIME : MAR-02-01 11:37
E-MAIL : ifax@toshiba.com
JOB NUMBER : 039
DATE : MAR-02-01 11:22
TO : user01@toshiba.com
NUMBER OF PAGES : 001
STATUS :*** NOT SURE IF THIS MESSAGE WAS SENT OR NOT, BECAUSE MDN NOT RECEIVED ***
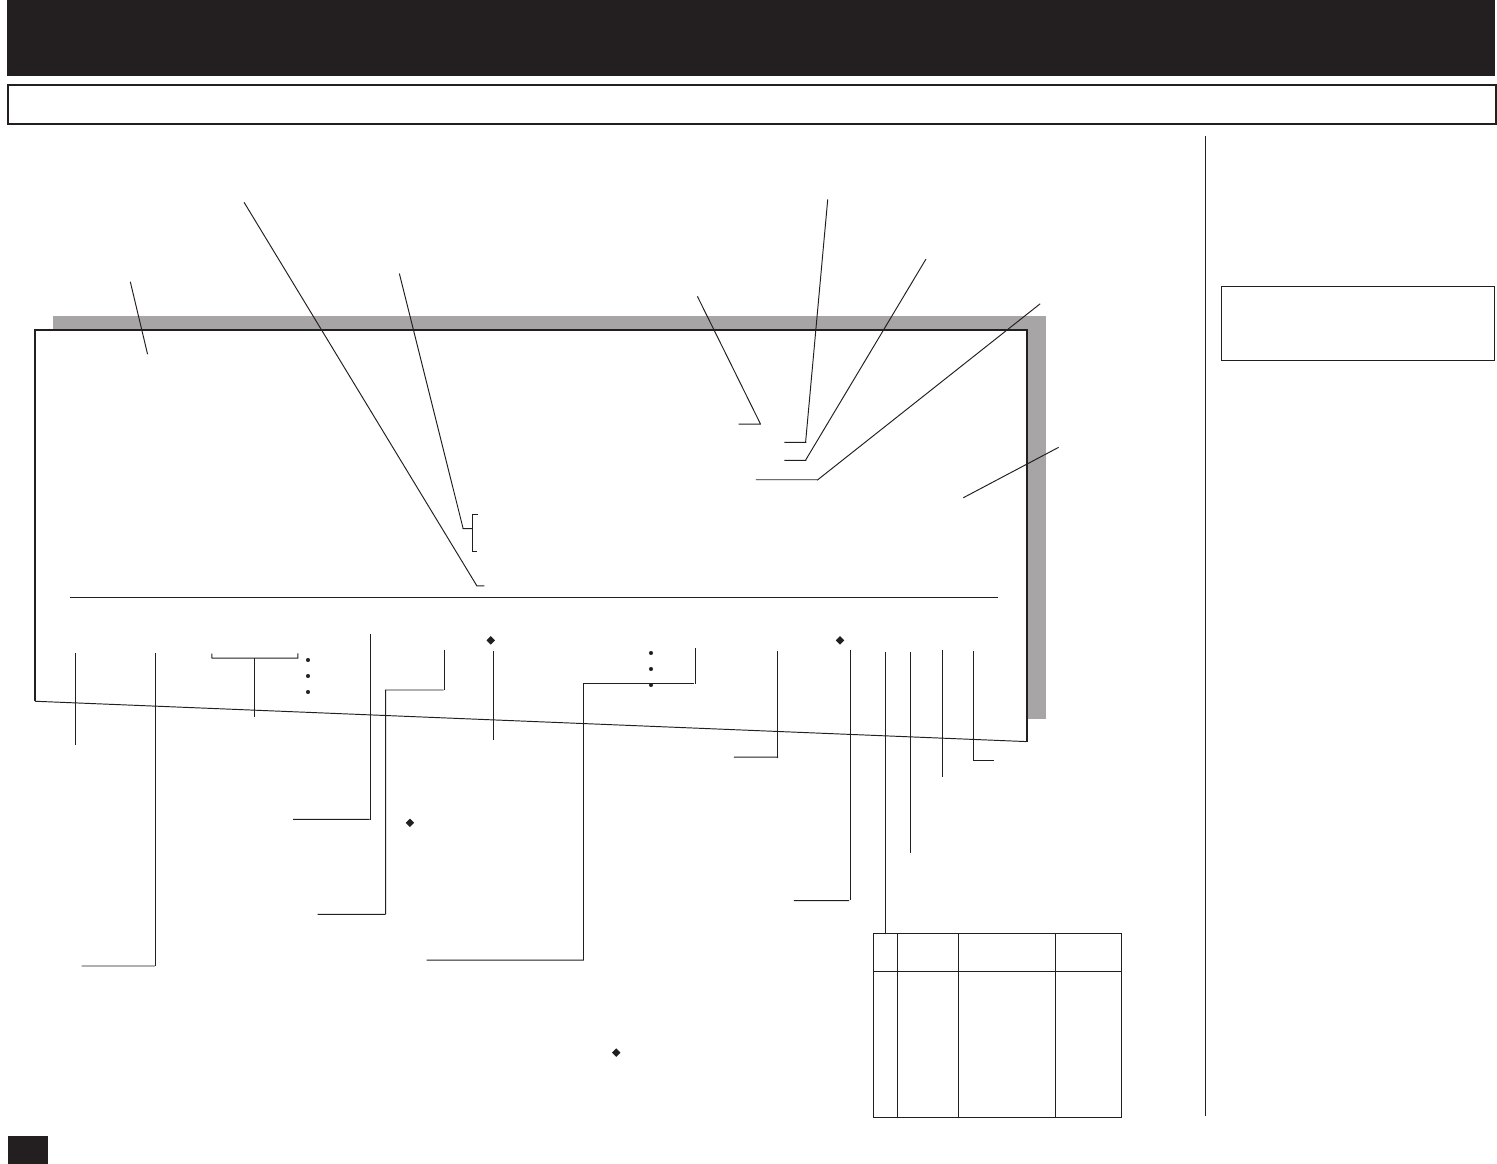
98
NBR. FILE NBR DATE TIME DURATION PGS TO DEPT NBR ACCOUNT MODE STATUS
001 020 MAY-17 12:06 00/25 003 user02@toshiba.com ML 00 OK
002 020 MAY-17 14:01 59/59 099 +1234567890 01 9999 G3 502 P NG 20
TRANSMISSION JOURNAL
PAGE : 001
TIME : MAY-17-00 14:25
TEL NUMBER1 : 12345678901234567890
TEL NUMBER2 : 12345678901234567890
E-MAIL : ifax@toshiba.com
NAME : ABCDEFGHIJKLMNOPQRSTUVWXYZ12345678901234
SCAN COUNT : 1234 (000004D2)
PRINT COUNT : 2345 (00000929)
DRUM COUNT : 3456 (00000D80)
Time of output of this
list or report
List/Report Name
Machine Counter
Information
Serial No.
(lists the trans-
missions in the
order they took
place)
File No.
(assigned to all com-
munication jobs at the
time of scanning)
Date and Time the
communication
started
Length of each
transaction:
Minutes/Seconds
Number of Pages
Remote Station’s
Fax/Telephone Num-
ber or E-mail Address
(“ ” is alternate num-
ber or sub-address
dial was used.)
Department No.
(indicates the depart-
ment responsible for
this transmission job;
printed only when the
Department Control
option is ON)
Account No.
(printed only when the
Account Number op-
tion is ON and used)
Result:
OK (successful)
NG (failure)
Communication Mode
G3 = G3
EC = ECM
EX = ECM with shortened
protocol
ML = E-mail
HW, HR= RDC communication
(“ ” is 2nd line communication)
Transmission/Reception Journal (Communication Journal)
“TO” is replaced with “FROM”
in a RECEPTION JOURNAL
Facsimile/Telephone Number
of this facsimile unit, Line 1
Your Station’s
ID Name
P = Polling
SR, R = Relay Communication
SB = Mailbox Communication
1st 2nd 3rd
(bps) (Resolution) (Mode)
0 2400 8x3.85 MH
1 4800 8x7.7 MR
2 7200 8x15.4 MMR
3 9600 - JBIG
4 12000 16x15.4
5 14400
6 V.34
8 300dpi
Facsimile/Telephone Number
of this facsimile unit, Line 2
E-mail Address
of this facsimile
unit
Error Code
Auto Print (available if pro-
grammed; see page 195 of the
DP120F/DP125F Operator’s
Manual):
Printing will automatically
start whenever 150 trans-
missions (or 150 receptions)
are completed.
Manual Print (always avail-
able; see page 196 of the
DP120F/DP125F Operator’s
Manual):
VERY IMPORTANT:
Up to date Activity Journals
must be maintained by the
user. In the event an elec-
tronic circuit board must be
replaced in this unit, infor-
mation pertaining to Scan,
Print, and Drum counters
must be entered into the re-
placement electronic circuit
board. This information is
listed at the top of every
journal.
Transmission/Reception Jour-
nal shows the result of each
communication for up to the
past 150 transmissions/recep-
tions.
Printing Procedure
- LIST AND REPORT PRINT FORMAT AND PRINTING PROCEDURE

99
MEMORY TRANSMISSION REPORT
PAGE : 001
TIME : MAY-17-00 14:25
TEL NUMBER1 : 12345678901234567890
TEL NUMBER2 : 12345678901234567890
E-MAIL : ifax@toshiba.com
NAME : ABCDEFGHIJKLMNOPQRSTUVWXYZ12345678901234
FILE NUMBER : 070
DATE : MAY-17 14:18
TO : user01@toshiba.com
DOCUMENT PAGES : 001
START TIME : MAY-17 14:20
END TIME : MAY-17 14:23
SENT PAGES : 000
STATUS : NG 7B
File Number of the transmission job
Date and time when the job is accepted
Remote Party’s Name, Facsimile/Tele-
phone Number, or E-mail Address
Number of pages input to memory
Time when the transmission started
Time when the transmission ended (the
time when a Recovery Transmission is
designated)
Number of pages transmitted normally
Transmission result
Auto Print (if programmed,
see page 198 of the DP120F/
DP125F Operator’s Manual):
Printing will automatically
start after a transmission is
completed.
This is the result report printed
after a Memory Transmission.
(A job transmitted after the
document is first scanned into
memory.)
Memory Transmission Report
Printing Procedure
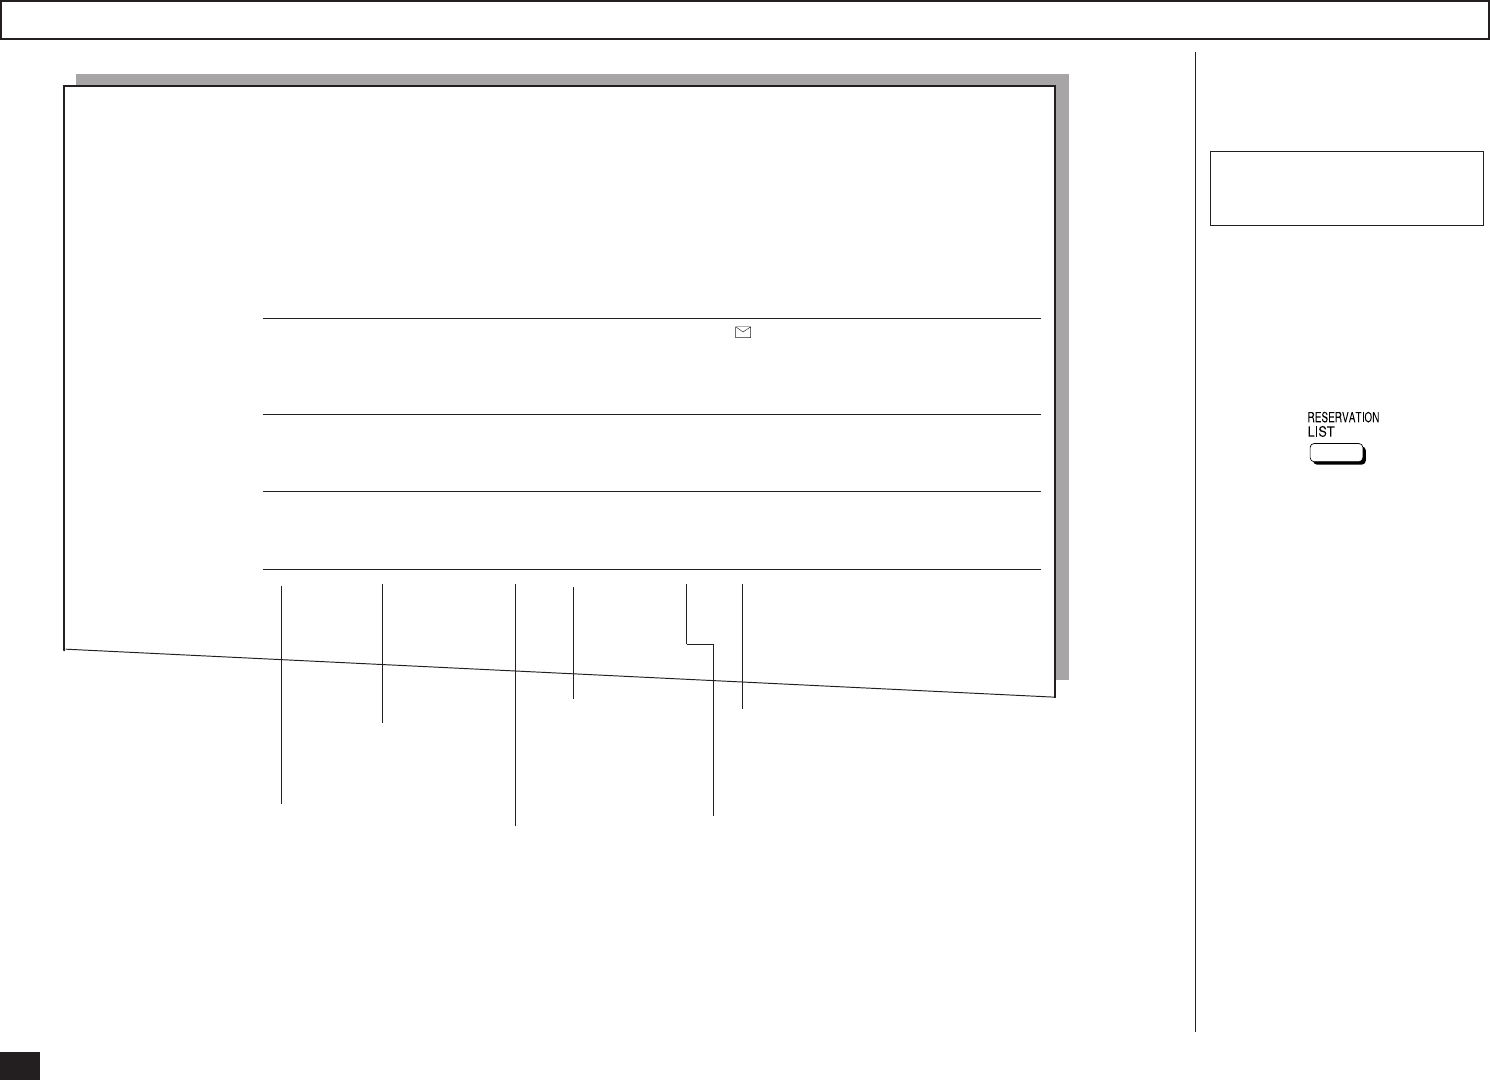
100
PAGE : 001
TIME : MAY-17-00 14:25
TEL NUMBER1 : 12345678901234567890
TEL NUMBER2 : 12345678901234567890
E-MAIL : ifax@toshiba.com
NAME : ABCDEFGHIJKLMNOPQRSTUVWXYZ12345678901234
TX/RX FILE NBR FUNCTION PGS MAIL DATE TIME TO
015 E-MAIL TO FAX GTWY 001 MAY-16 22:35 user01@toshiba.com
POLLING/FAX MAILBOX FILE NBR FUNCTION PGS MAIL DATE TIME TO
RECOVERY TX FILE NBR FUNCTION PGS MAIL DATE TIME TO
PC JOB FILE NBR FUNCTION PGS MAIL DATE TIME TO
Type of
communication
Box Number
(in case of Mailbox
communication)
Destination
(Name, Dial Number of the
Remote Party, or E-mail Address)
This is a listing of the commu-
nication jobs now reserved in
memory.
Manual Print
Turn the Flip Panel to the “50-
73” view to select the desired
Function Key.
Press:
Reservation List
File Number of the
communication Number of Pages Designated Time, or
Time of Reception
Printing Procedure
RESERVATION LIST
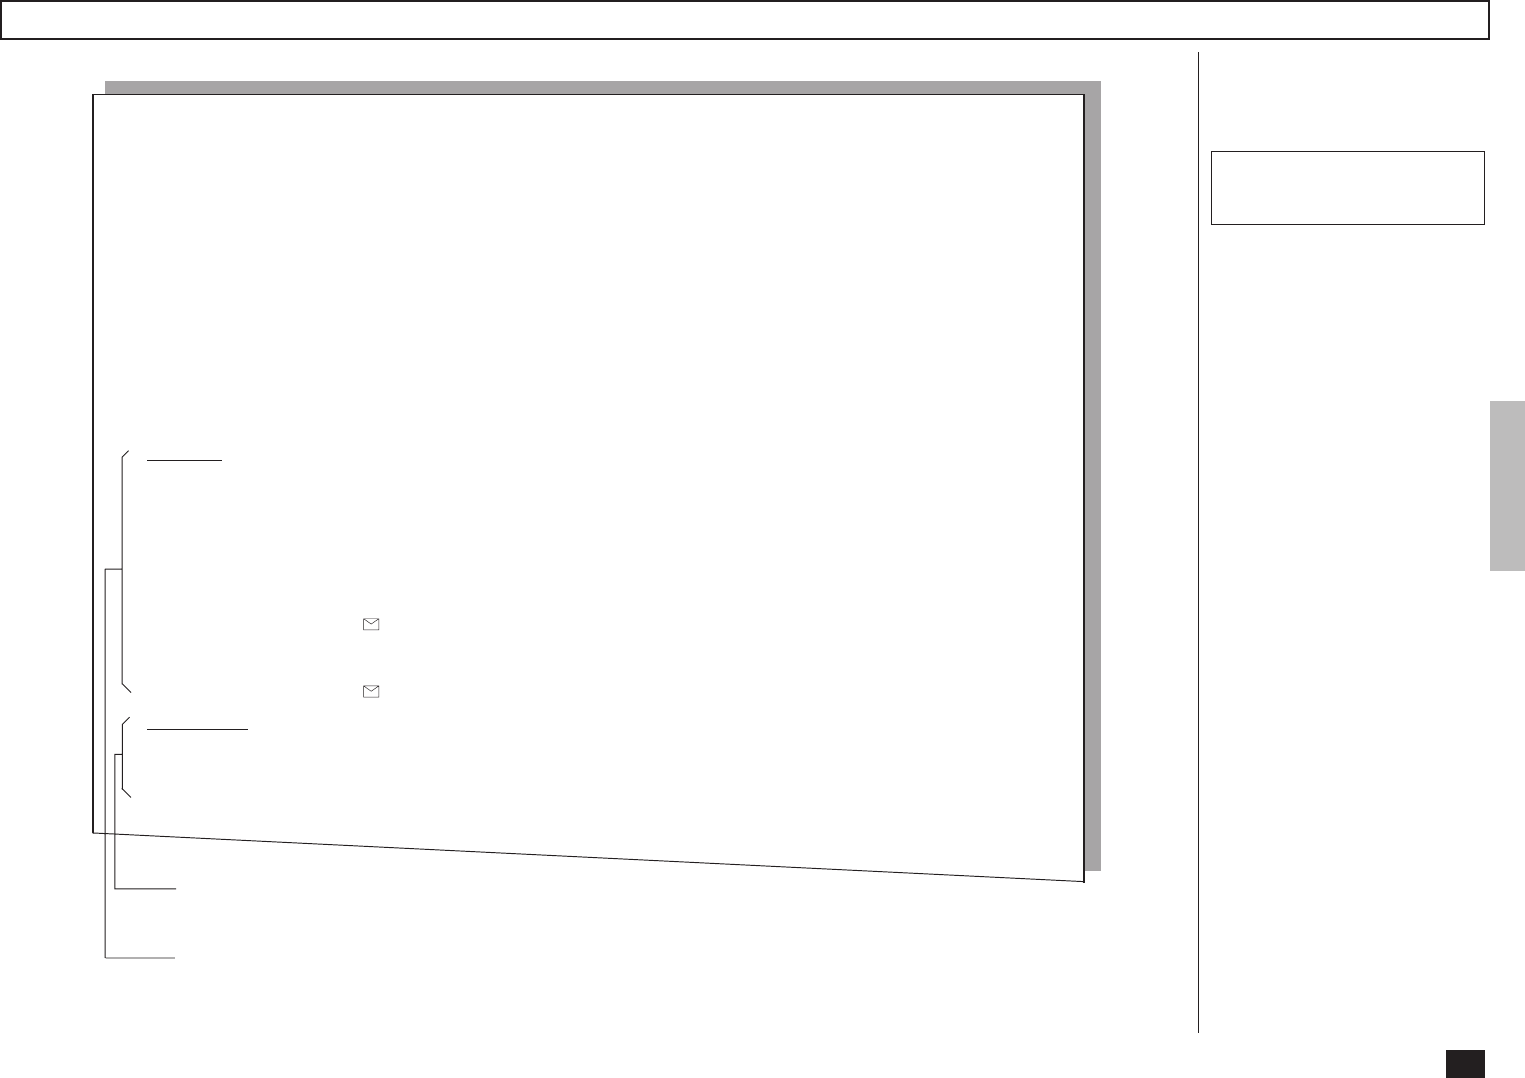
101
PAGE : 001
TIME : MAY-17-00 14:25
TEL NUMBER1 : 12345678901234567890
TEL NUMBER2 : 12345678901234567890
E-MAIL : ifax@toshiba.com
NAME : ABCDEFGHIJKLMNOPQRSTUVWXYZ12345678901234
FILE NUMBER : 005
DATE : MAY-17 14:18
DOCUMENT PAGES : 15
START TIME : MAY-17 10:56
END TIME : MAY-17 14:18 (RECOVERY TIME:MAY-17 14:18)
SUCCESSFUL
GROUP NUMBER
0001 ABCDEFGHIJKLMNOPQRST ABB. 001 002 003 004 005 006 007 008
009 010
OT 02 05
ONE TOUCH NUMBER
01 user01@toshiba.com
E-MAILS
user02@toshiba.com
UNSUCCESSFUL SENT PAGES
GROUP NUMBER
0002 AABBCCDDEEFFGGHHIIJJ 0T 33 AAABBBCCCDDDEEEFFFGG 01
Auto Print (if programmed;
see page 199):
Printing will automatically
start after all transmissions
in the operation have been
completed successfully or
unsuccessfully.
This is the result report printed
after a Multi-address Trans-
mission.
Receiver where an error occurred
SENT PAGES ... Number of pages sent normally
Receiver where the transmission was completed normally
Multi-Address Transmission Report
Printing Procedure
MULTI TRANSMISSION REPORT
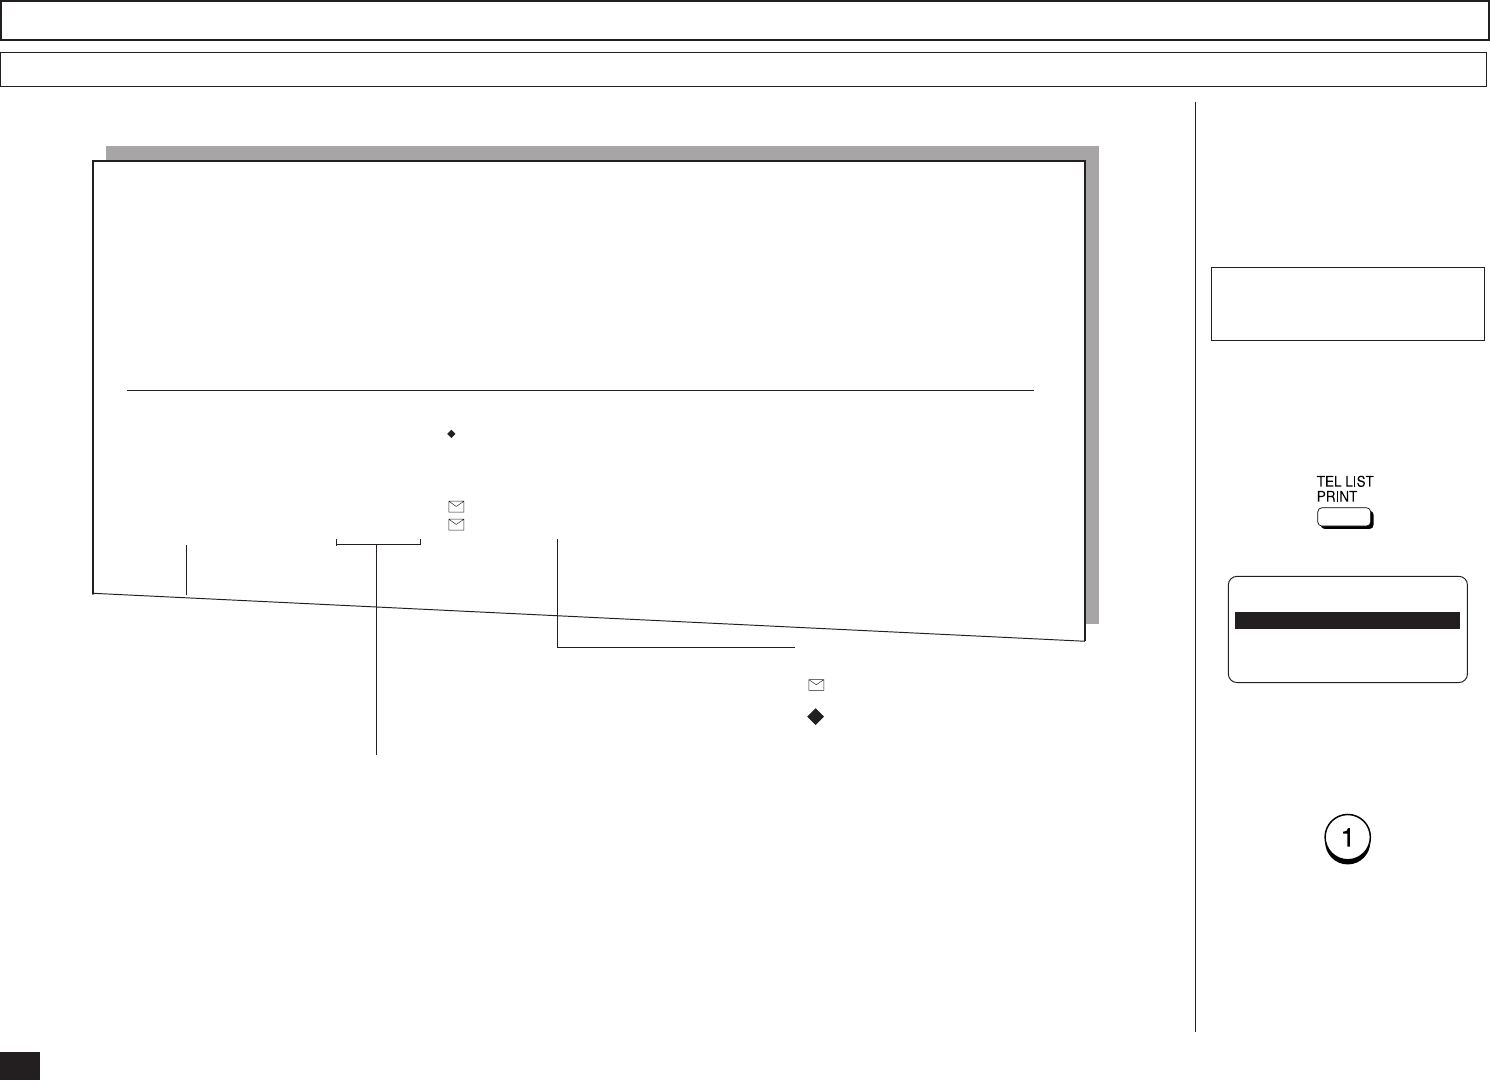
102
PAGE :001
TIME :MAY-17-00 14:25
TEL NUMBER1 :12345678901234567890
TEL NUMBER2 : 12345678901234567890
E-MAIL :ifax@toshiba.com
NAME :ABCDEFGHIJKLMNOPQRSTUVWXYZ12345678901234
PHONEBOOK IN ALPHABETICAL ORDER
NAME LOCATION FAX NUMBER/E-MAIL ADDRESS
ABCDEFGHIJKLMNOPQRST OT 01 1234567890123456789012345678901234567890
0987654321
SUB:09876543210987654321
SEP:998877665544
PWD:********************
user01@toshiba.com
BCDEFGHIJKLMNOPQRST ABB. 001 user02@toshiba.com
Issues a listing of names pro-
grammed to Abbreviated Dial
Numbers, One Touch Keys,
and Group Numbers.
Turn the Flip Panel to the “50-
73” view to select the desired
Function Key.
Press:
Names of Abbreviated
Dial Number, One
Touch Key or Group
Number
OT ............ One Touch Key Numbers
ABB. ......... Abbreviated Dial Numbers
Group ....... Group Number
Preset Dialing Number Lists
Alphabetical Sort List
Printing Procedure
To select “1.BY NAME,” press:
TELEPHONE NBRS LIST
1.BY NAME
2.ABB. NUMBERS
3.GROUP NUMBERS
4.ONE TOUCH NBRS
5.ALL REPORT
Station Dial Number/E-Mail Address
...... E-mail Address
....... Alternate Dial Number
SUB, SEP, or PWD
.......... Type of Sub-address
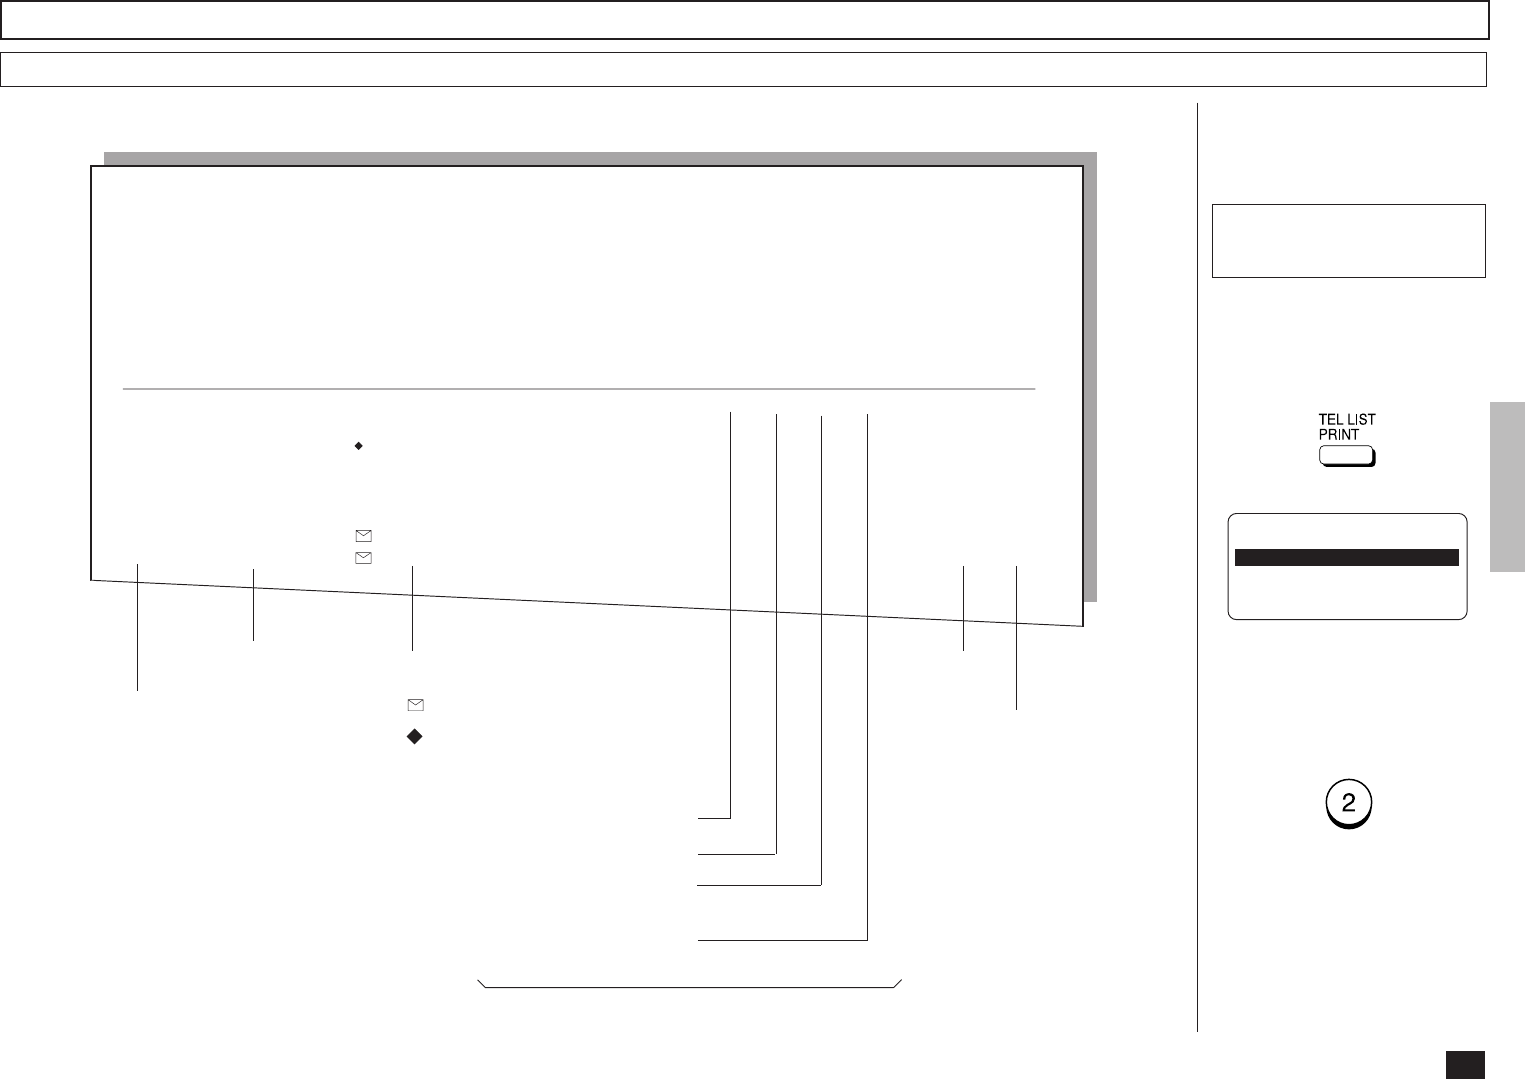
103
ABBREVIATED TEL NUMBER LIST
PAGE : 001
TIME : MAY-17-00 14:25
TEL NUMBER1 : 12345678901234567890
TEL NUMBER2 : 12345678901234567890
E-MAIL : ifax@toshiba.com
NAME : ABCDEFGHIJKLMNOPQRSTUVWXYZ12345678901234
Turn the Flip Panel to the “50-
73” view to select the desired
Function Key.
Press:
Issues a list of remote station
dialing numbers assigned as
Abbreviated Dial Numbers.
Abbreviated
Dial Number
Station
Name TEL NUMBER/E-MAIL ADDRESS:
... E-mail Address
... Alternate Dial Number
SUB, SEP, or PWD
... Type of Sub-address
Designated Time
Line Monitoring
Communication Speed
Limit (x 100)
TX Report Issue/Non-issue
Status
Attached Fax Option Status (if any)
Preset Dialing Number Lists - continued
Abbreviated Dial Number List
Printing Procedure
To select “2.ABB. NUMBERS,”
press:
TELEPHONE NBRS LIST
1.BY NAME
2.ABB. NUMBERS
3.GROUP NUMBERS
4.ONE TOUCH NBRS
5.ALL REPORT
ABB.NBR NAME TEL NUMBER/E-MAIL ADDRESS TIME MONI BPS REPORT LINE MAILMODE
001 ABCDEFGHIJKLMNOPQRST 1234567890123456789012345678901234567890 23:45 ON 144 ON 1
1234567
0987654321
SUB:12345678901234567890
SEP:112233445566
PWD:********************
user01@toshiba.com 200x200 MH
109 GREENVILLE OFFICE user02@toshiba.com 200x200 MH
Resolution
Compression
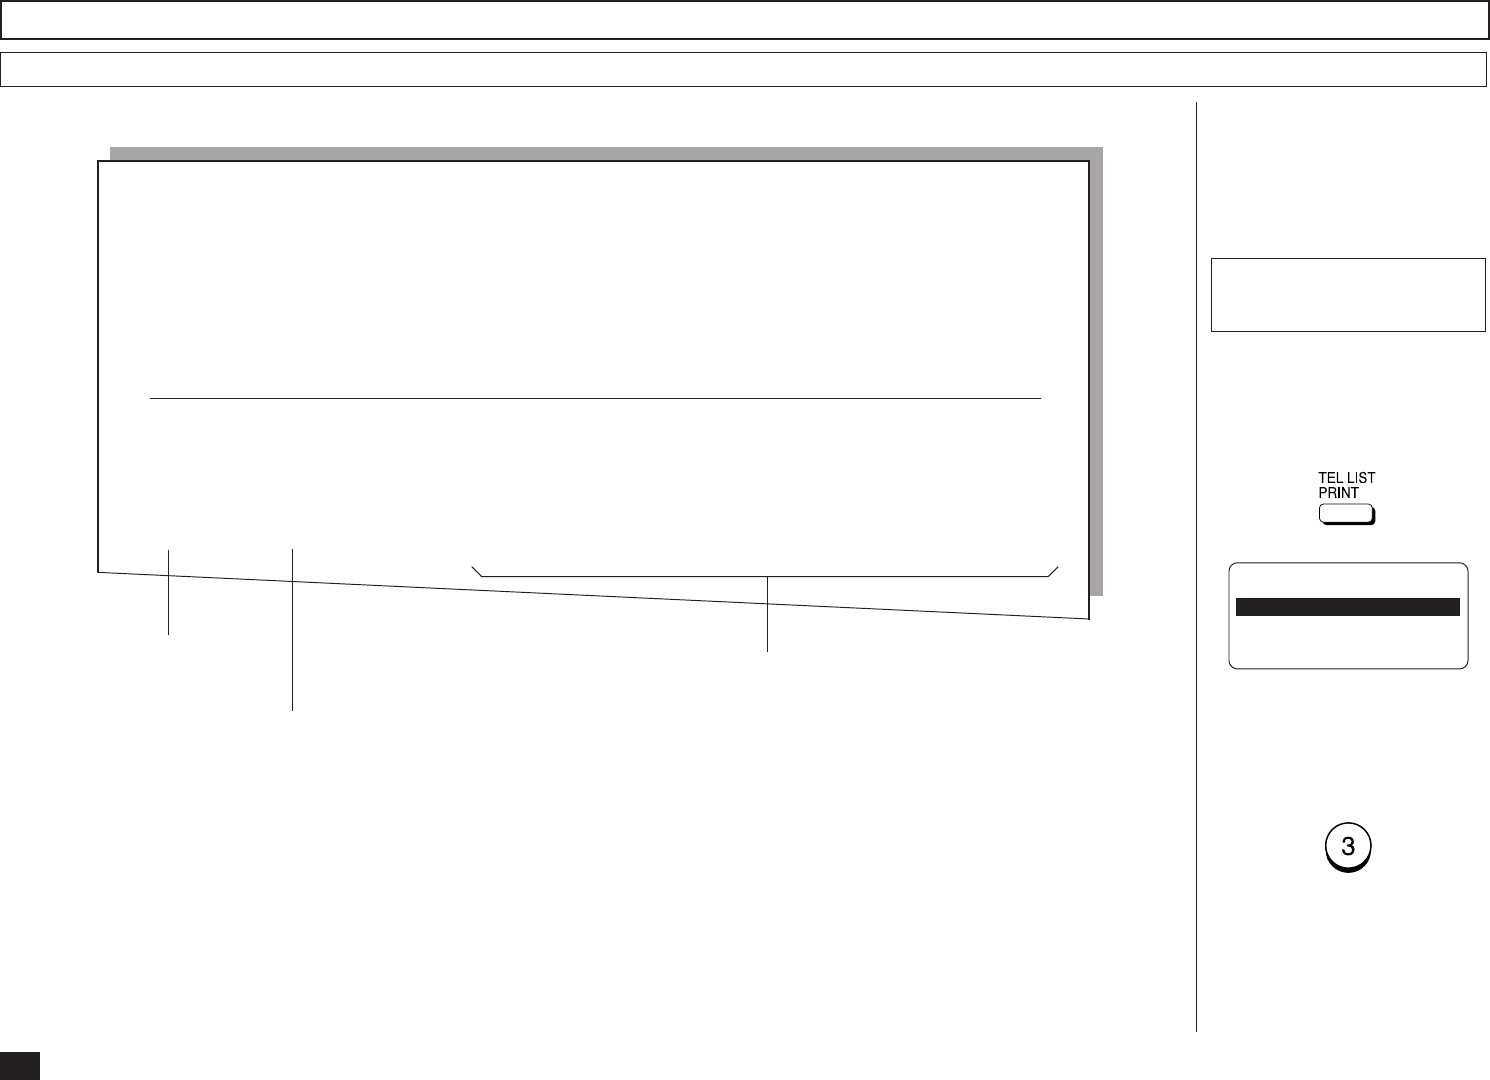
104
PAGE : 001
TIME : MAY-17-00 14:25
TEL NUMBER1 : 12345678901234567890
TEL NUMBER2 : 12345678901234567890
E-MAIL : ifax@toshiba.com
NAME : ABCDEFGHIJKLMNOPQRSTUVWXYZ12345678901234
GROUP NUMBER INFORMATION
Turn the Flip Panel to the “50-
73” view to select the desired
Function Key.
Press:
Issues a list of One Touch Key
or Abbreviated Dial Numbers
registered in Multi-address
Groups or Multi-polling Groups.
Group Name
Preset Dialing Number Lists - continued
Group Number List
Printing Procedure
To select “3.GROUP NUM-
BERS,” press:
Group Number
TELEPHONE NBRS LIST
1.BY NAME
2.ABB. NUMBERS
3.GROUP NUMBERS
4.ONE TOUCH NBRS
5.ALL REPORT
GROUP NUMBER NAME OT/ABB. NUMBER
0001 ABCDEFGHIJKLMNOPQRST OT 01 02 03 04 05 06 07 08 09 10 11 12 13 14 15
16 17 18 19 20
ABB. 001 002 003 004 005 006 007 008 009 010 011 012 013 014 015
016 017 018 019 020 021 022 023 024 025 026 027 028 029 030
031 032 033 034 999
1111 ABBCCCDDDDEEEEE ABB. 100 200 300 400 500
1999 ZZZZZ OT 31 32 33
ABB. 995 996 997 998 999
One Touch Key Numbers and Abbreviated Dial
Numbers belonging to the Group:
OT .... One Touch Key Numbers
ABB. .... Abbreviated Dial Numbers
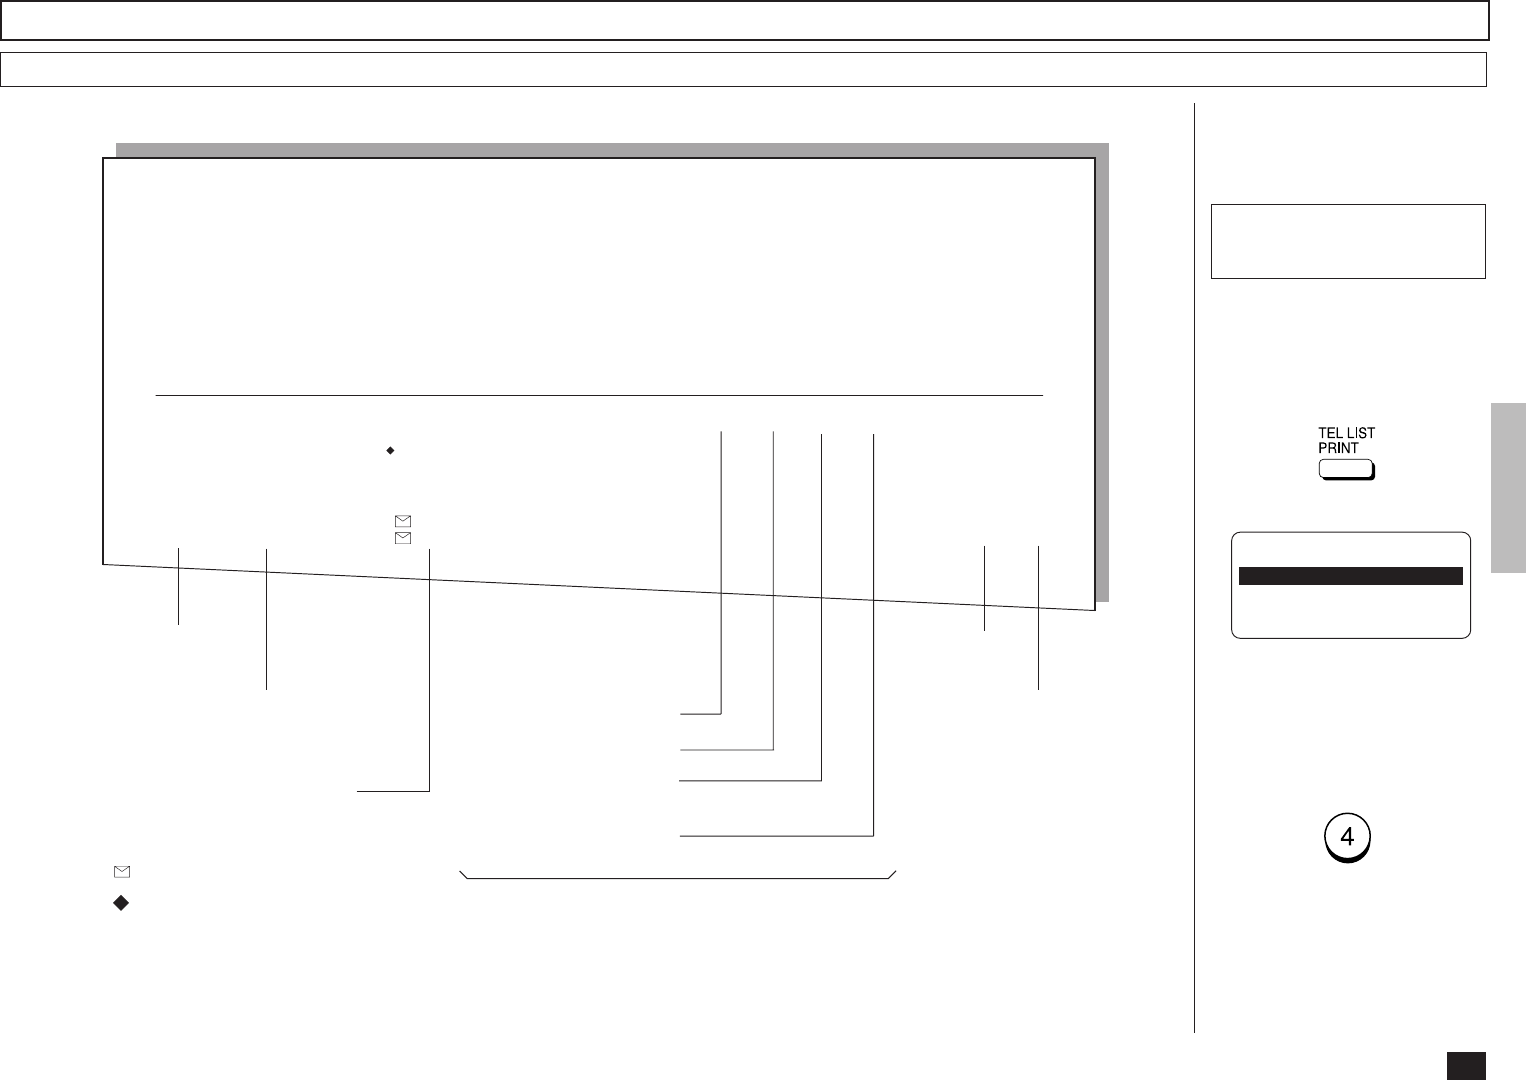
105
PAGE : 001
TIME : MAY-17-00 14:25
TEL NUMBER1 : 12345678901234567890
TEL NUMBER2 : 12345678901234567890
E-MAIL : ifax@toshiba.com
NAME : ABCDEFGHIJKLMNOPQRSTUVWXYZ12345678901234
Turn the Flip Panel to the “50-
73” view to select the desired
Function Key.
Press:
Issues a list of dial numbers of
the remote stations assigned
to One Touch Dial Keys.
Station Name, or
use of the key
One Touch
Key Number
Abbreviated Dial Number,
Group Number, actual Dial
Number, or E-mail Address
... E-mail Address
... Alternate Dial Number
SUB, SEP, or PWD
... Type of Sub-address
Preset Dialing Number Lists - continued
One Touch Number List
Designated Time
Line Monitoring
Communication Speed
Limit (x 100)
TX Report Issue/Non-issue
Status
Attached Facsimile Option Status (if any)
Printing Procedure
To select “4.ONE TOUCH
NBRS,” press:
TELEPHONE NBRS LIST
1.BY NAME
2.ABB. NUMBERS
3.GROUP NUMBERS
4.ONE TOUCH NBRS
5.ALL REPORT
ONE TOUCH NUMBER INFORMATION
OT NBR NAME/FUNCTION ABB. FAX NUMBER & E-MAIL TIME MONI BPS REPORT LINE MAILMODE
01 ABCDEFGHIJKLMNOPQRST 1234567890123456789012345678901234567890 23:45 ON 144 ON 2
1234567
0987654321
SUB:12345678901234567890
SEP:112233445566
PWD:********************
user01@toshiba.com 200x200 MH
09 ABB.NBR user02@toshiba.com 200x200 MH
Resolution
Compression

106
Function List
PAGE : 001
TIME : MAY-17-00 14:25
TEL NUMBER1 : 12345678901234567890
TEL NUMBER2 : 12345678901234567890
E-MAIL : ifax@toshiba.com
NAME : ABCDEFGHIJKLMNOPQRSTUVWXYZ12345678901234
FUNCTION LIST
DIAL TYPE(LINE1) : MF
DIAL TYPE(LINE2) : MF
CALL NUMBER :
KEYBOARD TYPE : QWERTY
MEMORY SIZE : 8MB
MACHINE SETTING
RINGER VOLUME : 4
ALARM VOLUME : 3
KEY TOUCH VOLUME : 4
MONITOR VOLUME : 4
SUPER POWER SAVER : MANUAL
PRINTER POWER SAVER : ON
START TIME : 00:00
END TIME : 00:00
FAX SEPARATOR PAGE : OFF
COPY SEPARATOR PAGE : OFF
PC SEPARATOR PAGE : OFF
SEPARATOR PAGE TRAY : AUTO
ACCOUNT CODE : OFF
PRINT DENSITY : 0
DOCUMENT LENGTH : 1m
LINE MONITOR : OFF
RECEIVE INTERVAL : 3MIN
ECM : ON
DOCUMENT MODE : STD
CONTRAST : NORMAL
COLLATED COPY : OFF
LETTER HEAD PAPER : OFF
REDIAL MODE INTERVAL : 1MIN
REDIAL MODE COUNTER : 5
AUTO RECEIVE MODE : AUTO
RING DELAY : 1
AUTO RECEIVE MODE(LINE2) : TX/RX
TX SETTINGS
MEMORY TX : ON
SECURITY TX : OFF
COVER SHEET : OFF
RECOVERY TX : OFF
TTI : INSIDE
SEND AFTER SCAN : OFF
RX SETTINGS
SECURE RX : OFF
MEMORY RX : ON
RX REDUCTION : ON
DISCARD : ON
REV.ORDER PRINT : OFF
PRIVILEGED RX : OFF
RTI : OFF
RX MULTI COPY : 1
REPORT & LIST
JOURNAL
MANUAL : TX & RX
AUTO : ON
FAX/POLL/RELAY REPORTS
COMMUNICATION REPORT : ON ERROR
A5 SIZE PRINT : OFF
MEMORY TX : ON ERROR(IMAGE)
A5 SIZE PRINT : OFF
MULTI TX : ON ERROR(IMAGE)
MULTI POLL : ON ERROR
RELAY ORIGINATOR : ON ERROR(IMAGE)
RELAY STATION : ON ERROR(IMAGE)
RELAY DESTINATION : ON ERROR(IMAGE)
RECEPTION LIST
LOCAL MAILBOX : OFF
REMOTE MAILBOX : OFF
RELAY STATION : ON
REMOTE SERVICE
REMOTE ACCESS : OFF
DOWNLOAD : NO JOB
RDC PASSWORD :
TOTAL PAGE
SCAN : 237
PRINT : 231
Fucntion List (First Copy)

107
Issues a list to confirm the
functions currently set in this
facsimile unit.
To display the main menu,
press:
Function List - continued
Printing Procedure
To select “2.LISTS,” press:
Then, to select “1.FUNCTION,”
press:
1.COMM. OPTIONS
2.LISTS
3.INITIAL SETUP
4.DEFAULT SETTINGS ↓
1.FUNCTION
2.DEPARTMENT
3.ITU MAILBOX
PAGE : 001
TIME : MAY-17-00 14:25
TEL NUMBER1 : 12345678901234567890
TEL NUMBER2 : 12345678901234567890
E-MAIL : ifax@toshiba.com
NAME : ABCDEFGHIJKLMNOPQRSTUVWXYZ12345678901234
FUNCTION LIST
NETWORK (TCP/IP)
BOOTP/DHCP : OFF
IP ADDRESS : 192.1.4.34
SUBNET MASK : 255.255.0.0
DEFAULT GATEWAY : 0.0.0.0
HOST NAME : ifax.toshiba.com
NETWORK (E-MAIL)
E-MAIL ADDRESS : ifax@toshiba.com
ERR E-MAIL FW ADDR : admin@toshiba.com
RECEIVE MODE : POP
DELIVERY NOTIFICATION : NOT SUPPORTED (POP)
POP SERVER ADDR : 192.1.5.121
POP TIME : 10MINUTES
POP LOGIN NAME : ifax
POP PASSWORD : pass
SMTP SERVER ADDR : 192.1.5.121
NETWORK (FTP)
FTP SRV LOGIN NAM : public
FTP SRV LOGIN PWD : pass
NETWORK (LAN FAX)
LAN FAX SRV ADDR : 0.0.0.0
NETWORK (NOVELL SETTING)
IPX/SPX PROTOCOL : ENABLE
FRAME TYPE : AUTO
E-MAIL
PRINT TEXT BODY : ON
BODY PAGE LIMIT : 05
SEND DISPOSITION : ON
PRINT HEADER : ON
PRINT E-MAIL ERR : ON
PRINT DSN : ON
PRINT DISPOSITION : ON
REQUEST DSN : ON
E-MAIL TO FAX GTWY : OFF
GATEWAY PRINT : ON
GAGEWAY SECURITY : ON
CONFIRM. TIMER : ON
SET CONFIRM. TIME : 15MINUTES
MSG SIZE LIMIT : 2.0MBYTE
FLASH ROM (OPTION)
PROGRAM : 1AUWWTS1SPA01045
: DEC-11-00
LANGUAGE : 2AUWWTS1SPA01015
: SEP-01-00
Fucntion List (Second Copy)

108
Menu List
PAGE : 001
TIME : MAY-17-00 14:25
TEL NUMBER1 : 12345678901234567890
TEL NUMBER2 : 12345678901234567890
E-MAIL : ifax@toshiba.com
NAME : ABCDEFGHIJKLMNOPQRSTUVWXYZ12345678901234
MENU LIST
1.COMM. OPTIONS
1.PAGE NUMBER
2.LINE MONITOR
3.TURNAROUND POLL
4.ECM
5.SECURITY TX
2.LISTS
1.FUNCTION
2.DEPARTMENT
3.ITU MAILBOX
3.INITIAL SETUP
1.LANGUAGE
2.DATE & TIME
3.TERMINAL ID
4.DIAL TYPE
5.NETWORK
01.TCP/IP
01.DONE
02.BOOTP/DHCP
03.IP ADDRESS
04.SUBNET MASK
05.DEFAULT GATEWAY
06.HOST NAME
02.E-MAIL
01.E-MAIL ADDRESS
02.ERR EMAIL FW ADDR
03.RECEIVE MODE
04.POP SERVER ADDR
05.POP TIME
06.POP LOGIN NAME
07.POP PASSWORD
08.SMTP SERVER ADDR
03.FTP
01.FTP SRV LOGIN NAM
02.FTP SRV LOGIN PWD
04.LAN FAX
01.LAN FAX SRV ADDR
05.NETWORK (NOVELL)
01.DONE
02.IPX/SPX PROTOCOL
03.FRAME TYPE
4.DEFAULT SETTING
1.MACHINE SETTINGS
01.SPEAKER VOLUME
01.RINGER VOLUME
02.ALARM VOLUME
03.KEY TOUCH VOLUME
04.MONITOR VOLUME
02.POWER SAVER
03.SEPARATOR PAGE
04.DEPARTMENT CODE
05.ACCOUNT CODE
06.PRINTER DENSITY
07.DOCUMENT LENGTH
08.LINE MONITOR
09.RECEIVE INTERVAL
10.ECM
11.DOCUMENT MODE
12.COLLATE COPY
13.LETTER HEAD PAPER
14.REDIAL MODE
01.INTERVAL
02.COUNTER
15.AUTO RECEIVE MODE
16.LINE-2 MODE
2.TX SETTINGS
01.MEMORY TX
02.SECURITY TX
03.COVER SHEET
04.RECOVERY TX
05.TTI
06.SEND AFTER SCAN
3.RX SETTINGS
01.SECURE RX
02.MEMORY RX
03.RX REDUCTION
04.DISCARD
05.REV.ORDER PRINT
06.PRIVILEGED RX
07.RTI
08.RX MULTI COPY
Menu List (First Copy)

109
Issues a list of menu items
through which functions or op-
tions can be set.
This list can be a useful guide
during machine programming.
To display the main menu,
press:
Menu List - continued
Printing Procedure
To select “5.MENU LIST,”
press:
1.COMM. OPTIONS
2.LISTS
3.INITIAL SETUP
4.DEFAULT SETTINGS ↓
5.MENU LIST
9.TEST MODE
PAGE : 001
TIME : MAY-17-00 14:25
TEL NUMBER1 : 12345678901234567890
TEL NUMBER2 : 12345678901234567890
E-MAIL : ifax@toshiba.com
NAME : ABCDEFGHIJKLMNOPQRSTUVWXYZ12345678901234
MENU LIST
4.REPORTS & LIST
01.JOURNAL
02.COMM. REPORT
01.TX REPORT
02.MEMORY-TX REPORT
03.MULTI-ADD REPORT
04.MULTIPOLL REPORT
05.RELAY ORG.REP
06.RELAY STN.REP
07.SET RELAY END REP
03.RECEPTION LIST
01.LOCAL MAILBOX
02.REMOTE MAILBOX
03.RELAY
5.REMOTE SERVICE
01.REMOTE ACCESS
02.DOWNLOAD
03.RDC PASSWORD
04.SUPPLY ORDER
6.E-MAIL
01.PRINT TEXT BODY
02.BODY PAGE LIMIT
03.SEND DISPOSITION
04.PRINT HEADER
05.PRINT E-MAIL ERR
06.PRINT DSN
07.PRINT DISPOSITION
08.REQUEST DSN
09.EMAIL TO FAX GTWY
10.GATEWAY PRINT
11.GATEWAY SECURITY
12.CONFIRM. TIMER
13.SET CONFIRM. TIME
14.MSG SIZE LIMIT
5.MENU LIST
9.TEST MODE
1.AUTO TEST
2.INDIVIDUAL TEST
01.ADF TEST
02.KEY TEST
03.LED TEST
04.LCD TEST
05.SPEAKER TEST
06.SWITCH TEST
07.TEST PRINT
3.TEST RESULT LIST
Menu List (Second Copy)
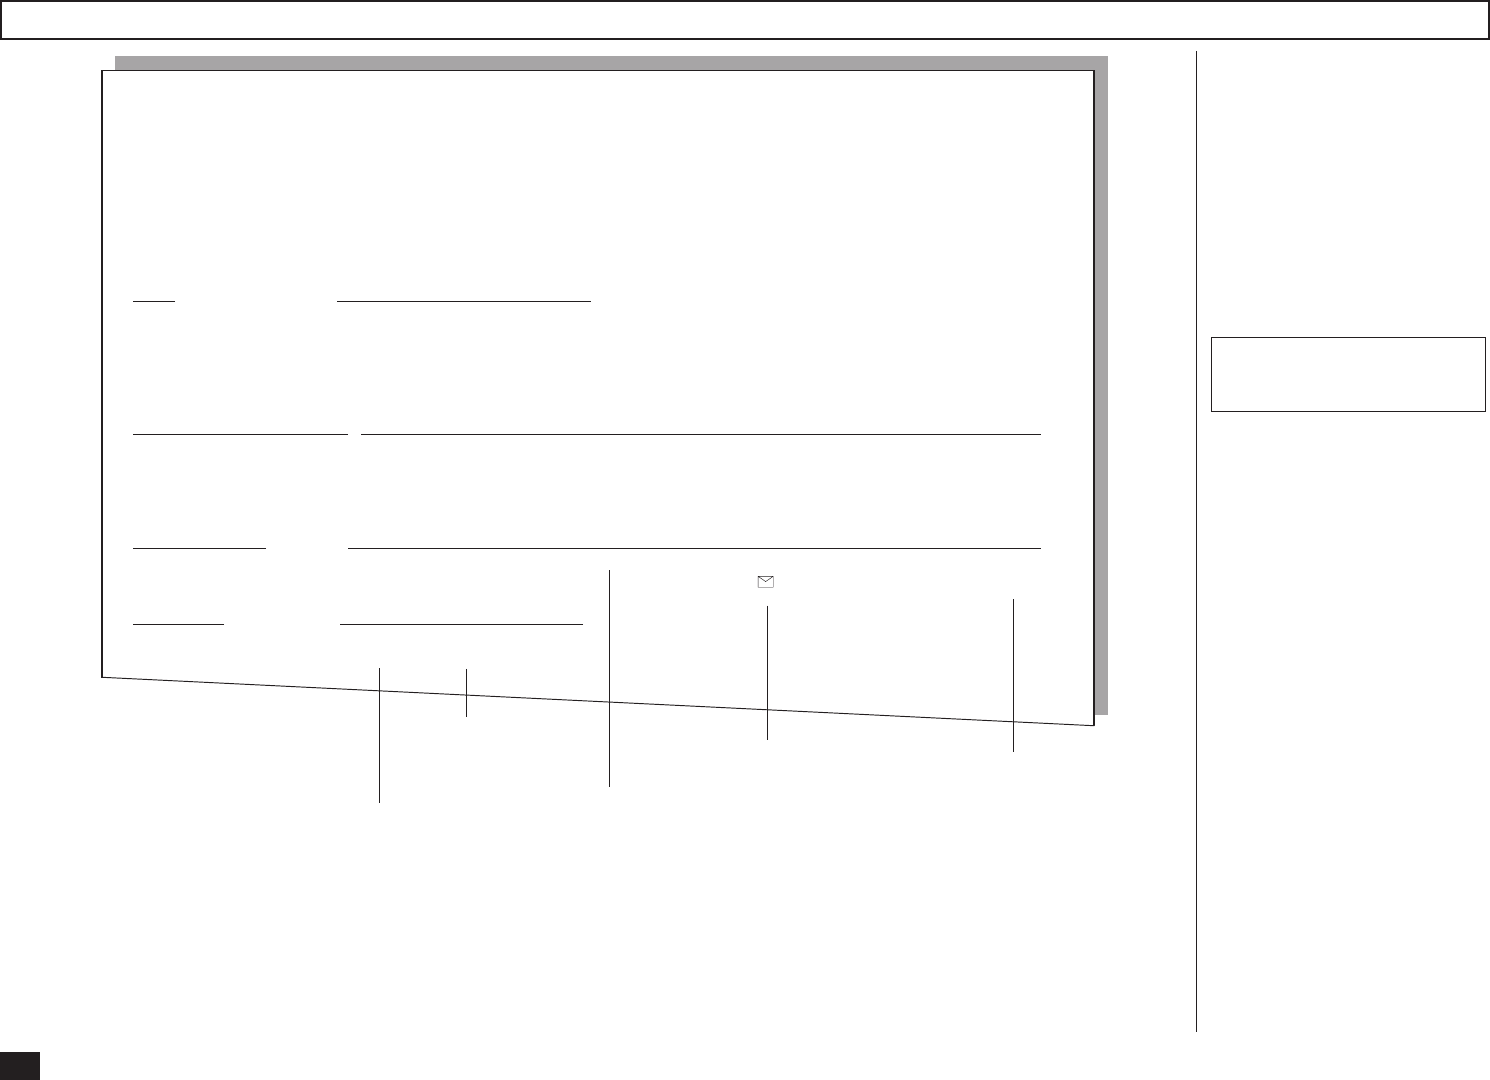
110
PAGE : 001
TIME : MAY-17-00 14:25
TEL NUMBER1 : 12345678901234567890
TEL NUMBER2 : 12345678901234567890
E-MAIL : ifax@toshiba.com
NAME : ABCDEFGHIJKLMNOPQRSTUVWXYZ12345678901234
POWER FAILURE LIST
This facsimile has a battery to
back up the document memory
contents. However, when the
power is turned off for a lengthy
period (due to a power failure,
etc.), the communication data
stored in memory will be
cleared. A list of the File Num-
bers of those cleared communi-
cations will be printed.
This list is automatically print-
ed after recovery from a power
failure event.
Type of
communication
Box Number
(in case of Mailbox
communication)
Station where the
communication or the
Mailbox is input
Power Failure List
File Number of the
communication
Time of Input
Printing Procedure
TX/RX FILE NBR FUNCTION
001 MULTI TX
005 POLLING RX
006 PRG. CONT POLL
010 MULTI POLLING
POLLING/FAX M-BOX/MAIL BOX FILE NBR FUNCTION MAIL FROM DATE TIME
101 POLLING LOCAL MAY-16 11:23
106 CONFIDENTIAL BOX *1234567890#12345678 9999999999999 MAY-17 07:55
107 BULLETIN BOARD ###***#123#999* LOCAL MAY-17 07:55
MEMORY RECEPTION FILE NBR FUNCTION MAIL FROM/TO DATE TIME
222 EMAIL ifax@toshiba.com MAY-16 21:37
RECOVERY TX FILE NBR FUNCTION
333 EMAIL
111
If an abnormal condition arises
in the machine or an incorrect
operation is performed, an
alarm buzzer is generated for
about 4 seconds and a mes-
sage to indicate the nature of
the error appears in the LCD
Display. In that case, take cor-
rective action according to the
following table.
TROUBLESHOOTING
Error Message Cause / Solution
Error Message
Error Messages
Cause / Solution
IMAGE INPUT ERROR The connectors of the Internet
Fax unit are not connected cor-
rectly or the machine or Internet
Fax unit has been damaged.
Confirm that all connectors of
the Internet Fax unit are con-
nected to the machine correctly.
If this Error Message is repeat-
edly displayed, the Internet Fax
unit should be replaced. Call for
service.
IMAGE OUTPUT ERROR The connectors of the Internet
Fax unit are not connected cor-
rectly or the machine or Internet
Fax unit has been damaged.
Confirm that all connectors of
the Internet Fax unit are con-
nected to the machine correctly.
If this Error Message is repeat-
edly displayed, call for service.
IMAGE DECODING ERROR The received document includes
unknown format files or dam-
aged image or text data.
Set “Error E-mail Forward Ad-
dress” to forward this document
to a personal computer (see
page 61).
MAIL RECEIVING ERROR Failed to receive the document
from the E-mail server.
Confirm the E-mail account set-
tings and E-mail properties are
correctly configured.
MEMORY OVERFLW There is not enough memory to
receive or send the document.
When this error is diaplyed dur-
ing receiving an E-mail, set “Er-
ror E-mail Forward Address” to
forward this document to a per-
sonal computer (see page 61).
When this error is displayed dur-
ing sending an E-mail, reduce
the size set at “MSG Size Lim-
it”.
ERROR ANALY. MAIL The document is sent in un-
known format by the E-mail
server or E-mail application of
the sender.
Ask the sender that the E-mail
application and the E-mail server
is compatible with the Internet
Fax.
MAIL DECODING ERROR The Internet Fax unit has been
damaged.
Call for service.
MAIL EDITING ERROR The Internet Fax unit has been
damaged.
Call for service.
MAIL SENDING ERROR The destination is not found.
Confirm the sending or forward-
ing address is correct.
112
Error Messages - continued
Error Message Cause / Solution
Error Message Cause / Solution
SMTP SRV NOT CONNECT The machine cannot connect to the SMTP server.
Confirm the setting of “SMTP Server Address”
that the IP address of the SMTP server correctly
assigned (see page 67). If this Error Message is
repeatedly displayed, ask your administrator of
the E-mail server.
HOST NAME ERROR Host Name is not set correctly.
Set the “Host Name” correctly (see page 58).
E-MAIL ADDRESS ERROR Your E-mail address is not set correctly.
Set the “E-mail Address” correctly (see page 60).
SMTP SRV NOT EXIST The SMTP server address is not assigned.
Set the “SMTP Server Address” (see page 67).
OUTPUT TRAP ERROR The Network Interface Card does not work prop-
erly while trapping.
Power your machine off, then back on. If the
error condition is cleared, confirm normal opera-
tion. If this Error Message is repeatedly dis-
played, call for service.
MIB ERROR The machine receives an invalid MIB request.
Confirm the sender’s computer has no problems.
NETWORK ACCESS ERROR
The Network Interface Card or Internet Fax unit
has been damaged.
The Network Interface Card or Internet Fax unit
must be replaced. Call for service.
NETWORK INITIALIZING The Network Interface Card is initializing.
Wait until the Network Interface Card completes
initializing.
INVALID ZERO DATA “0” is entered at “Body Page Limit” or “000” is set
to any 8-digit section of “IP address”.
Input a correct value.
CANNOT SET TCP/IP This error message is displayed by setting the IP
address, Subnetmask, and Default Gateway while
the machine obtains the TCP/IP settings from the
DHCP server.
Set OFF the “BootP/DHCP” to assign the TCP/IP
manually (see page 54).
INVALID HOST NAME The invalid character is entered for Host Name.
Input a correct value.
INVALID E-MAIL ADDR The invalid character is entered for E-mail Ad-
dress.
Input a correct value.
INVALID ERR E-MAIL The invalid character is entered for Error E-mail
Forward Address.
Input a correct value.
INVALID POP3 LOGIN The invalid character is entered for POP Login
Name.
Input a correct value.
INVALID POP3 PWD The invalid character is entered for POP Pass-
word.
Input a correct value.
INVALID FTP LGN NAME The invalid character is entered for FTP Server
Login Name.
Input a correct value.
113
Error Messages - continued
Error Message Cause / Solution
Error Message Cause / Solution
INVALID FTP PASSWORD The invalid character is entered for FTP Server
Login Password.
Input a correct value.
ENTRY AREA FULL There is not enough memory to store the One
Touch key, Speed Dial, or dialing history.
Delete the unnecessary address data.
INVALID DATA The communication problems in the interfaces be-
tween the Mother PCB and I-FAX PCB occur.
Turn off the machine and then turn on to restart
the machine. If the error cannot be recovered,
call for service.
NOT POP3 RECV. MODE This error message is displayed by pressing the
[Check E-mail] key while the Receive Mode is set
as SMTP.
Select POP for Receive Mode setting (see page
62) if your Incoming E-mail server is the POP
server. If the Receive Mode is set to SMTP, the
[Check E-mail] key is not available.
POP3 SRV. NOT EXIST The machine cannot find the POP server in the
Network when checking the E-mail.
Ask your administrator of the E-mail server.
IP ADDRESS NOT EXIST The IP address is not assigned.
Assign the IP address (see page 55).
E-MAIL NOT EXIST No E-mail has been received.
BAD POP3 LOGIN NAME The your user name is locked to log in the POP
server or the password is incorrect.
Confirm the POP Login Password is set correctly
(see page 66) or ask your administrator of the E-
mail server that your user name is not locked.
POP3 SRV NOT CONNECT The machine cannot connect to the POP server.
Ask your administrator of the E-mail server that
the settings for your account is configured cor-
rectly.
LOW BATTERY The power of the battery of the Internet Fax unit is
low.
Power your machine on, then wait for a while for
charging. If this Error Message is repeatedly dis-
played, the battery must be replaced. Call for
service.
BATTERY ERROR The battery is not connected to the Internet Fax
unit correctly or the battery is out of order.
Connect the battery to the Internet Fax unit cor-
rectly. If this error message is repeatedly dis-
played, replace the battery. Call for service.
INTERNET FAX SENDING This message is displayed by pressing any button
on the Operation Panel while the machine is send-
ing the E-mail.
Wait until sending the E-mail is finished.
INTERNET FAX RECEIVING
This message is displayed by pressing any button
on the Operation Panel while the machine is re-
ceiving the E-mail.
Wait until receiving the E-mail is finished.
PRINTING... This message is displayed by pressing any button
on the Operation Panel while the machine is print-
ing the received E-mail.
Wait until printing the E-mail is finished.
114
Error Messages - continued
Error Message Cause / Solution
MIB ACCESSING This message is displayed by pressing any button
on the Operation Panel while the machine is ana-
lyzing the MIB.
Wait until analyzing the MIB is finished.
FTP ACCESSING This message is displayed by pressing any button
on the Operation Panel while the machine is
transmitting the data in the FTP.
Wait until the FTP transmission is finished.
COMMAND ERROR The command error occurs while performing the
Network Test.
Call for service.
S-MEDIA NOT EXIST The Smart Media is not inserted while performing
the Smart Test.
Insert the Smart Media in the Smart Media slot.
RAM 0B:NG The RAM has become defective.
Call for service.
RAM 1C:NG The RAM has become defective.
Call for service.
CHKSUM ERR:PROGRAM The programming data has been damaged.
Call for service.
CHKSUM ERR:FUNCTION The function setting data has been damaged.
Call for service.
CHKSUM ERR:LANGUAGE The language data has been damaged.
Call for service.
CHKSUM ERR:BOOT The boot programming data has been dameged.
Call for service.
115
Error Codes Printed on Reports
When an Error Code is printed as a status indication on Transmission Reports, etc. related to Internet Fax transmission, refer to the following description for the applicable
Error Code to determine the cause.
Receive Code
Error
Code Cause How to Correct
70
71
72
73
74
75
Memory Overflow and “Error E-
mail Forward Address” is assigned
Memory Overflow
Attached File Error and “Error E-
mail Forward Address” is assigned
Attached File Error
TIFF File Error
TIFF File Error and “Error E-mail
Forward Address” is assigned
Contact your sender to resend the
document by reducing the sent pag-
es. Or confirm the E-mail data for-
warded to the “Error E-mail Forward
Address”.
Contact your sender to resend the
document by reducing the sent pag-
es.
Confirm the settings of related Net-
work data such as E-mail address,
IP address or SMTP server ad-
dress, etc. Or confirm the E-mail
data forwarded to the “Error E-mail
Forward Address”.
Confirm the settings of related Net-
work data such as E-mail address,
IP address or SMTP server ad-
dress, etc.
Contact your sender to resend the
document with correct TIFF image
files.
Contact your sender to resend the
document with correct TIFF image
files. Or confirm the E-mail data
forwarded to the “Error E-mail For-
ward Address”.
Error
Code Cause How to Correct
76
77
78
79
Offramp Gateway Security Error
and “Error E-mail Forward Ad-
dress” is assigned
Offramp Gateway Security Error
Offramp Gateway Telephone Num-
ber and/or Sub address Error and
“Error E-mail Forward Address” is
assigned
Offramp Gateway Telephone Num-
ber and/or Sub address Error
Contact your sender to confirm the
Offramp E-mail address (fax num-
ber) is correct because the ma-
chine cannot forward the offramp
gateway document to the facsimi-
le number not registered in the OT
and ABB dials when the Gateway
Security is set to ON. Or confirm
the E-mail data forwarded to the
“Error E-mail Forward Address”.
Contact your sender to confirm the
Offramp E-mail address (fax num-
ber) is correct because the ma-
chine cannot forward the offramp
gateway document to the facsimi-
le number not registered in the OT
and ABB dials when the Gateway
Security is set to ON.
Contact your sender to confirm the
Offramp E-mail address (fax num-
ber) is correct. Or confirm the E-
mail data forwarded to the “Error
E-mail Forward Address”.
Contact your sender to confirm the
Offramp E-mail address (fax num-
ber) is correct.

116
Error Codes Printed on Reports - continued
Error
Code Cause How to Correct
7A
7B
7C
7D
Memory Overflow
Communication Error with SMTP
server
Delivery Error
Processing Error in Reception side
Reduce the scan resolution or the
compression of scan method and
resend. Or increase the limitation
size set at the “MSG SIZE LIMIT” if
it is not set to maximum.
Confirm the following:
- SMTP Server Address is correctly
set.
- LAN cable is correctly connected.
- IP Address of this machine is cor-
rectly assigned.
- E-mail Address of this machine is
correctly set.
Then send again.
Resend the document or check the
any error condition occurs in recep-
tion side. If MDN/DSN report was
printed, check the report to refer the
information.
Resend the document or check the
any error condition occurs in recep-
tion side. If MDN/DSN report was
printed, check the report to refer the
information.
Transmit Code

117
TECHNICAL WORD REFERENCE
This section describes technical words used in this manual and basic terms for the
network technology.
D
Default Gateway
Default Gateway commonly refers to a gateway address of the router. The
router is a device that connects between a LAN and other LANs.
DHCP, dynamic host configuration protocol
DHCP is a protocol for the purpose of assigning dynamic IP addresses to
devices on a network. Using DHCP, the devices obtains the different IP ad-
dress every time the device connects to the network.
Domain
Domain defines a group of computers and devices on the network. Within the
Internet, domains are defined by the IP address or DNS name, such as
"toshiba.com".
DNS, domain name system (service)
DNS is an Internet service that manages the translations between IP addresses
and domain names. Instead of identifying a host with an IP address, the host
can be identified with alphabetic name using the DNS. Within the Internet, DNS
is commonly used to identify a host. For example, "www.toshiba.com" is a DNS
domain name that assigned using the DNS.
DSN, delivery status notification
DSN is a system to notify the electric mail sender of the status of the message
that been sent. The status, such as failed delivery, delayed delivery, success-
ful delivery, or the gateway of a message into an environment that may not
support DSNs, is notified when an electric mail with the DSN request is sent.
E
E-mail, electric mail
E-mail is the transmission of messages for over communications network, en-
ables to transfer the electric files stored on a disk between most mainframes
and computers on network.
E-mail Address
A name that identifies an electric post office box in a mail server within the
Internet. E-mail address consists of two elements, user name that identifies the
post office box in a mail server and host name that identifies the mail server,
and they are divided by "@". Within the Internet, usually the domain name is
used for the host name. For example, "ifax@toshiba.com" is an E-mail ad-
dress. "ifax" is a user name, and "toshiba.com" is the domain name that
identifies the mail server.
ESMTP, extended simple mail transfer protocol
ESMTP is defined as the service extensions based on SMTP, for the purpose of
providing some improvements from SMTP. Enhancing SMTP, ESMTP provides
a new command to support the DSN and MDN. (Refer to "SMTP")
F
FQDN, fully qualified domain name
FQDN is a domain name that completely identifies the host computer and
consists of a host and all level of the domain name. FQDN is always starts with
a host and ends with top-level domain. For example, when the host name is
"host1" and the domain name is "toshiba.com", the FQDN will be
"host1.toshiba.com".
FTP, file transfer protocol
FTP is a protocol commonly used for transferring files on the Internet.
G
H
Host
Host refers to a computer connected to a TCP/IP network.
Hostname
Hostname is a name to identifies a computer connected to a TCP/IP network.
Within the Internet, a DNS domain name is used for the Hostname.
I
IP Address
IP Address is used to identify the node on a TCP/IP network. It is described
with 32-bit numeric address written as four numbers separated by periods.
Internet
The Internet is a global network of networks connecting millions of computers
worldwide via many computer networks using a simple standard common ad-
dressing system and TCP/IP (Transmission Control Protocol/Internet Protocol).
Internet FAX
Internet FAX enables to transmit a facsimile through the local area network
(LAN) and the Internet communication instead of the public switched telephone
network (PSTN).

118
L
LAN, local area network
LAN is a computer network that consists of computers in a small area. Each
individual computer can share and access data and devices in a LAN.
M
MDN, message disposition notification
MDN is a system to notify the electric mail sender of the disposition of a
message after electric mail has been successfully delivered to a recipient.
MIB, management information base
MIB is a database of objects that can be monitored by a network management
system. Such as SNMP and RMON monitors the device on the network using
the MIB formats.
MIME, multipurpose internet mail extensions
MIME is a specification for the purpose of formatting non-ASCII messages.
MIME enables to send and receive graphics, audio, and video files through the
Internet mail system.
MTA, mail transfer agent
A server application that transfers the electric mail sent from the MUA is called
MTA.
MUA, mail user agent
A client application that send or receive the electric mail is called MUA.
N
Node
Node is a generic term of a processing location in network. It can be a
computer or network devices, such as printer. Every node has unique network
address such as DLC address and MAC address.
P
POP/POP3, post office protocol
POP is a protocol to retrieve the E-mail message from a mail server. Most E-
mail applications use POP. POP3 is a newer version of the POP protocol.
PSTN, public switched telephone network
PSTN is a global telephone system enables to communicate in worldwide using
copper wires to transmit analog data.
S
SMTP, simple mail transfer protocol
SMTP is a server protocol to transfer the E-mail message between servers.
Most E-mail system uses SMTP to transfer the E-mail messages over the
Internet.
SNMP, simple network management protocol
SNMP is a suite of protocols for the purpose of managing complex networks.
The device compatible to SNMP stores the data of itself in MIB format.
Subnet/Subnet Mask
Subnet is a portion of a network specified with a common address component
for the purpose of a security and performance. On TCP/IP network, a portion of
a network is specified with Subnet Mask. Subnet Mask determines what subnet
an IP address belongs to on the network.
T
TCP/IP, transmission control protocol/internet protocol
TCP/IP is a suite of protocols to connect the network nodes on the Internet.
TCP/IP actually composed of several protocols; such as TCP and IP. TCP is
used to manage the transmission of the data between applications. IP is used
to manage the transmission of the data between host computers. Using TCP/
IP, the node is identified with a 32-bit numeric address called "IP address".
TIFF, tagged image file format
TIFF is a file format for storing bitmapped images. The image files in TIFF
format commonly describes with a ".tif" extension.
DP120F/DP125F
Internet Facsimile
E1-XXXXXX

© Copyright TOSHIBA TEC CORPORATION 2000
ALL RIGHTS RESERVED
DP120F/DP125F Internet Facsimile
