Trans Electric B52Q Bike & Motorbike Camcorder User Manual
Trans Electric Co., Ltd. Bike & Motorbike Camcorder
UserManual.wiki
>
Trans Electric
>
B52Q User Manual
User Manual
Navigation menu
Upload a User Manual
Namespaces
Wiki Guide
HTML
PDF
Info
Views
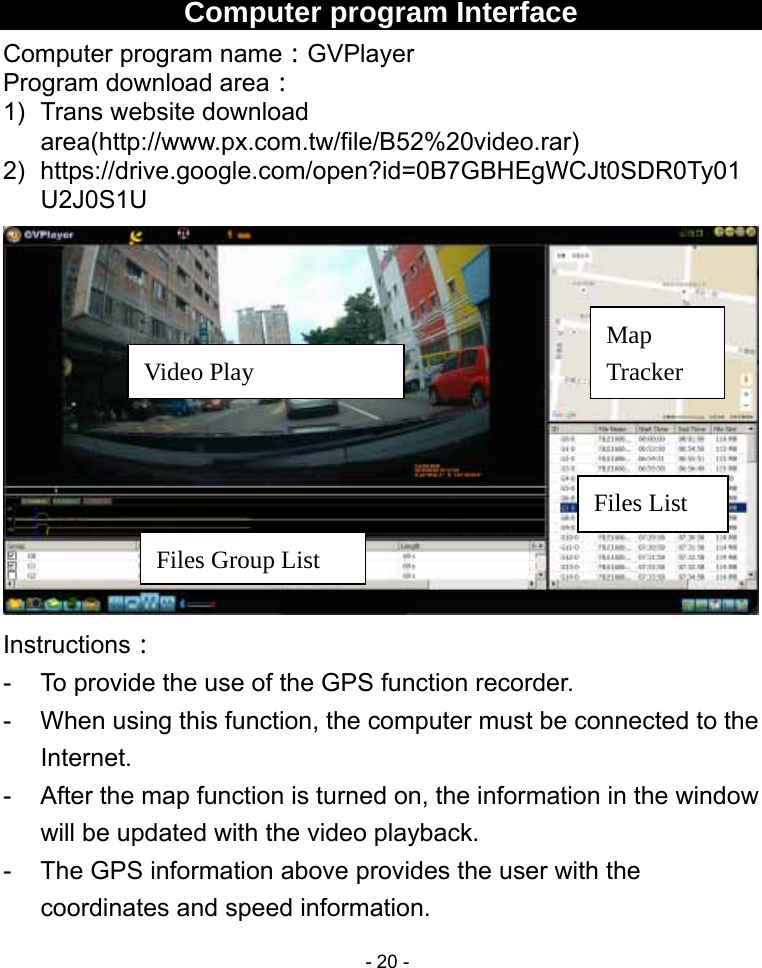
User Manual
Discussion / Help
Navigation
![- 3 - Precautions before Use Recording Mode (1) Once the system is powered on, it will enter loop recording mode. (The recording LED is flashing). (2) To exit the loop recording mode, please stop recording first Press [Loop] key Press Start Recording. Now, it’s normal recording. (The recording LED is ON permanently) Formatting your SD Card Long press [Loop/WIFI] key for 8 sec, system will response with 5 sec’s Continuous beep sound. Press the Snapshot key within 5 sec. will start formatting your SD card. Before formatting, please put your system into standby mode. (Stop recording .) After SD card formation, system will enter standby mode . Please restart the system. Restore to Factory Default Long press [Loop] key for 20 sec., system will prompt with continuous beep sound for 5 sec. Press [Snapshot] key within 5 sec., the system will restore to factory default settings. Hot key for File Backup Long press [Snapshot] key for 2 sec., the system will back up the previous and current recording files to your Backup folder in the SD card.](https://usermanual.wiki/Trans-Electric/B52Q/User-Guide-3702000-Page-3.png)