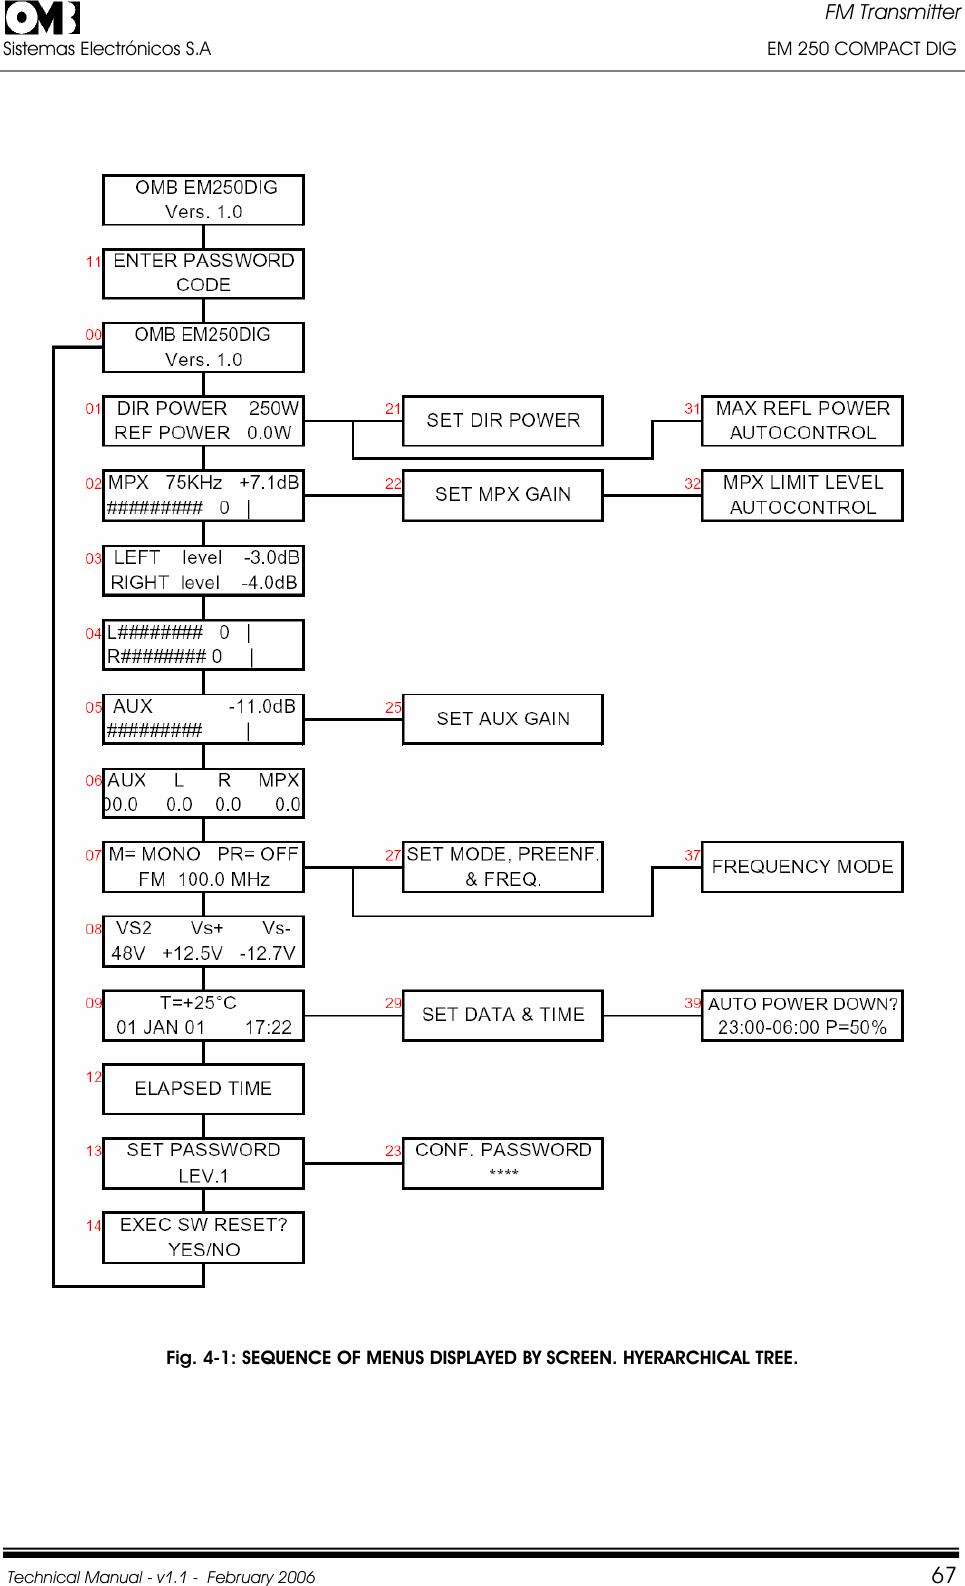
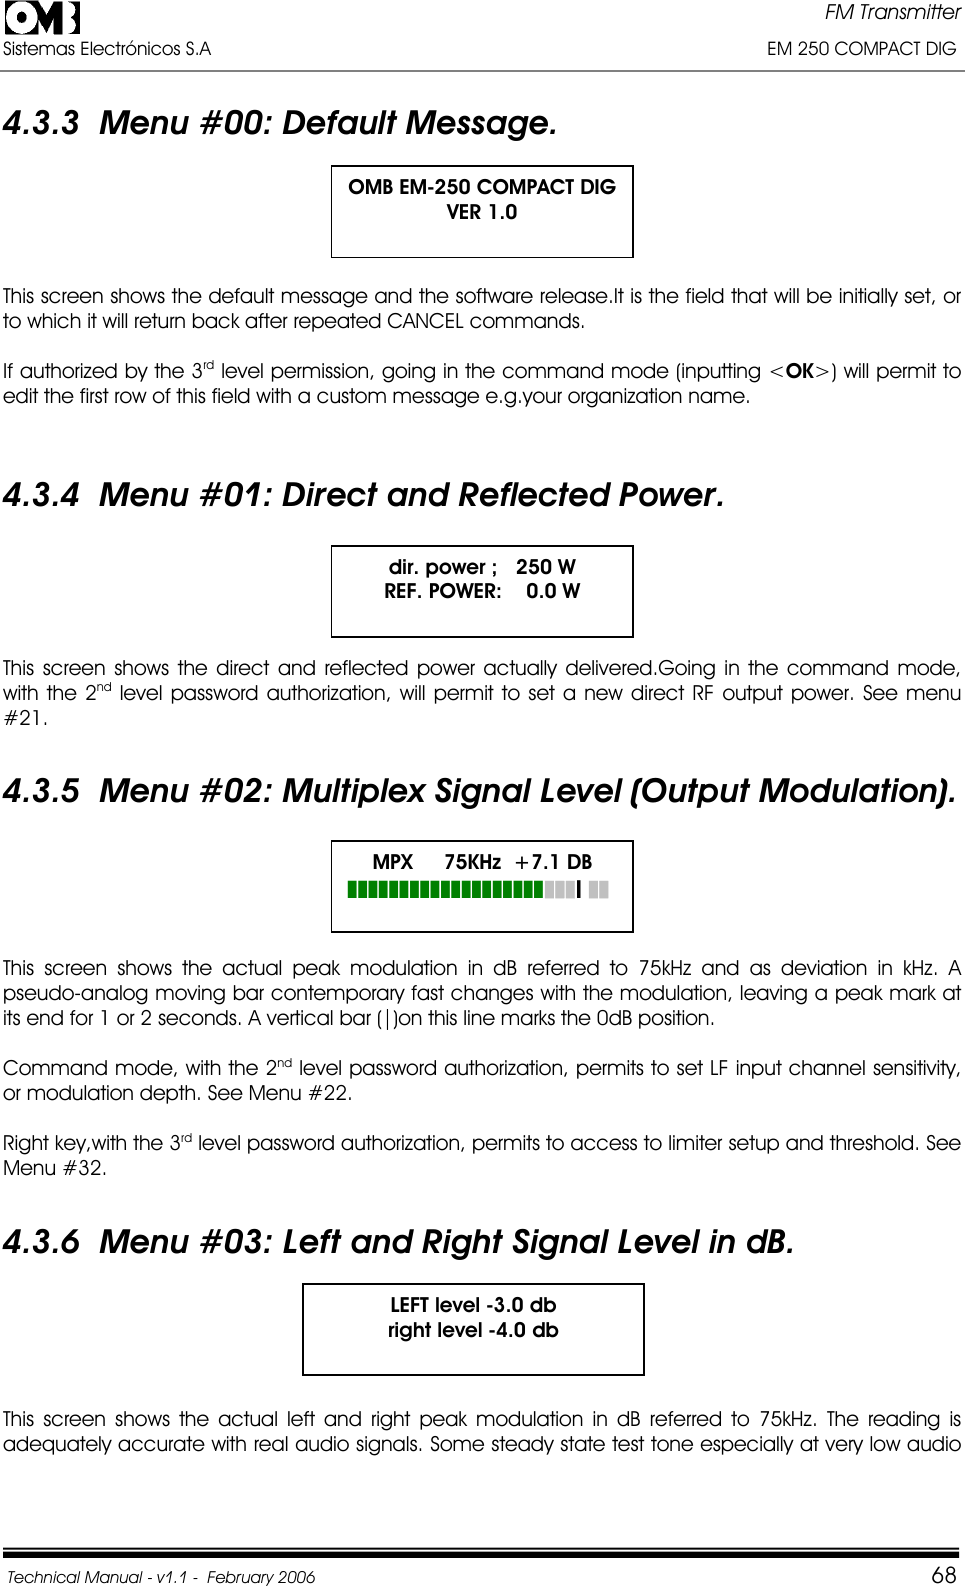
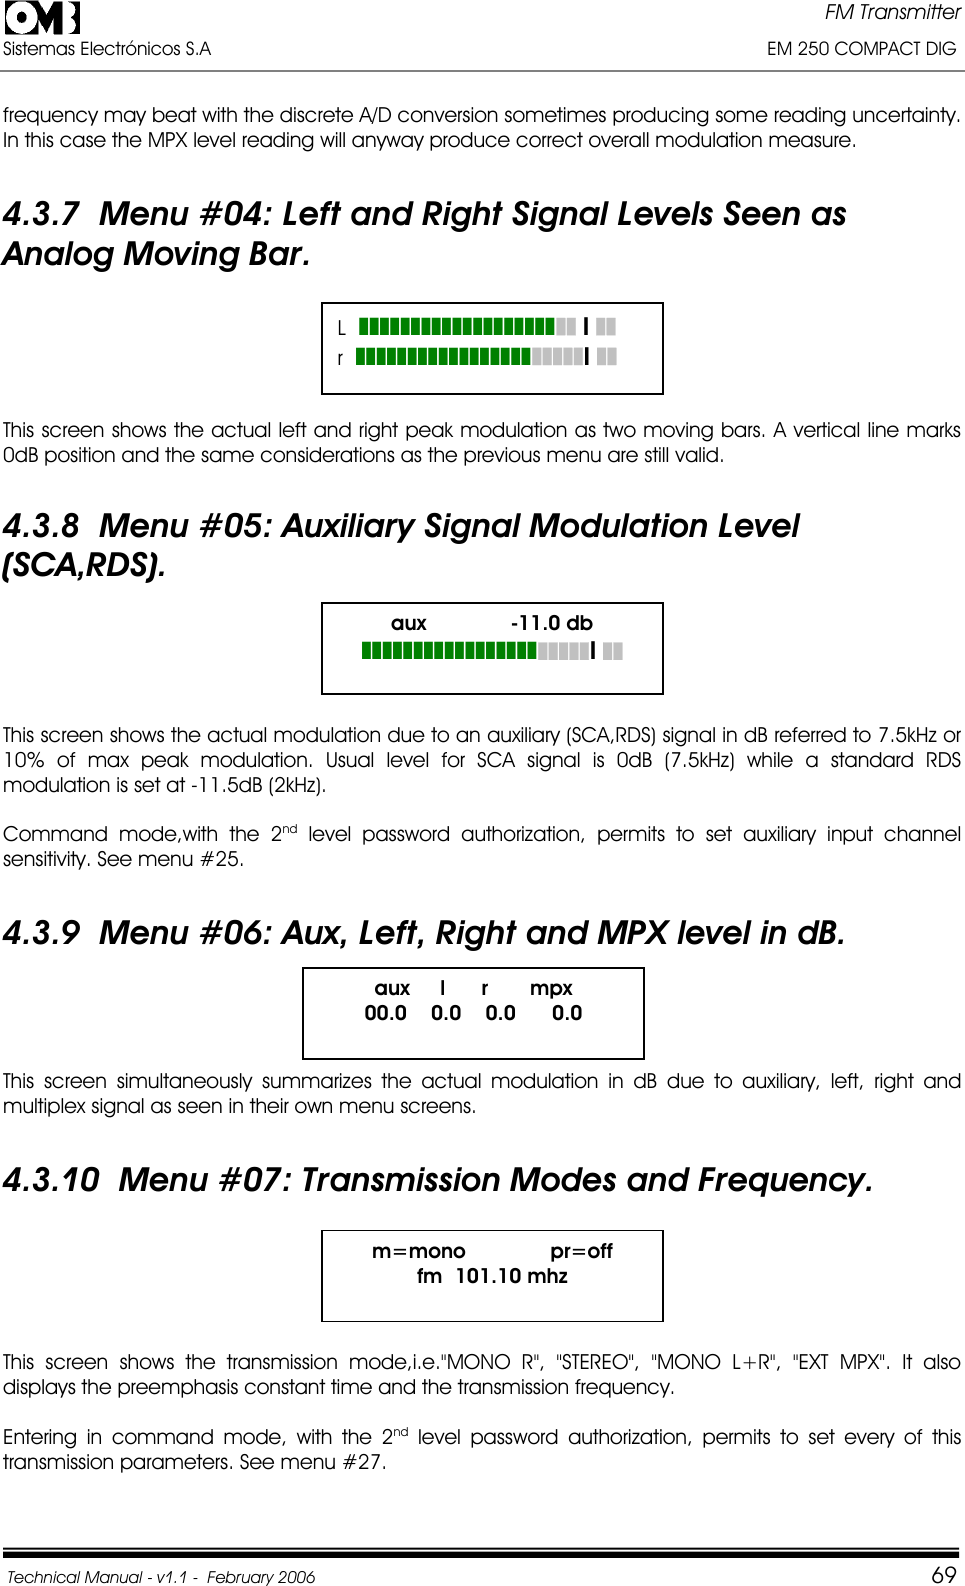
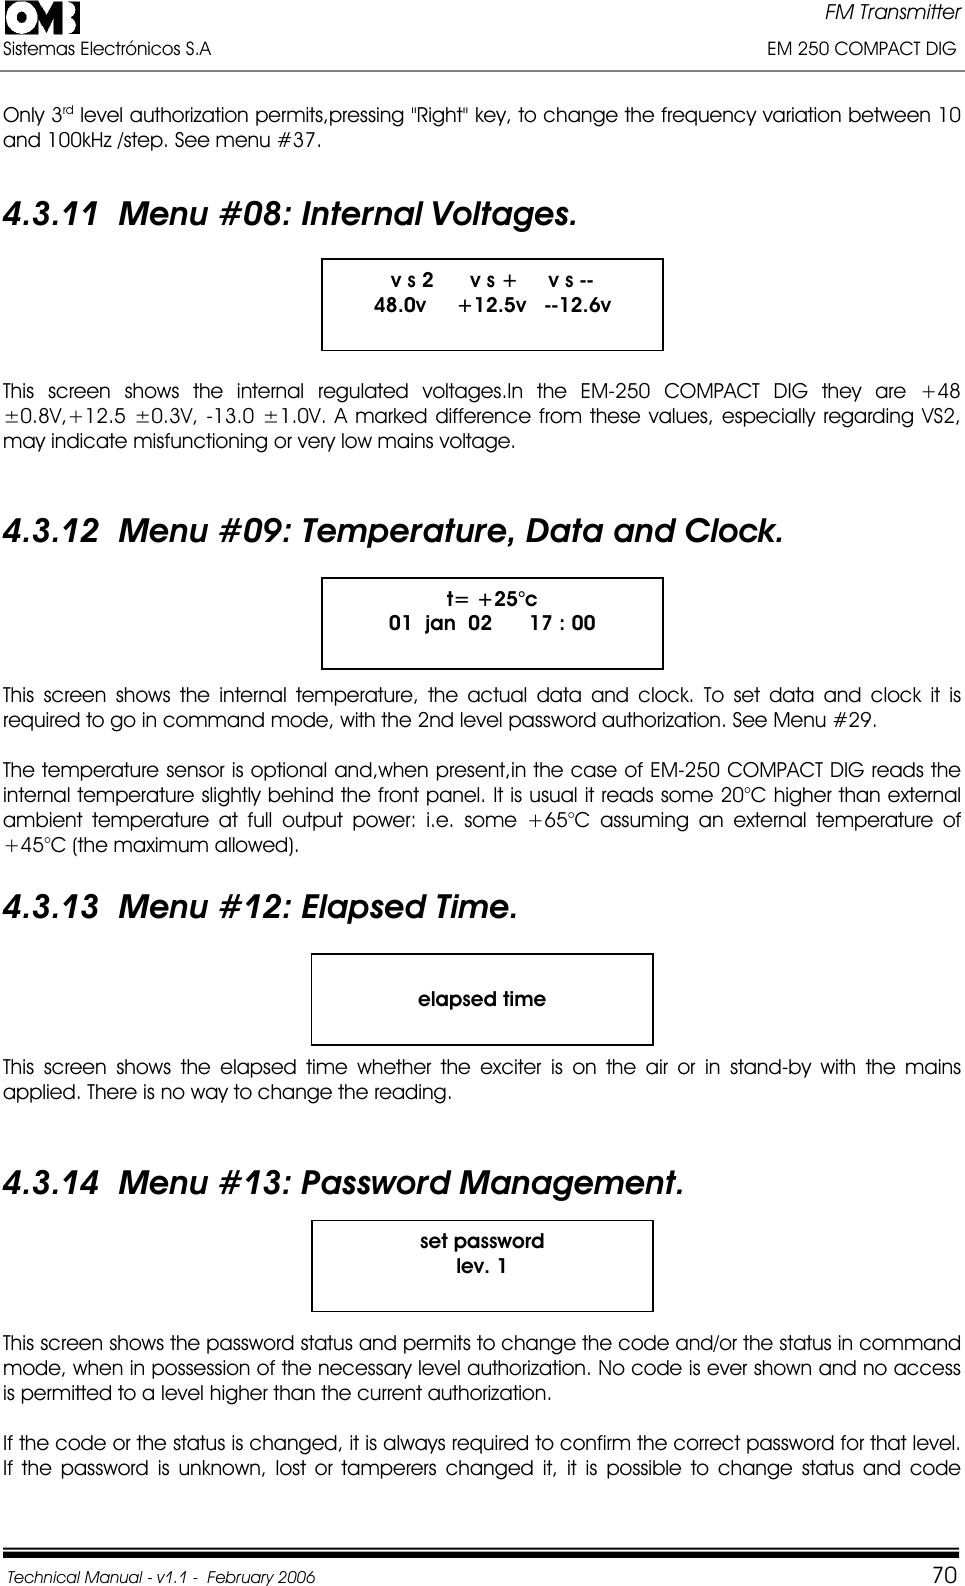
Transamerica Broadcasting EM250DIG 250 Watt FM Broadcast Transmitter User Manual manual ING v1 1 EM 250CD
Transamerica International Broadcasting Inc 250 Watt FM Broadcast Transmitter manual ING v1 1 EM 250CD
Contents
- 1. User Manual Part 1
- 2. user Manual Part 2
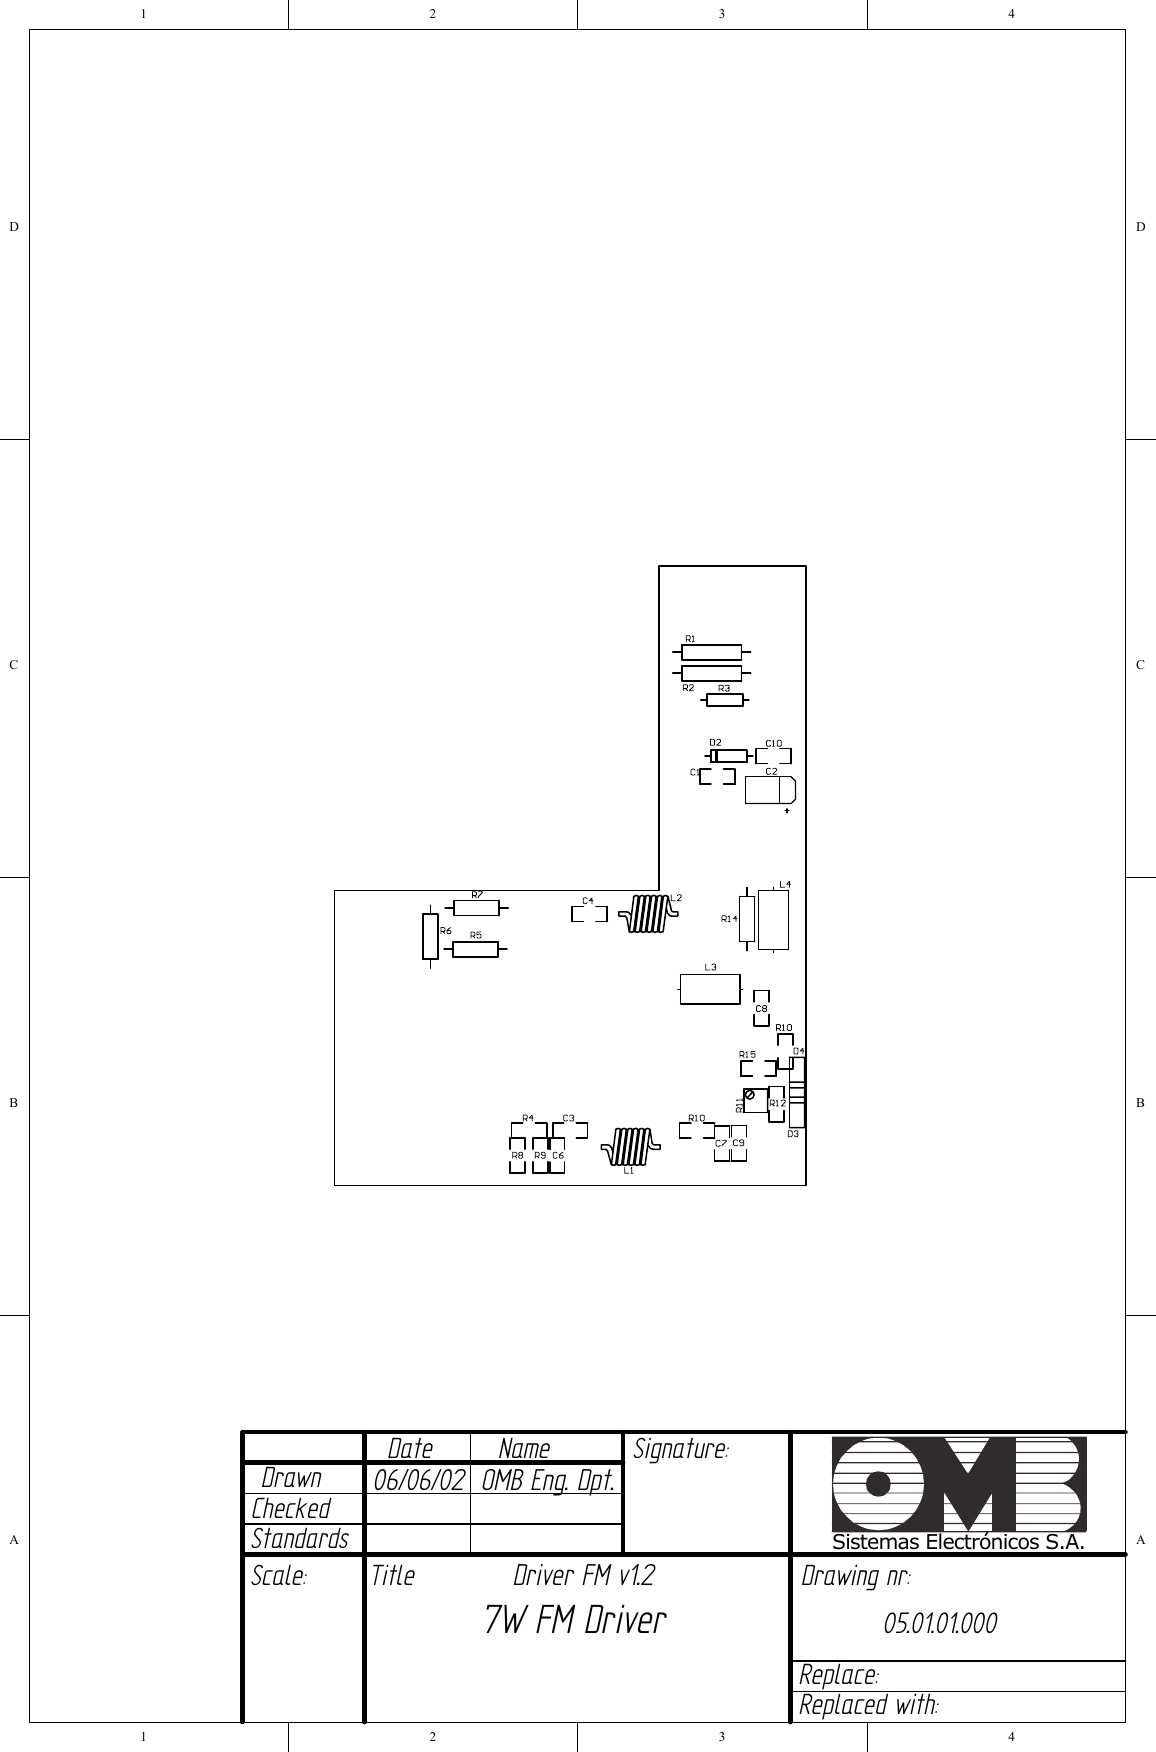
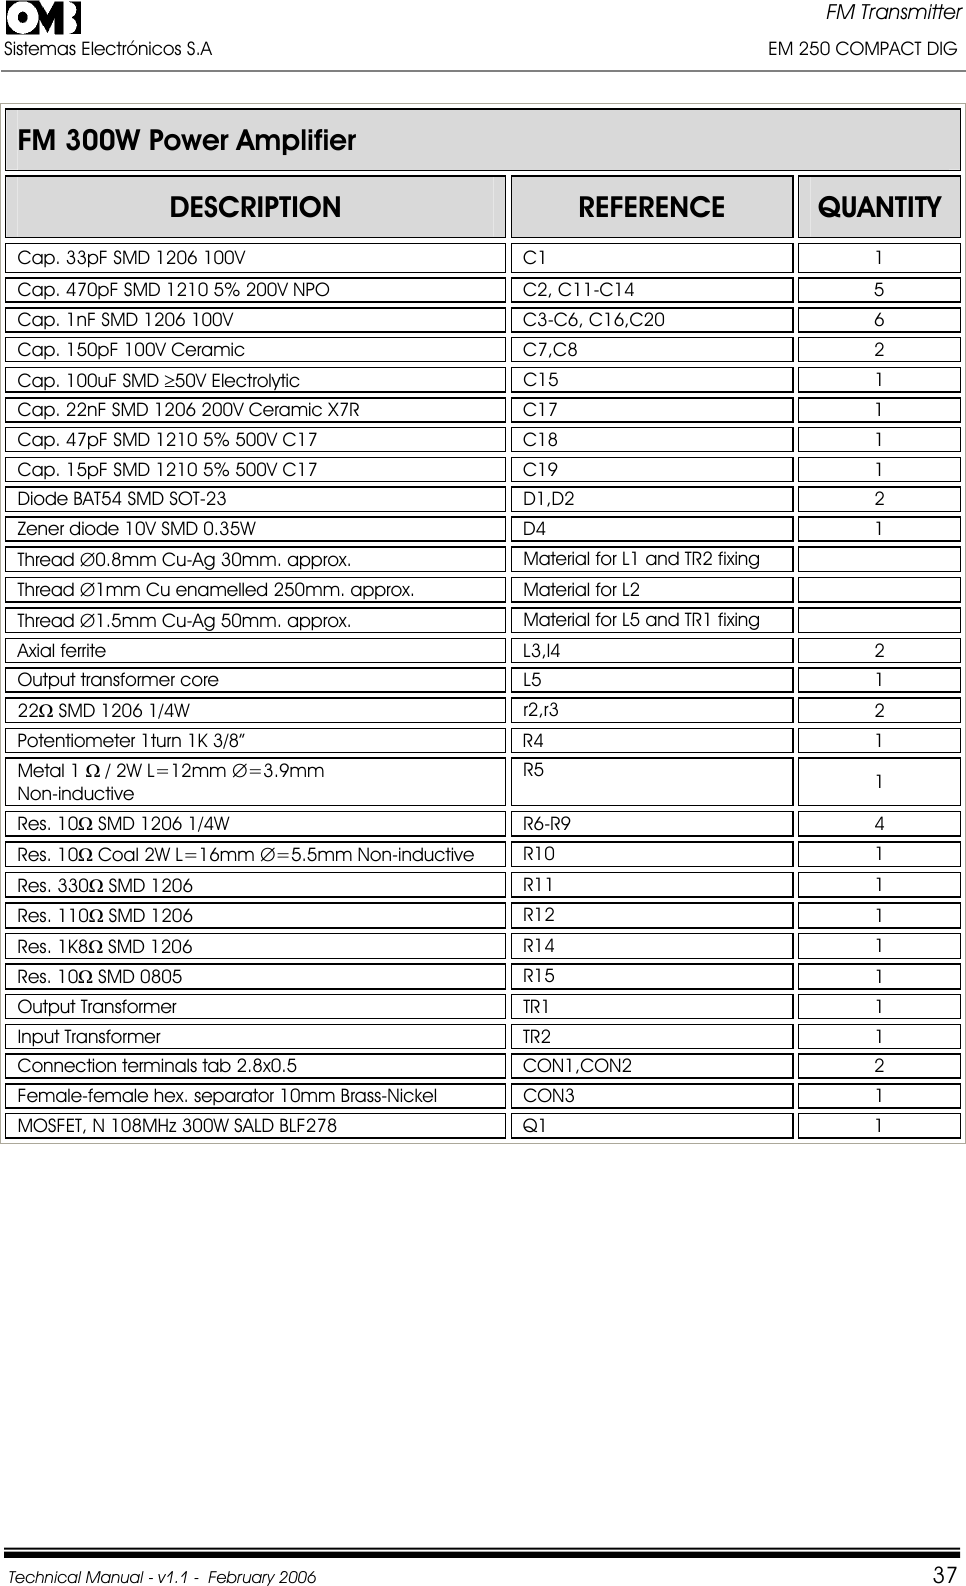
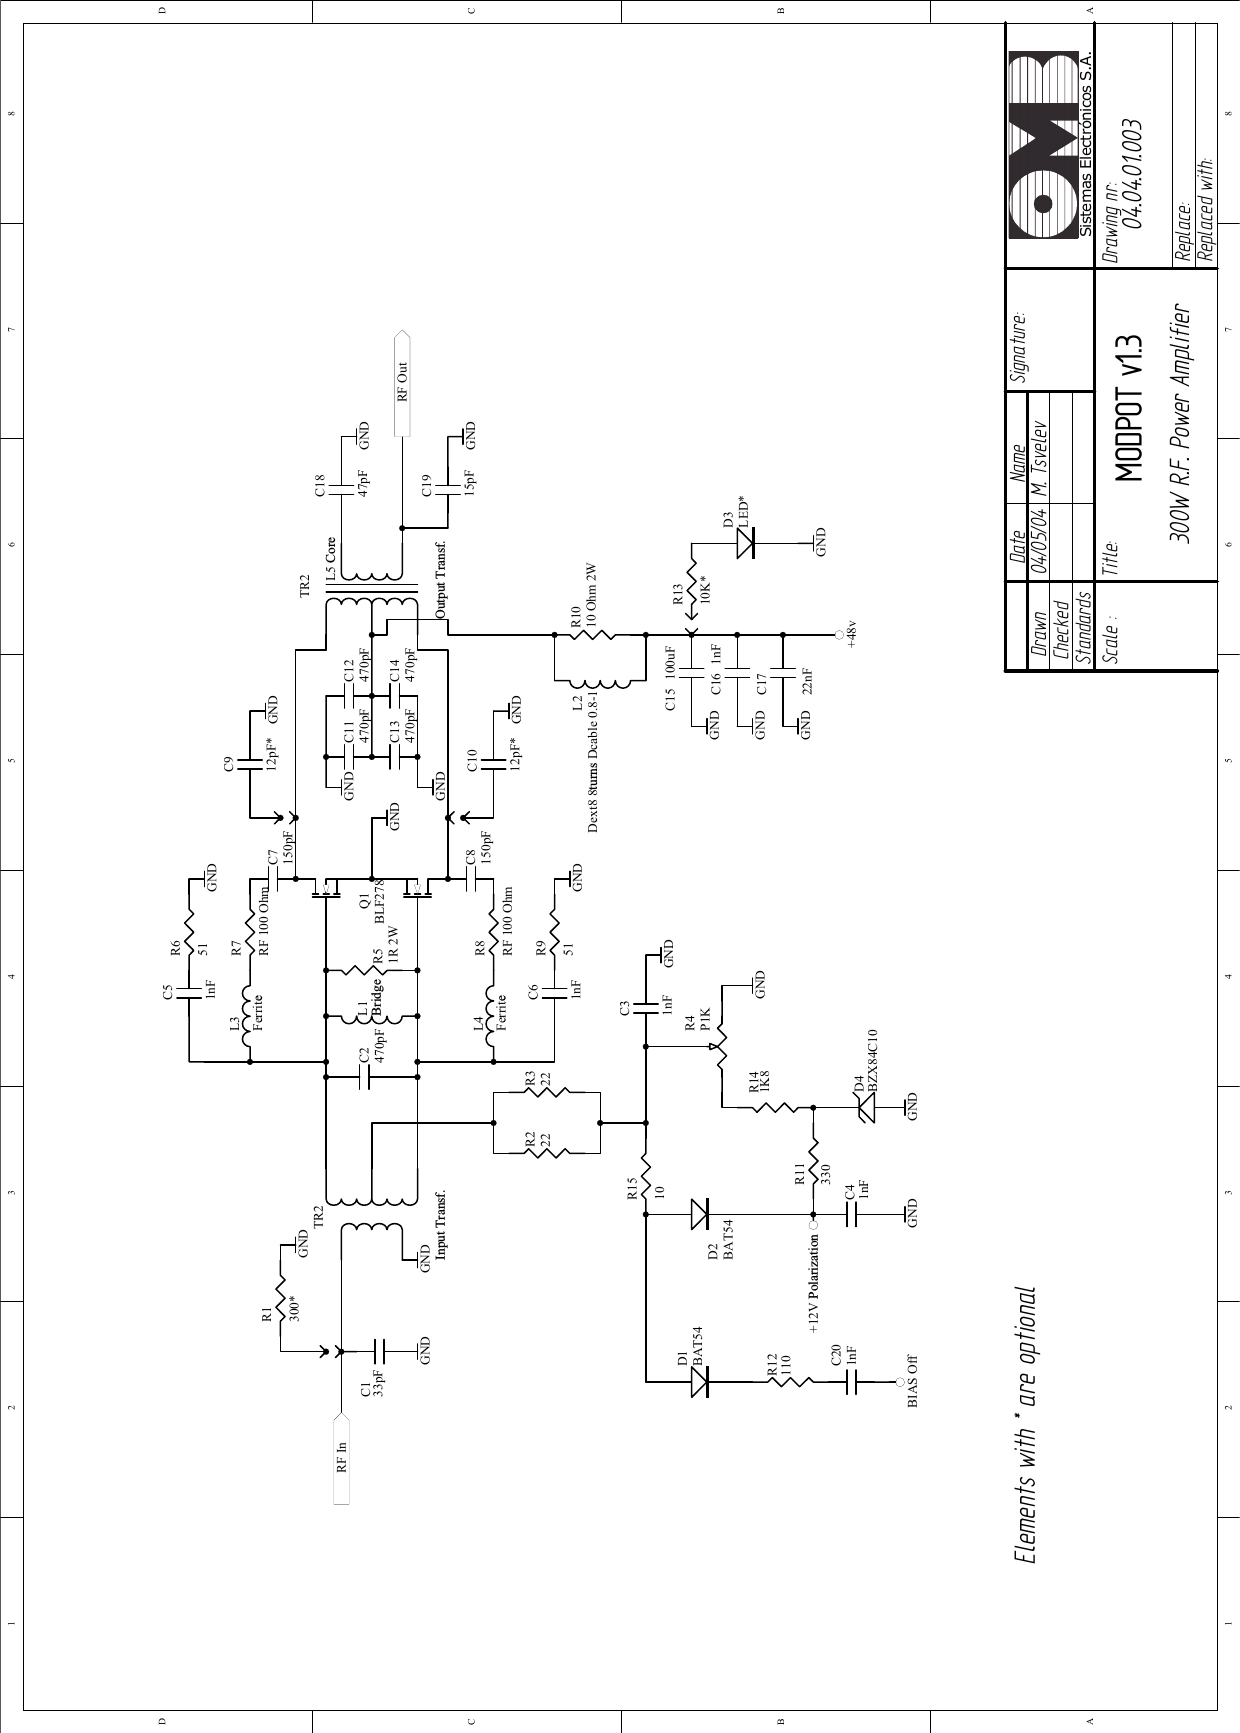
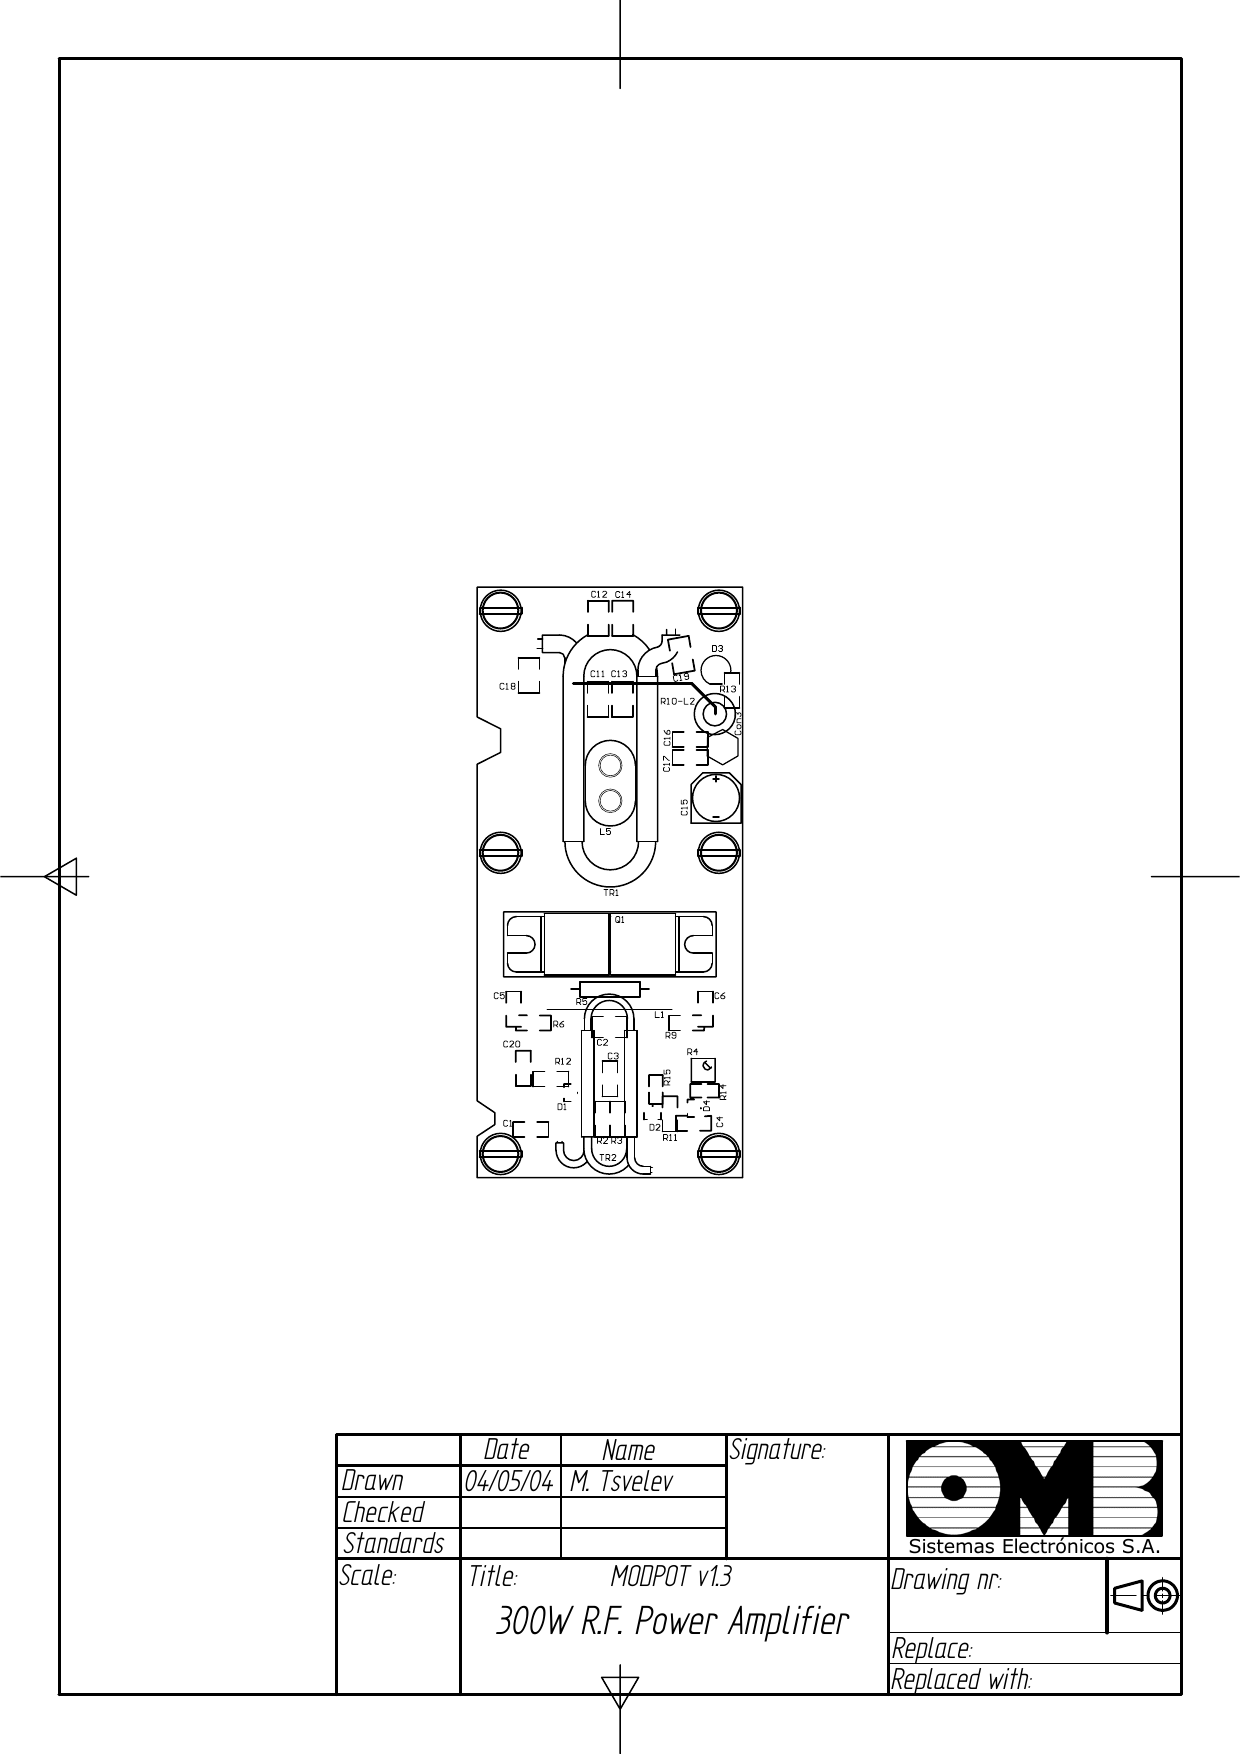
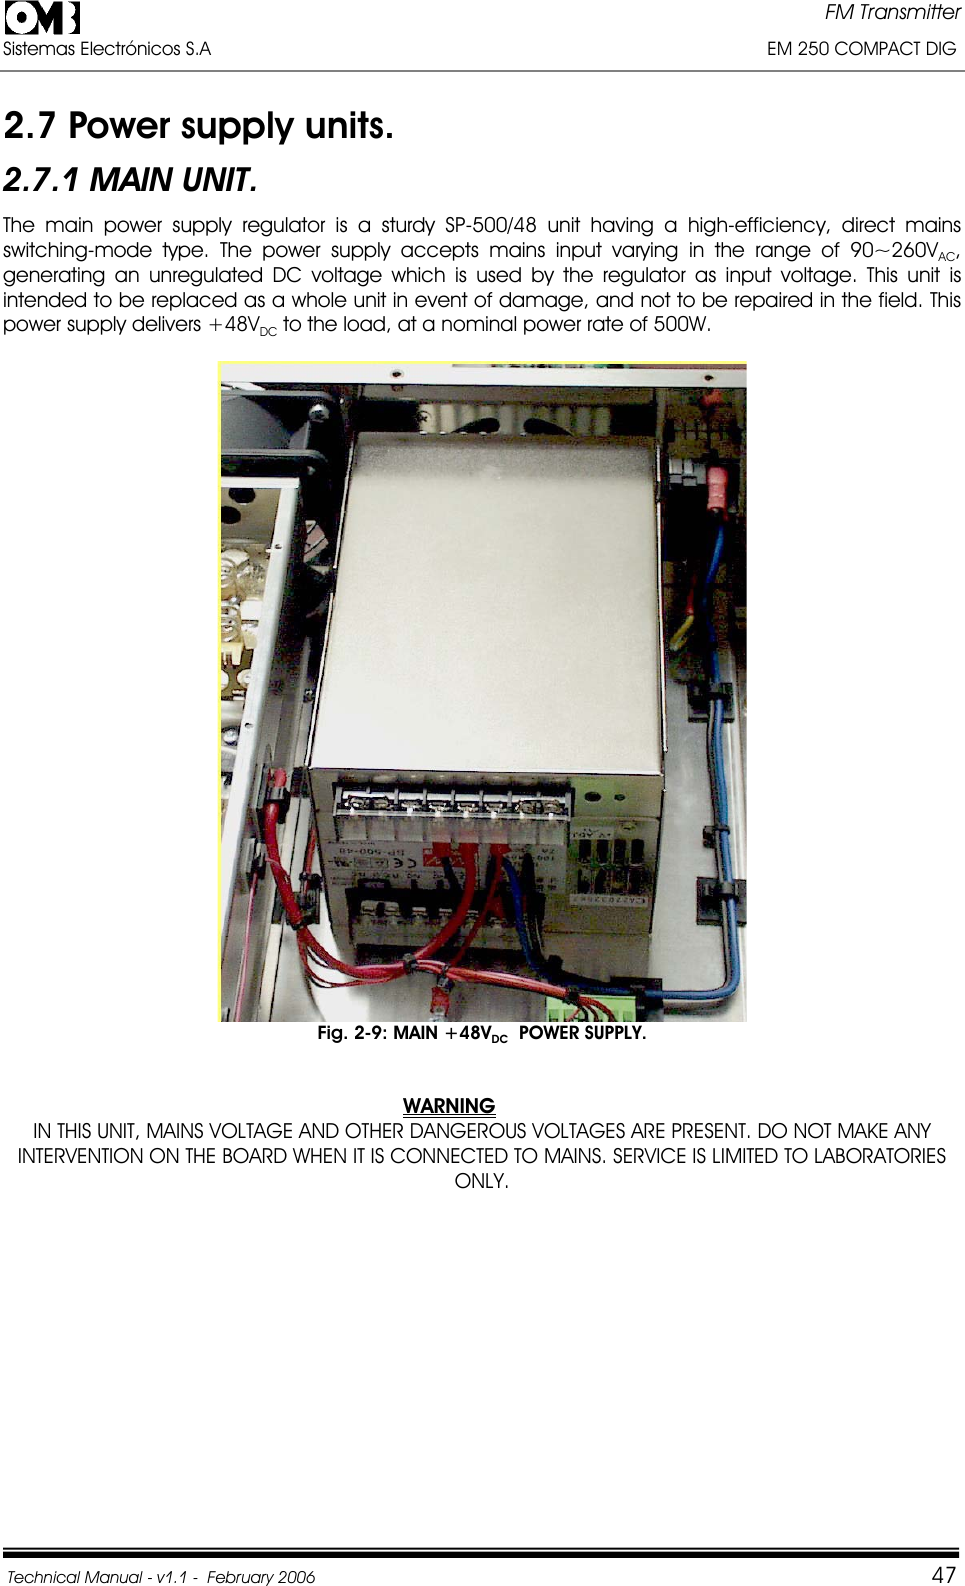
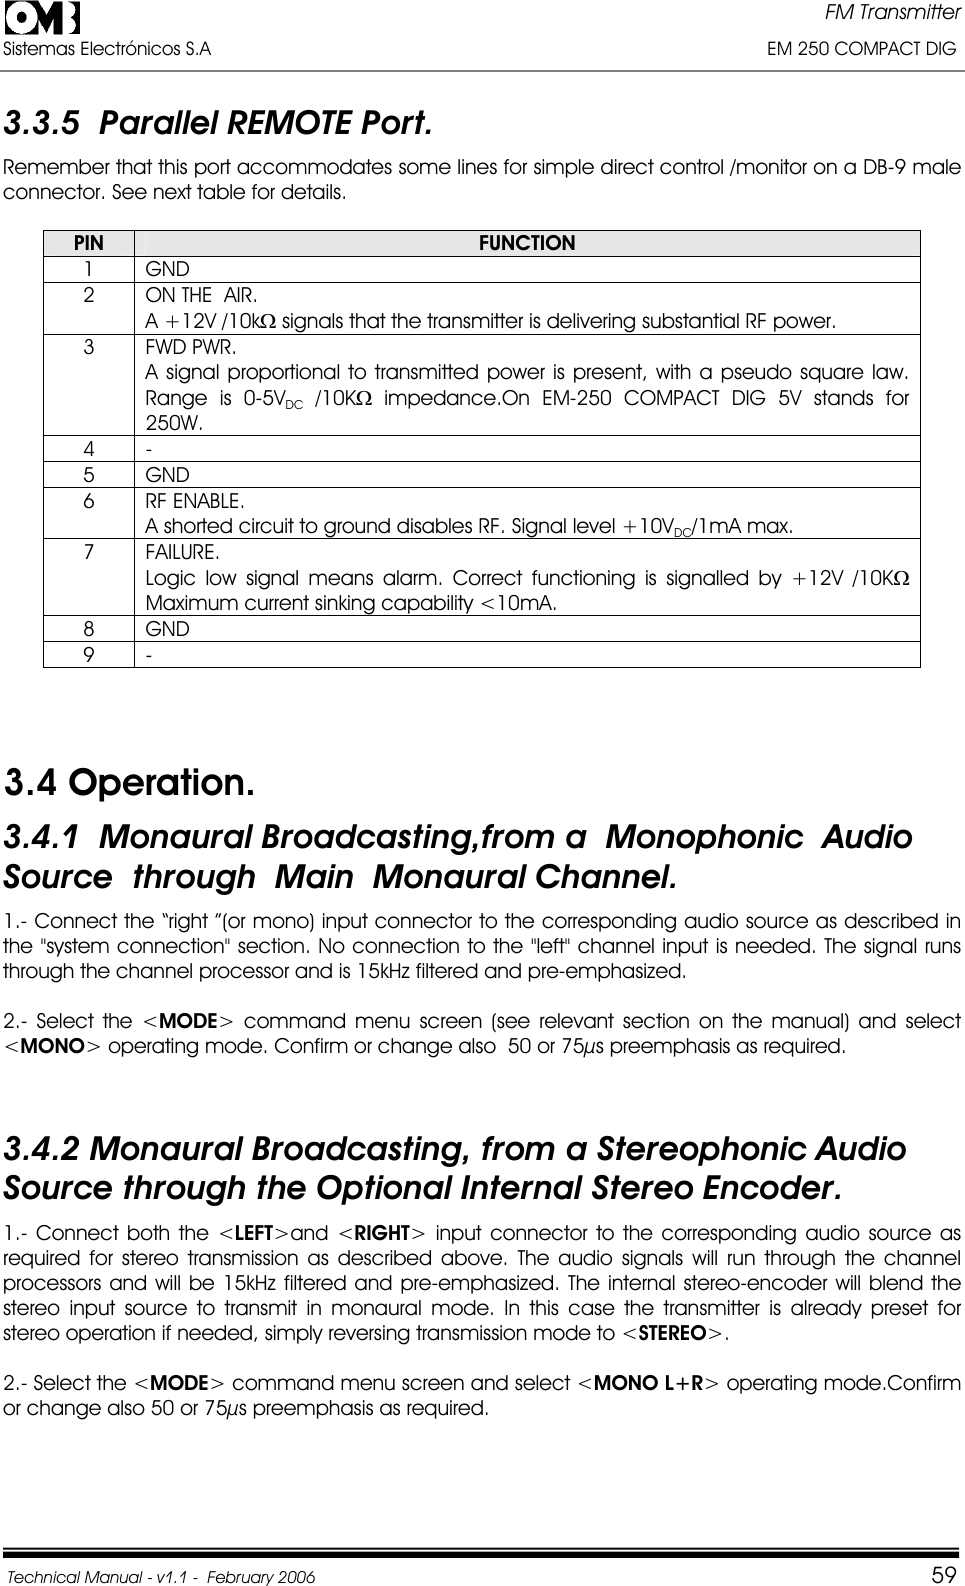
user Manual Part 2