TriGem Computer PT1400 NoteBook PC User Manual Averatec PT1400 ATT E Rev 1
TriGem Computer, Inc NoteBook PC Averatec PT1400 ATT E Rev 1
UserManual.wiki
>
TriGem Computer
>
PT1400 User Manual
User manual
Navigation menu
Upload a User Manual
Namespaces
Wiki Guide
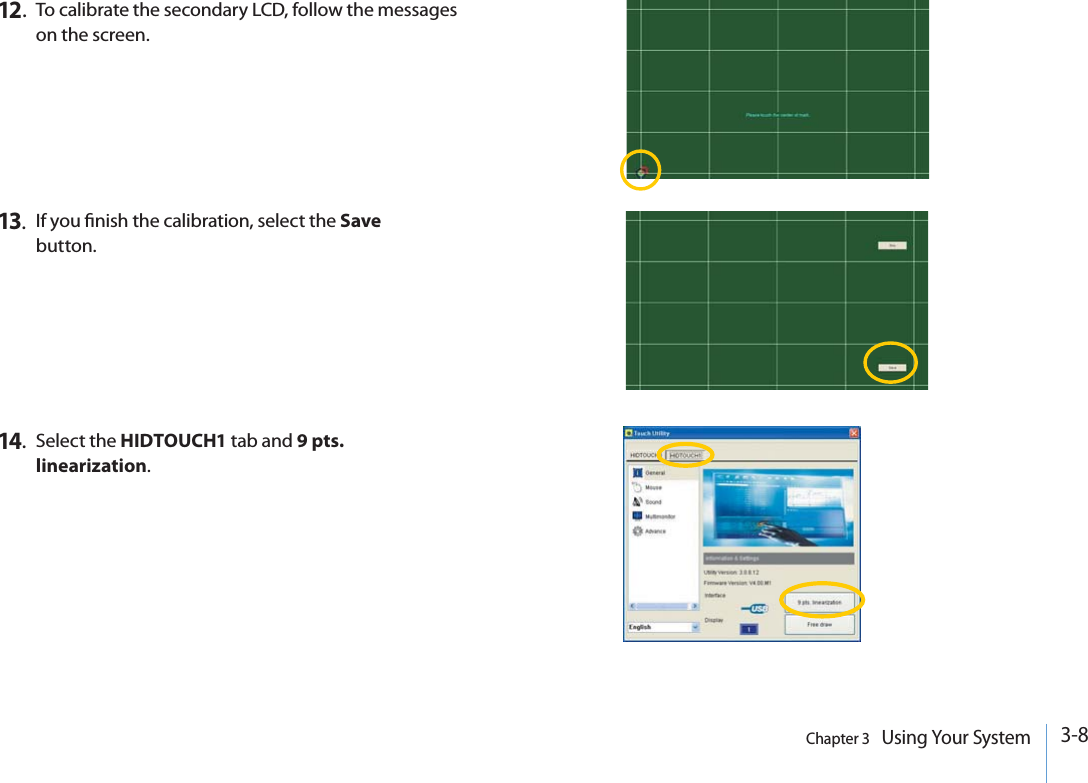
HTML
PDF
Info
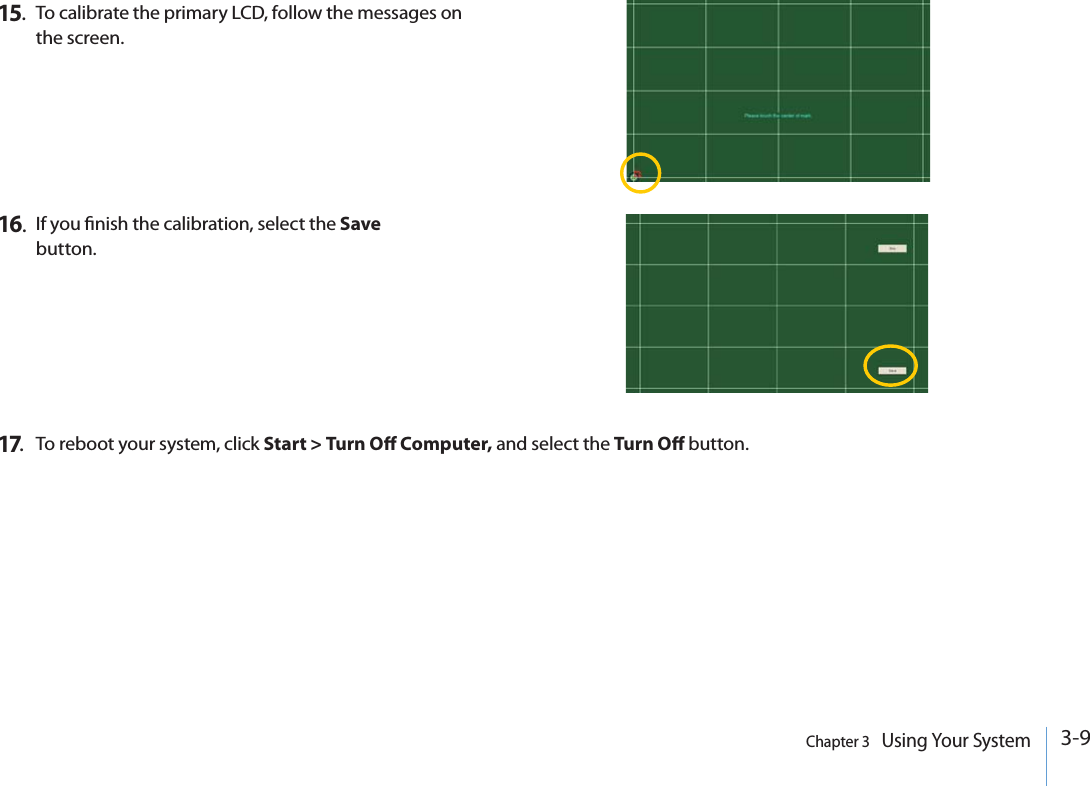
Views
User Manual
Discussion / Help
Navigation


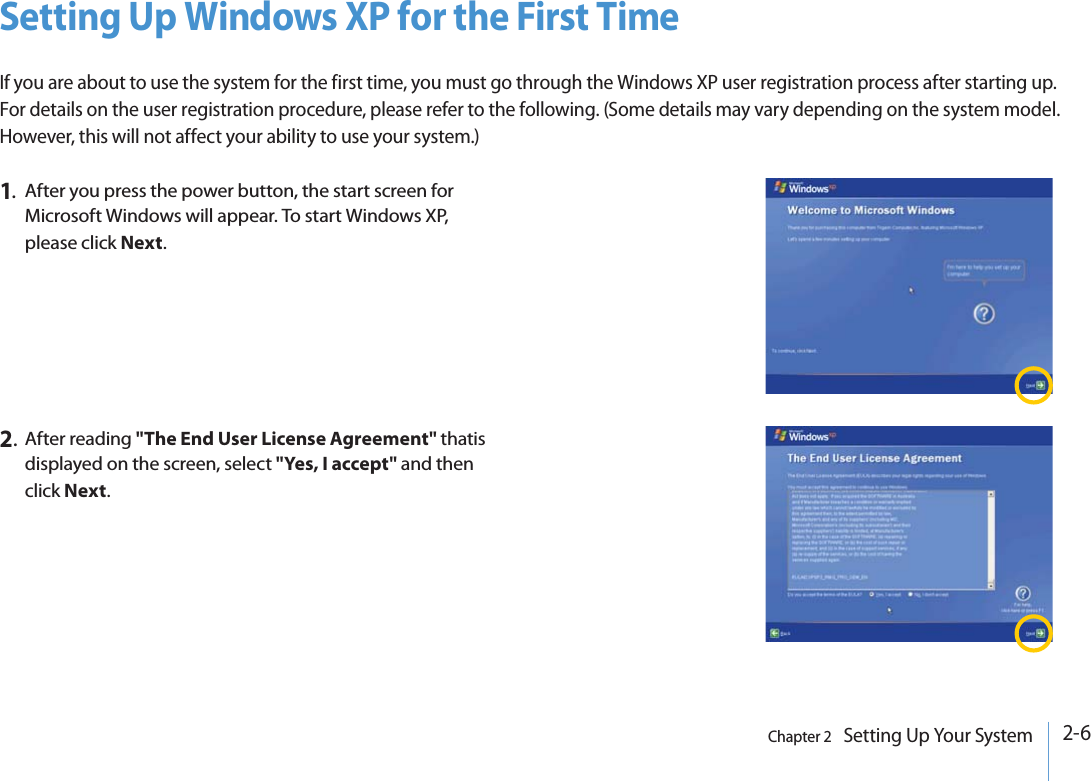
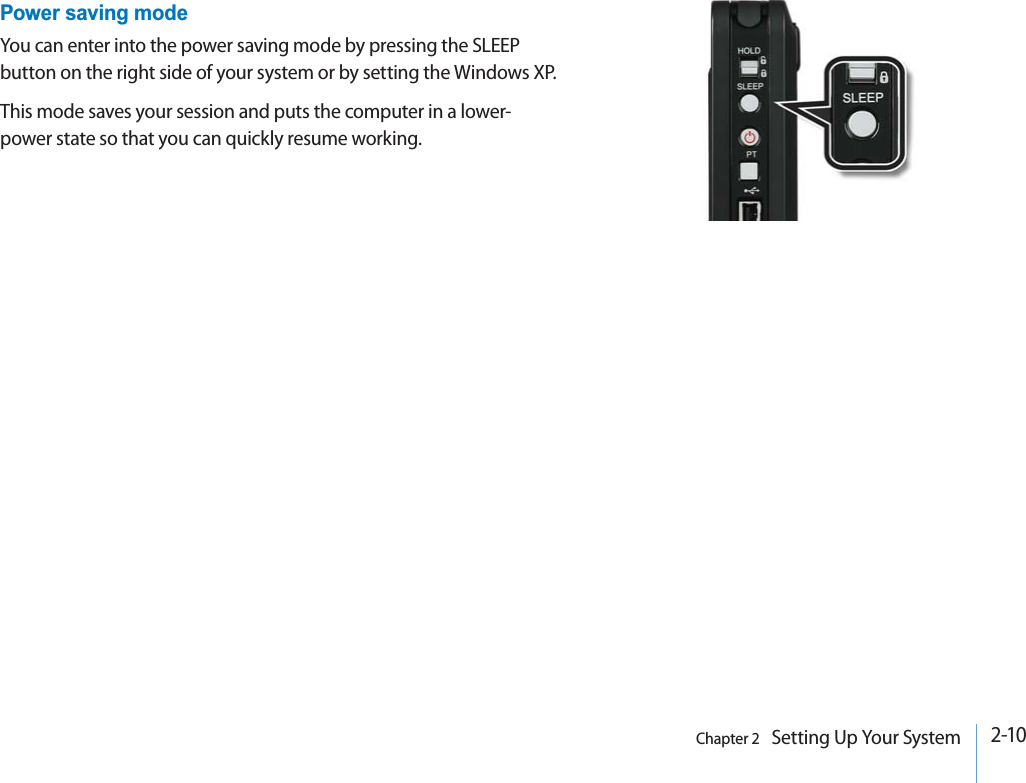

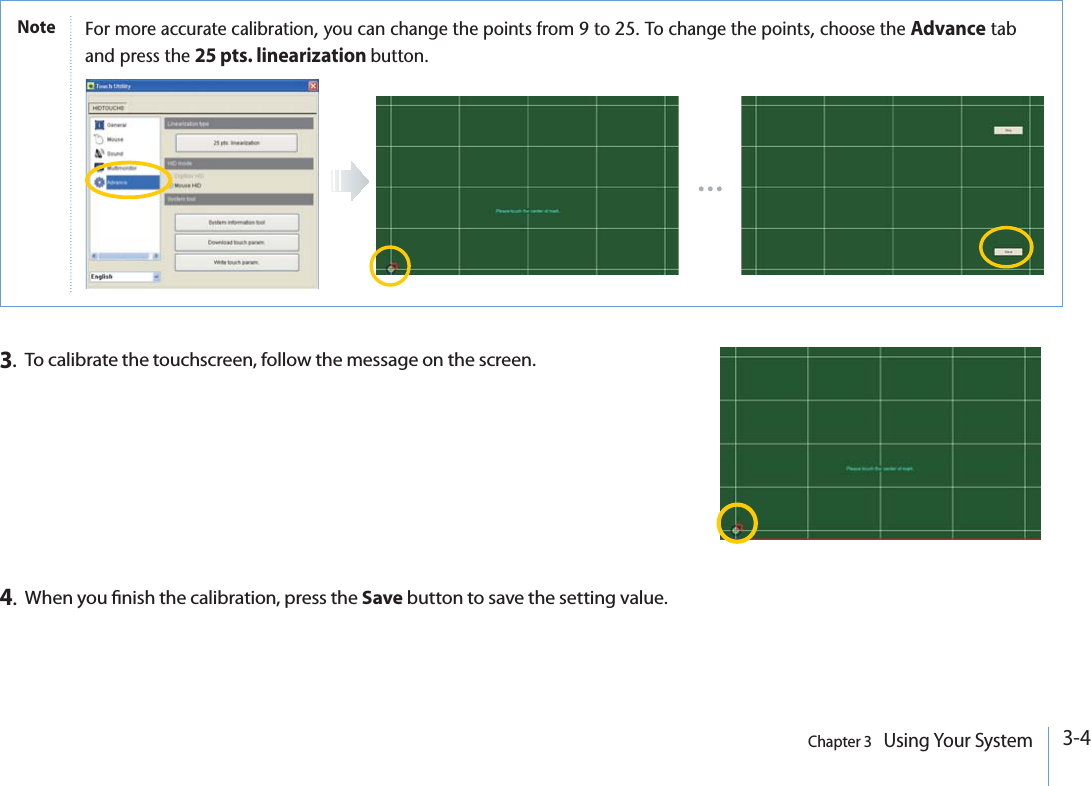
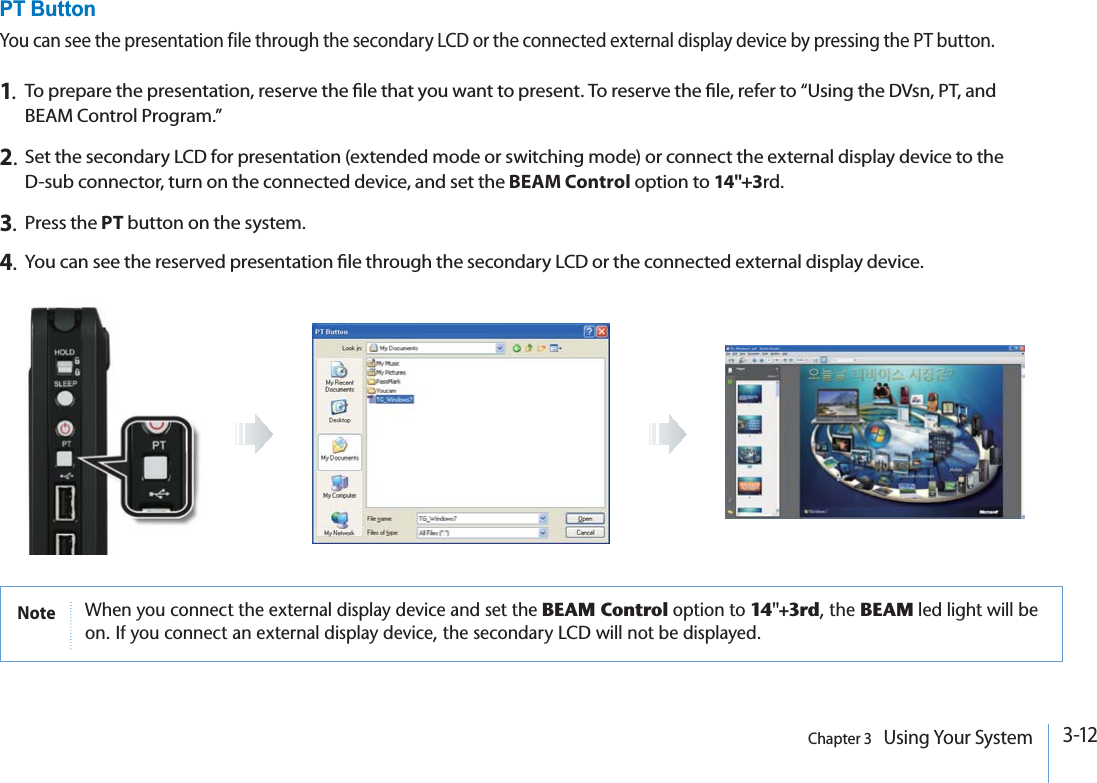
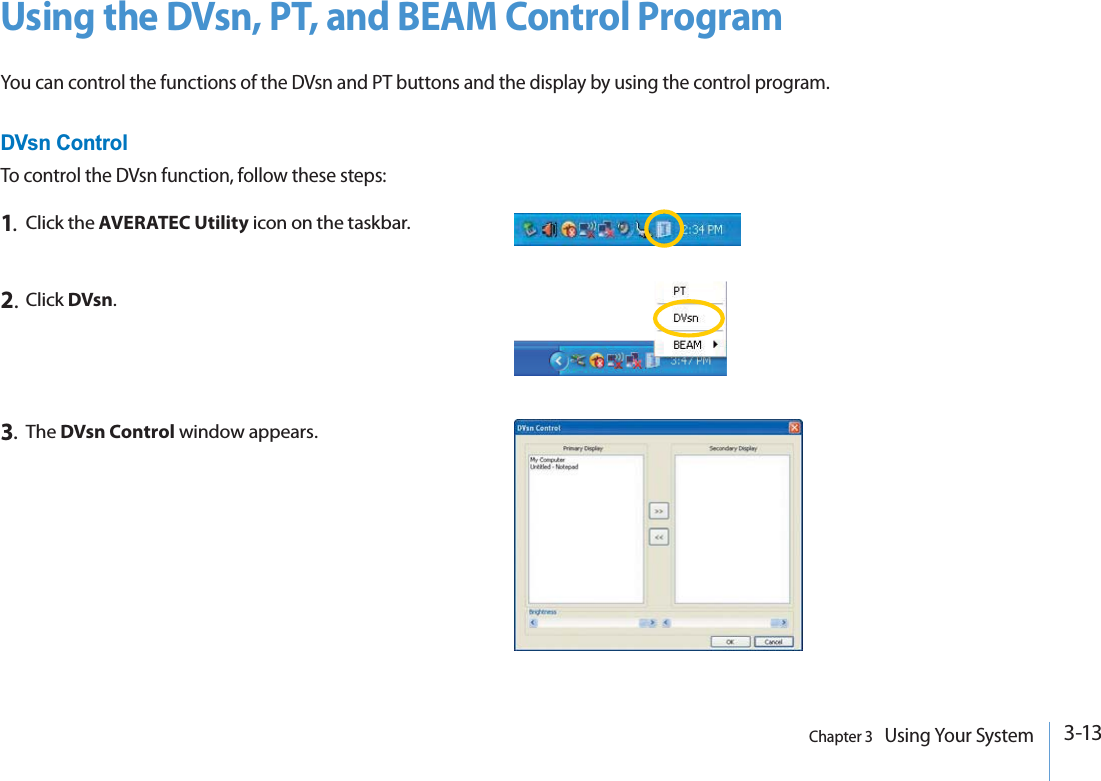
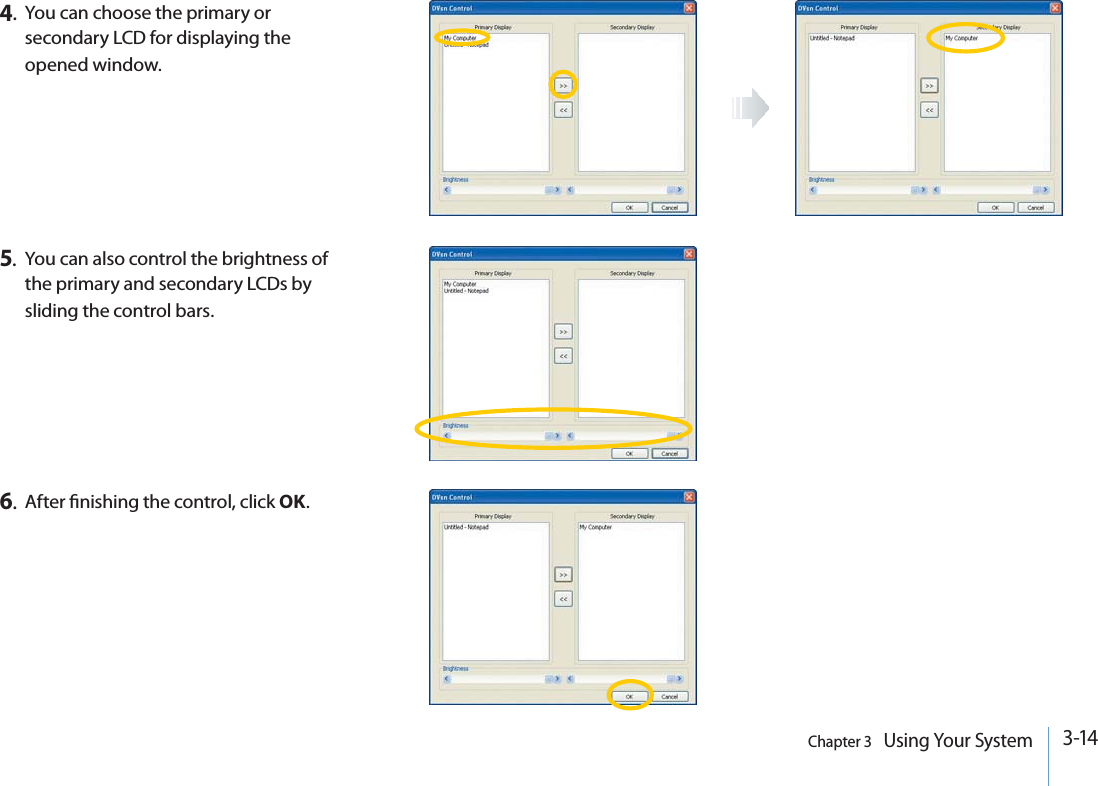
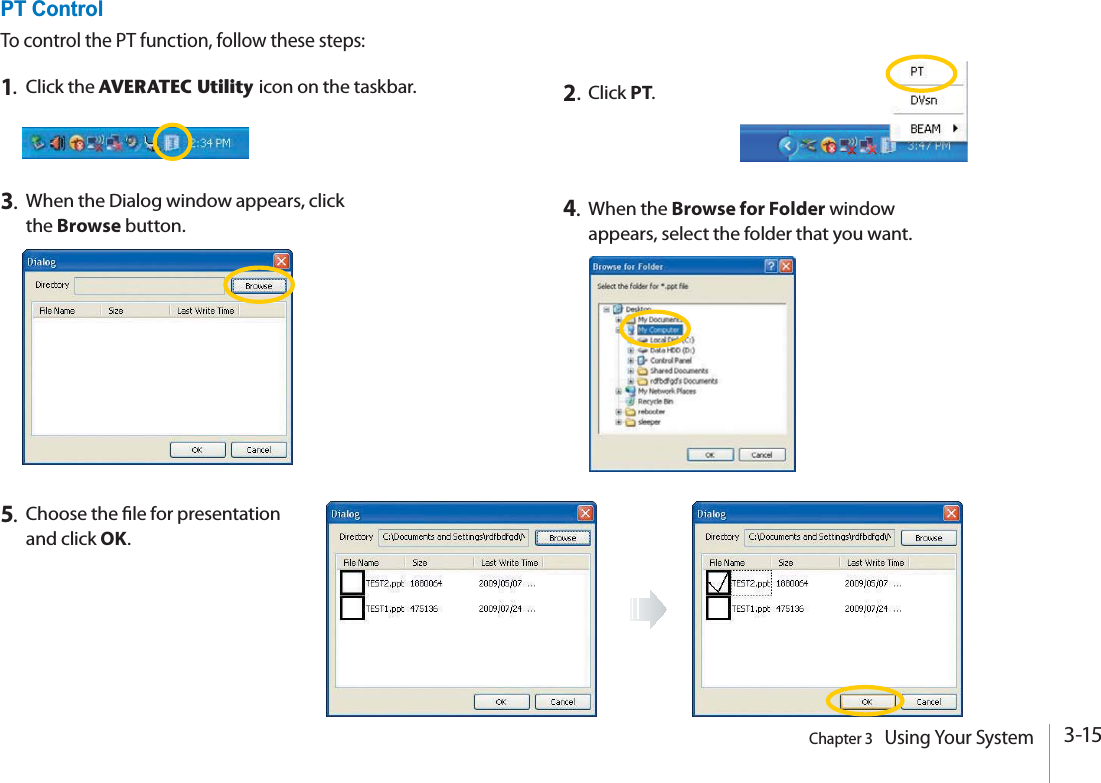


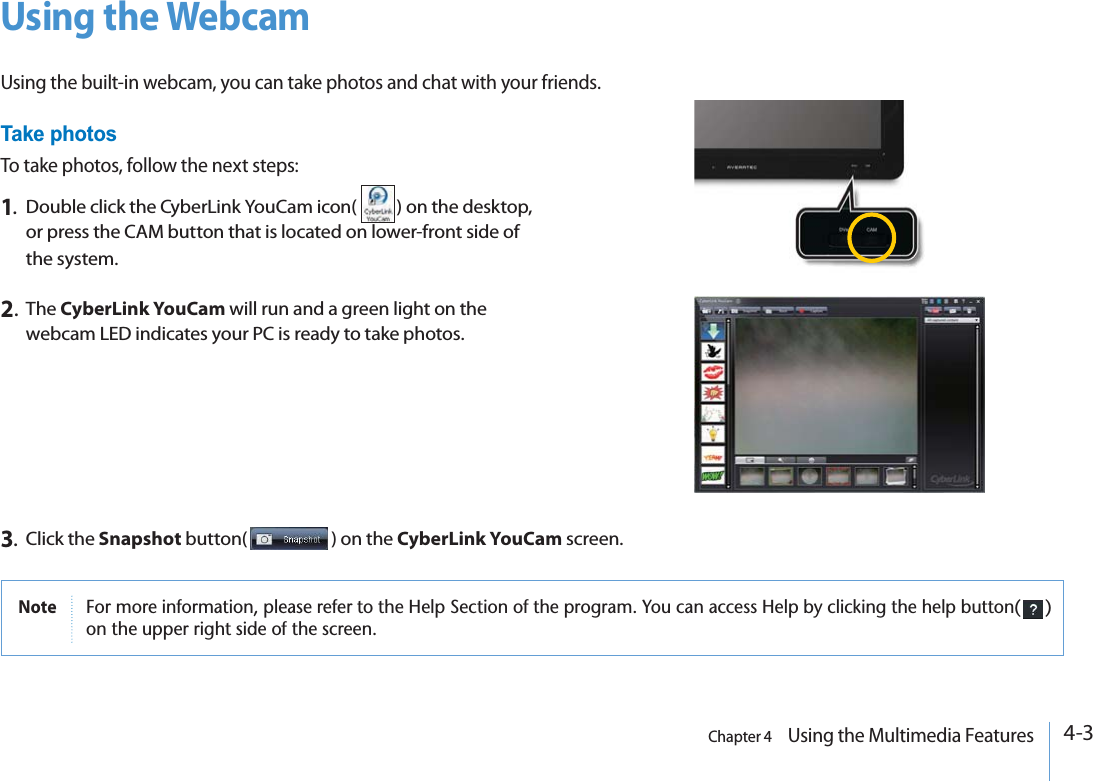
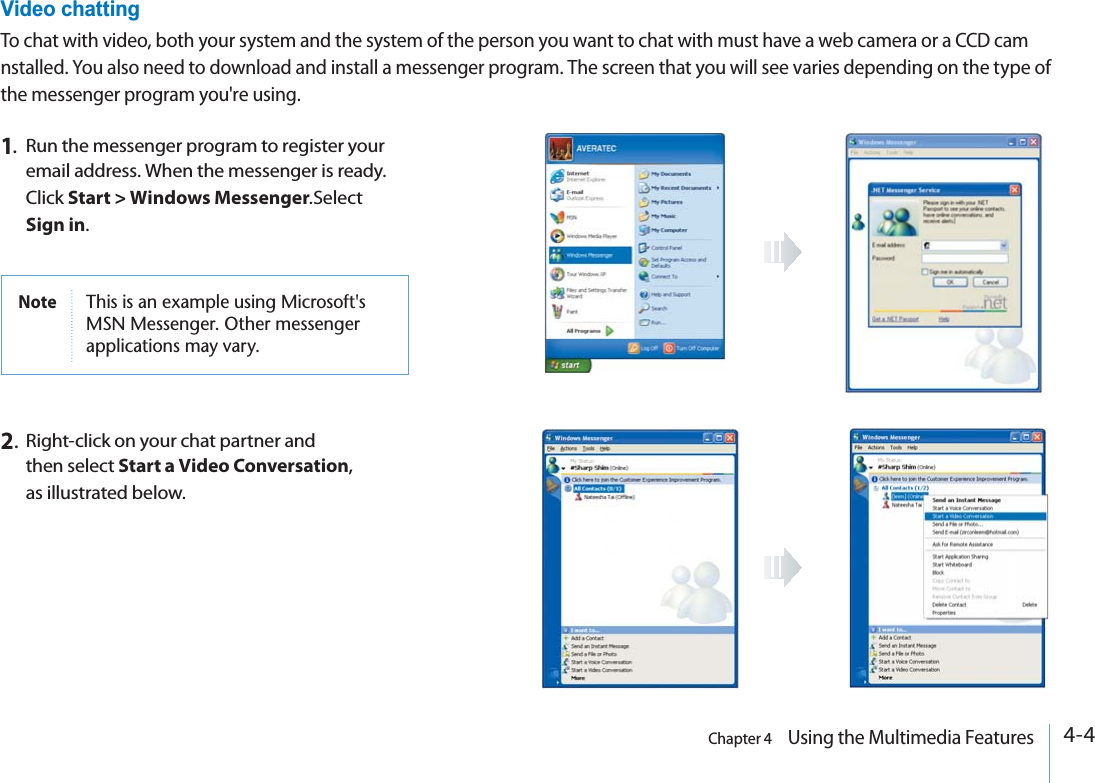
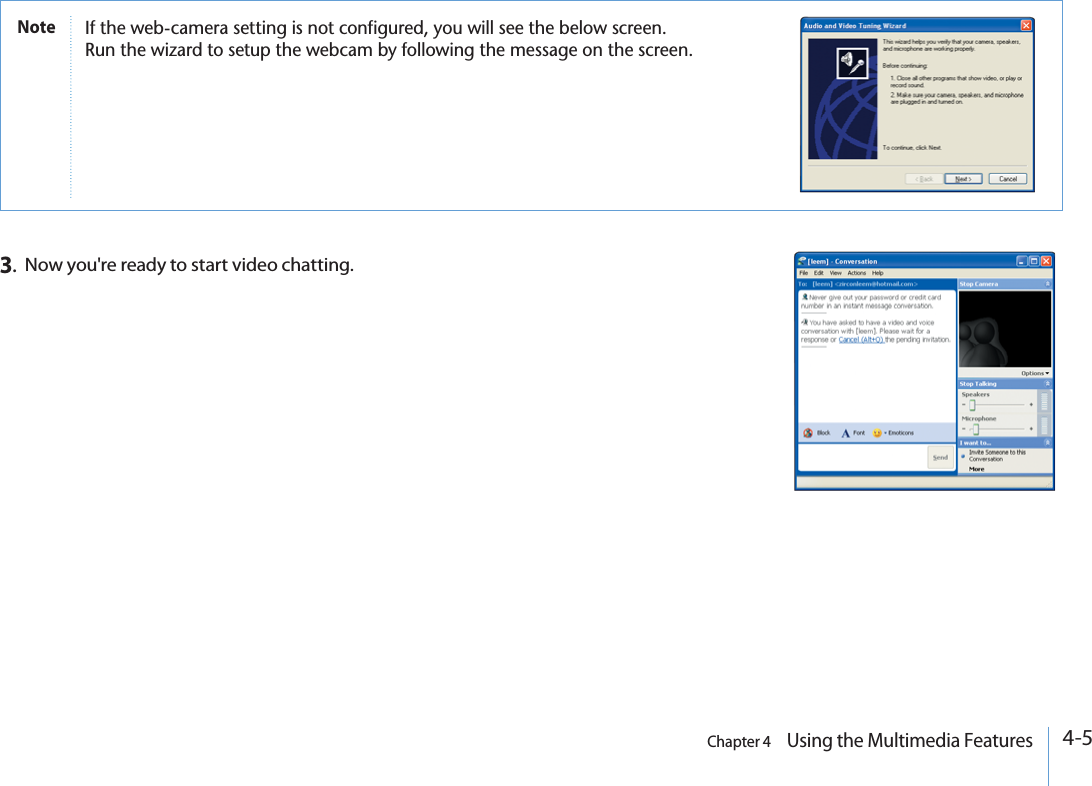
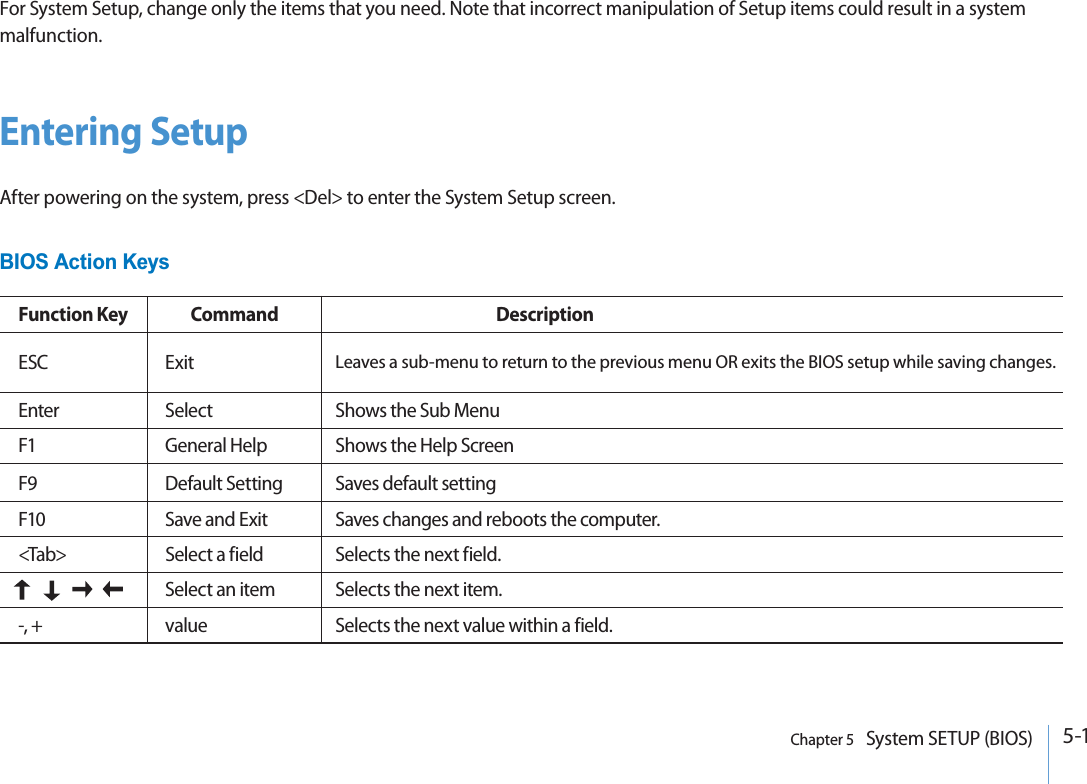
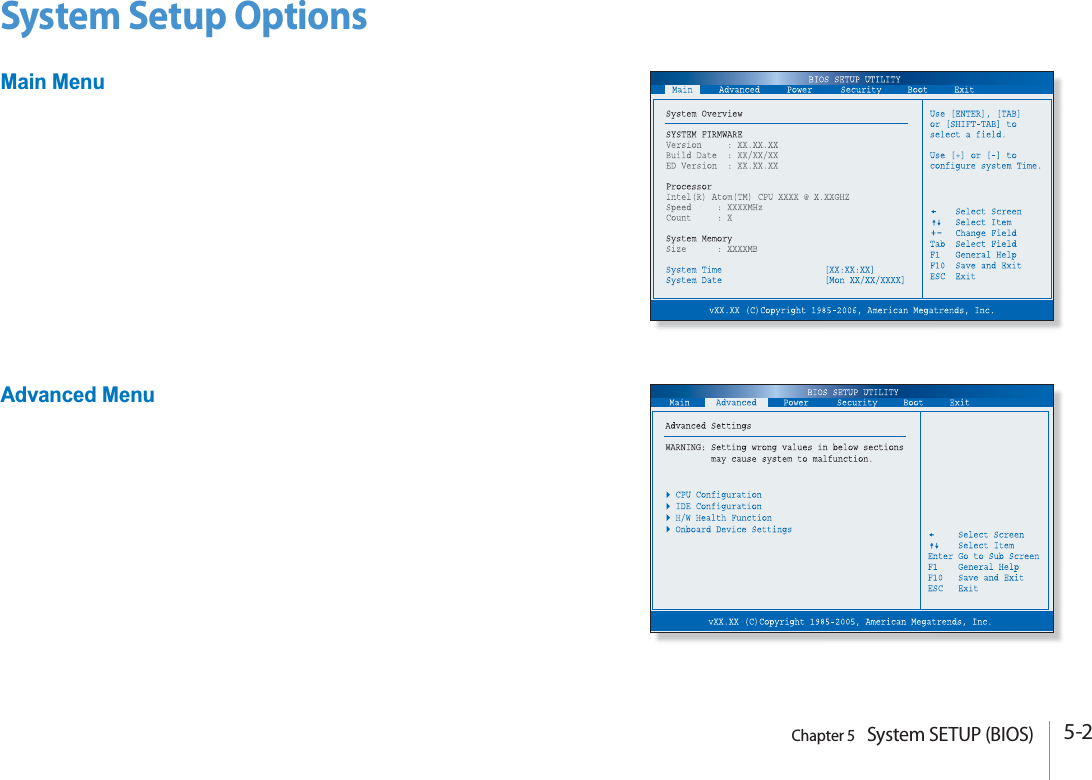
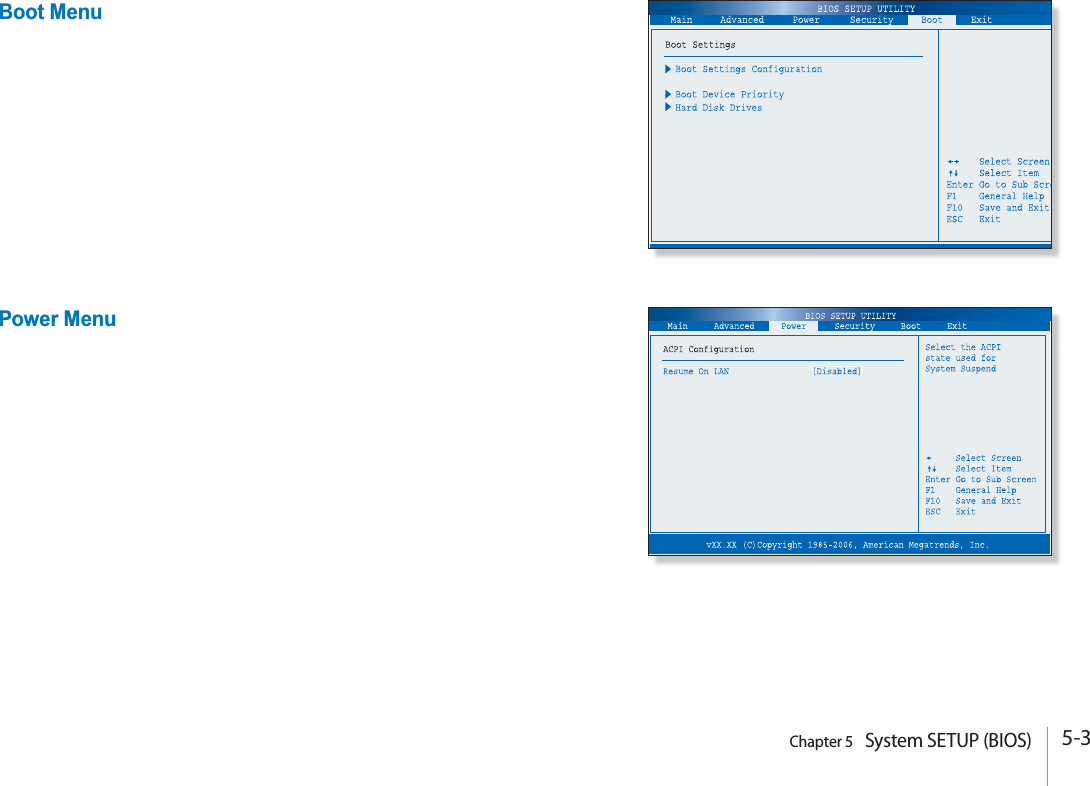
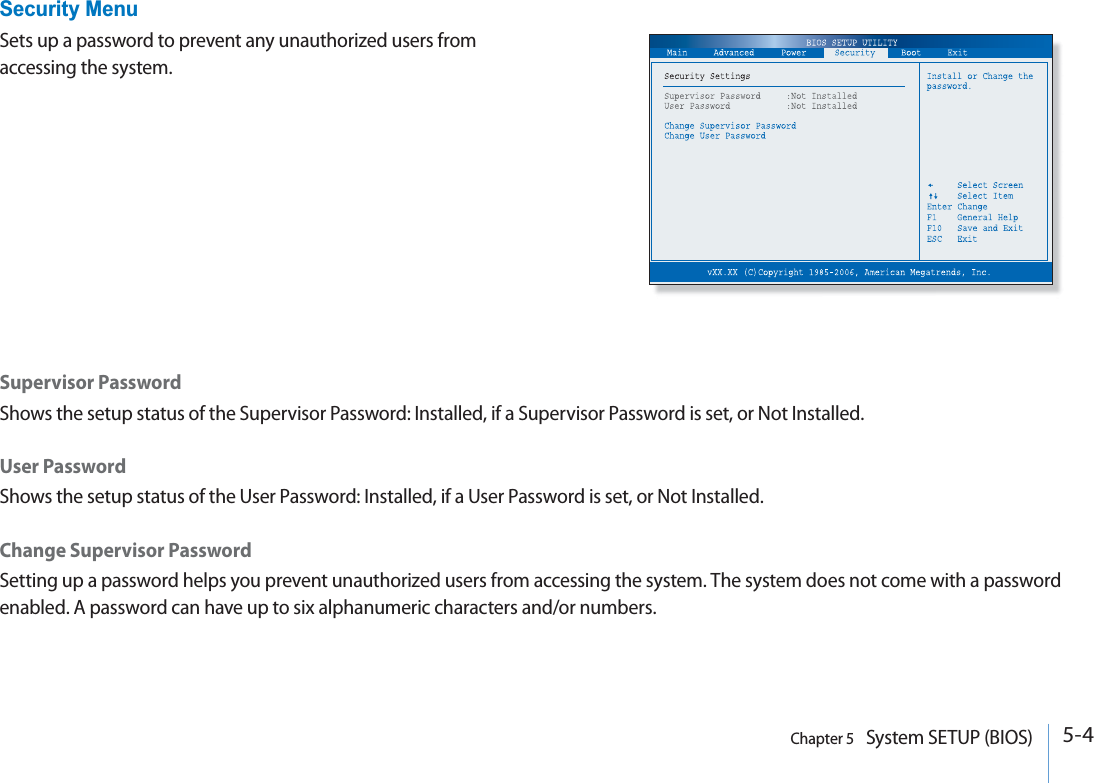
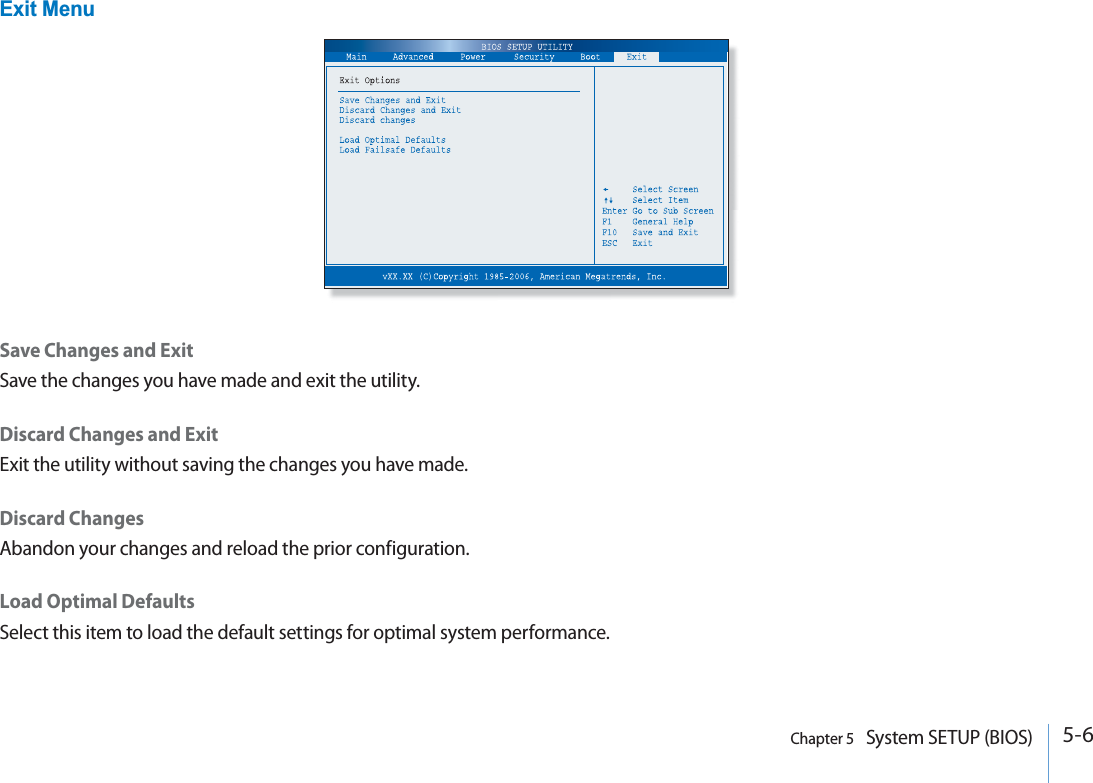
![5-5Chapter 5 System SETUP (BIOS)Set up Supervisor Password1.On the initial System Setup screen, Go to Change Supervisor Password, and then press Enter.2.On the following screen, enter the password and then press Enter.Then enter the same password again and press Enter.Enter New PasswordConfirm New Password3.If you entered the correct password, the following window will appear. Press Enter.This completes setting up a password.Password installed[OK]The Supervisor Password is at a higher level than the User Password.](https://usermanual.wiki/TriGem-Computer/PT1400/User-Guide-1184298-Page-70.png)