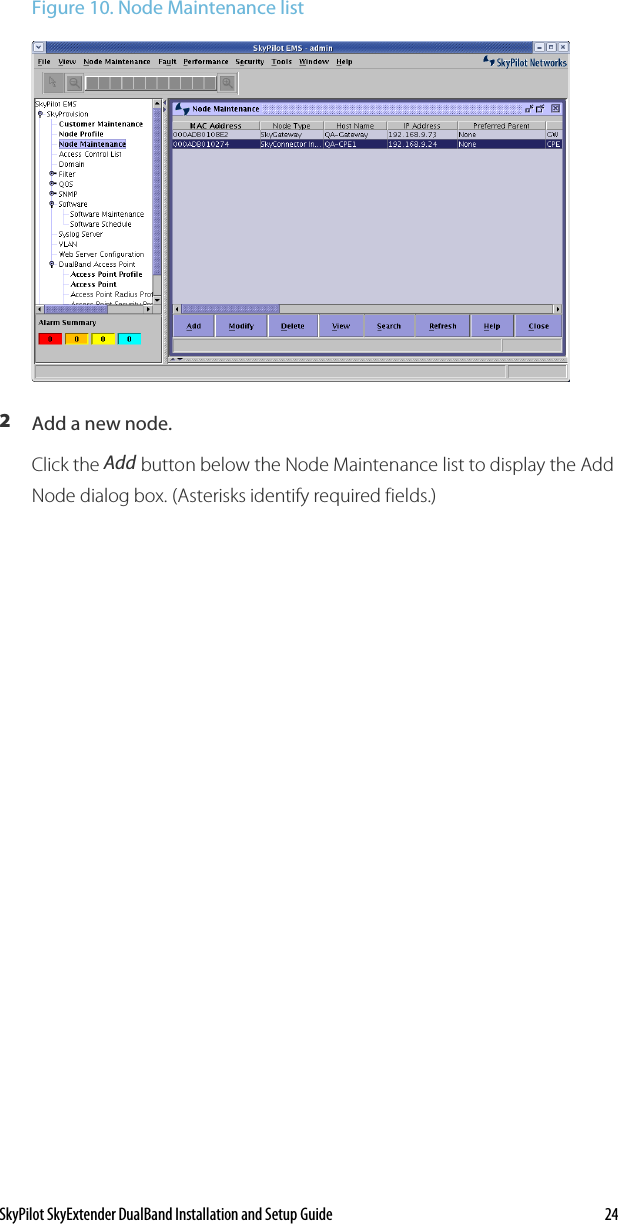
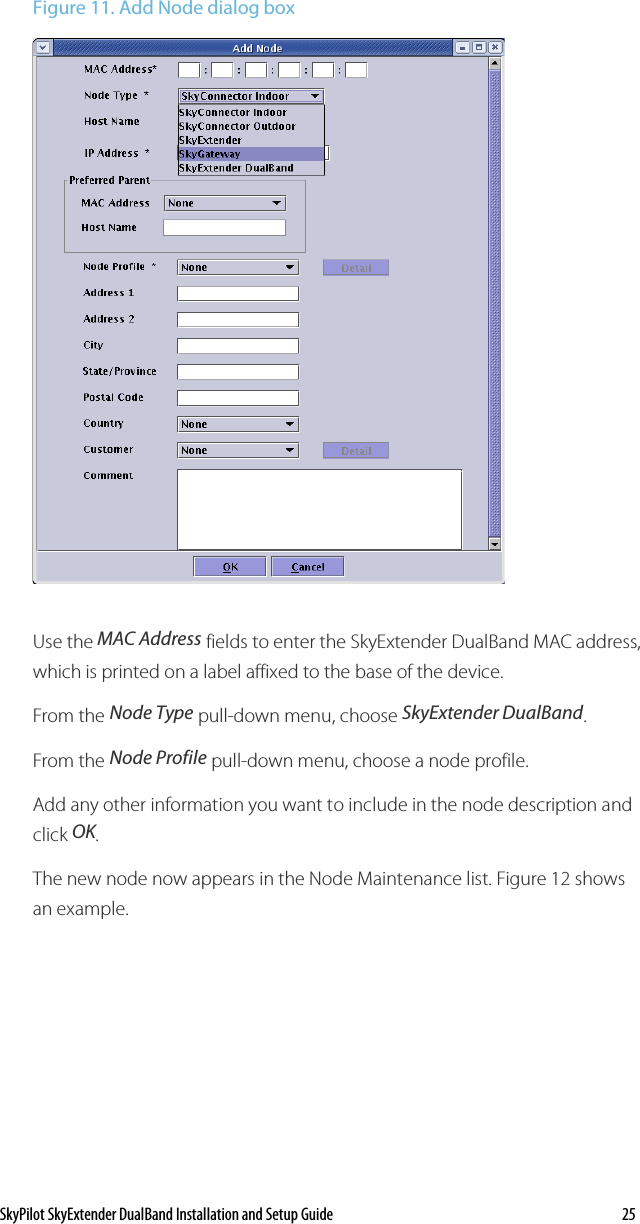
Trilliant Networks DBE1010 Dual Band 2.4GHz/5Ghz Wireless LAN User Manual dualband guide 010406
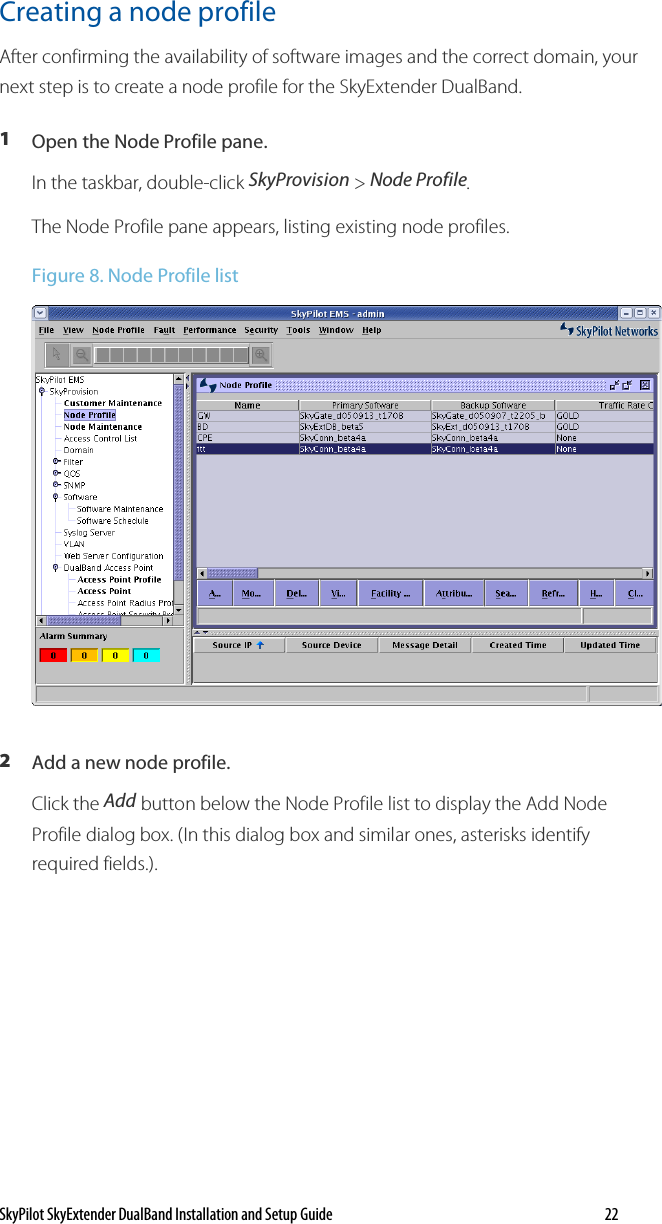
Trilliant Networks, Inc. Dual Band 2.4GHz/5Ghz Wireless LAN dualband guide 010406
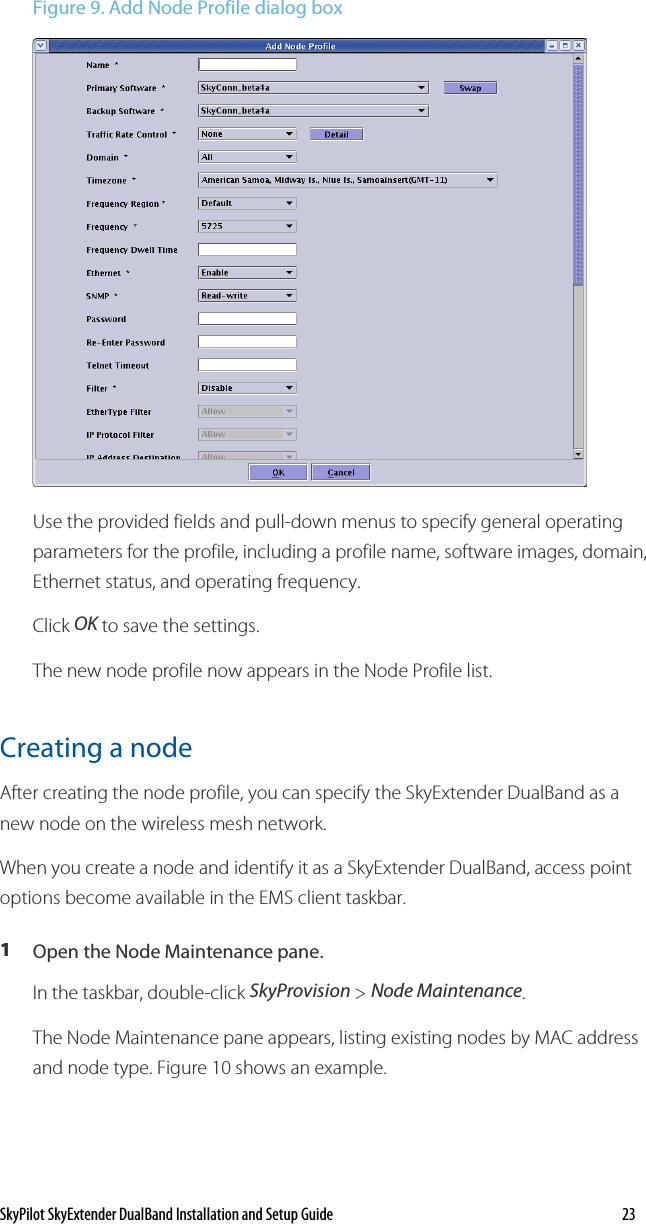
UserManual.wiki
>
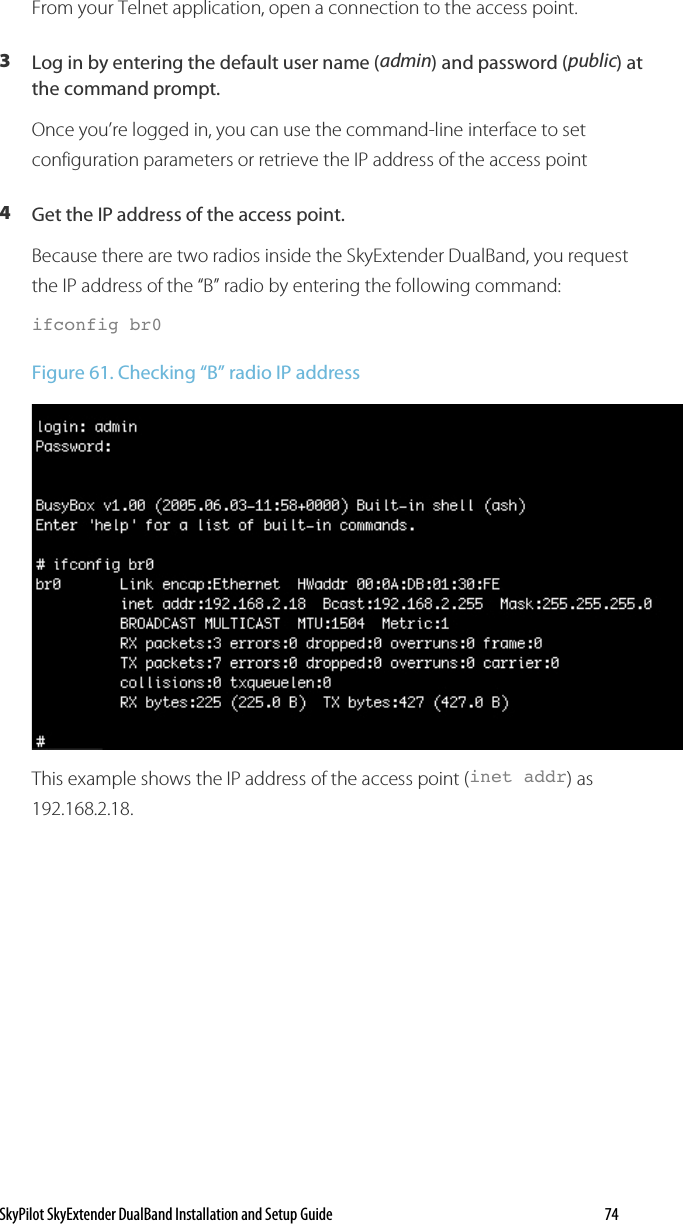
Trilliant Networks
>
DBE1010 User Manual
>
Users Manual
Contents
1.
Users Manual
2.
Manual
Users Manual
Navigation menu
Upload a User Manual
Namespaces
Wiki Guide
HTML
PDF
Info
Views
User Manual
Discussion / Help
Navigation

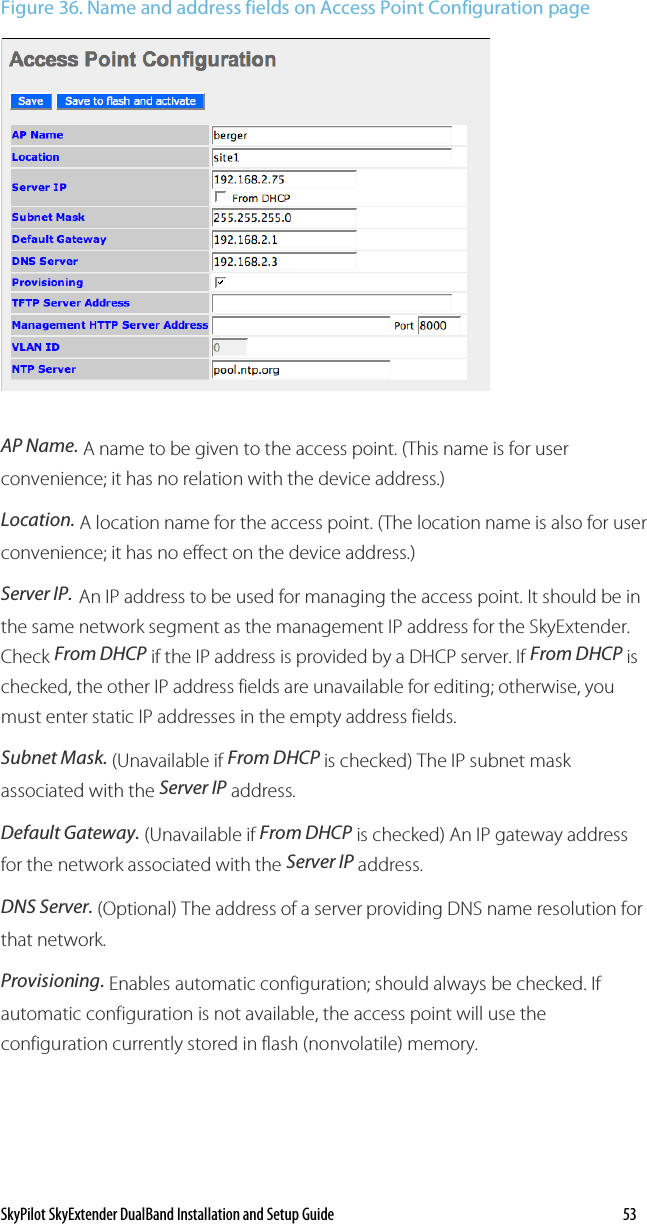
![FCC Radio Frequency Interference Statement SkyExtender DualBand FCC Number: RV7-DBE1010 This equipment has been tested and found to comply with the limits for a class B digital device, pursuant to part 90 of the FCC Rules. These limits are designed to provide reasonable protection against interference in a residential installation. This equipment generates, uses, and can radiate radio frequency energy and if not installed, and used in accordance with the instructions, may cause harmful interference to radio communications. However, there is no guarantee that interference will not occur in a particular installation. If this equipment does cause harmful interference to radio or television reception, which can be determined by turning the equipment off and on, the user is encouraged to try and correct the interference by one or more of the following measures: • Reorient or relocate the receiving antenna. • Increase the distance between the equipment and the receiver. • Connect the equipment to an outlet on a circuit different from that to which the receiver is connected. • Consult the dealer or an experienced radio/TV technician for help. This equipment has been certified to comply with the limits for a class B computing device, pursuant to FCC Rules. In order to maintain compliance with FCC regulations, shielded cables must be used with this equipment. Operation with non-approved equipment or unshielded cables is likely to result in interference to radio and TV reception. The user is cautioned that changes and modifications made to the equipment without the approval of manufacturer could void the user's authority to operate this equipment. Maximum Permissible Exposure In order to meet Industry Canada, FCC and other regulatory requirements for RF Exposure, the SkyGateway and SkyExtender units must be located a minimum of 21 cm (8 inches) from all persons. This distance is determined based upon the aforementioned 1 mW/cm2 limit, measured data, and the following far-field peak power density equation: []SdGP )20/)((10282.0 += where: d = MPE distance in cm P = Power in dBm (peak) G = Antenna Gain in dBi S = Power Density Limit in mW/cm2 (1 mW/cm2) Certified laboratory measurements indicate that the FCC’s Power Density Limit of 1 mW/cm2 is met at a distance of much less than 20 cm (8 inches). However the minimum distance for fixed or mobile transmitters is 20 cm even if calculations indicate the MPE distance is much less. FCC 15.203 statement Because this device uses standard RF connectors for the external removable antennas, professional installation is required. IC RSS-210 statement This device has been designed to operate with the external antennas for the 2.4 GHz band listed below, and having a maximum gain of 7.4 dBi. Antennas not included in this list or having a gain greater than 7.4 dBi are strictly prohibited for use with this device. The required antenna impedance is 50 ohms. Approved antennas: Manufacturer Model Comet SF245 Comet SF245+12 Comet SF245+12x](https://usermanual.wiki/Trilliant-Networks/DBE1010.Users-Manual/User-Guide-656564-Page-2.png)