Trimble 613 HANDHELD GPS WITH 802.11b+g WLAN User Manual GeoExplorer 2005 Series Getting Started Guide
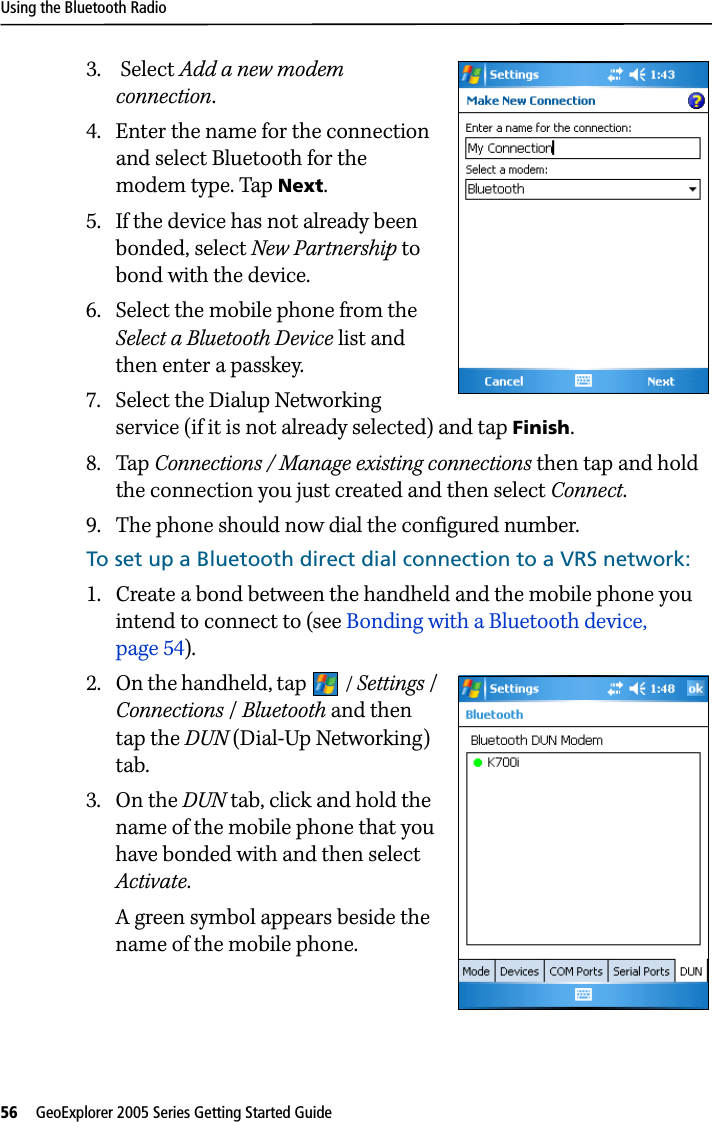
Trimble Navigation Ltd HANDHELD GPS WITH 802.11b+g WLAN GeoExplorer 2005 Series Getting Started Guide
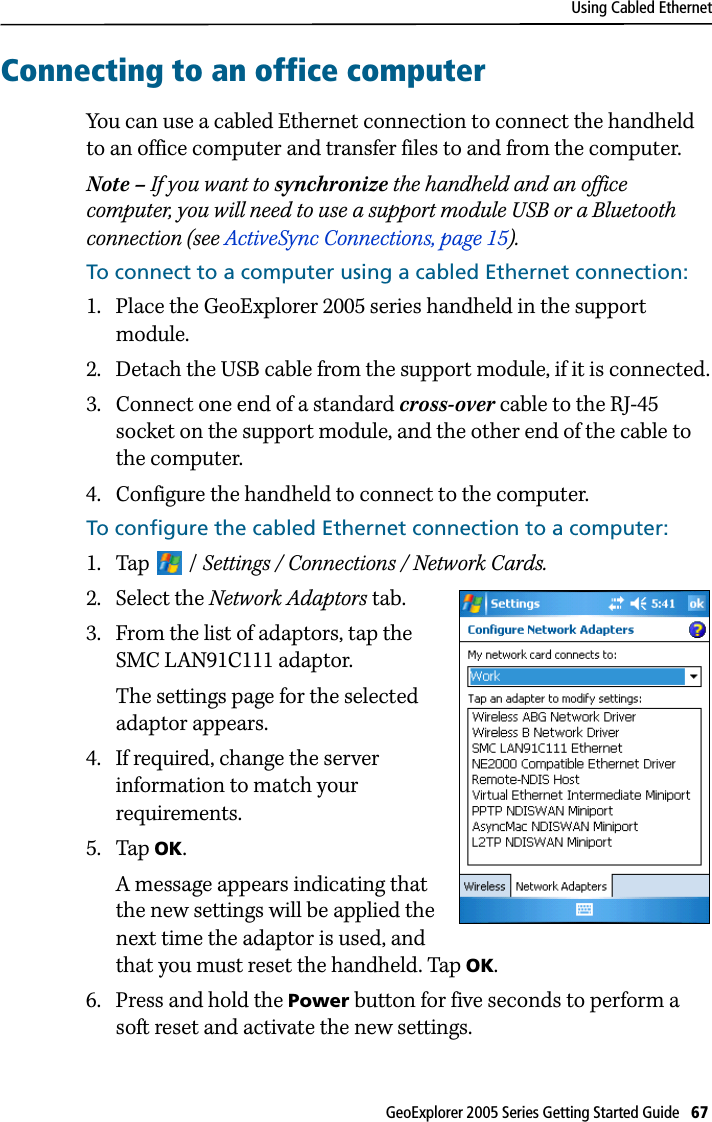
Trimble >
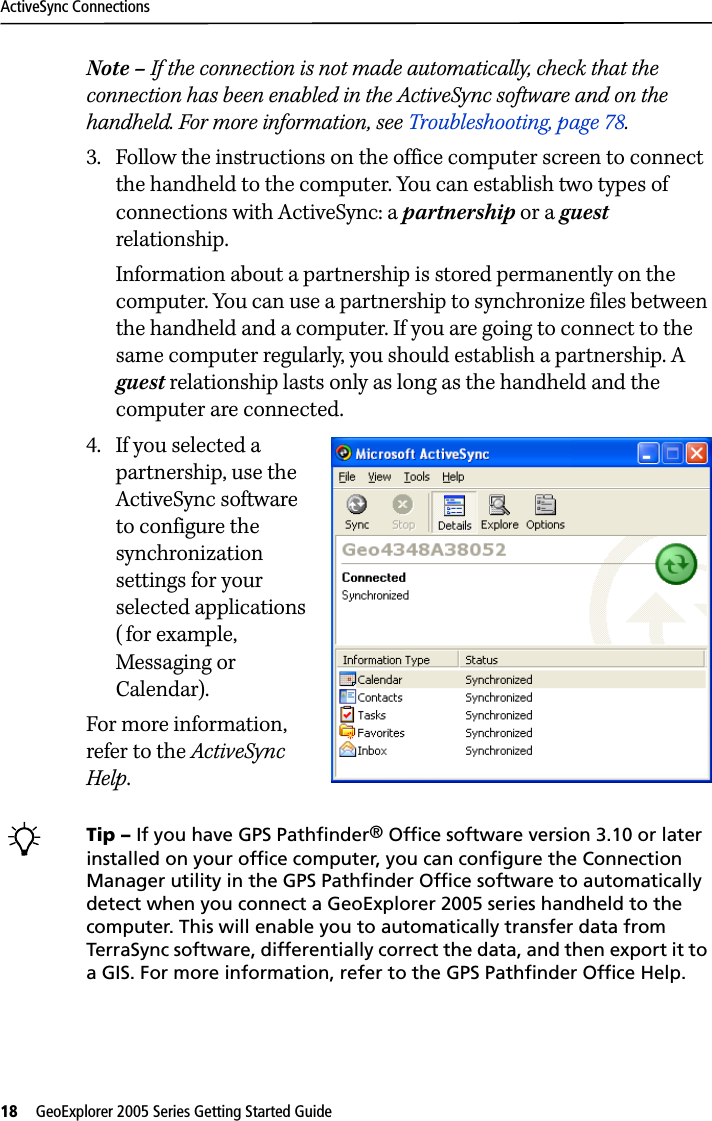
Contents
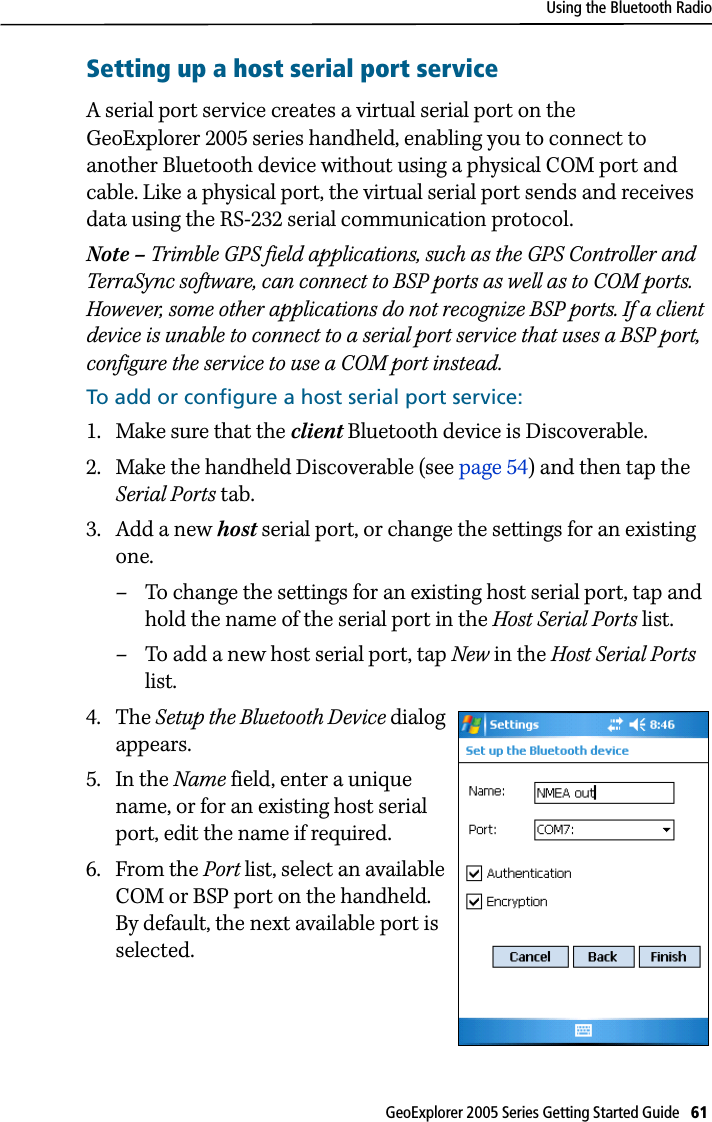
- 1. USERS MANUAL 1 OF 2
- 2. USERS MANUAL 2 OF 2
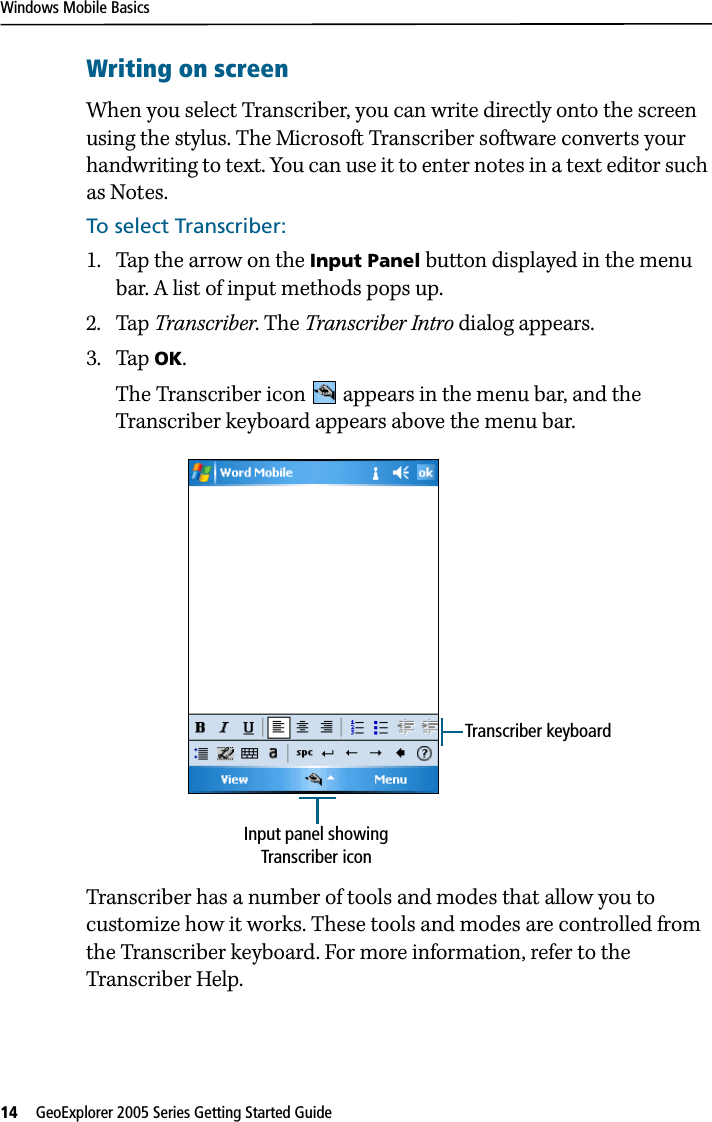
- 3. users manual 1
- 4. users manual 2
USERS MANUAL 1 OF 2