TwinMOS Technologies WGBPR1 802.11 b/g Mini-PCI Card User Manual G101 WLAN Card Engl
TwinMOS Technologies Inc. 802.11 b/g Mini-PCI Card G101 WLAN Card Engl
Contents
- 1. User Manual part 1
- 2. User Manual part 2
User Manual part 1
802.11b/g Series
Wireless LAN Adapter
(For OEMs use only) User’s Manual

G101 Series WLAN Card
Page 1
Contents
PACKAGE CONTENTS………………………........................................................2
INTRODUCTION.................……………………......................................................3
G101 WIRELESS NETWORK SCENARIOS………………………...…………4
HARDWARE INSTALLATION…………………………………….……...................7
SOFTWARE INSTALLATION FOR WINDOWS (XP/2000/98SE)…..................10
CONFIGURATION UTILITY.....…………....................................…………….40
SOFTWARE INSTALLATION FOR LINUX....………….…......….…........……….56
TROUBLESHOOTING.......…………....................................……………........…..59
TECHNICAL SPECIFICATIONS.…………...........…………............................…..60
FCC CAUTION……………………………………………………………….........…..61

G101 Series WLAN Card
Page 2
PACKAGE CONTENTS
Unpack your G101 WLAN adapter kit and verify that all items are present.
zG101 MiniPCI Wireless LAN Adapter
zUser’s Manual (on CD)
zDriver (on CD)
If any of the items described appear to be damaged or missing, please contact TwinMOS

G101 Series WLAN Card
Page 3
INTRODUCTION
The G101 WLAN adapter is a wireless network client that complies with the IEEE 802.11b/g standard
on wireless LANs. The IEEE 802.11b/g standards compliance means this adapter gives you the
flexibility to connect it to any 802.11b/g network. The IEEE 802.11b/g Ethernet standard allows you to
have network connection speed of up to 11Mbps, dependent upon the distance between wireless adapters,
the configuration of yo ur working environment, or the capabilities or limitations of the applicable
network systems.
This G101 WLAN Adapter supports following WLAN features:
zAutomatic transmit data rate select mechanism in the transmit range of 1, 2, 5.5, 6, 9, 12, 18, 24,
36, 48 and 54 Mbps.
zCenter frequency channel selection (2.4 GHz)
zRoaming over multiple channels.
zSupports MiniPCI interface for G101
zSupports power save mode
zSupports WPA
zSupports 64/128/152-bit Wired Equivalent Privacy (WEP), TKIP, AES data encryption.
This G101 comes with software drivers for the most popular Microsoft Windows operating systems and
can be integrated into a larger network, running Windows XP, Windows 2000, Windows ME, or
Windows 98 in either Ad-Hoc mode or infrastructure mode. This manual provides a quick introduction
to wireless technology and its application as it relates to networking. Take a moment to read through this
manual and familiarize you with wireless technology.
G101 Series WLAN Card
Page 4
G101 WIRELESS NETWORK SCENARIOS
The G101 WLAN adapter offers to:
zConnect an Ad-Hoc workgroup of wireless computing devices (see Figure 1-1 on page 6).
zConnect to a Small Office/Home Office (SOHO) network that includes a Residential Gateway (RG)
access point (see Figure 1-2 on page 7).
zConnect to a Local Area Network (LAN) Infrastructure that includes Access Points, or other IEEE
802.11 compliant LAN systems (see Figure 1-3 and Figure 1-4).
zExpand the capabilities of an Access Point, supporting wireless devices that have been equipped with
G101.
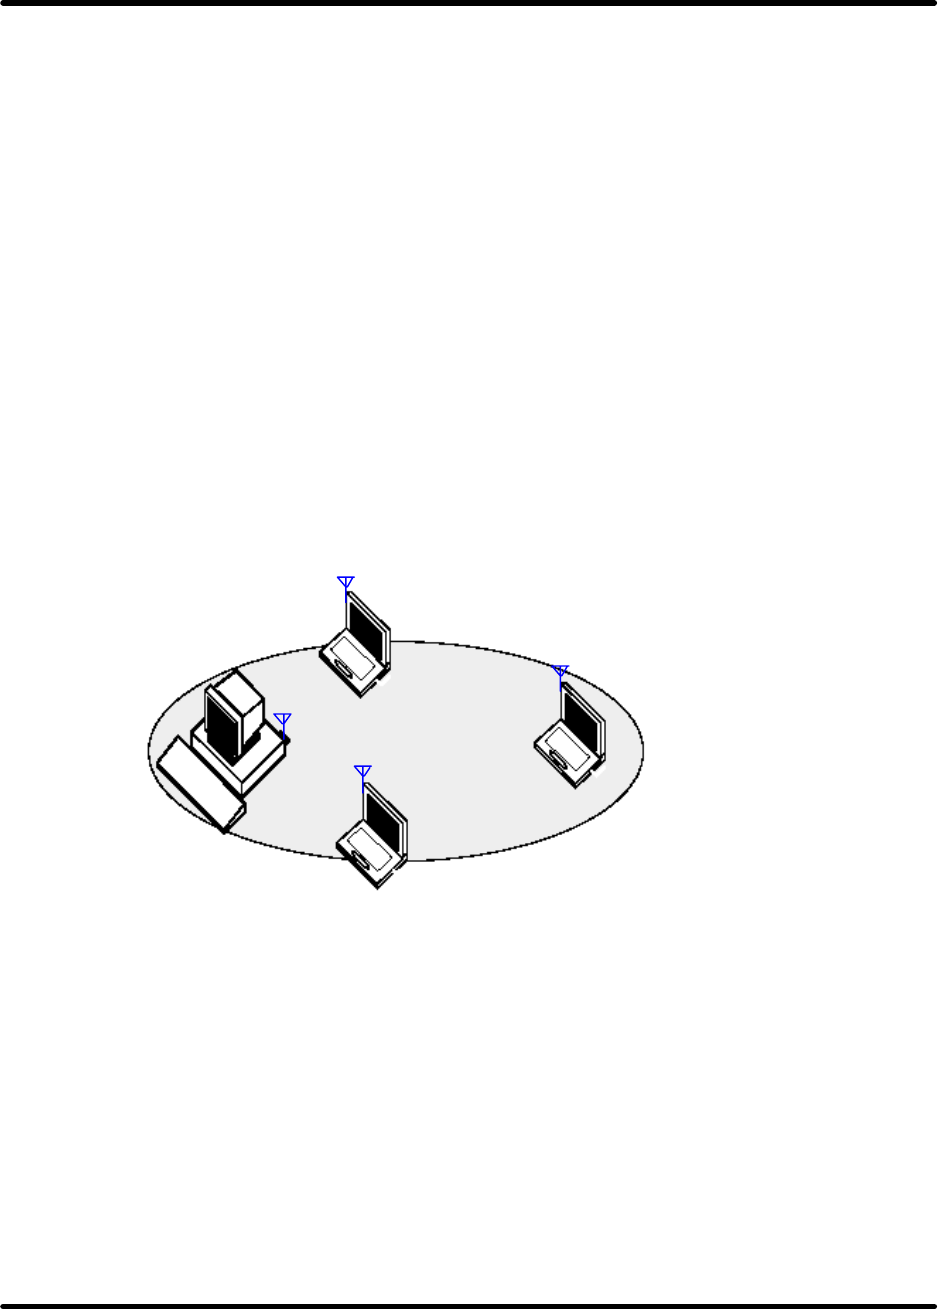
Ad-Hoc Workgroup
The Ad-Hoc workgroup configuration facilitates to quickly set up a small wireless workgroup, where the
workgroup participants can exchange files using features like “Files and Printer Sharing” as supported
by Microsoft Networking.
Figure 1-1 Ad-Hoc Wireless Workgroup
This option offers to setup a temporary or ad-hoc network in environments where no access points are
available (for example, in Small Office/Home Office (SOHO) environments). As long as the stations are
within range of one another, this is the easiest and least expensive way to set up a wireless network.
G101 Series WLAN Card
Page 5
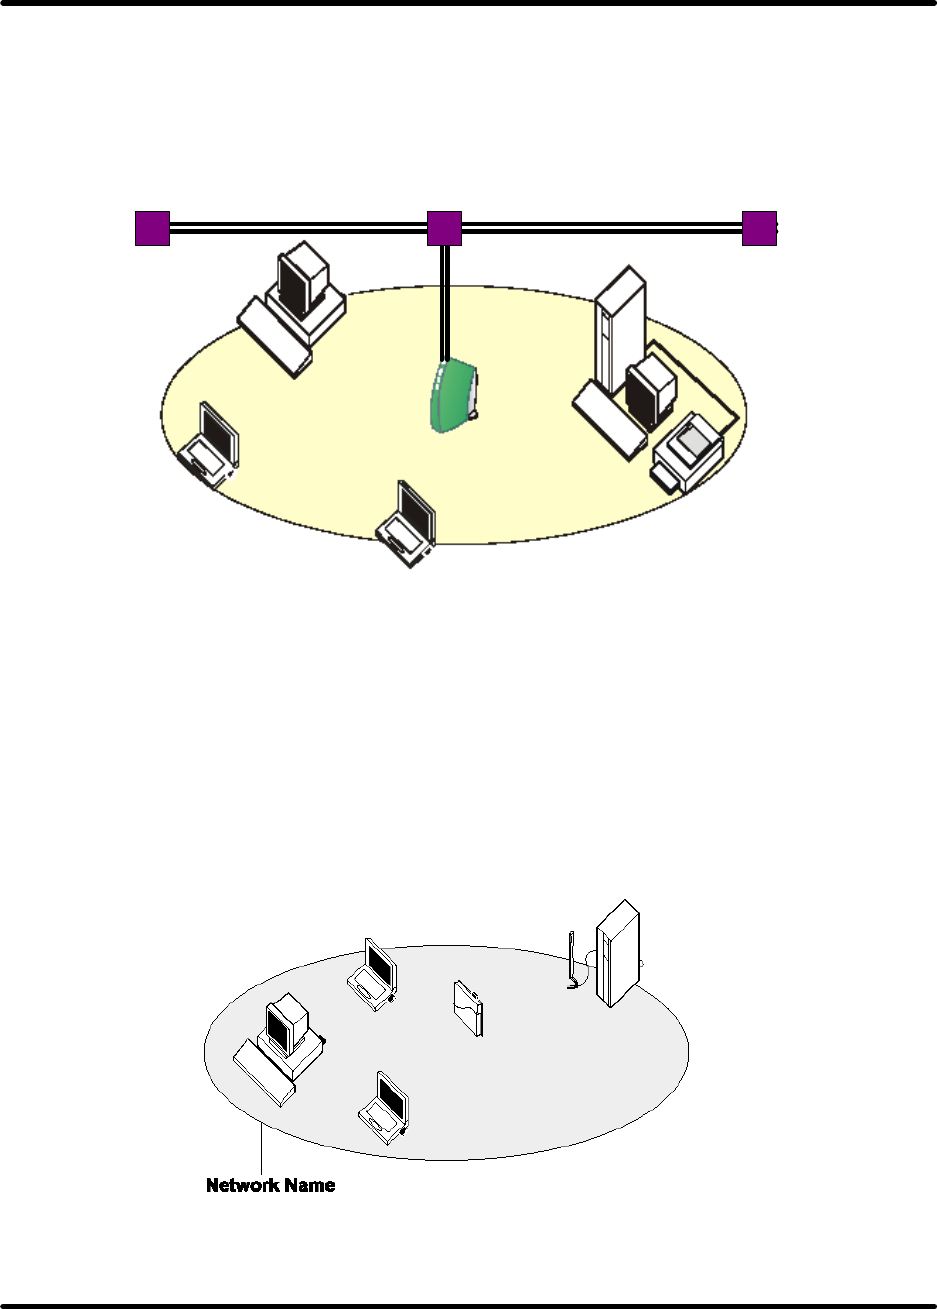
Home Networking
With the G101 WLAN adapter, wireless access to the Internet or other computing devices is fingertips.
What needs to do is to connect the wireless devices to an external cable, an xDSL or a ISDN modem and
you are ready to:
zShare files and printers, and
zAccess the Internet
Figure 1-2 Connect to a Residential Gateway (RG)
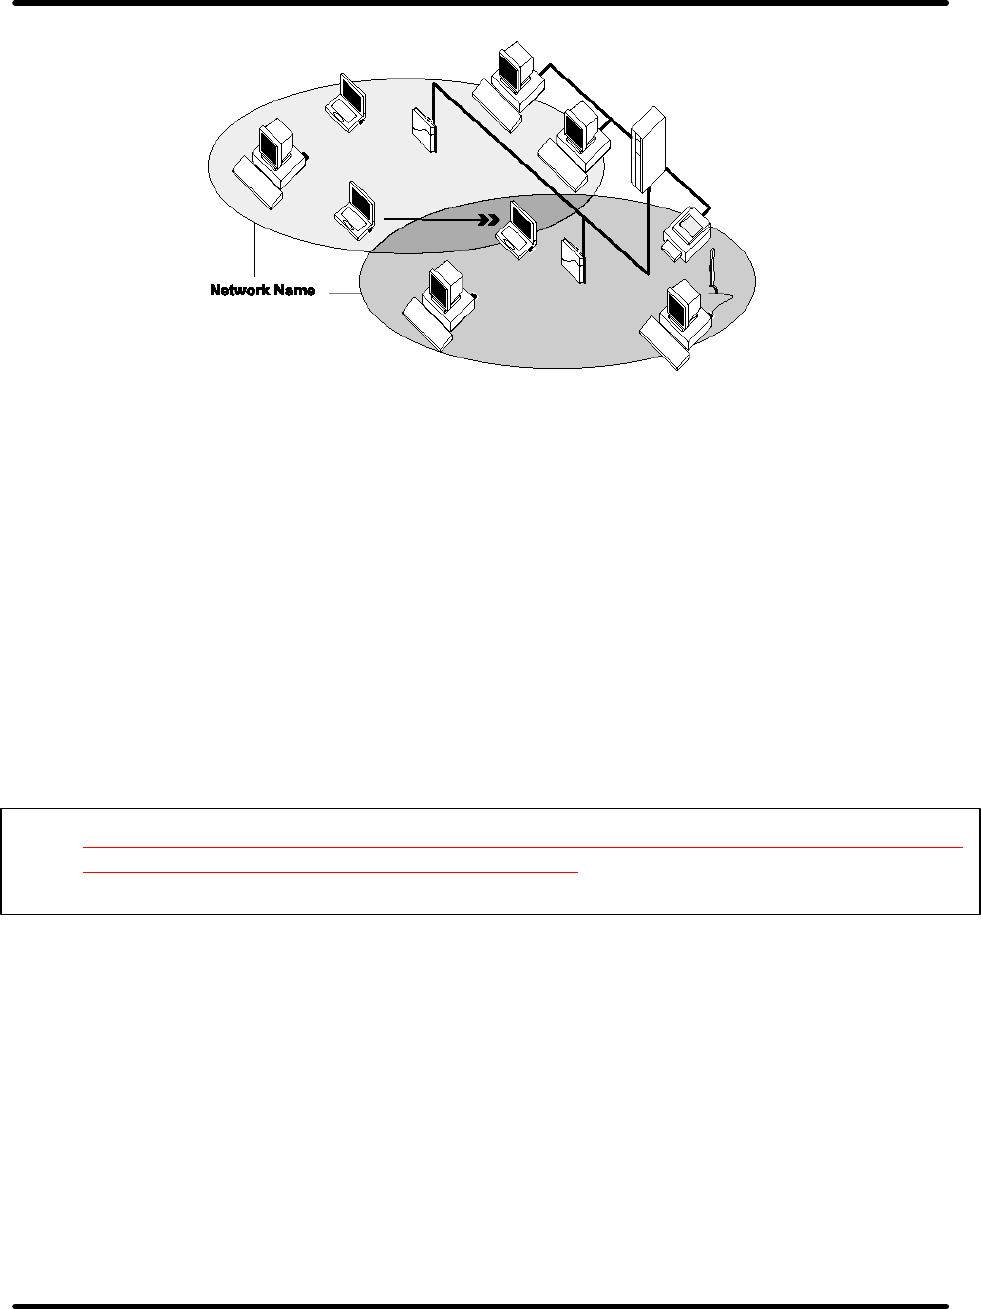
Enterprise Networking
With the 11 Mbps Wireless LAN access point, one can connect to a corporate Local Area Network
(LAN) infrastructure to have wireless access to all network facilities. LAN Infrastructures may either be:
zStand-alone wireless LANs (Figure 1-3).
zWireless network infrastructures connected to an existing Ethernet network (Figure 1-4).
Figure 1-3 Stand Alone Wireless LAN
xDSL
G101 Series WLAN Card
Page 6
Figure 1-4 LAN Infrastructure
It’s Easy
The G101 functions like any standard wired Ethernet card, but G101 does not need any wires!
Where an Ethernet card requires a cable connection to a hub and/or patch panel, the cable physically ties
user down to the location of the wired connection.
G101 offers connection to a Local Area Network (LAN) system from anywhere within the wireless
coverage area. Expanding or re-designing user network is easy: Add or relocate access point, power-up
your (new) wireless device, and the job is done!
Unlike Ethernet, G101 will allow you to roam throughout the network while remaining connected to the
LAN.
Note The G101 wireless adapter is a radio product. Refer to the flyer ”Information to the User” for
regulatory information that may apply in your country.
G101 Series WLAN Card
Page 7
HARDWARE INSTALLATION
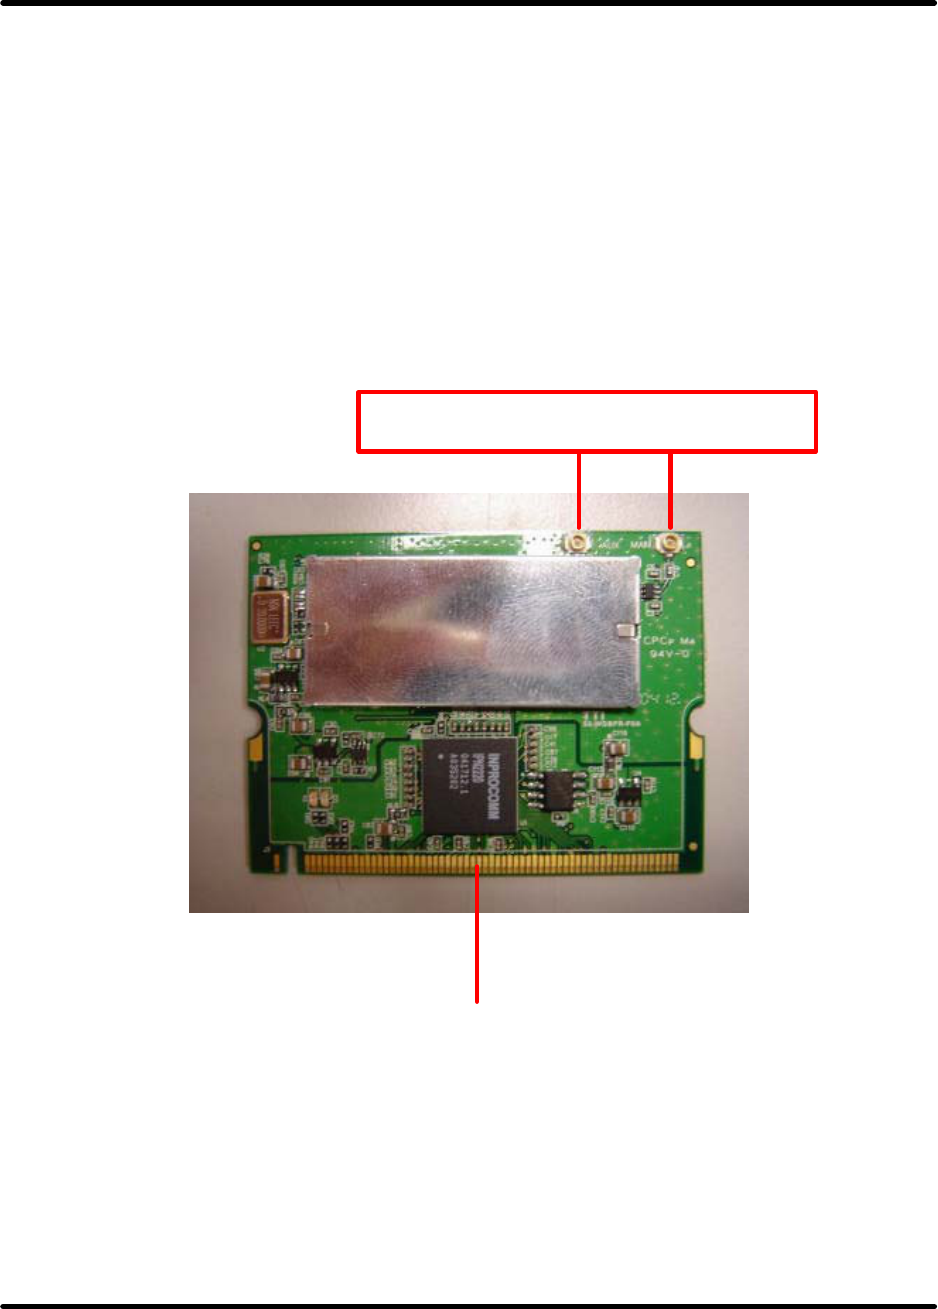
Product View
Golden Finger
Antenna connectors, J1 (Main) and J2 (Aux)
J1 J2
G101 Series WLAN Card
Page 8
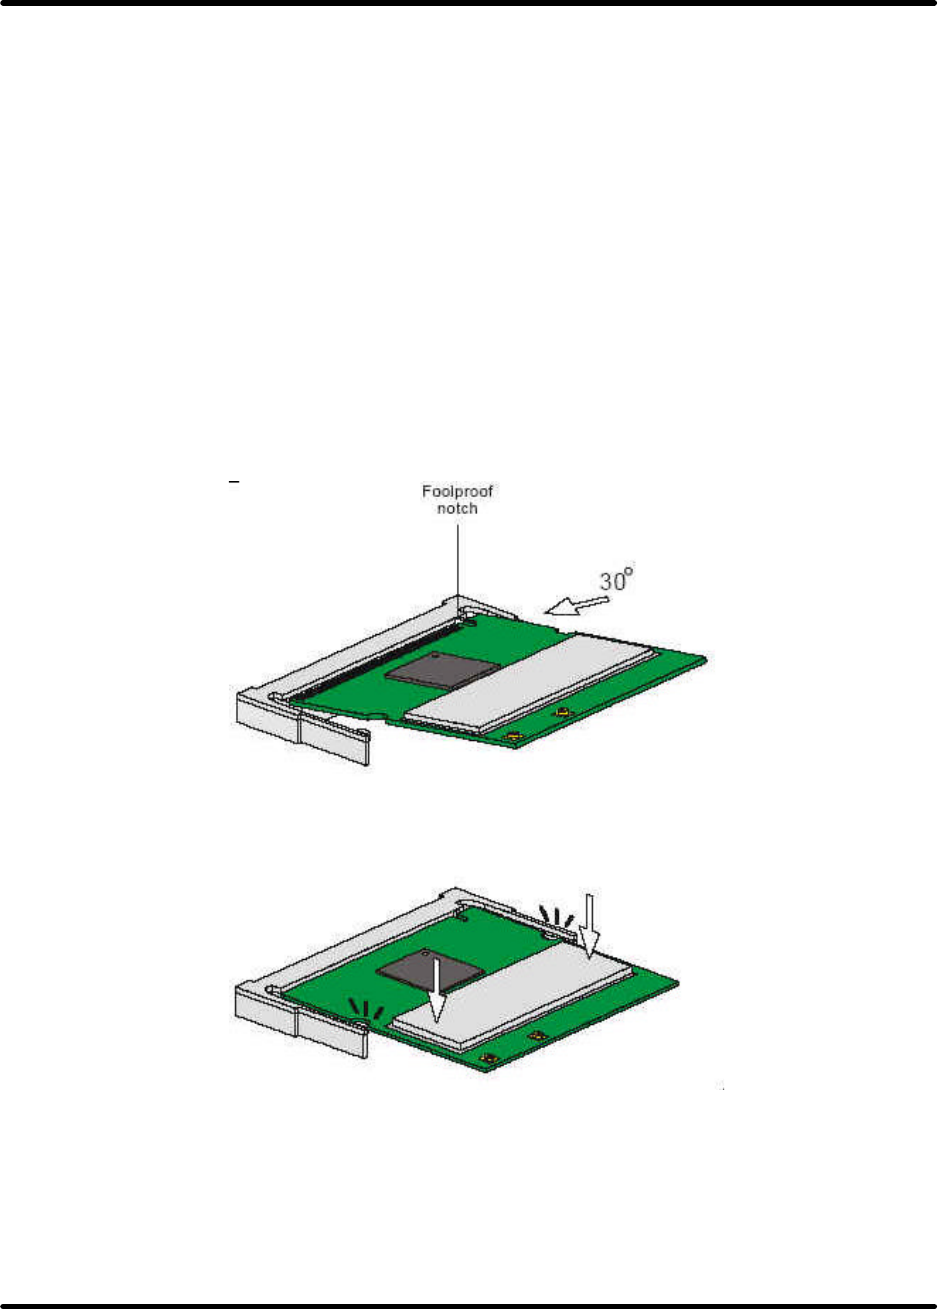
Installing the G101
The following diagrams provide the basic installation for the G101, including how to install into and
remove from the MiniPCI slot the MiniPCI card.
1. Locate the Mini PCI slot.
2. Place the G101 over the MiniPCI slot (at an angle of 30 degrees). Then, gently insert it into the slot
until the golden finger of the card gets fully inserted.
3. Press down the card, and the retaining clips (on two sides of the slot) will lock onto the notches of
the card.
G101 Series WLAN Card
Page 9
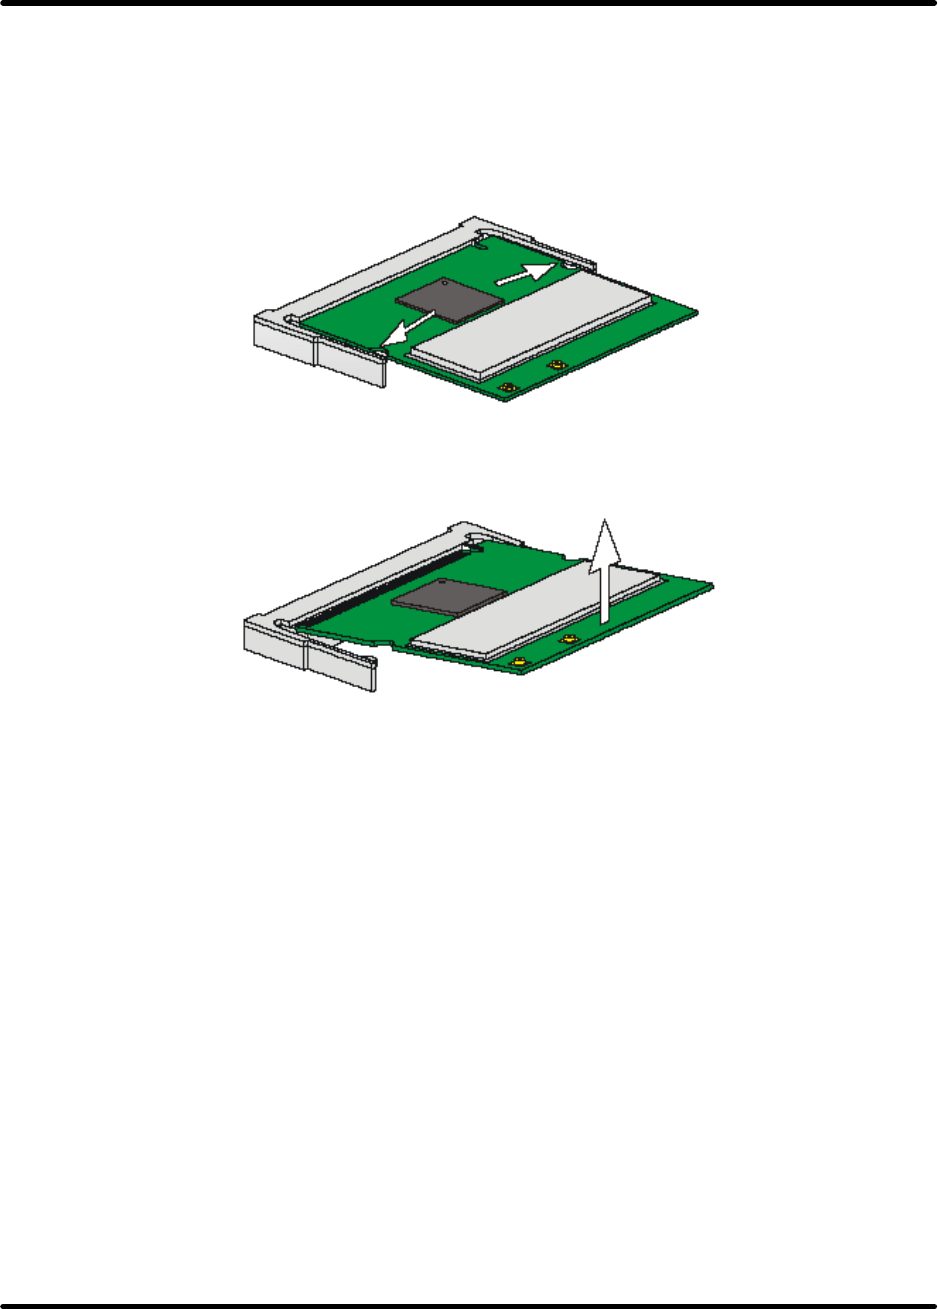
Removing the G101
1. Locate the MiniPCI slot with G101 installed.
2. Press the retaining clips outwards, and the card should bound upwards slightly after being released
from the slot.
3. Remove the card from the MiniPCI slot carefully.

G101 Series WLAN Card
Page 10
SOFTWARE INSTALLATION FOR WINDOWS (XP/2000/98SE)
The following section assists to install G101 WLAN adapter successfully. The driver will firstly be
installed, the G101 WLAN adapter will then be installed, and the network properties are finally set to
accommodate resource sharing and select the type of wireless network.
In order to establish a wireless network connection, make sure that some steps below is performed.
¦ Install the Access Point (AP) at first if user use Access Point network mode.
¦ Install the driver using the Installation CD.
¦ Plug in the G101 wireless LAN adapter.
¦ Install the network protocol(s) required to communicate on a network. Most likely the TCP/IP
protocol will be needed.
The Octopus Wireless LAN Configuration Utility is installed simultaneously with the driver by
executing the Setup .exe file. Note also that some versions of Microsoft Windows operating systems
require an administrator to install software. If this is the case, be sure to have such privileges before
executing the Setup.exe file. To upgrade an existing driver, it is not necessary to remove an existing
Octopus driver. Simply run the Setup.exe file to replace the existing driver with the latest version. After
the new driver is installed, the operating system (depending on the Windows’ OS) might be requested to
be re-started.
Please follow the following steps one by one in order to install the G101 WLAN adapter successfully.
Before proceeding with the installation, please notice the following description.
Note1: After running the driver package, re-starting will be needed for Win98 OS and re-starting will
not be needed for Win2000 or WinXP OS.
Note2: Please do not insert G101 WLAN adapter into the MiniPCI slot until Application setup has been
completed.
G101 Series WLAN Card
Page 11
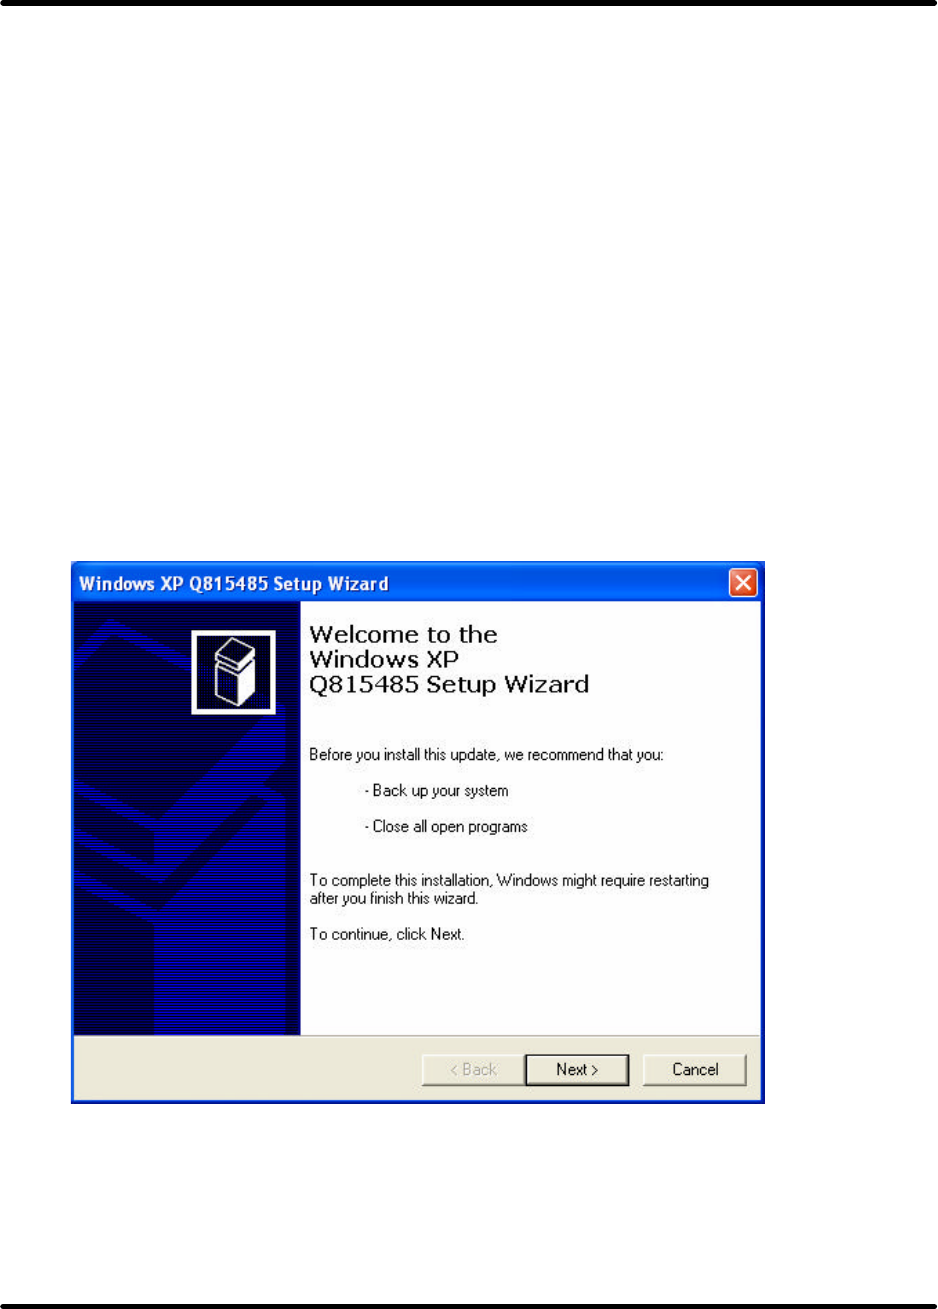
For Windows XP
Install the Driver and Utility
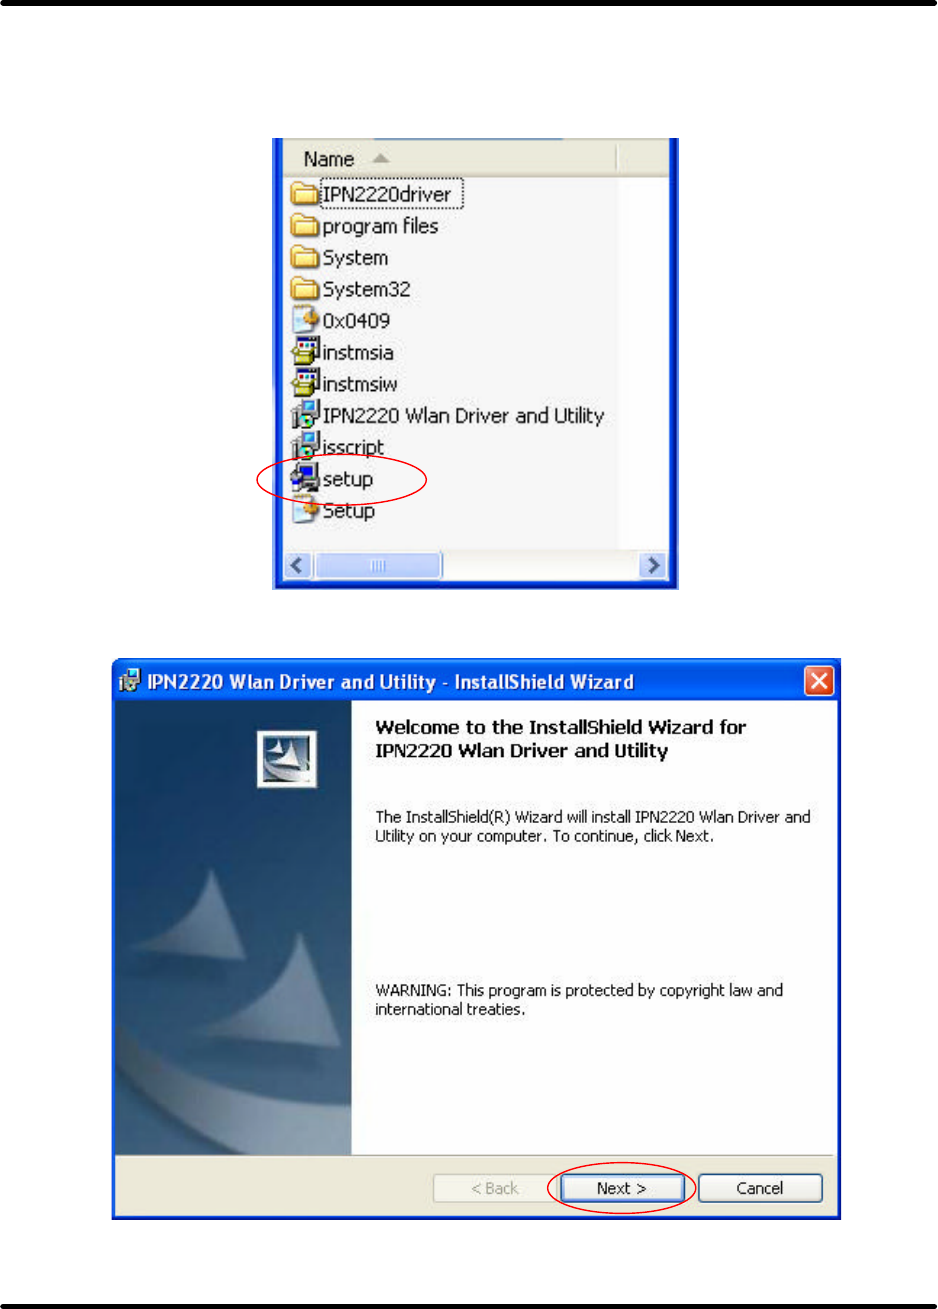
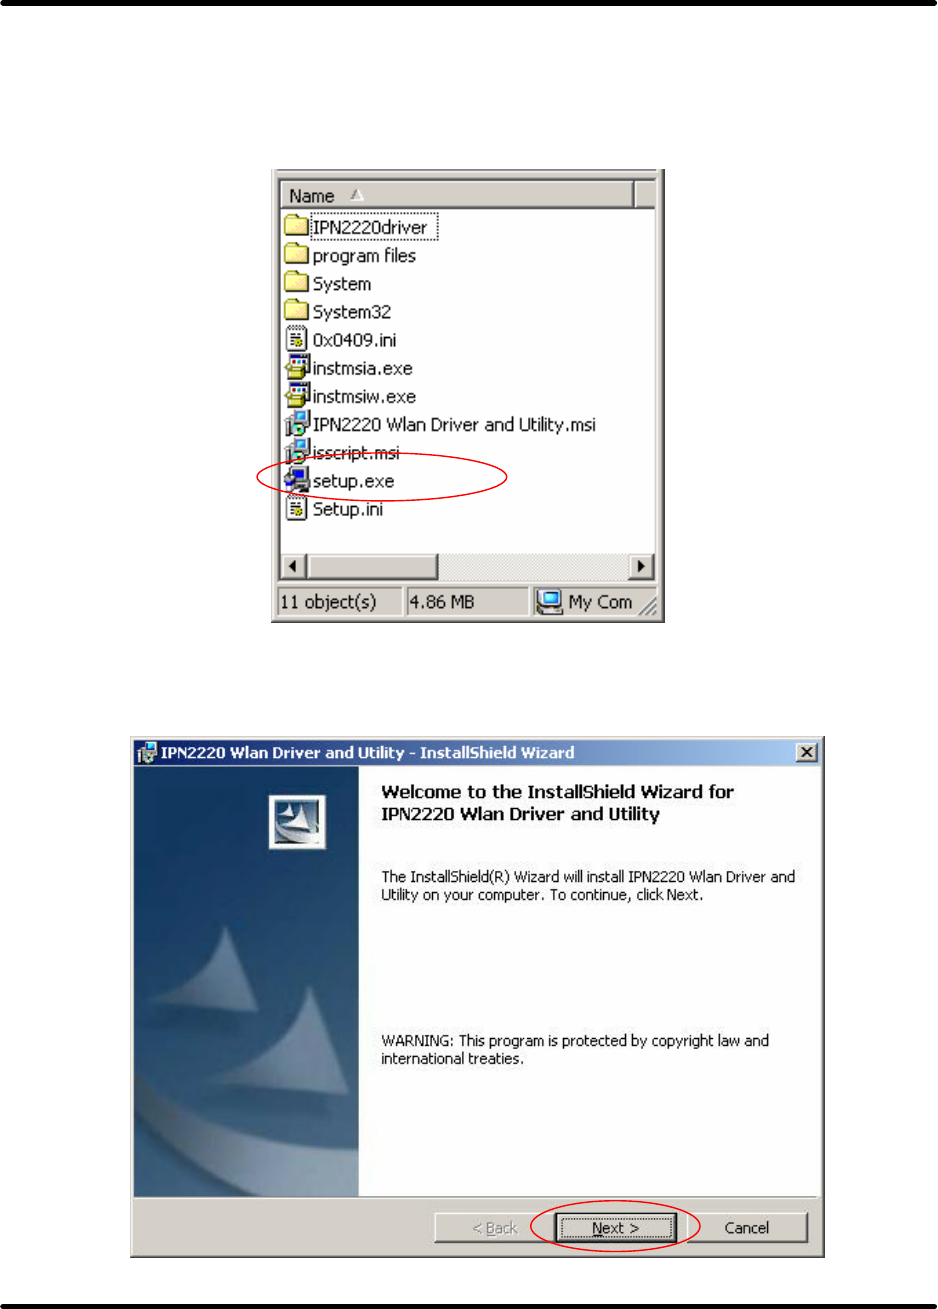
1. Insert the CD into the CD-ROM device and execute the "setup.exe " program.
2. The InstallShield Wizard box will appear, click "Next" to continue.
G101 Series WLAN Card
Page 12
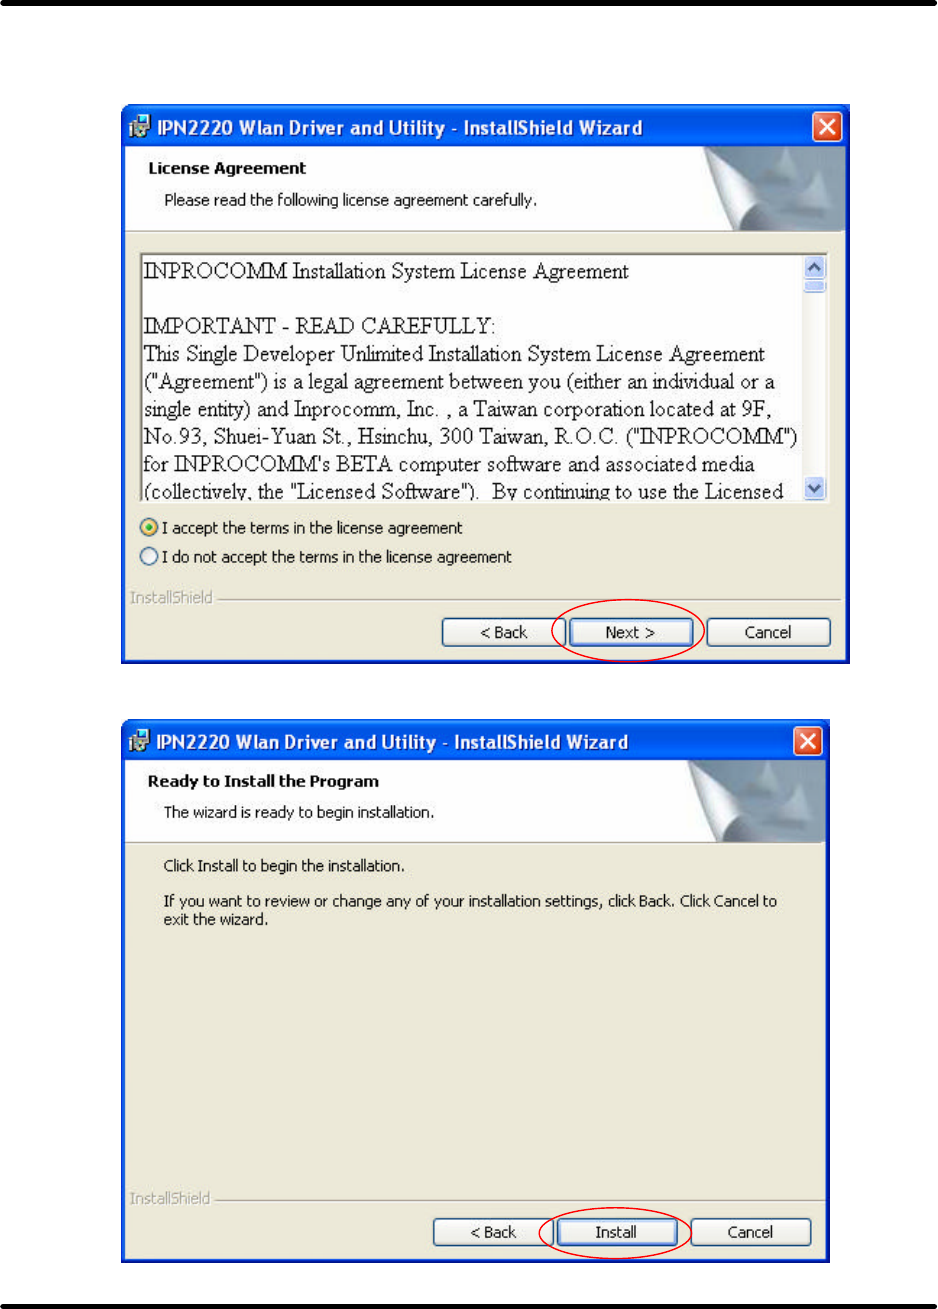
3. Licence Agreement appears. Please choice “I accept the terms in the license agreement ” and click
"Next" to continue.
4. Click "Install" button to continue.
G101 Series WLAN Card
Page 13
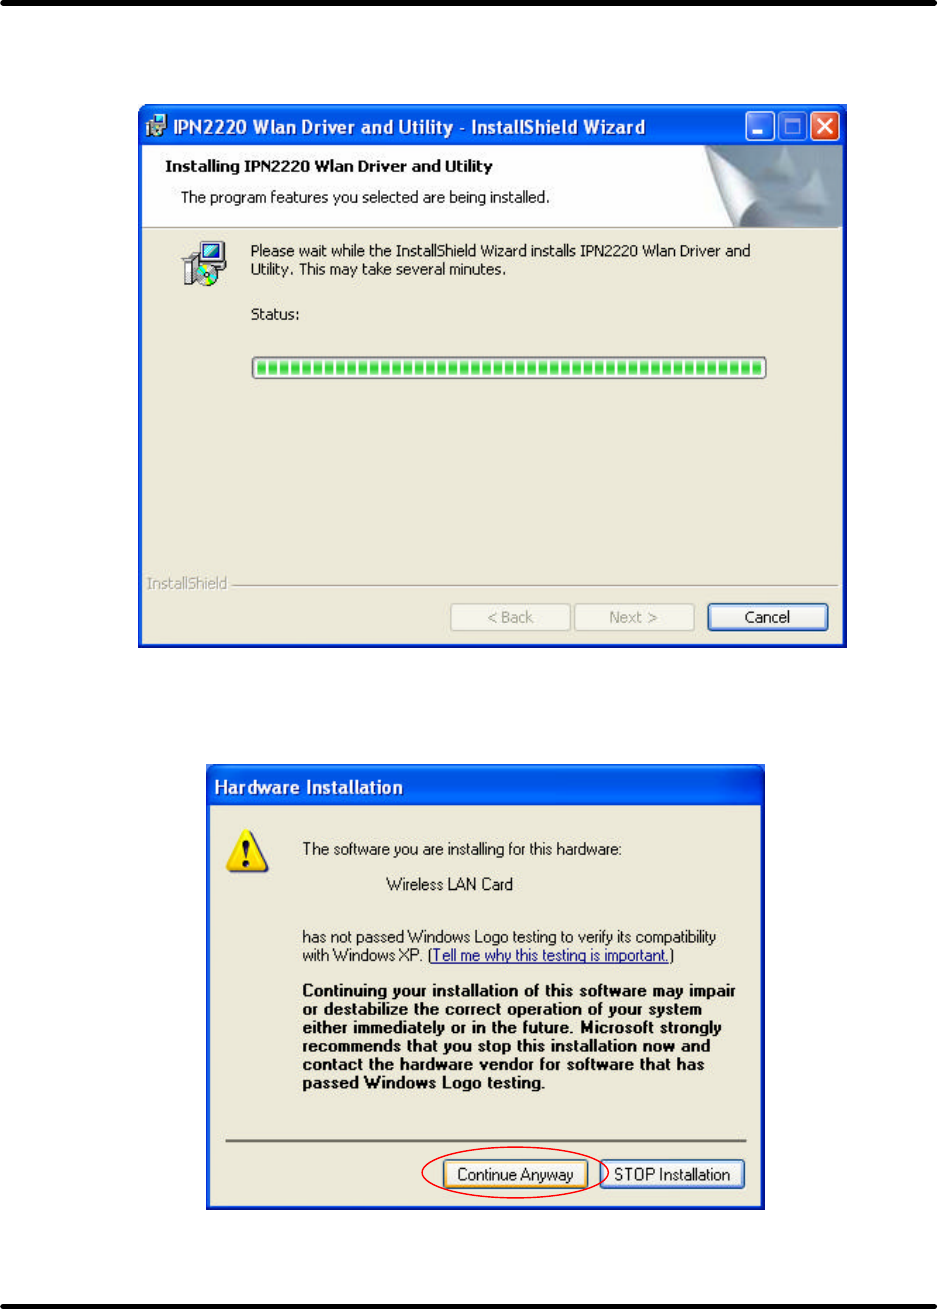
zThe driver and utility are Installing.
zDon’t care about the message below and click "Continue Anyway" button to continue.
G101 Series WLAN Card
Page 14
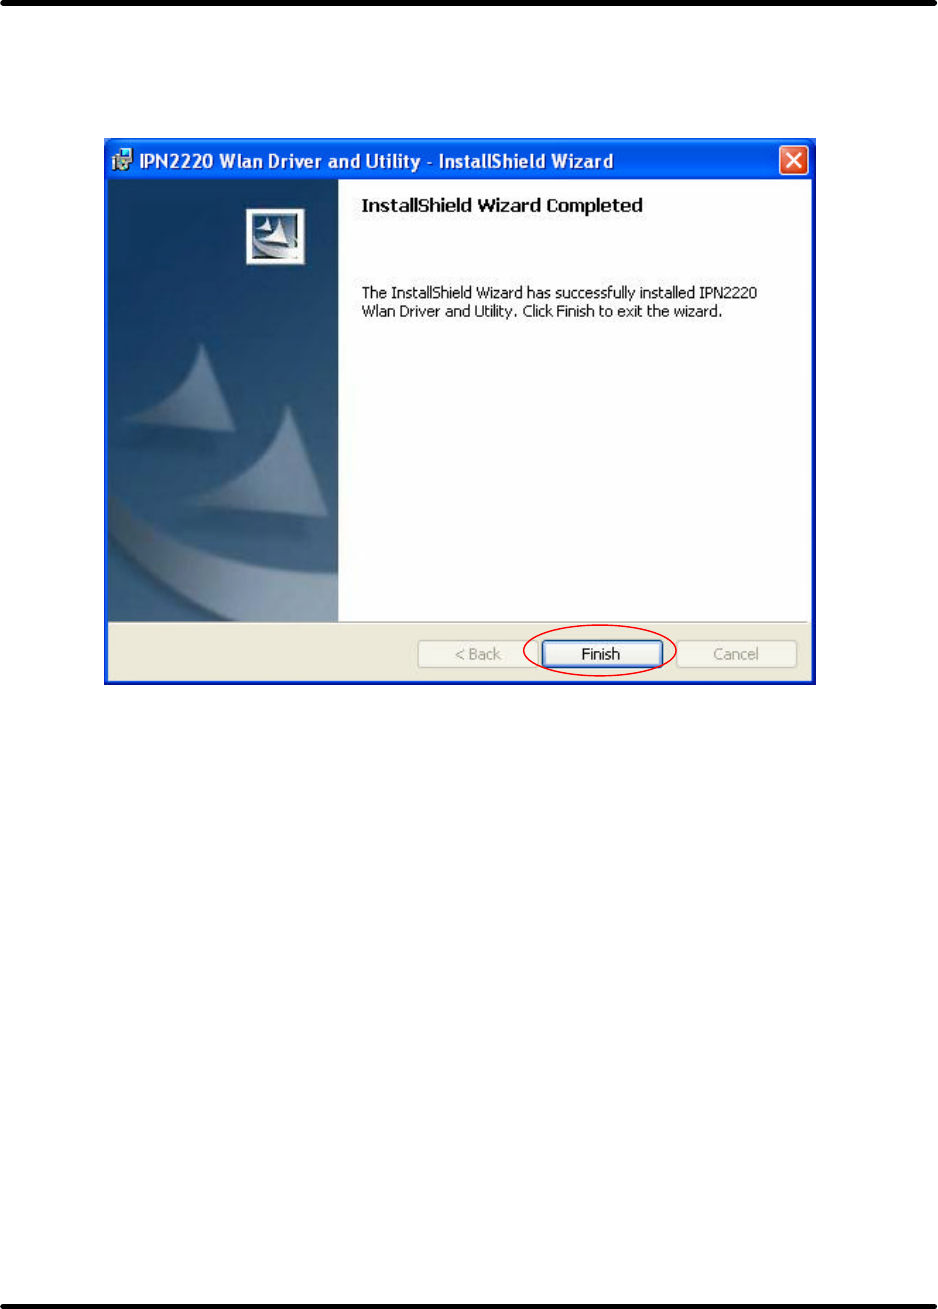
zClick finish button to complete install procedure.
G101 Series WLAN Card
Page 15
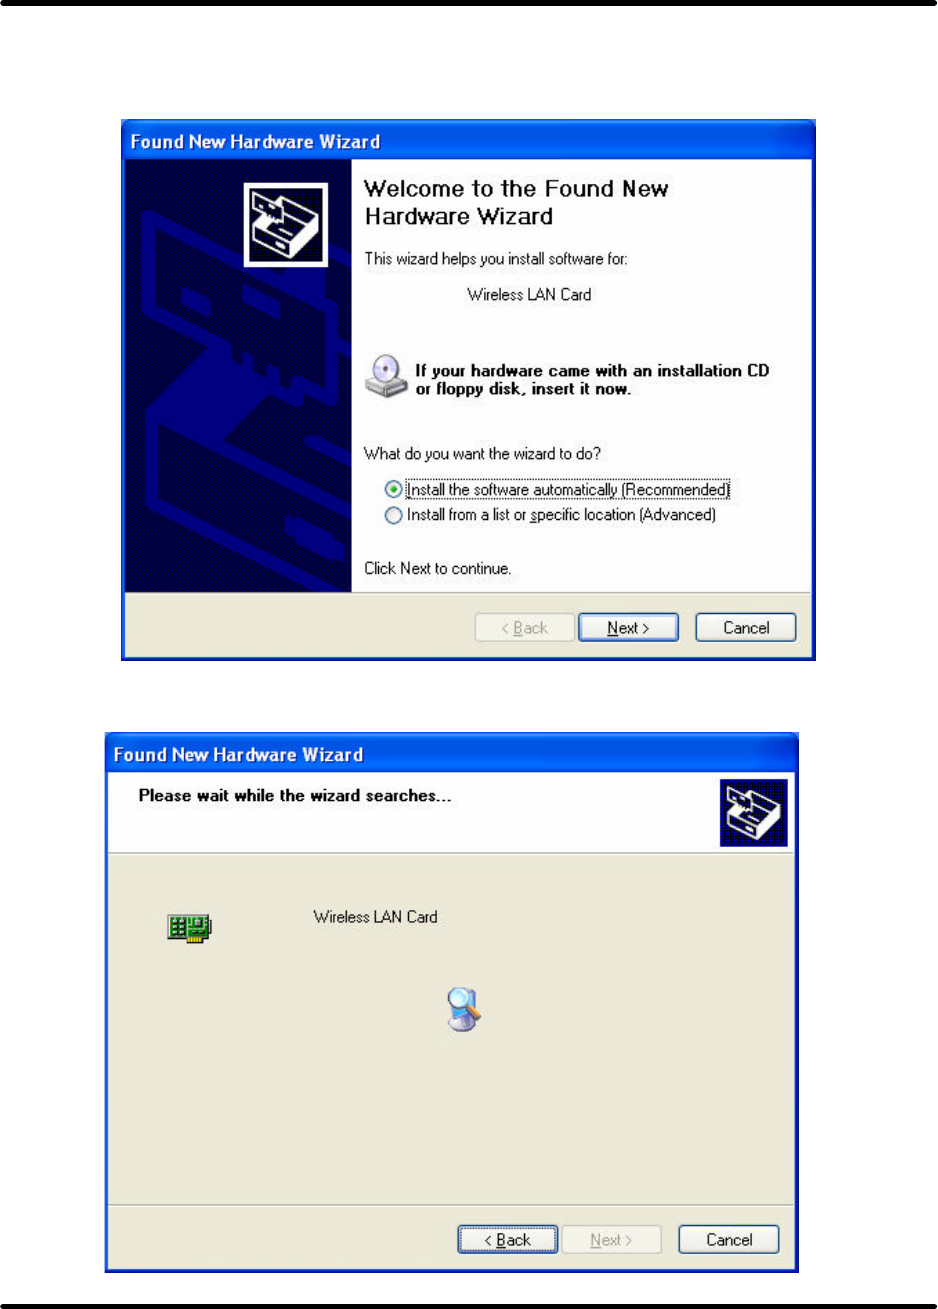
1. Insert the G101 WLAN adapter into the MiniPCI slot. The system will automatically find the
device and search for its software.
Note: Please turn-off the power before you insert G101.
zPlease wait while the wizard installs the software.
G101 Series WLAN Card
Page 16
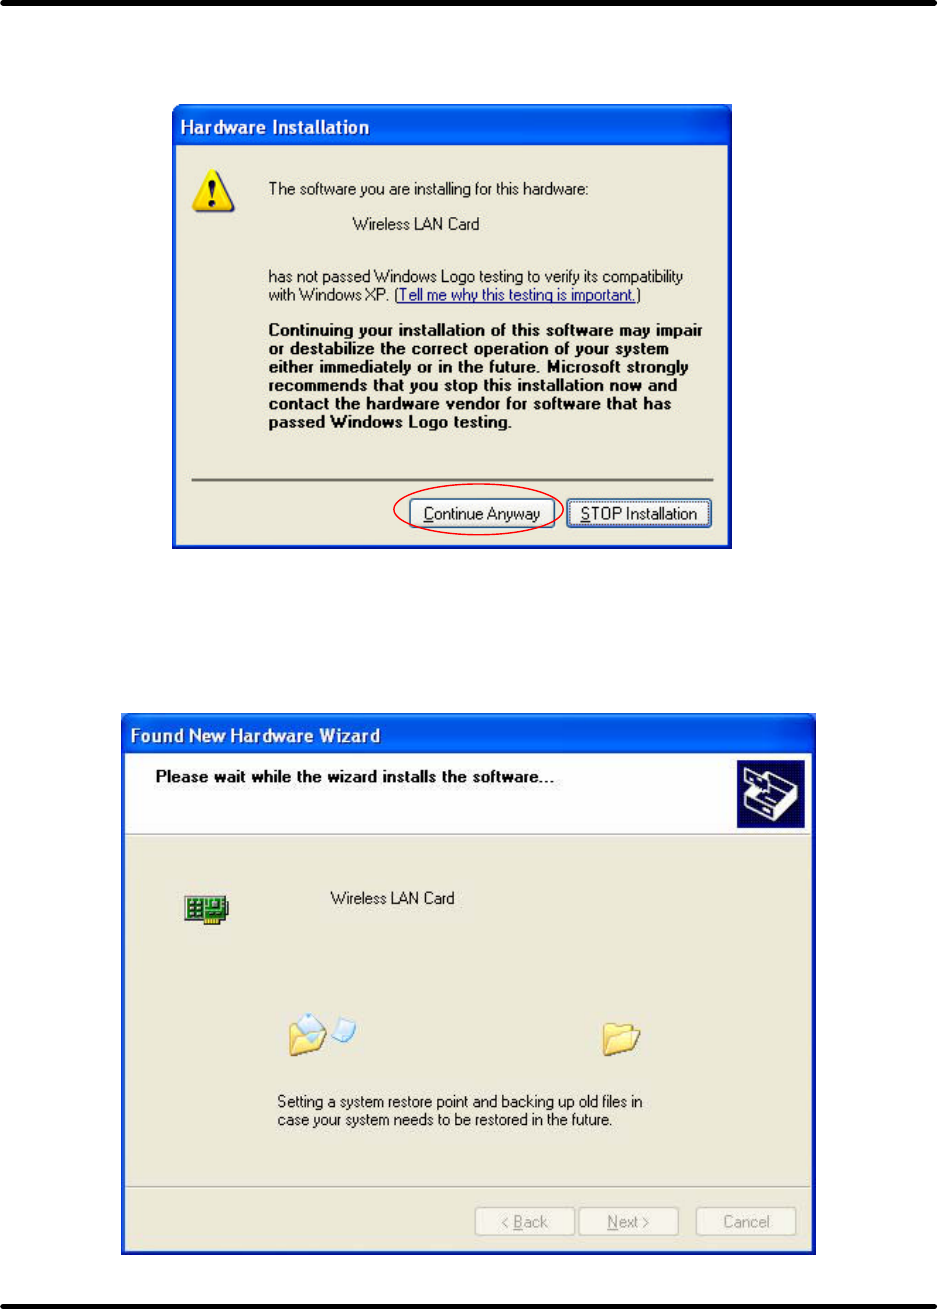
zDon’t care about the message below and click "Continue Anyway" button to continue.
zPlease wait while the wizard installs the software.
G101 Series WLAN Card
Page 17
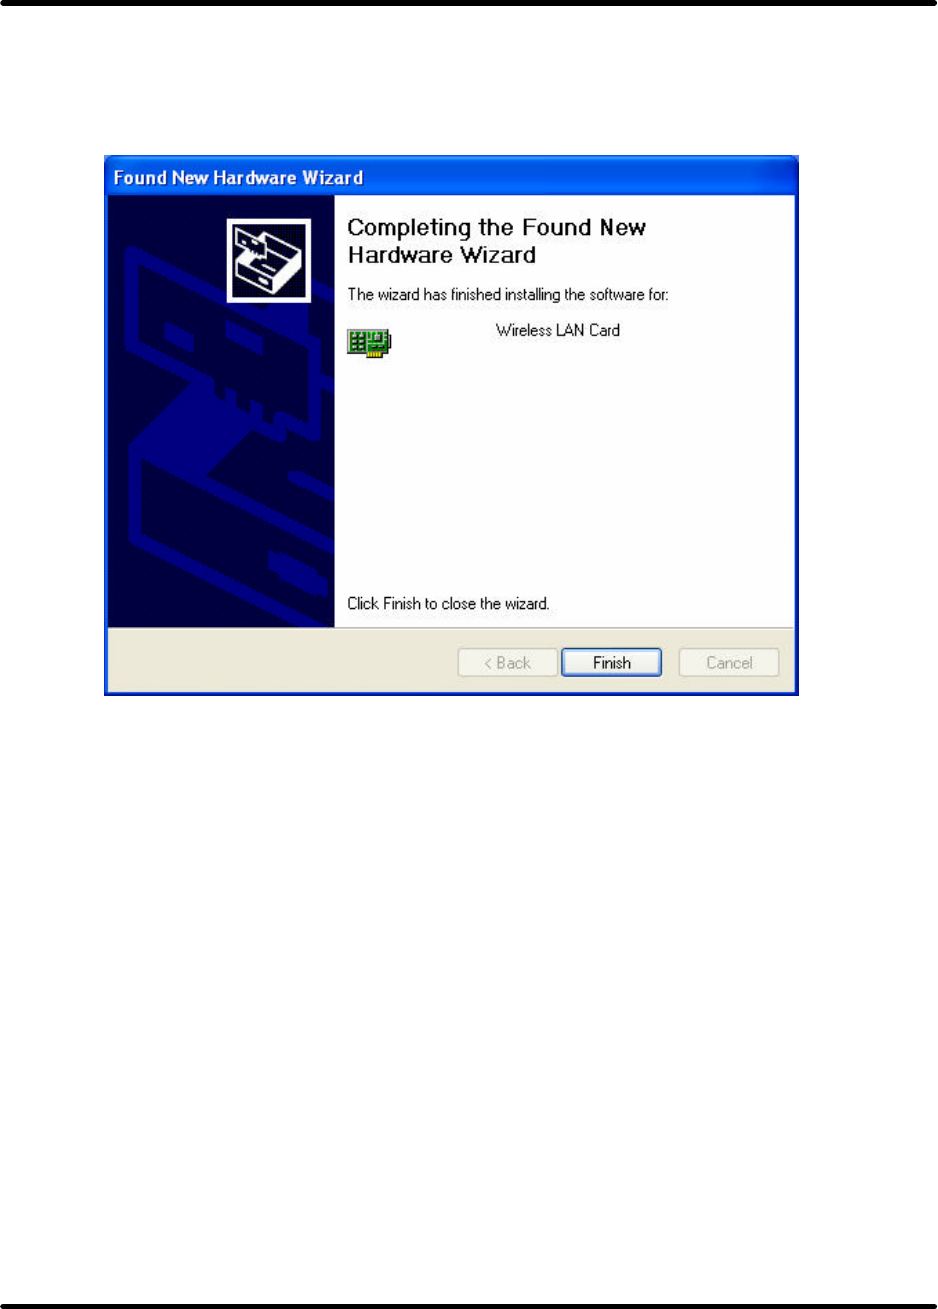
zComplete device install.
G101 Series WLAN Card
Page 18
Using the Windows XP’ s Utility
To connect to a wireless network, please do the following:
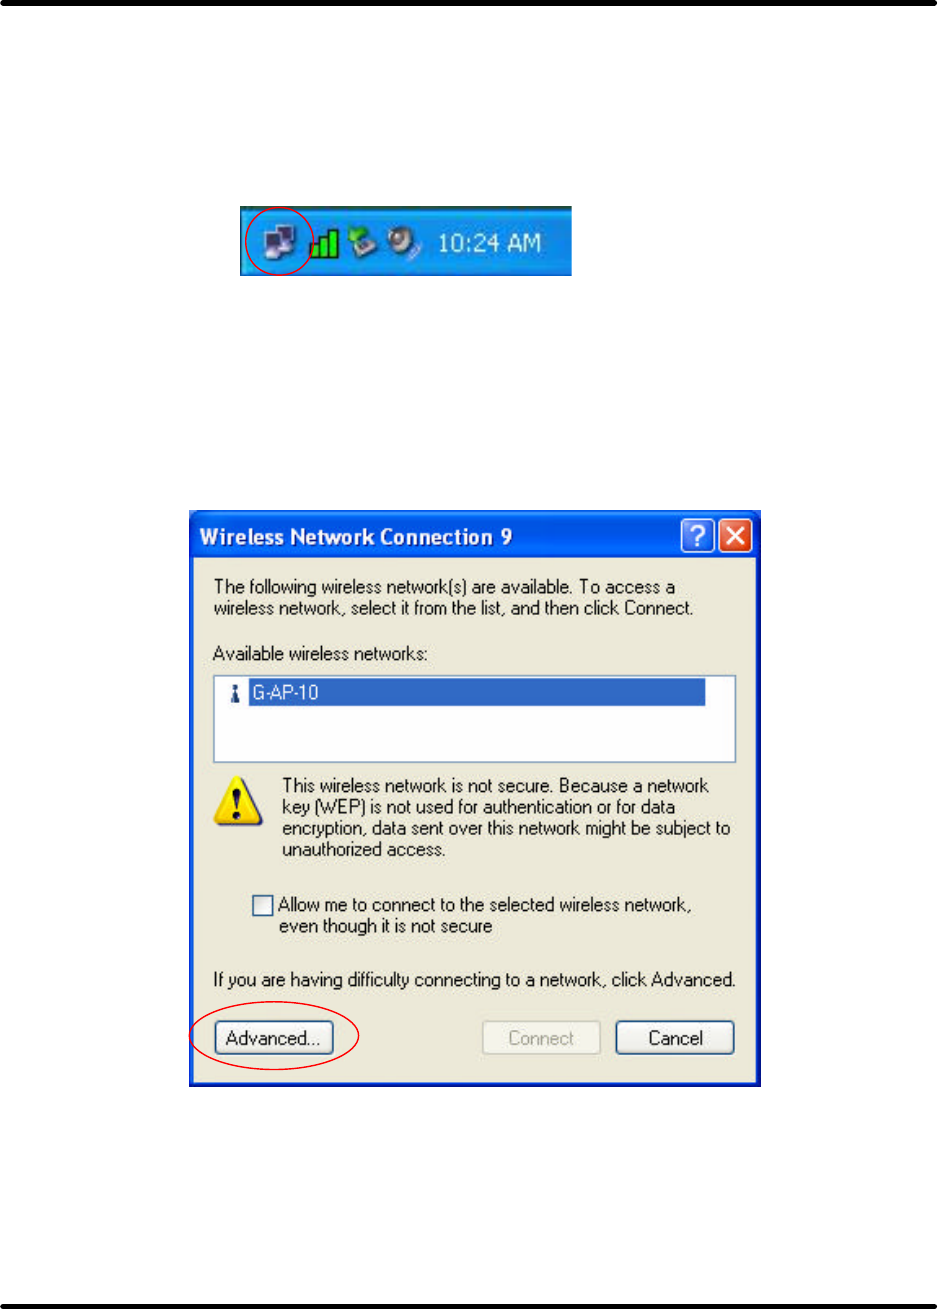
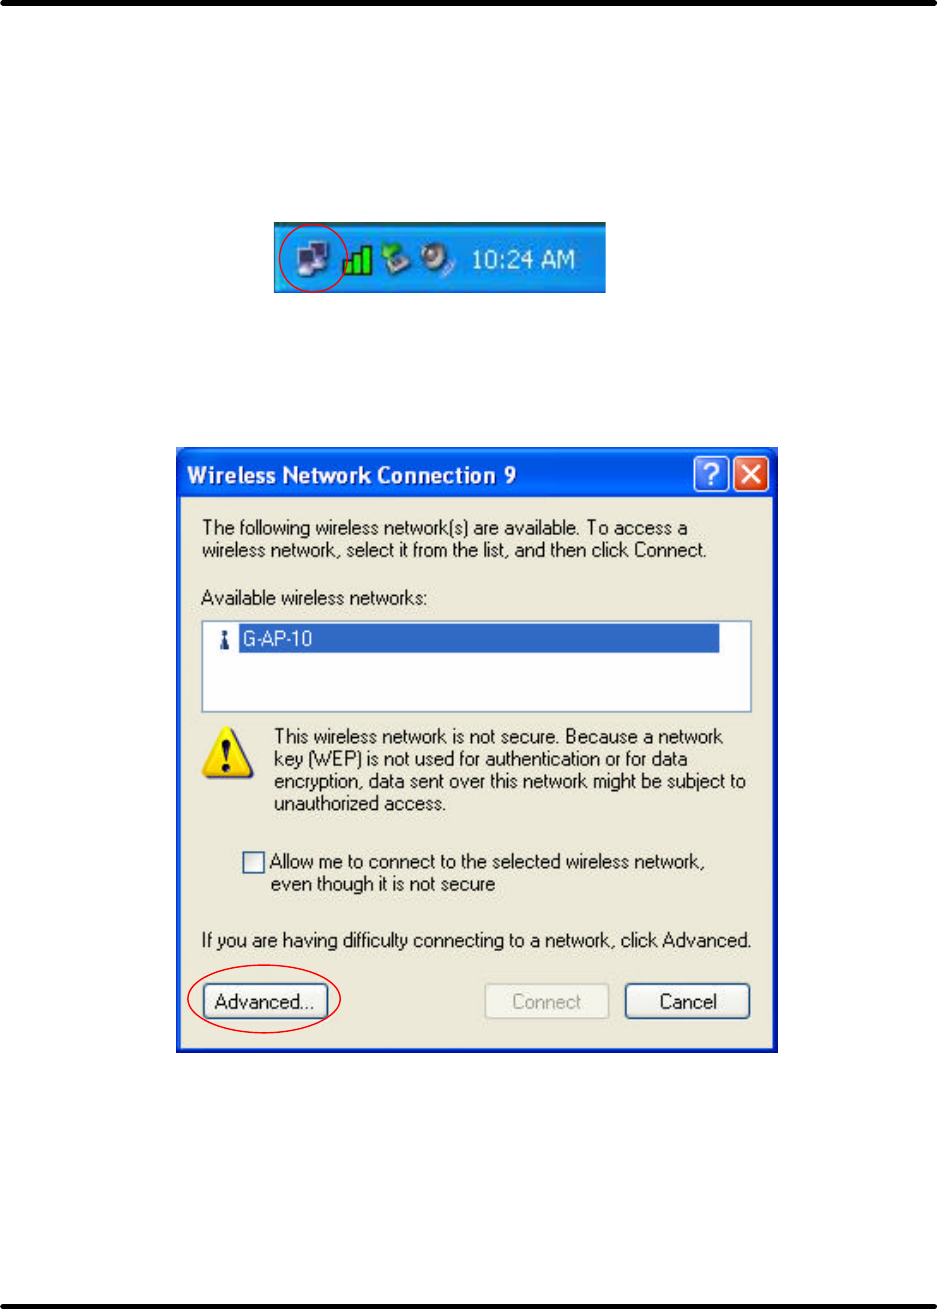
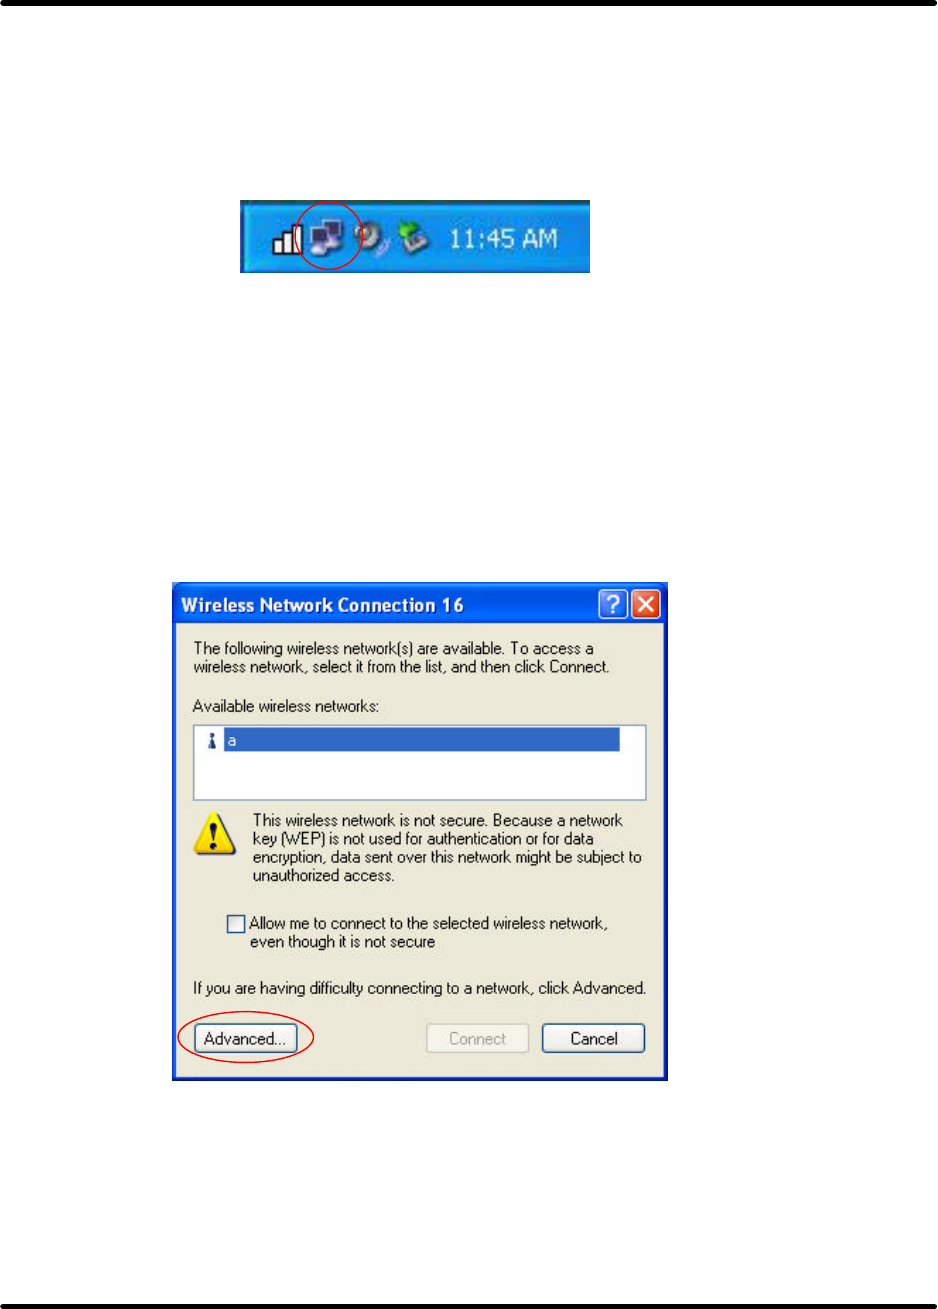
1.Double-click the icon marked in red in the taskbar and start using the Windows XP’ s wireless utility
zGet into Windows XP’ s utility, click "Advanced" button.
G101 Series WLAN Card
Page 19
2.The “Connect to Wireless Network” window will contain a list of all the available Wireless Networks.
Select the proper network as appropriate. In this example, “AP(G-AP-10)” network was selected as
shown.
G101 Series WLAN Card
Page 20
Using the Utility of G101 adapter
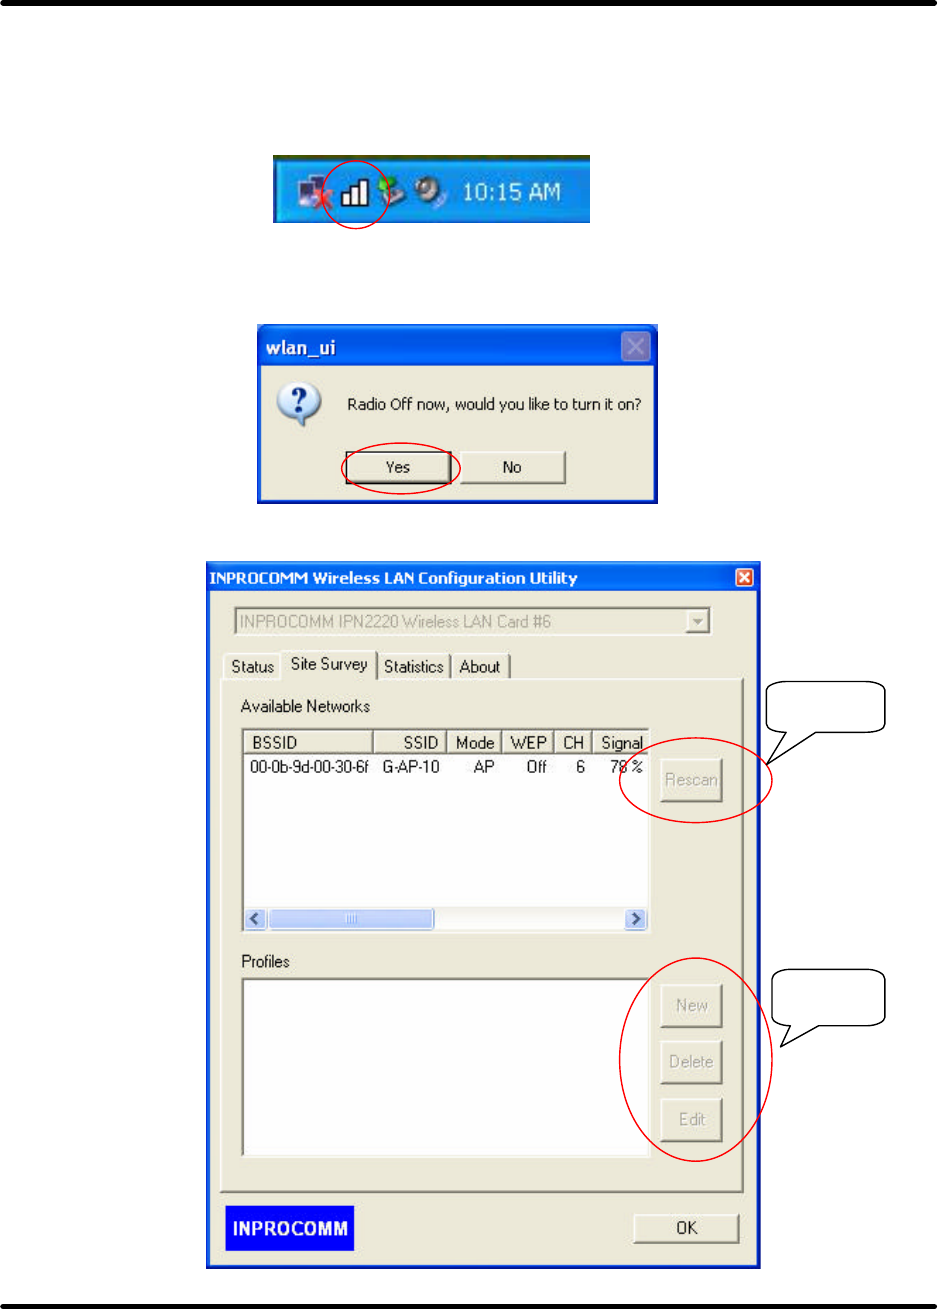
1. If the XP’ s Utility is no disabled, the adapter’ s utility will not be applicable.
zClicking on the utility icon.
zClick “Yes”,then Radio ON
zYou can not use function of the adapter’ s utility as below.
Useless
Useless
G101 Series WLAN Card
Page 21
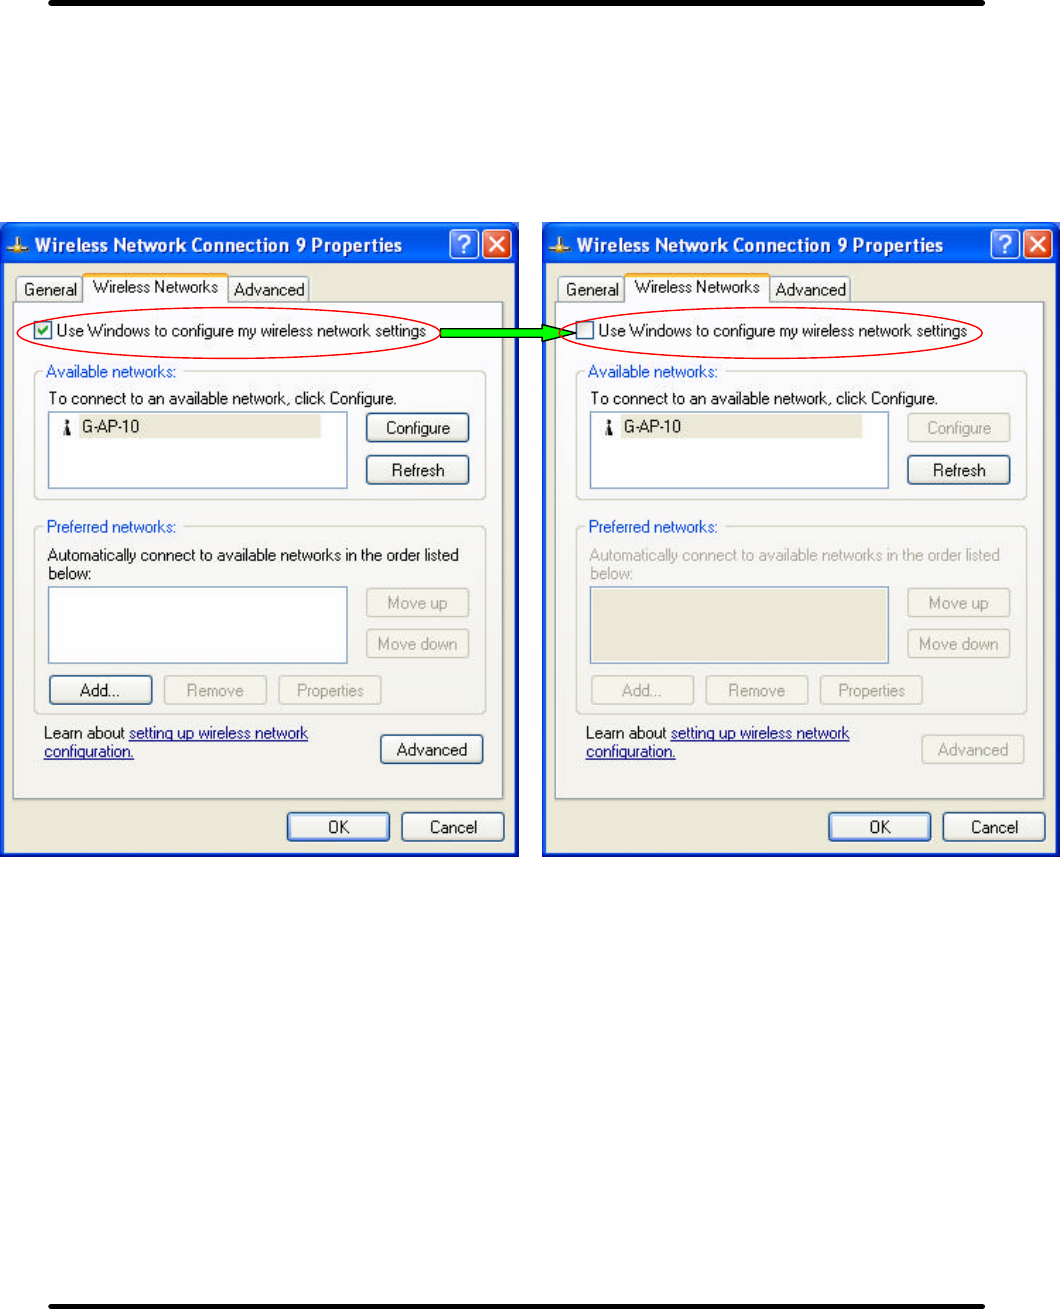
2. To Disable the XP’ s Utility for Using “Wireless LAN Configuration Utility”
zDouble-click the icon marked in red in the taskbar and start using the Windows XP’ s wireless
utility
zGet into Windows XP’ s utility, click "Advanced" button.
G101 Series WLAN Card
Page 22
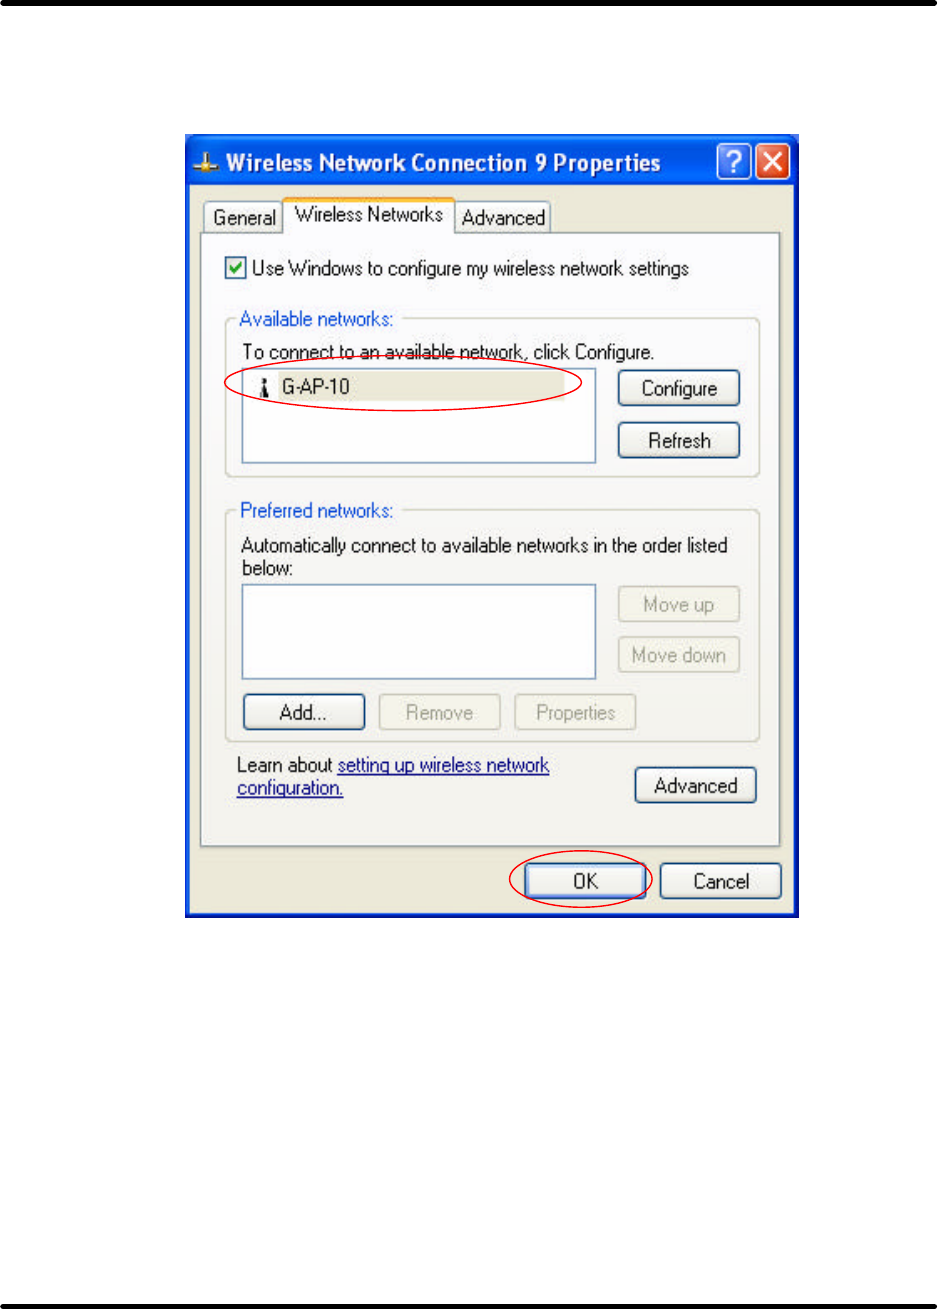
zIn “Wireless Network Connection Properties“ screen, uncheck the setting “Use Windows to
configure my wireless network settings“. Note that if it is requested to change back to the
Windows XP built- in utility, check the item again.
G101 Series WLAN Card
Page 23
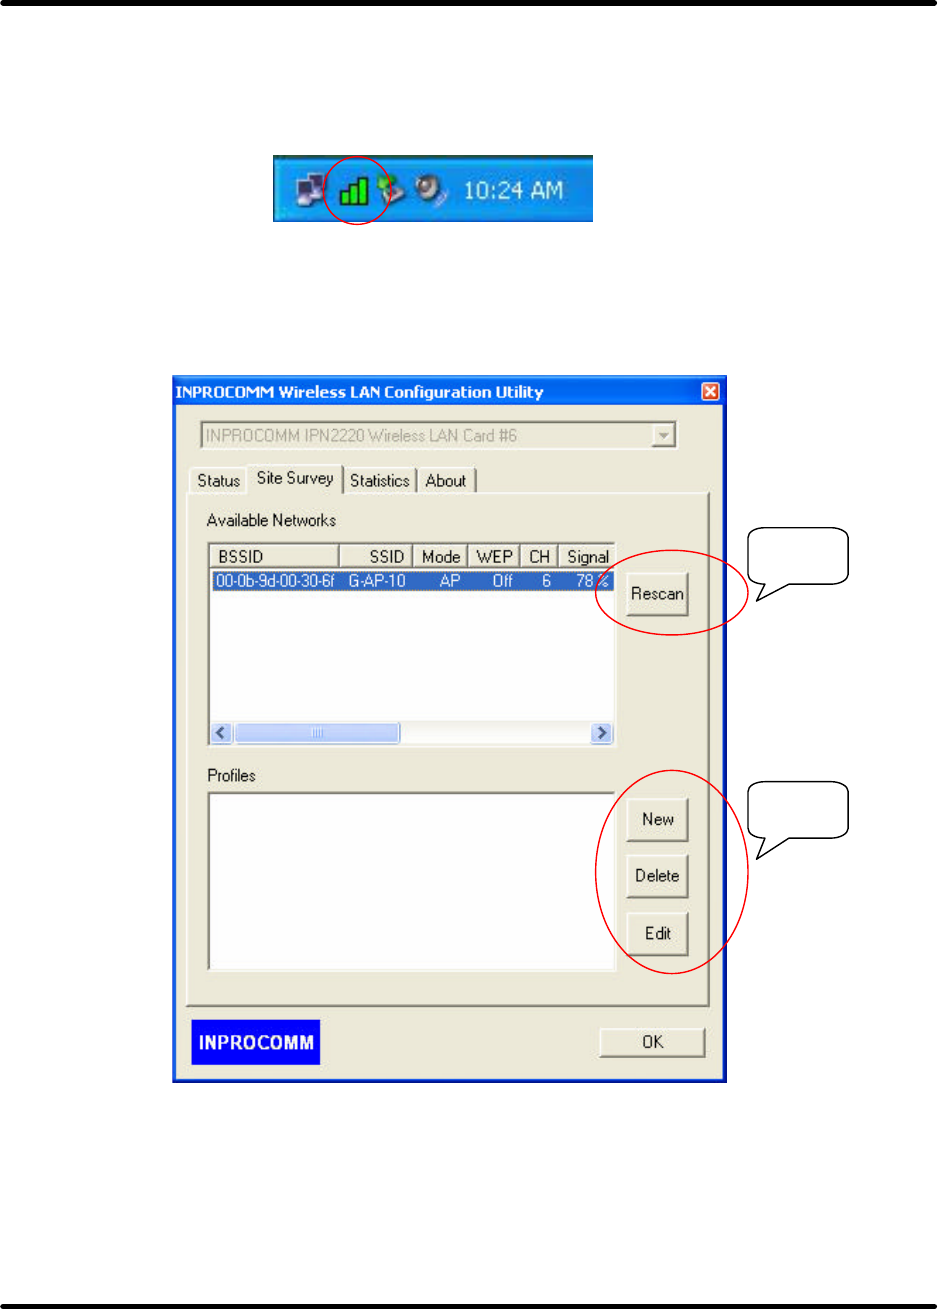
zClicking on the utility icon will start the Configuration Utility.
Useful
Useful
G101 Series WLAN Card
Page 24
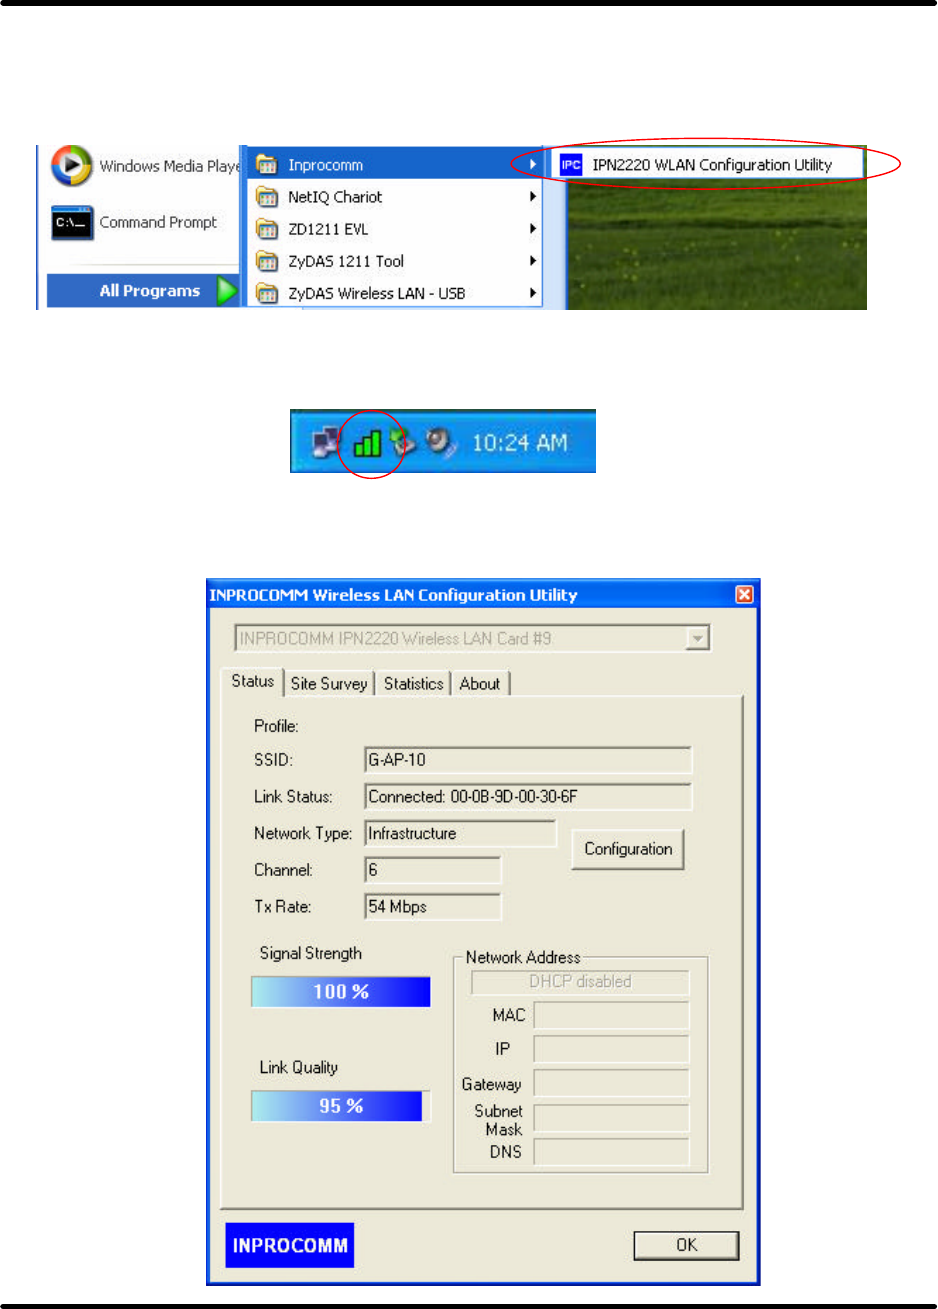
3. Please click “All programs-> Inprocomm->IPN2220 WLAN Configuration Utility”. Or to
double-click on the icon shown below. The “WLAN Configuration” screen will appear.
zOr to double click the icon
zThe “WLAN Configuration Utility” screen will appear.
G101 Series WLAN Card
Page 25
Using WPA of the Windows XP’ s Utility
Note1: Before using the WPA feature, please install Windows XP Service Pack 1 with
Windows XP Support Patch for Wi-Fi Protected Access program
Note2: Configure the card by Wireless built-in utility (Wireless Zero Configuration).
Note3: All devices in the network should use the same encryption method to ensure the
communication.
Wi-Fi Protected Access (WPA) is a specification of standards-based, interoperable security
enhancements that strongly increase the leve l of data protection (encryption) and access control
(authentication) for existing and future wireless LAN systems. The technical components of
WPA include Temporal Key Integrity Protocol (TKIP) for dynamic key exchange, and 802.1x
for authentication.
zExample :
G101 Series WLAN Card
Page 26
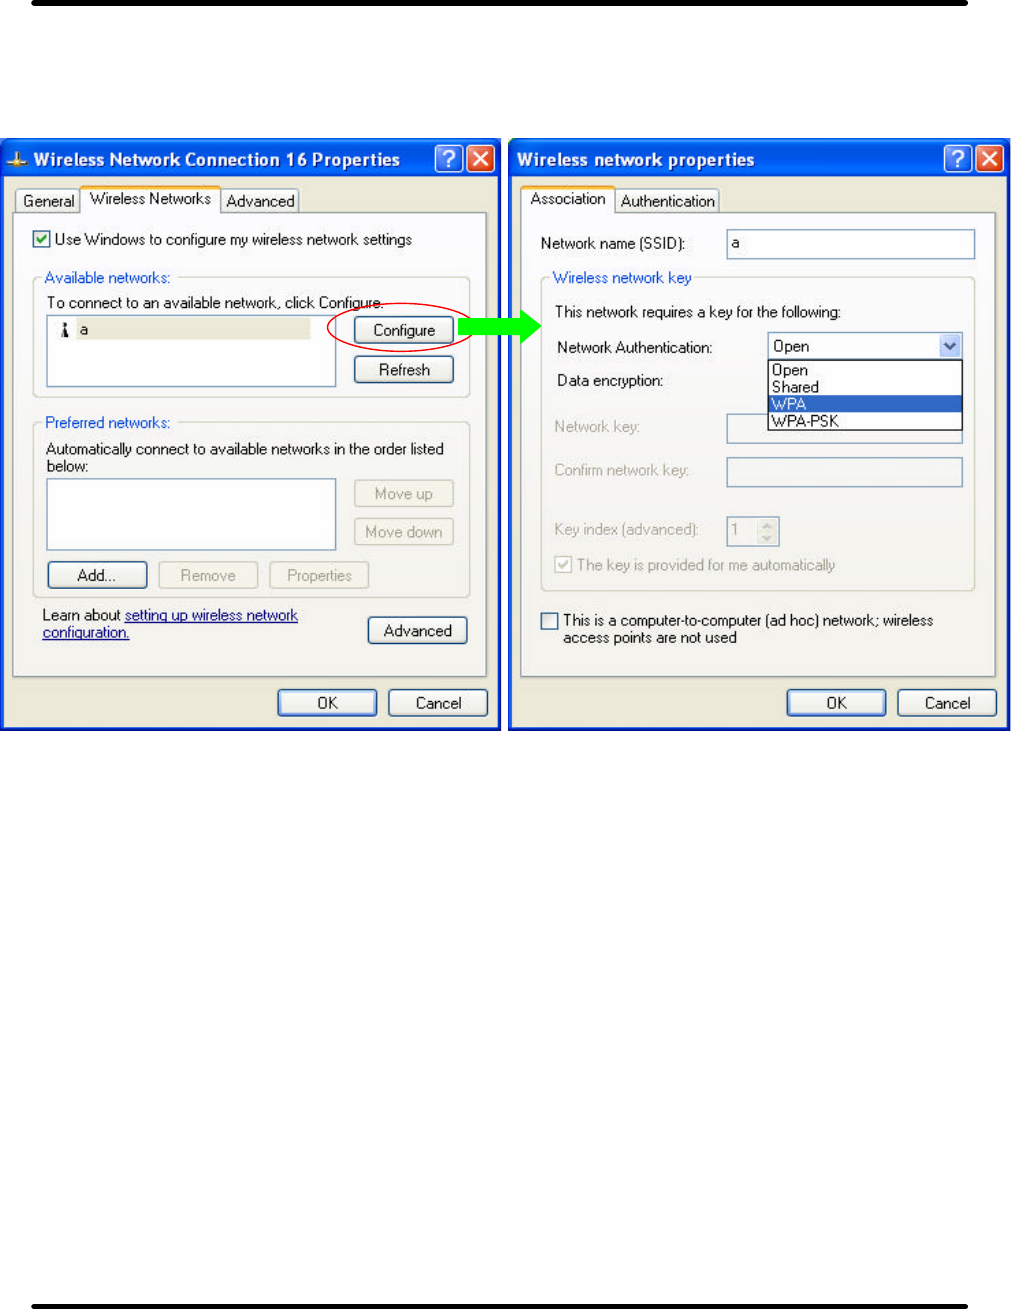
1: Right click the icon to select “View Available Wireless Networks”.
2: Click “Advanced” button from “Wireless Network Connection”.
G101 Series WLAN Card
Page 27
3: Click“Configure” button to configure the WPA function for the current network.
zNetwork Authentication
•Open –No authentication is needed among the wireless network.
•Shared – Only wireless stations using a shared key (WEP Key identified) are allowed to
connecting each other.
•WPA – This mode is for enterprise with an authentication server (Radius Server), WPA-enabled
access point, and a WPA-enabled client. Once WPA is enabled, all clients and access
points on the network must be WPA-enabled in order to access the network.
•WPA-PSK – It is a special mode designed for home and small business users who do not have
access to network authentication servers. In this mode, known as Pre-Shared Key, the
user manually enters the starting password in their access point or gateway, as well as
in each PC on the wireless network. WPA takes over automatically from that point,
keeping unauthorized users that don't have the matching password from joining the
network, while encrypting the data traveling between authorized devices.
G101 Series WLAN Card
Page 28
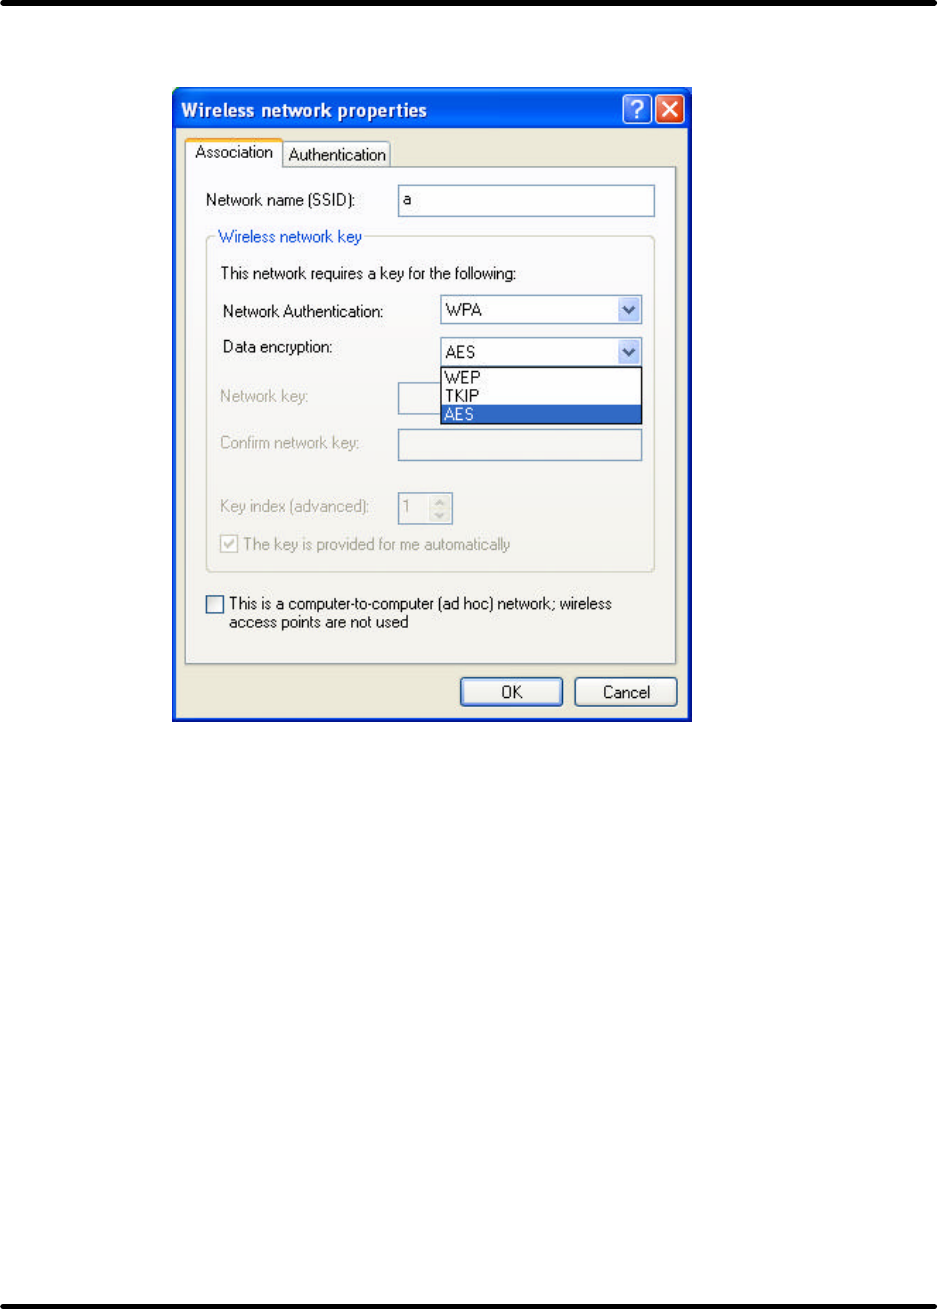
zData Encryption
•WEP – In WPA or WPA-PSK mode, WEP is also able to be the encryption method for the
transmission data.
•TKIP – TKIP (Temporal Key Integrity Protocol) changes the temporal key every 10,000
packets (a packet is a kind of message transmitted over a network.) This insures much
greater security than the standard WEP security.
•AES – AES has been developed to ensure the highest degree of security and authenticity for
digital information and it is the most advanced solution defined by IEEE 802.11i for
the security in the wireless network.
G101 Series WLAN Card
Page 29
For Windows 2000
Install the Driver and Utility
1.Insert the CD into the CD-ROM device and execute the "setup.exe " program for G101 series to select.
2. The InstallShield Wizard box will appear, click "Next" to continue.