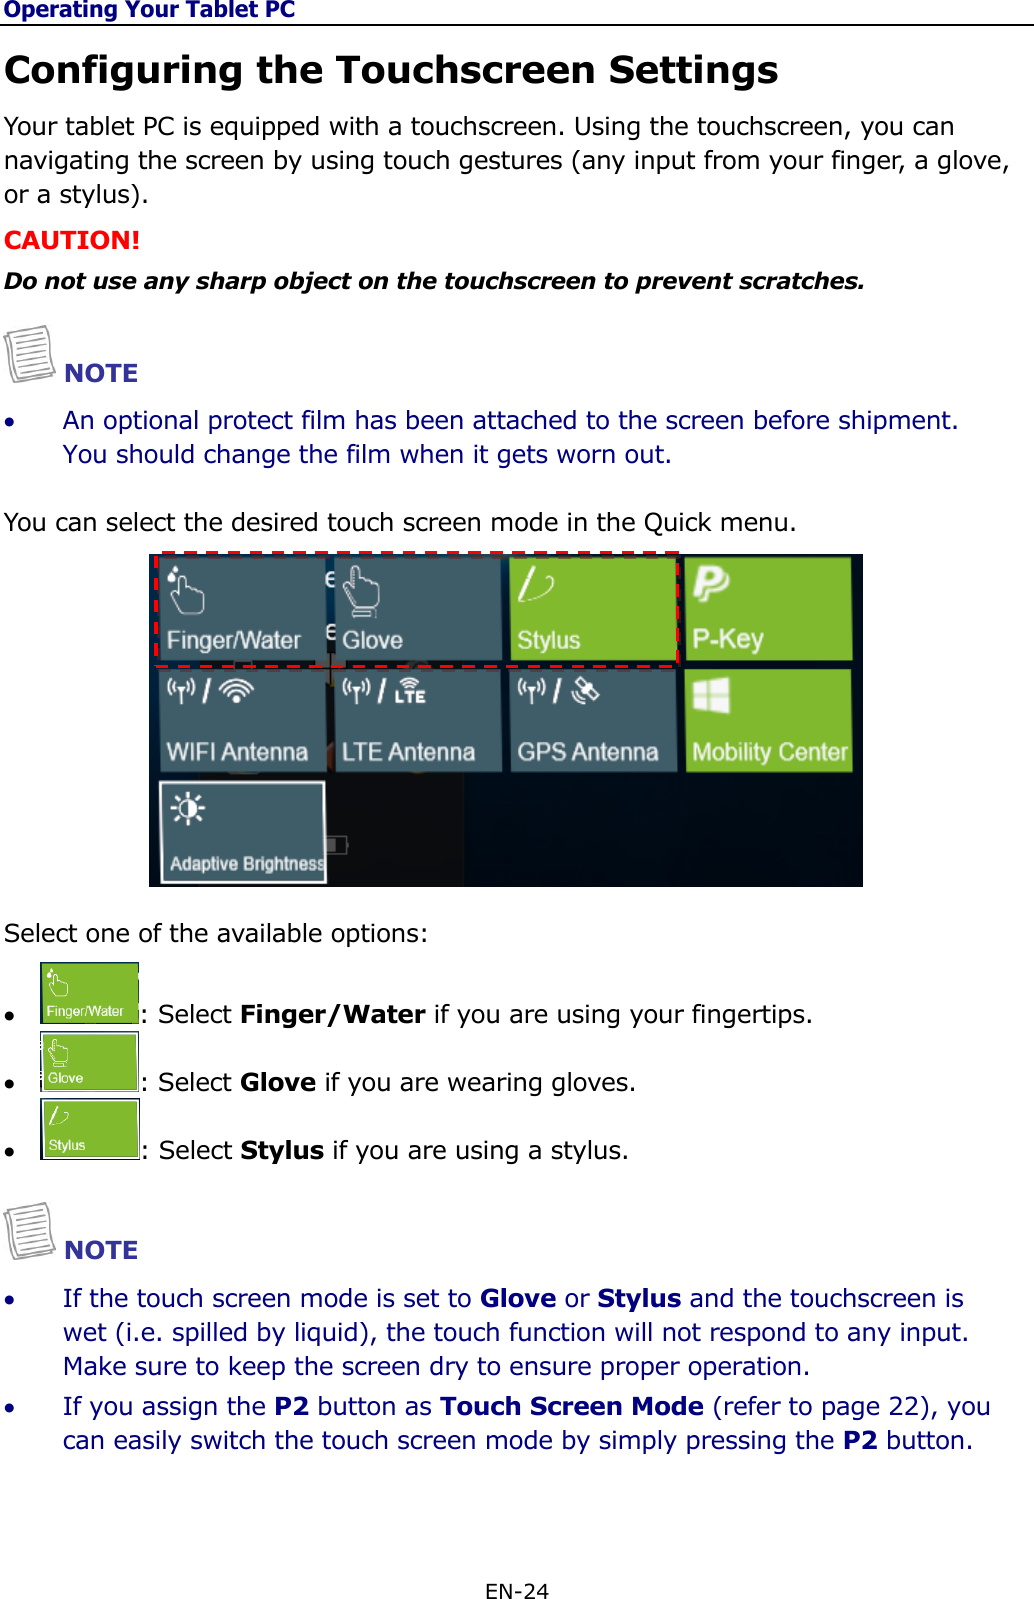
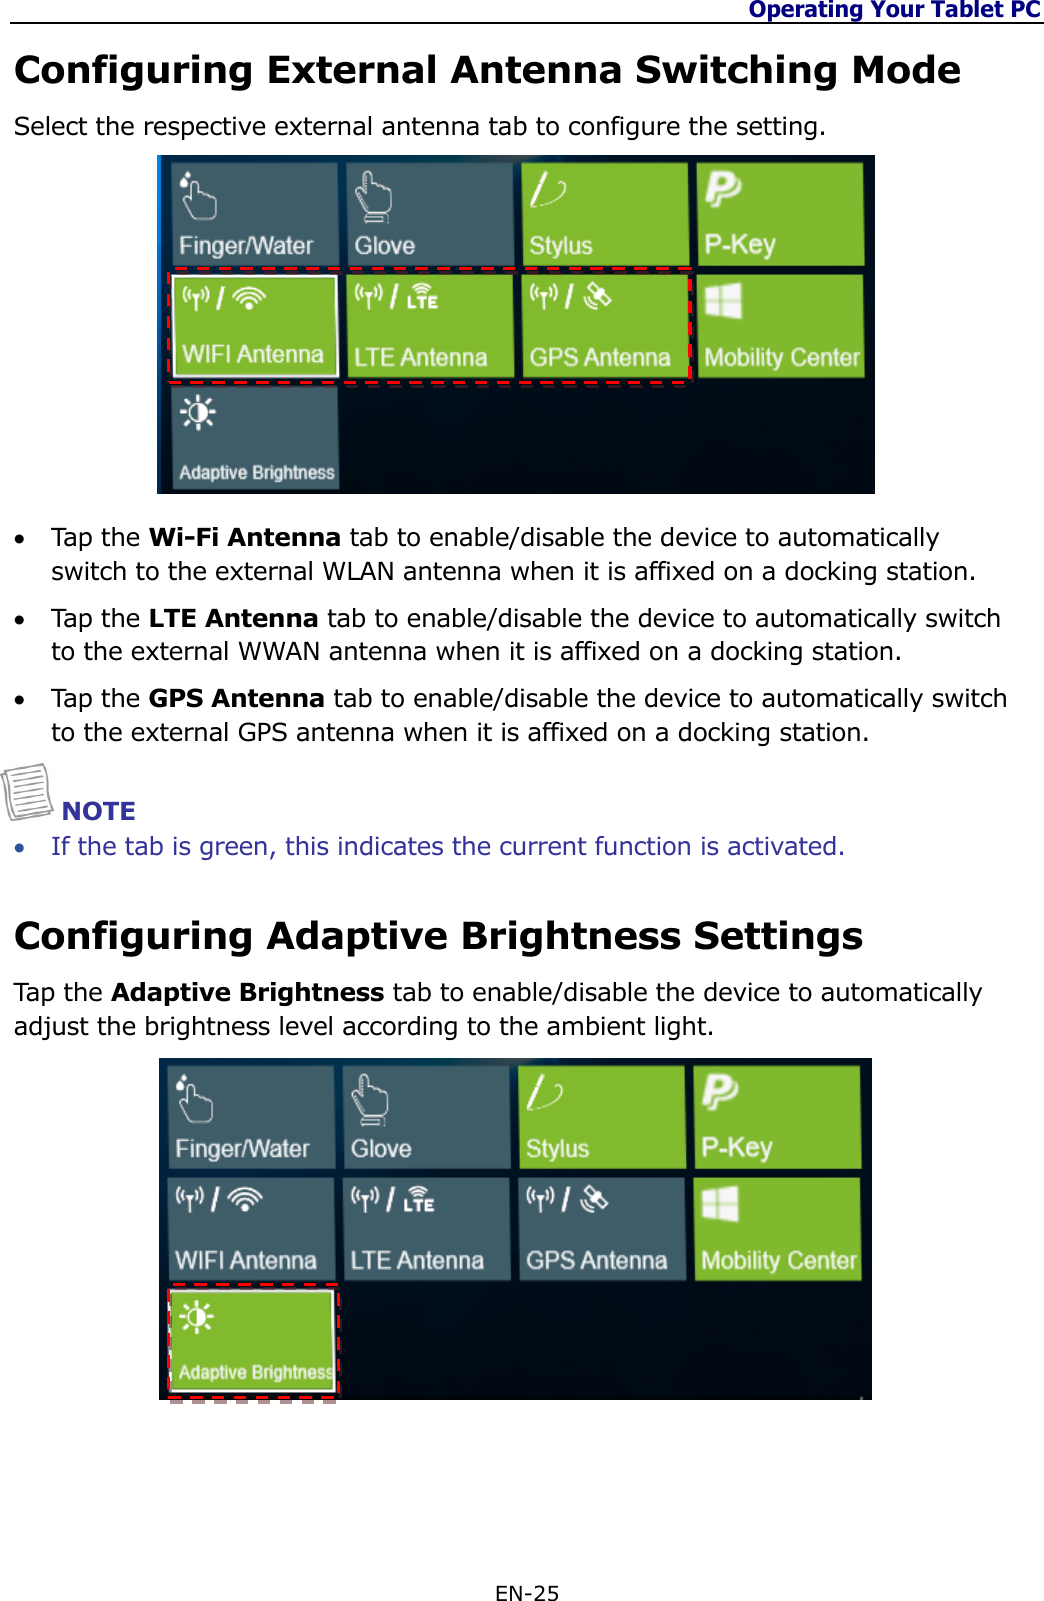
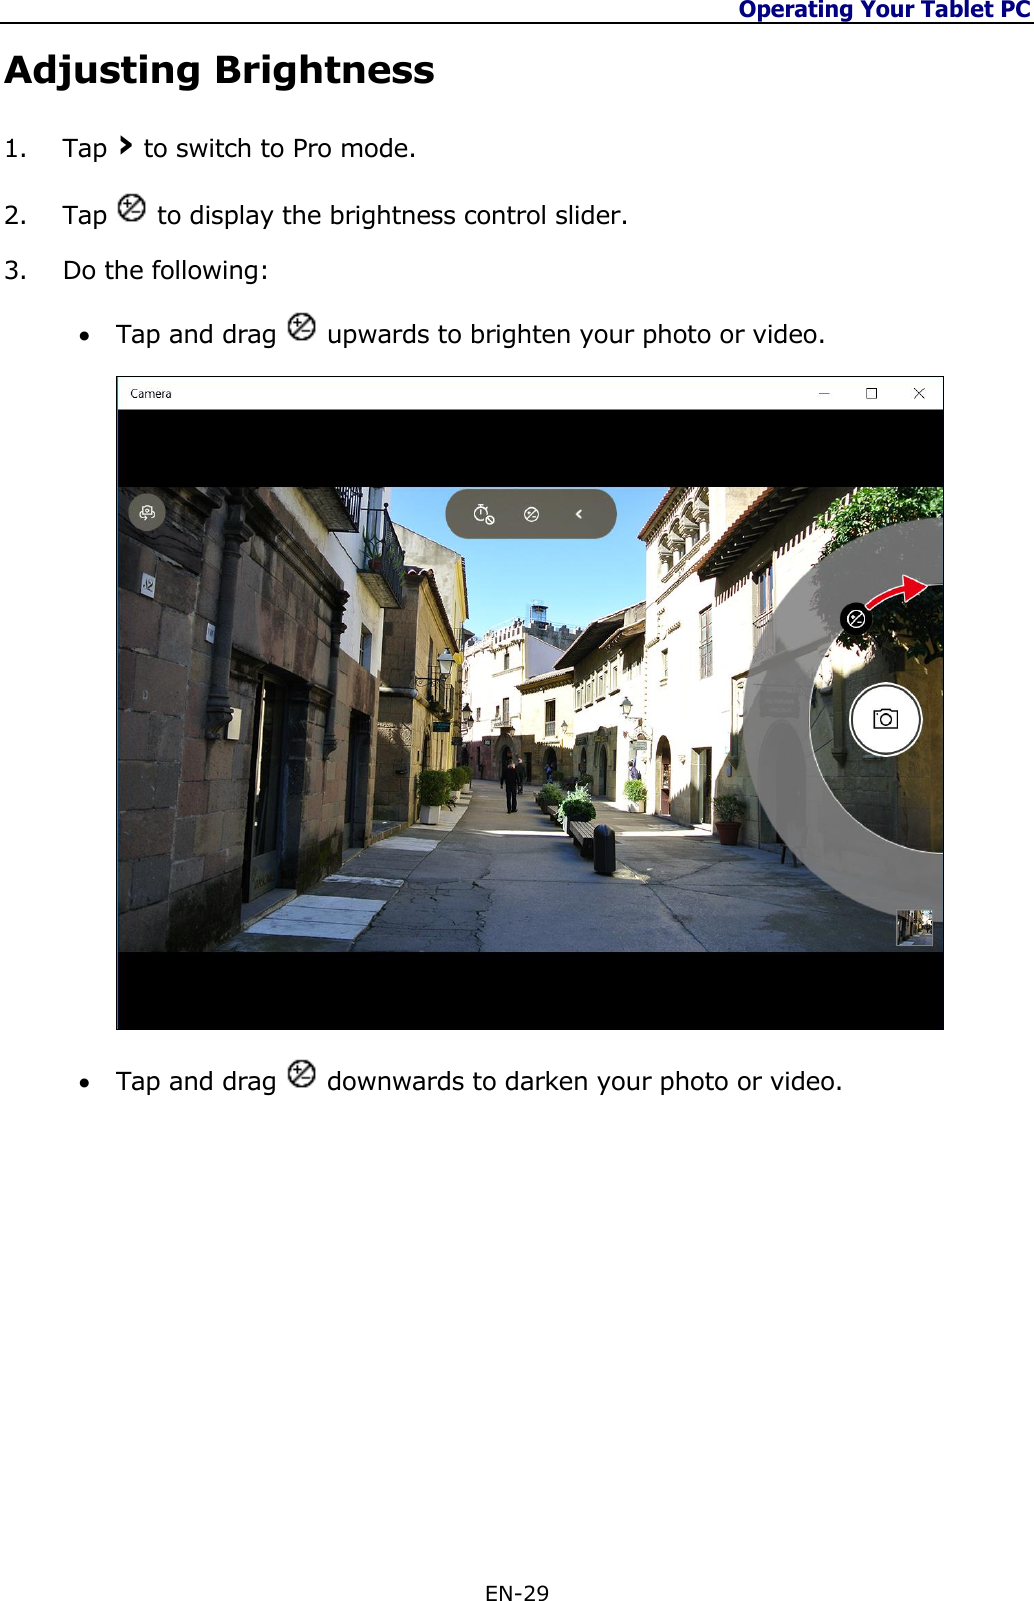
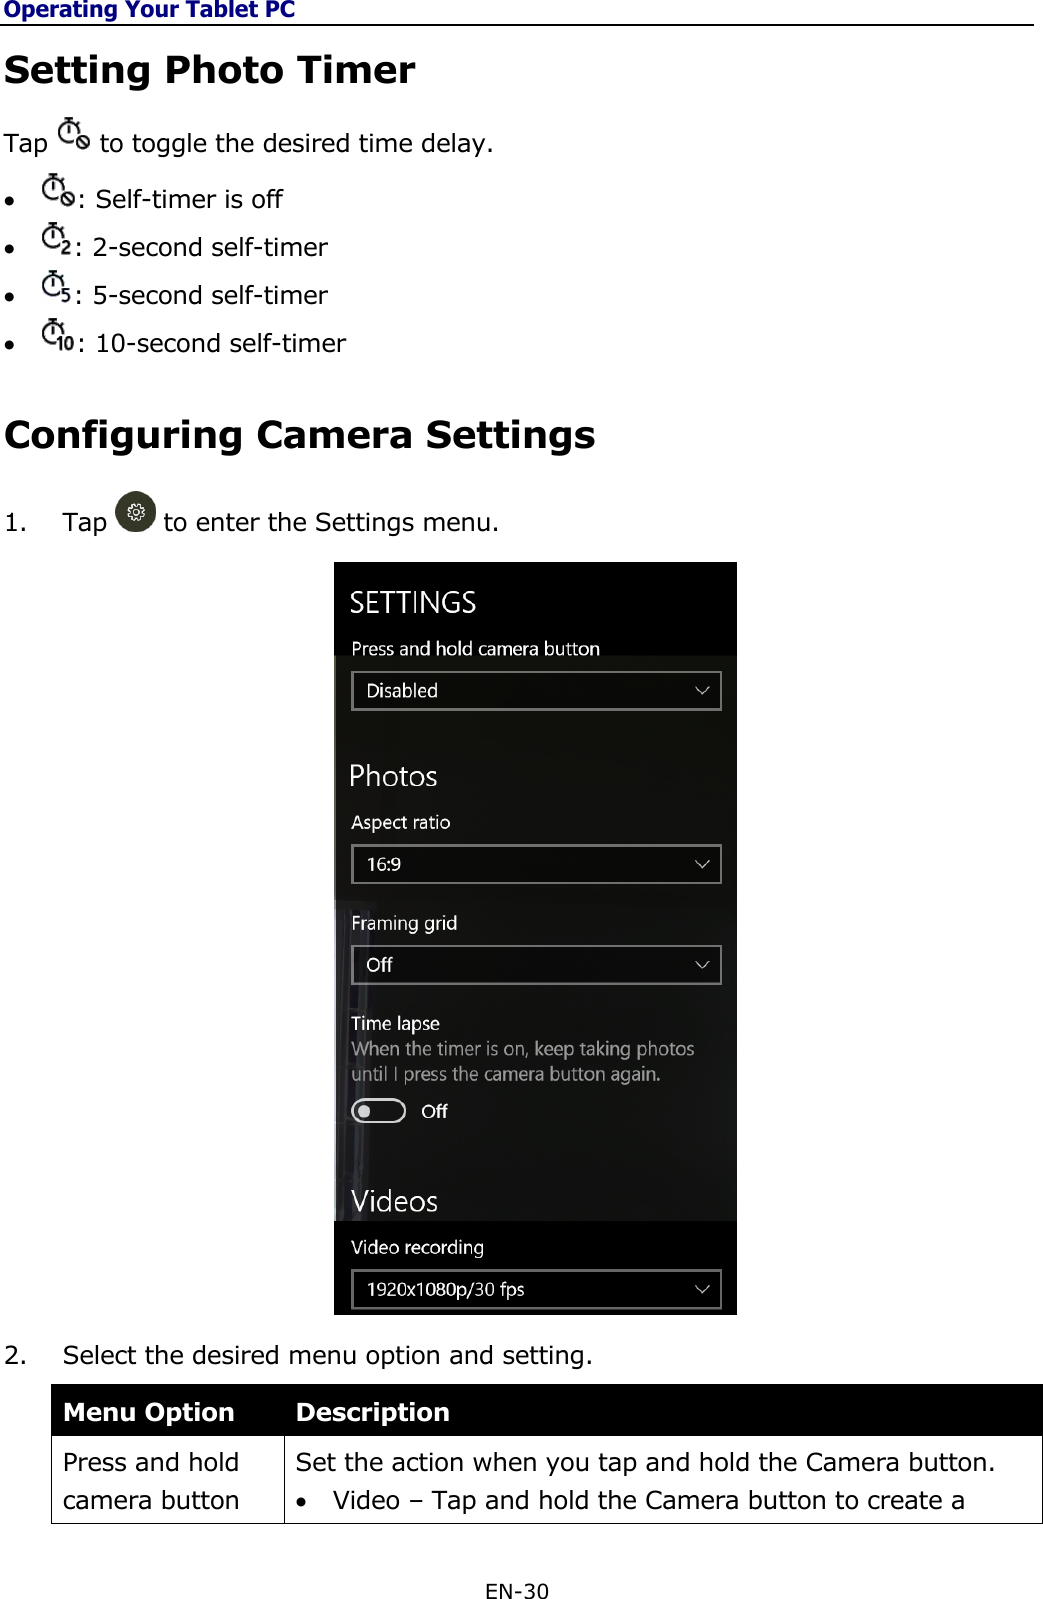
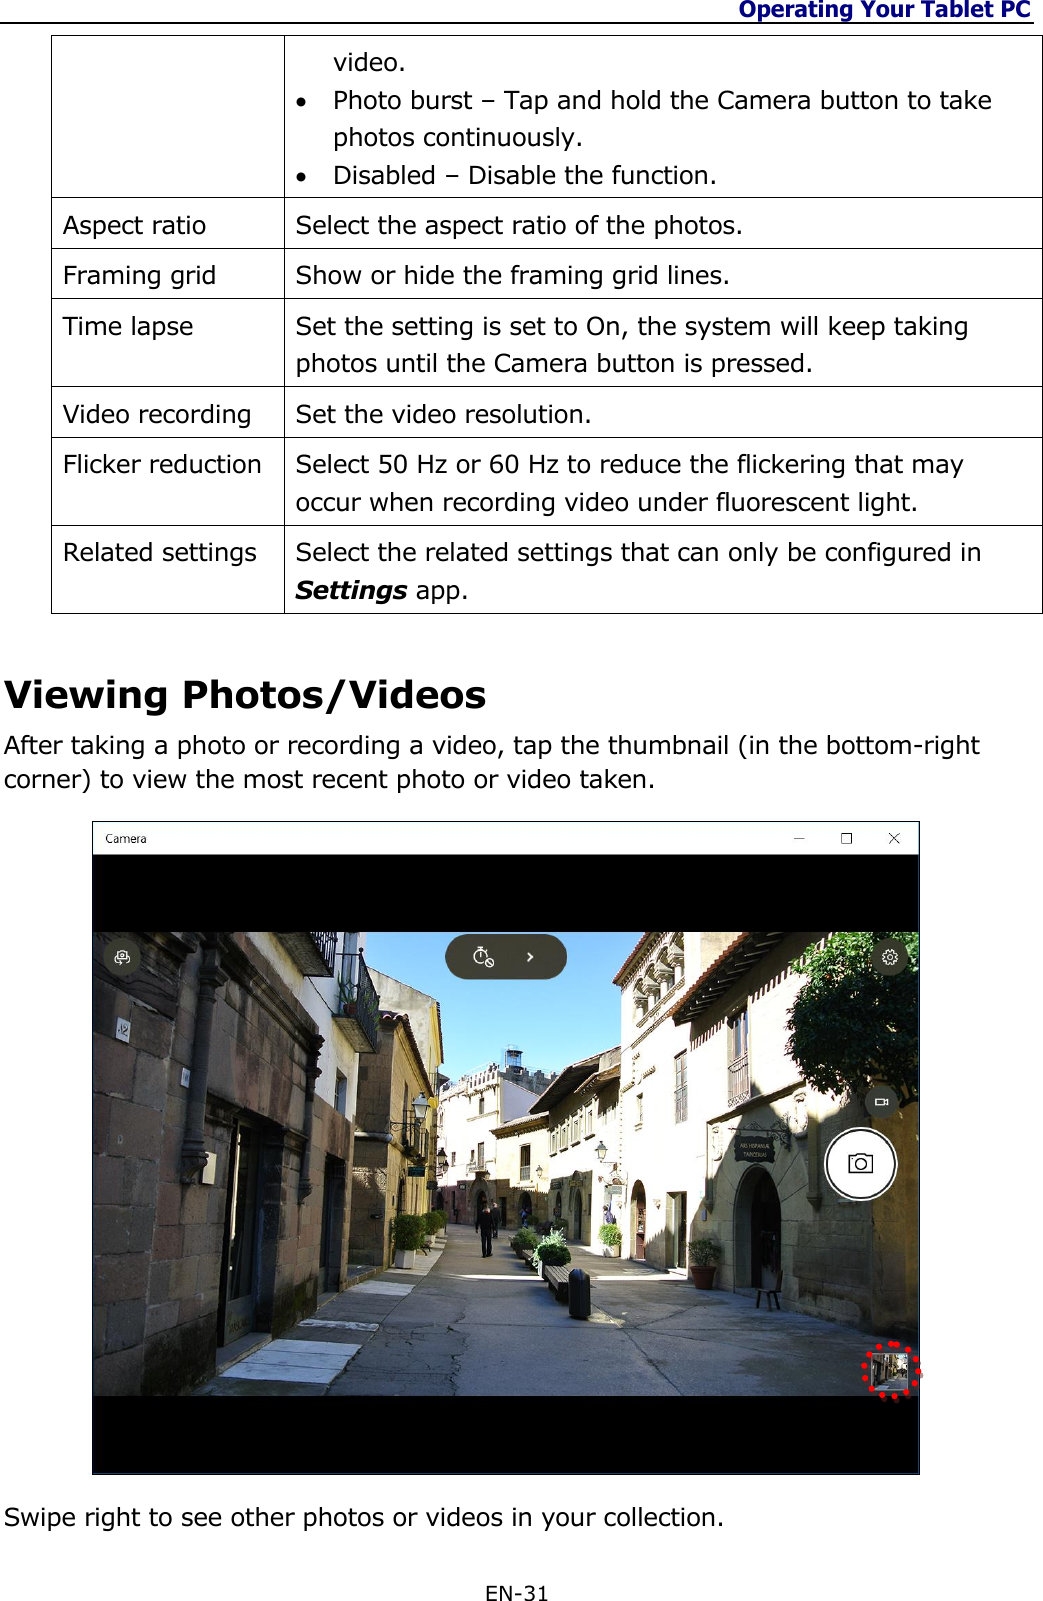
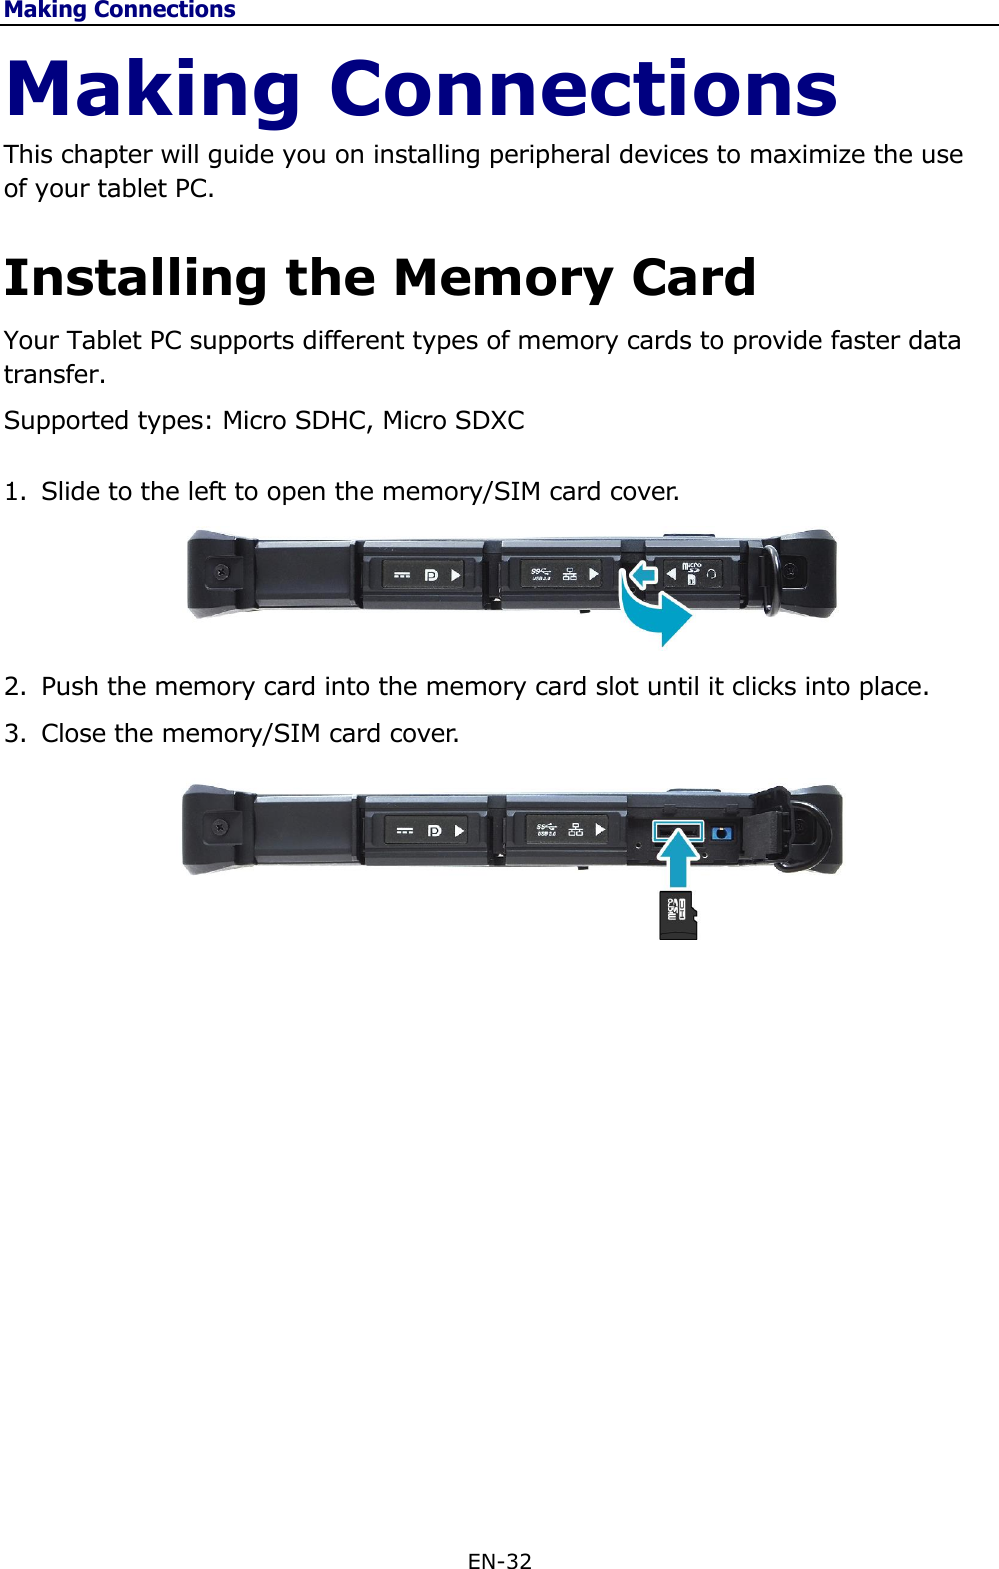
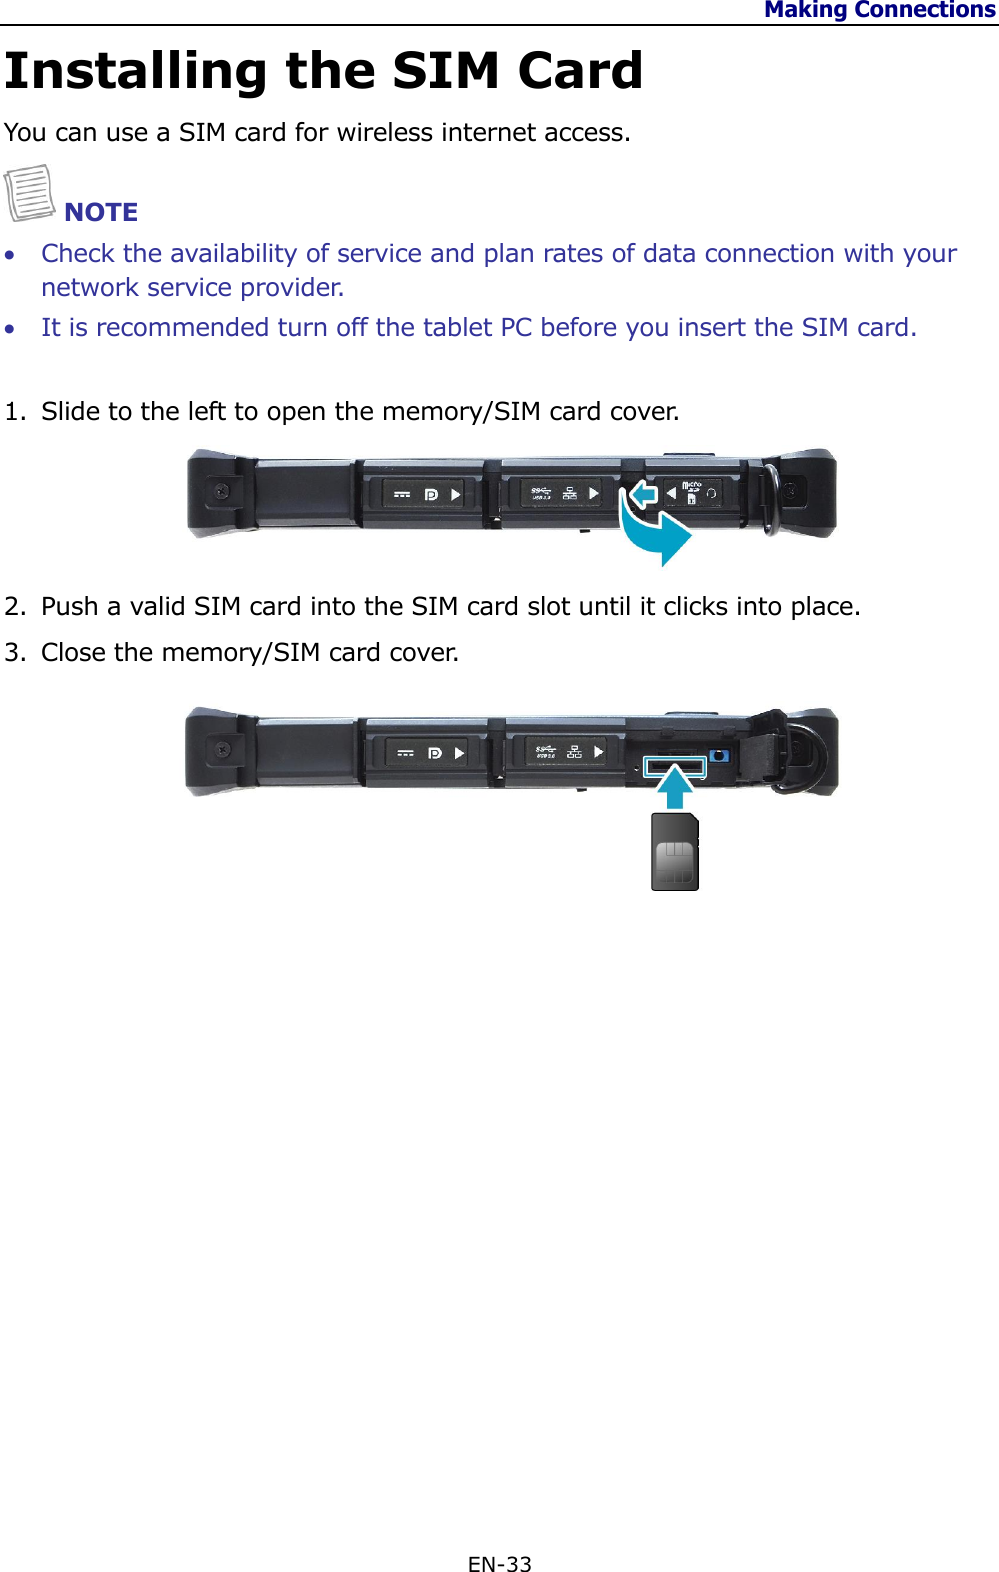
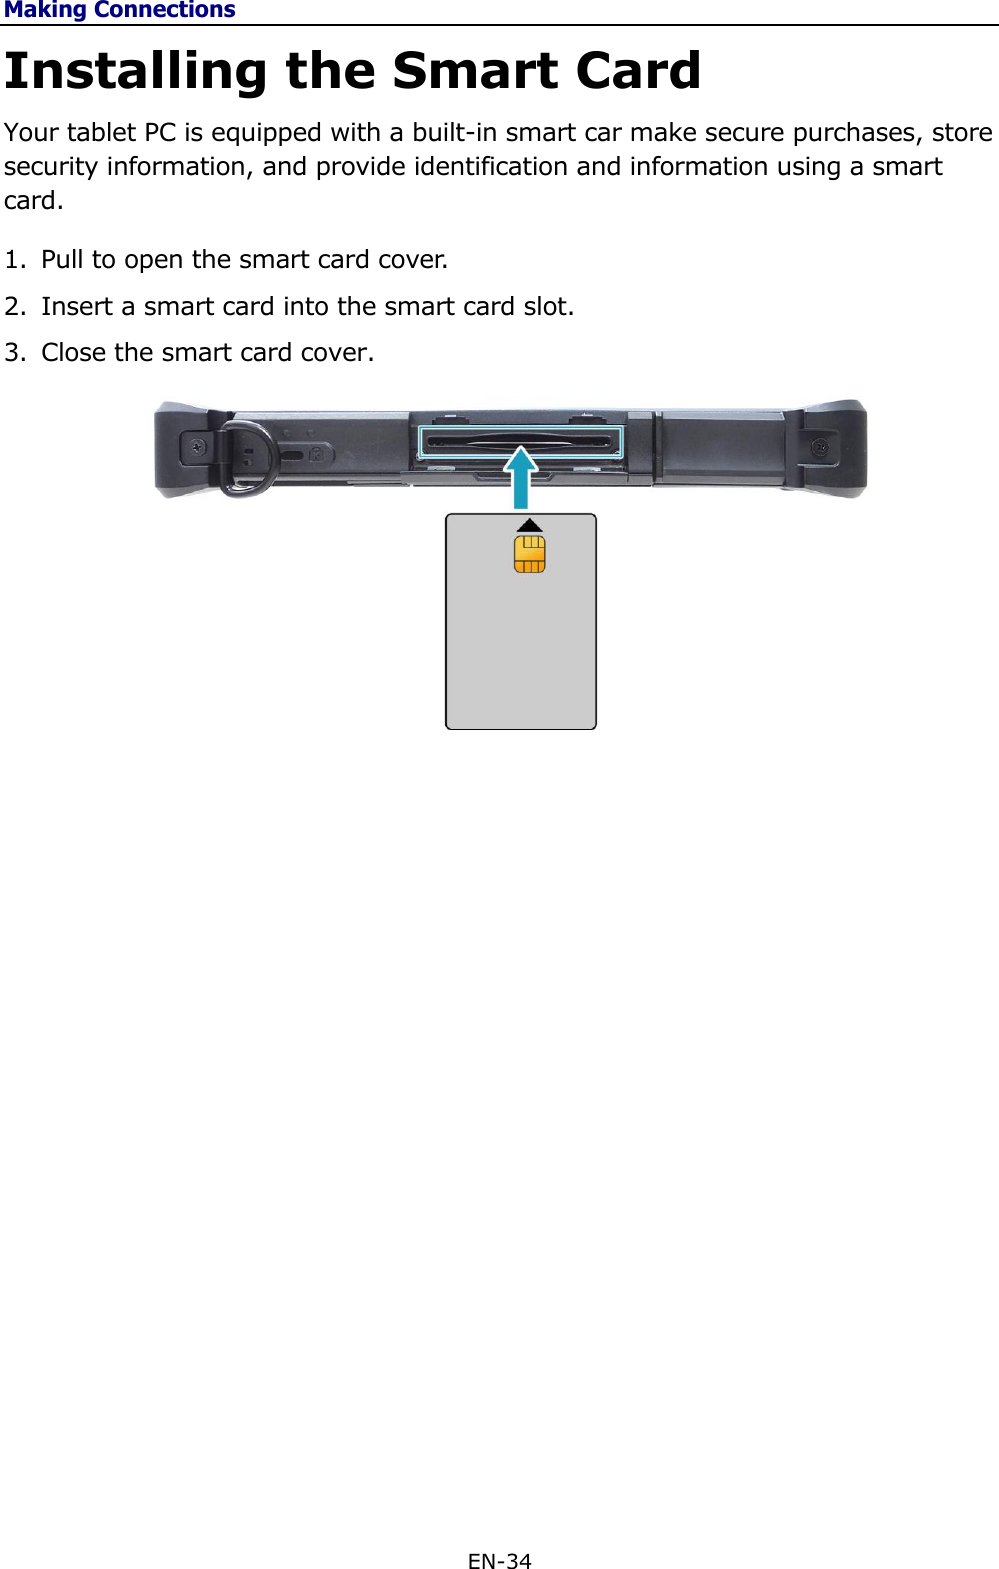
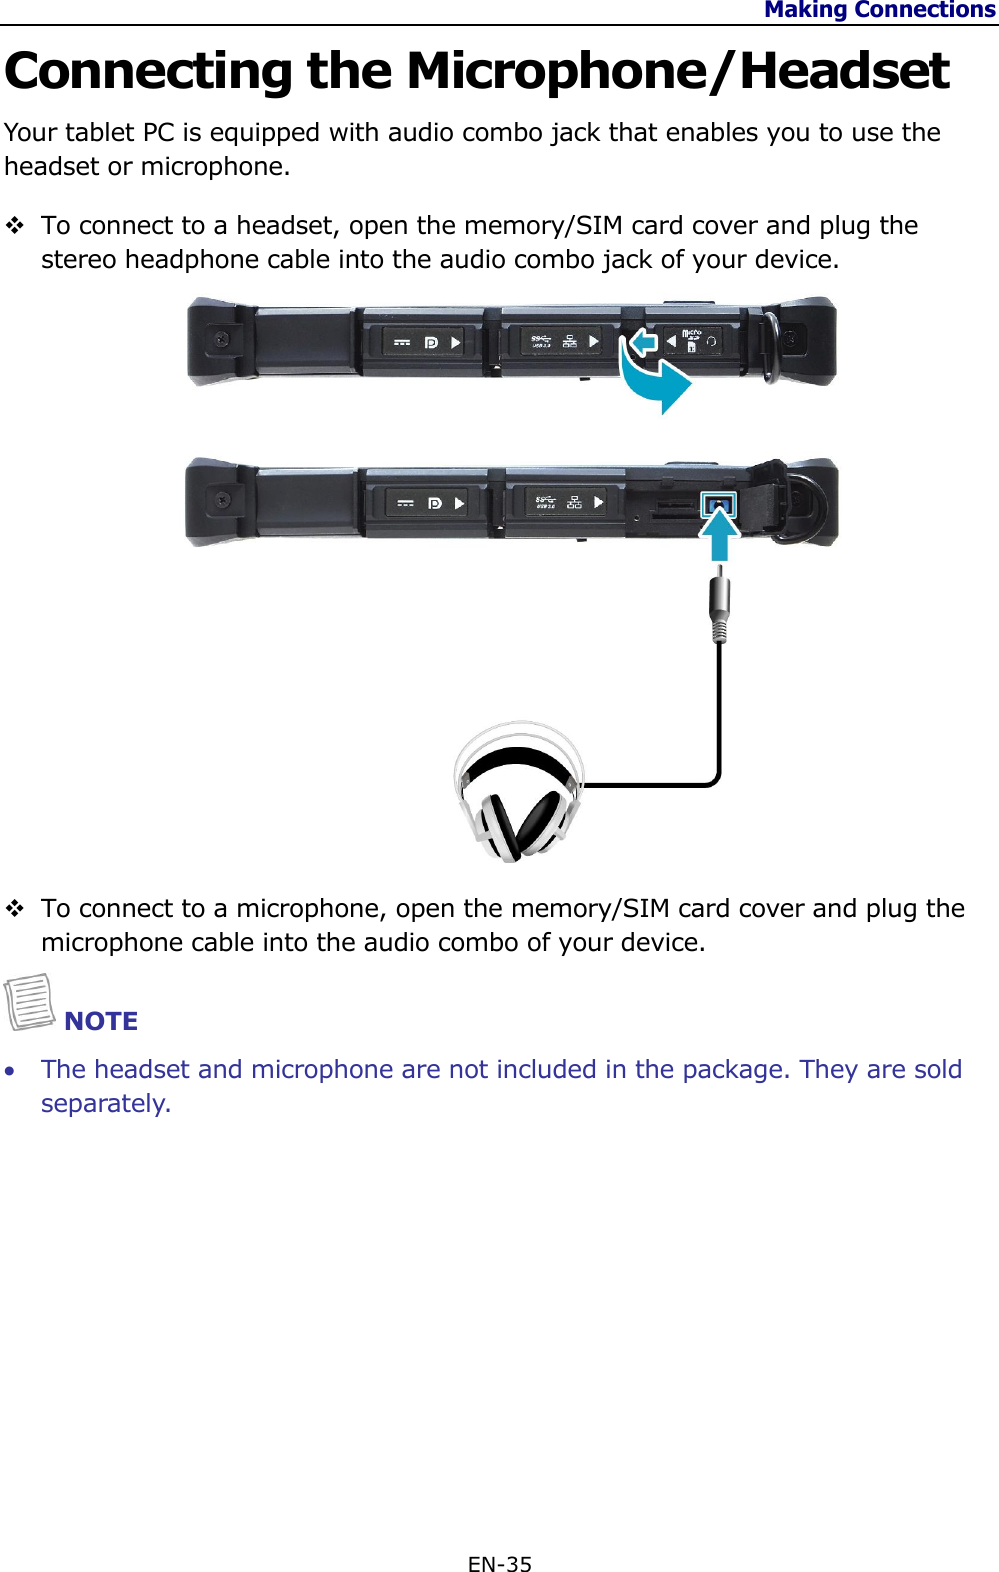
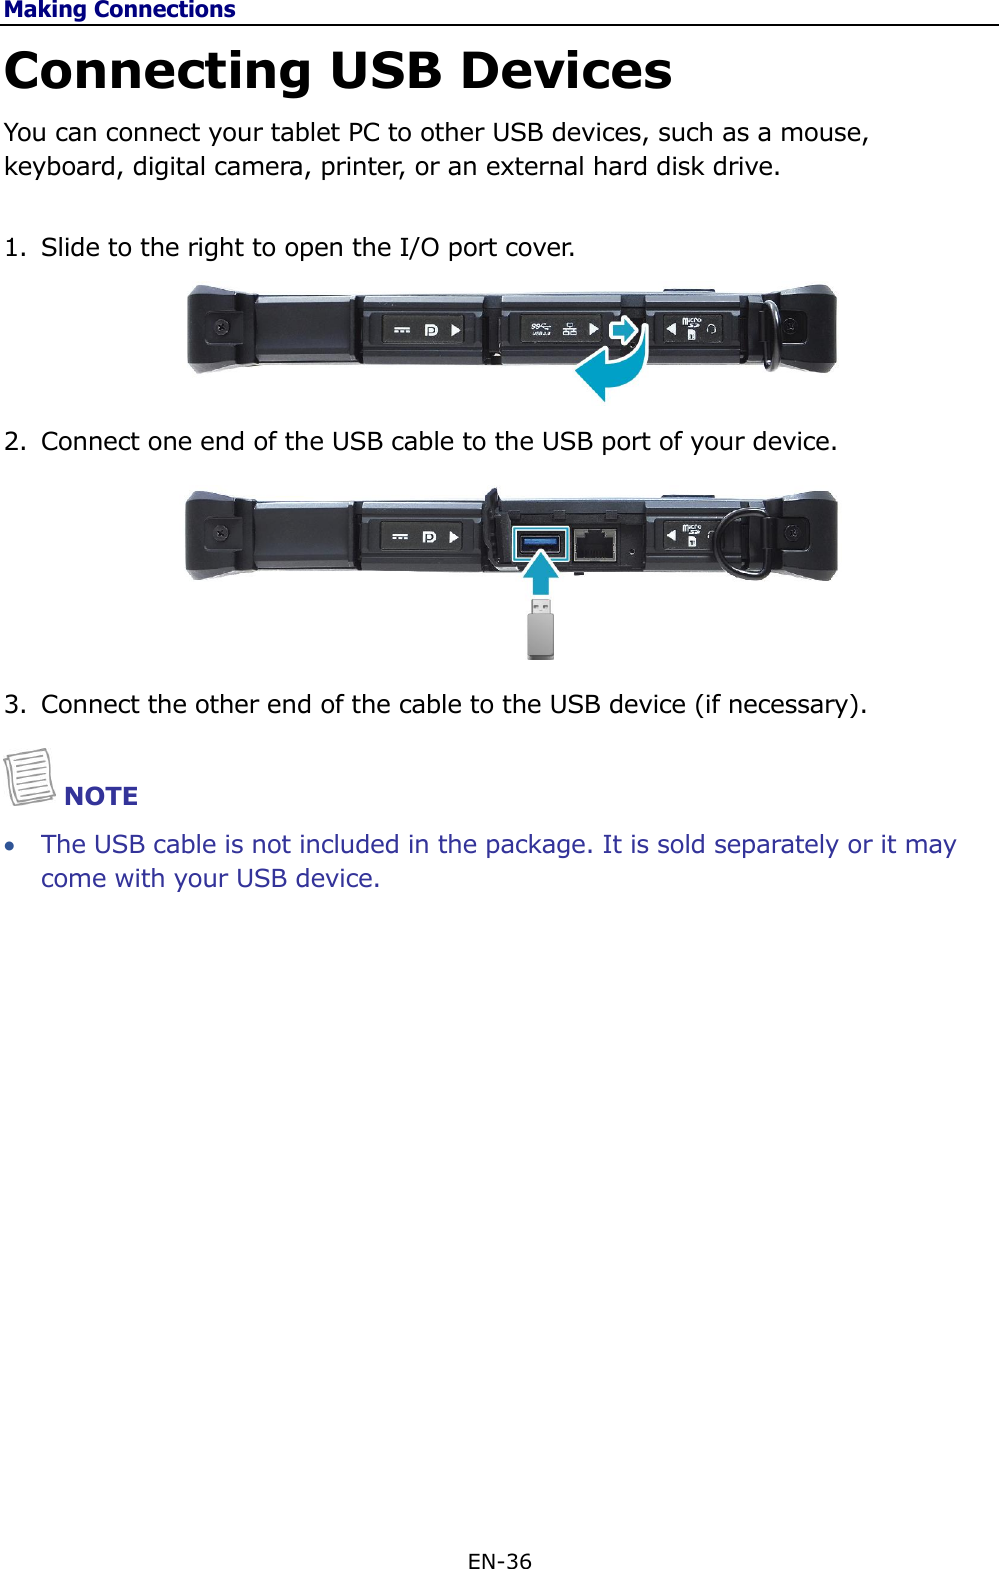
Twinhead X11BKA WLAN and BT, 2x2 PCIe M.2 2230 adapter card User Manual Twinhead U12C
Twinhead International Corporation WLAN and BT, 2x2 PCIe M.2 2230 adapter card Twinhead U12C
UserManual.wiki
>
Twinhead
>
X11BKA User Manual
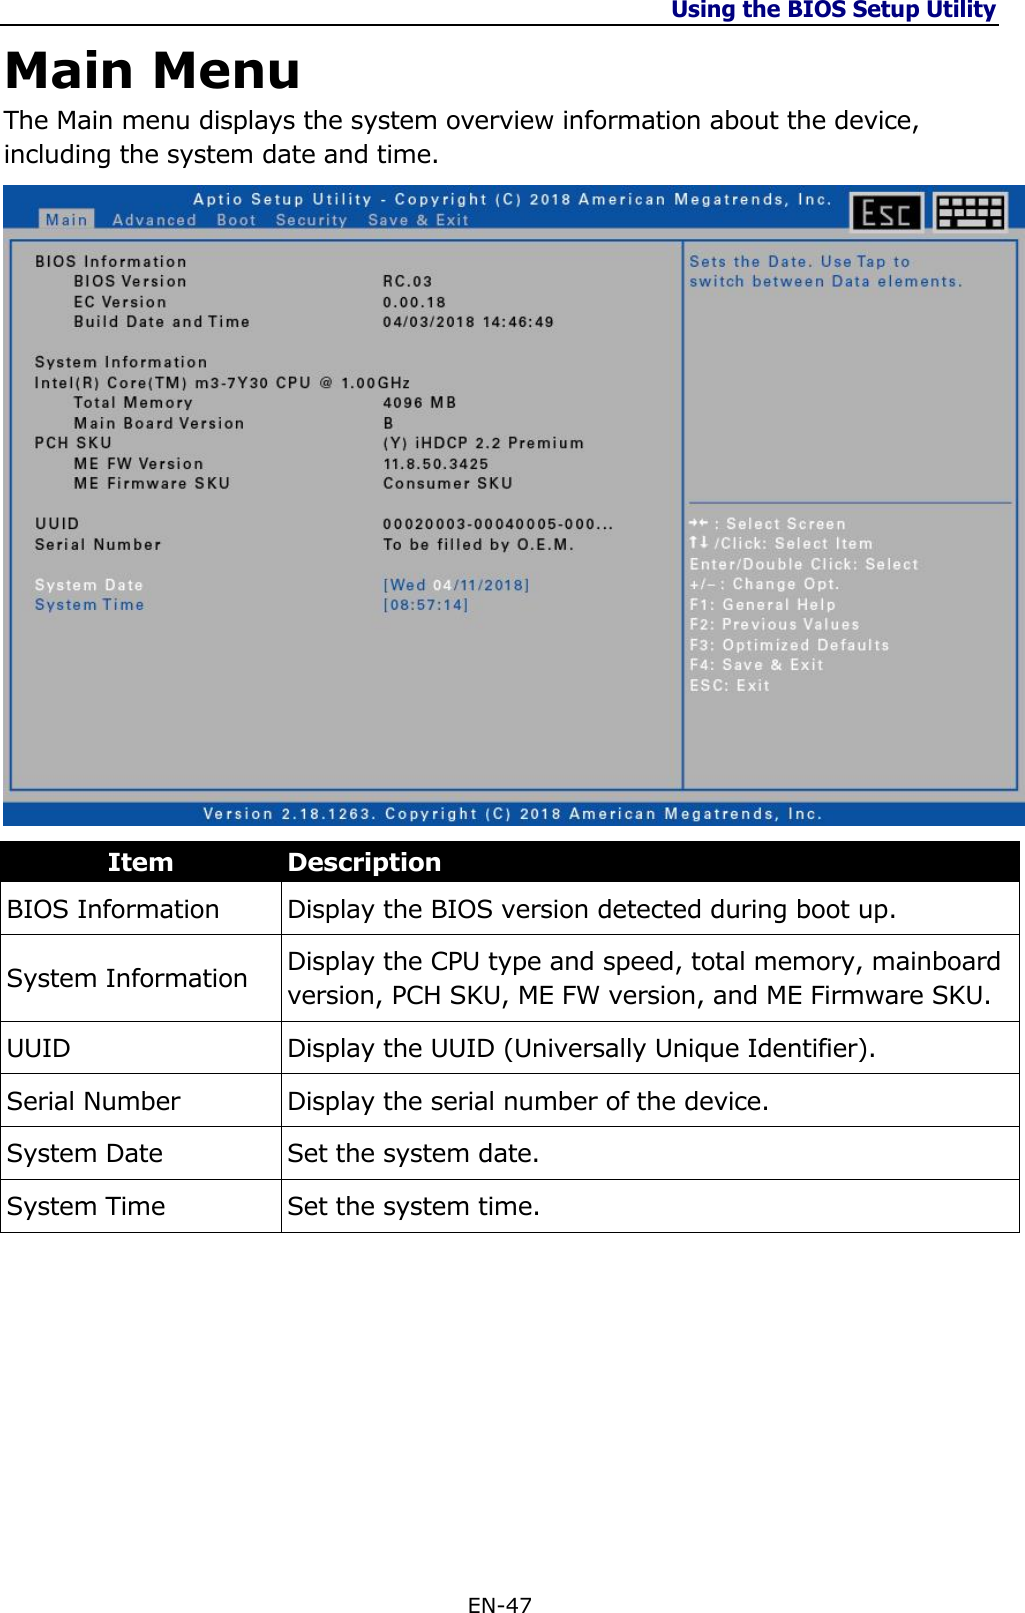
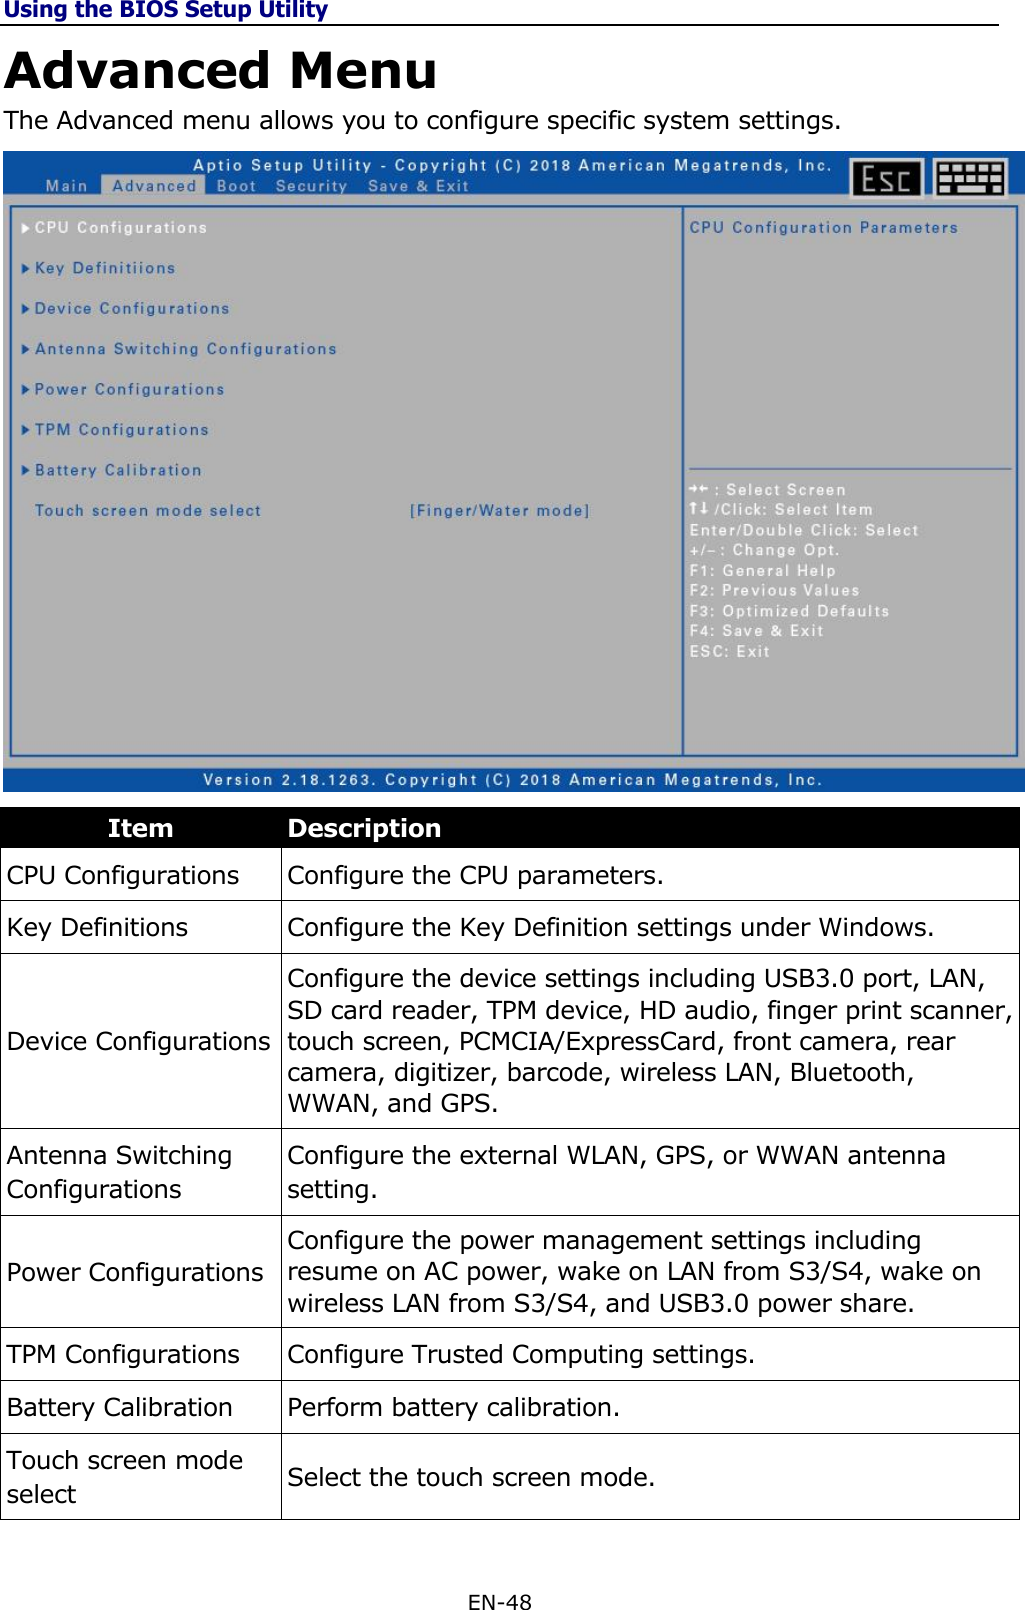
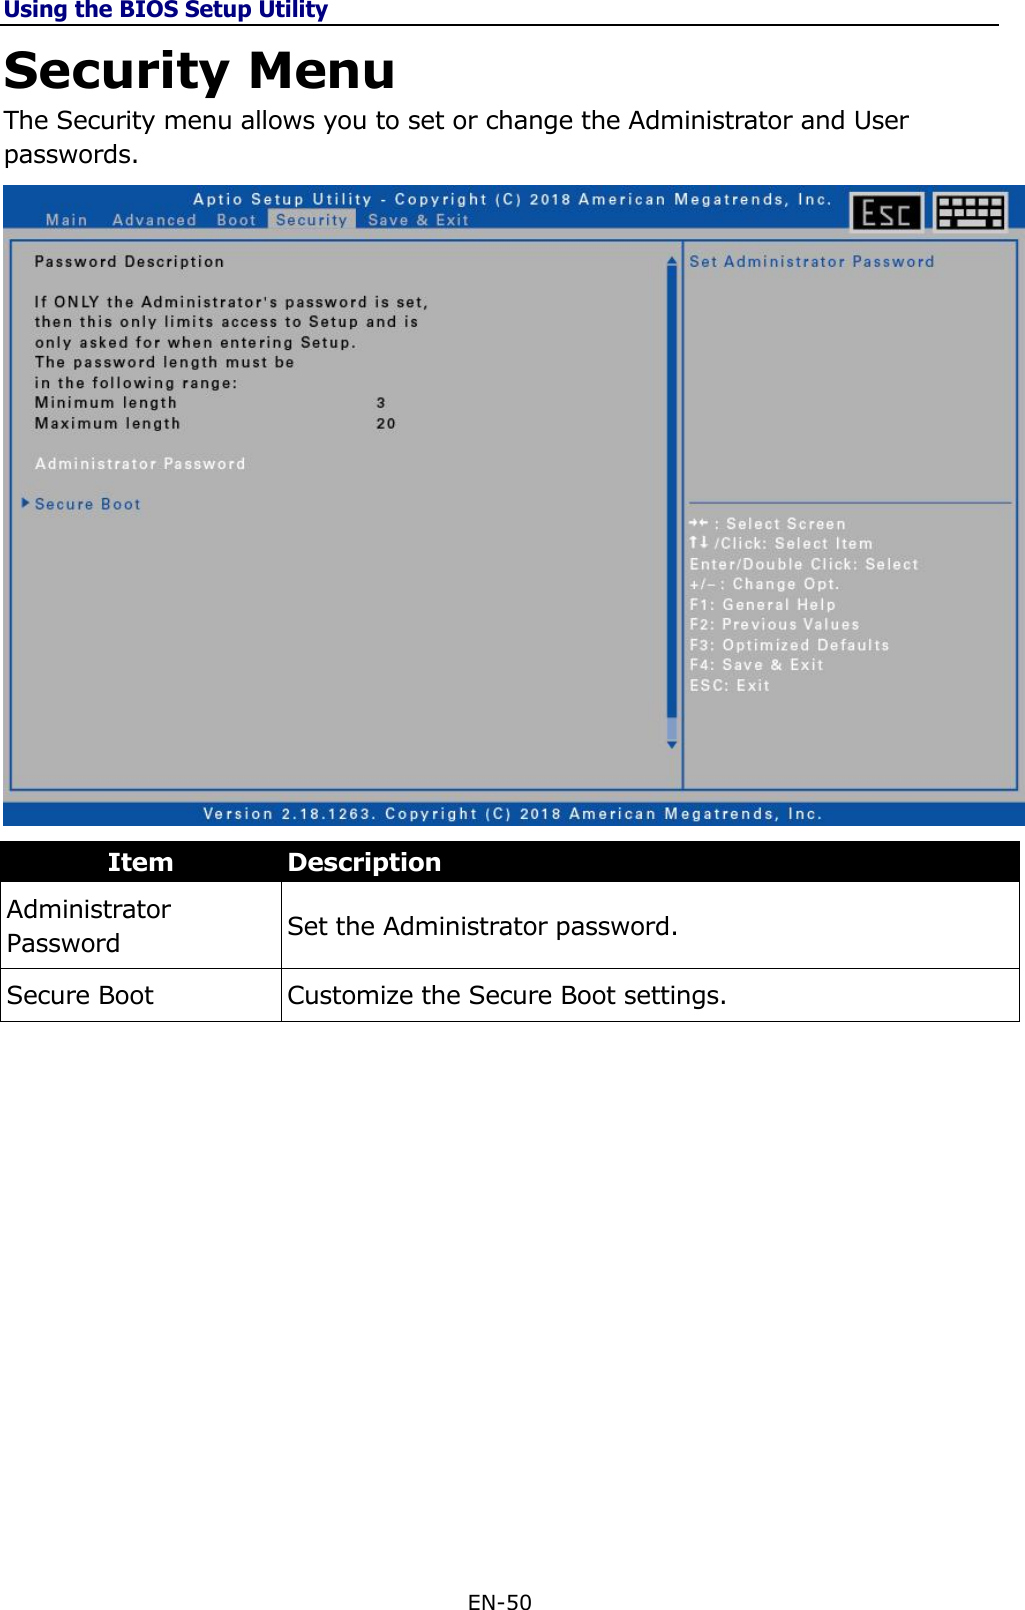
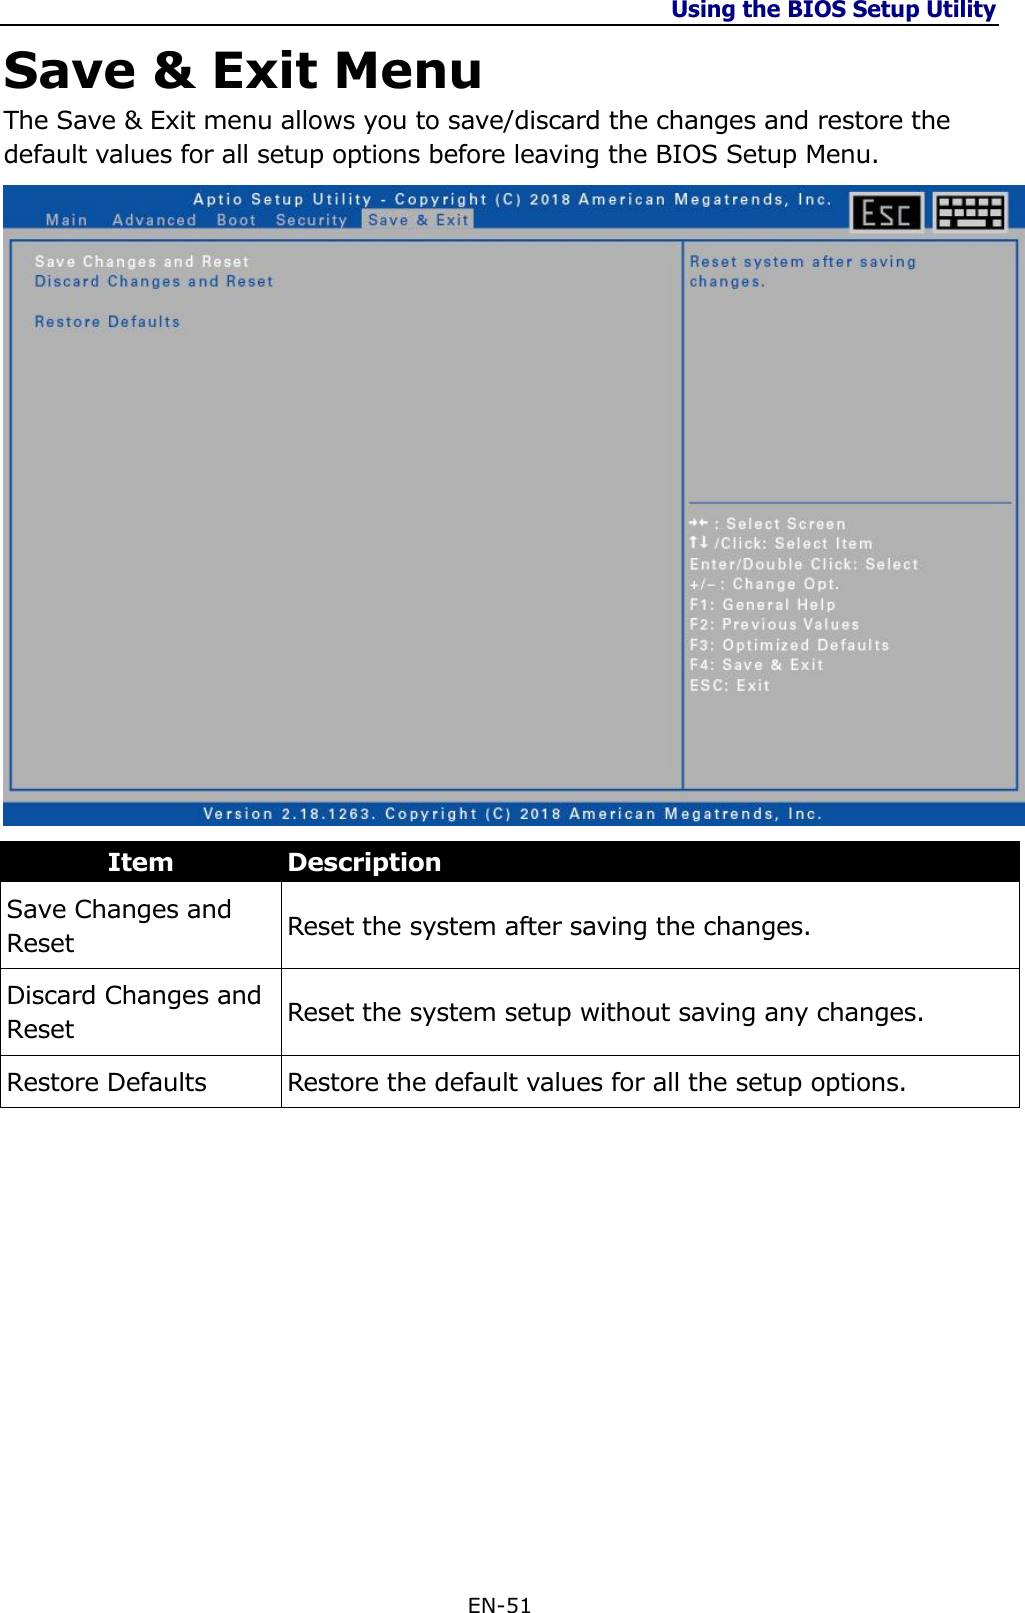
User manual
Navigation menu
Upload a User Manual
Namespaces
Wiki Guide
HTML
PDF
Info
Views
User Manual
Discussion / Help
Navigation