Tyco Safety Software House RMXIC Proximity Card Reader HID iClass compatible User Manual rm1 ICP quick install
Tyco Safety Products / Software House Proximity Card Reader HID iClass compatible rm1 ICP quick install
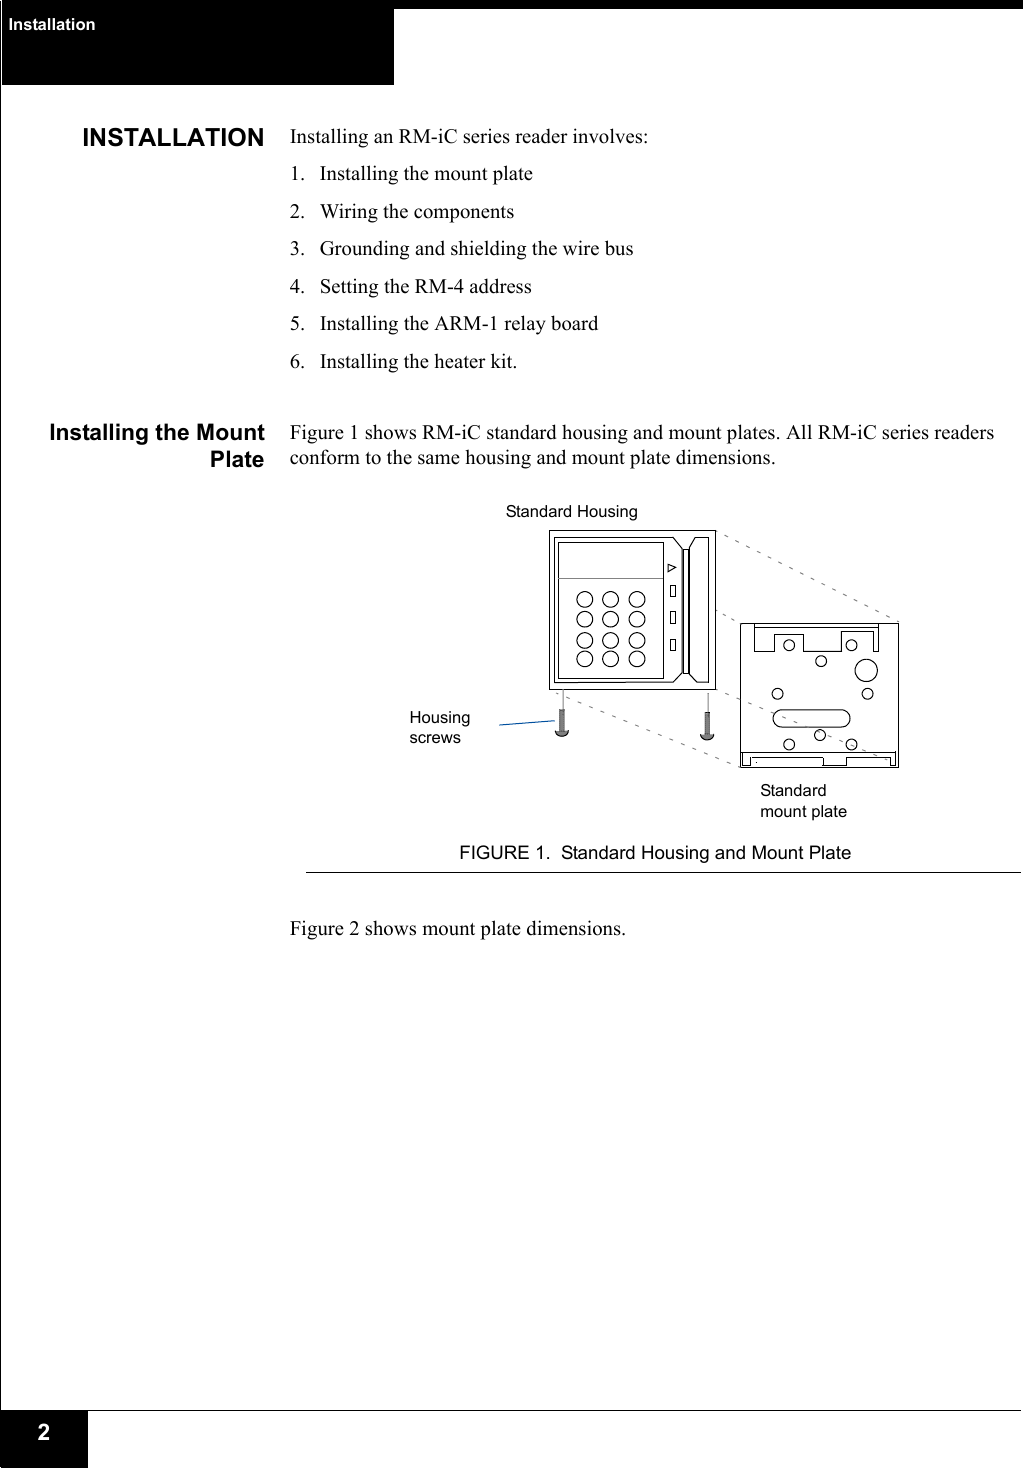
Contents
- 1. USERS MANUAL
- 2. users manual
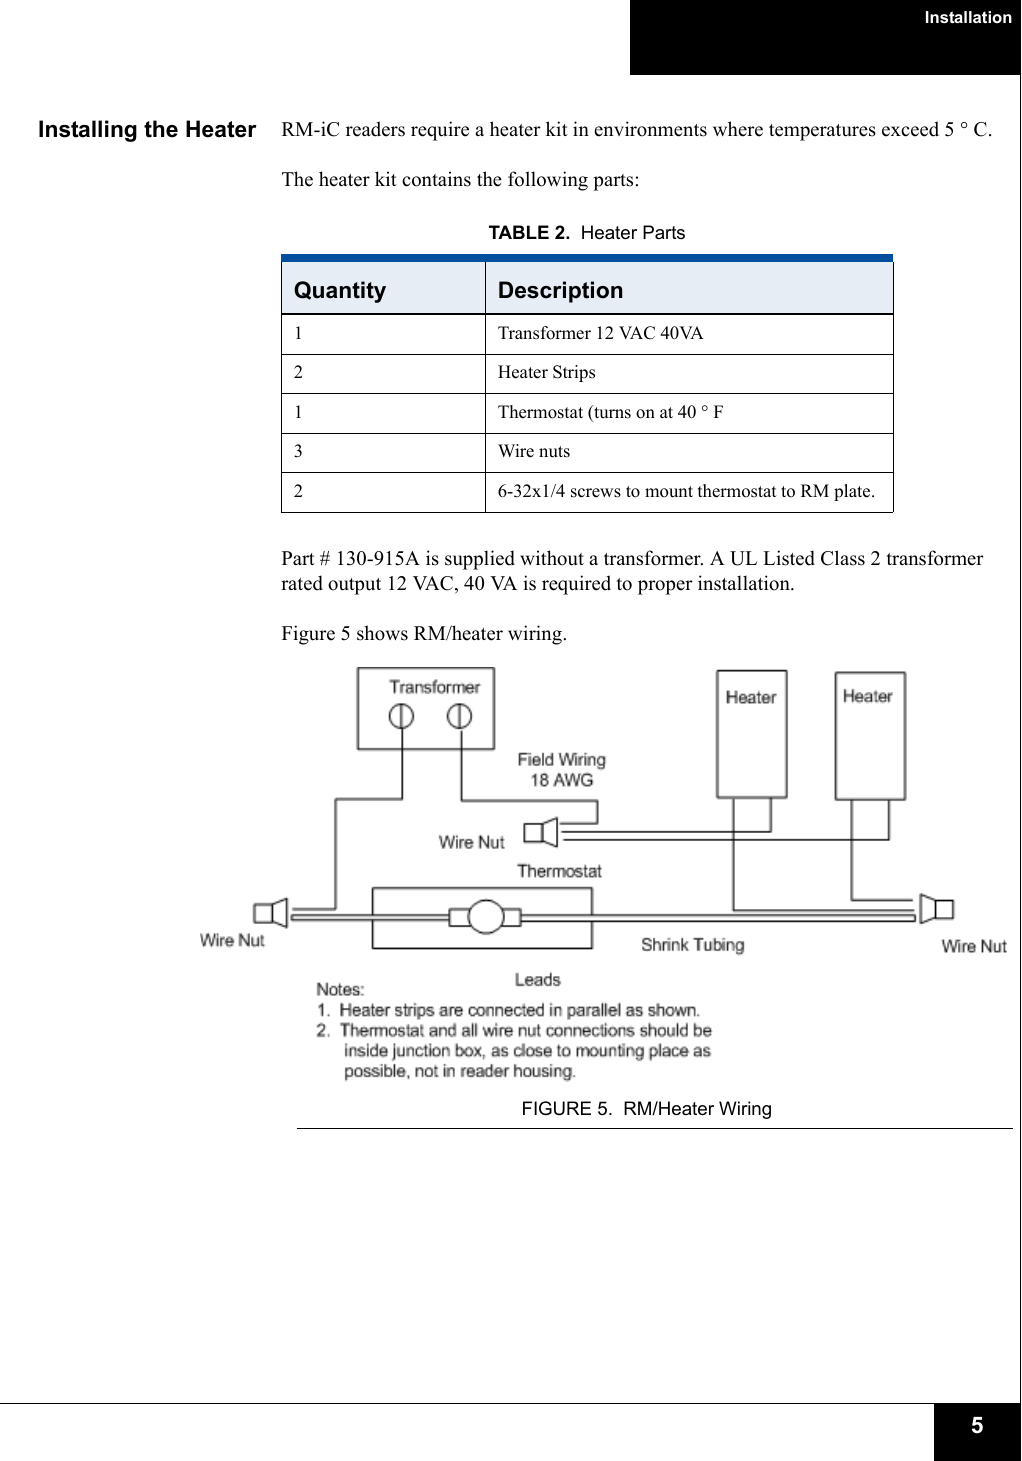
USERS MANUAL