UCB Medical Devices AVA ava User Manual 15 2AHK9 AVA
UCB Medical Devices S.A. ava 15 2AHK9 AVA
UserManual.wiki
>
UCB Medical Devices
>
AVA User Manual
15_2AHK9-AVA_User Manual
Navigation menu
Upload a User Manual
Namespaces
Wiki Guide
HTML
PDF
Info
Views
User Manual
Discussion / Help
Navigation


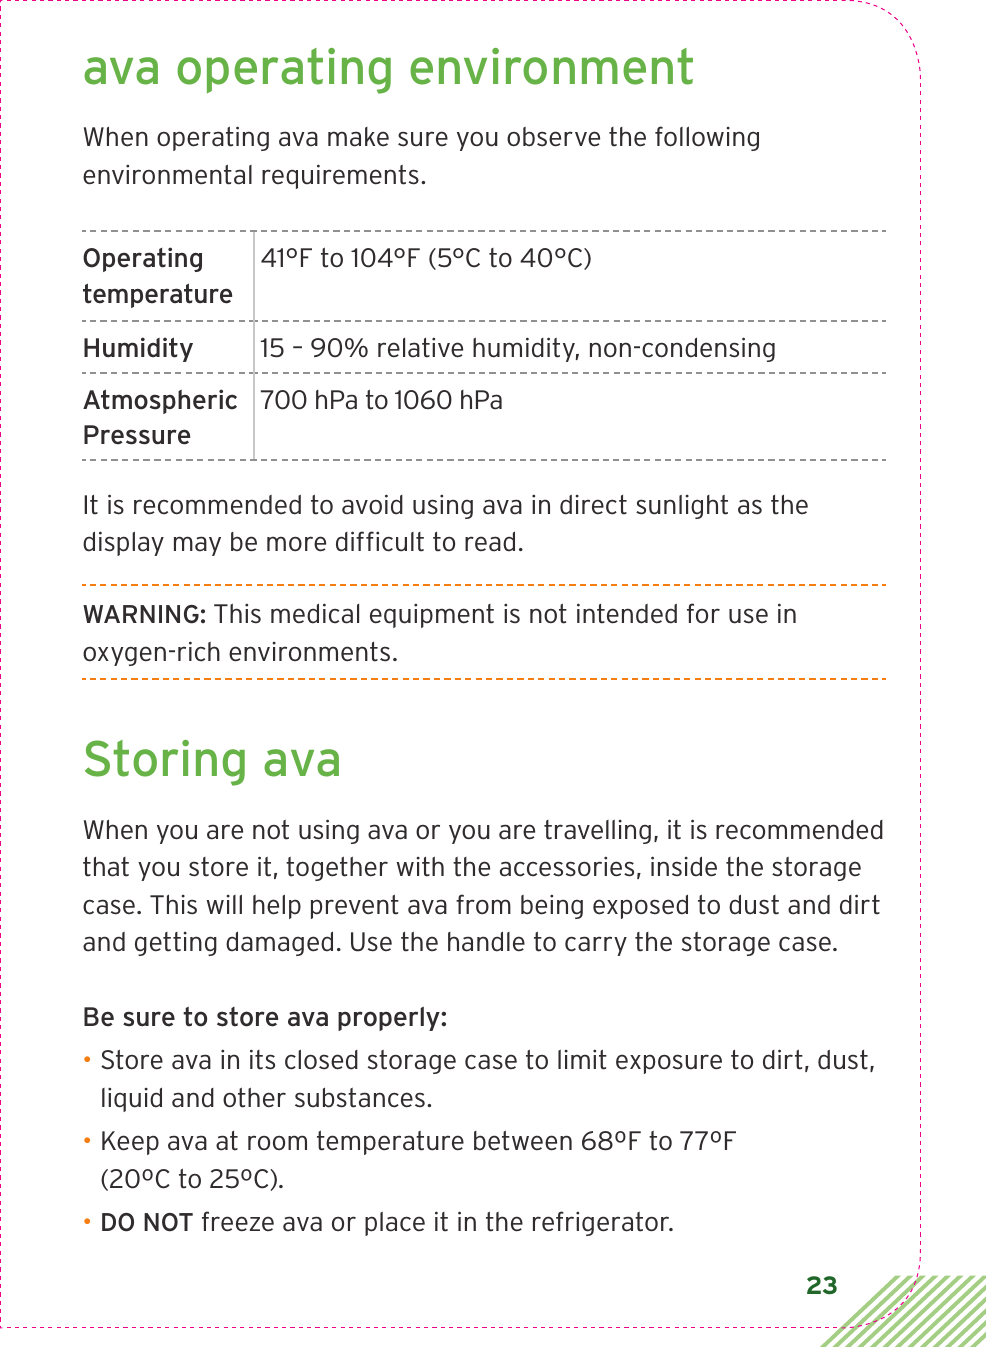


![96 Chapter 7: Technical Information about avaTechnical dataModel Name avaDimensions H : 203 [mm], W: 68 [mm], D: 56 [mm]; H: 8 [in.], W: 2.68 [in.], D: .2.2 [in.]Weight 245 g; 8.6 oz. Serial Number Unique 8 alphanumeric digit identifying each individual devicePower Supply Internally powered, rechargeable Lithium Ion Battery, 3.7V DC, 1620 mAh minimumBattery Charger Emerson / Artesyn DA12-M, 90 - 264V~ 0.15 A @240V (max), 47 / 63 Hz, output : 5V DC, 2.0 A (max)orFriwo Fox 12 Medical, Type FW8000MUSB/05100-240V~,0.15 A@ 240V (max), 50-60 Hz, output: 5V DC, 2.2 A (max)Classification Ingress Protection IP 52 (ava is protected only against occasional liquid droplets but it is not protected against water spillage)Applied part type BF Electromagnetic CompatibilityElectromagnetic compatibility in accordance with EN60601-1-2 (see EMC tables)Operating Environment 5°C – 40°C (41°F – 104°F) at 20 – 90% relative humidityPressure Limits Atmospheric pressure limits: ava can be used between 700 to 1060 hPa, at ambient pressure between 700 to 1060 hPaStorage Conditions -20°C – 60°C (-4°F – 140°F) at no humidity requirementDose Accuracy nominal injectable volume 1.0 ml min. volume 0.95 mlWarranty ava does not have any user serviceable parts. Opening or attempting to disassemble ava will void any device warranty. This medical equipment complies with the following international standards: ISO 60601 and ISO 11608](https://usermanual.wiki/UCB-Medical-Devices/AVA/User-Guide-3080648-Page-96.png)