UNION COMMUNITY KL-100X Digital Door Lock User Manual
UNION COMMUNITY Digital Door Lock
User Manual
Quick
MANUAL
Keyless Key (KL-100)

Instruction Manual
Precautions for Safety
<Warning> This precaution must be read to protect the users and to prevent any property loss
or inconvenience. Please read it carefully for proper use.
Do not install or repair this product by yourself.
Do not install where the space between the door and the door frame is less than 5mm.
Be careful not to expose your PIN code, and please change it regularly.
Do not use the product with wet hands. Be aware of liquid such as water or drinks permeating
into the product.
Do not press the buttons of the keypad with excessive force or use sharp objects.
Please confirm that the door is completely locked before leaving.
Please check the polarity (+/-) of the battery before inserting.
Please be aware as fluid flowing or battery rupture may occur if the polarity of the battery is
reversed.
Change all the batteries at once when they go dead. Do not confuse new batteries with the old
ones.
Do not use water, benzene, or alcohol to clean the product. Only use dry clothes.
Please replace the batteries within a week after the initial low-battery alarm.
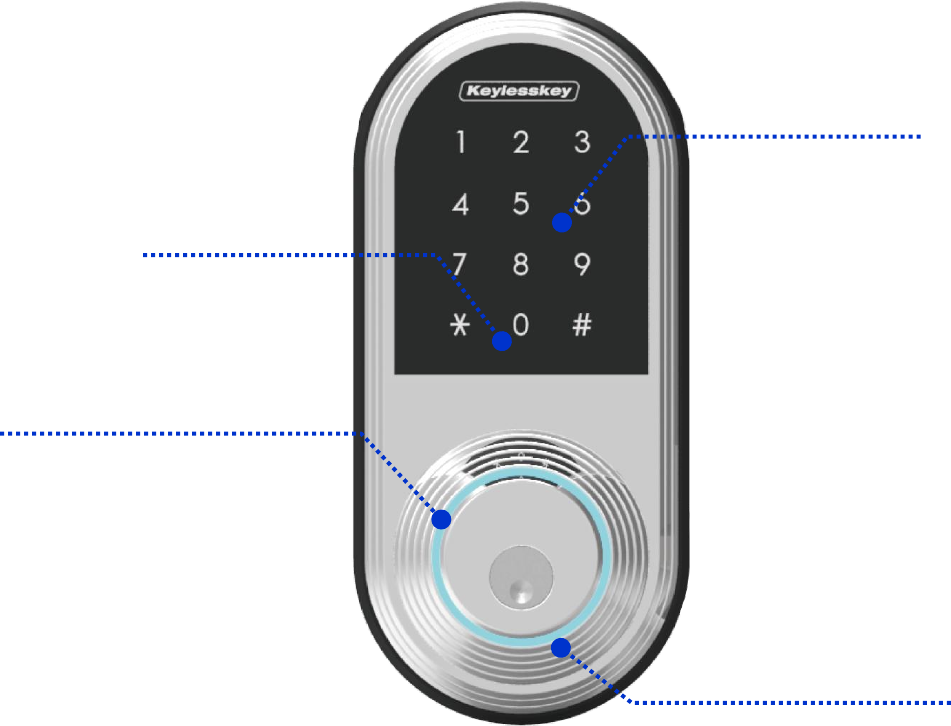
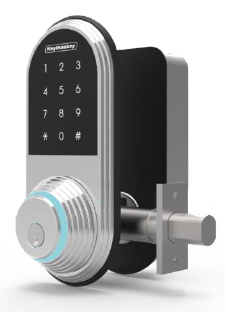
Identification of Product
Out-Body
Card Reader
- Card
authentication
Bluetooth 4.0[BLE]
- i-Key authentication
- d-Key authentication
Mechanical Key
Keypad
- PIN Code
authentication
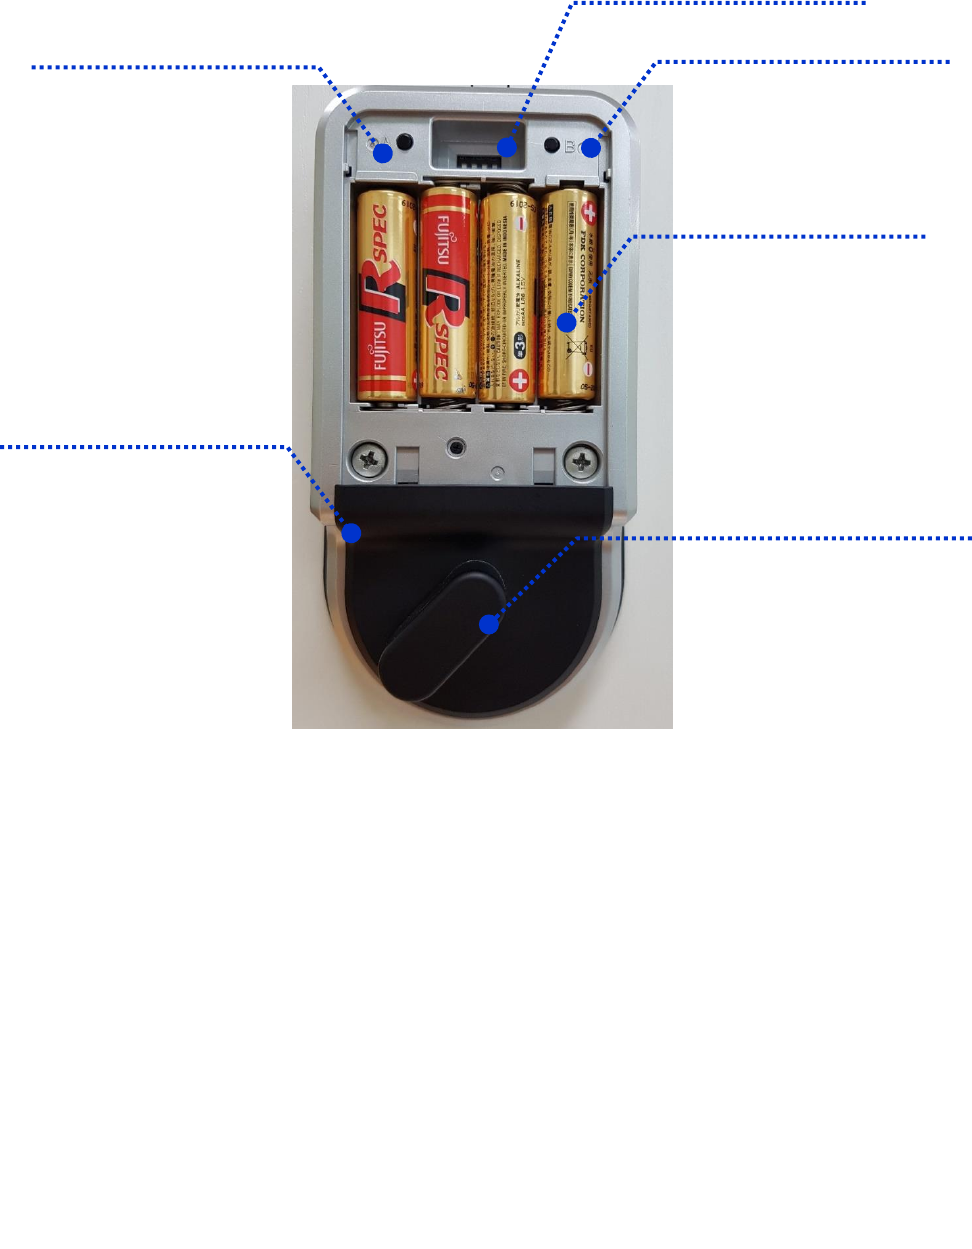
In-Body
DIP S/W
Tact S/W A
Fixing Screw
Battery
Manual lever
Tact S/W B
● TACT S/W‘A’ / ‘B’ & DIP S/W (On/Off Position)
1. TACT ‘A’ : (Press Long) i-Key Doorlock Registration.
(Press Short) Password Change Mode
2. TACT ‘B’ : (Press Long) Card Registraion.
(Press short) d-Key Registration & Doorlock Setting.
3. DIP Switch #1 (Left / Right Door Select)
DIP Switch #2 (Buzzer Mute On/Off)
DIP Switch #3 (Easy-Lock On/Off)
DIP Switch #4 (Reserved)

Using PIN code (Password)
Using PIN code to control the door lock
PIN code is used for User code and Guest code.
Initial PIN code and Factory Reset PIN code is “0000”
<USER PIN code>
Registration
① Open the battery cover of In-Body
② Press tact S/W ‘A’ shortly to activate the keypad of Out-Body
③ Press the current PIN code (initial code is 0000) and #
④ Press new PIN code and # (alarm)
⑤ Press the new PIN code once again and press # (alarm)
⑥ The keypad of Out-Body will go off
⑦ PIN code is registered
How to Use
① Touch the keypad or the keybox of Out-Body
② Two random numbers and ‘*’ / ‘#’ will appear
③ Press the two numbers regardless of order
④ The keypad will be activated
⑤ Press the registered PIN code and press # (Door will open)
<Guest PIN code>
Registration
① Touch the keypad or the keybox
② Two random numbers and ‘*’ / ‘#’ will appear
③ Press ‘#’ for two seconds, and the keypad will be activated
④ Press the registered PIN code and press #
⑤ Press the Guest PIN code (4 digits) of your choice and press #
⑥ Guess PIN code is registered successfully (alarm)
(In order to delete the Guest PIN code, proceed until ③ and wait for 5 seconds)
How to Use
① Touch the keypad or the keybox of Out-Body
② Two random numbers and ‘*’ / ‘#’ will appear
③ Press the two numbers regardless of order
④ The keypad will be activated
⑤ Press the registered Guest PIN code and press # (Door will open)
(Guest PIN code is valid only for single entry, and will be deleted after use.)
Using Card / Key Tag
The door lock can be controlled by cards and key tags which has RF function. Maximum of 10
cards or key tags can be registered.
* Caution *
After entering the registration mode and register new cards or key tags, previously registered
cards or key tags will be deleted. Therefore, please register all at once.
Registration
① Open the battery cover of In-Body
② Press tact S/W ‘B’ for 2 seconds and ‘C’ will appear on the keypad
③ Hold the card or key tag you want to register near the surface of the keypad
④ Alarm will ring as the card or key tag is registered successfully
⑤ Hold more cards or key tags you want to register near the surface of the keypad one by
one.
⑥ The registration mode will be deactivated if no card or key tag is registered within 5
seconds
(In order to delete the registered cards and key tags, enter the registration mode and
register new card or key tag, or Factory Reset the door lock.)
How to Use
① Touch the keypad or the keybox of Out-Body
② Two random numbers and ‘*’ / ‘#’ will appear
③ Hold the card or key tag near the surface of the keypad (door will open)
Using Smartphone (d-Key)
Controlling the door lock with Smartphone that has Bluetooth function
Install Keyless key App on your Smartphone and follow the procedures below to register.
Maximum of 10 Smartphones can be registered.
Registration
① Open the battery cover of In-Body
② Press tact S/W ‘B’ shortly and green LED of the keybox will be on
③ Run the Keyless key App on your Smartphone (enter the menu mode)
④ Enter the PIN code registered in your door lock
⑤ Press d-Key Button at the bottom of the screen
⑥ Press Register Button (Alarm)
⑦ After the registration is done, it will turn to standby mode. Repeat from ② to add more
devices.
(In order to delete, follow the procedures until 2.4.1-⑤ and press Delete-All Button at
the bottom, or Factory Reset the door lock to delete all the d-Keys)
How to Use 1
① Touch the keypad or the keybox of Out-Body
② Two random numbers and ‘*’ / ‘#’ will appear
③ When the green LED of the keybox turn on, activate the App on your smartphone and
press Open Button. (Door will open)
How to Use 2
① Touch the keypad or the keybox of Out-Body
② Two random numbers and ‘*’ / ‘#’ will appear
When the green LED of the keybox turn on, shake or swing the Smartphone, which the
screen is off. (Door will open)

Additional Function
Factory Reset
Every information will be deleted and turn to default settings, except the Serial Number of the
product.
① Open the battery cover
② Press both tact S/W ‘A’ and ‘B’ together for 5 seconds.
③ Alarm will ring and resetting procedure will be proceeded
④ All the functions User has registered will be deleted. (PIN code will be set to 0000)
LED Status
① Red
: Malfunction / Authentication Failure / Duplicate Registration / Rectification / Force Entry
② Green
: Authentication Succeeded / Registration Standby / Authentication Standby / Unlocked
③ Orange
: Low-Battery Warning
Battery Replacement
Low-Battery alarm will ring
- It is time to replace the batteries if the orange LED turn on with alarm when you open
the door with PIN code or RFID card.
Replacing the Battery
- Replace all the old batteries with new ones within a week after the initial warning alarm.
Caution
Duration of the battery differs depending on its brand, date of manufacture, and service
environment
(Four 1.5V AA Alkaline Batteries, assuming that it is used 10 times a day, lasts approximately 10
months.)
As fluids may flow from the batteries and damage the product, please check it regularly. (
Every 6 months)
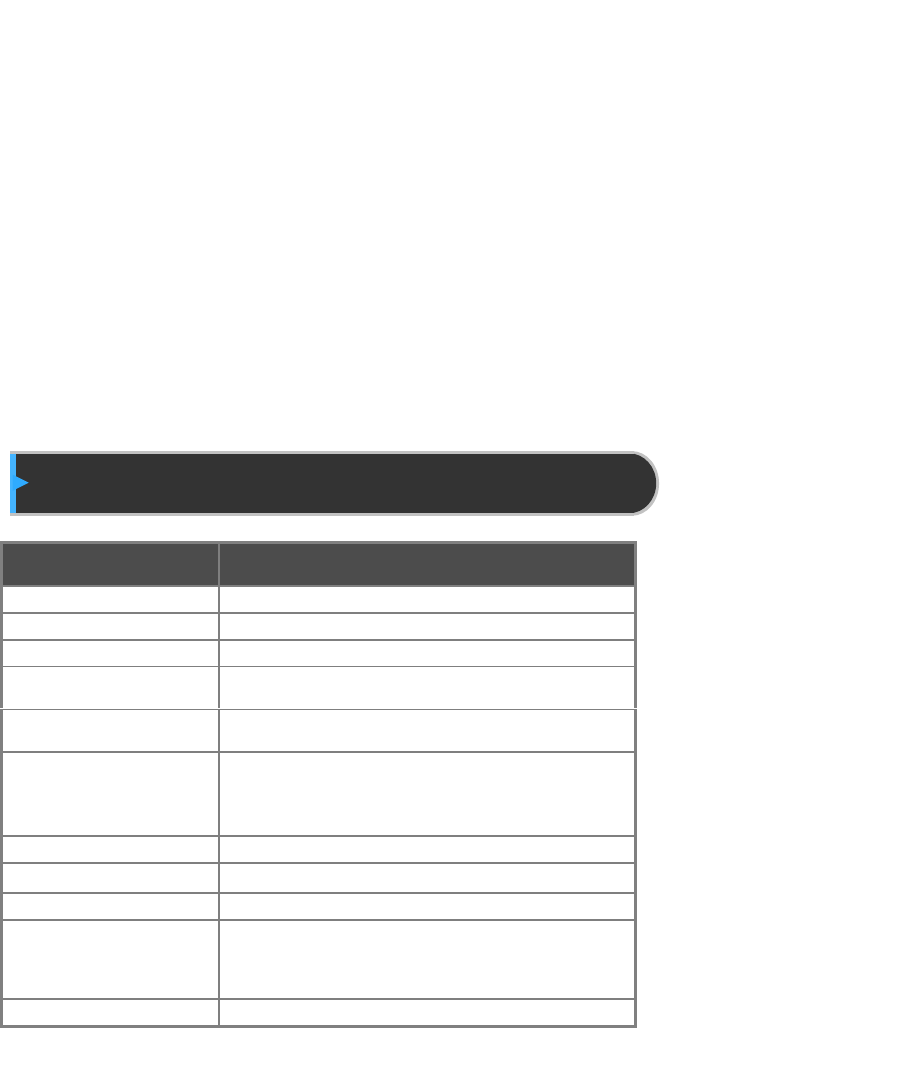
Product Specification
Item
Contents
CPU
ATSAM4LS4(M4)
Memory
2Mbyte
Touch key
3*4 Key (Capacity type)
RF Tag
13.56Mhz
Bluetooth
Bluetooth 4.0 [BLE]
Authentication Type
RF Card. Mobile key. Password
Mechanical Key
Lock
Deadbolt(UL)
Environment
-20~60 ℃ / < RH 90%
Certificate
CE, FCC,IP54
Dimension
Inbody : 83(W) x 164.5(L) x 37(D) mm
outbody : 85.3(W) x 183.8(L) x 33.6(D) mm
Power
Battery [AA Type 4EA (DC+6V)]

FCC Information
This device complies with part 15 of the FCC Results. Operation is subject to the
following two conditions :
(1) This Device may not cause harmful interface, and
(2) This device must accept any interference received, including interference that
may cause undesired operation.
Note: This equipment has been tested and found to comply with the limits for CLASS B digital
device, pursuant to Part 15 of FCC Rules. These limits are designed to provide reasonable
protection against harmful interference when the equipment is operated in a commercial
environment This equipment generates, uses and can radiate radio frequency energy and, if not
installed and used in accordance with the instructions, may cause harmful interference to radio
communications. However, there is no guarantee that interference will not occur in a particular
installation. If this equipment does cause harmful interference to radio or television reception,
which can be determined by turning the equipment off and on, the user is encouraged to try
correct the interference by one or more of the following measures:
1.1. Reorient or relocate the receiving antenna.
1.2. Increase the separation between the equipment and receiver.
1.3. Connect the equipment into an outlet on a circuit different from that to which receiver is
connected.
1.4. Consult the dealer or experienced radio/TV technician for help.
WARNING
Changes or modifications not expressly approved by the manufacturer could void the
user’s authority to operate the equipment.
Contains FCC ID: 2AEEY-PBLN51822M