UNION COMMUNITY SMART-I fingerprint terminal User Manual users manual
UNION COMMUNITY fingerprint terminal users manual
UserManual.wiki
>
UNION COMMUNITY
>
SMART I User Manual
users manual
Navigation menu
Upload a User Manual
Namespaces
Wiki Guide
HTML
PDF
Info
Views
User Manual
Discussion / Help
Navigation
![Smart-i 사용자 가이드 2 ㈜유니온커뮤니티 / 서울시 송파구 방이동 44-3 현대토픽스 빌딩 3층 (138-050) Tel : 02-6488-3000 , Fax : 02-6488-3099, E-Mail :sales@unioncomm.co.kr http://www.unioncomm.co.kr <Revison History> Version Date Description Firmware Version 1.01 2012-08-30 Initial Release 10.51.00-000.13 < Glossary > Admin, Administrator - As a user who can enter into the terminal menu mode, he can register/modify/delete terminal users and change the operating environment by changing settings. - If there is no administrator for a terminal, anyone can change the settings, so it is recommended to register at least one administrator. - Caution is required with registration and operation because an administrator has the right to change critical environmental settings of the fingerprint recognition unit. Authentication Method - Various Kinds of authentication including FP(fingerprint) authentication, RF(Card) authentication, or a combination of these methods. Ex) Card or FP: Card or fingerprint is used for authentication. Function Keys - [F1], [F2], [F3], [F4] are used to get in the menu and each key represents each authentication mode.](https://usermanual.wiki/UNION-COMMUNITY/SMART-I/User-Guide-1832778-Page-2.png)
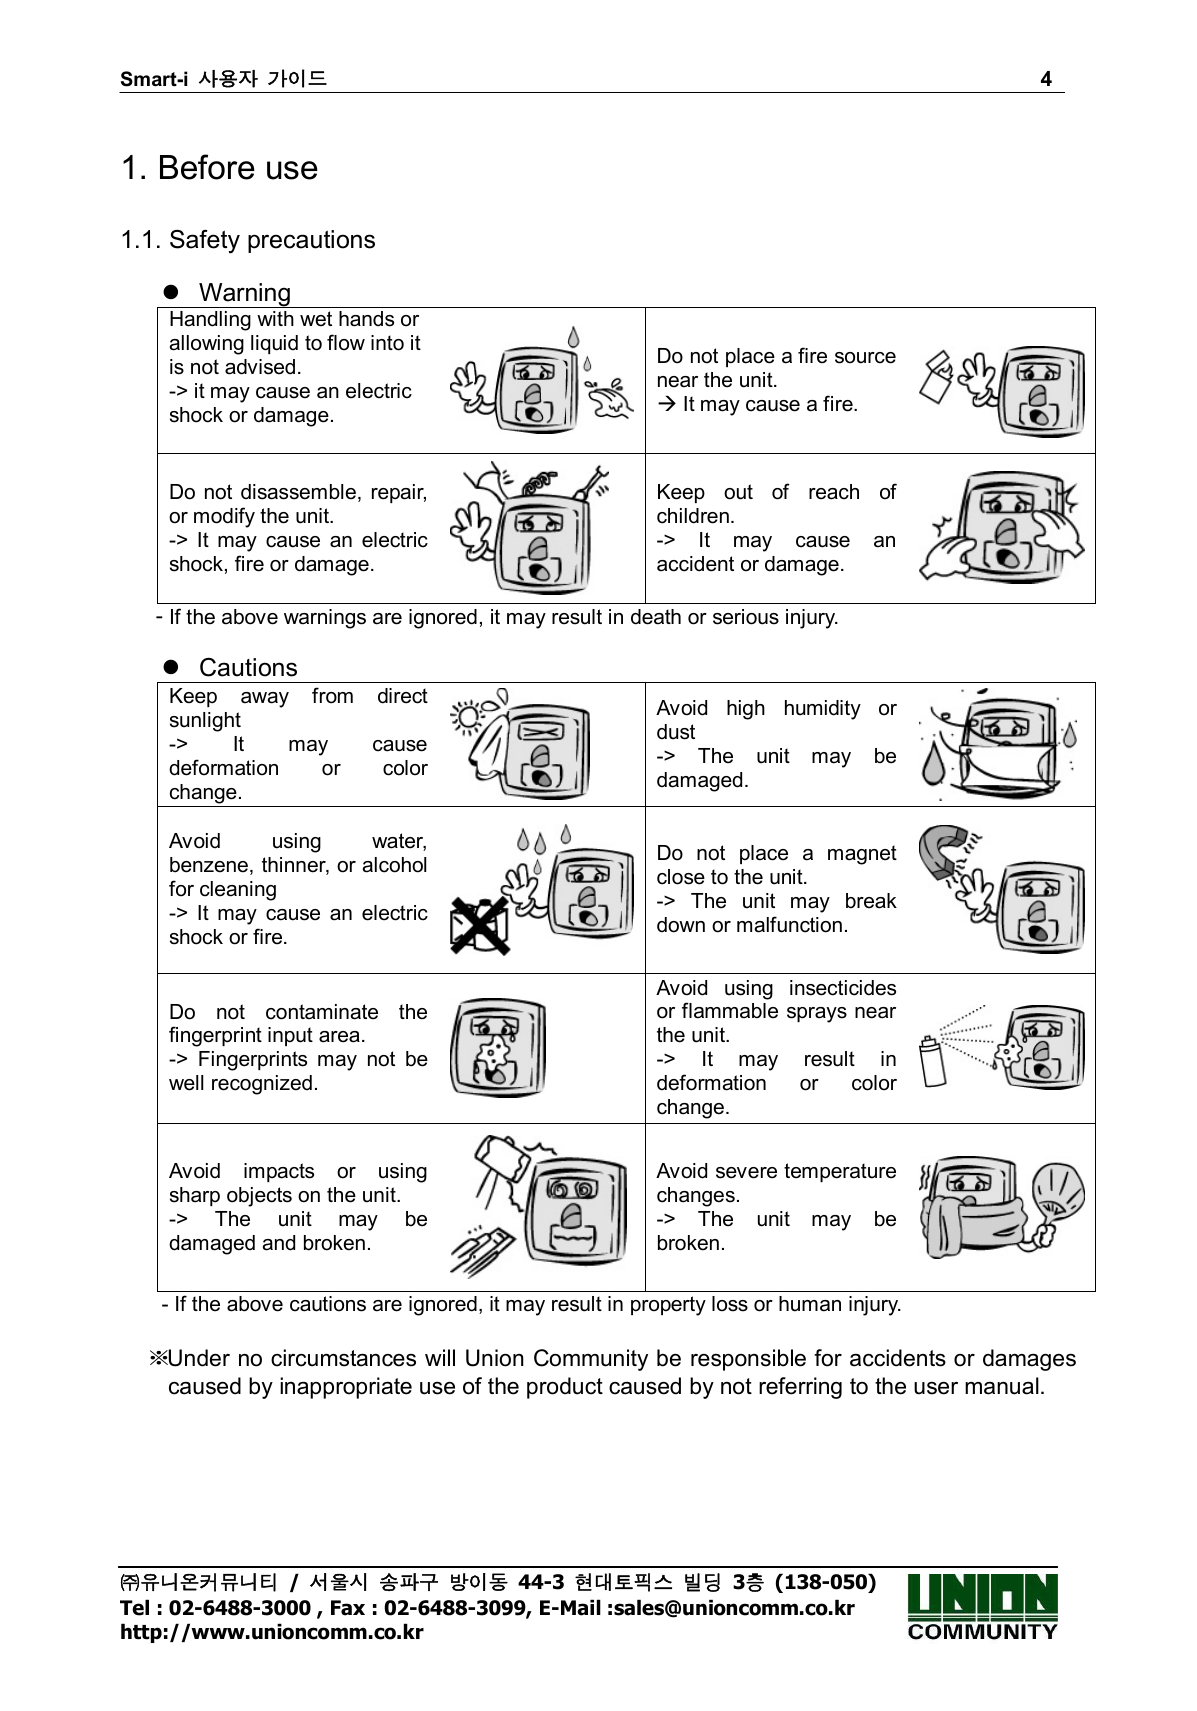
![Smart-i 사용자 가이드 5 ㈜유니온커뮤니티 / 서울시 송파구 방이동 44-3 현대토픽스 빌딩 3층 (138-050) Tel : 02-6488-3000 , Fax : 02-6488-3099, E-Mail :sales@unioncomm.co.kr http://www.unioncomm.co.kr 1.2. Terminal description 1.3. LED signal during operation ● Abnormal Red Light off : Normal Flickering : When the lid is open Light on : When authentication is failed ● Success Green Light on : When authentication is successful ● Condition Blue Flickering : Waiting for a card or FP to be read Light on : When “LED always on” is set in the terminal settings. 1.4. Function key information during operation [F1]~[F4] - Keys are used to modify the authentication mode [F4~hold it down] - It means holding [F4] down longer than 4 sec. - It is used to enter menu. 3 Color LED (R/G/B) Fingerprint Sensor Card Area Camera Touch Key IN Return Out Egression](https://usermanual.wiki/UNION-COMMUNITY/SMART-I/User-Guide-1832778-Page-5.png)
![Smart-i 사용자 가이드 9 ㈜유니온커뮤니티 / 서울시 송파구 방이동 44-3 현대토픽스 빌딩 3층 (138-050) Tel : 02-6488-3000 , Fax : 02-6488-3099, E-Mail :sales@unioncomm.co.kr http://www.unioncomm.co.kr 2.2. Configuration 2.2.1. Standalone Configuration (AP Mode) - In a case of Smart-I performs AP function - A smartphone is connected to terminal AP, and communicate. - Name of default AP: smartiAP_Serial No., Password:1234567890 [WEP64:Shared] - Terminal network set value IP: 192.168.0.1, Subnet Mask: 255.255.255.0, Gateway:192.168.0.1 - Basic setup when released from a factory 2.2.2. Network Configuration - In a case of Smart-I has already connected to specific AP - A smartphone connects to the same AP and communicates with the terminal - Name of default AP: unisSvrAP, password: 1234567890 [WPAPSK_AES] (It can be modified on smartphone application) - Server AP setup above can be modified in terminal settings menu of smartphone application. - IP address of the terminal is automatically given when connected to AP, if you want a static IP address, you can use DIP switch (No.3 – No. 10) on the back of the terminal like the picture below to modify. Default: DHCP (Auto IP) Static IP: xxx.xxx.xxx.11 AP ● Smart-i i-UNIS (Smart Phone) UNIS Server Internet WAN/LAN ● Smart-i i-UNIS](https://usermanual.wiki/UNION-COMMUNITY/SMART-I/User-Guide-1832778-Page-9.png)
![Smart-i 사용자 가이드 11 ㈜유니온커뮤니티 / 서울시 송파구 방이동 44-3 현대토픽스 빌딩 3층 (138-050) Tel : 02-6488-3000 , Fax : 02-6488-3099, E-Mail :sales@unioncomm.co.kr http://www.unioncomm.co.kr 3. Environment Settings 3.1. Check items before setting the environment 3.1.1. Entering menu ▶ [Hold (F4) down] (Blue LED light flickering) Admin authentication (Red & Green LED lights on) Menu mode When you hold [F4] down longer than 4 sec, you enter menu. At this moment, if a registered admin exists, blue LED light is flickering and it is waiting for administrator authentication. When card or FP authentication is successful, you enter menu, red and green LED lights are on in order to classify menu mode. Press [F4] or do not press any button for longer than 10 sec, it will automatically go back from menu mode to waiting for authentication mode. 3.1.2. How to enter menu without admin authentication This is how to enter menu when a registered admin card is lost or when admin is away so FP authentication is not possible. ① Remove the bracket on the back of the terminal and keep the lid open. ② DIP switch No. 3 to No. 10 on the back of the terminal should be “ON” as below. < Image 3-1> ③ Keep this condition above, and hold [F4] down longer than 4 sec. Buzzer sound will go off and then you can enter menu. ▶ Keep DIP switch “OFF” after modifying set value.](https://usermanual.wiki/UNION-COMMUNITY/SMART-I/User-Guide-1832778-Page-11.png)
![Smart-i 사용자 가이드 12 ㈜유니온커뮤니티 / 서울시 송파구 방이동 44-3 현대토픽스 빌딩 3층 (138-050) Tel : 02-6488-3000 , Fax : 02-6488-3099, E-Mail :sales@unioncomm.co.kr http://www.unioncomm.co.kr 3.2. Menu Configuration - [Fn~ long] means hold a key down for longer than 4 sec. Checking terminal mode [F1~ long] Blue LED light on for 1 sec : AP Mode Green LED light on for 1 sec : Network Mode Waiting for Authentication Mode Rebooting terminal [F2~ long] (Buzzer sound) Rebooting terminal (Try it when smartphone application cannot connect to the terminal.) Changing terminal mode (AP Network) [F1~ long] (Buzzer sound) Rebooting terminal after changing mode Delete logs [F2~ long] (Buzzer sound) Delete all logs including images on the terminal. Initializing set value [F3~ long] (Buzzer sound) Change all set values on the terminal to default and go to AP Mode. Users and logs are not deleted. Menu Mode [F4~ long] Admin Authentication Factory Initialization Place a finger on the fingerprint sensor and [F4~long] (Buzzer sound) Delete all Set value, users, logs on the terminal and go back to AP Mode. 4. How to use the terminal 4.1. Changing authentication mode Press a key to change authentication mode. Start a shift [F1], Finish a shift [F2], Start a break [F3], Return from a break [F4] 4.2. Authentication 4.2.1. Fingerprint authentication When you place your fingerprint on the fingerprint sensor, light of the sensor is on as buzzer sound goes off, and then it receives the fingerprint. Do not remove your finger until buzzer sound goes off after light of the sensor is off completely. Light of the sensor is not on if there are no registered users. 4.2.2. Card authentication Swipe a card on the card input area.](https://usermanual.wiki/UNION-COMMUNITY/SMART-I/User-Guide-1832778-Page-12.png)