UTC Fire and Security Americas 764A-SMOKE User Manual newsmoke
UTC Fire & Security Americas Corporation, Inc. newsmoke
UserManual.wiki
>
UTC Fire and Security Americas
>
764A SMOKE User Manual
Exhibit G
Navigation menu
Upload a User Manual
Namespaces
Wiki Guide
HTML
PDF
Info
Views
User Manual
Discussion / Help
Navigation
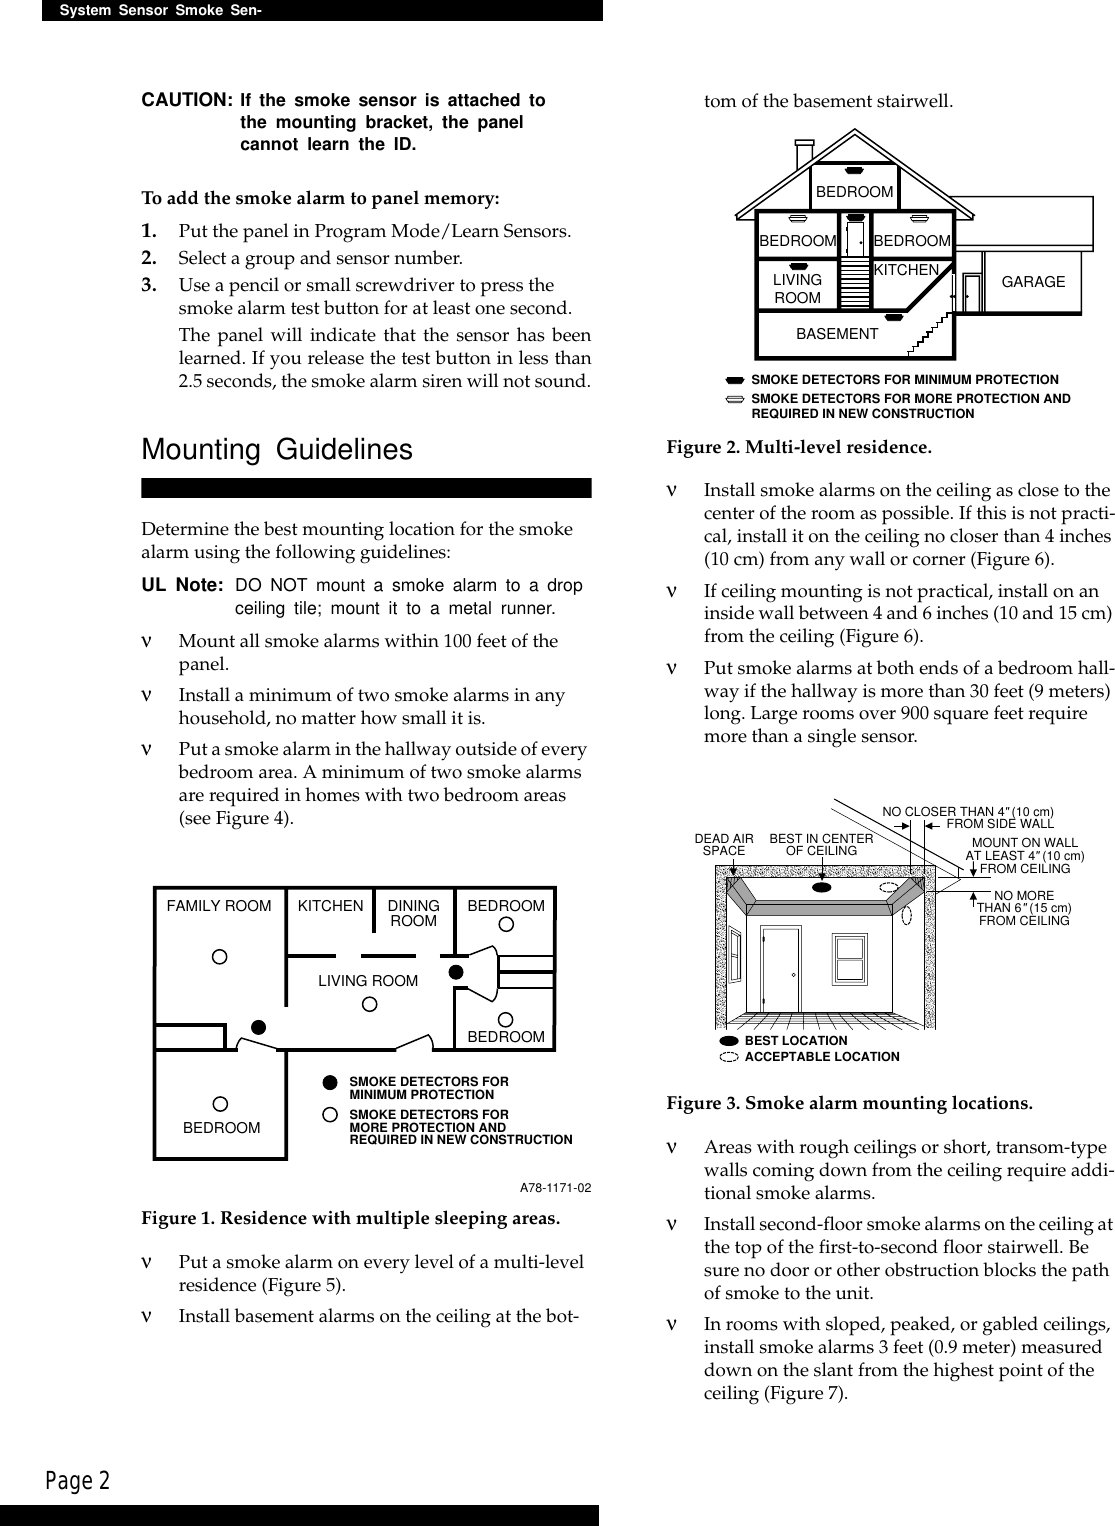
![Page 1System Sensor Smoke SensorSystem Sensor Smoke Sensor Model 2100ARFTDocument Number: 466-xxxx Rev. A PRELIMINARYAugust 1998INSTALLATIONINSTRUCTIONSProduct SummaryThe System Sensor™ Smoke Sensor Model 2100ARFT (smoke alarm) is a Learn Mode, wireless, photoelectric smoke sensor with a self-contained alarm siren, a low-battery annunciator, and a status light. The smoke alarm is part of a security/fire alarm system and com-municates with the system’s control panel.Figure 1 illustrates the smoke sensor’s parts.Installation GuidelinesνAvoid installing the unit until all contsruction is completed. The mounting ring may be pre-installed.νLeave the orange dust cover on the unit until sheet rocking and sanding are completed; other-wise, dust can get into the unit and cause false alarms.CAUTION: The orange dust cover must be removed for the unit to detect smoke.νDo not mix battery brands.νNot compatible with CareTaker Plus or custom versions with software versions 3.0 or earlier.νNot compatible with Commander 2000 or custom versions with software versions 4.0 or earlier. (The Commander 2000 announces the version when it is powered up or reset.)Tools NeededνPhillips screwdriver and pocket-sized slotted screwdriverBatteriesUL Note: Each smoke alarm uses two 3-volt lithium batteries. For UL installations, use one of the following: Sanyo CR123A, Panasonic CR123A, or Duracell DL123A. Do not mix brands.Inserting BatteriesThe batteries must be correctly installed before the panel can learn the smoke alarm ID. [Batteries are shipped in the unit backwards.] You must remove them and reinstall them correctly.To insert batteries into the smoke sensor:1. Gently twist the cover counterclockwise to sepa-rate it from the mounting bracket.2. Remove the batteries from the battery compart-ment.3. Insert the batteries into the battery compartment. Observe proper polarity.4. Leave the mounting ring off and proceed to “Learning the Smoke Sensor.”Low BatteriesWhen the batteries need to be replaced, the unit trans-mits a signal to the panel. If the batteries are not replaced within 7 days, the unit will chirp every 40 seconds until the batteries are exhausted.Note: If you test the smoke alarm or it goes into alarm during this 7-day period, chirp delay is canceled and the unit begins chirping immedi-ately.ProgrammingFor more detailed programming information, refer to the specific panel’s installation manual.60-838-95EXHIBIT G](https://usermanual.wiki/UTC-Fire-and-Security-Americas/764A-SMOKE/User-Guide-57231-Page-1.png)