UTC Fire and Security Americas 861-HTTP Hi-Tech Touchpad User Manual
UTC Fire & Security Americas Corporation, Inc. Hi-Tech Touchpad
UserManual.wiki
>
UTC Fire and Security Americas
>
861 HTTP User Manual
Users Manual
Navigation menu
Upload a User Manual
Namespaces
Wiki Guide
HTML
PDF
Info
Views
User Manual
Discussion / Help
Navigation
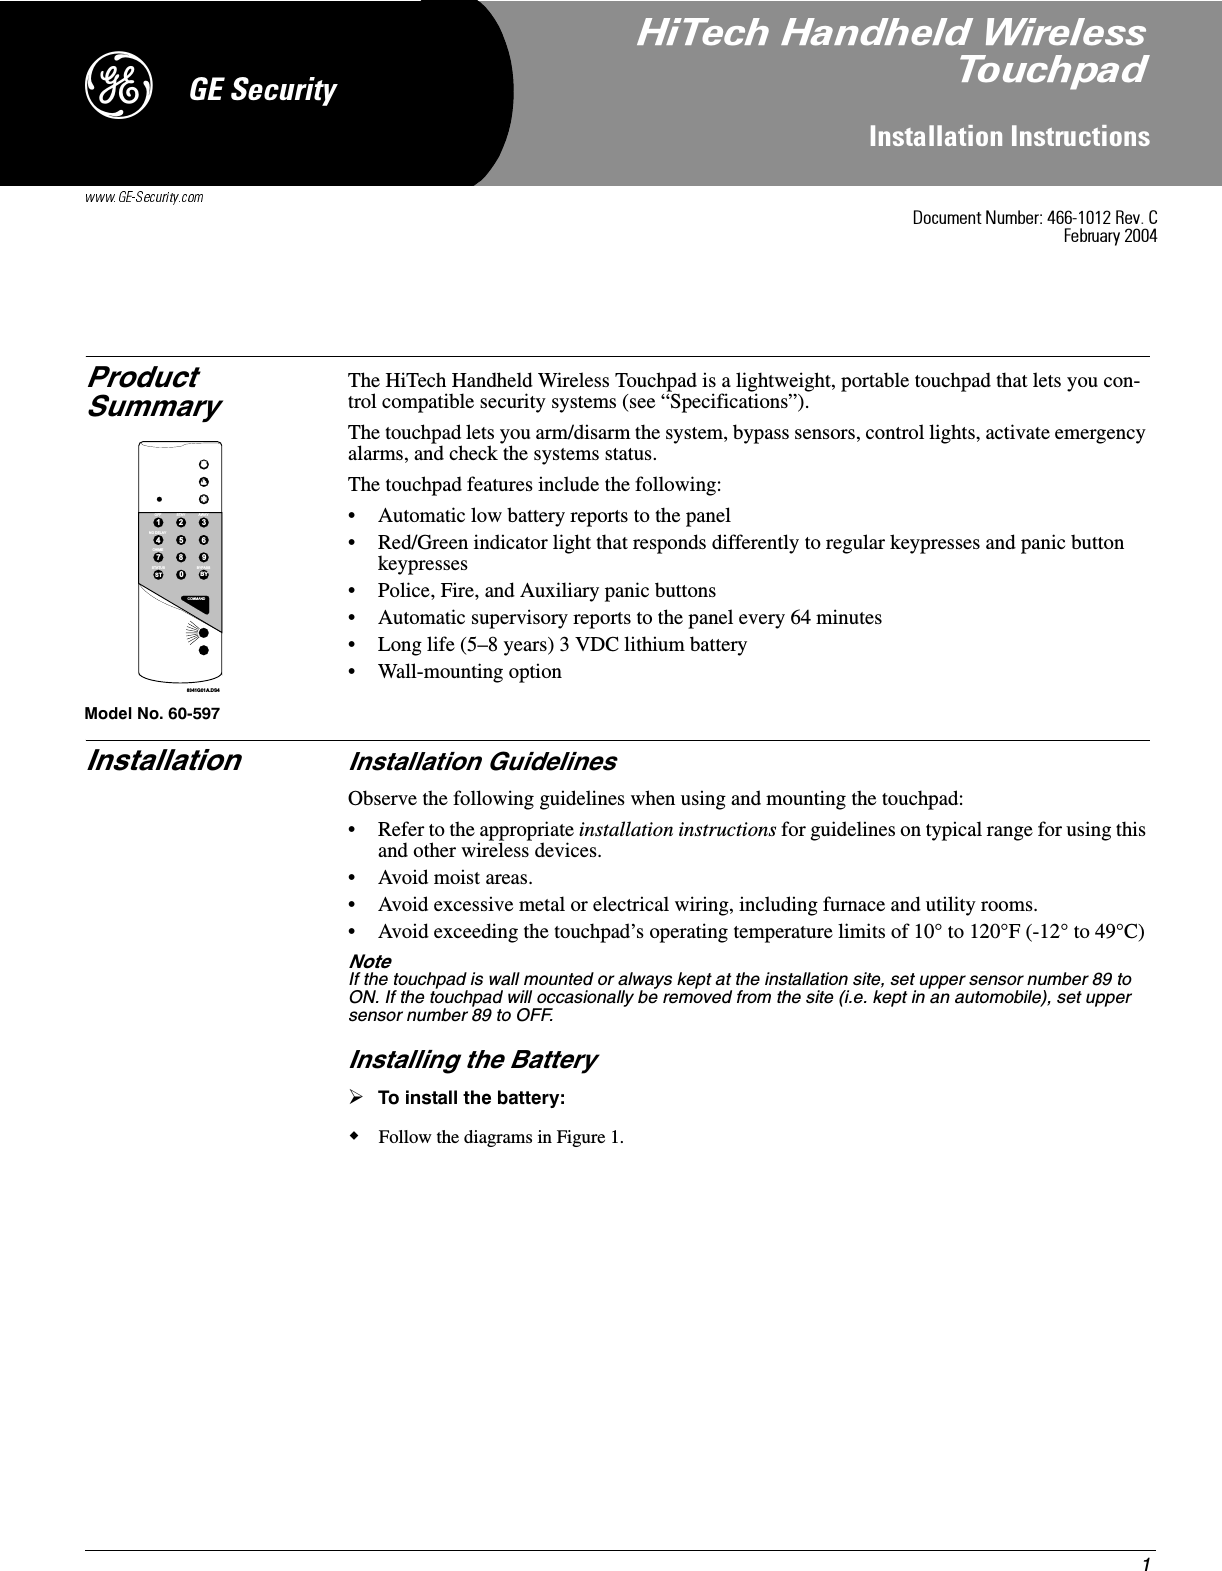
![3HiTech Handheld Wireless Touchpad Installation InstructionsPreliminary 2/20/045. Press and hold each panic button for two seconds, until the red/green indicator light stops flashing and the appropriate alarm sounds.6. To mute the touchpad: press the 1 and 2 buttons at the same time, until you hear confirma-tion beeps.7. Press various buttons to test the mute feature.8. Turn off mute by pressing the 1 and 2 buttons at the same time, until you hear confirma-tion beeps.9. Turn all lights on or off by pressing COMMAND + 0 with the Security Pro 2000 or by pressing LIGHTS-ON or LIGHTS-OFF twice with the Security Pro 4000.10. Turn individual lights on or off with the Security Pro 4000 by pressing LIGHTS-ON or LIGHTS-OFF + [unit number]. Unit numbers range from 1 to 9.Note: Refer to the appropriate Owner’s Manual for instructions on using the touchpad with a spe-cific panel.Specifications Compatibility: ..........................All GE Interlogix Learn Mode PanelsPower Requirements: ..............3.0 VDC lithium batteryStorage Temperature:..............-40° to 140° F (-34° to 60° C) Operating Temperature: .........10° to 120° F (-12° to 49° C)Maximum Humidity:...............90% relative humidity, non-condensingDimensions: ..............................2.1 x 0.86 x 6.1 in. (W x D x H)Installation:...............................Wall mountingListings:FCC Notice1. This device may not cause harmful interference.2. This device must accept any interference that may be received, including interference that may cause undes-ired operation.Notices)*(6HFXULW\](https://usermanual.wiki/UTC-Fire-and-Security-Americas/861-HTTP/User-Guide-398080-Page-3.png)