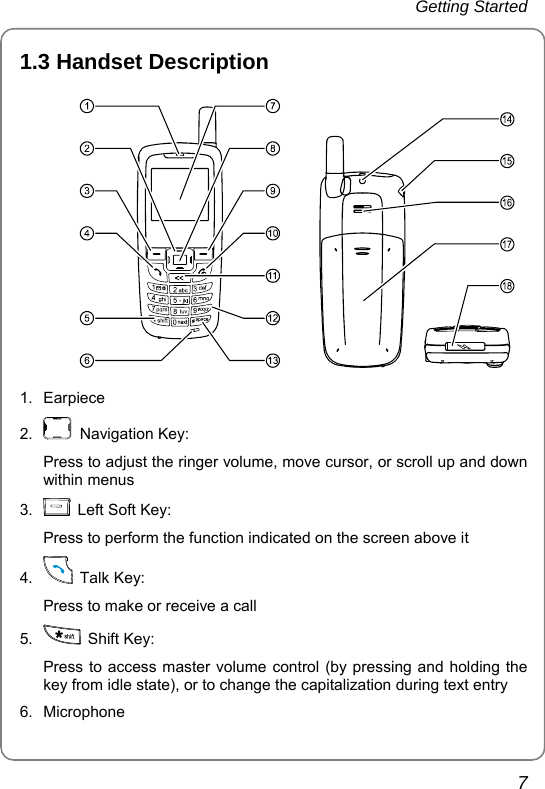
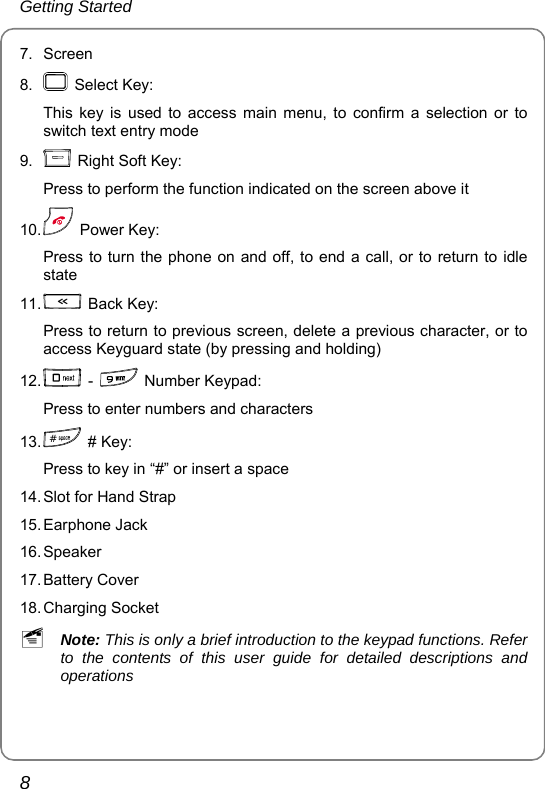
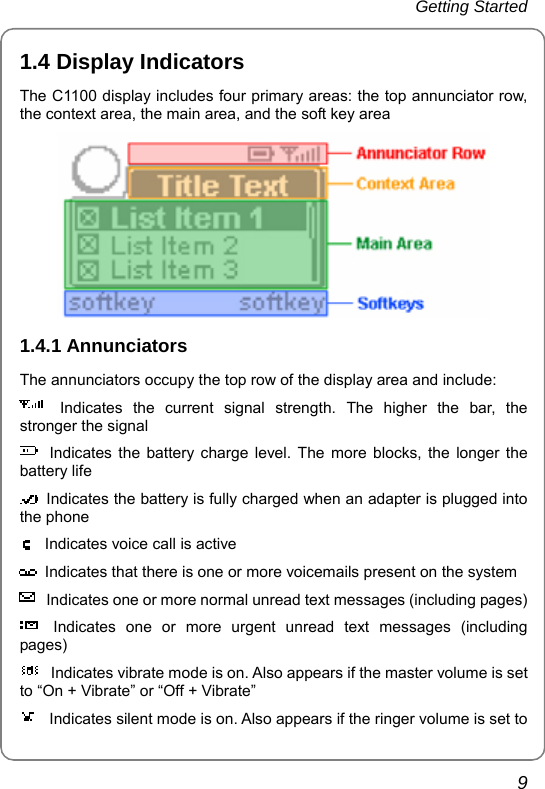
UTStarcom Korea Technologies C1100 Single-Mode CDMA Phone User Manual
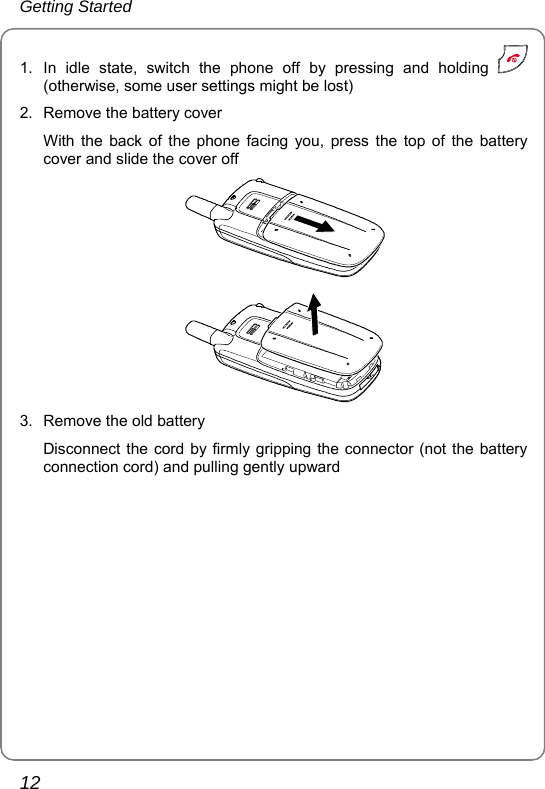
UTStarcom Korea Technologies Ltd. Single-Mode CDMA Phone
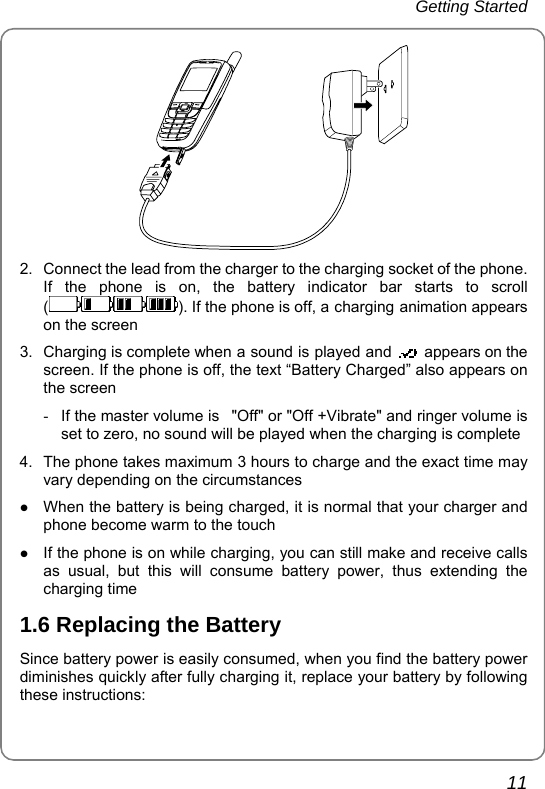
UserManual.wiki
>
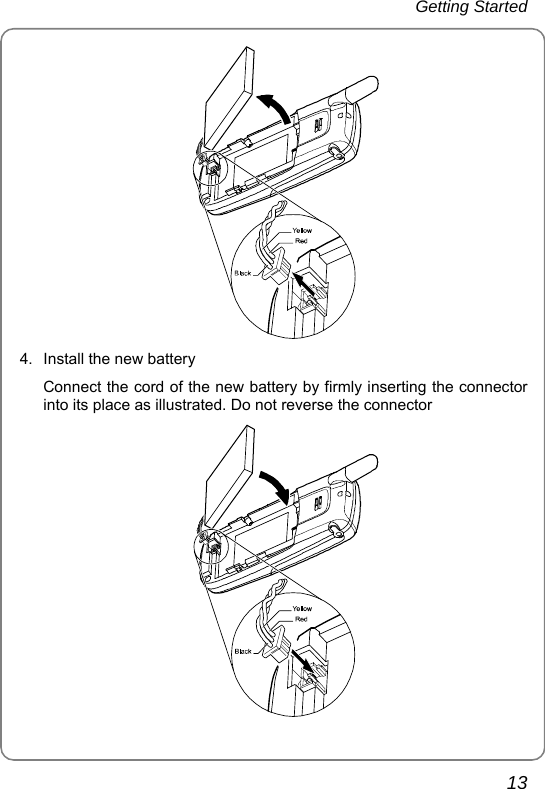
UTStarcom Korea Technologies
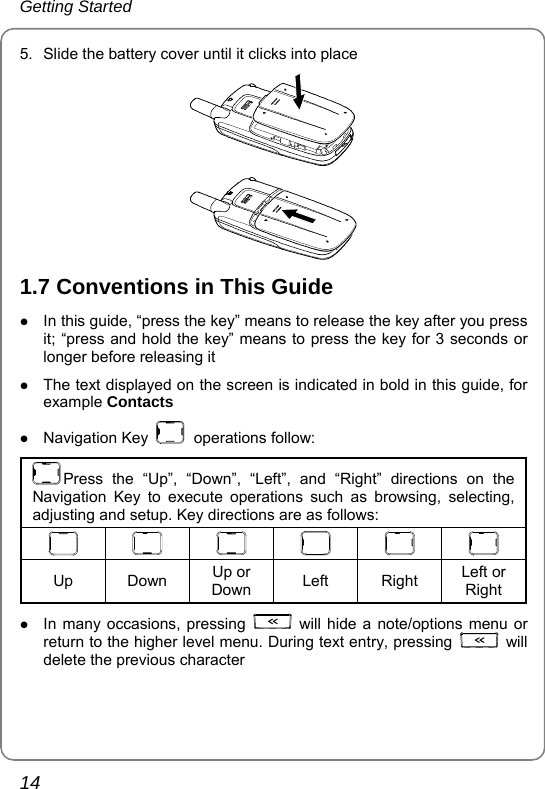
>
C1100 User Manual
Users Manual
Navigation menu
Upload a User Manual
Namespaces
Wiki Guide
HTML
PDF
Info
Views
User Manual
Discussion / Help
Navigation


![Contacts Application 44 currently been chosen. Press to select one ring tone and then press to confirm the selection - The ring tone list is displayed alphabetically, with “Default” being the exception, listed at the top - In the ring tone list, press the left soft key (Play) to play the ring tone. To silence the ring tone, press the left soft key (Silence) 10. After setting all items, press the left soft key (Save) to save the information. The screen will display the detailed information of the contact - The name field is listed in the order of [First name] [Last name]. For fields that cannot be completely displayed due to visual space limitations, ellipses are used. Press to scroll horizontally. When the text is exhausted, a space character is inserted after the last character, followed by the first characters of the field ~ Note: z You can enter the information in different fields based on needs, and then press the left soft key (Save) z After changing fields and pressing , a note will appear asking you to confirm whether or not you want to save the changes. Press the left soft key to (Yes) to save the contact or the right soft key (No) to return to idle state z The minimum requirement for an entry to be stored in Contacts is a single character in First name, Last name, Home phone, Work phone, Mobile phone, Unknown phone, Pager or Email. An entry cannot contain only a ring tone. Additionally, a phone number cannot contain only a pause character z You may lose Contacts entries because of damage, incorrect operation, static electricity or repair to the phone. Please keep a hardcopy as a backup](https://usermanual.wiki/UTStarcom-Korea-Technologies/C1100/User-Guide-566089-Page-52.png)