UTStarcom Korea Technologies C1100 Single-Mode CDMA Phone User Manual
UTStarcom Korea Technologies Ltd. Single-Mode CDMA Phone
Users Manual
C1100
USER GUIDE
i
_______________________________________
Trademark Statement: “‘UTStarcom’, ‘iPAS’, and the UTStarcom logo are
trademarks of UTStarcom, Inc.”
Copyright Statement: “©UTStarcom, Inc. 2005. All rights reserved. No
part of this publication may be reproduced in any form or by any means
without the prior written permission of UTStarcom, Inc.”
Warranty Language: “The contents of this manual, whether in whole or in
part, do not constitute any express or implied warranty with respect to any
products of UTStarcom, Inc., or its subsidiaries.”

ii
Table of Contents
SAFETY PRECAUTIONS.................................................... 1
HANDLING THE PHONE, BATTERY AND CHARGER ..................................1
HANDLING THE PHONE ........................................................................2
HANDLING THE BATTERY......................................................................3
HANDLING THE CHARGER .................................................................... 4
1. GETTING STARTED ....................................................... 5
1.1 PACKAGE CONTENTS..................................................................... 5
1.2 PHONE SPECIFICATIONS ................................................................5
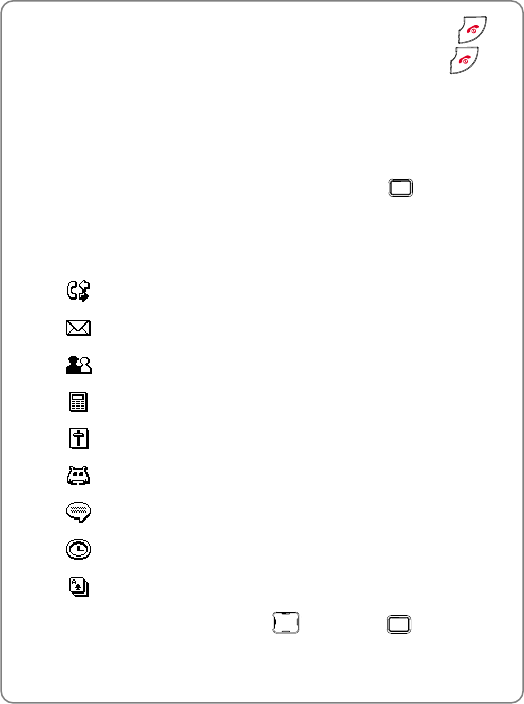
1.3 HANDSET DESCRIPTION ................................................................. 7
1.4 DISPLAY INDICATORS .....................................................................9
1.4.1 Annunciators....................................................................................9
1.4.2 Context Area..................................................................................10
1.4.3 Soft Key Area.................................................................................10
1.5 CHARGING THE BATTERY .............................................................10
1.6 REPLACING THE BATTERY ............................................................ 11
1.7 CONVENTIONS IN THIS GUIDE ......................................................14
1.8 ACCESSING MAIN MENU OPTIONS ................................................ 15
2. BASIC OPERATIONS ................................................... 17
2.1 TURNING THE PHONE ON/OFF .....................................................17
2.2 MAKING A CALL ...........................................................................17
2.3 IN CALL OPERATIONS................................................................... 18
2.3.1 Menu..............................................................................................18
2.3.2 Mute...............................................................................................19
2.4 MISSED CALLS ............................................................................19
2.5 THREE-PARTY CALLS ...................................................................19
2.6 SPEED DIALING A PHONE NUMBER ...............................................20
2.7 RECEIVING AN INCOMING CALL..................................................... 20
2.8 CALL WAITING .............................................................................21
2.9 KEYGUARD..................................................................................21
2.10 RINGER VOLUME CONTROL .......................................................22
iii
2.11 MASTER VOLUME CONTROL.......................................................23
3. STORING A PHONE NUMBER TO CONTACTS........... 24
3.1 ACCESS TO SAVING CONTACTS .................................................... 24
3.2 CREATING NEW CONTACT............................................................25
3.3 UPDATING CONTACT ....................................................................25
4. CALL LOG APPLICATION............................................ 26
4.1 ACCESSING THE CALL LOG LIST ...................................................26
4.2 SAVE CALL LOG TO CONTACTS.....................................................27
4.3 CALL LOG OPTIONS MENU ...........................................................27
4.3.1 Viewing Call Details .......................................................................27
4.3.2 Sending a Message .......................................................................27
4.3.3 Deleting Call Log ...........................................................................28
4.3.4 Showing Call Types .......................................................................28
4.3.5 Clearing Call Log List.....................................................................28
4.4 CALLING FROM CALL LOG ............................................................28
5. MESSAGING APPLICATION ........................................ 29
5.1 COMPOSING MESSAGE ................................................................29
5.2 INBOX .........................................................................................32
5.2.1 Reply .............................................................................................33
5.2.2 Forward .........................................................................................34
5.2.3 Message Details ............................................................................34
5.2.4 Call ................................................................................................34
5.2.5 Add Contact ...................................................................................35
5.3 SENT ..........................................................................................35
5.3.1 Forward .........................................................................................36
5.3.2 Message Details ............................................................................36
5.3.3 Call ................................................................................................36
5.3.4 Add Contact ...................................................................................37
5.4 DRAFT ........................................................................................37
5.4.1 Send ..............................................................................................37
5.4.2 Delete ............................................................................................38
5.5 PAGES ........................................................................................38
iv
5.6 MESSAGING SETTINGS ................................................................38
5.6.1 Callback Number ...........................................................................38
5.6.2 Delivery Confirmation.....................................................................39
5.6.3 Duplicate Detection........................................................................39
5.6.4 Auto Erase .....................................................................................39
6. CONTACTS APPLICATION .......................................... 41
6.1 EDITING CONTACTS .....................................................................41
6.1.1 Adding Contact ..............................................................................42
6.1.2 Searching Contact .........................................................................45
6.1.3 Re-editing Contact .........................................................................45
6.1.4 Re-editing Fields in Contact ...........................................................46
6.1.5 Setting Number/Email as Default ...................................................46
6.2 DELETING CONTACT ....................................................................47
6.3 ERASING NUMBER/EMAIL/SPEED DIAL/RING TONE FROM CONTACT
........................................................................................................48
6.4 MAKING CALL/CREATING NEW MESSAGE FROM CONTACT.............48
7. CALCULATOR APPLICATION...................................... 48
8. SETTINGS APPLICATION ............................................ 48
8.1 SOUND........................................................................................48
8.1.1 Ring Tones.....................................................................................48
8.1.2 Sound Effects ................................................................................48
8.1.3 Volumes.........................................................................................48
8.2 DISPLAY ......................................................................................48
8.2.1 Properties ......................................................................................48
8.2.2 Formatting .....................................................................................48
8.3 SHORTCUTS ................................................................................48
8.4 ROAMING ....................................................................................48
8.5 FEATURES...................................................................................48
8.5.1 Text Input .......................................................................................48
8.5.2 Anykey Answer ..............................................................................48
8.5.3 Auto Keyguard ...............................................................................48
8.5.4 Call Timers.....................................................................................48
8.5.5 Touchtone ......................................................................................48
8.5.6 Service Tones ................................................................................48
v
8.6 SECURITY ...................................................................................48
8.6.1 Voice Privacy .................................................................................48
8.6.2 Default Reset.................................................................................48
8.7 ABOUT ........................................................................................48
9. BREW APPLICATION ................................................... 48
9.1 MOBILESHOP ..............................................................................48
9.2 SETTINGS ...................................................................................48
9.2.1 Order Apps.....................................................................................48
9.2.2 Move Apps.....................................................................................48
9.2.3 Manage Apps.................................................................................48
9.2.4 Menu View.....................................................................................48
9.2.5 Screen Savers ...............................................................................48
9.2.6 View Log........................................................................................48
9.3 HELP ..........................................................................................48
10. VOICEMAIL APPLICATION ........................................ 48
11. CLOCK APPLICATION................................................ 48
11.1 ALARM CLOCK ...........................................................................48
11.2 TIMER .......................................................................................48
11.3 COUNTDOWN.............................................................................48
11.3.1 Set Countdown.............................................................................48
11.3.2 Start /Stop the Countdown............................................................48
12. POKER APPLICATION ............................................... 48
13. TEXT ENTRY............................................................... 48
13.1 NUMERIC MODE ........................................................................48
13.2 MULTITAP MODE ........................................................................48
13.3 EZITEXT MODE..........................................................................48
13.4 RESTRICTED TEXT FIELDS .........................................................48
13.4.1 Numeric .......................................................................................48
13.4.2 Name...........................................................................................48
13.4.3 Email Address..............................................................................48
13.5 DEFAULT TEXT MODES ..............................................................48
vi
14. TROUBLESHOOTING................................................. 48
15. SAFETY AND WARRANTY ........................................ 48
15.1 SAFETY INFORMATION FOR WIRELESS HANDHELD PHONES ......... 48
15.1.1 EXPOSURE TO RADIO FREQUENCY SIGNALS .......................48
15.1.2 ANTENNA CARE .........................................................................48
15.1.3 DRIVING SAFETY.......................................................................48
15.1.4 ELECTRONIC DEVICES .............................................................48
15.1.5 OTHER SAFETY GUIDELINES...................................................48
15.1.6 PRECAUTIONS...........................................................................48
15.2 SAFETY INFORMATION FOR FCC RF EXPOSURE..............48
15.2.1 CAUTIONS ..................................................................................48
15.2.2 BODY-WORN OPERATION.........................................................48
16. SAR INFORMATION ................................................... 48
17. FDA CONSUMER UPDATE ........................................ 48
18. 12 MONTH LIMITED WARRANTY.............................. 48

Safety Precautions
1
SAFETY PRECAUTIONS
Handling the Phone, Battery and Charger
DANGER
Only use the battery and charger specified for the
phone. Failure to do so can result in damage to the
phone, electric shock or fire.
CAUTION
Do not store or operate the phone or charger in hot,
damp, or dusty areas, which can damage electrical and
mechanical components. Avoid prolonged exposure to
temperatures below 5°C or in excess of 35°C.
DANGER
Do not drop, shake or throw the phone or charger.
Rough handling can damage internal circuit boards and
the battery pack.
Do not use the phone in the vicinity of volatile gases.
Leave the area before using the phone. Failure to leave
the area can result in the risk of fire or an explosion.
Do not disassemble or modify the phone, charger, or
battery. Incorrect modifications, reassembly, or
tampering may result in malfunction or personal injury.
Safety Precautions
2
Handling the Phone
DANGER
Do not use the phone while operating a vehicle.
Observe local regulations for specialized areas
(hospital, aircraft, etc) when using the phone.
Do not use the phone near electronic equipment prone
to interference. Radio frequency interference may result
in electronic equipment malfunction.
The following electronic equipment may be affected:
Hearing aids, pacemakers and other clinical electronic
devices, smoke detectors, automatic doors and other
automatically controlled devices.
CAUTION
Keep all storage media (magnetic cards, floppy disks,
credit cards, etc.) away from the phone. Close
encounters or contact can erase or damage the storage
media.
Keep all sharp metal objects (pins, nails, hairpins etc.)
away from the phone handset. The handset earpiece
contains a strong magnet that can attract and hold metal
objects. Remove any objects from the handset earpiece
before using, to avoid personal injury.
In case of emergency, key in the emergency number
(911 for example in US), then press the Talk key and let
the operator know your specific location. Don’t hang up
until you are told to do so.
Safety Precautions
3
Handling the Battery
DANGER
Do not dispose of the battery pack in a fire. It may
explode. Check with local waste management codes for
disposal instructions.
Do not force the battery pack into the phone. Improper
installation can cause malfunctions or damage the
battery pack. This may result in fire or personal injury.
Use caution in handling batteries in order not to short
the battery on conductive materials such as rings,
bracelets, and keys. The battery and/or conductor may
overheat and cause burns.
If the battery becomes too hot while recharging, it
should be removed immediately from the charger.
When clothes or skin are exposed to battery leakage,
rinse with clean water at once to prevent skin irritation.
Do not use a cracked, leaking or odor-emitting battery
pack near an open flame or high temperatures.
CAUTION
If a fully discharged battery is stored for a long period of
time, it may not be possible to recharge the battery.
Observe local waste management codes for proper
battery disposal instructions.
Safety Precautions
4
Handling the Charger
DANGER
Only use a power source that provides the appropriate
voltage (AC100-240V) for the charger. An unsuitable
power source can result in damage to the charger,
electric shock or fire.
Do not use the charger if the power supply cord or plug
is damaged or frayed (exposed or broken wires, etc).
This can result in the risk of fire or electric shock.
Do not short circuit the charger connector jack. This may
result in fire or electric shock.
In the event that liquid is spilled into the unit,
immediately unplug the charger from the wall outlet to
prevent fire or electric shock.
CAUTION
Always unplug the charger from the wall outlet before
cleaning to avoid the risk of electric shock.
To avoid damage, do not place heavy objects on the
cord.
Always grip the power plug when removing the charger
from the wall outlet. Do not pull on the power supply
cord to avoid damage and the risk of electric shock.
Getting Started
5
1. GETTING STARTED
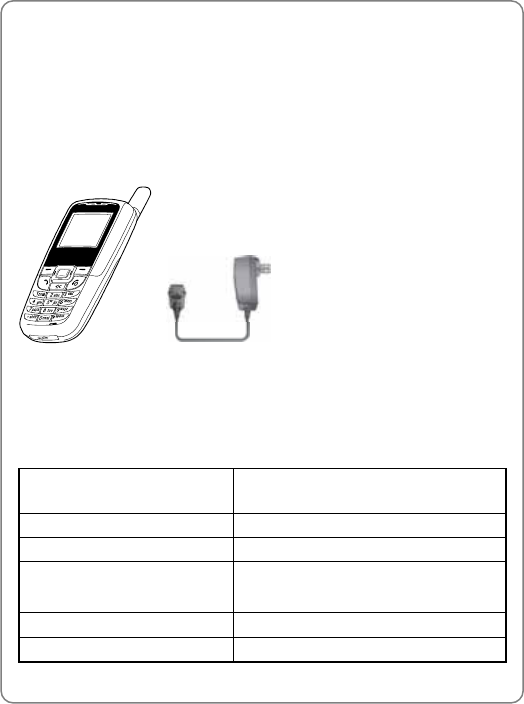
1.1 Package Contents
Please check the package contents by comparing them with the following
list. If you find anything missing or if the documentation set is incomplete,
contact your local phone dealer immediately
z Model C1100 (with one battery)
z Charger (one)
z User Guide (one)
1.2 Phone Specifications
Dimensions(height×width×
thickness) 102.9mm×44.2mm×19.2mm
Weight (including battery) 78g
Battery Li-ion 870mAh
Charger
Input : 100-240V AC 50-60Hz 150mA
Output: 5.2V DC 600mA
Charger Model S526024A
Charging Time maximum 3 hours

Getting Started
6
IS 95A/B CDMA 2000 1x
SCI 1, Backlight OFF, LCD
OFF
SCI 1, Backlight OFF,
LCD OFF
Standby
Time
180 Hours 270 Hours
-10dBm,Voice Activity 44% -10dBm,Voice Activity
44%
Talk
Time
230 min 210 min
z Standby time refers to the state in which the phone is continuously on
without being used for calls or moved to different service areas
z The standby time depends on the network conditions, phone usage
and surrounding area. The phone consumes more battery power
under the following conditions:
- In areas with weak signals, with high or low temperatures, or when
used outside the service coverage area
- When the phone frequently searches for network signal due to
location changes
- When you talk on the phone for long periods of time
- When features such as messaging and game are being used for a
long time
- When the alarm, backlight or vibration function is active
- When the ringer volume is set to maximum
Getting Started
7
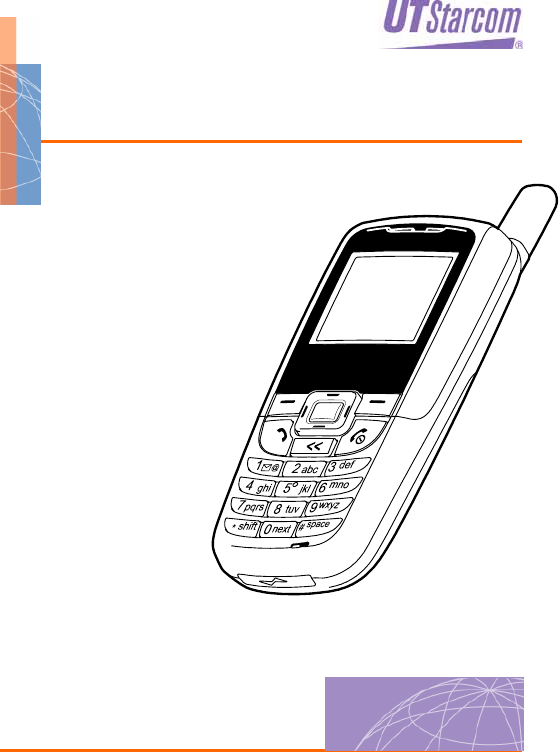
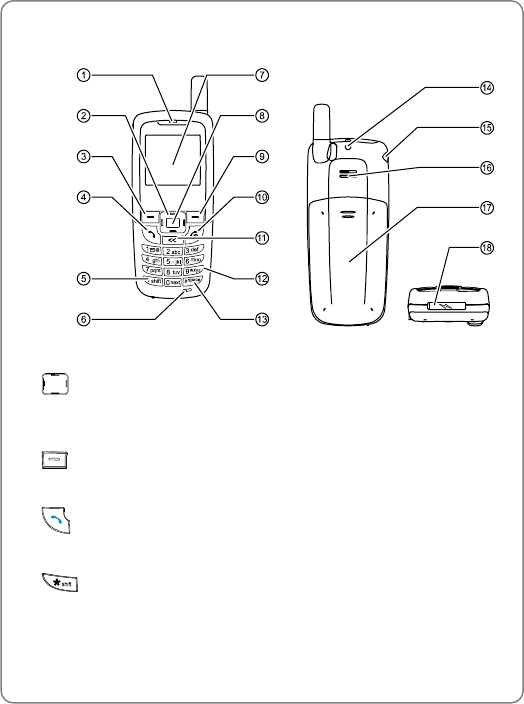
1.3 Handset Description
1. Earpiece
2. Navigation Key:
Press to adjust the ringer volume, move cursor, or scroll up and down
within menus
3. Left Soft Key:
Press to perform the function indicated on the screen above it
4. Talk Key:
Press to make or receive a call
5. Shift Key:
Press to access master volume control (by pressing and holding the
key from idle state), or to change the capitalization during text entry
6. Microphone
Getting Started
8
7. Screen
8. Select Key:
This key is used to access main menu, to confirm a selection or to
switch text entry mode
9. Right Soft Key:
Press to perform the function indicated on the screen above it
10. Power Key:
Press to turn the phone on and off, to end a call, or to return to idle
state
11. Back Key:
Press to return to previous screen, delete a previous character, or to
access Keyguard state (by pressing and holding)
12. - Number Keypad:
Press to enter numbers and characters
13. # # Key:
Press to key in “#” or insert a space
14. Slot for Hand Strap
15. Earphone Jack
16. Speaker
17. Battery Cover
18. Charging Socket
~ Note: This is only a brief introduction to the keypad functions. Refer
to the contents of this user guide for detailed descriptions and
operations
Getting Started
9
1.4 Display Indicators
The C1100 display includes four primary areas: the top annunciator row,
the context area, the main area, and the soft key area
1.4.1 Annunciators
The annunciators occupy the top row of the display area and include:
Indicates the current signal strength. The higher the bar, the
stronger the signal
Indicates the battery charge level. The more blocks, the longer the
battery life
Indicates the battery is fully charged when an adapter is plugged into
the phone
Indicates voice call is active
Indicates that there is one or more voicemails present on the system
Indicates one or more normal unread text messages (including pages)
Indicates one or more urgent unread text messages (including
pages)
Indicates vibrate mode is on. Also appears if the master volume is set
to “On + Vibrate” or “Off + Vibrate”
Indicates silent mode is on. Also appears if the ringer volume is set to

Getting Started
10
zero or the master volume is set to “Off”
Indicates the phone is roaming. This annunciator may blink, based on
certain parameters communicated to the phone by a specific network
Depending on network availability, this annunciator may or may not
appear depending on network availability. It means that the call is secure.
Voice privacy occurs only when a voice call is in session, and therefore
does not appear in idle state
Indicates there is a pending alarm event. This annunciator disappears
when the event has expired, unless the alarm is repeating
Indicates that a countdown is running. The annunciator disappears
when the event has expired
1.4.2 Context Area
The context area contains a context icon and a context title
The context icon, a large icon appearing at the top left of the screen, is an
indication of the active application. The context icon used is the same icon
that is found in the main menu
The context title indicates information about the current state but not
necessarily the current application: therefore, it changes within an
application depending on the given state
1.4.3 Soft Key Area
There are two soft keys: left soft key and right soft key. When text entry is
active, the center area is used for a text indicator, displaying information
about the text and case modes
1.5 Charging the Battery
When the battery power is low and needs recharging, the phone will
display a note, sound a low battery alarm, and the phone will be
automatically switched off. To charge the battery:
1. Connect the charger to an AC wall outlet (100-240V)
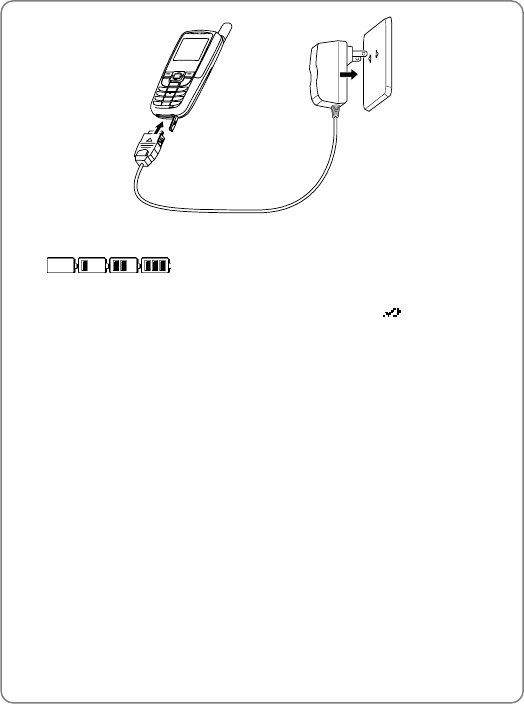
Getting Started
11
2. Connect the lead from the charger to the charging socket of the phone.
If the phone is on, the battery indicator bar starts to scroll
(). If the phone is off, a charging animation appears
on the screen
3. Charging is complete when a sound is played and appears on the
screen. If the phone is off, the text “Battery Charged” also appears on
the screen
- If the master volume is "Off" or "Off +Vibrate" and ringer volume is
set to zero, no sound will be played when the charging is complete
4. The phone takes maximum 3 hours to charge and the exact time may
vary depending on the circumstances
z When the battery is being charged, it is normal that your charger and
phone become warm to the touch
z If the phone is on while charging, you can still make and receive calls
as usual, but this will consume battery power, thus extending the
charging time
1.6 Replacing the Battery
Since battery power is easily consumed, when you find the battery power
diminishes quickly after fully charging it, replace your battery by following
these instructions:
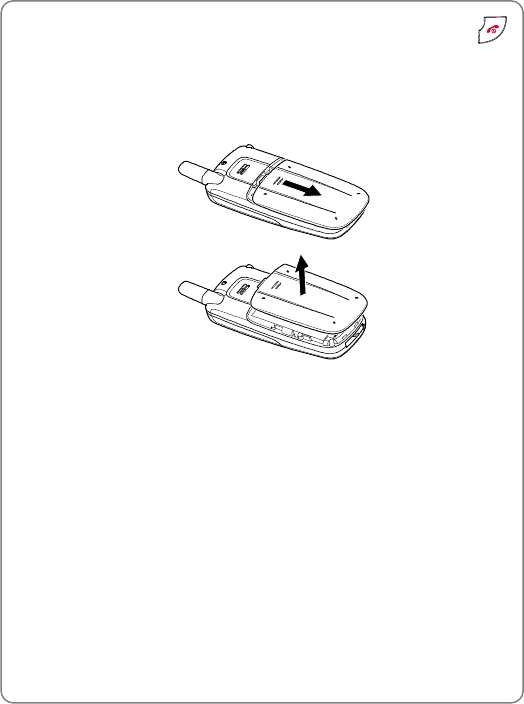
Getting Started
12
1. In idle state, switch the phone off by pressing and holding
(otherwise, some user settings might be lost)
2. Remove the battery cover
With the back of the phone facing you, press the top of the battery
cover and slide the cover off
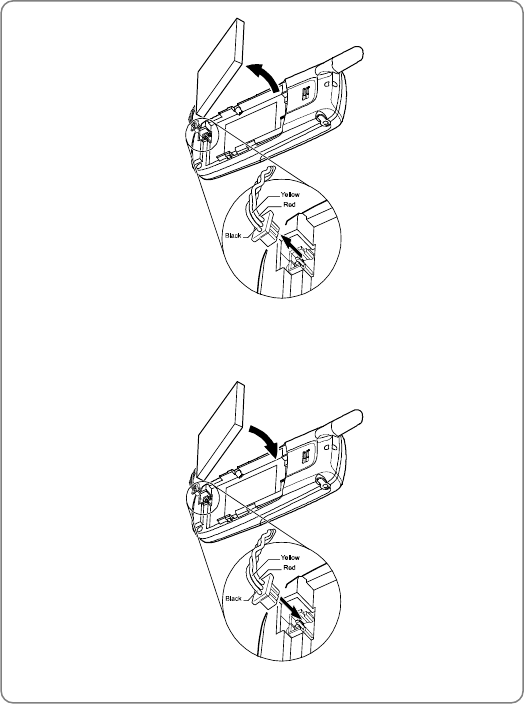
3. Remove the old battery
Disconnect the cord by firmly gripping the connector (not the battery
connection cord) and pulling gently upward
Getting Started
13
4. Install the new battery
Connect the cord of the new battery by firmly inserting the connector
into its place as illustrated. Do not reverse the connector
Getting Started
14
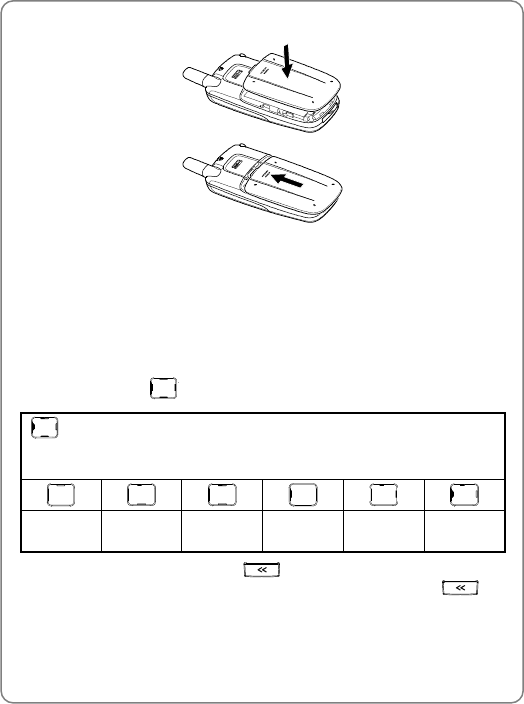
5. Slide the battery cover until it clicks into place
1.7 Conventions in This Guide
z In this guide, “press the key” means to release the key after you press
it; “press and hold the key” means to press the key for 3 seconds or
longer before releasing it
z The text displayed on the screen is indicated in bold in this guide, for
example Contacts
z Navigation Key operations follow:
Press the “Up”, “Down”, “Left”, and “Right” directions on the
Navigation Key to execute operations such as browsing, selecting,
adjusting and setup. Key directions are as follows:
Up Down
Up or
Down Left Right
Left or
Right
z In many occasions, pressing will hide a note/options menu or
return to the higher level menu. During text entry, pressing will
delete the previous character
Getting Started
15
z To save battery power, when the phone is not in use, press to
return the phone to idle state. In most occasions, pressing will
immediately return to idle state. However, there are occasions an
intermediary note will be displayed. In this case, follow the instructions
on the screen
1.8 Accessing Main Menu Options
1. To access the main menu from the idle state, press
Use the main menu to access all applications. Applications are
represented by an icon and a title below the icon
The main menu includes the following applications:
z Call log
z Messaging
z Contacts
z Calculator
z Settings
z Brew
z Voicemail
z Clock
z Poker
2. To reach the desired menu, press , then press again

Getting Started
16
3. Repeat step 2 to reach the desired option and then press to
access this option
z If there is a rightward arrow beside the option, you can also press
to access this option
~ Note: To return to the previous menu, press . To return to idle
state without changing the menu settings, press
~ You can also access an application from the shortcuts if you have
set the shortcuts (see “Shortcuts” on page 48). This user guide
takes the accessing method from the main menu as an example to
reach the desired option
Basic Operations
17
2. BASIC OPERATIONS
2.1 Turning the Phone On/Off
Press and hold . The phone will display the power-on/off animation
2.2 Making a Call
1. Key in the phone number
z As you enter digits, entry proceeds left to right, top to bottom (if more
than one line)
z Press to move the cursor. Press to delete the character
or digit to the left of the cursor
z A maximum of 64 digits can be entered
z After entering the digits, press the right soft key (Options) to
display a menu with three items: Save, Insert pause and Send
message. Select Save to save the number to Contacts (see “Storing a
Phone Number to Contacts” on page 24), select Send message to
edit a message (see "Composing Message” on page 29) or select
Insert pause to insert a pause. Select from Hard pause, 2 seconds
or 5 seconds; the corresponding icon will appear on the screen
2. To call the number, press
z The number will appear on the screen. If the number is stored in your
Contacts, the name will appear
z If the number includes a hard pause, a note will appear on the screen
during the call. When this occurs, press the right soft key (Stop)
to hide the note and return to the normal active call state and cancel
subsequent pauses. Press any other key except the right soft key
Basic Operations
18
and to terminate the hard pause and continue with pause
insertion as normal. Press to terminate the call
3. To end the call, press
z If you are in a single-party call and the number you dialed does not
match any record in Contacts, you are given 10 seconds to press the
left soft key (Save) save the entry to Contacts (see “Storing a
Phone Number to Contacts” on page 24). If the number you dialed
matches an entry in Contacts, the phone automatically returns to idle
state
2.3 In Call Operations
The phone provides a variety of functions that can be accessed during a
call
To adjust the earpiece or earphone (whichever the voice channel is
playing through) volume during a call, press or to access the
Voice Volume menu. Press to increase or press to decrease
the volume, then press , or wait for four seconds to return to
the call state. The phone will save the adjusted volume level
To access your Contacts during the call, press the left soft key
(Contacts) to edit/search a contact (see "Contacts Application” on page
41)
During a call, press the right soft key (Options) to display the
following options:
2.3.1 Menu
Select this option to access the main menu

Basic Operations
19
2.3.2 Mute
Select this option to mute the microphone. When activated, the Mute label
is changed to Unmute, and the icon in context area changes to ,
indicating that the phone is in a mute state. When de-activated, the label
returns to its original state. When the phone is unmuted, the standard
ongoing call icon will reappear
2.4 Missed Calls
A missed call is an incoming call that the user does not respond to.
Therefore, the following calls are not missed calls, but rather incoming
calls:
z Calls that are answered by the user
z Calls that are rejected by the user
z Calls that are silenced by the user
If there is one missed call, “1 Missed Call” will appear on the screen. The
phone number (if known), and the Contact name (if it is stored in Contacts)
will also appear. You can press the left soft key (Call Back) (if the
number is known) or the right soft key (Done) to hide the note. If
there are multiple missed calls, “X Missed Calls” appears, where X is the
number of missed calls. You can press the left soft key (Full View)
to access the Call Log list or the right soft key (Done) to hide the
note
Normally the missed call note appears immediately after the missed call.
However, if you’re on the phone and miss a call via call waiting, the
missed call note does not appear until the ongoing call is ended
2.5 Three-party Calls
This function requires network support and may vary depending on the
network. Contact your local service provider for assistance
During a call, you can dial another phone number and then press to

Basic Operations
20
initiate a three-party call
2.6 Speed Dialing a Phone Number
If you know the speed dial location of the telephone number (see "Adding
Contact” on page 42 for instructions on assigning a speed dial key) you
want to call,
z Press and hold to call the Voicemail number
z Press any key - then to dial the phone number
assigned to corresponding Speed Dial key 2-9
z Press and hold any key - to dial the phone number
assigned to corresponding Speed Dial key 2-9
z Press a key - then press and hold a second key
- to dial the phone number assigned to corresponding
Speed Dial key 10-99
2.7 Receiving an Incoming Call
When you receive an incoming call, the ring tone should play (based on
the Master Volume settings) and repeat as necessary. The screen
displays the Caller ID, and if the Caller ID matches with a contact, then the
contact information is displayed and the appropriate ring tone is played.
The Default ring tone is used if no ring tone is associated with the contact
or if there is no Caller ID match
z If Anykey Answer is set to Off (see "Anykey Answer” on page 48),
press to answer an incoming call
z If Anykey Answer is set to On, press any key to answer an incoming
call except the Reject soft key, Silence soft key or the key
z To reject the call, select the Reject soft key

Basic Operations
21
z To silence the ring tone/vibrator, press the Silence soft key. The
display still shows the call as if the call is still ringing. Therefore, the
call is still active and you can still answer the phone call. Only once the
call has been rerouted to voicemail or the incoming signal is
terminated does the phone return to idle state
2.8 Call Waiting
Call waiting requires network support and may vary depending on the
network. Contact your local service provider for assistance
While you have a call in progress, if there is an incoming call from the third
party, the earpiece will sound a waiting tone. You can press to
answer the call
2.9 Keyguard
The Keyguard state prevents the keys from being accidentally pressed,
resulting in unintentional operations. When Keyguard is on, the left soft
key Unlock appears in idle state
z To access and display the Keyguard state, press and hold in
idle state. A note is displayed for 10 seconds, stating all key presses
will be ignored when Keyguard is on
z To unlock the Keyguard state, press the left soft key (Unlock)
and then press #
In the Keyguard state,
- When any key except the left soft key (Unlock) is pressed, a
note appears, prompting you to press the left soft key and the #
key to unlock Keyguard
- When the left soft key (Unlock) is pressed, a note appears,
prompting you to press the # key to unlock Keyguard
~ Note:
Basic Operations
22
z When Keyguard is activated, you can still answer a call as usual.
During the call, you can operate the phone normally. However, the
Keyguard will automatically be activated when the call ends or if the
call is rejected
z The Keyguard state can also be invoked from auto keyguard, a feature
set in the Settings application. Auto keyguard allows you to set a
trigger time for Keyguard to automatically activate (see “Auto
Keyguard” on page 48)
2.10 Ringer Volume Control
Ringer volume controls currently selected ring tones and certain
notification sounds played through the speaker. It excludes voice played
through the speaker
To adjust the ringer volume,
1. In idle state, press
2. There are eight volume levels. Press to increase or to
decrease the volume. As you adjust the volume levels(non-zero), you
can press the left soft key (Play) to play the current selected
default ring tone and the soft key’s label changes to Silence
z When the volume is set to zero, the silent annunciator is shown
on the annunciator row; if the annunciator was previously displayed
and the volume has been changed, the annunciator disappears
z If the volume is at the highest level, the volume level will not change
when is pressed; if the volume is zero, the volume level will not
change when is pressed
3. After completing the volume selection, press , or or
wait for four seconds to return to idle state. The adjusted volume level
will be saved
~ Note: You can also access the ringer volume control from Settings
Basic Operations
23
application. Refer to "Ringer Volume” on page 48 for details
2.11 Master Volume Control
This function enables you to define how the phone will notify you of events
such as incoming calls, new messages/pages and alarm, countdown,
notes, and so on. Master volume affects all sounds except for voice
To change the master volume:
1. Press and hold from idle state. A check mark appears on the
current setting
2. To select the desired option, press
- If the master volume is set to “Off”, is displayed; if the volume is
changed from off to on, the annunciator is hidden (unless the ringer
volume is set to zero, in which case it stays on). If the master
volume is set to “On + Vibrate” or “Off + Vibrate”, appears; if
vibrate is changed from on to off, then the annunciator is hidden
- The following options are available:
On: The phone will play sounds for events
Off: The phone will neither play sounds nor vibrate for eventsOn +
Vibrate: The phone will first vibrate and then play sounds for events
Off + Vibrate: The phone will vibrate for events
3. Press to complete the setting
~ Note: You can also access the master volume control from Settings
application. Refer to “Master Volume” on page 48 for details

Storing a Phone Number to Contacts
24
3. STORING A PHONE NUMBER TO
CONTACTS
You can store frequently used phone numbers and email addresses to the
memory of the phone (Contacts). Contacts can store up to 100 contacts.
Each contact may contain information such as first name, last name,
home phone, work phone, mobile phone, unknown phone, pager, email,
speed dial key, and ring tone
3.1 Access to Saving Contacts
You can save contact information to Contacts in the following ways:
z In idle state, key in a phone number and then press the right soft key
(Options). Select Save to save the number
z After you finish a single-party call to a number not stored in Contacts,
you are given 10 seconds to press the left soft key (Save) to
save the number to Contacts
z Display the Call Logs (see "Accessing the Call Log List” on page 26 for
instructions to display the Call Log list) and then press the left soft key
(Save) to save an entry in the Call Log to Contacts
z Display the message detail and then press the right soft key
(Options). Select Add contact to save the phone number to Contacts.
Refer to "Add Contact” on page 35 and page 37 for additional
information
To create a new contact, select New Contact. Refer to “Creating New
Contact” on page 25 for additional information
To add the number to an existing contact, select Update Contact. Refer
to “Updating Contact” on page 25 for additional information
Storing a Phone Number to Contacts
25
3.2 Creating New Contact
After accessing the Contacts saving option as described in page
24 ”Access to Saving Contacts”, select the New contact option to add
new entries into Contacts
z If 100 contacts have been saved, a note appears, stating space is not
available to add a new contact and you should try deleting an old one
1. After selecting New contact, press or
2. To select the contact type, press then press . The number
will appear in the selected contact type field
3. Refer to steps 3-10 in “Adding Contact” on page 42 for additional
information
3.3 Updating Contact
After accessing the Contacts saving option as described on page
24 ”Access to Saving Contacts”, select the Update contact option to
update entries in Contacts
1. After selecting Update contact, press . The screen displays the
contacts list
2. To select the contact to be updated, press then press
3. To select the contact type, press then press . The number
will appear in the selected contact type field
- If you have selected a contact type whose field is not empty for the
current contact, a note will display asking whether you want to
overwrite it. Press the left soft key (Yes) to continue or the
right soft key (No) to reselect a contact type
4. Refer to steps 3-10 in “Adding Contact” on page 42 for additional
information

Call Log Application
26
4. CALL LOG APPLICATION
The Call Log maintains a list of all calls initiated by or received by the
phone. A call initiated by the phone is an outgoing call. Received calls are
classified as either incoming or missed. An incoming call is a call that has
either been answered or actively rejected by the user. A missed call is a
call not answered by the user
Your phone records the last 20 missed, incoming and outgoing calls as
well as their call details
4.1 Accessing the Call Log List
To access the Call Log list, press , then select Call Log.
The Call Log list defaults to showing calls of all types: missed, incoming
and outgoing. When no calls have yet been made or received, or after all
calls have been cleared, the phone displays “(no calls)”
You also have the ability to view only one type of call (see "Showing Call
Types” on page 28 for details). The behavior of these other views is
identical to that of the full Call Log view. Only the calls shown differ
The Call Logs appear in reverse chronological order. The Call Log list
includes the following information:
z Icon (per call type) + name (if name is stored in Contacts), or phone
number, or unknown, as applicable
Call icons include:
: Missed call
: Incoming call
: Outgoing call
Call Log Application
27
4.2 Save Call Log to Contacts
In the Call Log list view, the left soft key (Save) appears only when
the highlighted phone number has no match in Contacts. Press the left
soft key (Save) to save the number to Contacts or update a number
that has already been stored in Contacts (see "Storing a Phone Number
to Contacts” on page 24 for detailed instructions)
4.3 Call Log Options Menu
From the Call Log list view, press to select the desired Call Log, and
then press the right soft key (Options) to access the Call Log
options menu
By the Call Log options menu, you can perform the following operations:
4.3.1 Viewing Call Details
To view the details for a specific call, select the desired entry from the Call
Log list then press , or select Show details from the Call Log options
menu. The call details note shows the details of the phone call in the
following order:
z Icon (per call type) +name (if there is a match in Contacts)
z Phone number
z Start time of call+ Date
z Call duration – if available (not applicable for missed calls)
4.3.2 Sending a Message
From the Call Log options menu, select Send message to initiate the
short message sending process. The number from the Call Log
automatically appears in the Recipients box. Refer to steps 4-8 in
“Composing Message” on page 29 for additional information
Call Log Application
28
4.3.3 Deleting Call Log
To delete a Call Log, select Delete from the Call Log options menu. A note
appears asking you to confirm the deletion. Press the left soft key
(Yes) to delete the Call Log entry or press the right soft key (No) or
to return to the Call Log list
4.3.4 Showing Call Types
To set the type of call (all calls, missed, incoming or outgoing) to be
displayed in the Call Log list view, select Show call type from the Call
Log options menu. A check mark appears on the current setting. Press
to select and then press to save the setting. The Call Log
displays the selected type of call
4.3.5 Clearing Call Log List
To clear all phone numbers of the selected type from the Call Log, select
Clear list from the Call Log options menu. A note is displayed asking you
to confirm the deletion. Press the left soft key (Yes) to delete the
entire list or press the right soft key (No) or to return to Call
Log list. For example, if you are viewing missed calls then select Clear
list, only all missed calls are deleted
4.4 Calling from Call Log
To place an outgoing call from Call Logs, highlight the entry you want to
call then press to call the number from the Call Log list view. You
can also press or the left soft key (Call) from the call details
view (see ”Viewing Call Details” on page 27)
Messaging Application
29
5. MESSAGING APPLICATION
Select this application to read, edit, save and send short messages and
pages
5.1 Composing Message
MsgingÆCompose
z The maximum size of a message is 140 characters
z A message can be sent to up to 5 recipients simultaneously
1. Press to access the main menu; select the Msging application
2. Select Compose; the Recipients box is displayed
3. Enter phone numbers directly from the keypad, or select numbers
from Contacts
z To select numbers from Contacts,
1) When no character is entered in the Recipients box, press the left
soft key (PhBook); if there are characters that have been
entered, you still can press the right soft key (Options) then
select PhBook
2) Press or press the digit keys to search for a contact and press
3) If the contact has more than one number, pressing will display
all the numbers for the contact. Select the desired number and press
to confirm the selection. If the contact only has one number,
press to confirm the selection. The check box before the
contact will be selected. If you want to enter more than one number,
repeat the selection. To cancel the selection of a check box, press
again
Messaging Application
30
4) After the selection, press the left soft key (Done) to return to
the Recipients box. The selected numbers appear in the box, with a
comma and a space automatically inserted as separators between
multiple numbers
z To enter numbers directly from the keypad, refer to “Text Entry” on
page 48 for text entry methods
- To enter multiple numbers directly from the keypad, press # to
enter a comma and a space before entering the next numbers
z To correct the input, press to delete the previous character.
Press and hold to delete all the previous characters
4. After entering the numbers of all recipients, press the left soft key
(Next) to access the message edit box
5. Enter the message text. The status bar displays how many characters
currently exist as well as the maximum number of characters that can
fit in the text body. The maximum size of a message is 140 characters
z If you have reached the maximum size of the message and try to enter
another character, the cursor does not move ahead and the character
is not added
z To enter canned messages, press the right soft key (Options)
then select Canned msgs. Press or to display the canned
message list. Press to select then press to confirm the
selection. The text will appear in the message edit box. If you select a
canned message but the message cannot fit entirely in the message
edit box (because the character count is exceeded), then the part of
the message that can fit is placed in the edit box and the remaining is
truncated
z If you want to edit the recipients again, press the right soft key
(Options) then select Edit recipients
6. To mark the message as urgent, press the right soft key
(Options) then select Mark urgent
Messaging Application
31
- If the current message’s priority is marked as “urgent”, then the
“Mark urgent” is replaced with “Mark normal”
7. To preview the message, press the right soft key (Options) and
select Preview
- The preview mode displays the recipient list followed by the text of
the message. If the message is marked urgent, there is an
exclamation mark before the Preview title. To re-edit the message
from the preview mode, press the right soft key (Options)
then select Edit
8. To send the message, press the left soft key (Send) or
z The left soft key (Send) will not be displayed if there is no
recipient in the Recipients box
z After sending is complete, you are returned to the main Messaging
Menu
z If the message fails to send, the phone will prompt the error message
z If you press , the phone will ask whether you want to save a draft.
Press the left soft key (Yes) to save the message to the Draft
box or press the right soft key (No) to return to idle state
~ Note:
z You can also compose a message in the following ways:
- Compose a message from Call Log (see “Sending a Message” on
page 27)
- Compose a message from Contacts (see "Making Call/Creating
New Message from Contact” on page 48)
- Enter a number from the keypad directly; press the right soft key
(Options) then select Send message. Refer to steps 4-8 on
pages 30-31 for additional information
Messaging Application
32
z If you receive an incoming call while composing a message, you can
press to answer the call or press the soft key to reject the call. If
you answer the call, the message is automatically saved to the Draft
box if the box is not full or the “auto erase” (see "Auto Erase” on page
39) setting is on
z While composing a new message, you can press the right soft key
(Options) then select Save as draft to save the message to the
Draft box; or Cancel msg to exit the message editing
5.2 Inbox
When receiving a new message (page) the phone will ring or vibrate. The
message icon (normal message) or (urgent message) appears
on the annunciator row and a note will be displayed on the standby
display screen. If there is only one message, the note displays the
message text directly. Press to scroll the screen; press the right soft
key (Done) to hide the note. If there are multiple messages, the note
displays the number of messages. Press the left soft key (Full View)
to access the Inbox list or press the right soft key (Cancel) to hide
the note
z The Inbox can store up to 30 messages. If the Inbox is 75% or 100%
full, the phone will display a note prompting you to delete messages or
turn on auto erase function. To avoid losing important messages in the
Inbox, periodically erase some existing messages or turn on auto
erase (see “Auto Erase” on page 39)
z The Inbox item is followed by parentheses and the number of unread
messages, if any. If there are no unread messages, then no
parenthesis appears. To access the message list, press . If the
sender is known (either an origination or callback address is present),
then the name (if there is a match in Contacts) or number (if there is no
match) is displayed on the row. If the sender is not known, then the
first few characters of the message is displayed
z Messages are listed in reverse chronological order according to the
time the message was received. Unread messages are bolded.
Messaging Application
33
Normal read messages have a icon on the leftmost column; while
normal unread messages have a icon. Once you view a message,
it is marked as read. Urgent messages, however, whether read or
unread, have an exclamation mark preceding them
z If the Inbox is empty, “(no messages)” will be displayed
z To delete a message from the message list, press to scroll to the
intended message, and then press the left soft key (Delete).
Press the left soft key (Yes) to confirm the deletion or the right
soft key (No) to cancel the deletion
To perform operations to a message, press to scroll to the intended
message, then press . Press to view the message details. The
top of the screen displays the position of the message in the list of total
messages. Press to display the message details. Press the left soft
key (Delete) to delete the message; press the right soft key
(Options) to select from the following options:
5.2.1 Reply
This option is only available if the message contains a valid sender
address
Select this option to reply to the message. The steps to reply to a
message are similar to those for composing a message (see ”Composing
Message” on page 29)
The difference is that, after you select Reply, the sender’s phone number
automatically appears in the Recipients box and the cursor is in the
message edit box. If the sender has set a callback number, you must
choose one number from the origination number and callback number.
Pressing or will display the two numbers. Select one address
then press to make it appear in the Recipients box

Messaging Application
34
5.2.2 Forward
This option, allows you to edit and forward the message. The steps to
forward a message are similar to those for composing a message
(see ”Composing Message” on page 29). The difference is that the
message automatically appears in the message edit box
5.2.3 Message Details
Message Details fields include:
z From: The origination address. The contents of the field are not
matched to a name in Contacts, even if such a match exists
z Callback: If applicable, the callback number is shown
z Date: The date when the message was sent, in your chosen time
format (see “Date & Time” on page 48)
z Time Sent: The time when the message was sent, in your chosen time
format (12 or 24 hours, see “Date & Time” on page 48)
z Time Received: The time when the phone was alerted of the message,
in your chosen time format
z Type: A text field, stating whether the message is a text message or
page
5.2.4 Call
If there is both a sender’s number and a callback number, after accessing
this option, the Call option will have an arrow beside it. The arrow means
that you must select between one of two phone numbers. Pressing
or will display the two numbers. Select one number then press
to dial the phone number
If there do not appear to be any valid phone numbers in either the
callback address or the sender’s address (because it is a page), then the
“Call” function is not present at all
Messaging Application
35
5.2.5 Add Contact
This option is only available if the number in the “From” field is not
currently stored in your Contacts. Select this option to edit the sender’s
address and store it to Contacts
The sender might have set the callback number. In this case, after
accessing this option, choose one number from the origination number
and the callback number. Pressing or will display the two
numbers. Choose one number then press to add the number to a
contact. Refer to "Storing a Phone Number to Contacts” on page 24 for
additional information
5.3 Sent
The last 50 messages you have sent are stored in the Sent box
To access the message list, press . If there are no messages in the
Sent box, “(no messages)” is displayed. Messages are listed in reverse
chronological order of being sent to the network. If the messages have not
yet been sent to the network, then they are listed in the order of being sent
by the user
The icons before each message indicate its status. There are three states:
z Normal (icon: √): No problems have been reported regarding the
outgoing message. Once a message leaves the phone it is
automatically set to this normal state
z Pending (icon:…): Message has not yet been sent from the phone to
the network due to the lack of signal or a temporary error
z Failed delivery (icon:×): The phone has received a permanent error
message regarding the delivery of the outgoing message
To delete a message from the message list, press to scroll to the
intended message, and then press the left soft key (Delete). Press
the left soft key (Yes) to confirm the deletion or the right soft key
(No) to cancel the deletion

Messaging Application
36
To perform operations to a message in the Sent box, press to reach
the desired message then press . Press to view the message;
press the left soft key (Delete) to delete the message; press the
right soft key (Options) to select from the following options:
5.3.1 Forward
This option, allows you to edit and forward the message. The steps to
forward a message are similar to those for composing a message
(see ”Composing Message” on page 29). The difference is that the
message automatically appears in the message edit box
5.3.2 Message Details
The fields in message details are:
z To: The destination address. There may be multiple addresses in this
field, all separated by a comma. All addresses in the field are not
matched to a name in Contacts, even if such a match exists
z The sent state is displayed, which can be normal, pending or failed
z Callback: The callback number is shown if you have set the callback
number (see "Callback Number” on page 38)
z Date: The date when the message was sent in your chosen time
format (see “Date & Time” on page 48)
z Time Sent: The time when the message was sent in your chosen time
format (12 or 24 hours, see “Date & Time” on page 48)
z Type: A text field, stating whether the message is a text message or
page
5.3.3 Call
After reaching this option, press to dial the number to which the
message is addressed
Messaging Application
37
5.3.4 Add Contact
This option is only available if the number in the “To” field is not currently
in your Contacts. Select this option to edit the receiver’s address and
store it to Contacts
After reaching this option, press or to display New contact
and Update contact. Refer to "Storing a Phone Number to Contacts” on
page 24 for additional information
5.4 Draft
Up to 10 edited messages can be stored in the Draft box
The Draft item is followed by parentheses and the number of draft
messages, if any. If there are no draft messages, then no parenthesis are
shown
To access the message list, press . If there are no messages in the
Draft box, “(no messages)” will be displayed. Unlike messages that have
been placed in the Inbox, icons on the leftmost column will never indicate
whether or not the messages have been read
To delete a message from the message list, press to scroll to the
intended message, and then press the left soft key (Delete). Press
the left soft key (Yes) to confirm the deletion or the right soft key
(No) to cancel the deletion
To perform operations to a message in the Draft box, press to reach
the desired message then press . Press to view the message.
Press the left soft key (Edit) to edit the message (see ”Composing
Message” on page 29 for details); press the right soft key (Options)
to select from the following options:
5.4.1 Send
Select this option to send the draft message

Messaging Application
38
After the message has been sent, it will be deleted from the Draft box
5.4.2 Delete
When you access this option, “The message will be deleted” will appear.
Press the left soft key (Yes) to complete the deletion
5.5 Pages
The page text contains only the numeric page: no additional text is
included
If the callback number is available it alone is displayed in the text; if only
the origination is available, then it is displayed. The call details note,
however, displays both numbers, if they are available
Functionally, the view state behaves the same, although there are some
differences in the Options menu: “Forward” and “Reply” are not available
5.6 Messaging Settings
5.6.1 Callback Number
MsgingÆSettingsÆCallback Num
This setting allows you to set a callback number separate from the
origination number, if desired
The following options are available:
z Off
z On + text body entry
If you highlight On, press then enter the desired callback number in
the text body
After the selection, save the setting by pressing the left soft key
(Save)
Default: Off

Messaging Application
39
5.6.2 Delivery Confirmation
MsgingÆSettingsÆDelivery Conf
This setting allows you to turn delivery confirmation on or off. When
delivery confirmation is on, the phone will display a delivery confirmation
report. When off, no report will be displayed
The following options are available:
z On
z Off
Highlight the desired option and press to confirm
Default: Off
5.6.3 Duplicate Detection
Msging Æ Settings Æ Dup Detection
This setting allows you to turn duplication detection on or off. If detection
is on, all but the most recent messages of a series of identical messages
are deleted. If off, the messages are not processed in any special way
and simply appear as received
The following options are available:
z On
z Off
Highlight the desired option then press to confirm
Default: Off
5.6.4 Auto Erase
Msging Æ Settings Æ Auto Erase
If an incoming text message or page is received by the phone but no
enough memory to store it, Auto Erase will delete the oldest read

Messaging Application
40
messages/pages in the mailbox to make room for the incoming
messages/pages. Auto Erase does not apply if all the messages are
unread. The Sent and Draft box will also be affected if this setting is on: if
you send a message and there is no more room in the Sent box, the
oldest message is deleted to make room for the new one
This setting allows you to turn the Auto Erase feature on or off
The following options are available:
z On
z Off
Highlight the desired option then press to confirm
Default: Off
Contacts Application
41
6. CONTACTS APPLICATION
The Contacts application allows you to store phone numbers and email
addresses into your phone, and to use when placing phone calls or
creating messages
6.1 Editing Contacts
The Contacts can store a maximum of 100 contacts. Each contact can
store four phone numbers, one pager and one email address. You can
also assign a speed dial key and ring tone for the contact
Contact Type Notes
First Name
Maximum of 64 alphanumeric characters can
be entered
Last Name
Maximum of 64 alphanumeric characters can
be entered
Home Phone
Work Phone
Mobile Phone
Unknown Phone
Pager
Maximum of 32 continuous digits can be
entered for each phone number before a
pause is entered. However, after a pause
character has been entered, these fields can
accept 64 characters
Email
Maximum of 32 alphanumeric letters can be
entered
Speed Dial
Assigns a speed dial key for the phone
number in the contact entry
Ring Tone
Assigns a ring tone for incoming calls from the
phone numbers in the contact entry

Contacts Application
42
6.1.1 Adding Contact
1. Press to open the main menu, then select Contacts
- If there are no contacts, the text “(no contacts)” is displayed
- The contacts are displayed in alphabetical order by last name
- The Contacts list items might contain an icon. The icon is the default
number/email for that contact. If there is no default setting, then no
icon is displayed. For fields that cannot be completely displayed due
to visual space limitation, ellipse is used. Press to scroll the
text horizontally
2. Press the left soft key (Add) to go to the edit page of Contacts
3. In the First Name field, enter the first name of the contact. Press
to move the highlight down to the Last Name field, then enter the last
name
- For text entry method, refer to ”Text Entry” on page 48
- The First Name and Last Name fields contain a maximum of 64
characters
- To correct the input, press to delete the previous character
4. Press to move the highlight down to the Home phone, Work
phone, Mobile phone, Unknown phone and Pager fields. Enter
phone numbers in the corresponding fields
- These number fields contain a maximum of 64 characters including
pauses. The number fields can contain only 32 digits before a
pause is inserted
- To insert a pause, press the right soft key (Options) and then
press or . Select the type of pause, then press to
make the pause icon appear in the field
Contacts Application
43
5. Press to move the highlight down to the Email field. Enter an
email address of the contact
- Refer to “Text Entry” on page 48 for text entry methods
- The Email field can contain only 32 characters
- To correct the input, press to delete the previous character
6. Press to move the highlight down to the Speed Dial field, then
press . The phone will display the current speed dial key
assignment
- Pressing on Speed Dial will not respond if Home phone,
Work phone, Mobile phone, Unknown phone and Pager fields
are all empty
- Used speed dial numbers display the name of the assigned contact
after the number. The contact type icon (see the table on page 41)
is displayed to the left of the name to denote the type of number that
is assigned. The numbers list is an endless list from 2-99
7. Press to select the speed dial number then press
- If you select a speed dial entry with a phone number already
assigned to it, the phone will display a note. Press the left soft key
(Yes) to confirm the re-assignment or press the right soft key
(No) to return to the speed dial number list and reselect
another entry
8. When you select an empty speed dial number or have confirmed that
you will overwrite an existing speed dial number, the phone will display
all the numbers for the contact. Select one phone number for which
the speed dial number is assigned and then press . The Speed
Dial field will display the assigned speed dial number and contact type
9. Press to move the highlight down to the Ring Tone field, then
press . A check mark will appear on the ring tone that has
Contacts Application
44
currently been chosen. Press to select one ring tone and then
press to confirm the selection
- The ring tone list is displayed alphabetically, with “Default” being the
exception, listed at the top
- In the ring tone list, press the left soft key (Play) to play the
ring tone. To silence the ring tone, press the left soft key
(Silence)
10. After setting all items, press the left soft key (Save) to save the
information. The screen will display the detailed information of the
contact
- The name field is listed in the order of [First name] [Last name]. For
fields that cannot be completely displayed due to visual space
limitations, ellipses are used. Press to scroll horizontally.
When the text is exhausted, a space character is inserted after the
last character, followed by the first characters of the field
~ Note:
z You can enter the information in different fields based on needs, and
then press the left soft key (Save)
z After changing fields and pressing , a note will appear asking you
to confirm whether or not you want to save the changes. Press the left
soft key to (Yes) to save the contact or the right soft key
(No) to return to idle state
z The minimum requirement for an entry to be stored in Contacts is a
single character in First name, Last name, Home phone, Work
phone, Mobile phone, Unknown phone, Pager or Email. An entry
cannot contain only a ring tone. Additionally, a phone number cannot
contain only a pause character
z You may lose Contacts entries because of damage, incorrect
operation, static electricity or repair to the phone. Please keep a
hardcopy as a backup
Contacts Application
45
z For other methods to create a new contact, refer to "Storing a Phone
Number to Contacts” on page 24
6.1.2 Searching Contact
1. Press to open the main menu, then select the Contacts
application to access the contacts list
2. Press - on the keypad to move the highlight to the last
name beginning with the first letter on the corresponding numeric key
- When the key is pressed once, the contact whose last name starts
with the first letter of that key will be highlighted; if there is no such
name match, the key press is ignored. When pressed twice, the
name that starts with the second letter of that key will be highlighted;
if there is no such match, the key presses are ignored. The third
and/or fourth letter may be similarly accessed
- If you continue to press the key, the phone keeps track of the
number of times the key is pressed automatically, and the name will
be highlighted accordingly
- Press to browse
3. With the desired contact highlighted, press to see the detailed
information: name, phone numbers, email and speed dial location. If
the ring tone is not “Default”, the selected ring tone is also displayed.
Press to browse through the text
~ Note: When the contact details are displayed, you can move the
highlight to one phone number and then press to call the
phone number; or move the highlight to phone number/email and
then press the left soft key (Send Msg) to edit a message
6.1.3 Re-editing Contact
This feature is used for modifying a contact
Contacts Application
46
1. Refer to steps 1-2 in “Searching Contact” on page 45 to find the
contact to be modified
2. Press the right soft key (Options) and then select Edit to enter
the editing screen. The First Name field is highlighted
3. To select the item to be modified, press . Refer to steps 3-10 in
“Adding Contact” on page 42 for detailed instructions
4. After changes, press the left soft key (Save) to save the changes
6.1.4 Re-editing Fields in Contact
This feature allows you to modify the name/phone numbers/email/speed
dial/ring tone fields in a contact
1. Refer to steps 1-3 in “Searching Contact” on page 45 to display the
detailed information of the contact
- The default phone number/email is underlined
2. Press to move the highlight to the field to be modified
3. Press the right soft key (Options) then select Edit
4. To enter the editing screen, press . The highlight is on the field
you just selected
5. Refer to steps 3-10 in “Adding Contact” on page 42 for detailed
instructions
6. After the modification, press the left soft key (Save) to save the
changes
6.1.5 Setting Number/Email as Default
After setting a number/email as a default for a contact, press to dial
the default number or to create a message/email addressed to the default
number/email by selecting a contact directly from the contact list view.
Refer to step 1 in "Making Call/Creating New Message from Contact” on

Contacts Application
47
page 48 for details
1. Refer to steps 1-3 in “Searching Contact” on page 45 to display the
detailed information of the selected contact
- The default phone number/email is underlined
2. To move the highlight to the desired phone number/pager/email to be
set as default, press . Press the right soft key (Options)
then highlight Set as default
- The option of Set as default is unavailable if you have already set
the selected phone number/pager/email as default
3. Press ; a note will be displayed asking you to confirm the selection
of the default number
- If you have already set one default number/email, the note will
prompt that a previous default number already exists and whether
you want to set the selected number/email as default
4. Press the left soft key (Yes) to set the selected number/email as
default
~ Note: When a default number/email is set, the contact type icon will
be displayed in the contact list view
6.2 Deleting Contact
1. Refer to steps 1-2 in “Searching Contact” on page 45 to locate the
contact to be deleted
2. Highlight the contact to be deleted, press the right soft key
(Options), then select Delete
3. The phone will prompt that the contact will be deleted. Press the left
soft key (Yes) to confirm the deletion or the right soft key
(No) to cancel
Contacts Application
48
6.3 Erasing Number/Email/Speed Dial/Ring Tone
From Contact
1. Refer to steps 1-2 in “Searching Contact” on page 45 to locate the
contact whose entries are to be deleted
2. To display the detailed contact information, Press . Press to
move the highlight to the number/email/speed dial/ring tone to be
deleted
- If the ring tone is set as “Default”, the ring tone entry is not
displayed
3. Press the right soft key (Options) then select Erase entry
4. The phone will prompt you that the entry will be deleted. Press the left
soft key (Yes) to confirm the deletion
~ Note: If the ring tone is deleted, the setting will be changed to
“Default”
6.4 Making Call/Creating New Message from
Contact
1. Refer to steps 1-2 in “Searching Contact” on page 45 to find the
desired contact
- If there is an icon preceding the contact item, it indicates a default
number/email has been set. Press to dial the default number
or create an email addressed to the default email, ignoring the
following steps
- If there is no icon preceding the contact item or you want to make a
call/create a message or email to another number/email, go to step
2
2. To display the detailed information of the selected contact, press

Contacts Application
49
3. To make a call, press to highlight the desired phone number,
then press
To create a message or email, press to highlight the desired
address then press or the left soft key (Send Msg). The
address automatically appears in the Recipients box. Refer to steps
4-8 in “Composing Message” on page 29 for additional information
Calculator Application
50
7. CALCULATOR APPLICATION
This function permits 10-digit arithmetic operations, with a series of
operators, both simple (for example, addition) and advanced (for example,
reciprocal). The calculator also includes simple memory functions
To access the calculator application from the idle state, press to
access main menu, and then select Calc
The screen appears as an old-style simple calculator, with the key
mappings shown on the calculator
1. The screen will initially display the number “0”. Enter the first number to
be calculated
- To enter a minus sign, press ; to enter a decimal point, press
#
2. Press , , or to enter the plus, minus, multiplication
or division signs respectively
z To implement advanced operations, press the left soft key
(Advanced) and then select the desired operation
3. Enter the second number
- To enter “0”, press # and ; “0.0” will be displayed
4. To display the calculation result, press
- To conduct further calculations from this result, repeat steps 2-4
- To store the calculation result in the phone, press the right soft key
(Memory) to open the Memory menu and then select Store.
The restored value appears in parenthesis after the Recall item. To
retrieve the memory in later operation, select Recall in the Memory
menu. To clear the memory, select Clear in the Memory menu.
Calculator Application
51
5. When starting a new calculation, if the result from the last calculation is
not “0”, press to initialize
z Press to return to idle state. Contents of the current calculation
are erased, but the memory is preserved
z To delete the character you just entered, press . To erase all
entered characters, press and hold
z A maximum of 10 digits (with or without minus sign and decimal point)
can be entered at one time. The phone will ignore any additionally
entered digits
z If the formula violates mathematical principles (for example, division
by zero and square root of negative number), “Error” will be displayed.
Press to clear this message before entering any operators and
operands
z If the calculation result is more than 11 significant digits, “Error” will
be displayed
z Precision number after decimal point is 6

Settings Application
52
8. SETTINGS APPLICATION
The Settings application allows you to change the following phone
settings: sound, display, buttons, network, phone features, and security.
An additional “about” option is available to display phone specific
information
To access Settings application, press to access the main menu then
select Settings
Many menu entries have a right soft key labeled “Info” associated with
them. The soft key only appears when the highlight is on the associated
menu item. Press the right soft key (Info) to view the contents; press
to scroll the screen; press the left soft key (Done) or to
return to the menu
8.1 Sound
SettingsÆ Sound
This menu allows you to set ring tones, sound effects and phone volumes
8.1.1 Ring Tones
Settings Æ Sound Æ Ring Tones
This sets the default ring tone. The default ring tone is played for all
incoming calls that do not have another ring tone assigned to them in
Contacts
Press to scroll through the ring tones and press the left soft key
(play) to listen to a sample of each. After highlighting the desired
ring tone, press to save the setting

Settings Application
53
8.1.2 Sound Effects
Settings Æ Sound Æ Sound Effects
Any non-voice sound that is also not a ring tone is considered to be a
sound effect. Traditional “clicks”, “tones”, and other DTMF sounds are
grouped under sound effects. The sounds are played through the
earphone if it is attached; otherwise they are played through the far field
speaker
This setting allows you to determine how many sounds are played when
the phone is in use. You can choose from only a few broad categories
(you do not have complete control over each sound used)
Press to select the desired sound effect then press to confirm.
The radio button before the current sound effect is selected
The following options are available:
z Complete: All sound effects will be played
z Alerts only: Only sound effects for missed call notification, battery, call
origination failed, call dropped notes will be played
z None: No sound effects will be played
However, if the ringer volume is zero, or the master volume is "Off" or "Off
+ Vibrate", no sound effects will be played at all, no matter whatever the
sound effects setting is
Default: Complete
8.1.3 Volumes
This menu allows you to set master volume, ringer volume, voice volume
and key volume
8.1.3.1 Master Volume
Settings Æ Sound Æ Volumes Æ Master Volume
This function enables you to define how the phone will notify you of events
Settings Application
54
such as incoming calls, new messages/pages and alarm, countdown,
notes, and so on. Master volume affects all sounds except for voice
You can also access this option by pressing and holding from idle
state. Refer to "Master Volume Control” on page 23
Press to select the desired option then press to confirm the
selection
The radio button before the current sound effect is selected
The following options are available:
z On: The phone will play ring tone for events
z Off: The phone will neither play ring tone nor vibrate for events
z On + Vibrate: The phone will first vibrate and then play ring tone for
events
z Off + Vibrate: The phone will vibrate for events
Default: On
By the master volume, you can turn on the phone vibrator. The vibrator
applies only to ring tones/alerts. The volume can be on or off, and the
vibrator, independently, can be turned on or off. When the volume is off
but the vibrator is on, the phone is in “Vibrate” mode and the vibrate
annunciator appears. When both the volume and the vibrator are off,
the phone is in “Silent” mode, and the silent annunciator appears.
These two annunciators are mutually exclusive
8.1.3.2 Ringer Volume
Settings Æ Sound Æ Volumes Æ Ringer Volume
You can also access this option by pressing or in idle state.
Refer to "Ringer Volume Control” on page 22
Ringer volume controls volume control for currently selected ring tones
and missed call notes, battery, call origination failed, call dropped
notification sounds played through the speaker. It excludes voice(s)
Settings Application
55
played through the speaker
To adjust the volume, press . There are eight volume levels (0-7). If
the value is not zero, press the right soft key (Play) to listen to the
volume. Press the left soft key (Save) to save the setting
z When the volume is set to zero, the silent annunciator is shown; if
the annunciator was previously displayed and the volume has been
changed to a non-zero value, the annunciator disappears
Default: 3
8.1.3.3 Voice Volume
Settings Æ Sound Æ Volumes Æ Voice Volume
You can also access this option by pressing or during call
state. Refer to "In Call Operations” on page 18
This setting allows you to set the earpiece or earphone (whichever the
voice channel is playing through) volume
To adjust the volume, press . There are eight volume levels (0-7).
Press the left soft key (Save) to save the setting; press the right soft
key (Cancel) or to exit
Default: 3
8.1.3.4 Key Volume
Settings Æ Sound Æ Volumes Æ Key Volume
Select this option to adjust the key pad volume
To adjust the volume, press . There are 8 eight volume levels (0-7).
Press the left soft key (Save) to save the setting; press the right soft
key (Cancel) or to exit
Default: 3

Settings Application
56
8.2 Display
This menu allows you to set screen properties and formatting
8.2.1 Properties
Settings Æ Display Æ Properties
This menu enables you to set the contrast, backlight timer and application
timeout value
8.2.1.1 Contrast
Settings Æ Display Æ Properties Æ Contrast
This option enables you to specify the contrast level for the screen. After
you access this option, pressing will display the current setting in the
pop-up selector
There are seven contrast levels. Press to adjust the contrast. The
screen display will reflect the contrast setting. After adjusting the contrast,
press or to complete the setting
Default: 4
8.2.1.2 Backlight Timer
Settings Æ Display Æ Properties Æ Light Timer
Normally the backlight turns off after a certain period of inactivity. If off, the
backlight will automatically turn on (if Light Timer is not set to "Always off")
when you press keys or when the phone receives a call
After you access this option, the radio button before the current setting is
selected. Press to move the highlight then press to confirm the
selection
The following options are available:
Settings Application
57
After 10 sec
The backlight will last for 10 seconds after the last keystroke
After 30 sec
The backlight will last for 30 seconds after the last keystroke
After 60 sec
The backlight will last for 60 seconds after the last keystroke
Always off
The backlight will always be off
Always on
The backlight will always be on. When this option is set, the phone
displays a warning message that the battery may drain quickly if the
backlight is always on. Press the left soft key (Yes) to confirm the
setting, or press the right soft key (No) or to return to the
backlight timer selection with the previous value selected
Default: After 10 sec
8.2.1.3 Application Timeout
Settings Æ Display Æ Properties Æ AppTimeOut
This setting enables you to set the period of time before the phone returns
to idle state. However, if you have added, deleted, or altered information
after your arrival at the application, the phone will not automatically return
to idle state
When you access this option, the radio button before the current setting is
selected. Press to move the highlight and then press to
confirm the selection

Settings Application
58
The following options are available:
After 60 sec
The phone will return to idle state 60 seconds after the last action in an
application
After 2 min.
The phone will return to idle state 2 minutes after the last action in an
application
After 5 min.
The phone will return to idle state 5 minutes after the last action in an
application
Default: After 60 sec
8.2.2 Formatting
Settings Æ Display Æ Formatting
This menu enables you to set the phone language, name order (first
name, last name), date & time and banner
8.2.2.1 Phone Language
Settings Æ Display Æ Formatting Æ UI Lang.
This setting sets the language that appears on the phone’s text display.
This selection is independent of the text entry language (see "Text
Language” on page 48)
The radio button before the current setting is selected. Press to
move the highlight and then press to confirm the selection
The following options are available:
z English

Settings Application
59
z Spanish
z Portuguese
Default: English
8.2.2.2 Name Order
Settings Æ Display Æ Formatting Æ Name Order
This setting enables you to determine the formatting of names in Contacts
and other places where contact names are displayed (for example: Call
Log, Messaging)
The radio button before the current setting is selected. Press to
move the highlight and then press to confirm the selection
The following options are available:
z First then last
z Last then first
z Last, First
Default: First then last
8.2.2.3 Date & Time
Settings Æ Display Æ Formatting Æ Date & Time
Date Format
This setting determines the date formatting
The radio button before the current setting is selected. Press to
move the highlight and then press to confirm the selection
The following options are available:
z MM/DD/YYYY
z DD/MM/YYYY

Settings Application
60
z YYYY/MM/DD
Default: MM/DD/YYYY
Separator
This setting determines the date separator formatting
The radio button before the current setting is selected. Press to
move the highlight and then press to confirm the selection
The following options are available:
z Slash “/”
z Period “.”
z Space “ “
Default: Slash “/”
Time Format
This setting determines the time formatting
The radio button before the current setting is selected. Press to
move the highlight to the desired format then press to confirm the
selection
The following options are available:
z AM/PM
z 24 hour
Default: AM/PM
8.2.2.4 Banner
Settings Æ Display Æ Formatting Æ Banner
This setting enables you to edit the banner text displayed on the screen in
idle state
Settings Application
61
After accessing this option, enter the banner text (up to 11 alphanumeric
characters can be entered), then press the left soft key (Save) to
complete the operation. For text entry, refer to "Text Entry" on page 48
8.3 Shortcuts
Settings Æ Shortcuts
The shortcuts setting allows you to access an application with a single key
press in idle state. You can assign shortcuts for the left soft key, right soft
key, send key, left keypress and right keypress
After reaching this menu, press to access its submenu. Press
to highlight a shortcut key then press . Press to highlight an
application to be assigned to the selected key. Press to confirm the
selection
The same application can be mapped to several keys
Default values:
z Left softKey: Contacts
z Right softKey: Msging
z Send Key:Call Log
z Left Keypress: None
z Right Keypress: None
8.4 Roaming
Settings Æ Roaming
This setting controls access to a roaming network
The radio button before the current setting is selected. Press to
move the highlight and then press to confirm the selection
The following options are available:

Settings Application
62
z On
z Off
Default: On
8.5 Features
Settings Æ Features
This setting allow you to set phone features such as text input, any key
answer, auto keyguard, call timers, touch tone and service tones
8.5.1 Text Input
SettingsÆ Features Æ Text Input
This menu enables you to clear the phone dictionary, set the text entry
method and the text language
8.5.1.1 Clear Dictionary
SettingsÆ FeaturesÆ Text Input Æ Clear Dictionary
The phone automatically adds words that you use to a personal word
dictionary. You can use this setting to clear the dictionary
Press to select this option. You will be asked whether you want to
clear the personal dictionary. Press the left soft key (Yes) to confirm
or press the right soft key (No) or to cancel
8.5.1.2 Text Entry
Settings Æ Features Æ Text Input Æ Text Entry
Not all text entry modes are applicable to all text/numeric entry types; only
the applicable modes are shown for a given text/numeric entry type. Refer
to the table in "Default Text Modes” on page 48 for details
This setting sets the default text entry mode for unrestricted text fields

Settings Application
63
The radio button before the current setting is selected. Press to
move the highlight to the desired option then press to confirm the
selection
The following options are available:
z Multitap
z eZiText
z Numeric
For details of the text entry methods, refer to "Text Entry" on page 48
Default: Depends on type of text entry field
8.5.1.3 Text Language
Settings Æ Features Æ Text Input Æ Text Lang
This setting sets the text entry language for the phone. This selection is
independent of phone language (see “Phone Language” on page 48)
The radio button before the current setting is selected. Press to
move the highlight to the desired language then press to confirm the
selection
The following options are available:
z UI Language
z English
z Spanish
z Portuguese
Default: UI Language
8.5.2 Anykey Answer
Settings Æ Features Æ AnyKey Answer
This setting allows you to enable/disable any-key answering. If this setting

Settings Application
64
is "On", you can answer incoming calls by pressing any key on the keypad
except the Reject soft key, Silence soft key or the key
The radio button before the current setting is selected. Press to
move the highlight to the desired option then press to confirm the
selection
The following options are available:
z On
z Off
Default: Off
8.5.3 Auto Keyguard
Settings Æ Features Æ Auto Keyguard
This setting allows you to automatically lock the keypad for a set period of
time after the last action on the keypad; or you can disable the keypad to
be automatically locked
The radio button before the current setting is selected. Press to
move the highlight to the desired option and then press to confirm
the selection
The following options are available:
z 30 Seconds: The keypad will be automatically locked 30 seconds after
the last action
z 1 Minute: The keypad will be automatically locked one minute after the
last action
z 2 Minutes: The keypad will be automatically locked two minutes after
the last action
z 5 Minutes: The keypad will be automatically locked five minutes after
the last action
z Off: The keypad will not be automatically locked
Settings Application
65
Default: Off
8.5.4 Call Timers
Settings Æ Features Æ Call Timers
This setting allows you to view and reset the call timers for incoming,
outgoing and all calls
After you access this menu, press to access its sub-menu. Press
to select the type of call timer then press . The total time for the
given type of call appears. Press the right soft key (Reset) to clear
the time value to zero. Press the left soft key (Done) or to
exit without changing the time value. The All Calls Timer cannot be
cleared
8.5.5 Touchtone
Settings Æ Features Æ Touchtone
This setting allows you to change the length of the DTMF tones
The radio button before the current setting is selected. Press to
move the highlight and then press to confirm the selection
The following options are available:
z Short: A short DTMF tone burst (key beep) will be generated
regardless of how long a key press is held before releasing
z Long: It results in generation of a continuous DTMF tone that ceases
only when a key press is released
Default: Short
8.5.6 Service Tones
Settings Æ Features Æ Svc Tones
With this setting on, standard tones will be played when the phone has
acquired or lost a signal. The tones will play only when the phone is in idle

Settings Application
66
state, and they will be played through the speaker. The volume is scaled
based on the ringer volume. If the earphone is connected, then the tones
are played through the earphone, and they are scaled using the earphone
volume, and further scaled by the ringer volume
The radio button before the current setting is selected. Press to
move the highlight to the desired option then press to confirm the
selection
The following options are available:
z On
z Off
Default: On
8.6 Security
Settings Æ Security
This setting allows you to set voice privacy, and reset the phone’s settings
to their original configuration
8.6.1 Voice Privacy
Settings Æ Security Æ Voice Privacy
This setting turns voice privacy on and off
The radio button before the current setting is selected. Press to
move the highlight to the desired option then press to confirm the
selection
The following options are available:
z On
z Off
Default: On
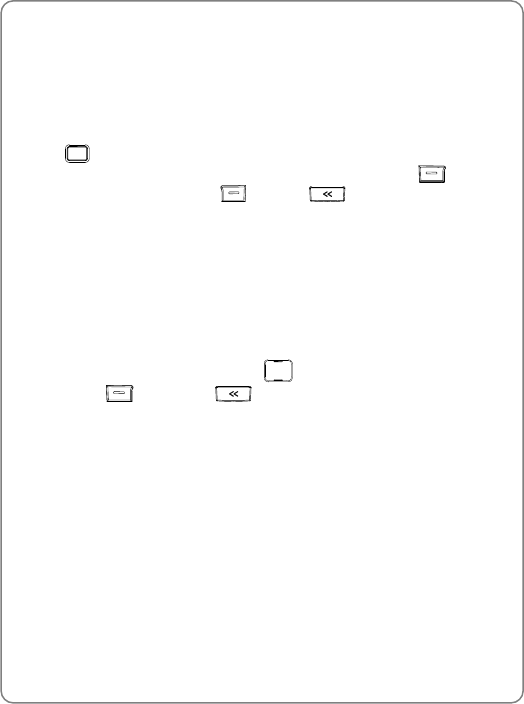
Settings Application
67
8.6.2 Default Reset
Settings Æ Security Æ Default Reset
This setting allows you to reset the phone’s settings to their original
configuration. No other information (such as Contacts, messages) will be
erased
Press and a note will be displayed, asking whether you want to
continue to reset the default values. Press the left soft key (Yes) to
continue or the right soft key (No) or to cancel and return to
the menu
8.7 About
Settings Æ About
The About menu displays the MDN (Mobile Directory Number), Hex ESN
(Electronic Serial Number), BREW (Binary Runtime Environment for
Wireless) Version and Software Version
After you access this option, press to scroll the screen. Press the
left soft key (Done) or to hide the screen and return to the
Settings menu
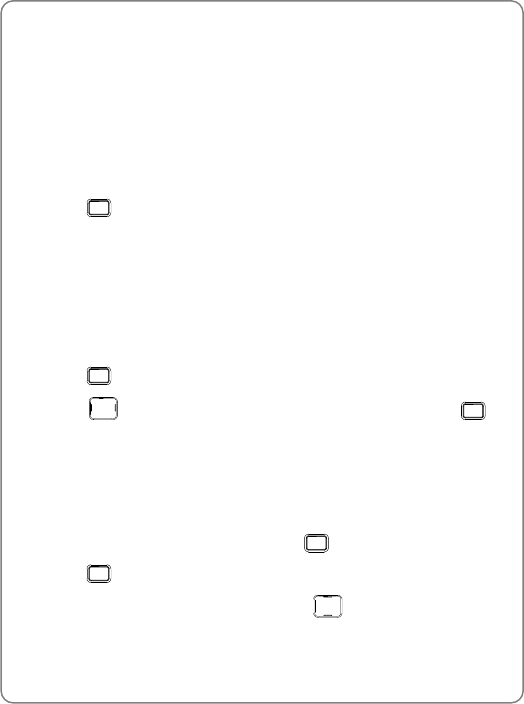
Brew Application
68
9. BREW APPLICATION
This application requires network support
9.1 MobileShop
Mobileshop allows you to download your favorite ring tone, screen saver,
games, etc via Application Server access
1. Press to access the main menu then select Brew
2. Select MobileShop
z Catalog: Shows available MobileShop application
z Download Help: Detailed information on the downloadable application
list, downloading cost, how to download, memory status and more
9.2 Settings
1. Press to access the main menu then select Brew
2. Press to move the highlight to Settings then press to
access the menu
9.2.1 Order Apps
To set the application order:
1. Select Order Apps then select a folder from the Main Menu,
Favorites, Work or Fun list, then press
2. Press and then you will see the up and down arrow key
3. Move the application orders by pressing

Brew Application
69
9.2.2 Move Apps
To move an application to a selected folder:
1. Select Move Apps then select a folder from the Main Menu, Favorites,
Work or Fun list, then press
2. Select the application to be moved to another folder
3. Select the folder where the selected application is to be saved
4. You will see a note indicating the successful moving of the application
9.2.3 Manage Apps
This menu allows you to select Manage Apps and the application to
manage
9.2.4 Menu View
This menu allows you to select the Main Menu display style from the
“Small Icon” “Large Icon” and “List” types
9.2.5 Screen Savers
This menu shows your screen savers and allows you to select screen
saver images
9.2.6 View Log
This menu allows you to view the Brew application access logs
9.3 Help
This menu gives detailed explanation to help you understand how to
purchase an application, how to pay and the charges
1. Press to access the main menu then select Brew

Brew Application
70
2. Press to move the highlight to Help then press to access
the menu
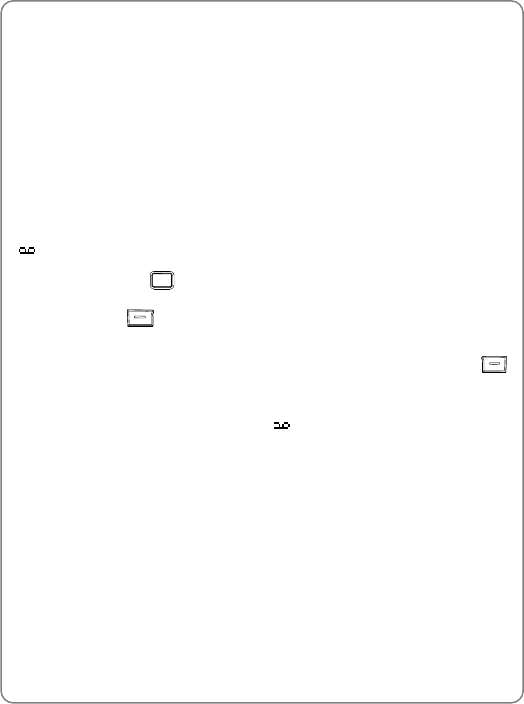
Voicemail Application
71
10. VOICEMAIL APPLICATION
The voicemail function requires system connection
When the phone is switched off, outside of the service area range or
unavailable, incoming calls will be redirected to the voicemail system. The
system will automatically answer the calls and prompt the callers to leave
a message
By voicemail application, you can see how many voicemails are on the
network and dial in to listen / retrieve the message(s). When there is one
or more voicemails on the network, the voicemail annunciator
appears
In idle state, press to access the main menu and then select VMail.
The screen text indicates how many voicemails are on the network. Press
the left soft key (Call) to dial the voicemail server number to retrieve
the message
z If there is at least 1 voicemail, you can press the right soft key
(Reset) to reset the number of voicemails to zero
z When there are no voicemails or you have manually reset the counter
to zero, the voicemail annunciator does not appear
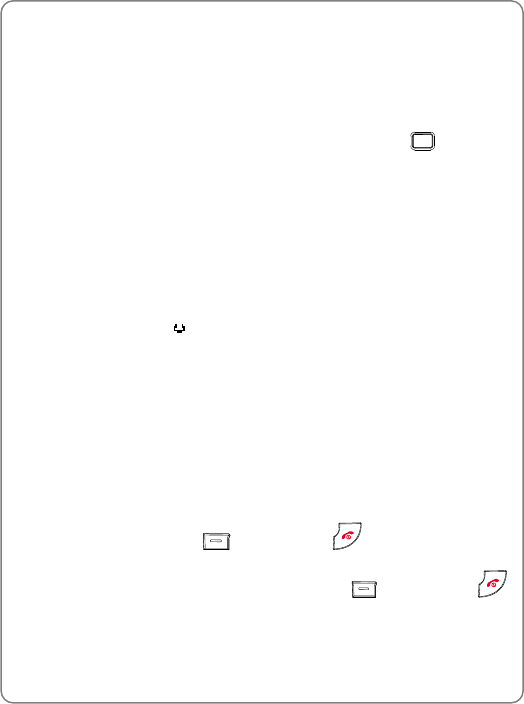
Clock Application
72
11. CLOCK APPLICATION
This application enables you to set the alarms for a specified time, and
use timer and countdown functions
To access the clock application from the idle state, press to access
main menu, then select Clock
~ Note: This function requires network support. If you are in places
where no digital signal is available, a note stating “A signal is
required for this application to begin” will display
11.1 Alarm Clock
This function enables you to activate/deactivate and review alarms for
specified time. Up to three alarms can be set. Once an alarm is activated,
the alarm annunciator will be displayed
z When the preset alarm time expires, the phone will sound the alarm
ringer and a note with the “Alarm” title will appear. The body of the
note contains the time. The alarm will sound for two minutes and the
note will remain on the screen until you dismiss it
z If the ringer volume is zero, or the master volume is “Off”, no alarm
ringer will be played but the "Alarm" note will be displayed when the
preset alarm time expires; if the master volume is “Off + Vibrate”, the
phone will vibrate; if the master volume is "On + Vibrate", the phone
will first vibrate and then play the ring tone
z Press the left soft key (Dismiss) or to silence the alarm
and return to the state in which the note appeared. When the keypad
is locked, you still can press the left soft key (Dismiss) or
to silence the ring tone and dismiss the note
Clock Application
73
z After an alarm sounds, the alarm annunciator is removed from the
display, unless the alarm is repeating, in which case it remains on the
screen
z If the phone is off when the alarm time expires, nothing will be
displayed when the phone is powered back on
z When the alarm time expires, if a call is ongoing, a simple tone is
played through the earpiece or earphone (whichever the voice channel
is playing through) instead of the assigned ring tone. The simple tone
will be repeated once
z A new alarm has priority over an old alarm. If an alarm is ringing, and a
new one interferes, the new alarm’s sound plays. However, once you
dismiss the new alarm, the old alarm continues to play until the total
time is two minutes, including the time it was playing before the
interference that it has been playing
To set a new alarm or revise an existing alarm:
1. After accessing the clock application, select Alarm Clock. There are
three alarms you can set. All three alarms are uninitialized upon factory
installation and “None” is displayed on the screen
- Once the alarm is initialized, there is no way to return to the
uninitialized state
- If the alarm has been initialized, the right soft key (Turn
off/Turn on) appears as long as the alarm time is in the future. The
item contains an icon (√ means the alarm is on and × means the
alarm is off), a date (as per the date format), a separator (@) and a
specified time. Press the right soft key (Turn on/off) to switch
between the alarm on/off states
2. Select an item and then press to set the alarm
- The cursor is placed at the first character of the Time field
3. To set the date (as per the date format), press to highlight the
Date field, and then press the - keys to enter the date
Clock Application
74
- If the alarm is uninitialized, the default date is the current date
- The cursor is on the digit which is not highlighted. It will advance
automatically as you enter the date
- The year that can be set for alarm clock is 63 years later than the
current time, otherwise, the phone will prompt "The date is not valid,
but it can still be saved". The year range that can be saved is
1980-2115
- The phone does not allow invalid input. If you are on the first
character of the month field, and you enter a number greater than 1,
then the first character of the month field will be filled with ‘0’ and the
second with the entered digit. If you have entered a 1 on the first
character, then button presses with values greater than 2 will be
ignored
4. To set the time, press to highlight the Time field, and then press
-to enter the time
- The cursor is on the digit which is not highlighted. It will advance
automatically as you enter the time
- The phone does not allow invalid input. If you enter a number
greater than the allowed value on the first character of the hour or
minute field, then the first character of the field will be filled with "0"
and the second with the entered digit. If you enter a number greater
than the allowed value on the second character of the hour field, the
button presses will be ignored
- If the time format is AM/PM, and if you want to change “AM” in the
Time field to “PM”, press when the cursor is on “A”. If you
want to change “PM” in the Time field to “AM”, press when
the cursor is on “P”. The presses other than or are
ignored. You cannot move the cursor to "M".
5. To set the repeat mode, press to highlight the Repeat field and
then press to display an option menu
Clock Application
75
- The options are: Never, Every day, Once a week, Every week
day or Every weekend. The last option is context-sensitive. If the
day of the alarm falls on a week day, then the “Every week day”
item is visible, and there is no “Every weekend” item. If the day of
the alarm falls on a Saturday or Sunday, then the “Every weekend”
item is visible, and there is no “Every week day” item
- Press to highlight an option and press to confirm the
selection. The currently selected value is indicated by a check mark
6. To set the ring tone, highlight the Ringer field then press to
display an option menu
- Press to highlight a ring tone and press to confirm the
selection. The currently selected value is indicated by a check mark
- If you do not set the ring tone, the default ring tone “Bells” is used
7. Press the left soft key (Set) to save the setting
- If the alarm date is earlier than the current date, a note prompting
“The date is not valid, but it can still be saved.” appears. Press the
left soft key (Yes) to save or press the right soft key (No)
to cancel
- If the master volume is set to “Off + Vibrate”, “Alarm will not sound
in Vibrate mode” appears
- If the master volume is set to “Off” or the ringer volume is zero,
“Alarm will not sound in Silent mode” appears
~ Note: During the setting, you can press to move one field up
or down. When you enter the date and time, press to move
the cursor and then modify the number
Both the Date and Time fields use special restricted text entry
11.2 Timer
To set the timer function:
Clock Application
76
1. After accessing the clock application, select Timer
2. If the timer is stopped or has a zero value, press the left soft key
(Start) or to start the timer. The left soft key changes to “Stop”
3. When the timer is running, you can press the left soft key (Stop)
or to stop the timer
- If the timer is running, press to return to the Clock menu, or
press to return to idle state, with the timer continuing to run. If
the timer is stopped and has a non-zero value, press to
return to the Clock menu, or press to return to idle state, with
the value saved
4. To reset the timer (a non-zero value), press the left soft key
(Reset)
11.3 Countdown
If a countdown is running. the annunciator is displayed until the event
has expired
z When a countdown expires, the phone will sound the countdown ring
tone, and a note with the “Countdown” title will appear. The body of the
note contains the duration for which the countdown was set. The alarm
will sound for two minutes and the note will remain on the screen
unless you dismiss it
z If the ringer volume is zero, or the master volume is “Off”, no
countdown ring tone will be played, however, the countdown expiry
note will be displayed when the preset countdown duration expires; if
the master volume is “Off + Vibrate”, the phone will vibrate; if the
master volume is "On + Vibrate", the phone will first vibrate and then
play the ring tone
z Press the left soft key (Dismiss) or to silence the ring tone
and return to the state in which the note appears
Clock Application
77
z The countdown annunciator is removed from the display when
the countdown expires
z If the phone is off when the countdown expires, nothing will be
displayed when the phone is powered back on. The countdown
annunciator is removed from the screen
z When the countdown expires and if a call is ongoing, a simple tone is
played through the earpiece or earphone (whichever the voice channel
is playing through) instead of the assigned ring tone. The simple tone
will be repeated once
z When the keypad is locked, you still can press the left soft key
(Dismiss) or to silence the ring tone and dismiss the note
11.3.1 Set Countdown
There are two cases of setting the countdown function:
11.3.1.1 When Countdown Value is Zero
If the countdown value was never set, or the timer value has been reset,
the initial countdown value is zero. In this case, to set the countdown
function:
1. After accessing the Clock application, select Countdown
2. Press the right soft key (Ring Tone) to assign a custom ring tone
to play when the countdown time has elapsed
- Press to highlight a ring tone and press to confirm the
selection. The currently selected value is indicated by a check mark
- If you do not set the ring tone, the default ring tone “Bells” is used
3. Press the left soft key (Set) to set the countdown duration. Key in
the countdown duration in hh:mm:ss format
- The maximum duration that can be entered for a countdown is
99:59:59 (99 hours, 59 minutes, 59 seconds)
Clock Application
78
- The tens digit for the minute and second field is restricted so that no
entry above "6" is permitted
- Press to reset the previous character to zero. Press to
return to idle state and no changes are saved to the countdown
duration
4. To save the countdown, press the left soft key (Save)
- If the master volume is set to “Off + Vibrate”, “Alarm will not sound
in Vibrate mode” appears
- If the master volume is set to “Off” or the ringer volume is zero,
“Alarm will not sound in Silent mode” appears
11.3.1.2 When Countdown Value is not Zero
If the duration of the countdown is not zero, you can reset the duration to
zero or change the ring tone by observing the following steps:
1. After accessing the Clock application, select Countdown
2. Press the right soft key (Options) to reset the countdown value to
zero or to change the ring tone
- When Reset is highlighted, press to reset the countdown
duration to zero. Refer to "When Countdown Value is Zero” on page
48 for additional information
- When Ring Tone is highlighted, press or to assign a
custom ring tone to play when the countdown time has elapsed
11.3.2 Start /Stop the Countdown
When the countdown duration is set, press the left soft key (Start) to
start the countdown. When a countdown is running. the annunciator
is displayed until the event has expired

Clock Application
79
z Once the countdown is started, you can press the left soft key
(Cancel) to stop the countdown and reset the value to the last set
duration

Poker Application
80
12. POKER APPLICATION
The poker (Video Poker) application is a game provided for your
enjoyment. Video poker is a simplified version of poker, wherein you only
get one “turn” to swap any desired cards with ones dealt from the deck
If the game was previously terminated by pressing or due to
application timeout, the phone automatically saves the game
1. To access the Video Poker application, press to access the main
menu and then select Poker. The screen displays the Video Poker
graphic
- If the phone has a saved game (that is, the game was terminated by
pressing or due to application timeout), the phone will display
“Continue with saved game?”. Press the left soft key (Yes) to
resume the game or press the right soft key (No) to start a
new game. If you resume the game, proceed with step 6
2. To view the payouts, press the right soft key (Payouts). Press
to scroll the screen then press the left soft key (Done) to
hide the screen
3. To start the game, press the left soft key (Play)
- The phone displays your bank amount and current bet. If a previous
game has been saved, the phone uses the saved bank amount and
current bet amount
4. You can press the right soft key (Options) to change the bet,
view the payouts and restart a game
- When the highlight is on Change bet, press or to access
the menu. The current bet is marked with a check mark. Press
Poker Application
81
to select the desired bet amount then press to confirm the
change or press to cancel the change
- Select Payouts to view the “win” payout table. While browsing,
press to scroll the screen. Press or the left soft key
(Done) to hide the table
- To quit the current game and restart a game, select Game restart.
You will be asked whether you really want to start a new game.
Press the left soft key (Yes) to confirm the restart; or press the
right soft key (No) or to cancel
5. Press the left soft key (Deal). The phone displays 5 cards
randomly drawn from a 52-card deck
6. Press to move the arrow beneath the cards then press to
select a card to be discarded. The selected card will not show its value.
Repeat this step if multiple cards are to be discarded
- To cancel the selection of the card to be discarded, press to
move the arrow then press . The card will show its value again
and this card will be kept
- You can also press the numeric keys - to discard the
No. 1-5 card. Pressing the corresponding numeric key again will
keep the card to be discarded
- To restart a game, press the right soft key (Options) and
select Game restart. Press to continue the game
7. Press the left soft key (Draw) to replace the cards to be discarded
with new ones. The screen will show the game result
- If the hand qualifies for a payout, the phone displays a “win”
message and increases your bank amount accordingly
- If the hand does not qualify for a payout, the phone displays a “lose”
message and decreases your bank amount accordingly

Poker Application
82
8. To continue the game, press the left soft key (Continue). The
screen displays your bank amount and current bet. Repeat steps 5-8
- If your Bank Amount falls below $5, the screen will display the result
as “Game over”, and you can press the left soft key (Again)
to start a new game
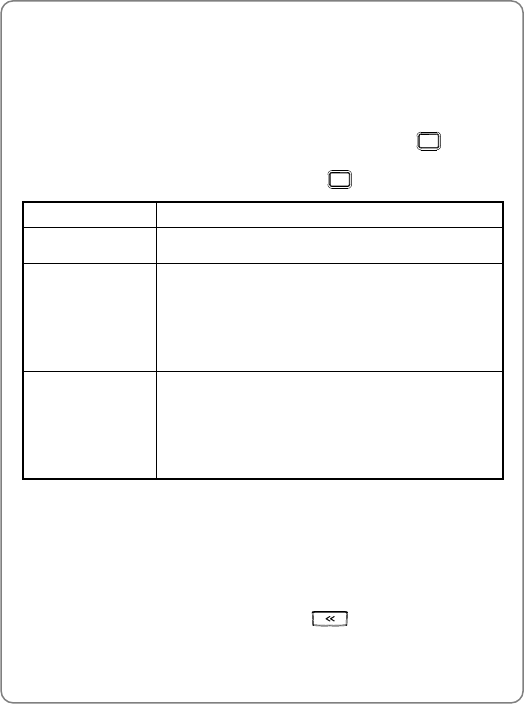
Text Entry
83
13. TEXT ENTRY
The phone supports three text entry methods or modes, including numeric,
multitap and eZiText
In text entry screen (for example, message edit box), press to switch
between the available modes. The current text entry mode indicator will
be displayed on the screen directly above the key:
Entry Mode Indicator
numeric mode 123
Multitap z Abc: Smart mode. First letter is capitalized
with the remaining in lowercase
z ABC: Uppercase. All letters are capitalized
z abc: Lowercase. All letters are in lowercase
eZiText z Ez: Smart mode. First letter is capitalized with
the remaining in lowercase
z EZ: Uppercase. All letters are capitalized
z ez: Lowercase. All letters are in lowercase
In addition to the three modes, there are two general classes of text entry:
unrestricted text entry, and restricted text entry. In unrestricted text entry,
you are permitted the complete use of all three modes; in restricted text
entry, text capabilities are limited to suit the current context (see page 48
"Restricted Text Fields” for more detailed descriptions)
In all modes of text entry, you can press to delete the previous
character
Text Entry
84
13.1 Numeric Mode
This mode is primarily used for entering phone numbers
In numeric mode, the - keys are mapped directly to numbers.
You are able to enter only numbers, symbols, or the space character
1. Press to switch between the text entry modes until the visual
indicator 123 appears on the screen directly above
- Pressing and holding # switches to alphanumeric mode; either
eZitext or multitap becomes active depending on which was active
last (default is multitap)
2. To enter digits, press the corresponding number keys -
- To insert a space, press #
- To enter a symbol, press to display the symbol table. Use
then press to enter the highlighted symbol
13.2 Multitap Mode
In multitap mode, you can press the same key quickly in succession to
switch between the letters associated with that key. You can also press
and hold the key to input its numeric value
1. Press to switch between the text entry modes until one of the
visual indicators Abc, ABC or abc appears on the screen directly above
the key
- Pressing and holding will display the text language selection
menu. This allows you to changes input language temporarily
2. Press repeatedly to switch between the three capitalization
modes: smart mode (indicator: Abc), uppercase (indicator: ABC),
lowercase (indicator: abc)

Text Entry
85
- In "smart" mode, the phone operates using basic intelligence about
capitalization. The very first letter of a text entry is capitalized but
the others are automatically in lowercase. When you enter a period
(or an exclamation mark or a question mark) and a space, then the
first letter after the space is capitalized with the remaining letters in
lowercase
3. Press -to enter the corresponding letter labeled on the
respective key. To enter a letter, press the corresponding key
repeatedly until the letter appears
4. After you have entered the intended letter, press any other key on the
keypad to enter the next letter. If the next letter and current letter share
the same key, press or simply wait for one second to remove the
highlight, and then enter the next letter. Press # to confirm the
current letter input and enter a space
5. Enter symbols and spaces: Press to display the symbol list.
Press to highlight the intended symbol, then press to enter
this symbol. Press # to enter a space
6. Enter digits: Press and hold the corresponding key to quickly enter the
numeric value associated with each key, or press and hold the #
key to switch to numeric mode and then press the corresponding key
13.3 eZiText Mode
The eZiText paradigm follows a “one button press, one character”
approach. In eZiText mode, you spell out each word, pressing each button
a single time for each letter. The handset attempts to guess the correct
word based on word frequency data. This greatly speed up the text entry
process
1. Press to switch between the text entry modes until one of the
visual indicators Ez, EZ or ez appears on the screen directly above the
key
Text Entry
86
- Pressing and holding will display the text language selection
menu. This allows you to changes input language temporarily
2. Press repeatedly to switch between the three capitalization
modes: smart mode (indicator: Ez), uppercase (indicator: EZ),
lowercase (indicator: ez)
- In "smart" mode, the phone operates using basic intelligence about
capitalization. The very first letter of a text entry is capitalized but
the others are automatically in lowercase. When you enter a period
(or an exclamation mark or a question mark) and a space, then the
first letter after the space is capitalized with the remaining letters in
lowercase
3. To enter letters, press -one time for the letters labeled on
the respective key; a word matching the entered letters will be
displayed automatically
- When you enter the first letter of any English letter, “…” will be
displayed. As you enter letters, the phone will automatically
associate the matched English words
- If the letter input does not correspond with any English word in the
phone’s dictionary, the key press will have no response
- Press repeatedly to delete letters from right to left
- To enter the word "a", press and then press . To
enter the word "I", press and then press . Press
to change the case
4. The word just entered is highlighted. When the word is highlighted,
perform the following to select a word and change upper/lowercase:
z Select a word: If the highlighted word displayed is not desired, press
the key to view other candidates; if there are no other
candidate, pressing the key will have no response; pressing
and holding the - key will accept the current candidate and
enter the corresponding number
Text Entry
87
z Change upper/lowercase: Press repeatedly to switch between
the three capitalization modes
5. Enter the selected word: Press or to confirm the selected
word and to remove the highlight; or press # to confirm the word
and to add a space
- When no word is highlighted, press # to enter a space; press
to switch text entry modes; press to move the cursor
6. Enter symbols: Press to display the symbol list. Press to
highlight the intended symbol, then press to enter this symbol
7. Enter digits: Press and hold the corresponding key to quickly enter the
numeric value associated with each key, or press and hold the #
key to switch to numeric mode and then press the corresponding key
13.4 Restricted Text Fields
Some fields do not require full text-editing capabilities; restricted text fields
are implemented to help enter appropriate characters and to prevent from
creating error conditions such as invalid email addresses or phone
numbers
The table on page 48 "Default Text Modes” lists the modes available for
each text box, as well as the default mode
13.4.1 Numeric
In numeric restricted text entry, you are permitted only to insert numbers
in the active text field. Therefore:
z The text mode must be numeric
z Pressing the key is ignored; pressing and holding the key is also
ignored

Text Entry
88
z A single key press, pressing and holding of # is mapped to the
pound character (‘#’)
z A single key press of is mapped to the star character (‘*’)
13.4.2 Name
In name restricted text entry, you are expected to enter a name. Since
proper nouns are not in the eZitext database, you are not allowed to enter
eZitext mode. Therefore:
z The text mode can be numeric or multitap (default multitap)
z The key switches only between numeric and multitap
z Pressing and holding # in numeric mode goes to multitap
z Pressing and holding in multitap mode is ignored
13.4.3 Email Address
In email address restricted text entry, you are expected to enter an email
address. Therefore, you are not permitted to enter eZitext mode, and all
the restrictions in name restricted text entry apply
Additionally, the key is optimized for symbols relating to email entry.
The key is remapped in multitap mode to: @ _ . # * + 1. Normally
this key evokes the symbol list, but because the number of options
available to the user is limited, multitap behavior here is more appropriate
13.5 Default Text Modes
This section lists which text modes are available for a given text field. The
default text mode for each text field is also listed; you can change the
default text field (but not the restrictions on the field) in the Settings
application (see “Text Entry” on page 48)
Text Entry
89
Application Text Field Default Text
Mode Restrictions
Contacts First name,
Last name
Multitap Name restricted
Contacts Phone
numbers, pager
Numeric Numeric restricted
Contacts Email Multitap Email address
restricted
Messaging Messaging
Recipients
fields
Numeric Email address
restricted
Messaging Messaging text
body Multitap Unrestricted
Idle Pop-up number
input box
Numeric Numeric restricted
Troubleshooting
90
14. TROUBLESHOOTING
When using this phone, if you run into malfunctions, refer to the following
troubleshooting techniques before requesting help:
Symptom Diagnosis Solution
Have you pressed and
held it for more than 3
seconds?
Press and hold
for more than 3
seconds
The phone
cannot be
switched on
Is the battery low? Charge the battery
Is the phone outside of
service area range? Is there
sufficient signal strength?
Move to an area with
stronger signal
Cannot
make calls Is the phone number
correct?
Enter the correct
number to make the
call.
No ring Is the ringer volume set to
zero or master volume “off”?
Set different ringer
volume or master
volume
Is the charger properly
connected to the phone?
Correctly connect the
charger and phone.
The battery
cannot be
charged.
(The battery
indicator
bar does
not scroll)
Is the charger connected to
a 100-240V AC wall outlet?
Correctly connect the
charger to a
100-240V AC wall
outlet
If the malfunction symptoms are not listed in the above table, or the
corresponding solution is invalid, please contact your local UTStarcom
Customer Service Center.
For Technical Support and Assistance please visit the UTStarcom website

Troubleshooting
91
at:
http://www.utstar.com
Select “Support” and be directed to the Toll Free number of the
UTStarcom International Professional Service Regional Center that
serves your area.
Or you can call the UTStarcom North America Professional Service
organization at 1-(866) 663-3266.

Safety and Warranty
92
15. SAFETY AND WARRANTY
This chapter addresses the safety guidelines and precautions to follow
when operating your phone. Before operating your phone, please be
aware of all the safety details
This chapter contains the terms and conditions of services and the
warranty for your phone. Please review them thoroughly
z SAFETY INFORMATION FOR WIRELESS HANDHELD PHONES
z SAFETY INFORMATION FOR FCC RF EXPOSURE
z SAR INFORMATION
z FDA CONSUMER UPDATE
z 12 MONTH LIMITED WARRANTY
15.1 Safety Information for Wireless Handheld
Phones
Read This Information before Using Your Handheld Portable Cellular
Telephone
15.1.1 EXPOSURE TO RADIO FREQUENCY SIGNALS
Your wireless handheld portable telephone is a low power radio
transmitter and receiver. When it is ON, it receives and also sends out
radio frequency (RF) signals
In August 1996, the Federal Communications Commissions (FCC)
adopted RF exposure guidelines with safety levels for handheld wireless
phones. Those guidelines are consistent with the safety standards
previously set by both U.S. and international standards bodies:
z ANSI C95.1 (1992) *
z NCRP Report 86 (1986) *
z ICNIRP (1996) *
Those standards were based on comprehensive and periodic evaluations
of the relevant scientific literature. For example, over 120 scientists,
engineers, and physicians from universities, government health agencies,

Safety and Warranty
93
and industry reviewed the available body of research to develop the ANSI
Standard (C951)
The design of your phone complies with the FCC guidelines (and those
standards)
1* : American National Standards Institute.
2* : National Council on Radiation protection and measurements.
3* : International Commission on Nonionizing Radiation Protection.
15.1.2 ANTENNA CARE
Use only the supplied or an approved replacement antenna. Unauthorized
antennas, modifications, or attachments could damage the phone and
may violate FCC regulations
15.1.3 DRIVING SAFETY
Talking on the phone while driving is extremely dangerous and is illegal in
some states. Remember, safety comes first. Check the laws and
regulations on the use of phones in the areas where you drive. Always
obey them. Also, if using your phone while driving, please:
z Give full attention to driving. Driving safely is your first responsibility
z Use hands-free operation, if available
z Pull off the road and park before making or answering a call, if driving
conditions so require
If you must use the phone while driving, please use one-touch, speed
dialing, and auto answer modes
An airbag inflates with great force. DO NOT place objects, including both
installed or portable wireless equipment, in the area over the airbag or in
the air bag deployment area. If in-vehicle wireless equipment is
improperly installed and the air bag inflates, serious injury could result
Warning: Failure to follow these instructions may lead to serious
personal injury and possible property damage

Safety and Warranty
94
15.1.4 ELECTRONIC DEVICES
Most modern electronic equipment is shielded from RF energy. However,
certain electronic equipment may not be shielded against the RF signals
from your wireless phone
15.1.4.1 Pacemakers
The Health Industry Manufacturers Association recommends that a
minimum separation of six (6”) inches be maintained between a handheld
wireless phone and a pacemaker to avoid potential interference with the
pacemaker. These recommendations are consistent with the independent
research by and recommendations of Wireless Technology Research
Persons with pacemakers:
z ALWAYS keep the phone more than six inches from your pacemaker
when the phone is turned on
z Do not carry the phone in a breast pocket
z Use the ear opposite the pacemaker to minimize the potential for
interference
z If you have any reason to suspect that interference is taking place,
turn your phone OFF immediately
15.1.4.2 Other Medical Devices
If you use any other personal medical device, consult the manufacturer of
your device to determine if they are adequately shielded from external RF
energy. Your physician may be able to assist you in obtaining this
information
Turn your phone OFF in healthcare facilities when any regulations posted
in these areas instruct you to do so. Hospitals or healthcare facilities may
be using equipment that could be sensitive to external RF energy
15.1.4.3 Posted Facilities
Turn your phone OFF where posted notices so require

Safety and Warranty
95
15.1.5 OTHER SAFETY GUIDELINES
15.1.5.1 Aircraft
FCC and Transport Canada Regulations prohibit using your phone while
in the air. Turn your phone OFF before boarding an aircraft
15.1.5.2 Blasting Areas
To avoid interfering with blasting operations, turn your phone OFF when in
a “blasting area” or in areas posted: “Turn off two-way radio.” Obey all
signs and instructions
15.1.5.3 Potentially Explosive Atmospheres
Turn your phone OFF when in any area with a potentially explosive
atmosphere and obey all signs and instructions. Sparks in such areas
could cause an explosion or fire resulting in bodily injury or even death
Areas with a potentially explosive atmosphere are often, but not always,
clearly marked. They include fueling areas such as gas stations; below
deck on boats; fuel or chemical transfer or storage facilities; vehicles
using liquefied petroleum gas (such as propane or butane); areas where
the air contains chemicals or particles, such as grain, dust, or metal
powders; and any other area where you would normally be advised to turn
off your vehicle's engine
15.1.6 PRECAUTIONS
Your Handheld Portable Telephone is a high quality piece of equipment.
Before operating, read all instructions and cautionary markings on (1) AC
Adaptor (2) Battery and (3) Product Using Battery
Warning: DO NOT use this equipment in an extreme environment
where high temperature or high humidity exists
DO NOT abuse the equipment. Avoid striking, shaking or shocking.
When not using, lay down the unit to avoid possible damage due to
instability
DO NOT expose this equipment to rain or spilled beverages
DO NOT use unauthorized accessories
DO NOT disassemble the phone or its accessories. If service or

Safety and Warranty
96
repair is required, return unit to an authorized UTStarcom cellular
service center. If unit is disassembled, the risk of electric shock or fire
may result
DO NOT short-circuit the battery terminals with metal items etc
15.2 SAFETY INFORMATION FOR FCC RF
EXPOSURE
WARNING: Read this information before using
15.2.1 CAUTIONS
In August 1996 the Federal Communications Commission (FCC) of the
United States with its action in Report and Order FCC 96-326 adopted an
updated safety standard for human exposure to radio frequency
electromagnetic energy emitted by FCC regulated transmitters. Those
guidelines are consistent with the safety standard previously set by both
U.S. and international standards bodies. The design of this phone
complies with the FCC guidelines and these international standards. Use
only the supplied or an approved antenna. Unauthorized antennas,
modifications, or attachments could impair call quality, damage the phone,
or result in violation of FCC regulations. Do not use the phone with a
damaged antenna. If a damaged antenna comes into contact with the skin,
a minor burn may result. Please contact your local dealer for replacement
antenna
15.2.2 BODY-WORN OPERATION
This device was tested for typical body-worn operations with the back of
the phone kept 1.5 cm. from the body. To maintain compliance with FCC
RF exposure requirements, use only belt-clips, holsters or similar
accessories that maintain a 1.5 cm. separation distance between the
user’s body and the back of the phone, including the antenna. The use of
belt-clips, holsters and similar accessories should not contain metallic
components in its assembly. The use of accessories that do not satisfy
these requirements may not comply with FCC RF exposure requirements,
and should be avoided
~ Note: For more information about RF exposure, please visit the

Safety and Warranty
97
FCC website at www.fcc.gov

SAR Information
98
16. SAR INFORMATION
THIS MODEL PHONE MEETS THE GOVERNMENT’S REQUIREMENTS
FOR EXPOSURE TO RADIO WAVES
Your wireless phone is a radio transmitter and receiver. It is designed and
manufactured not to exceed the emission limits for exposure to
radiofrequency (RF) energy set by the Federal Communications
Commission of the U.S. Government. These limits are part of
comprehensive guidelines and establish permitted levels of RF energy for
the general population. The guidelines are based on standards that were
developed by independent scientific organizations through periodic and
thorough evaluation of scientific studies. The standards include a
substantial safety margin designed to assure the safety of all persons,
regardless of age and health
The exposure standard for wireless mobile phones employs a unit of
measurement known as the Specific Absorption Rate, or SAR. The SAR
limit set by the FCC is 1.6 W/kg. * Tests for SAR are conducted with the
phone transmitting at its highest certified power level in all tested
frequency bands. Although the SAR is determined at the highest certified
power level, the actual SAR level of the phone while operating can be well
below the maximum value. This is because the phone is designed to
operate at multiple power levels so as to use only the power required to
reach the network. In general, the closer you are to a wireless base
station antenna, the lower the power output
Before a phone model is available for sale to the public, it must be tested
and certified to the FCC that it does not exceed the limit established by
the government adopted requirement for safe exposure. The tests are
performed in positions and locations (e.g., at the ear and worn on the
body) as required by the FCC for each model. The highest SAR value for
this model phone when tested for use at the ear is 1.16 W/Kg and when
worn on the body, as described in this user guide, is 0.798W/Kg.
(Body-worn measurements differ among phone models, depending upon
available accessories and FCC requirements). While there may be
differences between the SAR levels of various phones and at various
positions, they all meet the government requirement for safe exposure
The FCC has granted an Equipment Authorization for this model phone

SAR Information
99
with all reported SAR levels evaluated as in compliance with the FCC RF
exposure guidelines. SAR information on this model phone is on file with
the FCC and can be found under the Display Grant section of
http://www.fcc.gov/ oet/fccid after searching on O6Y-C1100
Additional information on Specific Absorption Rates (SAR) can be found
on the Cellular Telecommunications Industry Association (CTIA) website
at http://www.wow-com.com
* In the United States and Canada, the SAR limit for mobile phones used
by the public is 1.6 watts/kg (W/kg) averaged over one gram of tissue.
The standard incorporates a substantial margin of safety to give additional
protection for the public and to account for any variations in
measurements

FDA Consumer Update
100
17. FDA CONSUMER UPDATE
FDA: U.S. Food and Drug Administration -Center for Devices and
Radiological Health Consumer Update on Wireless Phones
1. Do wireless phones pose a health hazard?
The available scientific evidence does not show that any health problems
are associated with using wireless phones. There is no proof, however,
that wireless phones are absolutely safe. Wireless phones emit low levels
of radiofrequency energy (RF) in the microwave range while being used.
They also emit very low levels of RF when in the stand-by mode. Whereas
high levels of RF can produce health effects (by heating tissue), exposure
to low level RF that does not produce heating effects causes no known
adverse health effects. Many studies of low level RF exposures have not
found any biological effects. Some studies have suggested that some
biological effects may occur, but such findings have not been confirmed
by additional research. In some cases, other researchers have had
difficulty in reproducing those studies, or in determining the reasons for
inconsistent results
2. What is FDA’s role concerning the safety of wireless phones?
Under the law, FDA does not review the safety of radiation-emitting
consumer products such as wireless phones before they can be sold, as it
does with new drugs or medical de-vices. However, the agency has
authority to take action if wire-less phones are shown to emit
radiofrequency energy (RF) at a level that is hazardous to the user. In
such a case, FDA could require the manufacturers of wireless phones to
notify users of the health hazard and to repair, replace or recall the
phones so that the hazard no longer exists. Although the existing scientific
data do not justify FDA regulatory actions, FDA has urged the wireless
phone industry to take a number of steps, including the following:
z Support needed research into possible biological effects of RF of the
type emitted by wireless phones
z Design wireless phones in a way that minimizes any RF exposure to
the user that is not necessary for device function

FDA Consumer Update
101
z Cooperate in providing users of wireless phones with the best possible
information on possible effects of wireless phone use on human health
FDA belongs to an interagency working group of the federal agencies that
have responsibility for different aspects of RF safety to ensure
coordinated efforts at the federal level. The following agencies belong to
this working group:
z National Institute for Occupational Safety and Health
z Environmental Protection Agency
z Federal Communications Commission
z Occupational Safety and Health Administration
z National Telecommunications and Information Administration
The National Institutes of Health participates in some inter-agency
working group activities, as well. FDA shares regulatory responsibilities
for wireless phones with the Federal Communications Commission (FCC).
All phones that are sold in the United States must comply with FCC safety
guidelines that limit RF exposure. FCC relies on FDA and other health
agencies for safety questions about wireless phones. FCC also regulates
the base stations that the wireless phone networks rely upon. While these
base stations operate at higher power than do the wireless phones
themselves, the RF exposures that people get from these base stations
are typically thousands of times lower than those they can get from
wire-less phones. Base stations are thus not the subject of the safety
questions discussed in this document
3. What kinds of phones are the subject of this update?
The term “wireless phone” refers here to hand-held wireless phones with
built-in Antennas, often called “cell,” “mobile” or “PCS” phones
These types of wireless phones can expose the user to measurable
radiofrequency energy (RF) because of the short distance between the
phone and the user’s head. These RF exposures are limited by Federal
Communications Commission safety guidelines that were developed with
the advice of FDA and other federal health and safety agencies. When the
phone is located at greater distances from the user, the exposure to RF is
drastically lower because a person’s RF exposure decreases rapidly with
increasing distance from the source. The so-called “cordless phones,”

FDA Consumer Update
102
which have a base unit connected to the telephone wiring in a house,
typically operate at far lower power levels, and thus produce RF
exposures far below the FCC safety limits
4. What are the results of the research done already?
The research done thus far has produced conflicting results, and many
studies have suffered from flaws in their research methods. Animal
experiments investigating the effects of radiofrequency energy (RF)
exposures characteristic of wireless phones have yielded conflicting
results that often cannot be repeated in other laboratories. A few animal
studies, how-ever, have suggested that low levels of RF could accelerate
the development of cancer in laboratory animals. However, many of the
studies that showed increased tumor development used animals that had
been genetically engineered or treated with cancer-causing chemicals so
as to be pre-disposed to develop cancer in the absence of RF exposure.
Other studies exposed the animals to RF for up to 22 hours per day.
These conditions are not similar to the conditions under which people use
wireless phones, so we don’t know with certainty what the results of such
studies mean for human health. Three large epidemiology studies have
been published since December 2000. Between them, the studies
investigated any possible association between the use of wireless phones
and primary brain cancer, glioma, meningioma, or acoustic neuroma,
tumors of the brain or salivary gland, leukemia, or other cancers. None of
the studies demonstrated the existence of any harmful health effects from
wireless phone RF exposures. However, none of the studies can answer
questions about long-term exposures, since the average period of phone
use in these studies was around three years
5. What research is needed to decide whether RF exposure from
wireless phones poses a health risk?
A combination of laboratory studies and epidemiological studies of people
actually using wireless phones would provide some of the data that are
needed. Lifetime animal exposure studies could be completed in a few
years. However, very large numbers of animals would be needed to
provide reliable proof of a cancer promoting effect if one exists.
Epidemiological studies can provide data that is directly applicable to
human populations, but 10 or more years’ follow-up may be needed to
pro-vide answers about some health effects, such as cancer. This is

FDA Consumer Update
103
because the interval between the time of exposure to a cancer- causing
agent and the time tumors develop - if they do -may be many, many years.
The interpretation of epidemiological studies is hampered by difficulties in
measuring actual RF exposure during day-to-day use of wireless phones.
Many factors affect this measurement, such as the angle at which the
phone is held, or which model of phone is used
6. What is FDA doing to find out more about the possible health
effects of wireless phone RF?
FDA is working with the U.S. National Toxicology Program and with
groups of investigators around the world to ensure that high priority
animal studies are conducted to address important questions about the
effects of exposure to radiofrequency energy (RF). FDA has been a
leading participant in the World Health Organization International
Electromagnetic Fields (EMF) Project since its inception in 1996. An
influential result of this work has been the development of a detailed
agenda of research needs that has driven the establishment of new
research programs around the world
The Project has also helped develop a series of public information
documents on EMF issues. FDA and the Cellular Telecommunications &
Internet Association (CTIA) have a formal Cooperative Research and
Development Agreement (CRADA) to do research on wireless phone
safety. FDA provides the scientific oversight, obtaining input from experts
in government, industry, and academic organizations. CTIA-funded
research is conducted through con-tracts to independent investigators.
The initial research will include both laboratory studies and studies of
wireless phone users. The CRADA will also include a broad assessment
of additional research needs in the context of the latest research
developments around the world
7. How can I find out how much radiofrequency energy exposure I
can get by using my wireless phone?
All phones sold in the United States must comply with Federal
Communications Commission (FCC) guidelines that limit radiofrequency
energy (RF) exposures. FCC established these guidelines in consultation
with FDA and the other federal health and safety agencies. The FCC limit
for RF exposure from wireless telephones is set at a Specific Absorption
Rate (SAR) of 1.6 watts per kilogram (1.6 W/kg). The FCC limit is

FDA Consumer Update
104
consistent with the safety standards developed by the Institute of
Electrical and Electronic Engineering (IEEE) and the National Council on
Radiation Protection and Measurement. The exposure limit takes into
consideration the body’s ability to remove heat from the tissues that
absorb energy from the wireless phone and is set well below levels known
to have effects. Manufacturers of wireless phones must report the RF
expo-sure level for each model of phone to the FCC. The FCC website
(http://www.fcc.gov/oet/rfsafety) gives directions for locating the FCC
identification number on your phone so you can find your phone’s RF
exposure level in the online listing
8. What has FDA done to measure the radiofrequency energy
coming from wireless phones?
The Institute of Electrical and Electronic Engineers (IEEE) is developing a
technical standard for measuring the radiofrequency energy (RF)
exposure from wireless phones and other wireless handsets with the
participation and leader-ship of FDA scientists and engineers. The
standard, “Recommended Practice for Determining the Spatial-Peak
Specific Absorption Rate (SAR) in the Human Body Due to Wireless
Communications Devices: Experimental Techniques,” sets forth the first
consistent test methodology for measuring the rate at which RF is
deposited in the heads of wireless phone users. The test method uses a
tissue-simulating model of the human head. Standardized SAR test
methodology is expected to greatly improve the consistency of
measurements made at different laboratories on the same phone. SAR is
the measurement of the amount of energy absorbed in tissue, either by
the whole body or a small part of the body. It is measured in watts/kg (or
milliwatts/g) of matter. This measurement is used to determine whether a
wireless phone complies with safety guidelines
9. What steps can I take to reduce my exposure to radiofrequency
energy from my wireless phone?
If there is a risk from these products—and at this point we do not know
that there is—it is probably very small. But if you are concerned about
avoiding even potential risks, you can take a few simple steps to minimize
your exposure to radiofrequency energy (RF). Since time is a key factor in
how much exposure a person receives, reducing the amount of time spent
using a wireless phone will reduce RF exposure

FDA Consumer Update
105
If you must conduct extended conversations by wireless phone every day,
you could place more distance between your body and the source of the
RF, since the exposure level drops off dramatically with distance. For
example, you could use a headset and carry the wireless phone away
from your body or use a wireless phone connected to a remote antenna
Again, the scientific data do not demonstrate that wireless phones are
harmful. But if you are concerned about the RF exposure from these
products, you can use measures like those described above to reduce
your RF exposure from wire-less phone use
10. What about children using wireless phones?
The scientific evidence does not show a danger to users of wireless
phones, including children and teenagers. If you want to take steps to
lower exposure to radiofrequency energy (RF), the measures described
above would apply to children and teenagers using wireless phones.
Reducing the time of wire-less phone use and increasing the distance
between the user and the RF source will reduce RF exposure. Some
groups sponsored by other national governments have advised that
children be discouraged from using wireless phones at all. For example,
the government in the United Kingdom distributed leaflets containing such
a recommendation in December 2000. They noted that no evidence exists
that using a wireless phone causes brain tumors or other ill effects. Their
recommendation to limit wireless phone use by children was strictly
precautionary; it was not based on scientific evidence that any health
hazard exists
11. What about wireless phone interference with medical
equipment?
Radiofrequency energy (RF) from wireless phones can inter-act with
some electronic devices. For this reason, FDA helped develop a detailed
test method to measure electromagnetic interference (EMI) of implanted
cardiac pacemakers and defibrillators from wireless telephones. This test
method is now part of a standard sponsored by the Association for the
Advancement of Medical instrumentation (AAMI). The final draft, a joint
effort by FDA, medical device manufacturers, and many other groups,
was completed in late 2000. This standard will allow manufacturers to
ensure that cardiac pacemakers and defibrillators are safe from wireless
phone EMI. FDA has tested hearing aids for interference from handheld

FDA Consumer Update
106
wireless phones and helped develop a voluntary standard sponsored by
the Institute of Electrical and Electronic Engineers (IEEE). This standard
specifies test methods and performance requirements for hearing aids
and wireless phones so that that no interference occurs when a person
uses a “compatible” phone and a “compatible” hearing aid at the same
time. This standard was approved by the IEEE in 2000. FDA continues to
monitor the use of wireless phones for possible interactions with other
medical devices. Should harmful interference be found to occur, FDA will
conduct testing to assess the interference and work to resolve the
problem
12. Where can I find additional information?
For additional information, please refer to the following re-sources:
z FDA web page on wireless phones (http://www.fda.gov/cdrh/
phones/index.html)
z Federal Communications Commission (FCC) RF Safety Pro-gram
(http://www.fcc.gov/oet/rfsafety)
z International Commission on Non-Ionizing Radiation Protection
(http://www.icnirp.de)
z World Health Organization (WHO) International EMF Project
(http://www.who.int/emf)
z National Radiological Protection Board (UK) (http://www.nrpb.org.uk/)

12 Month Limited Warranty
107
18. 12 MONTH LIMITED WARRANTY
UTStarcom/Audiovox Communications (the Company) warrants to the
original retail purchaser of this Audiovox handheld portable cellular
telephone, that should this product or any part thereof during normal
consumer usage and conditions, be proven defective in material or
workmanship that results in product failure within the first twelve (12)
months period from the date of purchase, such defect(s) will be repaired
or replaced (with new or rebuilt parts) at the Company’s option, without
charge for parts or labor directly related to the defect(s)
The antenna, key pad, display, rechargeable battery and battery charger,
if included, are similarly warranted for twelve (12) months from date of
purchase
This Warranty extends only to consumers who purchase the product in
the United States or Canada and it is not transferable or assignable
This Warranty does not apply to:
z Product subjected to abnormal use or conditions, accident,
mishandling, neglect, unauthorized alteration, misuse, improper
installation or repair or improper storage
z Product whose mechanical serial number or electronic serial number
has been removed, altered or defaced
z Damage from exposure to moisture, humidity, excessive temperatures
or extreme environmental conditions
z Damage resulting from connection to, or use of any accessory or other
product not approved or authorized by the Company
z Defects in appearance, cosmetic, decorative or structural items such
as framing and non-operative parts
z Product damaged from external causes such as fire, flooding, dirt,
sand, weather conditions, battery leakage, blown fuse, theft or
improper usage of any electrical source

12 Month Limited Warranty
108
The Company disclaims liability for removal or reinstallation of the product,
for geographic coverage, for inadequate signal reception by the antenna
or for communications range or operation of the cellular system as a
whole
To obtain repairs or replacement within the terms of this Warranty, the
product should be delivered with proof of Warranty coverage (e.g. dated
bill of sale), the consumer’s return address, daytime phone number and/or
fax number and complete description of the problem, transportation
prepaid, to the Company at the address shown below or to the place of
purchase for repair or replacement processing
In addition, for reference to an authorized Warranty station in your area,
you may telephone in the United States (800) 229-1235, and in Canada
(800) 465-9672 (in Ontario call 905-712-9299)
THE EXTENT OF THE COMPANY’S LIABILITY UNDER THIS
WARRANTY IS LIMITED TO THE REPAIR OR REPLACEMENT
PROVIDED ABOVE AND, IN NO EVENT, SHALL THE COMPANY’S
LAIBILITY EXCEED THE PURCHASE PRICE PAID BY PURCHASER
FOR THE PRODUCT
ANY IMPLIED WARRANTIES, INCLUDING ANY IMPLIED WARRANTY
OF MERCHANTABILITY OR FITNESS FOR A PARTICULAR PURPOSE,
SHALL BE LIMITED TO THE DURATION OF THIS WRITTEN
WARRANTY. ANY ACTION FOR BREACH OF ANY WARRANTY MUST
BE BROUGHT WITHIN A PERIOD OF 18 MONTHS FROM DATE OF
ORIGINAL PURCHASE. IN NO CASE SHALL THE COMPANY BE
LIABLE FOR AN SPECIAL CONSEQUENTIAL OR INCIDENTAL
DAMAGES FOR BREACH OF THIS OR ANY OTHER WARRANTY,
EXPRESS OR IMPLIED, WHATSOEVER. THE COMPANY SHALL NOT
BE LIABLE FOR THE DELAY IN RENDERING SERVICE UNDER THIS
WARRANTY OR LOSS OF USE DURING THE TIME THE PRODUCT IS
BEING REPAIRED OR REPLACED
No person or representative is authorized to assume for the Company any
liability other than expressed herein in connection with the sale of this
product
Some states or provinces do not allow limitations on how long an implied
warranty lasts or the exclusion or limitation of incidental or consequential

12 Month Limited Warranty
109
damage so the above limitation or exclusions may not apply to you. This
Warranty gives you specific legal rights, and you may also have other
rights which vary from state to state or province to province
IN USA : UTStarcom/Audiovox Communications
555 Wireless Blvd.
Hauppauge, NY 11788
(800) 229-1235
IN CANADA : UTStarcom Canada Company
5155 Spectrum Way, Unit #5
Mississauga, Ontario L4W 5A1
(800) 465-9672

UTStarcom, Inc. USA
1275 Harbor Bay Parkway Alameda, CA 94502, USA
Tel: 510-864-8800 Fax: 510-864-8802
http://www.utstar.com