UniData Communication Systems WIP-5000 Wireless IP Phone User Manual Microsoft PowerPoint UserGuide v1 0 0
UniData Communication Systems Inc. Wireless IP Phone Microsoft PowerPoint UserGuide v1 0 0
UserManual.wiki
>
UniData Communication Systems
>
WIP 5000 User Manual
Users Manual
Navigation menu
Upload a User Manual
Namespaces
Wiki Guide
HTML
PDF
Info
Views
User Manual
Discussion / Help
Navigation


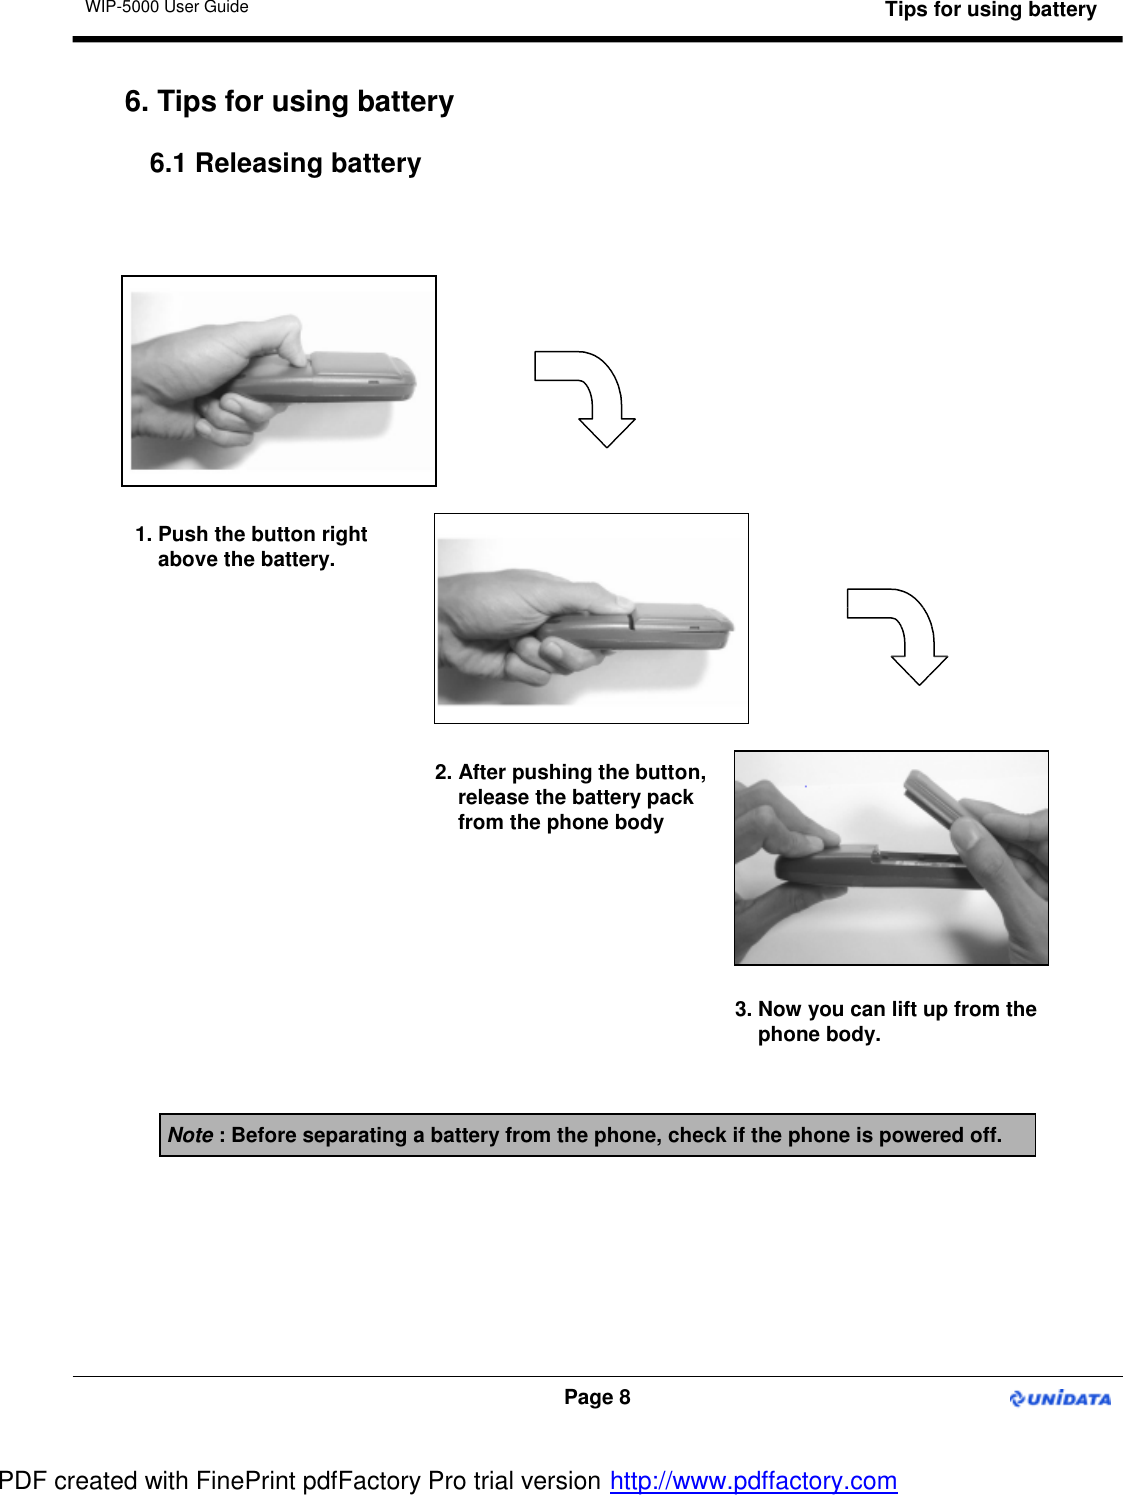
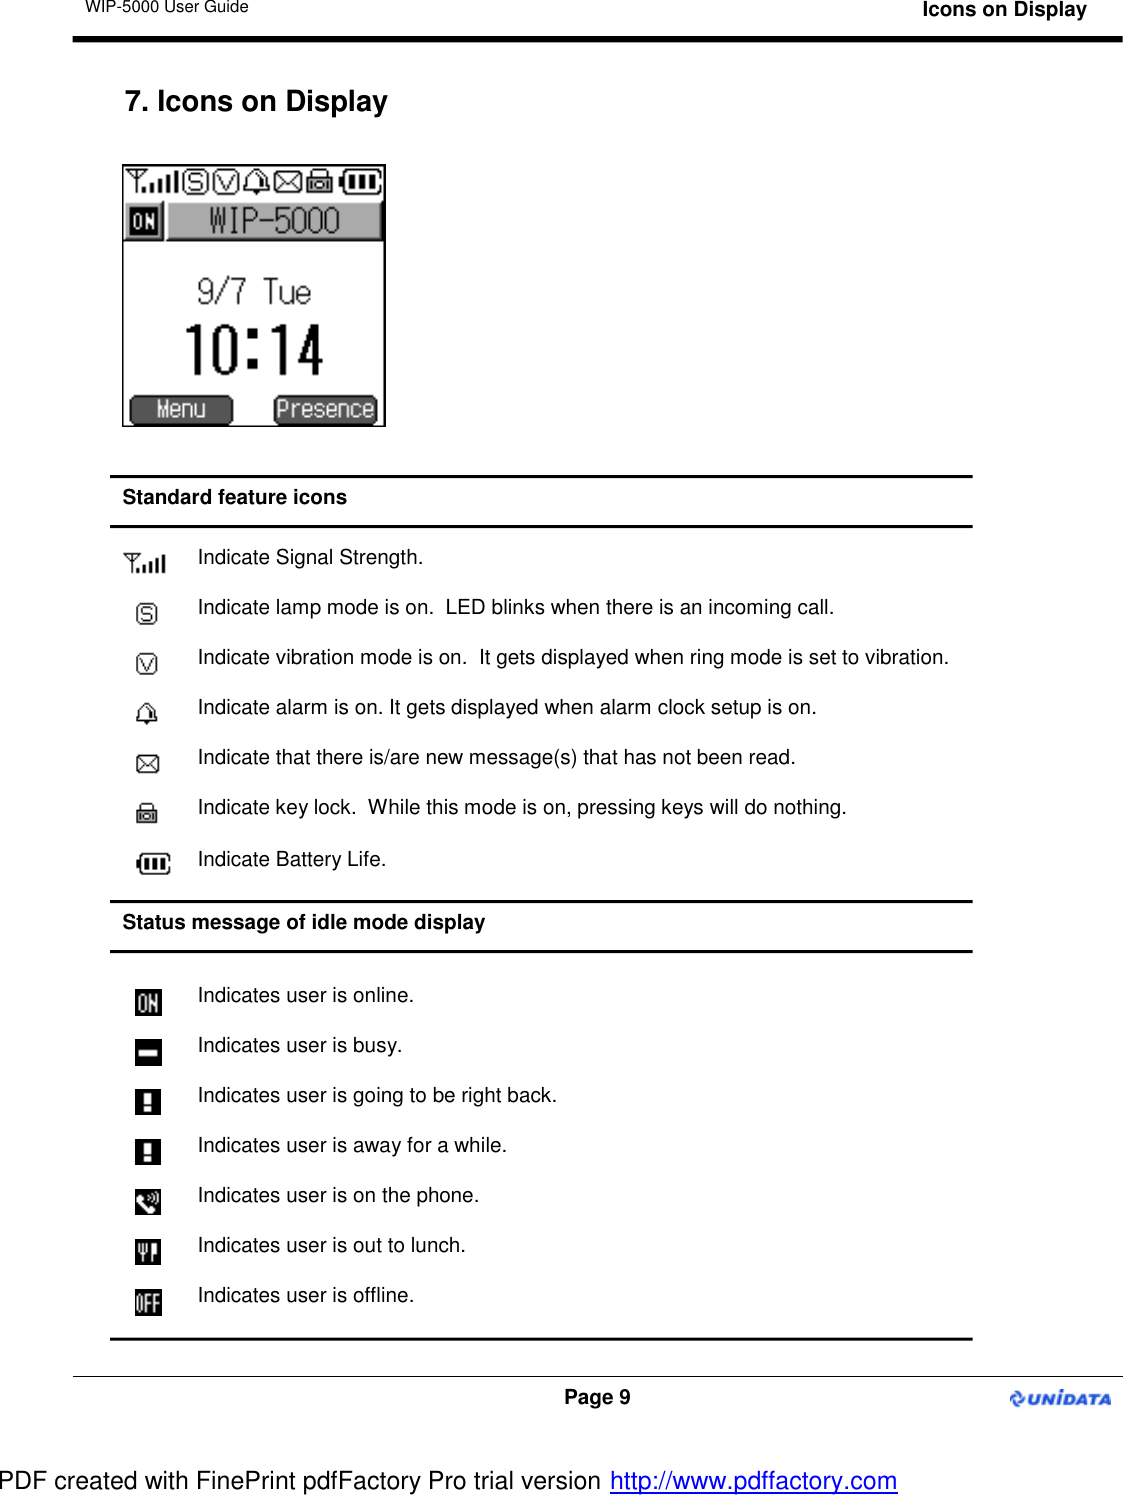
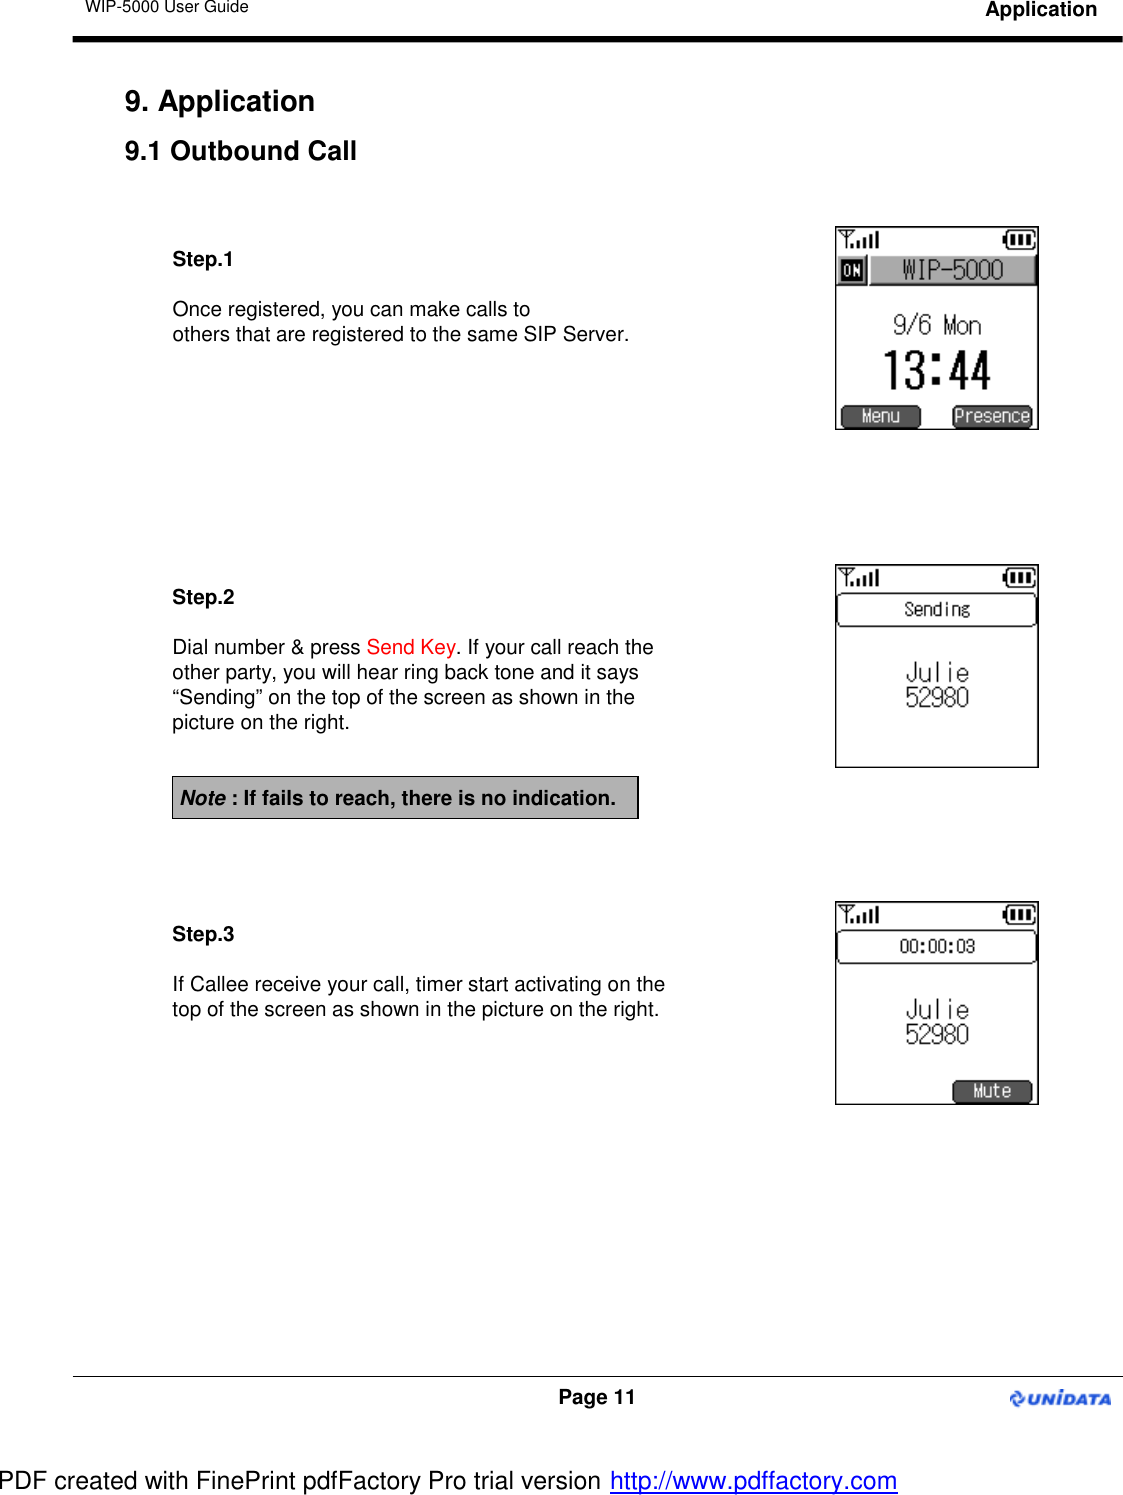
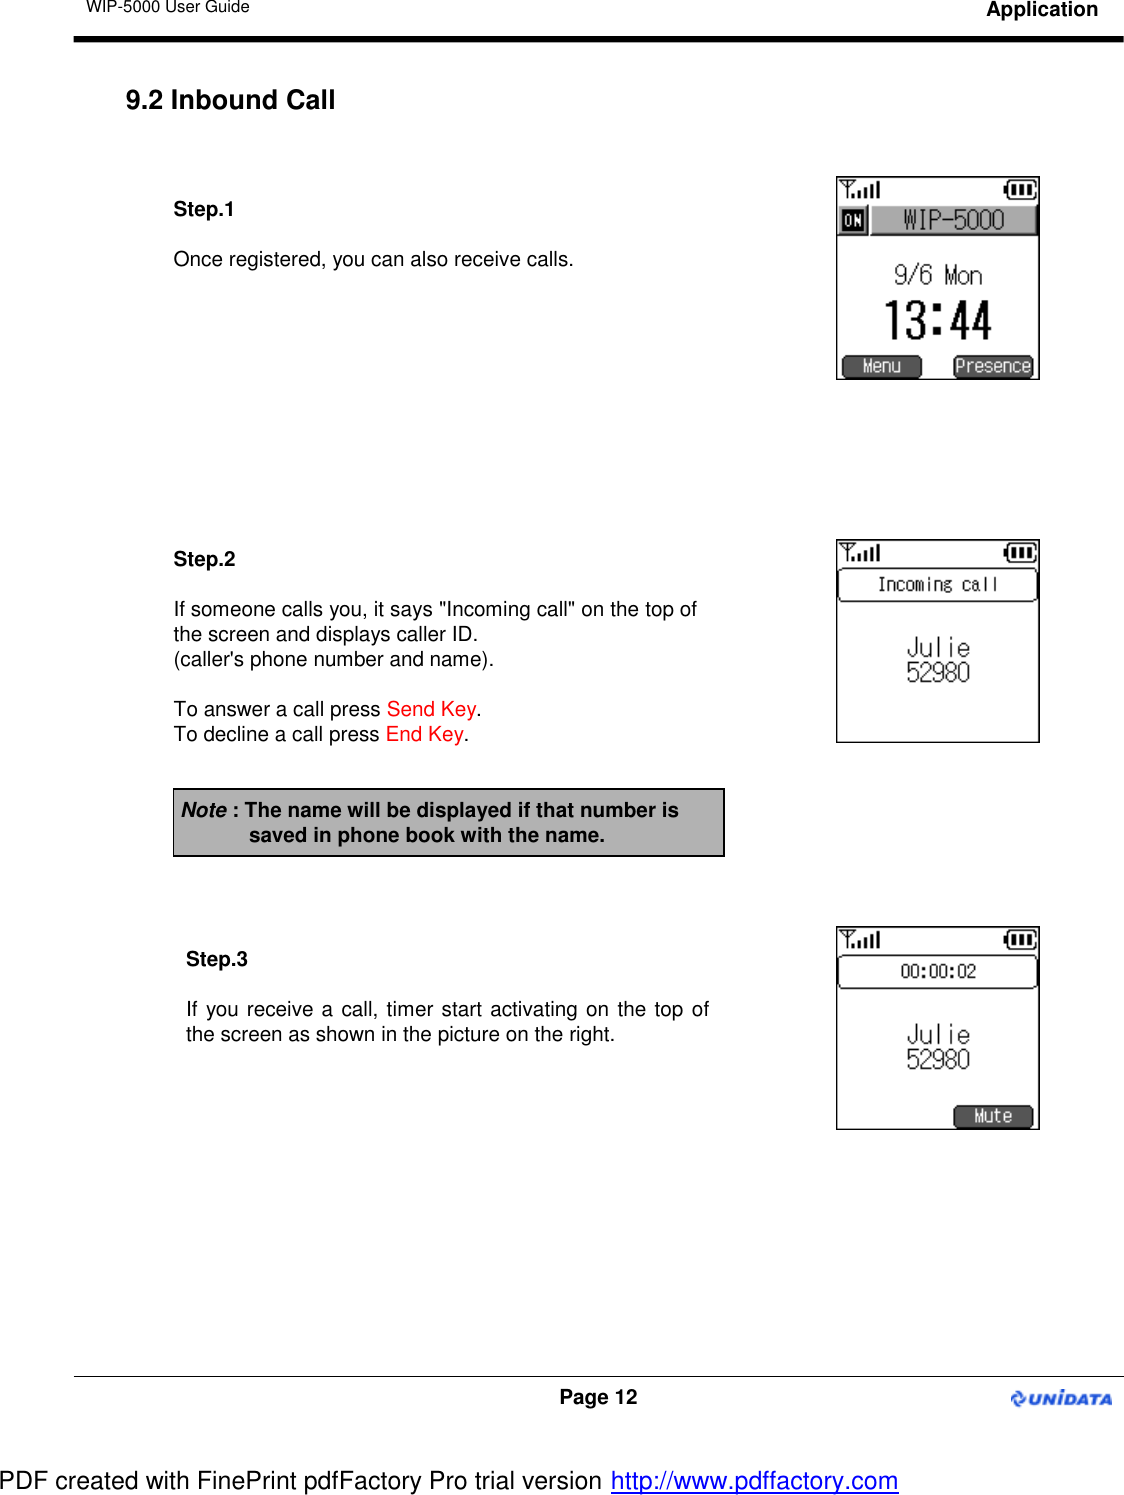
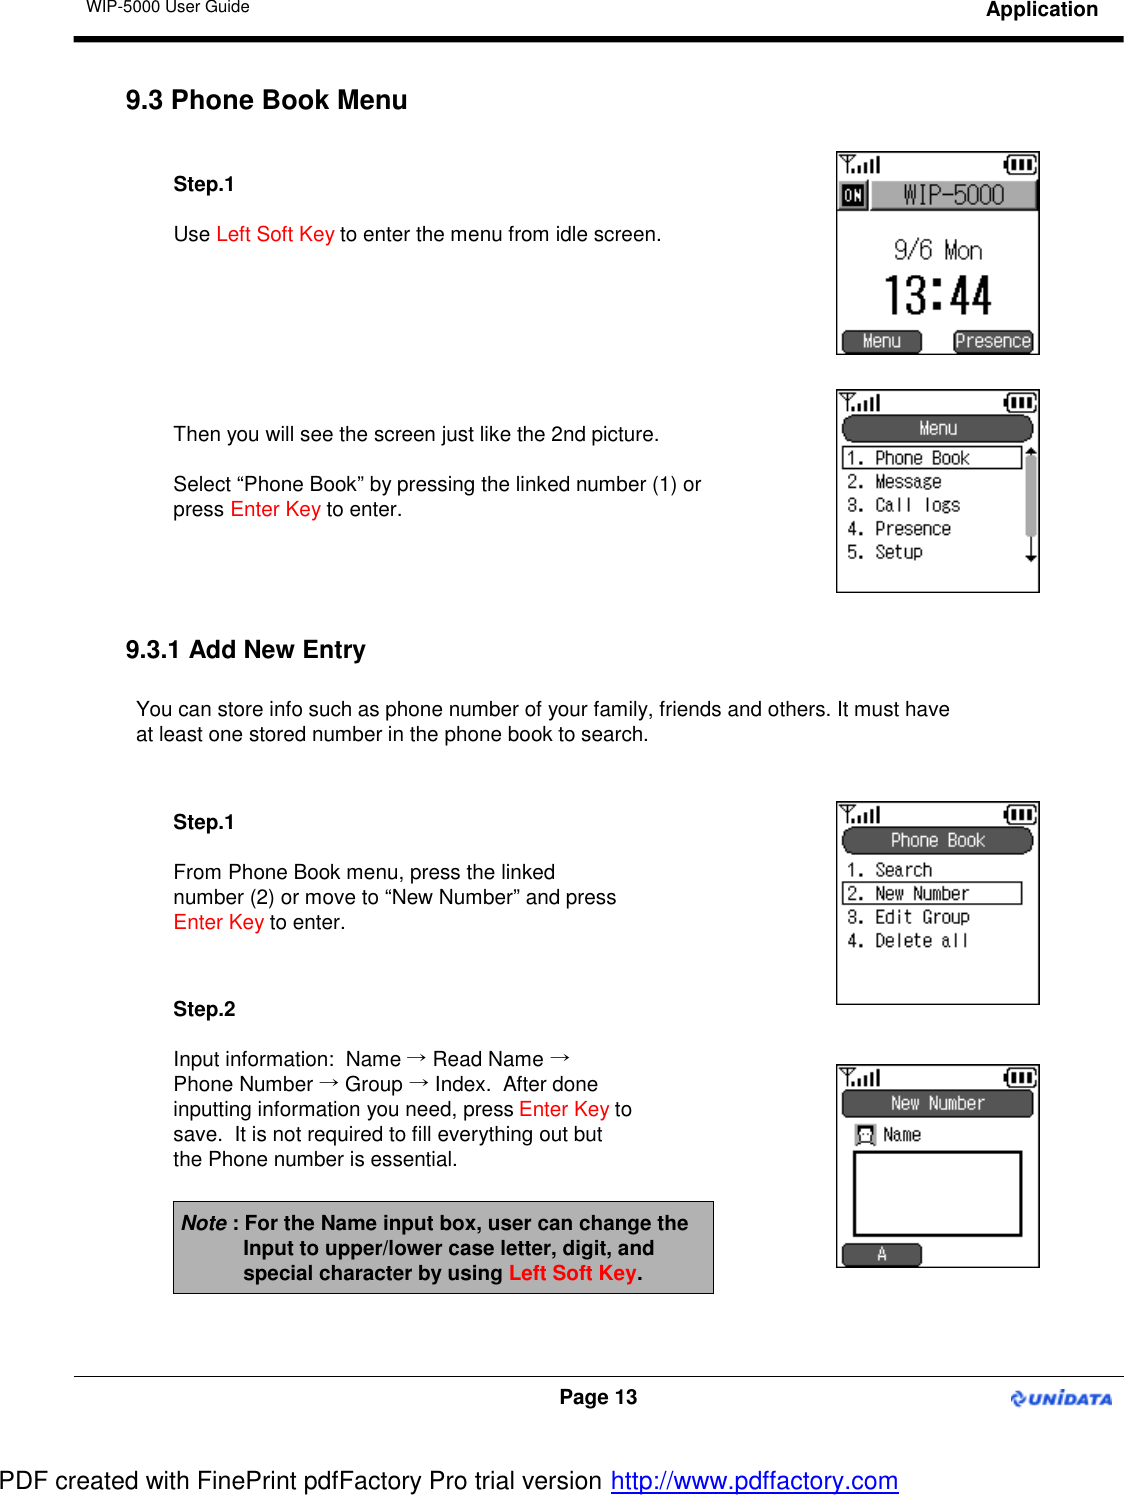
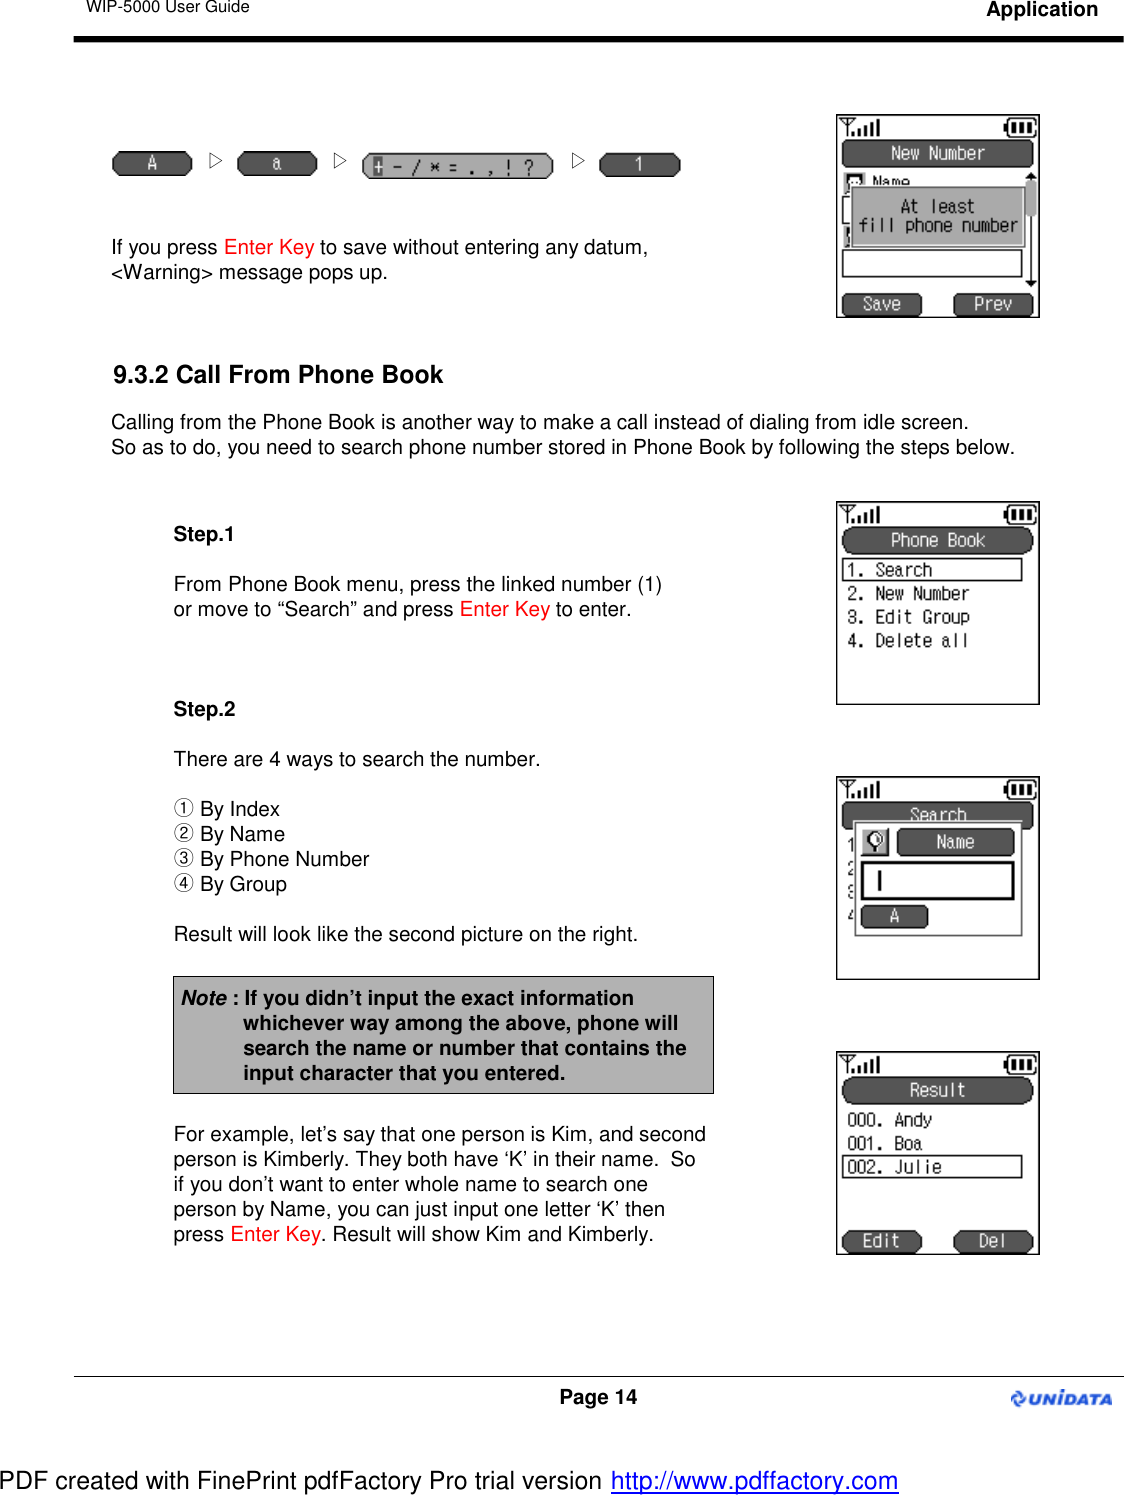
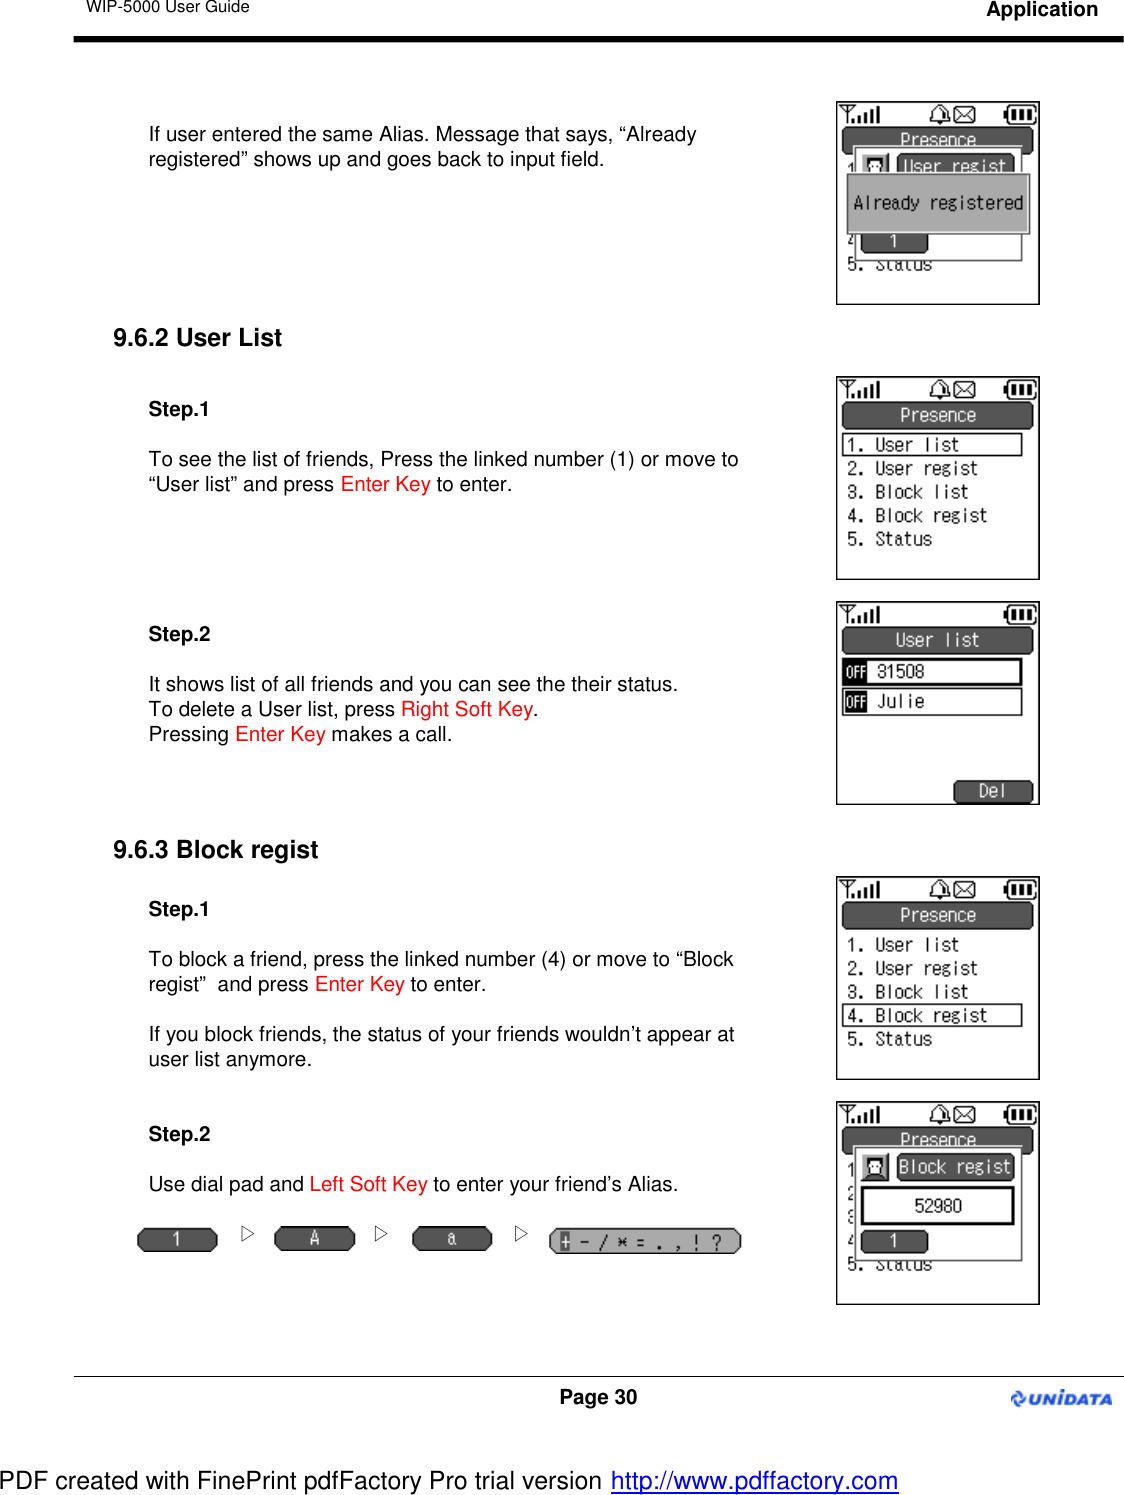
![Inputting CharactersWIP-5000 User Guide8. Inputting Characters ( Dial Pad )>=~<}+|Z S){YR(’XVQOLIFC’_WUPNKHEB&^9T7MJGDA%]z8s65432$[-yvrolifc;?spacexuqnkheb,#!@wtpmjgda/:#.*00998877665544332211FONTKeyDial Pad Dial pad is formed with integer 0~9, *, and # and used for inputting 3 or 4 alphabet letters and some symbols. Once a Dial key has been pressed, pressing it again while the rectangular cursor keeps blinking will change the current input to the next letter assigned for that specific key. See the table below for the Dial key assignment. Note that after the rectangular cursor blinks couple of times, it will change into a vertical bar cursor. Alphabet letters are lowercase by default.Let’s try entering “Hello 2004”Step. 1 For “H”: Press ‘4’seven times. Step. 2 For “e”: Press ‘3’three times.Step. 3 For “l”: Press ‘5’four times.Step. 4 For “l”: Press ‘5’four times.Step. 5 For “o”: Press ‘6’four times.Step. 6 For “space”: Press ‘0’three times + Multi Function Key rightdirection.Step. 7 For “2”: 2Step. 8 For “0”: 0Step. 9 For “0”: 0Step. 10 For “4”: 4 Note : This dial pad system is for bootrom menu only.Page 10PDF created with FinePrint pdfFactory Pro trial version http://www.pdffactory.com](https://usermanual.wiki/UniData-Communication-Systems/WIP-5000/User-Guide-496526-Page-14.png)