Unical DM150HS DECT 6.0 Cordless Telephone with 3G Cell Phone User Manual
Unical Enterprises Inc DECT 6.0 Cordless Telephone with 3G Cell Phone Users Manual
UserManual.wiki
>
Unical
>
DM150HS User Manual
Users Manual
Navigation menu
Upload a User Manual
Namespaces
Wiki Guide
HTML
PDF
Info
Views
User Manual
Discussion / Help
Navigation
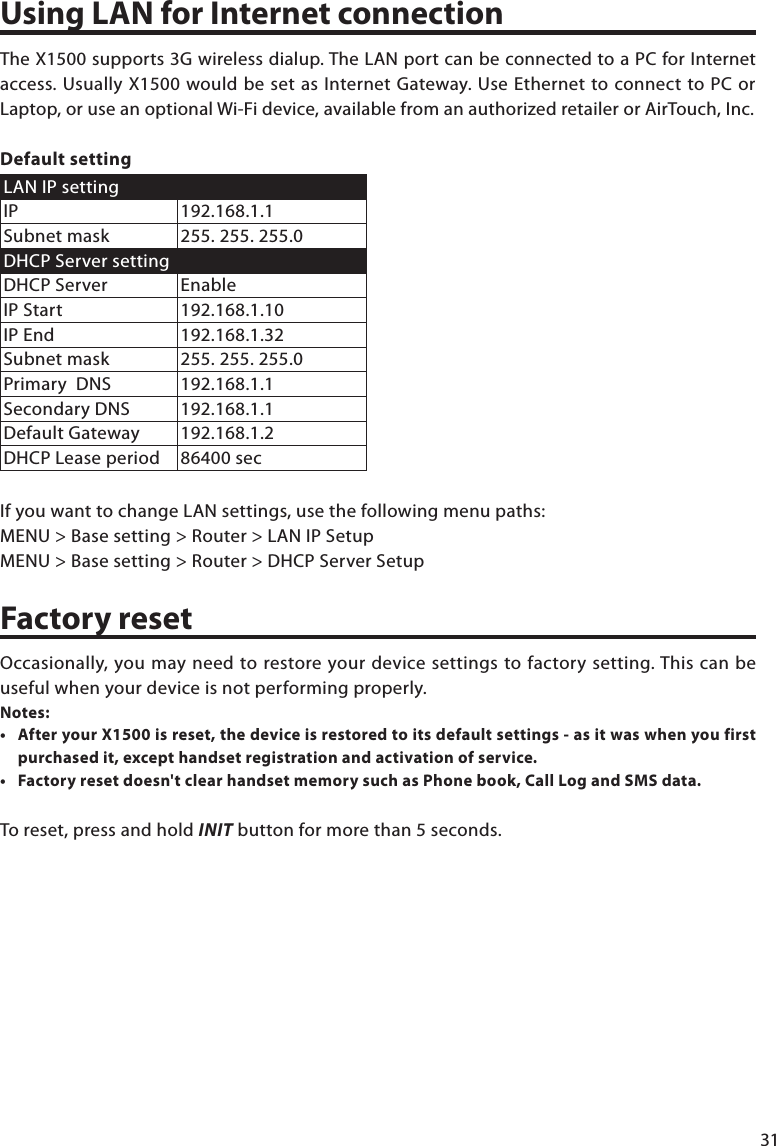
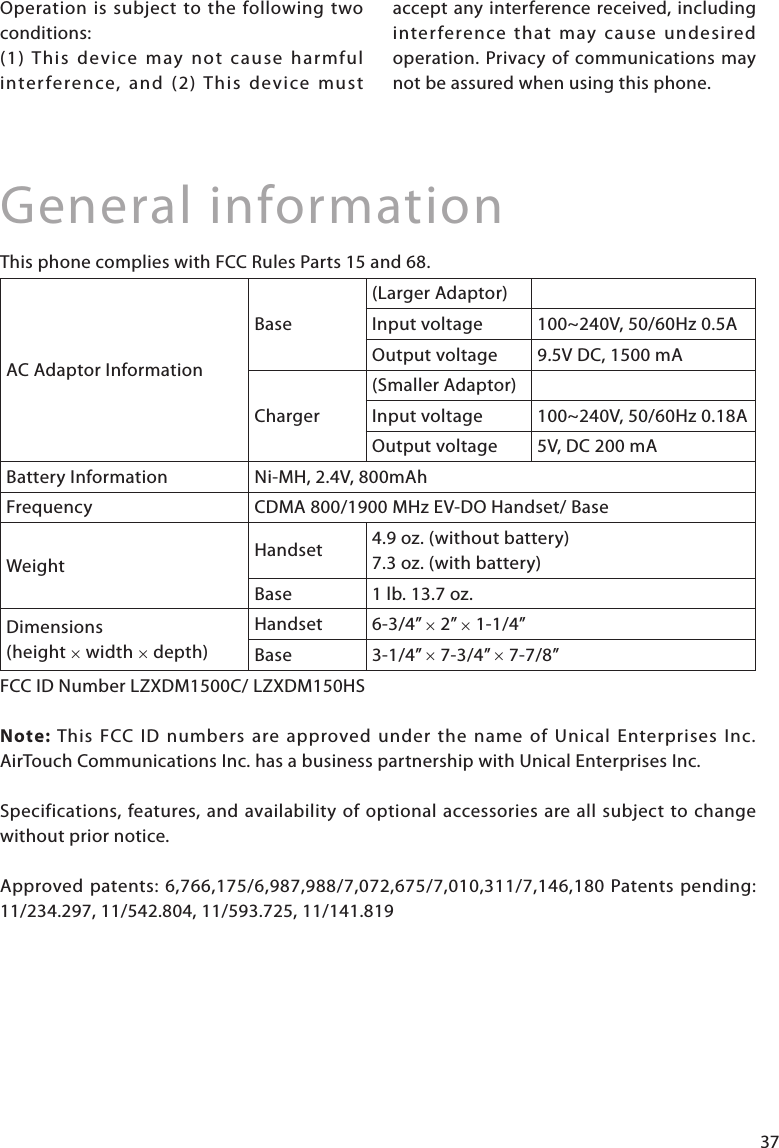
![18Enter names and characters Use the keypad to choose the characters you want. Use the #A/a key in the lower right area of the Handset to switch the letters from capital to lower case as needed.CharactertableforenteringnamesNumberoftimeskeypressedkeys 1234567891space 1 . ,: ; ' " () < > & % ! ? ¡ ¿2A B C 23D E F 34G H I 45JKL 5 ^ { } \ [~ ] | €6M N O 67P Q R S 78T U V 89W X Y Z 900 + - * / = # _ $£ ¥ @ Δ ¤ § Φ• UsePB to scroll to the left or the A key to scroll to the right.• PressDelete (F2) to erase a character.• # A/aKeyselectsUppercaseorLowercaseinputsetting.](https://usermanual.wiki/Unical/DM150HS/User-Guide-1605560-Page-18.png)