Unication Co ABN25ARA00 2-Way Pager User Manual users manual
Unication Co Ltd 2-Way Pager users manual
UserManual.wiki
>
Unication Co
>
ABN25ARA00 User Manual
>
users manual
Contents
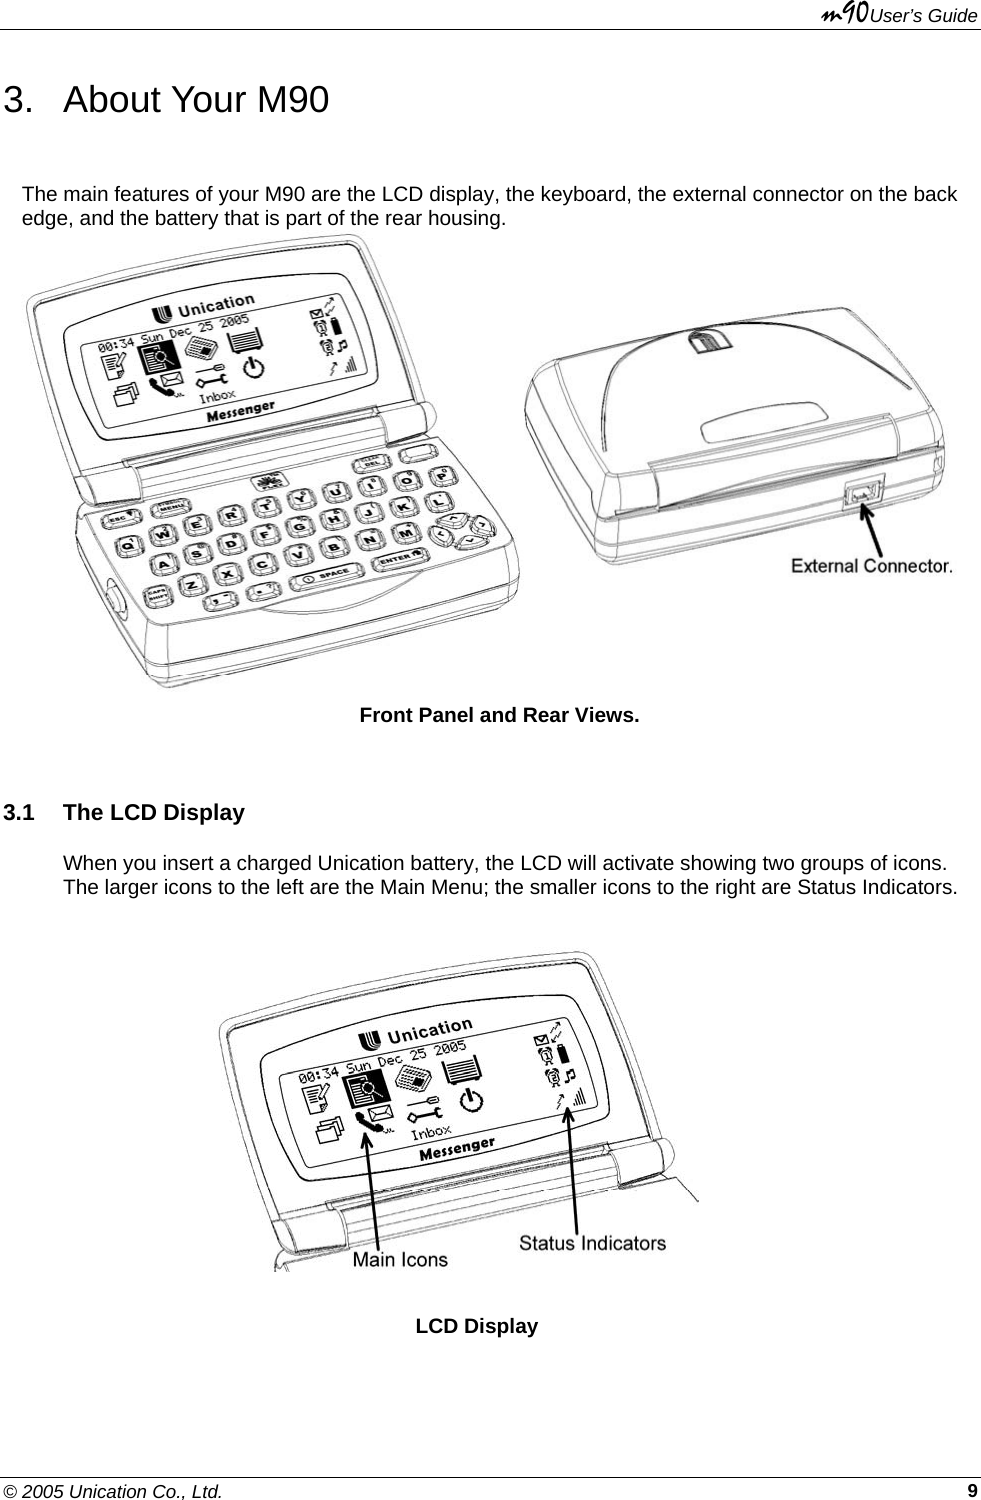
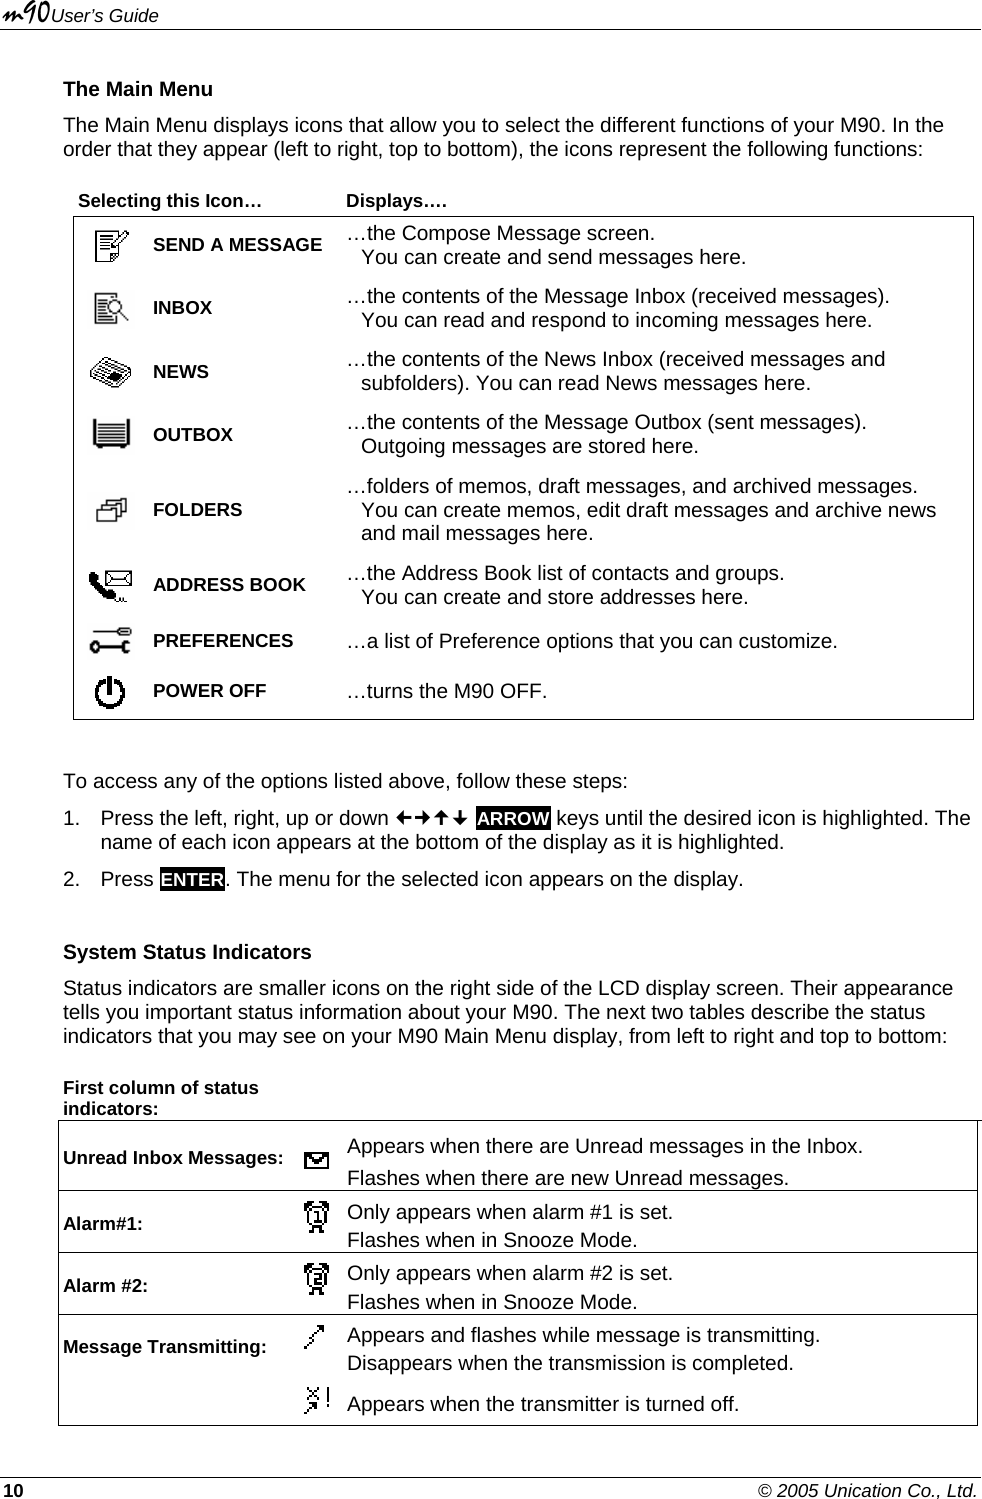
1.
quickstart users manual
2.
users manual
users manual
Navigation menu
Upload a User Manual
Namespaces
Wiki Guide
HTML
PDF
Info
Views
User Manual
Discussion / Help
Navigation


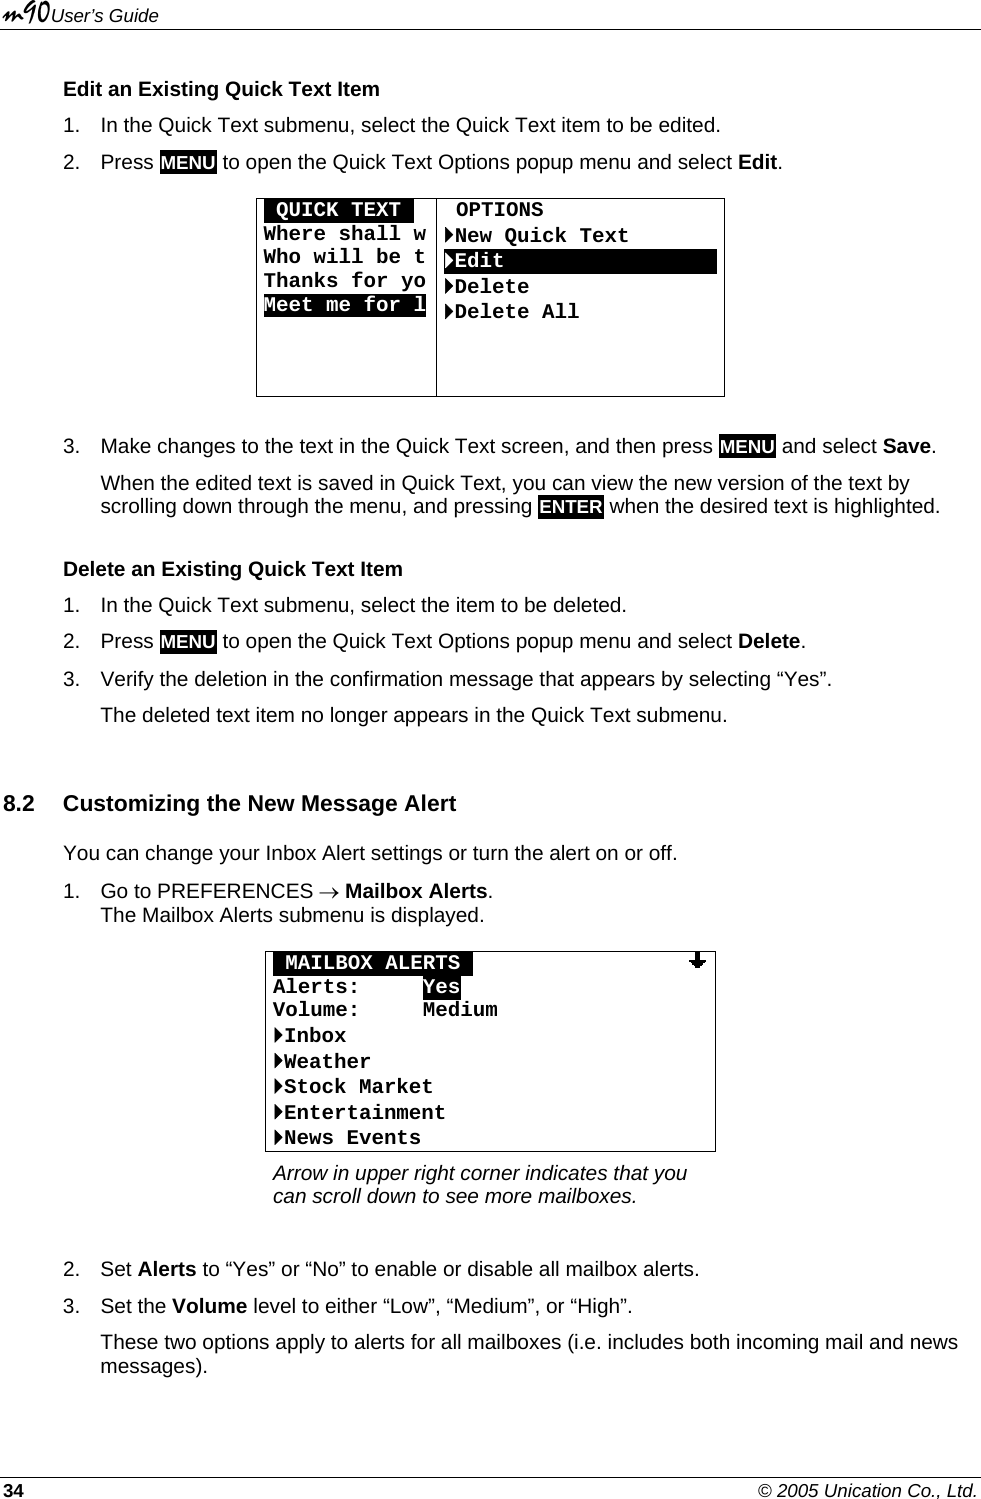
![m90User’s Guide © 2005 Unication Co., Ltd. 235. Sending Messages You can compose and send messages to wireless and email addresses. To start, select SEND A MESSAGE in the Main Menu. The Send A Message screen is displayed: SEND A MESSAGEO To: OOOOOOOOOOOOOOOOOOOOOOOOOOOOOOO Msg: Cursor is in the To field. Note: For shortcuts see Section 3.5 Shortcuts for Navigating, on page 14. 5.1 Selecting Contacts from the Address Book You can select contacts (or groups) from your Address Book to be in your To field. To use this option you must have first created contacts and groups in the Address Book (see Adding a Contact to the Address Book on page 37). To select a contact to be in your message To field: 1. Press MENU to open the Message Options popup menu. OSEND A MESS To:OOOOOOOOO Msg: OPTIONS `Select AddressOOOOOO`Manual Entry `View Selected `Send 2. Select Select Address. The Address Book contact list is displayed. (A faster way of getting to the Address Book, is to press ENTER while in the To field.) ADDRESS BOOKA 1 of 4 • Brown, Tom* [WA]AAAAAAAAAAAAAAA • Doe, Sally* [WA] Anka, Alice [WA] Brown, Ed [WE] • A bullet indicates that this contact has been selected. * An asterisk indicates that this contact has a “Frequent” setting, which puts the name at the top of the Address Book list of contacts.](https://usermanual.wiki/Unication-Co/ABN25ARA00.users-manual/User-Guide-631639-Page-25.png)
![m90User’s Guide 24 © 2005 Unication Co., Ltd. 3. Select one or more names from the Address Book. A bullet (•) will be shown when ENTER is pressed for that name. To unselect a contact, press ENTER again. 4. Press the left ARROW key to exit the Address Book. The name(s) you have selected will appear in the To field. There is only one display line for the To field, so if several contacts were selected, they may not all fit on the display. 5. To view all addresses in the To field, press the up ARROW key so that the To field is highlighted, and press MENU to open the Options popup menu again. 6. Select View Selected in the popup menu to display a complete list of contacts that have been added to the To field. OSELECTED ADDRESSESO 1 of 2 Brown, Tom* [WA] OOOOOOO OO Doe, Sally* [WA] Sending to Non-Default Addresses You may send to a different address than the default address shown in the Address Book. 1. While selecting contacts in the Address Book, press MENU to open the Options popup menu. •ADDRESS BOO • Brown, Tom • Doe, Sally Anka, Alic Brown, Ed OPTIONS `Done Addressing `View Contact00000000`New Contact `New Group 2. Select View Contact 3. Select one or more addresses. A bullet (•) will be shown when you press ENTER for that name. 4. Press MENU to open the Options popup menu OBrown, Tom* • WA: 913224 • HE: tom@ho AE: tb12@w OPTIONS `Update Contact `Done Selecting000000 Select Update Contacts to save the changes permanently into the Address Book, or select Done Selecting to use the changes for this message only.](https://usermanual.wiki/Unication-Co/ABN25ARA00.users-manual/User-Guide-631639-Page-26.png)
![m90User’s Guide © 2005 Unication Co., Ltd. 255.2 Adding or Editing a Manual Address Entry You can add an address manually, or edit a manual address you have already entered. 1. With the cursor in the To field, press MENU to open the Message Options popup menu. 2. Select Manual Entry to open the Manual Entry display. 3. Type the address (or edit an existing address). MANUAL ENTRY To: manual. [ Press Enter to exit ] [ to SEND A MESSAGE ] 4. Press ENTER to save text and exit the Manual Entry screen. Alternatively, when the cursor is on the To field in the Send a Message screen, you may start typing the manual address, and the device will automatically open up the Manual Entry screen. 5.3 Composing your Message Move the cursor (press the down ARROW key) to the Msg field and type your message. You can add Quick Text or Memos to your message (see Creating Quick Text for Messages on page 33 and Creating a Memo on page 47). Quick Text is a phrase you have created and saved in your Quick Text menu. Memos are text files you have created and saved in your Memos folder. Add Quick Text or Memos to your Message 1. With the cursor in the Msg field, press MENU to open the Message Options popup menu. OSEND A MESS To: Tom@hotm Msg: Tom, Sally: . OPTIONS `Send `Insert Quick TextOOO`Insert Memo `Save to Draft 2. Select Insert Quick Text from the popup menu. A list of Quick Text messages is displayed. 3. Select the desired Quick Text from the list. The list closes and the Quick Text is inserted at the cursor in the message area. You can also insert memos in a similar manner, by selecting Insert Memo from the popup menu (see Creating a Memo on page 47). Note: For shortcuts see Section 3.5 Shortcuts for Navigating, on page 14.](https://usermanual.wiki/Unication-Co/ABN25ARA00.users-manual/User-Guide-631639-Page-27.png)
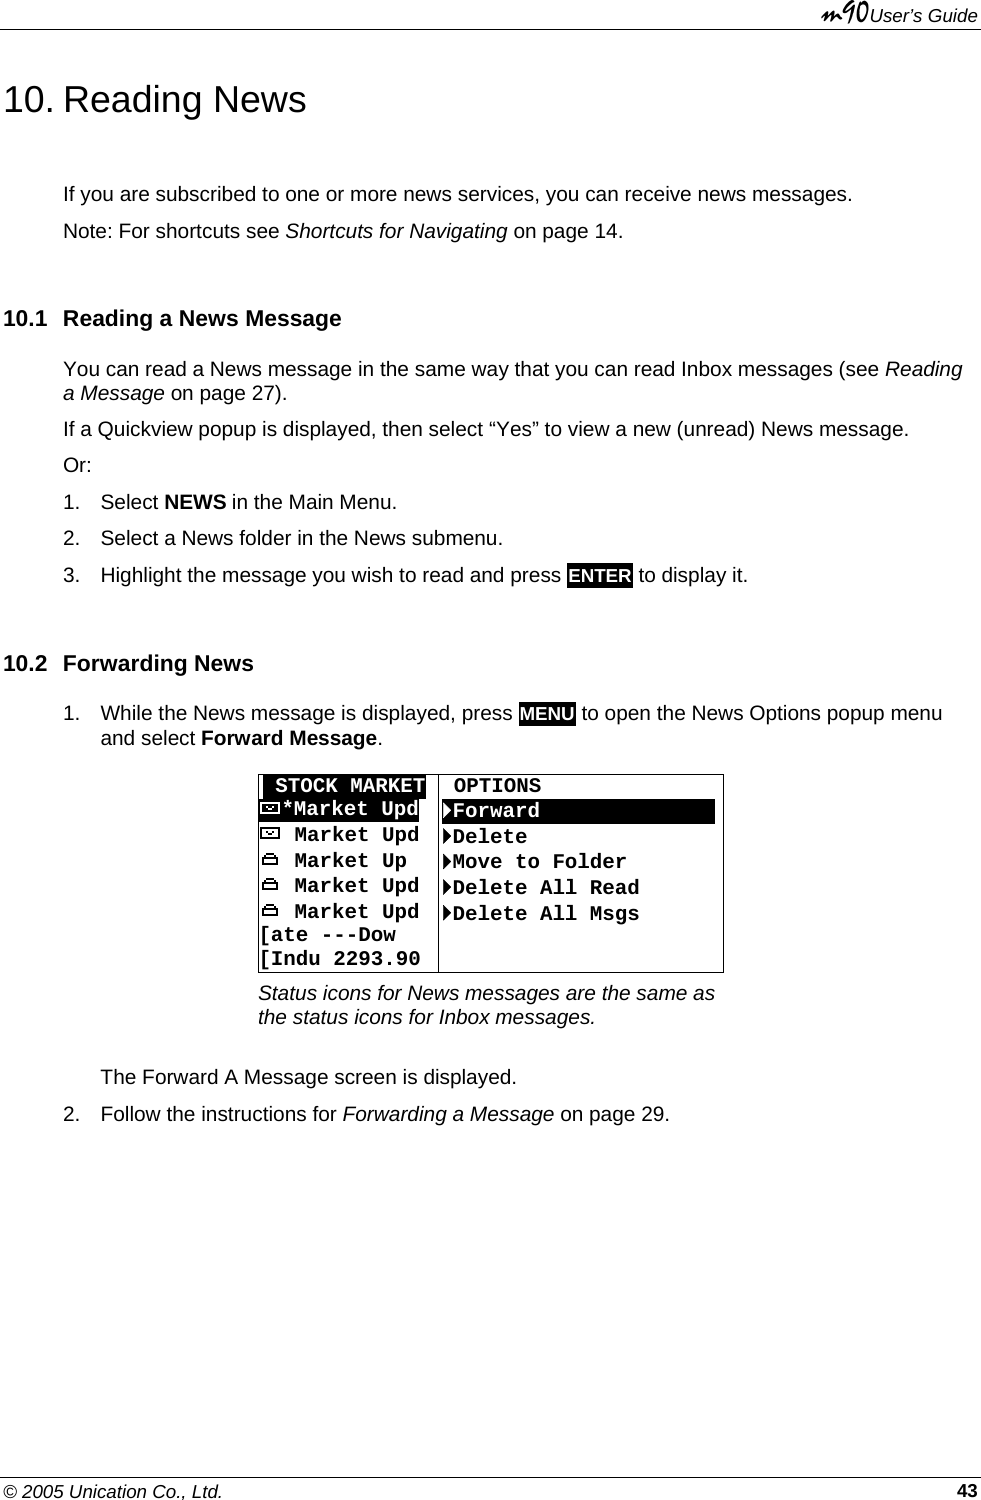
![m90User’s Guide © 2005 Unication Co., Ltd. 276. Managing Incoming Messages Received personal messages are stored in your Inbox. Each message has a symbol indicating its current status: Unread message Read message Message has been forwarded. Message has been replied to. Message forward or reply failed. A brief preview of a selected message is displayed in the bottom two lines of the screen. If you subscribe to a News service, news messages are not stored in the Inbox but are stored in News. See Reading News on page 43. Select INBOX in the Main Menu to display the personal messages that you have received. Note: For shortcuts see Shortcuts for Navigating, on page 14. 6.1 Reading a Message 1. Select INBOX in the Main Menu. A listing is displayed of all messages in your Inbox, organized from the newest (at the top) to the oldest. OINBOXO 4 of 4 Steve@infoserve.net Got your messa Ellie@home.com We’ve finally decid Can you pick up groceries on your Tom@hotmail.com Bring your packo [with you when you come. Jay ] [ ] Text in [brackets] at bottom of display is a continuation of the highlighted message text. 2. Scroll through the Inbox menu of received messages to the desired message. 3. Press ENTER to open the message for viewing. 4. Press ESC to return to the INBOX when finished reading the message. Reading a Message with Quickview If a Quickview New Message Received popup is displayed, select “Yes” in the popup to display the message. Quickview is a quick way to read messages on your M90. The Quickview popup appears on the display as soon as a new message arrives in the Inbox, and selecting “Yes” in the popup immediately opens the message for viewing. For information on setting up the Quickview alert, see Customizing the New Message Alert on page 34. Note that the Quickview popup does not allow you to view the new message if you are currently editing a message or a memo.](https://usermanual.wiki/Unication-Co/ABN25ARA00.users-manual/User-Guide-631639-Page-29.png)


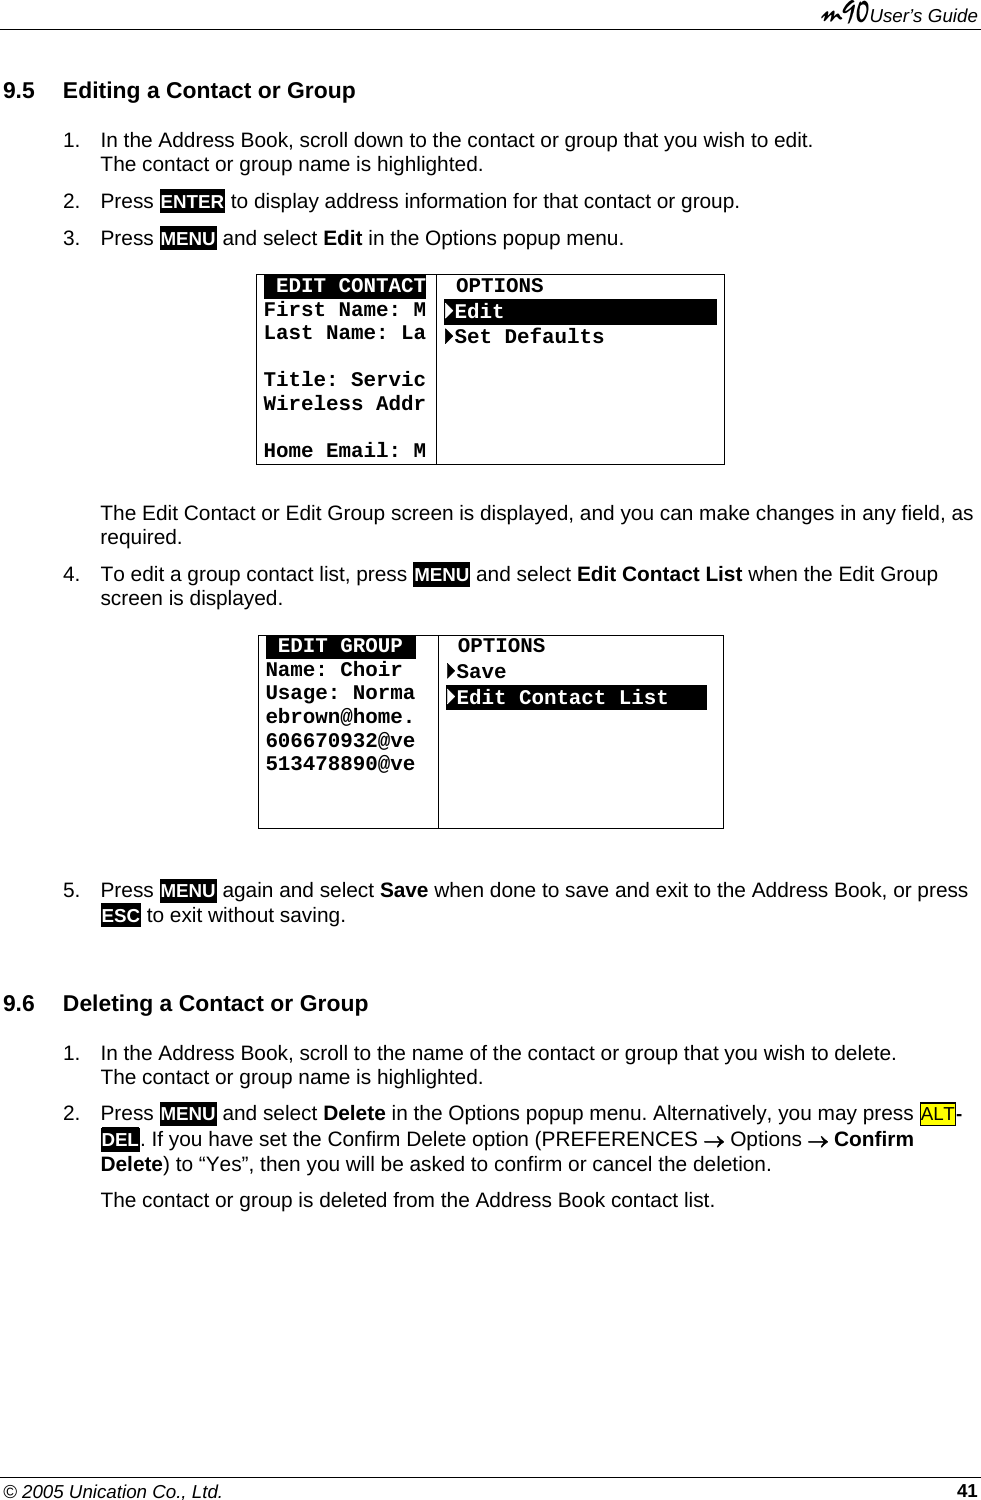
![m90User’s Guide 38 © 2005 Unication Co., Ltd. 5. When done, press MENU to open the Options popup menu and select Save to save the new contact and return to the Address Book. OADDRESS BOO First Name: MLast Name: La Title: ServicWireless Addr Home Email: M OPTIONS `Save `Set Defaults Or, press ESC to exit without saving. 9.2 Setting the Default Address within a Contact When you create your contact if you don’t explicitly set your default address, the topmost filled in address will become your default. A contact contains the following addressable fields: • Wireless Address [WA] • Work Email [WE] • Home Email [HE] • Alternate Email [AE] • Work Phone [WP] (if enabled by your service provider) • Home Phone [HP] (if enabled by your service provider) • Mobile Phone [MP] (if enabled by your service provider) • Fax Number [FX] (if enabled by your service provider) For example, if you filled in Wireless Address and Home Email, then the default would be Wireless Address for that contact. If you wish to change the default address, or make other addresses also defaults, then do the following: 1. In the Options popup menu above, select Set Defaults. The Set Defaults screen is displayed: OLamb, MikeO •WA: 8876758 WA:MikeLamb@work.com 2. Select all addresses or phone numbers that you want to use as default. • If more than address is selected, messages sent to this contact will be delivered to all selected addresses • Phone number options will only appear if enabled by your service provider. • If you unselect all addresses, then the topmost address will be selected as the default.](https://usermanual.wiki/Unication-Co/ABN25ARA00.users-manual/User-Guide-631639-Page-40.png)
![m90User’s Guide © 2005 Unication Co., Ltd. 39 3. When done, press MENU to open the Options popup menu and select Update Contacts to save your selections and return to the Edit Contact display. OLamb, MikeO •WA: 8876758 •WA: MikeLam OPTIONS `Update Contacts 4. Press MENU again and select Save to save the new contact information and return to the Address Book. The new contact appears in the Address Book list. OADDRESS BOOKO 5 of 5 Brown, Tom* [WA] Doe, Sally* [WA] Anka, Alice [WA] Brown, Ed [WE] Lamb, Mike [WA, WE]000000000000000 9.3 Adding a Group to the Address Book 1. In the Address Book, press MENU to open the Options popup menu and select New Group. 2. In the New Group screen type a name for the group in the Name field. 3. Set Usage to “Normal” or “Frequent” (groups that are used most often and should appear at the top of the Address Book list). 4. Press MENU to open the Options popup menu and select Edit Contact List to view a list of existing contacts (but not groups) in your Address Book. 5. Scroll down the list and select each contact that you wish to add to the group. OEDIT CONTACT LISTO 1 of 5 •Brown, Tom* [WA]OOOOOOOOOOOOOOOOOO •Doe, Sally* [WA] Anka, Alice [WA] Brown, Ed [WE] Lamb, Mike [WA, WE] You cannot add a manual address to a group; you can only add contacts that you have already created in your Address Book.](https://usermanual.wiki/Unication-Co/ABN25ARA00.users-manual/User-Guide-631639-Page-41.png)
![m90User’s Guide 40 © 2005 Unication Co., Ltd. 6. When done adding contacts, press MENU to open the Options popup menu and select Done Selecting to save the contact list and return to the New Group screen. 7. Press MENU and select Save from the Options popup menu to save the new group and exit to the Address Book. Or, press ESC to exit without saving. 9.4 Viewing Contact or Group Information 1. In the Address Book, scroll to a contact or group you wish to view. The contact or group name is highlighted. OADDRESS BOOKO 1 of 5 Brown, Tom* [WA]000000000000000000 Doe, Sally* [WA] Brown, Ed [WE] Choir [grp] Lamb, Mike [WA, WE] • Contacts are listed alphabetically by last name, with frequent contact names (marked by “ * “) at the top of the list. • Group names are indicated by “[grp]”. • The addresses that messages will be sent to are indicated for each contact: [WA] Wireless Address [WP] Work Phone [WE] Work Email [HP] Home Phone [HE] Home Email [MP] Mobile Phone [AE] Alternate Email [FX] Fax Number • Phone number options will only appear if enabled by your service provider. 2. Press ENTER to display detailed information about the selected contact: OBrown, Tom*O President *WA: 5467329812@carrier.com _WE: tom.brown@work.org _HE: tbrown@home.com • The “ * “ in the top line indicates that this is a frequent contact name. • “*WA” indicates that the Wireless Address is the address to which all messages for this contact will be sent. • “_WE“ indicates that messages will not be sent to the Work Email address. 3. Press ESC to return to the Address Book contact list.](https://usermanual.wiki/Unication-Co/ABN25ARA00.users-manual/User-Guide-631639-Page-42.png)


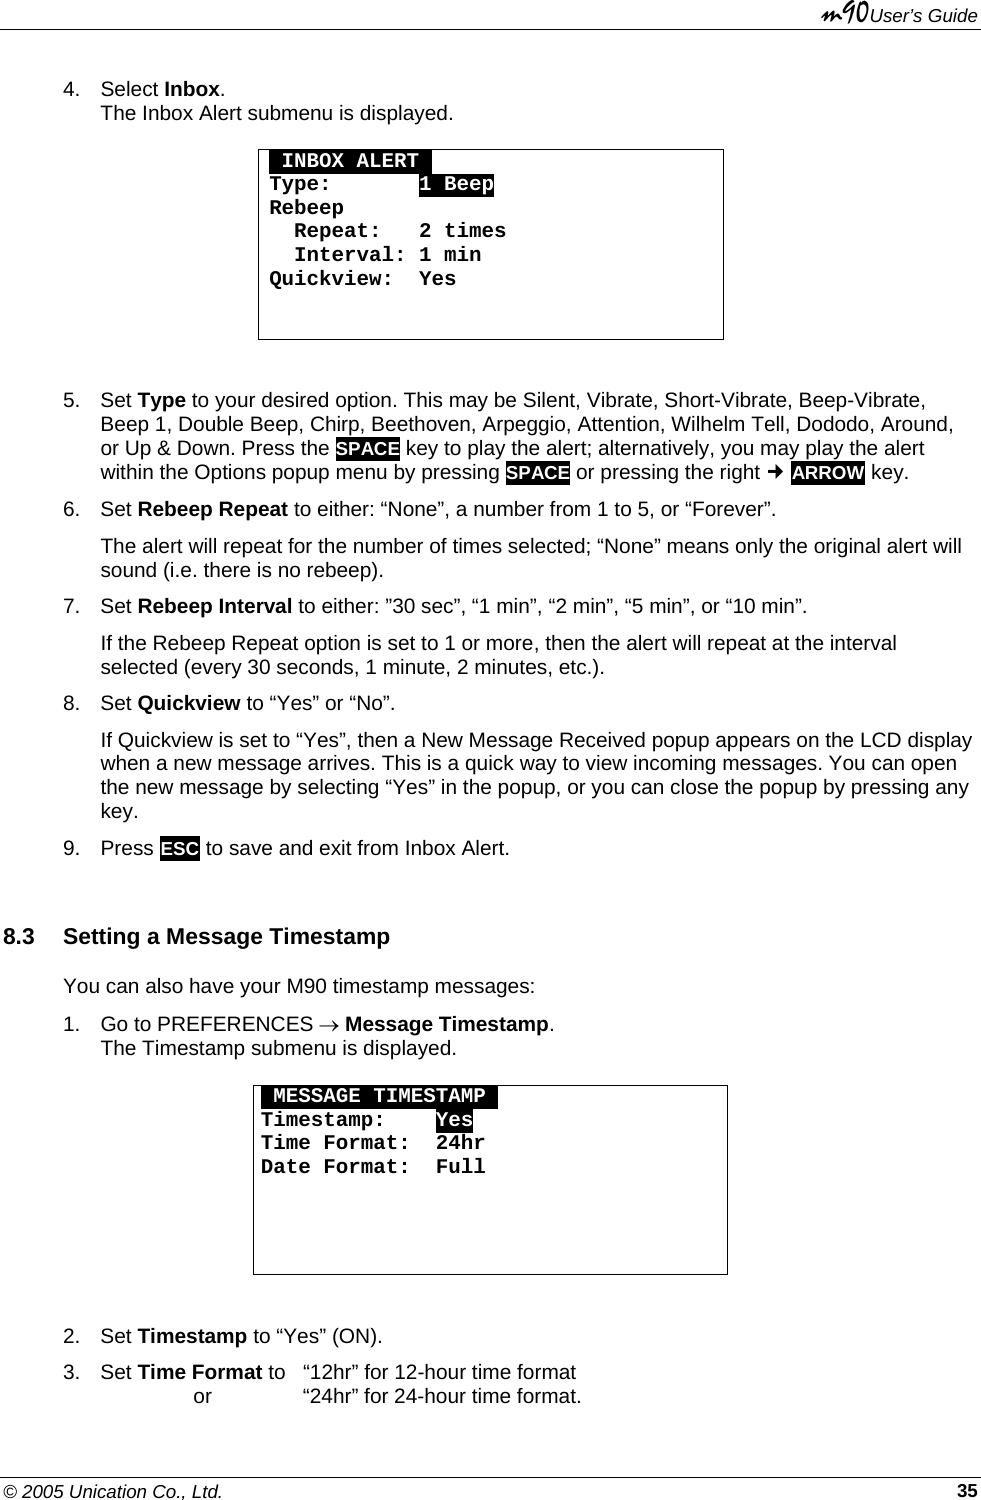
![m90User’s Guide 54 © 2005 Unication Co., Ltd. 2. Set Alert Volume to either “High”, “Medium”, or “Low”. In the Alarm Clock menu, you can see whether either alarm is set On or Off. To set an alarm that is currently Off, do the following: 3. Select Alarm #1 (which is currently set OFF) to open the Set Alarm #1 submenu. OSET ALARM #1O Alarm Clock: Off Frequency: Once Time: [HH] :[MM] [AM] Alert Type: Beep 1 Snooze: Yes Comment: 4. In the Alarm #1 submenu you can make the following changes: • Alarm Clock: set to “On” or “Off” • Frequency: set how often the alarm alert should sound “Once” (only one occurrence, at the set time), ”Daily” (every day at the set time), ”Weekday” (every Mon., Tues., Wed., Thurs. and Fri. at the set time), or ”Weekend” (every Sat. and Sun. at the set time). • Time: If Date and Time Time Format is set to 12 hour format: set the hour (01–12), minute (00–59) and AM or PM for the alarm alert If Date and Time Time Format is set to 24 hour format: set the hour (00-23), and minute (00–59) for the alarm alert • Alert Type: set to your desired option. This may be one of Silent, Vibrate, etc. • Snooze: “Yes” (alarm alert will sound up to 3 more times at 10 minute intervals) or “No” (only one alarm alert at the set time). If Snooze is enabled then the alarm icon will flash in the Main Menu when the alarm alert is triggered, and continues to flash until the alarm is turned off. • Comment: enter text to describe Alarm (e.g., Dental appointment); this will appear in the Alarm Alert popup. 5. When done, save and exit from the Alarm #1 submenu and return to the Alarm Clock menu. 6. You can select Alarm #2 and make similar changes there as well. 7. Press ESC to save and exit from Alarm Clock.](https://usermanual.wiki/Unication-Co/ABN25ARA00.users-manual/User-Guide-631639-Page-56.png)
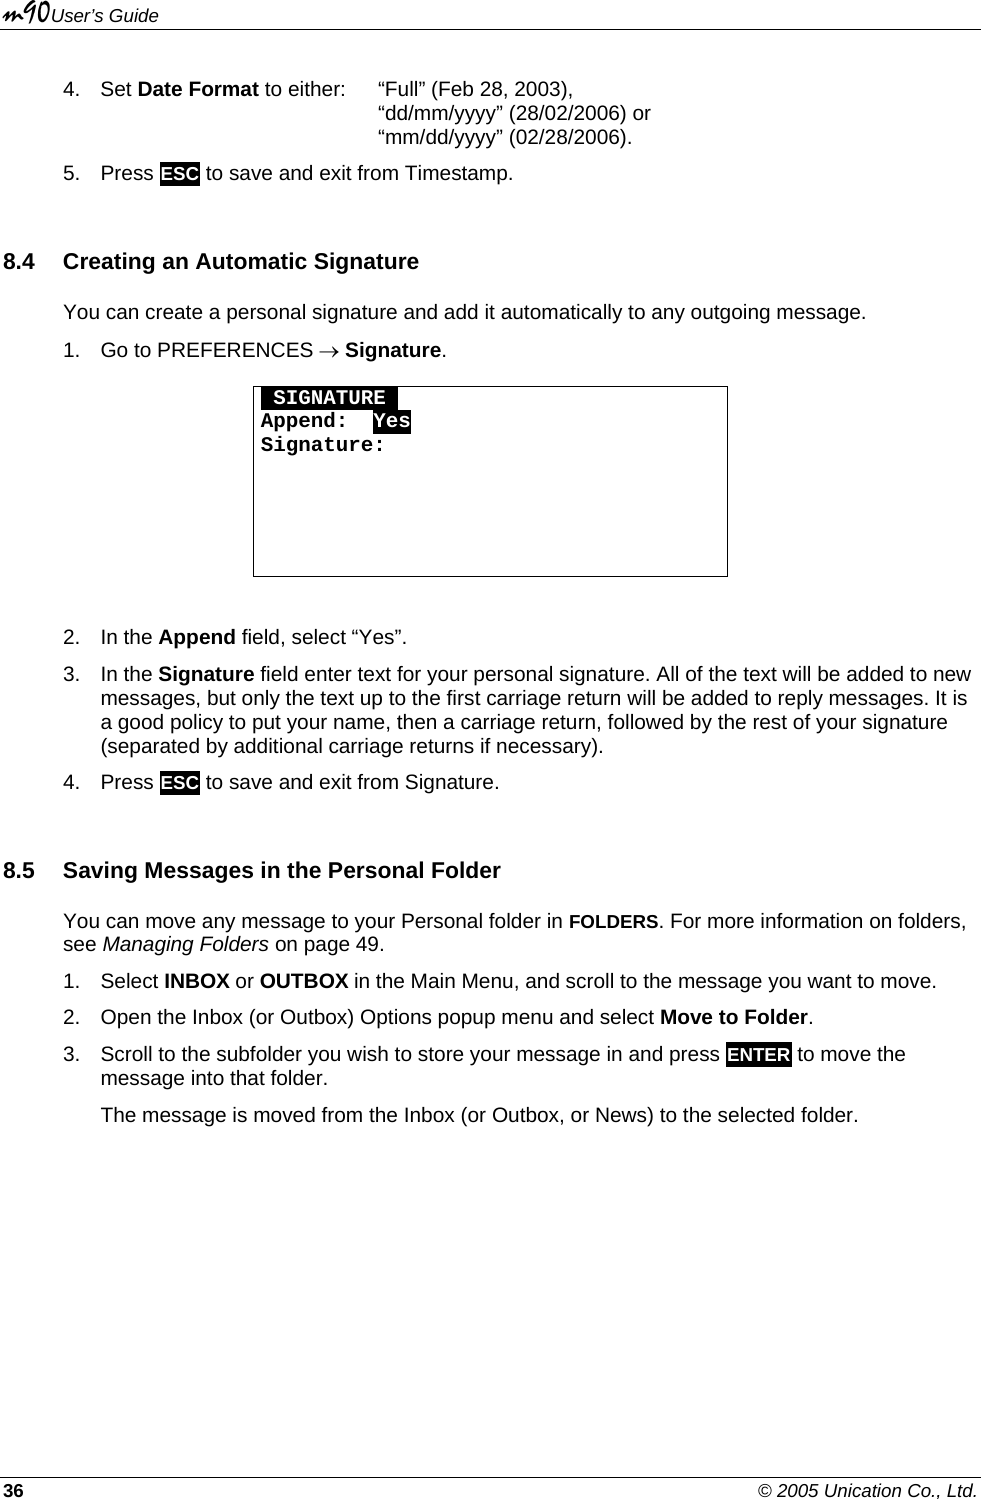
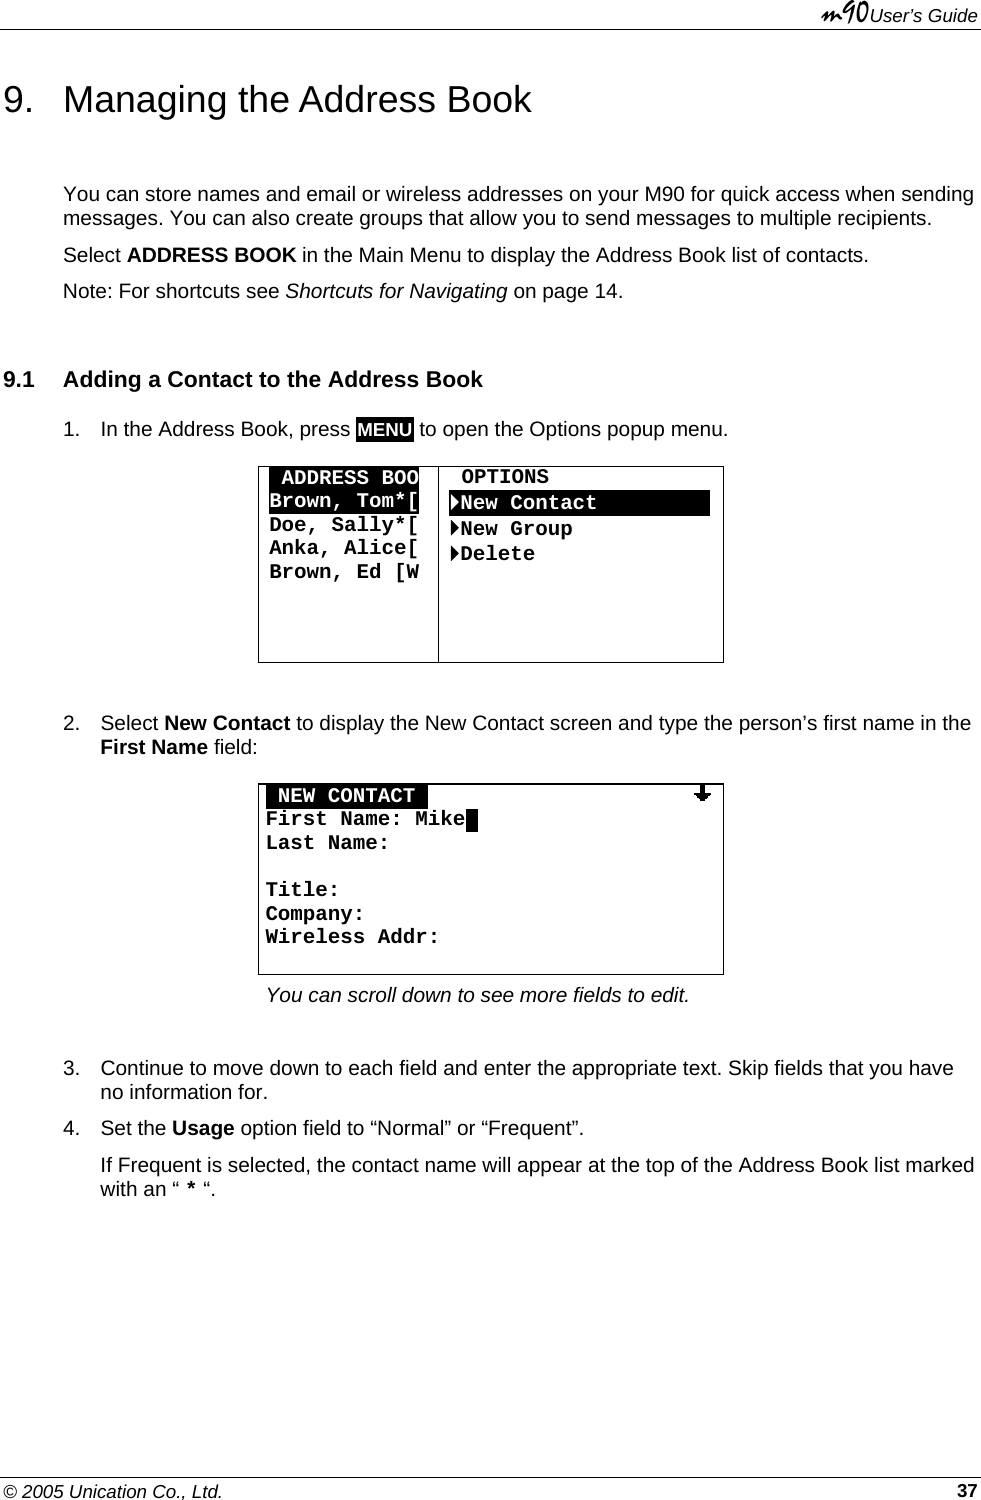
![m90User’s Guide 56 © 2005 Unication Co., Ltd. 2. Make changes in the Options submenu as desired. Press the up or down ARROW keys to move from field to field, and press ENTER to change options in each field. • Font Size: Set to “5-line” for larger font or “8-line” (default) for smaller font. OOPTIONSOOOOOOOOOOOOOOOOFont Size: 5-line Contrast: 5 Confirm Delete: Yes Keyclick: No Display screen with 5-line font selected • Contrast: Set the LCD display contrast to a number from 1 (low) to 10 (high). • Confirm Delete: for a confirmation message whenever you delete a message/memo/text, set to “Yes”, or “No” (no confirmation message will be displayed). • Keyclick: Set to “Yes” for an audible click whenever any key is pressed, or “No” for no click. • Screen Timeout: Set to “30 sec”, “60 sec” or “Off”. After the M90 has been idle for the selected length of time, the LCD screen will go blank to conserve energy. If the back light is on, it will turn off. If set to “Off”, then the screen will remain on until the device is turned off. • Message Privacy: If your M90 is enabled for Message Privacy, then you can set this option to “Yes”. This means that if the network requests the “read” status of a message sent to you, the device will inform the network that the device is currently set to private. If set to “No”, or if Message Privacy is not enabled for your device, then the device will respond to any network “read” status requests. 3. Press ESC to save and exit from Options. 13.4 Setting Private Time Private Time allows you to turn off Inbox and News Message Alerts for a specified period of time every day (for example, when you are asleep at night). To configure Private Time: 1. Go to PREFERENCES → Private Time. OPRIVATE TIMEO Private Time: No Start Time: [HH]:[MM] [AM] End Time: [HH]:[MM] [AM] Alert at End: Yes 2. Set Private Time to “Yes” to turn on Private Time.](https://usermanual.wiki/Unication-Co/ABN25ARA00.users-manual/User-Guide-631639-Page-58.png)