Unication Co ABN25ARA00 2-Way Pager User Manual users manual
Unication Co Ltd 2-Way Pager users manual
Contents
- 1. quickstart users manual
- 2. users manual
users manual

Unication
Advanced 2-way Messaging Device
USER’S GUIDE

m90 User’s Guide
© 2005 Unication Co., Ltd. 1
This document is published by Unication Co., Ltd. The information contained in this document is
the exclusive property of Unication Co., Ltd. It shall not be disclosed, distributed or reproduced in
whole or in part without written permission of Unication Co., Ltd. The information in this document
may change without notice due to improvements to programs and/or equipment. Such changes will
be incorporated into new editions.
© Copyright 2005, Unication Co., Ltd
All rights reserved.

m90User’s Guide
2 © 2005 Unication Co., Ltd.
The M90 device described in this documentation implements the ReFLEX™ protocol and
incorporates one or more of the following United States patents under license from Motorola, Inc.
ReFLEX™ is a trademark of Motorola, Inc.
6,229,794 5,600,312 5,311,516 5,878,035
6,101,370 5,555,183 5,252,963 5,799,012
5,956,640 5,546,394 5,206,855 5,793,756
5,686,898 5,440,299 5,168,493 5,740,534
5,682,147 5,423,057 6,611,197 5,710,547
5,635,914 5,414,419 6,515,971 5,644,568
5,625,351 5,371,899 6,108,544 5,602,875
5,617,083 5,371,737 6,069,886 5,551,061
5,610,919 5,325,088 5,923,266 5,475,863
Other patents covering this product are pending.

m90 User’s Guide
© 2005 Unication Co., Ltd. 3
Contents
1. Safety Information ...............................5
2. Getting Started.....................................7
2.1 Unpacking Your M90.................................... 7
2.2 Installing the Battery..................................... 7
2.3 Charging the Battery .................................... 7
2.4 Using the M90 Holster.................................. 8
2.5 Attaching a Lanyard Cord............................. 8
3. About Your M90 ...................................9
3.1 The LCD Display .......................................... 9
3.2 The External Connector ............................. 12
3.3 The Back Light ........................................... 12
3.4 The Keyboard and Alert Silence Button..... 12
3.5 Shortcuts for Navigating............................. 14
3.6 Navigation Conventions in this Manual...... 15
3.7 Your Personal Memory............................... 16
3.8 Help ............................................................ 16
4. Setting Up Your M90..........................17
4.1 Viewing System Information....................... 17
4.2 Entering Owner Information ....................... 18
4.3 Setting Date and Time................................ 19
4.4 Turning Your M90 Off and On.................... 19
4.5 Main Menu Options .................................... 20
5. Sending Messages.............................23
5.1 Selecting Contacts from the Address Book 23
5.2 Adding or Editing a Manual Address Entry 25
5.3 Composing your Message.......................... 25
5.4 Sending your Message............................... 26
6. Managing Incoming Messages.........27
6.1 Reading a Message ................................... 27
6.2 Replying to a Message............................... 28
6.3 Forwarding a Message............................... 29
6.4 Deleting Messages..................................... 29
6.5 Erred Messages ......................................... 29
7. Managing Outgoing Messages.........31
7.1 Reviewing Sent Messages......................... 31
7.2 Resending a Message................................ 31
7.3 Deleting Messages..................................... 31
8. Other Messaging Options .................33
8.1 Creating Quick Text for Messages............. 33
8.2 Customizing the New Message Alert ......... 34
8.3 Setting a Message Timestamp................... 35
8.4 Creating an Automatic Signature ............... 36
8.5 Saving Messages in the Personal Folder ...36
9. Managing the Address Book............ 37
9.1 Adding a Contact to the Address Book.......37
9.2 Setting the Default Address within a
Contact........................................................38
9.3 Adding a Group to the Address Book .........39
9.4 Viewing Contact or Group Information........40
9.5 Editing a Contact or Group .........................41
9.6 Deleting a Contact or Group .......................41
10. Reading News.................................... 43
10.1 Reading a News Message..........................43
10.2 Forwarding News ........................................43
10.3 Deleting News.............................................44
10.4 Reordering News Folders ...........................45
10.5 Customizing News Alerts ............................45
10.6 Saving News in the Personal Folder...........46
11. Creating and Managing Memos ....... 47
11.1 Creating a Memo.........................................47
11.2 Viewing a Memo..........................................47
11.3 Editing a Memo ...........................................48
11.4 Deleting a Memo.........................................48
11.5 Inserting a Memo into a Message...............48
12. Managing Folders.............................. 49
12.1 Creating a New Subfolder for Mail or News
Messages....................................................49
12.2 Editing a Subfolder Name...........................50
12.3 Deleting Subfolders.....................................50
12.4 Managing Draft Messages..........................50
12.5 Managing Personal Messages....................51
13. Setting Personal Options.................. 53
13.1 Setting Up the Alarm Clock.........................53
13.2 Alarm Alerts.................................................55
13.3 Customizing Display Features ....................55
13.4 Setting Private Time....................................56
14. Maintenance....................................... 59
14.1 General Care...............................................59
14.2 Battery Care................................................59
15. Troubleshooting ................................ 61
16. FCC / ICC Compliance Statement .... 63
Index .......................................................... 65

m90User’s Guide
4 © 2005 Unication Co., Ltd.

m90User’s Guide
© 2005 Unication Co., Ltd.
5
1. Safety Information
IMPORTANT INFORMATION ON SAFE AND EFFICIENT OPERATION.
READ THIS INFORMATION BEFORE USING YOUR M90™ PERSONAL MESSAGING DEVICE.
RF Operational Characteristics
Your M90 device contains a transmitter and a receiver. When it is ON, it receives and transmits radio
frequency (RF) energy. The M90 operates in the frequency range of 900 MHz and employs common digital
modulation techniques.
Transmissions occur infrequently and usually follow a page that has been received or when the device is first
turned on. When you communicate with your M90, the output power level conducted to the antenna is typically
1 watt.
Human Exposure to RF Energy
This device complies with the RF exposure requirements specified in FCC 47 CFR 2.1093 and Health
Canada’s Safety Code 6. To maintain compliance with these guidelines when you wear the device on the
body, you must use the supplied Unication approved holster. Use of any other accessories may not
ensure compliance with FCC/IC RF exposure limits. These government limits are part of comprehensive
guidelines for the general population in an uncontrolled exposure environment developed by independent
scientific studies. The standards include a safety margin designed to assure the safety of all persons,
regardless of age and health. Refer to The Federal Communications Commission (FCC) of the U.S. or
Industry Canada (IC) websites for more information.
Electromagnetic Interference and Compatibility
As nearly every electronic device is susceptible to electromagnetic interference (EMI) if inadequately shielded
or designed for electromagnetic compatibility, use the M90 with care around:
• Public Facilities
Turn off your M90 in any facility where posted notices instruct you to do so. Hospitals or health care
facilities, for example, may be using equipment that is sensitive to external RF energy.
• Aircraft
When instructed to do so, turn off your M90 when on board an aircraft. Use of an M90 must be in
accordance with applicable regulations per airline crew instructions.
• Medical Devices
Pacemakers: The Health Industry Manufacturers Association recommends that a minimum
separation of 6 inches (15 centimeters) be maintained between a handheld wireless communication
device and a pacemaker. These recommendations are consistent with the independent research by,
and recommendations of, Wireless Technology Research.
Persons with pacemakers should:
• Always keep the M90 more than six inches (15 centimeters) from their pacemaker when the
M90 is turned ON.
• Never carry the M90 in the breast pocket.
• Turn the M90 OFF immediately if it is suspected that pacemaker interference is occurring.
Hearing Aids: The M90 may interfere with some hearing aids. Should interference occur, you may
want to consult your hearing aid manufacturer to discuss alternatives.
Other Medical Devices: If you use any other personal medical device, consult the manufacturer of
your medical device to determine if it is adequately shielded from RF energy. Your physician may be
able to assist you in obtaining this information.

m90User’s Guide
6 © 2005 Unication Co., Ltd.
Use While Driving
Check the laws and regulations on the use of wireless communication devices in the area where you drive.
Always obey them. Unication recommends that you do not use your M90 while driving so you can give your
full attention to driving. Pull off the road and park before using your M90 in your vehicle.
Operational Warnings
For Vehicles with an Air Bag
Do not place a portable M90 in the area over an air bag or in the air bag deployment area. Air bags inflate with
great force. If the M90 is placed in the air bag deployment area and the air bag inflates, the M90 may be
propelled with great force and cause serious injury to vehicle occupants.
Potentially Explosive Atmospheres
Turn off your M90 prior to entering any area with a potentially explosive atmosphere. Never remove, install, or
charge batteries in such areas. Sparks in a potentially explosive atmosphere can cause an explosion or fire
resulting in bodily injury or even death.
Important: The areas with potentially explosive atmospheres referred to above include:
• fueling areas
• below deck on a boat
• fuel or chemical transfer or storage facilities
• areas where the air contains chemicals or particles such as grain, dust or metal powders
• any other area where you would normally be advised to turn off your vehicle engine.
Note: Areas with potentially explosive atmospheres are not always posted.
Blasting Caps and Blasting Areas
To avoid possible interference with blasting operations, turn off your M90 when you are near electrical blasting
caps, in a blasting area, or in areas posted: “Turn off two-way radio.” Obey all signs and instructions.
Operational Cautions
Batteries and Charging
The M90’s lithium ion polymer battery contains a built-in protection circuit. Lithium ion polymer batteries are
among the safest batteries available, however with abuse, all batteries can cause property damage and/or
bodily injury if misused or mistreated. The common sense battery safety rules listed below must be followed:
• Only use the Unication batteries in the M90 and charge only with the charger supplied.
• Do not immerse the battery in any liquid, or allow it to get wet.
• Do not place the battery in a fire, heat the battery by any means, or place it in, on, or near any high-
temperature sources such as ovens, stove tops, microwave ovens or similar devices or appliances.
• Keep the battery, and an M90 containing the battery, away from direct hot sunlight.
• Do not connect the positive terminal to the negative terminal together with any metal object such as a
wire, hairpin, necklace, paper clip, etc.
• Do not puncture, chew, or subject the battery to physical shock.
• Should the battery be punctured and internal fluid contact skin, wash skin thoroughly with water. If
fluid contacts one’s eye, do not rub. Immediately rinse the eye thoroughly and seek medical care.
• Do not disassemble, open, or modify the battery.
• The M90 and its battery are not for use by children. Keep all batteries away from children.
• Charge the battery only over the temperature range of 0°C to 45°C (32°F to 110°F).
• Discharge the battery using only the M90 over the temperature range of 0°C to 50°C (32°F to 120°F).
m90User’s Guide
© 2005 Unication Co., Ltd.
7
2. Getting Started
2.1 Unpacking Your M90
Your M90 comes with the following parts and accessories:
• Unication 3.6V lithium ion polymer battery • Quick Start Guide
• Battery Charger • CD-ROM (with detailed User’s Guide)
• Holster • RS232-compatible serial cable
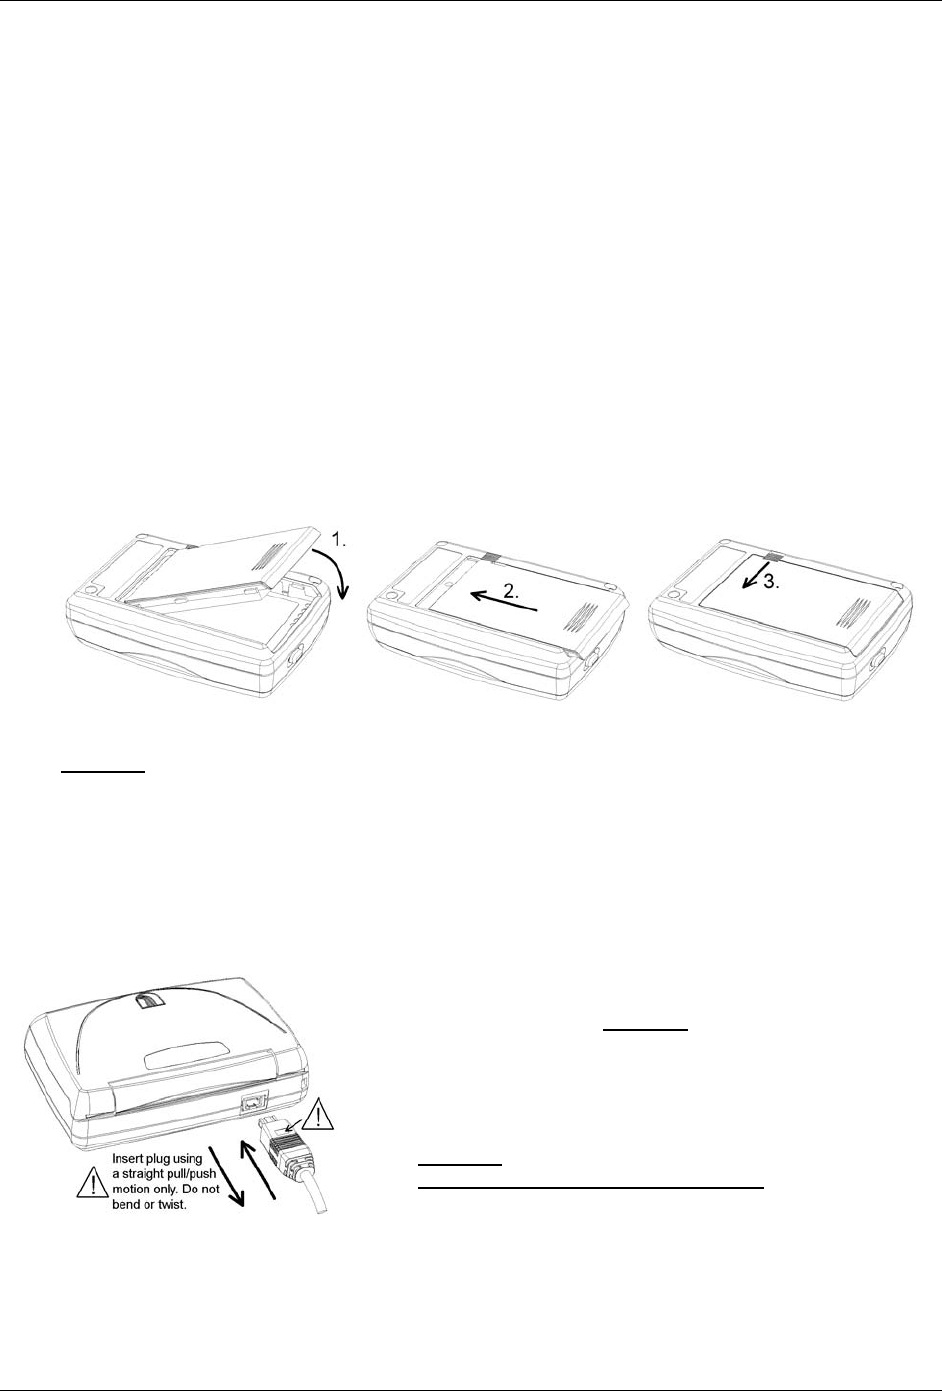
2.2 Installing the Battery
Install the M90 battery according to the illustrations below. Insert the battery at an angle into the
M90 housing, then swing down flush with the back of the M90. Slide the battery into place, then
slide the battery lock inwards to lock the battery. The battery should insert easily; do not use force.
To remove the battery, carry out the above steps in reverse.
Important: The battery is an integral part of the M90. Use of any other type will result in damage.
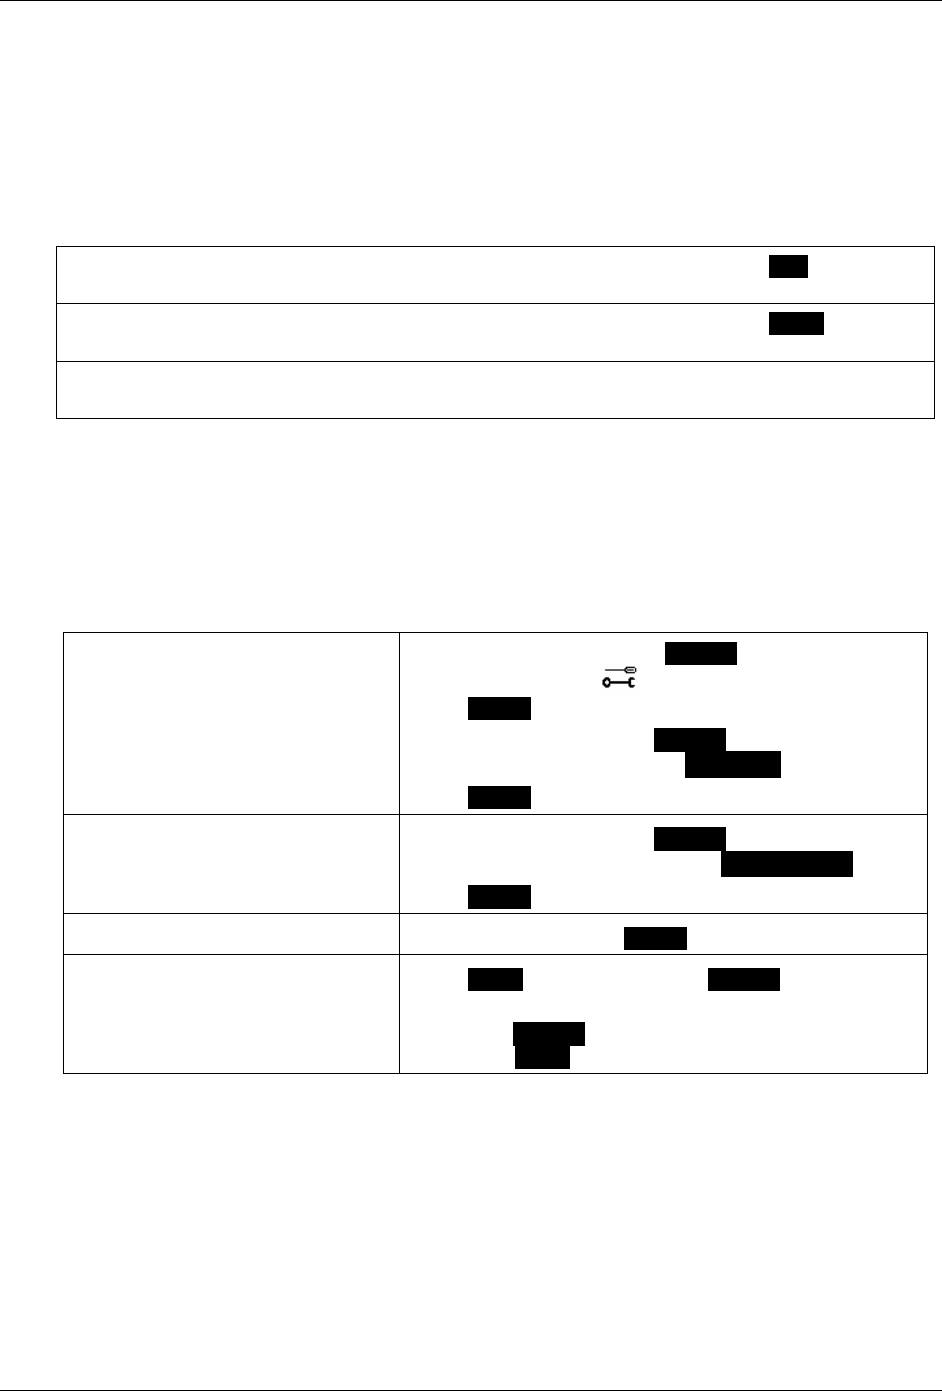
2.3 Charging the Battery
You must charge the battery before using your M90 for the first time. The battery may be recharged
at any time thereafter; it is not necessary to fully discharge the battery before recharging.
• Plug charger into 120V AC power source.
• Plug charger connector into rear socket of the M90 as
shown in illustration. Important: the “ ” symbol on the
connector must face upwards when inserting.
• Charging will begin and battery status icon will flash.
• Charging is complete when icon stops flashing. The charger
may now be disconnected and your M90 is ready to use.
• Important: Always remove the plug by pulling straight back.
Never pull up or down, or twist the plug.
• A full charge of a depleted battery typically takes 4-5 Hours,
but charging may be terminated before that, if required.
• When starting to charge a fully depleted battery, it may
require up to a half hour before the battery charges
sufficiently to activate the LCD display.
m90User’s Guide
8 © 2005 Unication Co., Ltd.
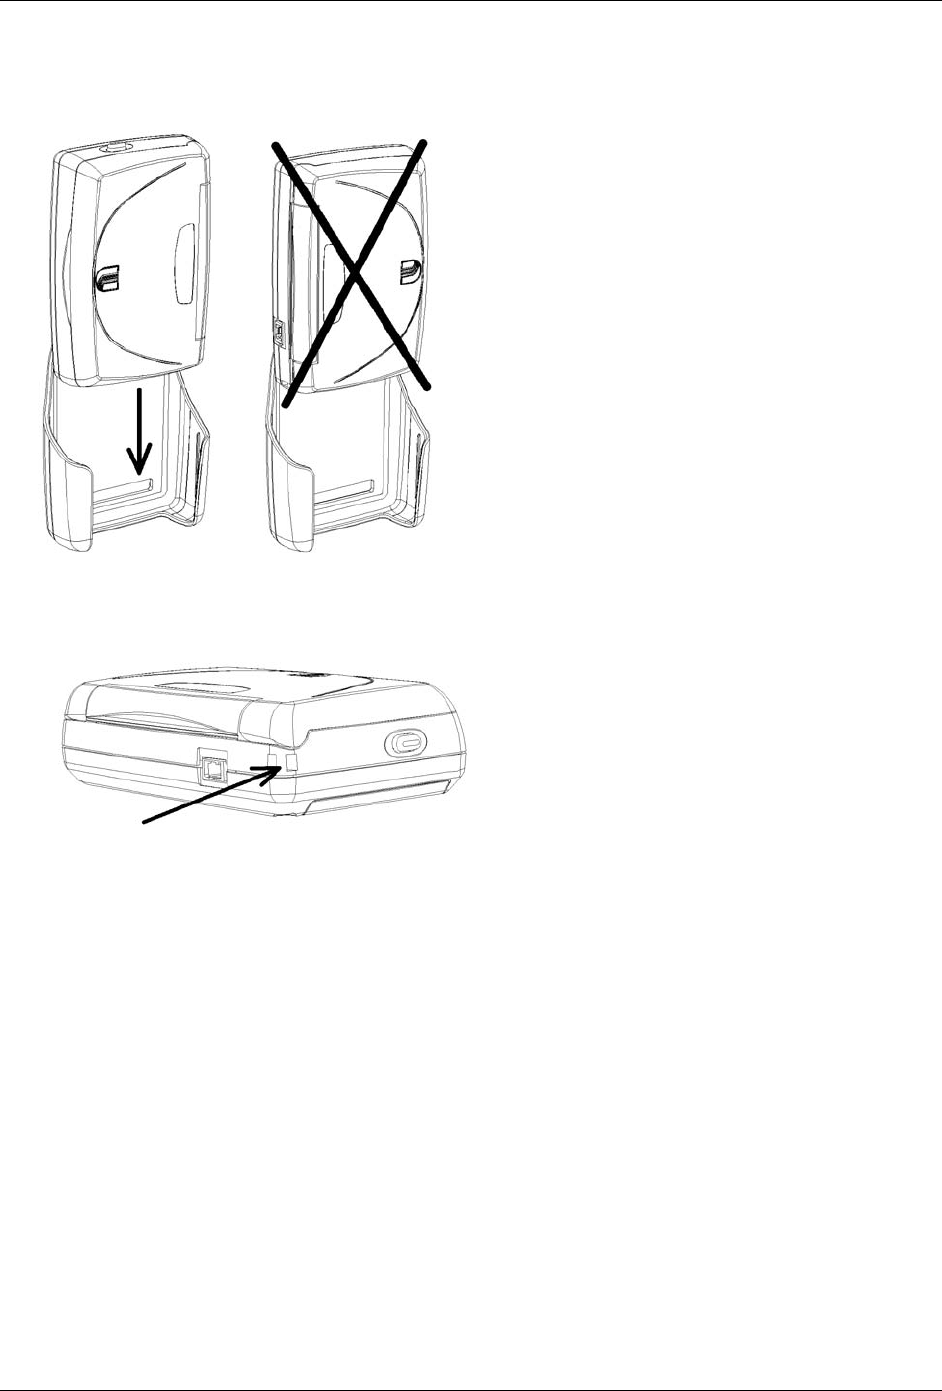
2.4 Using the M90 Holster
A belt-worn holster is provided with your M90. Use the holster as follows:
• Attach the holster securely to your belt using the
spring-loaded belt clip at the rear of the holster.
• Insert the M90 into the holster as shown in the
illustration to the left.
• The Alert Silence button on the left side of the
M90 must face upwards when inserting into the
holster.
• The M90 is firmly held in the holster, but may be
easily removed when you need to use it.
2.5 Attaching a Lanyard Cord
A post is provided at the left rear corner of the
M90 for attaching a lanyard cord.
m90User’s Guide
© 2005 Unication Co., Ltd.
9
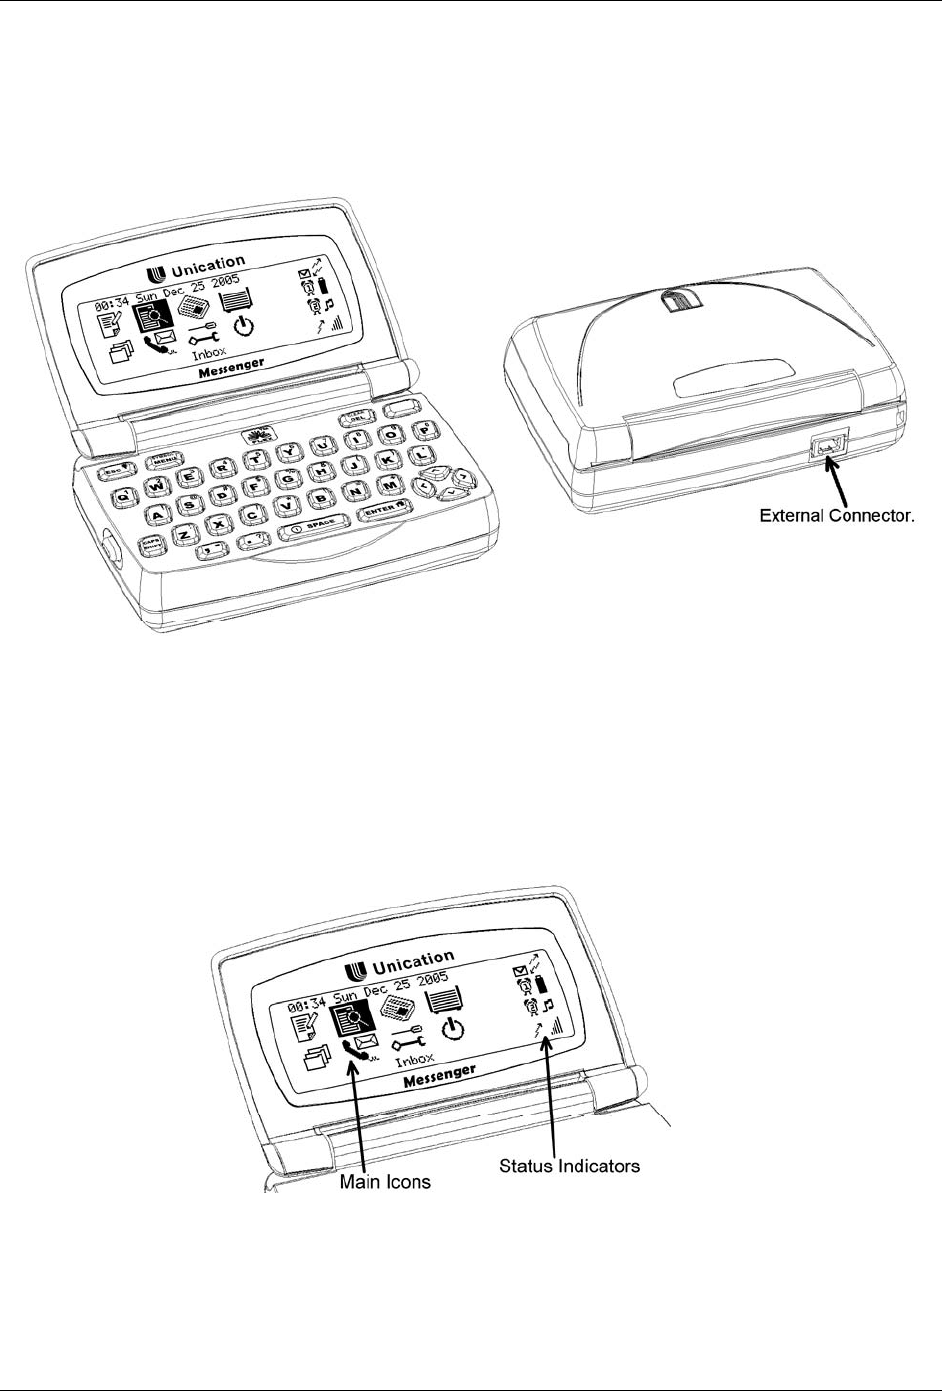
3. About Your M90
The main features of your M90 are the LCD display, the keyboard, the external connector on the back
edge, and the battery that is part of the rear housing.
Front Panel and Rear Views.
3.1 The LCD Display
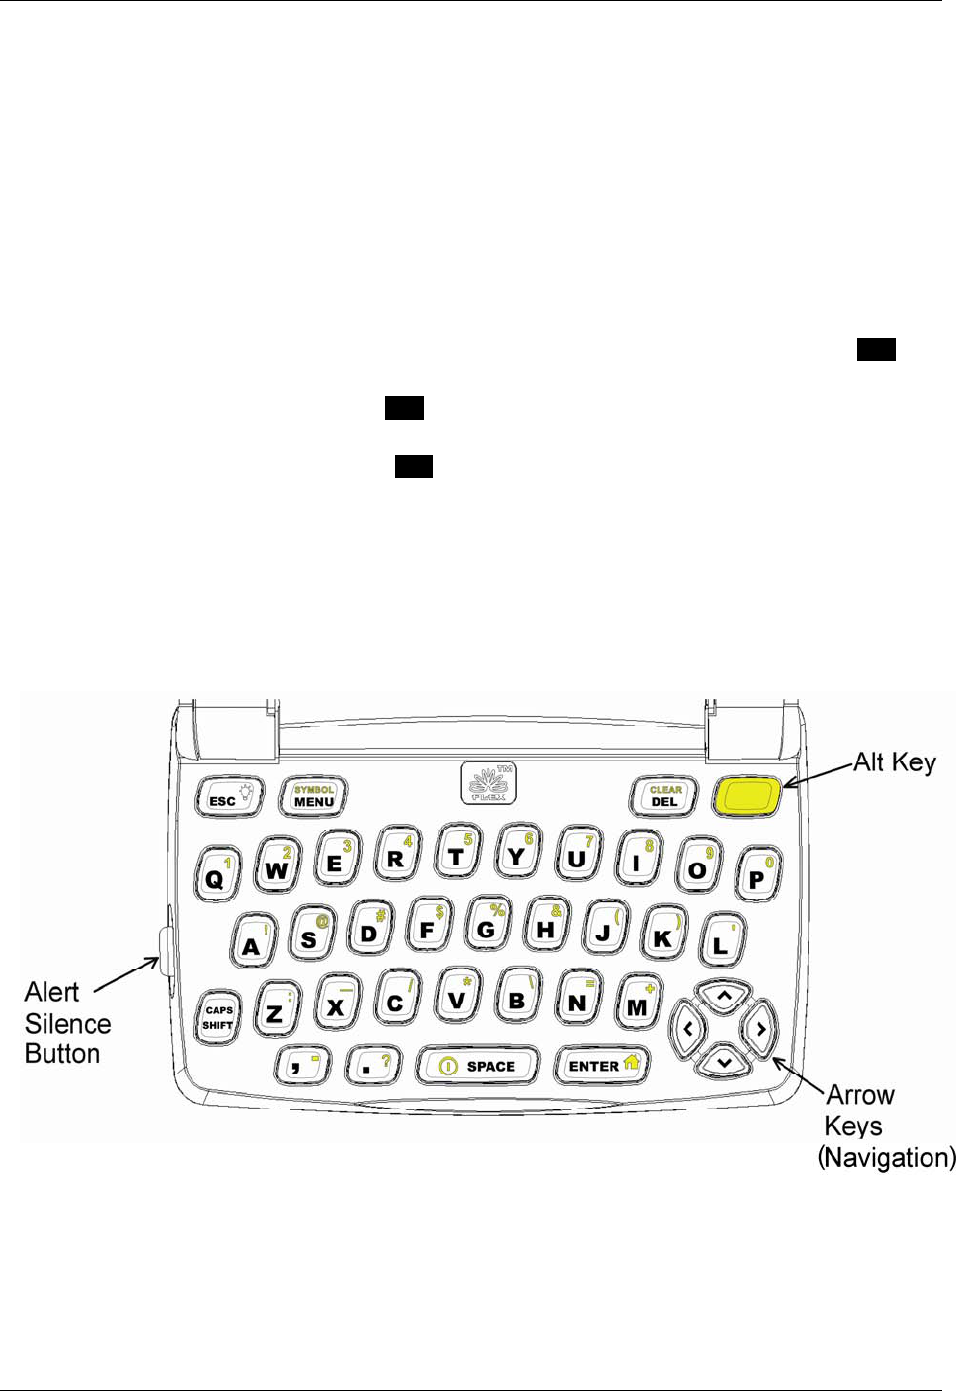
When you insert a charged Unication battery, the LCD will activate showing two groups of icons.
The larger icons to the left are the Main Menu; the smaller icons to the right are Status Indicators.
LCD Display
m90User’s Guide
10 © 2005 Unication Co., Ltd.
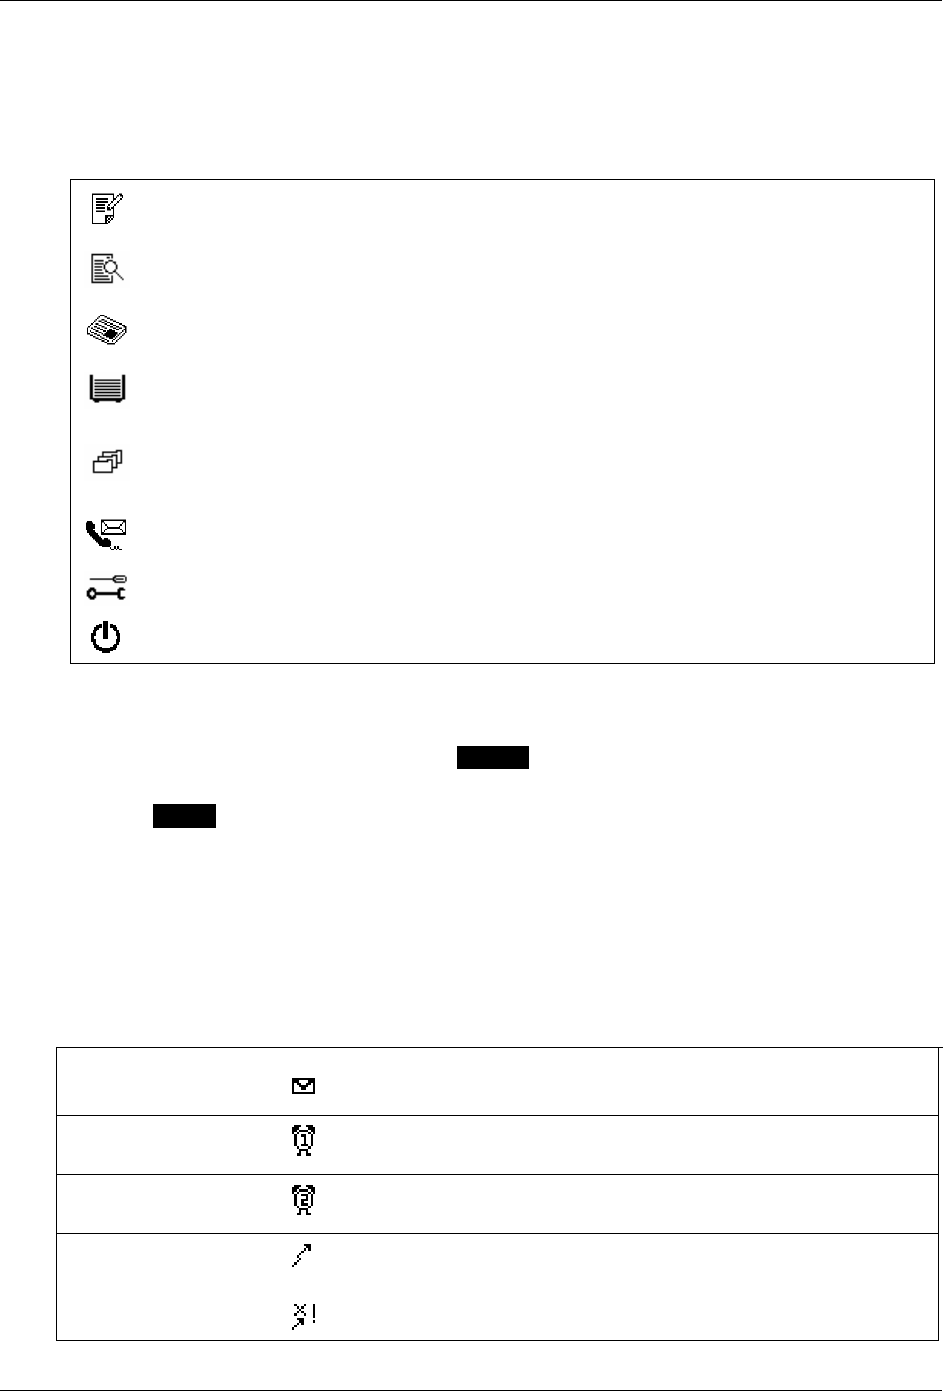
The Main Menu
The Main Menu displays icons that allow you to select the different functions of your M90. In the
order that they appear (left to right, top to bottom), the icons represent the following functions:
Selecting this Icon… Displays….
SEND A MESSAGE …the Compose Message screen.
You can create and send messages here.
INBOX …the contents of the Message Inbox (received messages).
You can read and respond to incoming messages here.
NEWS …the contents of the News Inbox (received messages and
subfolders). You can read News messages here.
OUTBOX …the contents of the Message Outbox (sent messages).
Outgoing messages are stored here.
FOLDERS …folders of memos, draft messages, and archived messages.
You can create memos, edit draft messages and archive news
and mail messages here.
ADDRESS BOOK …the Address Book list of contacts and groups.
You can create and store addresses here.
PREFERENCES …a list of Preference options that you can customize.
POWER OFF …turns the M90 OFF.
To access any of the options listed above, follow these steps:
1. Press the left, right, up or down ARROW keys until the desired icon is highlighted. The
name of each icon appears at the bottom of the display as it is highlighted.
2. Press ENTER. The menu for the selected icon appears on the display.
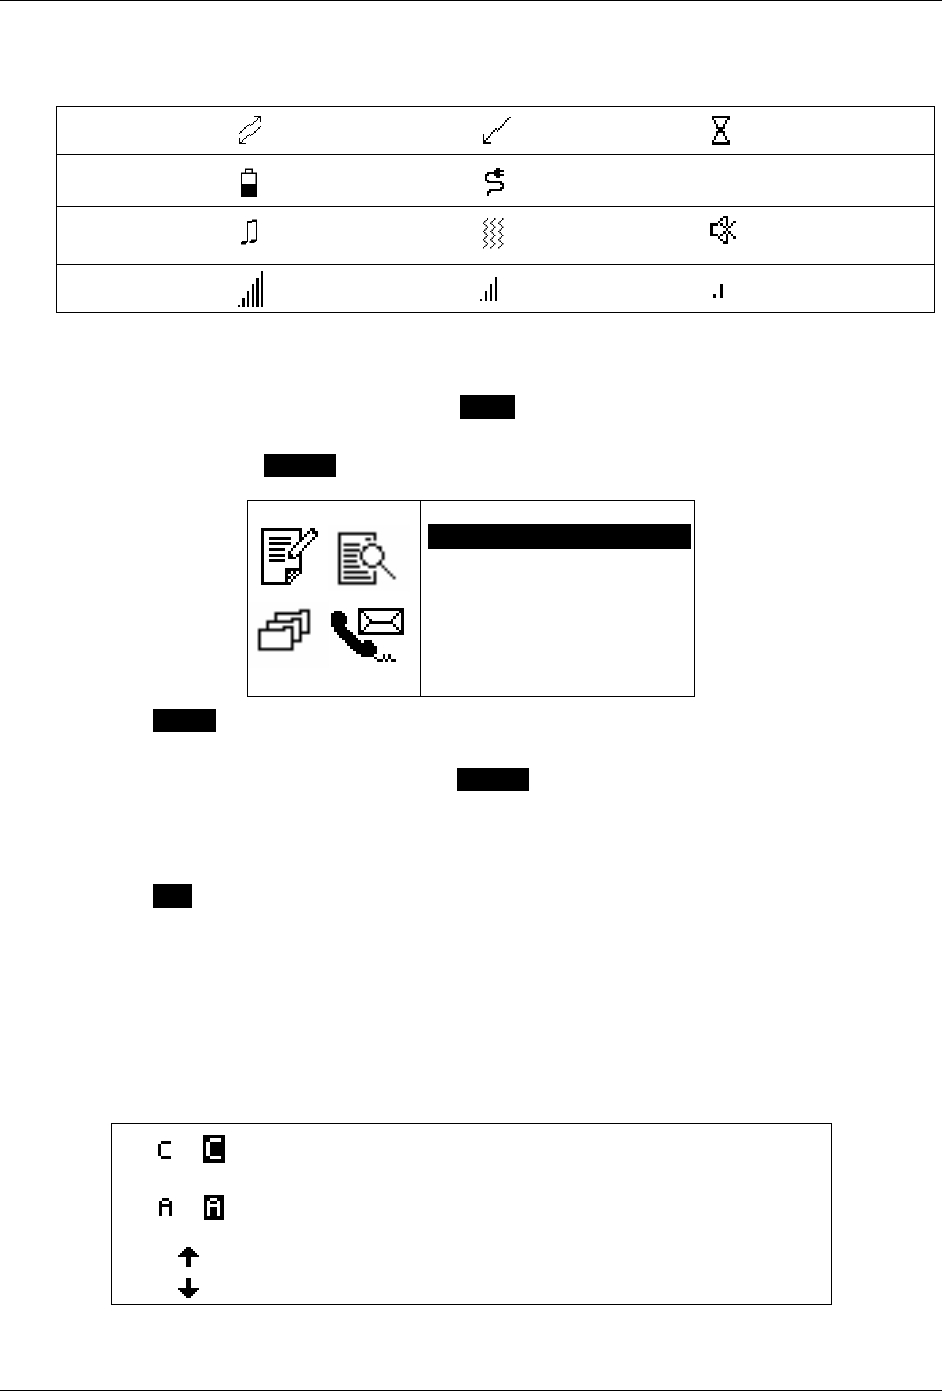
System Status Indicators
Status indicators are smaller icons on the right side of the LCD display screen. Their appearance
tells you important status information about your M90. The next two tables describe the status
indicators that you may see on your M90 Main Menu display, from left to right and top to bottom:
First column of status
indicators:
Unread Inbox Messages: Appears when there are Unread messages in the Inbox.
Flashes when there are new Unread messages.
Alarm#1: Only appears when alarm #1 is set.
Flashes when in Snooze Mode.
Alarm #2: Only appears when alarm #2 is set.
Flashes when in Snooze Mode.
Message Transmitting: Appears and flashes while message is transmitting.
Disappears when the transmission is completed.
Appears when the transmitter is turned off.
m90User’s Guide
© 2005 Unication Co., Ltd.
11
Second column of status indicators:
Coverage: 2-Way 1-Way No Coverage
Battery Life: Battery icon, 50%
charge remaining Battery charging
Alert Setting: Tone Vibrate Silent
Signal Strength*: High Medium Low
*Note: Signal Strength is visible if enabled by your service provider.
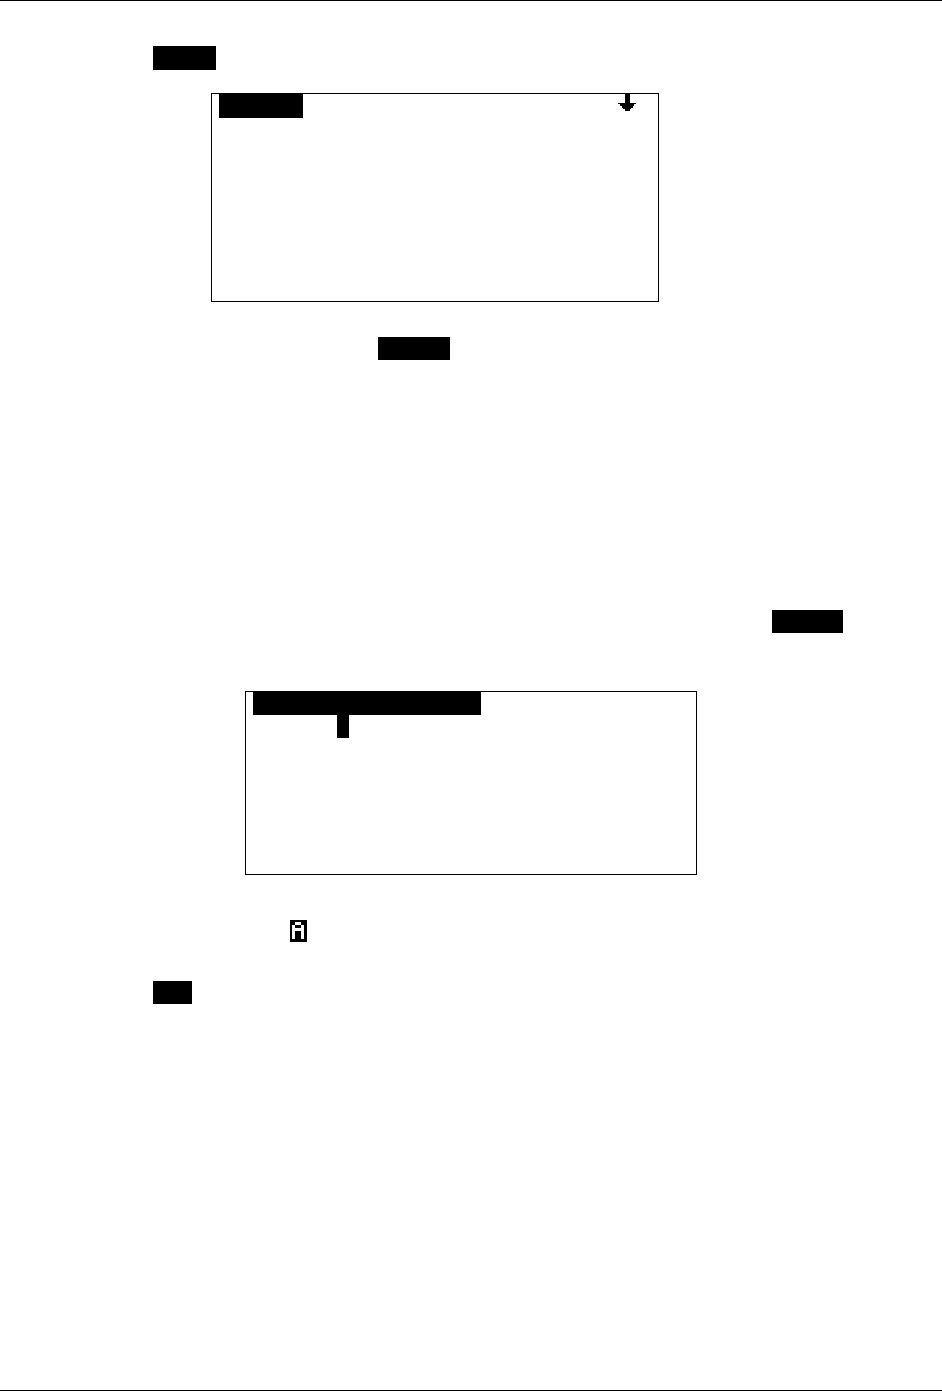
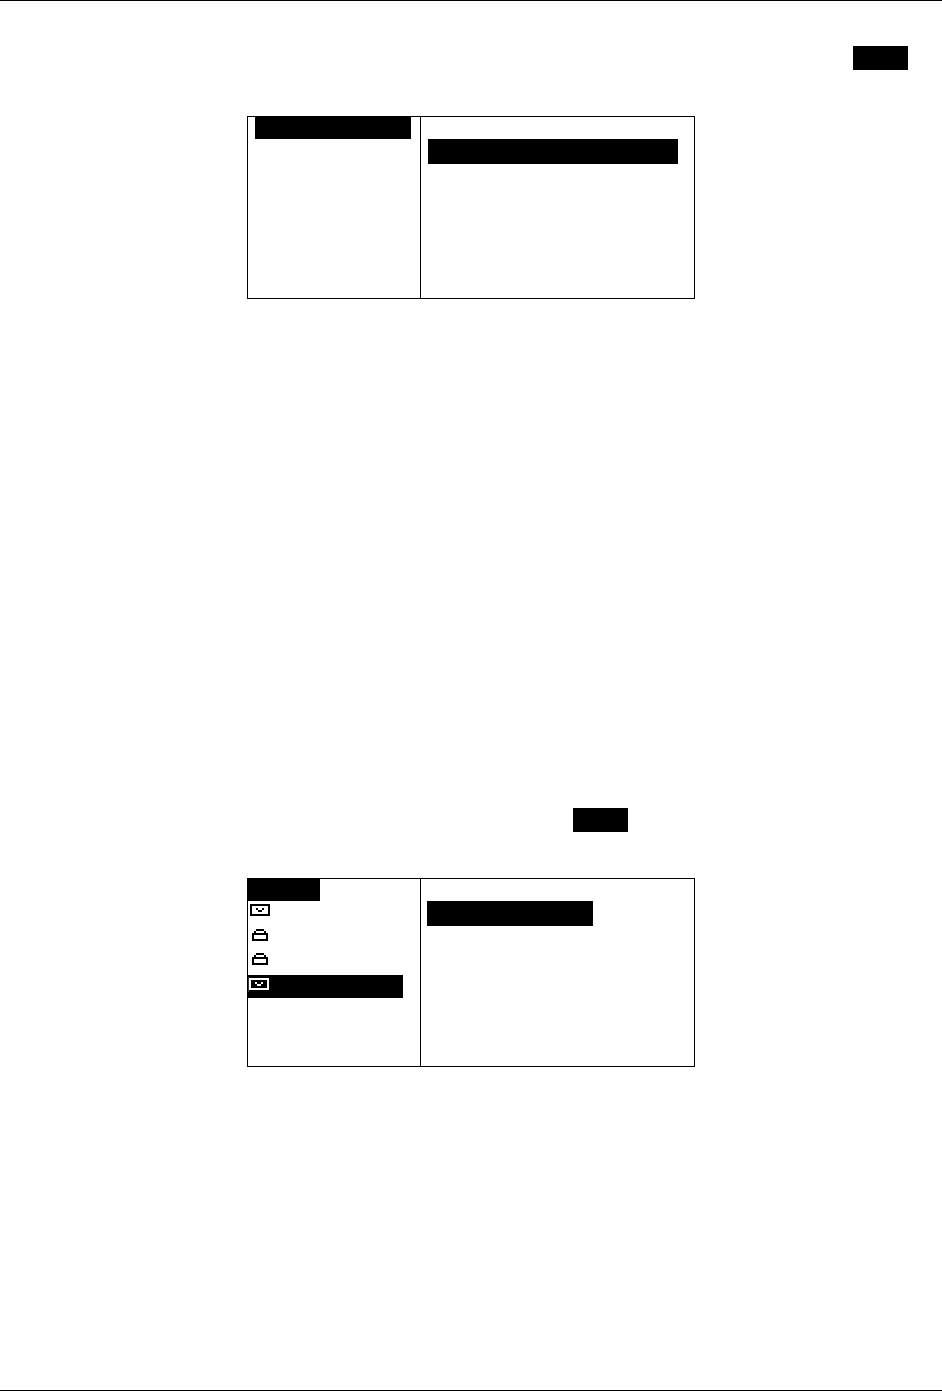
To view more detailed information for each status indicator:
1. While the Main Menu is displayed, press MENU. A popup menu appears on the right side of the
screen.
2. Press the down ARROW key until the item “Go To Status Icons” is highlighted.
06:16PM Th
OPTIONS
`Go To Status IconsOOO
`Silence Alerts
`Vibrate Alerts
`Alerts On
`Transmitter Off
`Power Off
`Keyboard Lock
3. Press ENTER. The top icon in the first column of status indicators is highlighted, and text
describing the icon appears at the bottom of the screen.
4. Press the left, right, up or down ARROW keys to move from icon to icon. Detailed
information about each icon appears at the bottom of the screen as the icon is highlighted.
For example, when the Battery Life icon is highlighted, the text “Battery: N%” will appear at the
bottom of the screen (‘N’ is the percentage of charge remaining on the battery).
5. Press ESC to return to the Main Menu.
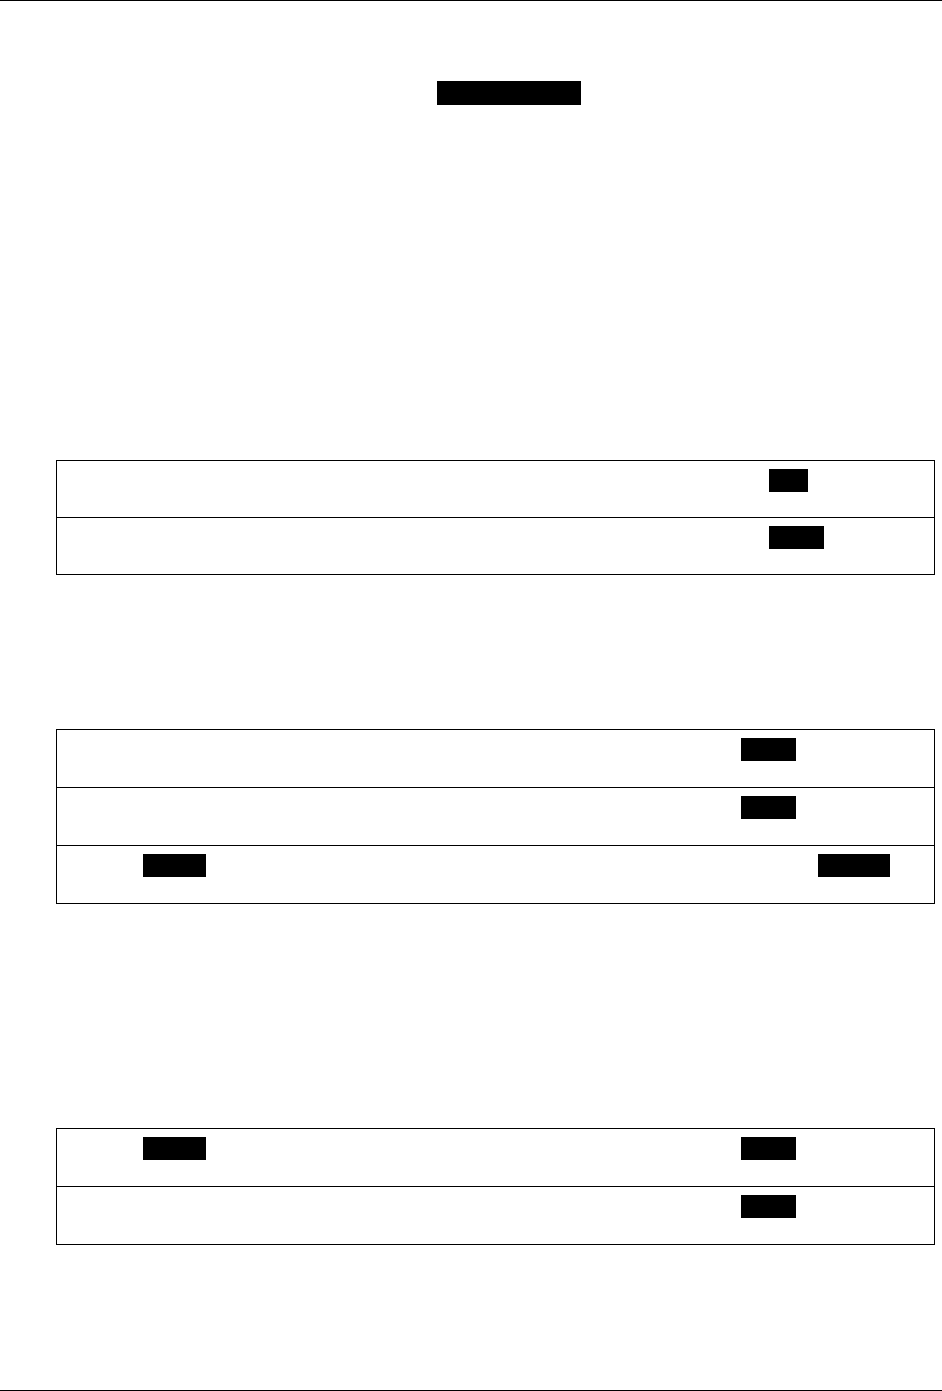
Device Mode Indicators
Device mode indicators appear in the upper right corner of the LCD display when certain device
modes are in effect. They will not appear on the Main Menu display, but can appear in other screen
displays. For example, the Caps Lock icon will appear when you press the Shift key twice to enable
Shift Lock.
This Indicator… tells you…
or SHIFT (for typing a single uppercase letter) or
SHIFT Lock (for multiple uppercase letters) is on.
or ALT (for typing a single number or special character) or
ALT Lock (for multiple numbers/special characters) is on.
You can scroll UP to view more text or menu items.
You can scroll DOWN to view more text or menu items.
m90User’s Guide
12 © 2005 Unication Co., Ltd.
3.2 The External Connector
An external connector is located on the back edge of your M90. This connector accepts both the
120 V AC power transformer cable for battery recharging, and the RS232-compatible serial cable
to allow data exchange between the M90 and a PC-compatible computer.
3.3 The Back Light
The LCD display and keyboard keys can be backlit for use in low light conditions. Use the ESC key
to turn the back light on and off.
1. To turn ON the back light, press ESC and hold down for 2 seconds until the back light turns on.
The LCD display and all key labels will be lit.
2. To turn OFF the back light, press ESC and hold down 2 seconds until the back light turns off.
The back light will turn off automatically after the device has been idle (i.e. a key has not been
pressed) for a period of time. You can specify the idle time length in the Preferences menu:
Options J Screen Timeout (see Customizing Display Features on page 55).
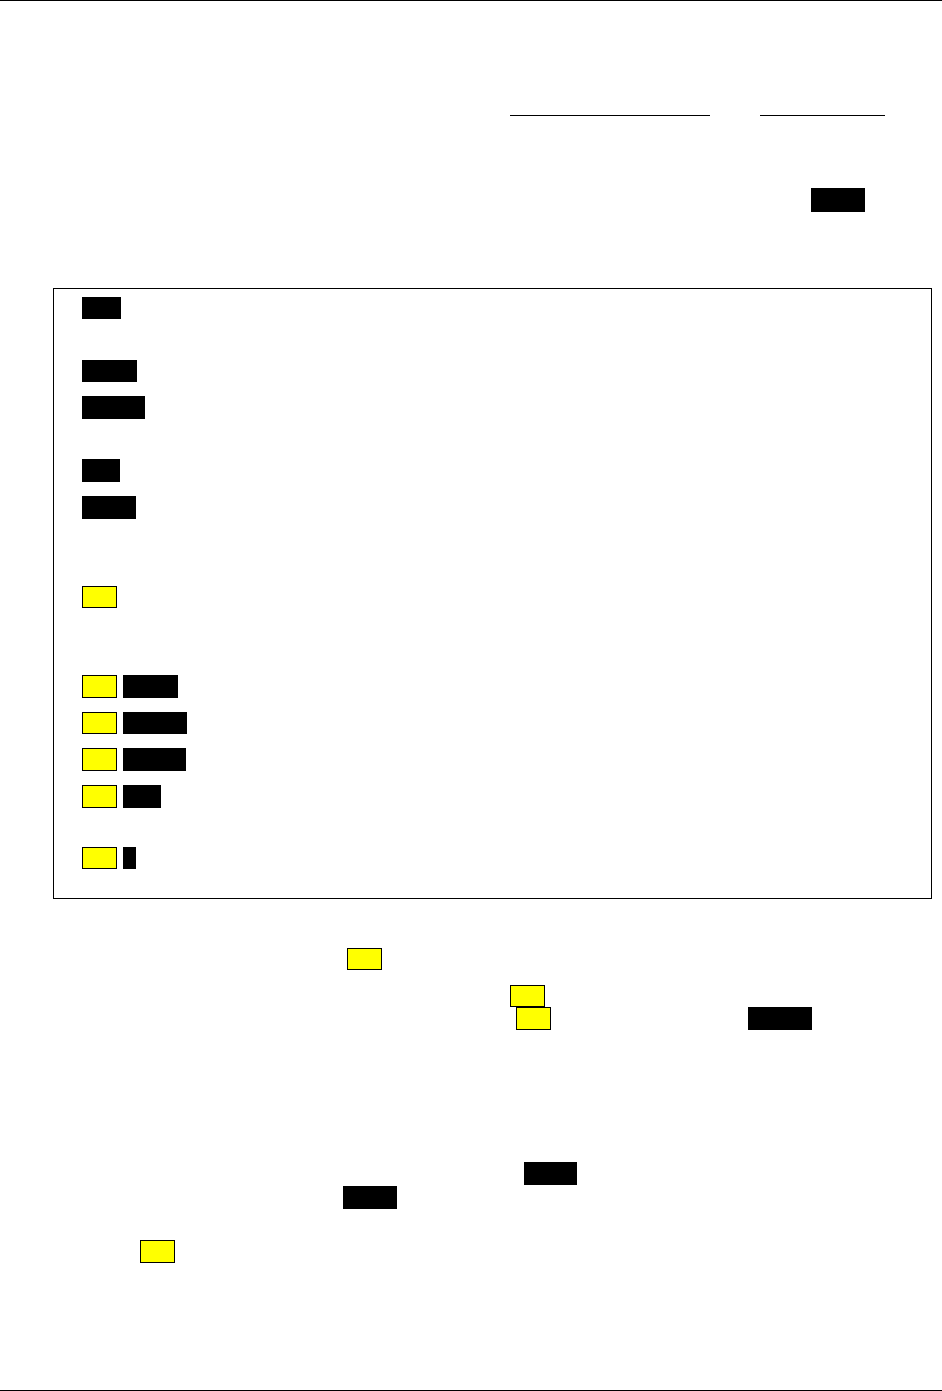
3.4 The Keyboard and Alert Silence Button
The Keyboard
m90User’s Guide
© 2005 Unication Co., Ltd.
13
Keyboard Functions
The keyboard contains two different kinds of keys: Control (function) keys, and Text Edit keys.
Control Keys
The Control keys are located in the top and bottom rows of the keyboard (except the SHIFT key,
which is in the lower left corner of the keyboard). The control keys can be used to do the following:
Press this key …to do this:
ESC − Once to exit from current submenu or text screen.
− Hold to turn backlight on or off.
MENU − Display a popup menu on the right side of the screen, if one is available.
ENTER − To display a highlighted menu.
− Page down while viewing a message.
DEL − Delete one character to the left of the cursor.
SHIFT − Once to type an uppercase letter;
− Twice for Caps Lock (all uppercase);
− Once again to return to lowercase characters.
ALT − Once to type a number or special character (yellow on text entry keys);
− Twice for Alt Lock (all numbers or special characters);
− Once again to return to normal characters.
ALT-MENU − Access special symbols not displayed on the keyboard text entry keys.
ALT-SPACE − Turn off the M90.
ALT-ENTER − Return to Main Menu.
ALT-DEL − Clear (delete) all characters in the current field;
- Delete current message/memo/Quick Text in the list screen.
ALT-L This is a special key sequence that locks/unlocks the keyboard from the Main
Menu.
Note the following:
• There is no label on the ALT key. It is simply colored yellow.
• To execute the above 2-key functions, the ALT key must be released before pressing the next
key. For example, to turn the M90 off, press the ALT key, and then press the SPACE key.
Text Entry Keys
Each regular keyboard key is capable of producing 3 kinds of text:
• Lowercase characters
• Uppercase characters (press, then release SHIFT before pressing the character you want
in uppercase, or press SHIFT twice to lock uppercase “on” for all subsequent characters).
• Numbers and Special Characters (appear yellow on text entry keys; press and release
ALT before pressing the desired character’s key).
m90User’s Guide
14 © 2005 Unication Co., Ltd.
Alert Silence Button
The M90 is equipped with a side mounted ALERT SILENCE button to allow the user to quickly
silence message and alarm alerts while the M90 remains in its holster. Pressing this button will
immediately silence message and alarm alerts.
3.5 Shortcuts for Navigating
To speed up the navigation process, you may want to use some of the following shortcuts or
alternatives:
Shortcuts for basic navigation
In most screens and all Option Popup Menus:
Use this shortcut… …in place of…
Press
(left)
to return to previous menu pressing ESC
Press
(right)
to display a popup menu on the right pressing MENU
Shortcuts for viewing Messages/Memos/Quick Text
While viewing a message, memo or Quick Text, the following shortcuts can be used:
Use this shortcut… …in place of…
Press
(left)
to display previous message pressing MENU and selecting
Previous Message
Press
(right)
to display next message pressing MENU and selecting
Next Message
Press ENTER to page down one screen pressing down ARROW key
multiple times
Shortcuts to enter an address in Send a Message
While in the To field in Send a Message, you may want to use the following shortcuts:
Use this shortcut… …in place of…
Press ENTER
to display the Address Book pressing MENU and selecting
Select Address
Enter characters to display the manual address entry screen pressing MENU and selecting
Manual Entry
m90User’s Guide
© 2005 Unication Co., Ltd.
15
Shortcuts for the Address Book
While viewing the address book list (either through Send a Message or Address Book), you may
use the following shortcuts:
Use this shortcut… …in place of…
Press
(left)
to return to previous menu pressing ESC
Press
(right)
to display a popup menu on the right pressing MENU
Press first letter
of Contact name to search for Contact name beginning with
that letter pressing up or down
multiple times
3.6 Navigation Conventions in this Manual
In this manual various operations are described using the navigation conventions described below.
This… means….
Go to PREFERENCES → Options In the Main Menu, press the ARROW keys until the
PREFERENCES icon ( ) is highlighted.
Press ENTER to display the Preferences menu.
Press the up or down ARROW key until the
`Options item is highlighted (`Options).
Press ENTER to display the Options submenu.
Select New Folder Press the up or down ARROW key until the menu
item `New Folder is highlighted (`New Folder).
Press ENTER to display the New Folder screen.
Set to “Yes” In an option field, press ENTER until “Yes” is displayed.
Open a popup menu Press MENU or press the right ARROW key.
In Edit Text or View Message Modes, you cannot press
the right ARROW key to open the popup menu, you
must press MENU.

m90User’s Guide
16 © 2005 Unication Co., Ltd.
3.7 Your Personal Memory
Your device contains 3 different areas of memory: Personal, Address Book, and News. Each area
of memory can contain different amounts of information as customized by your service provider.
The following are stored in the Personal Memory area:
• Inbox
• Outbox
• Folders (Drafts, Memos, Personal Folder)
• Quick Text
Automatic Deletion when Personal Memory is Full
Eventually your Personal Memory will get full if you don’t delete messages from your Outbox and
Inbox, or if you store many messages/memos in Folders. Your M90 will automatically delete Inbox
and Outbox messages to make room for new incoming Inbox messages, or new outgoing
messages (including replies and forwards), or new memos. The order of priority for automatic
deletion is:
1. The oldest Inbox messages marked as Read, or Outbox messages marked as failed or
sent, are deleted first.
2. If all of the above messages have been deleted, or all messages are unread, then the
oldest Inbox messages marked as Unread are deleted.
Go to PREFERENCES → About to see the amount of Personal Memory being currently consumed.
Note: If you do not want a message to be automatically deleted when Personal Memory gets
full, then you must move that message into a Personal Folder.
3.8 Help
The M90 contains a built in help folder. To view help:
1. Select the FOLDERS icon from the Main Menu.
2. Select Help from the Folders menu.

m90User’s Guide
© 2005 Unication Co., Ltd.
17
4. Setting Up Your M90
Your M90 comes with certain options already set for you. You can change any of the options listed
in the Preferences Menu. Some settings, such as Owner Information and Signature, are not set in
advance, so you will want to configure them as soon as possible.
4.1 Viewing System Information
To view useful system information about your M90:
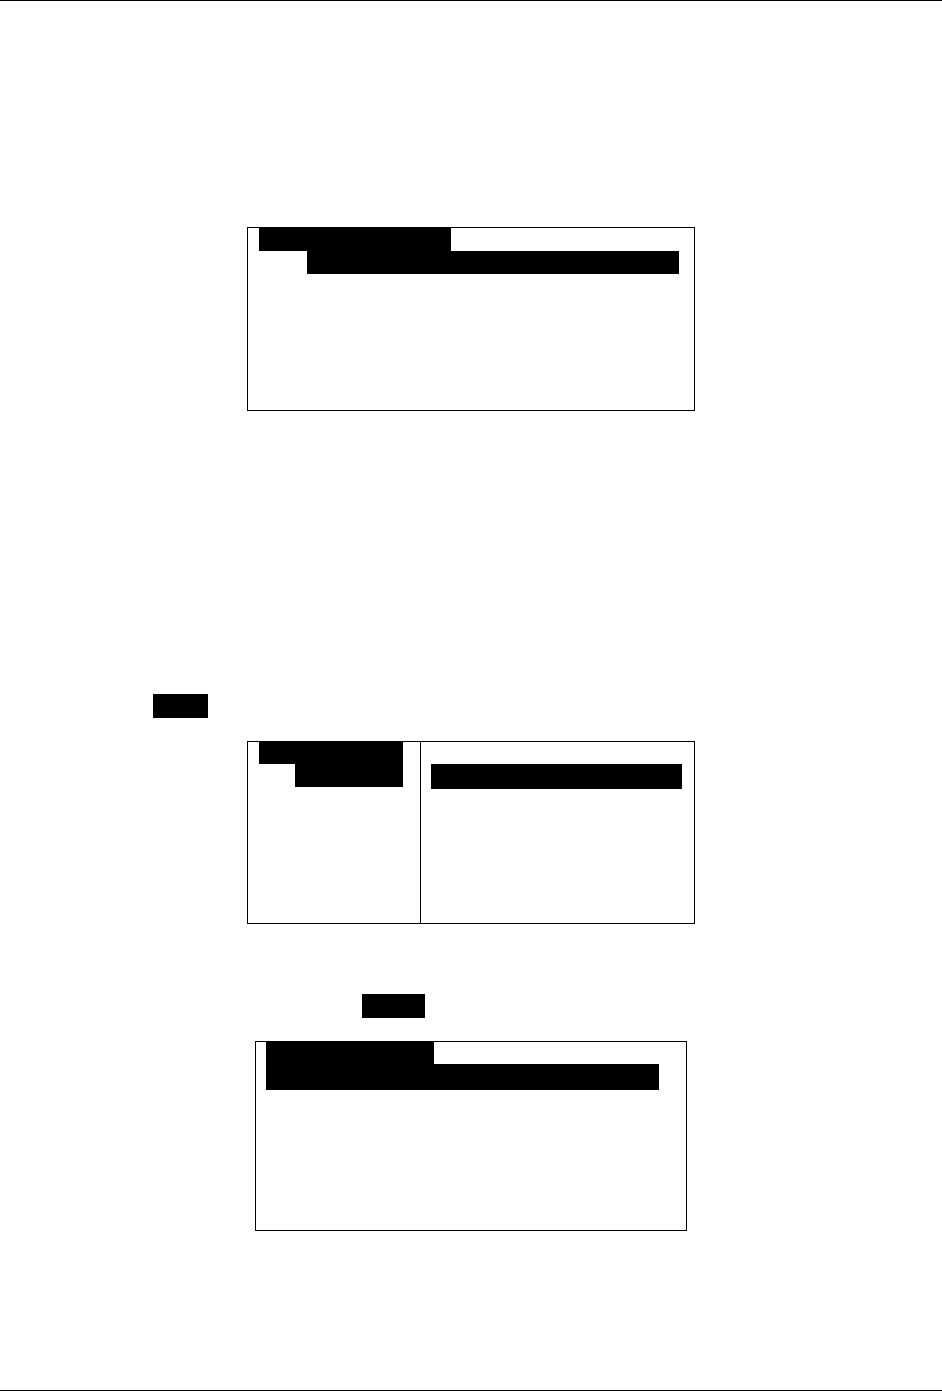
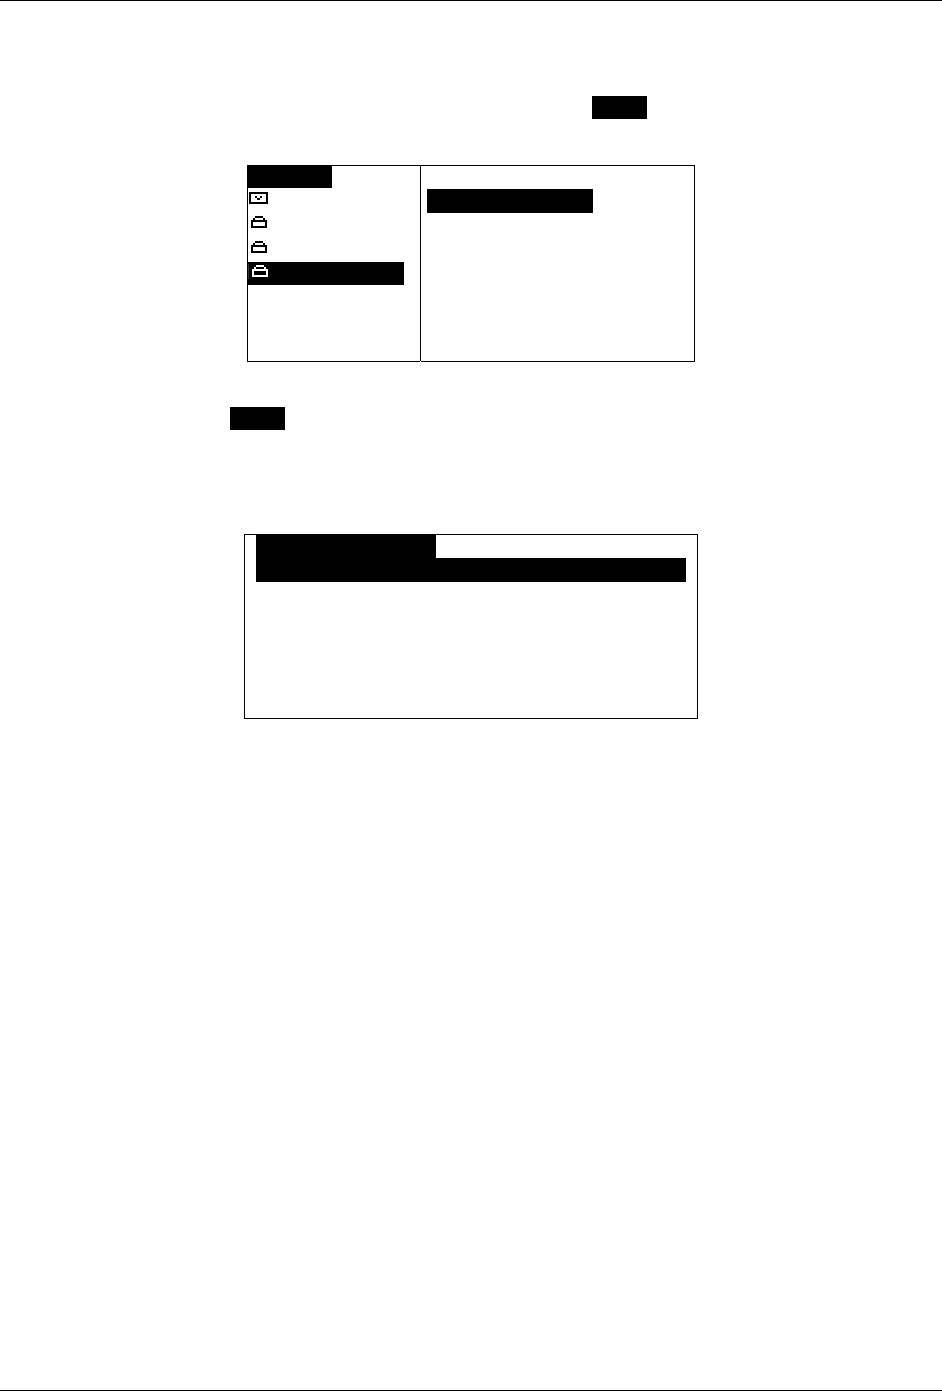
1. Select the PREFERENCES icon in the Main Menu.
Press the ARROW keys to move to the Preferences icon (it will be highlighted),
then press ENTER to select it.
The Preferences menu appears in the LCD display.
PREFERENCES
fAlarm ClockOOOOOOOOOOOOOOOOOOOOOOO
fDate and Time
fMailbox Alerts
fOptions
fOwner Information
fPrivate Time
fQuick Text
Arrow in the top right corner indicates there are
more options below, use the down ARROW
key to scroll downward.
This view and others in this User’s Guide show an 8-line display; for a larger font you can set
your M90 to display only 5 lines. See Customizing Display Features on page 55.
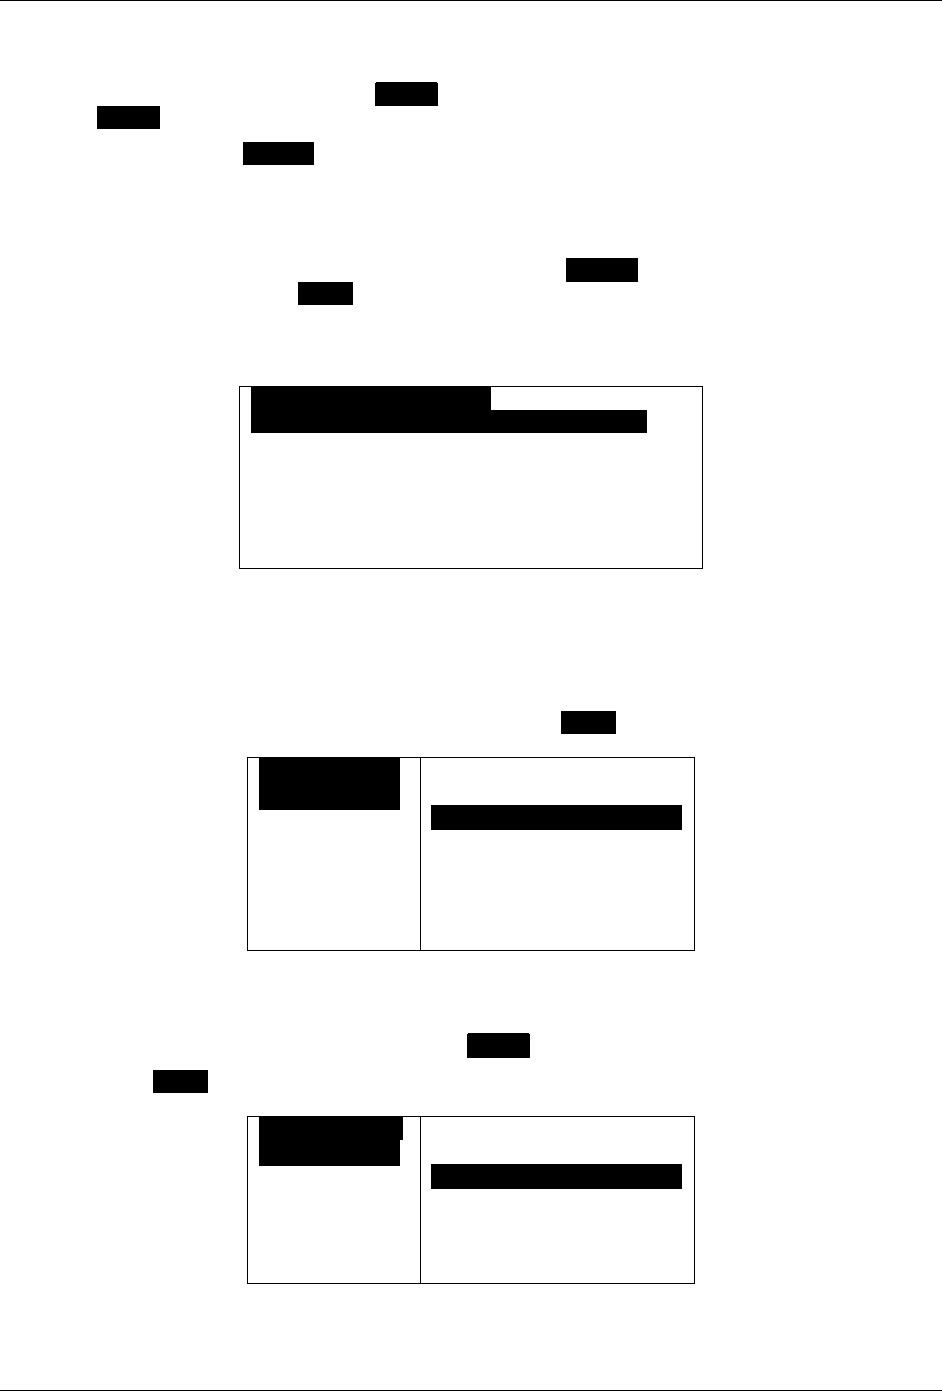
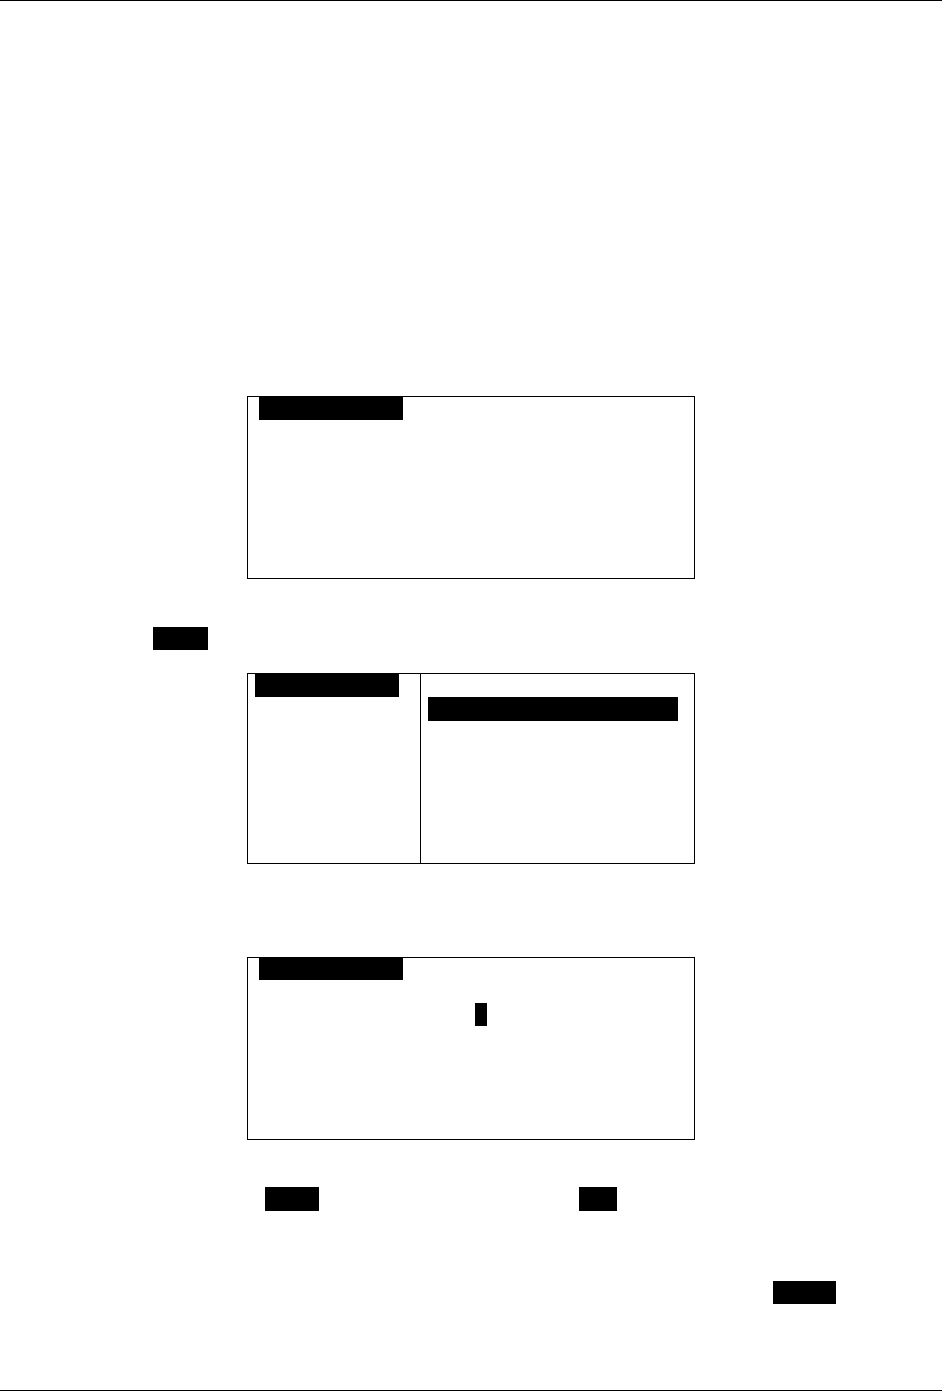
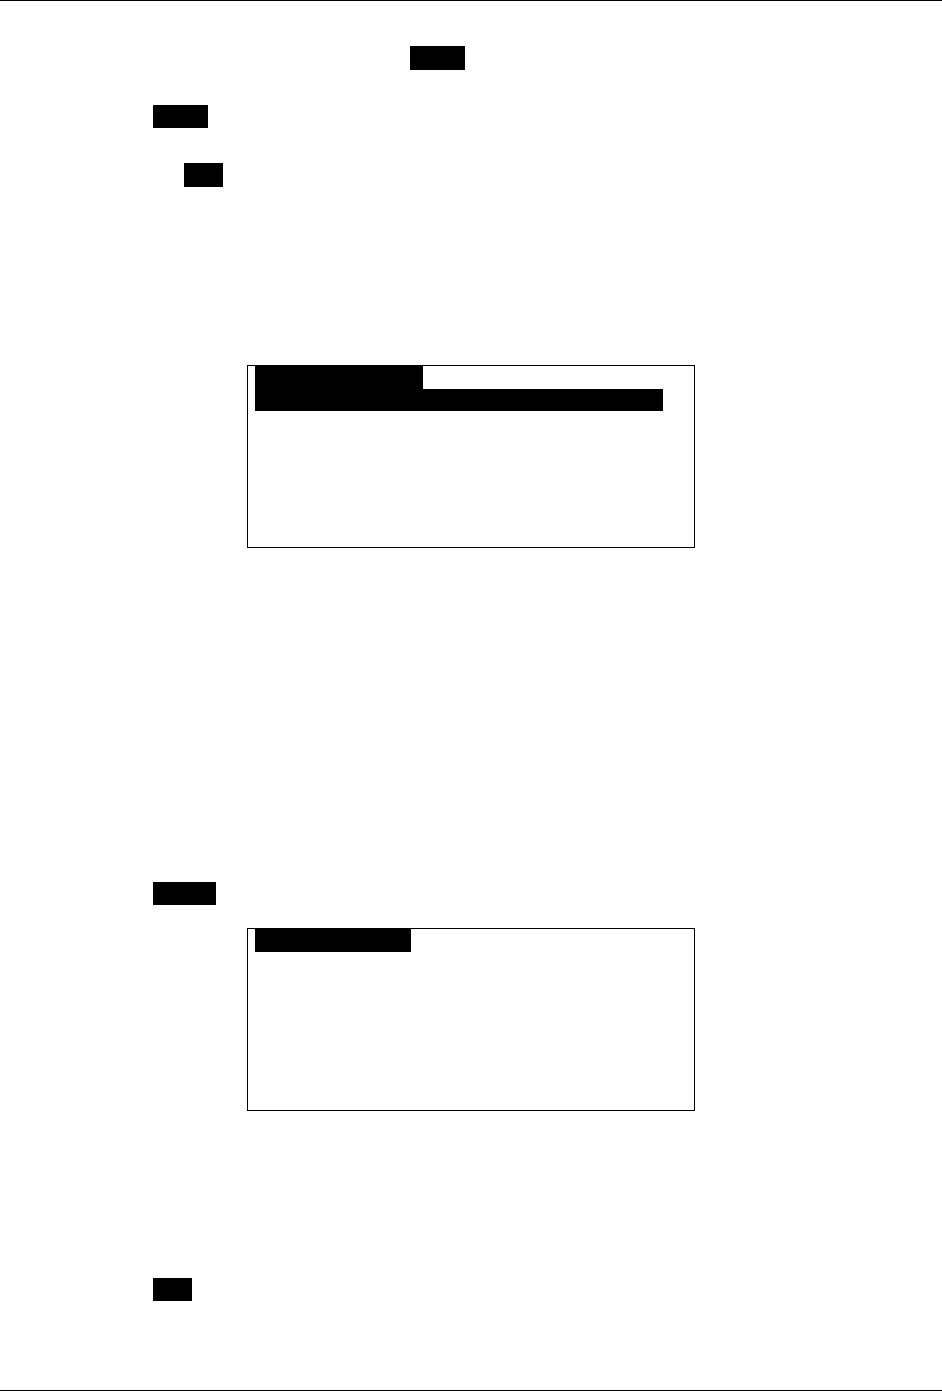
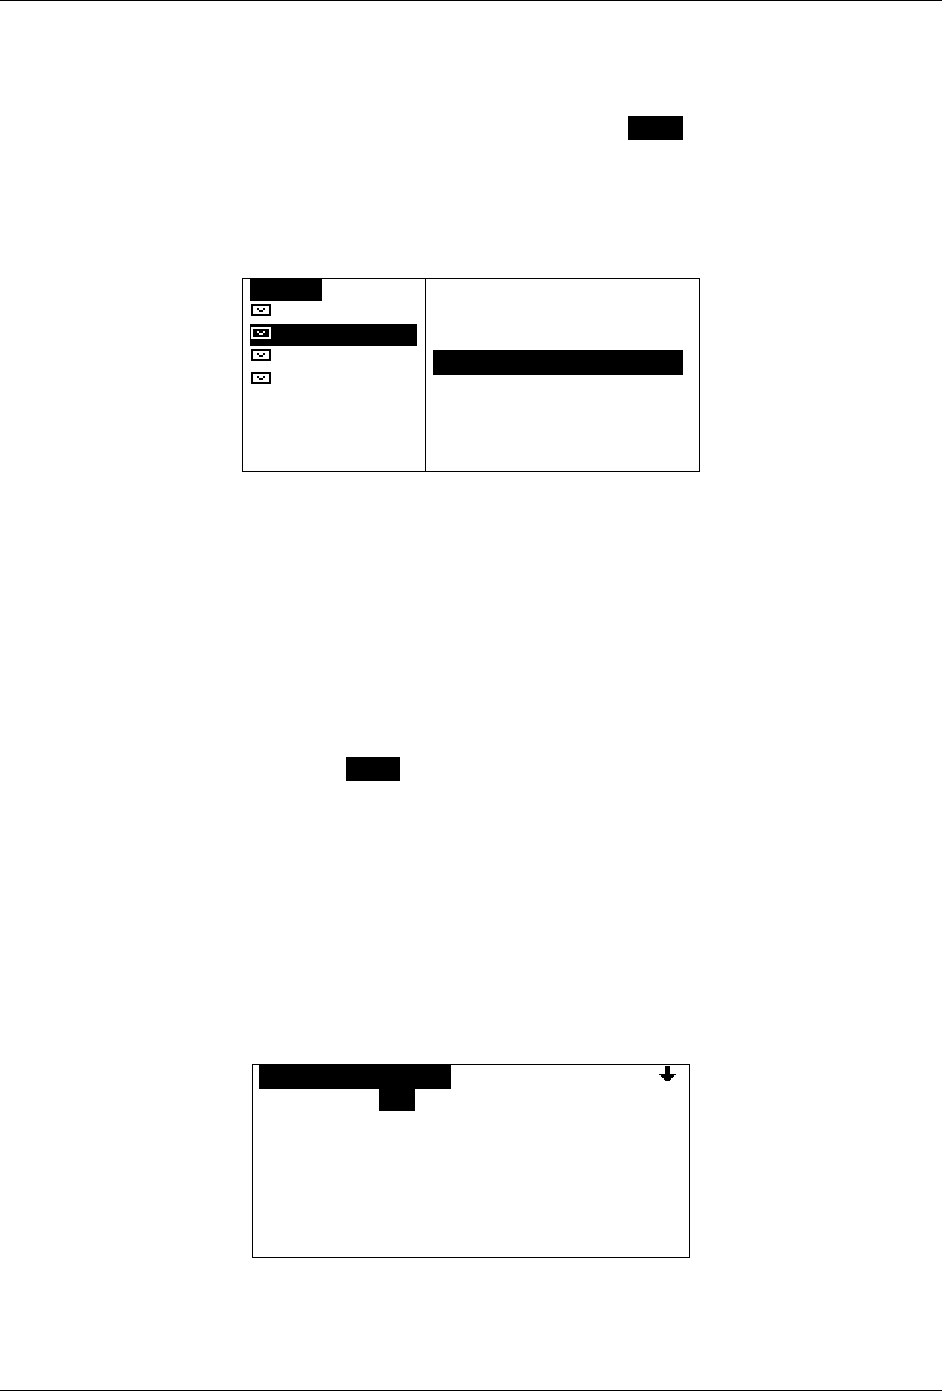
2. Select About from the Preferences menu.
Press the down ARROW key until About appears in the display and is highlighted:
PREFERENCES
fOptions
fOwner Information
fPrivate Time
fQuick Text
fMessage Timestamp
fSignature
fAboutOOOOOOOOOOOOOOOOOOOOOOOOOOOO
Arrow in the top right corner indicates there are
more options above, use the up ARROW key
to scroll upward.
m90User’s Guide
18 © 2005 Unication Co., Ltd.
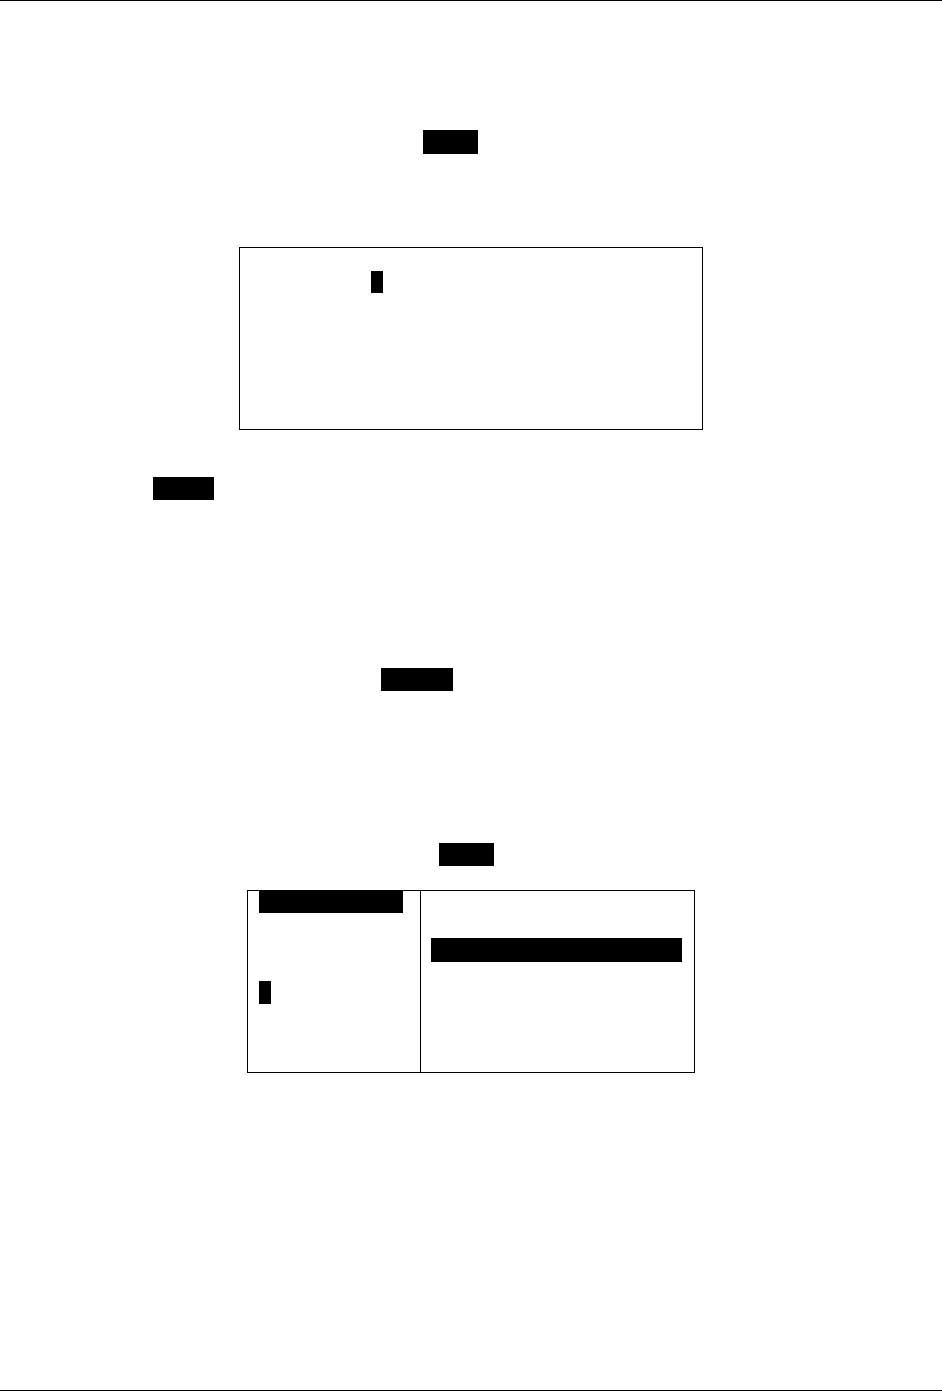
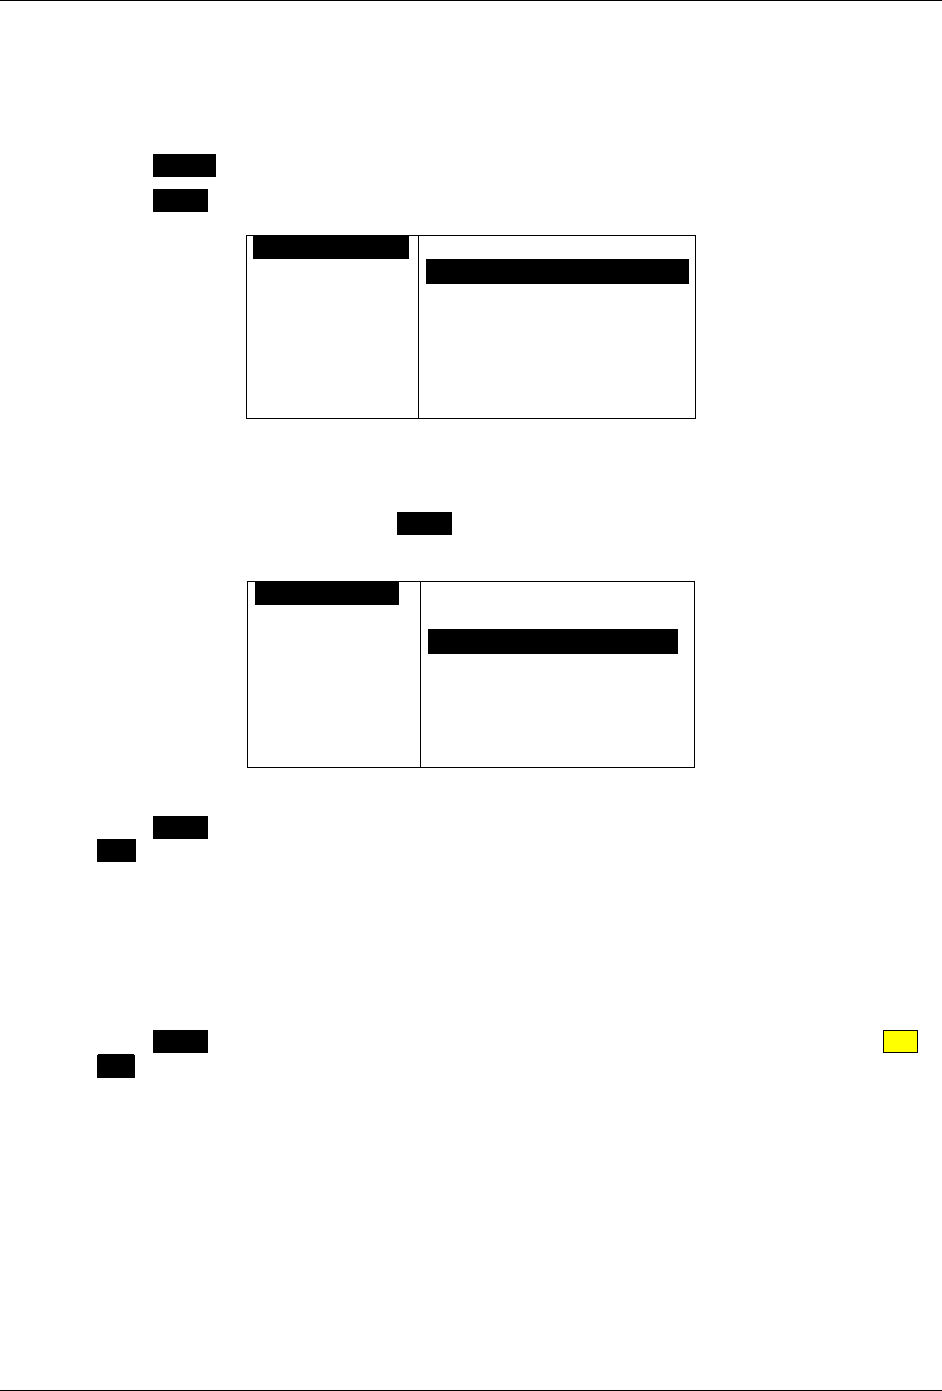
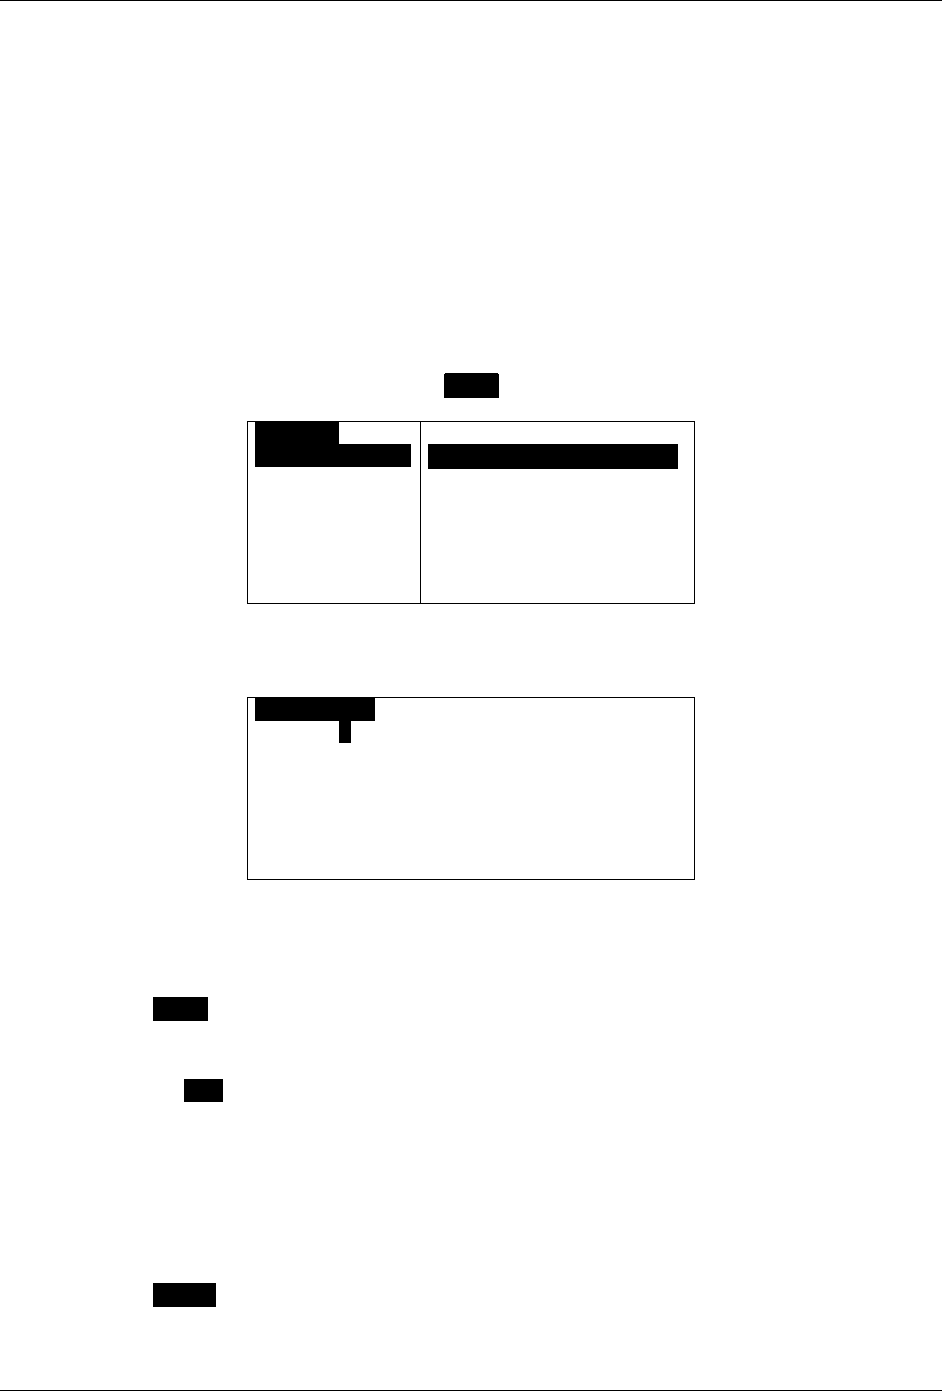
3. Press ENTER to display the About screen:
OABOUTO
Coverage: 2 way
Battery Charged: 80%
Memory Used
Personal: 13%
Address Book: 55%
News: 21%
Serial Number: 123456
S/W version: 2.03
- network service level
- % battery charge level
- % of memory used in:
Personal Area
Address Book
News
- device serial number
- software version number
4. When finished, press the left ARROW key to exit from the About display and return to the
Preferences menu.
For more information about Personal Memory see Your Personal Memory on page 16.
4.2 Entering Owner Information
To enter personal contact information:
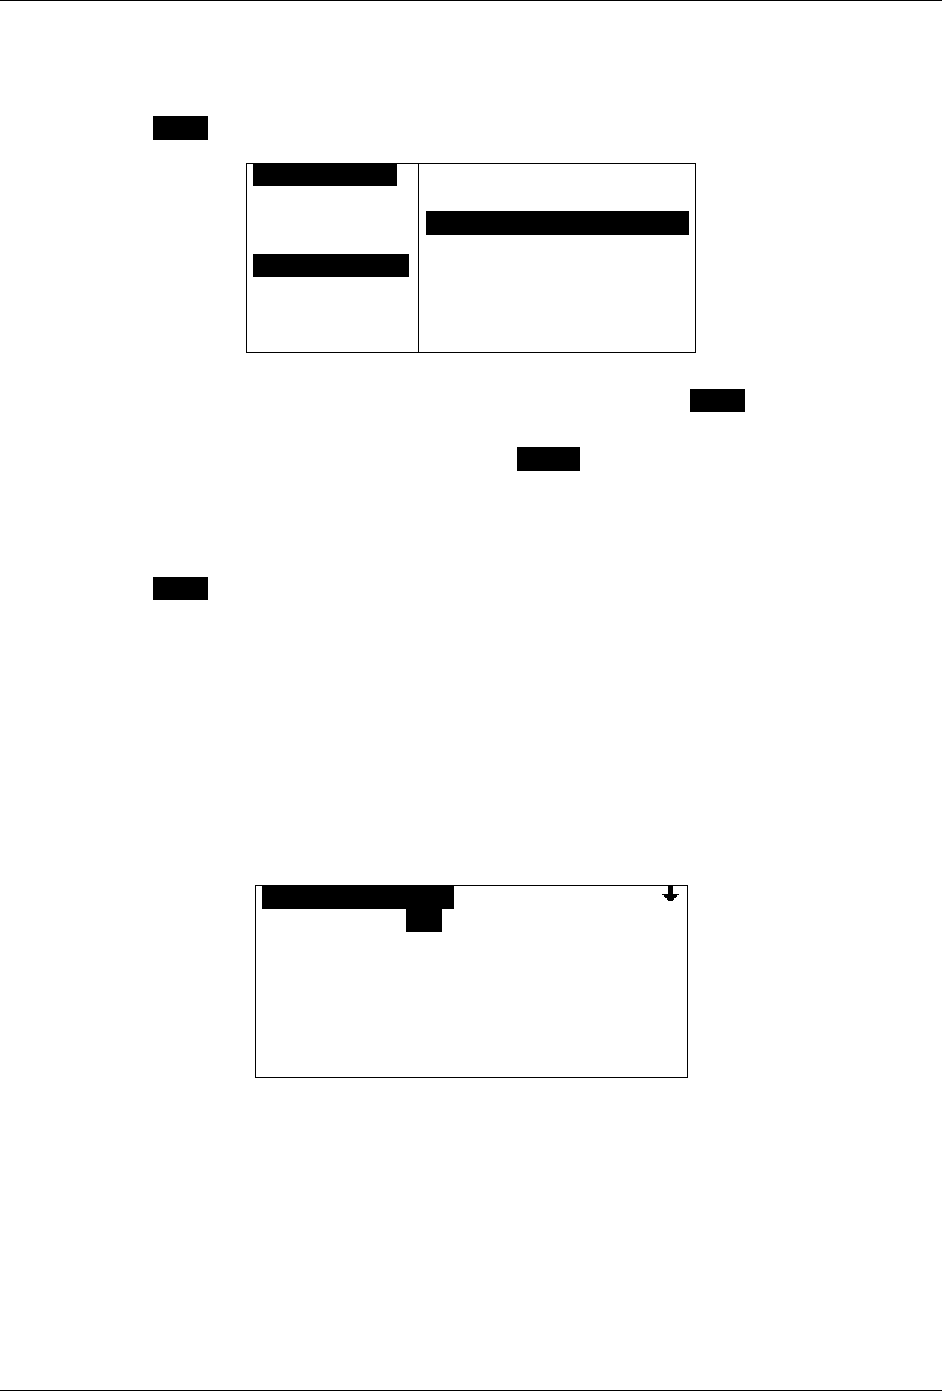
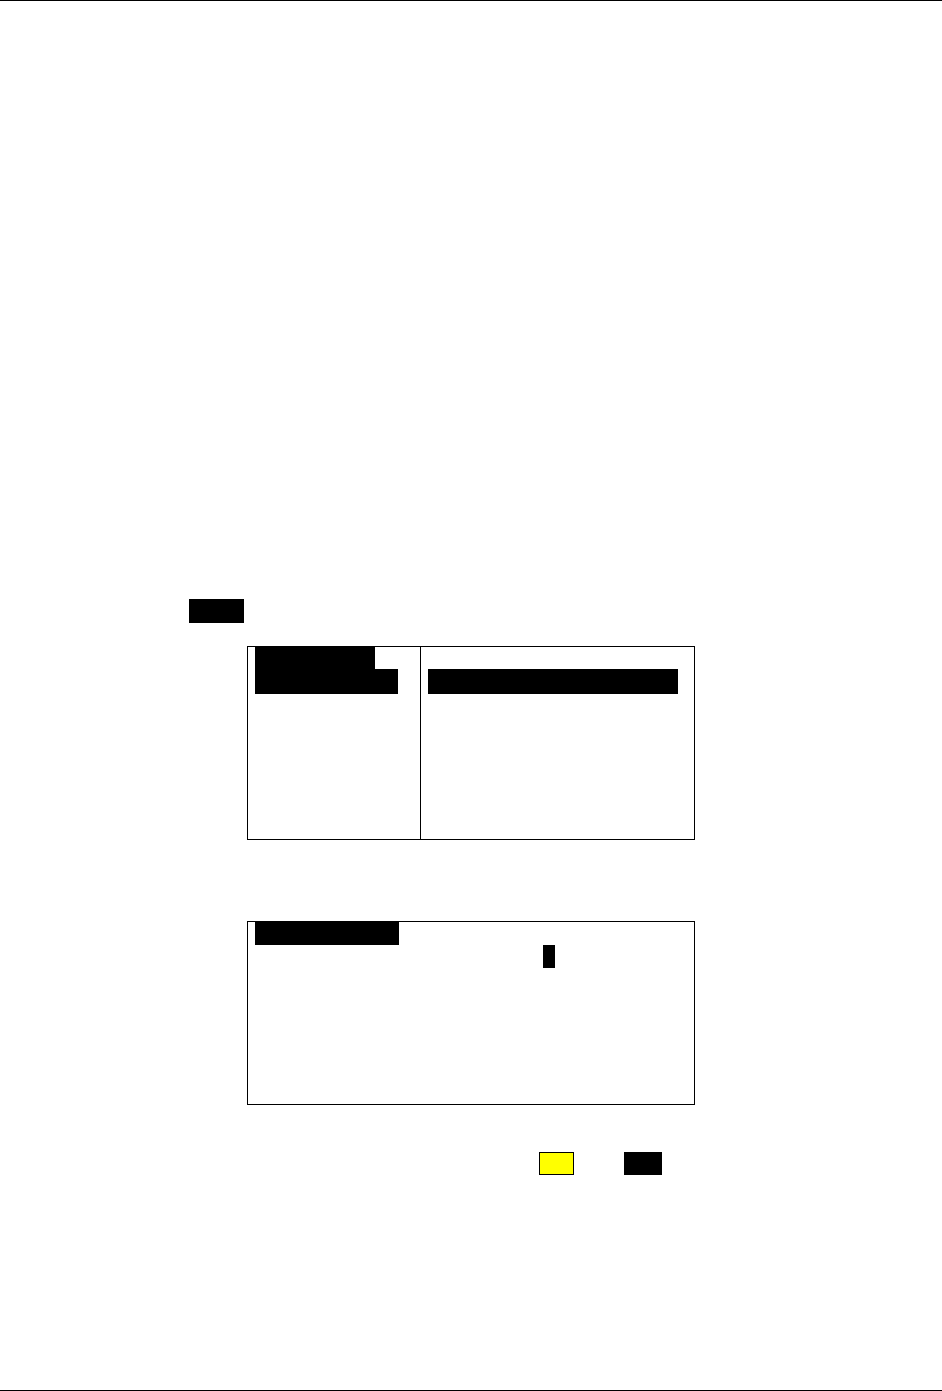
1. Go to PREFERENCES → Owner Information.
The Owner Information screen appears.
Move between each entry field as needed, by pressing the up or down ARROW keys.
2. Enter text, using the keyboard:
OOWNER INFORMATIONO
Name: .
Phone:
Comment: If found please phone
When the cursor is in the Phone: field, Alt Lock is
set automatically for entering numbers, you will
see in the upper right corner of the display.
3. Press ESC to exit from the Owner Information screen. Your changes are automatically saved.
The Preferences submenu is displayed.

m90User’s Guide
© 2005 Unication Co., Ltd.
19
4.3 Setting Date and Time
To set the correct date and time on your M90:
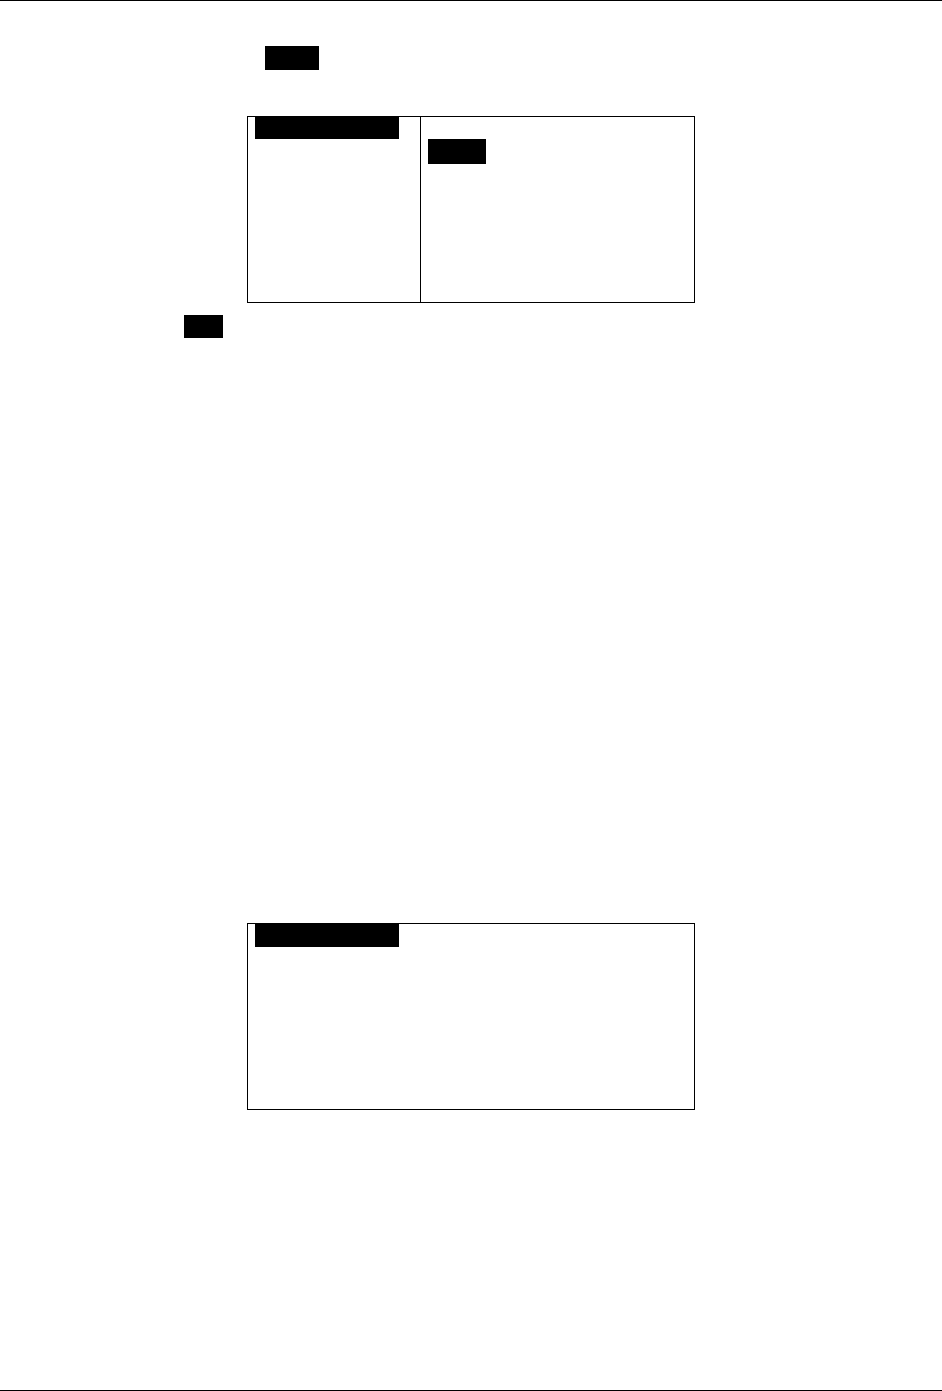
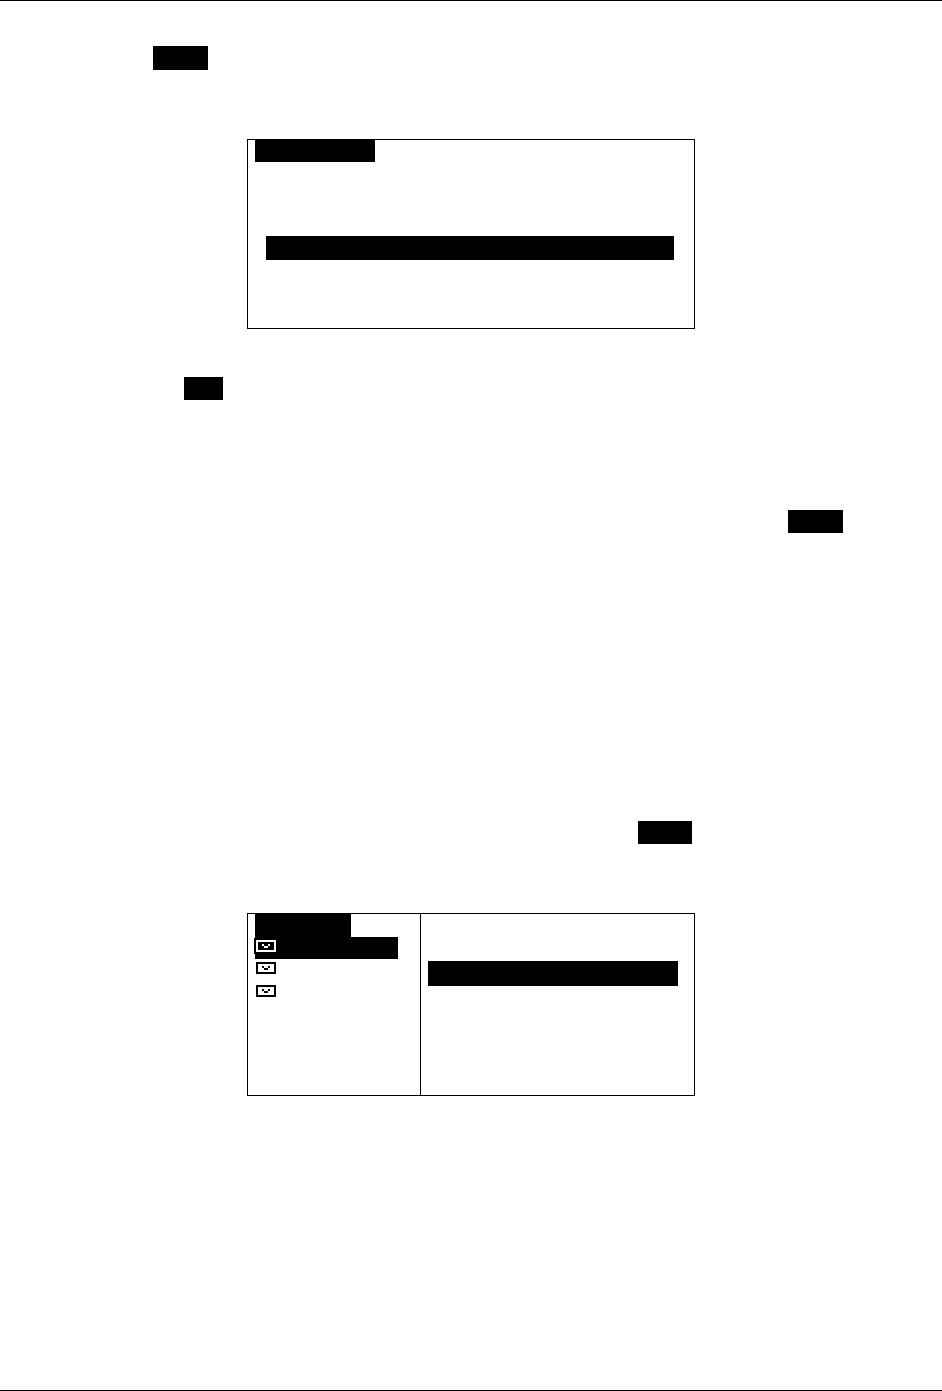
1. Go to PREFERENCES → Date and Time.
The Date and Time submenu is displayed.
ODATE AND TIMEO
Time Format: 12hr
Time: 04:39 PM
Date: May 28 2003
Network Sync: Yes
If Time Format is set to 24hr, then PM or AM
will not be displayed.
2. Use the ARROW keys to move from one field to another, and press ENTER to change options
in each selectable field.
3. Set Time Format to “24hr” format or “12hr” format as desired.
4. Set the current Time:
HH (00–23 for 24-hour format, or 01–12 for 12-hour format)
MM (set automatically by system if Network Sync set to Yes)
AM/PM (this is displayed only if 12hr format selected).
5. Set the current Date:
MMM (“Jan”, “Feb”, “Mar”, etc.)
DD (01–31)
YY (00-99).
6. If Network Sync is set to Yes, then the device will automatically set the minutes of the time.
7. Press ESC to exit from Date and Time. Your changes are automatically saved.
4.4 Turning Your M90 Off and On
You can turn OFF your M90 by one of the following 4 methods:
• Selecting the POWER OFF icon in the Main Menu,
• Pressing ALT and then SPACE
• Pressing Power Off in the Main Menu popup options menu, or….
• Press MENU and select Power Off
The display will then show the “Power Off Device?” screen. Clicking “Yes” will cause an information
screen to appear explaining how to turn power back on again, and once this screen times out, the
M90 will power off.
• To turn the M90 back on again, press ALT and then SPACE.
The Main Menu icons will appear in the LCD display and the M90 will be operational.
m90User’s Guide
20 © 2005 Unication Co., Ltd.
4.5 Main Menu Options
The Main Menu options menu lets you quickly access the different features of the M90. You can
quickly change your alert sound to vibrate or silent, turn off message transmission, and view device
status information.
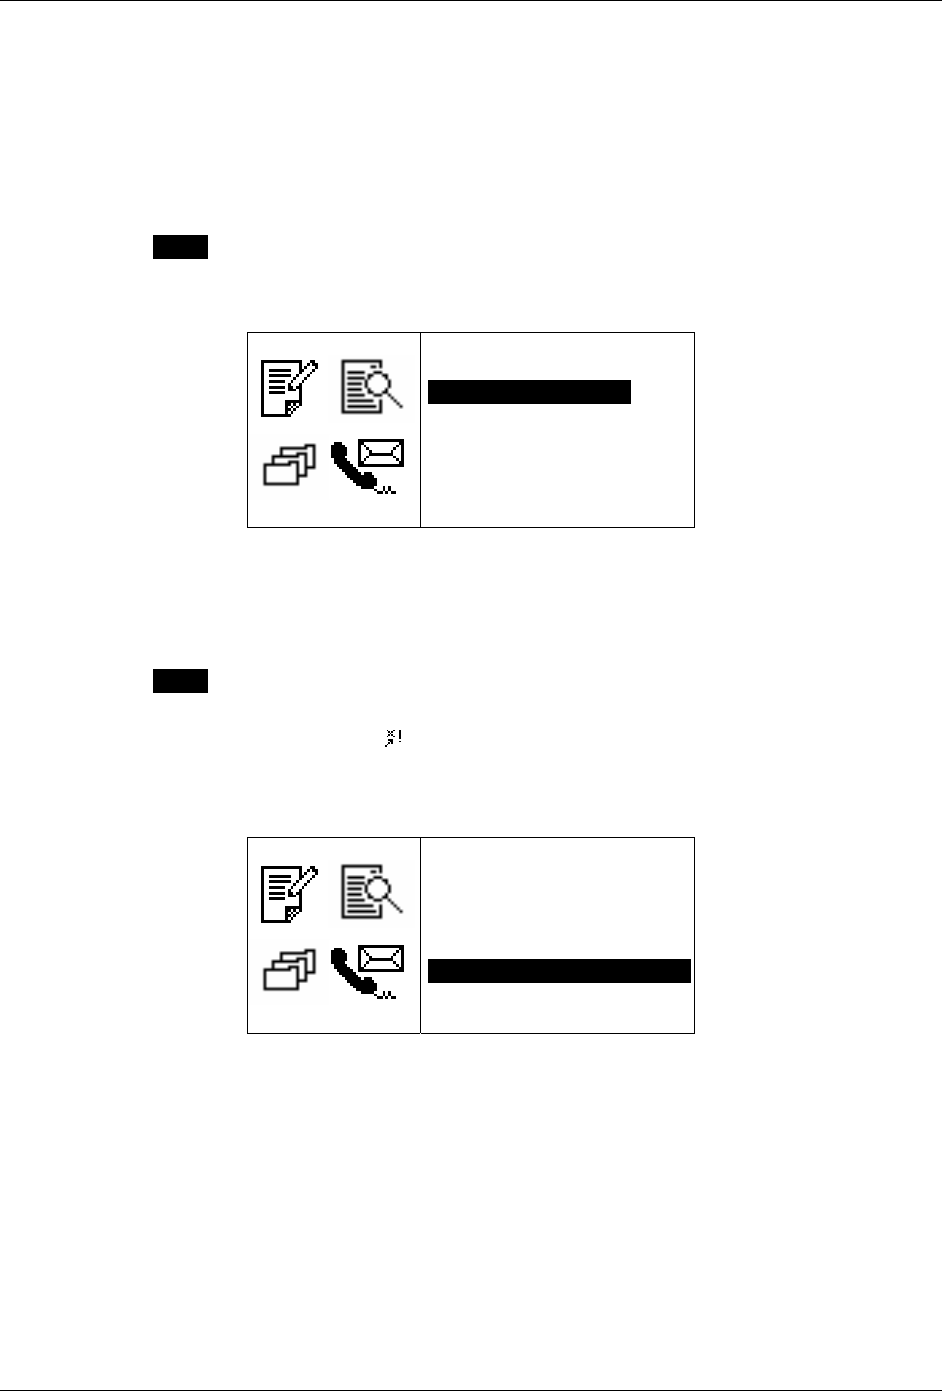
To change your alert sound:
1. Press MENU and select:
• Silence Alerts to turn off your alert sound (Note: alarm alerts are not affected)
• Vibrate Alerts to change your alert sound to vibrate (Note: alarm alerts are not affected).
06:16PM Th
OPTIONS
`Go To Status Icons
`Silence AlertsOO
`Vibrate Alerts
`Alerts On
`Transmitter Off
`Power Off
`Keyboard Lock
2. Return to your default alert setting by selecting Alerts On (Note: alarm alerts are not affected).
To turn off message transmission:
1. Press MENU and select Transmitter Off.
You can receive messages, but will not be able to send messages until you turn message
transmission on again. The icon will display on the Main Menu screen when the transmitter
is off. Your device will not transmit when the transmitter is off!
2. Turn message transmission back on by selecting Transmitter On.
06:16PM Th
OPTIONS
`Go To Status Icons
`Silence Alerts
`Vibrate Alerts
`Alerts On
`Transmitter OnOOOOOOO
`Power Off
`Keyboard Lock
m90User’s Guide
© 2005 Unication Co., Ltd.
21
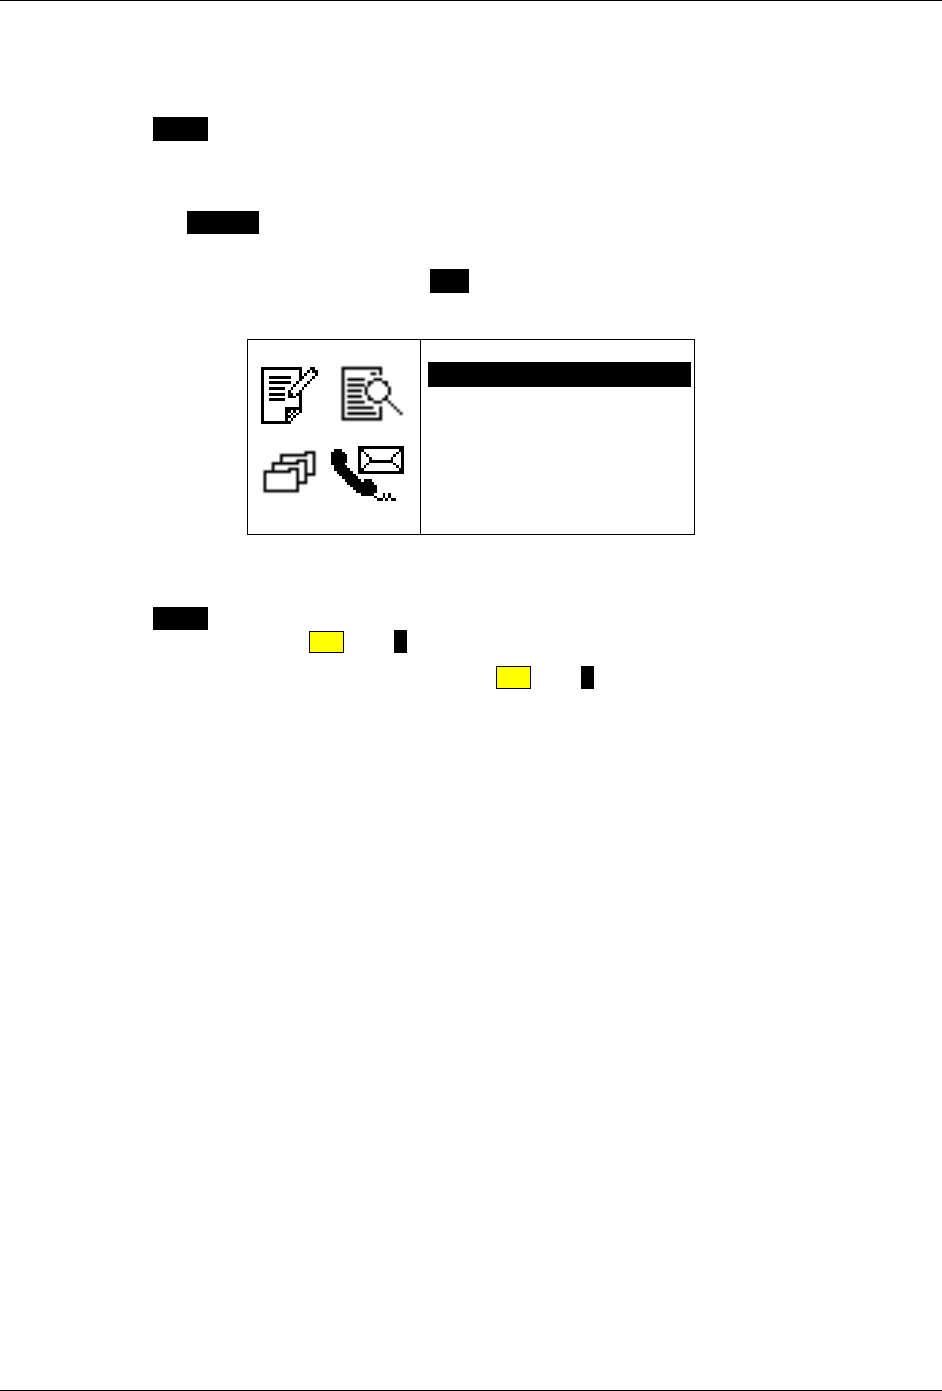
To view additional status information:
1. Press MENU and select Go to Status Icons.
2. The popup menu closes and the cursor is now on one of the status icons on the right side of
the screen.
3. Press the ARROW keys to navigate and select the desired status icon, and view status
information at the bottom of the screen.
4. Return to the Main Menu by pressing ESC, or by selecting Go to Main Menu in the popup
menu.
06:16PM Th
OPTIONS
`Go To Main MenuOOOOOO
`Silence Alerts
`Vibrate Alerts
`Alerts On
`Transmitter Off
`Power Off
`Keyboard Lock
To lock your keyboard:
1. Press MENU and select Keyboard Lock. Alternatively, you can lock the keyboard from the
Main Menu by pressing ALT then L.
2. Unlock the keyboard by once again pressing ALT then L.

m90User’s Guide
22 © 2005 Unication Co., Ltd.
m90User’s Guide
© 2005 Unication Co., Ltd.
23
5. Sending Messages
You can compose and send messages to wireless and email addresses.
To start, select SEND A MESSAGE in the Main Menu.
The Send A Message screen is displayed:
SEND A MESSAGEO
To: OOOOOOOOOOOOOOOOOOOOOOOOOOOOOOO
Msg:
Cursor is in the To field.
Note: For shortcuts see Section 3.5 Shortcuts for Navigating, on page 14.
5.1 Selecting Contacts from the Address Book
You can select contacts (or groups) from your Address Book to be in your To field. To use this
option you must have first created contacts and groups in the Address Book (see Adding a Contact
to the Address Book on page 37).
To select a contact to be in your message To field:
1. Press MENU to open the Message Options popup menu.
OSEND A MESS
To:OOOOOOOOO
Msg:
OPTIONS
`Select AddressOOOOOO
`Manual Entry
`View Selected
`Send
2. Select Select Address. The Address Book contact list is displayed. (A faster way of getting to
the Address Book, is to press ENTER while in the To field.)
ADDRESS BOOKA 1 of 4
• Brown, Tom* [WA]AAAAAAAAAAAAAAA
• Doe, Sally* [WA]
Anka, Alice [WA]
Brown, Ed [WE]
• A bullet indicates that this contact has been selected.
* An asterisk indicates that this contact has a “Frequent”
setting, which puts the name at the top of the
Address Book list of contacts.
m90User’s Guide
24 © 2005 Unication Co., Ltd.
3. Select one or more names from the Address Book.
A bullet (•) will be shown when ENTER is pressed for that name. To unselect a contact, press
ENTER again.
4. Press the left ARROW key to exit the Address Book.
The name(s) you have selected will appear in the To field.
There is only one display line for the To field, so if several contacts were selected, they may
not all fit on the display.
5. To view all addresses in the To field, press the up ARROW key so that the To field is
highlighted, and press MENU to open the Options popup menu again.
6. Select View Selected in the popup menu to display a complete list of contacts that have been
added to the To field.
OSELECTED ADDRESSESO 1 of 2
Brown, Tom* [WA] OOOOOOO OO
Doe, Sally* [WA]
Sending to Non-Default Addresses
You may send to a different address than the default address shown in the Address Book.
1. While selecting contacts in the Address Book, press MENU to open the Options popup menu.
•ADDRESS BOO
• Brown, Tom
• Doe, Sally
Anka, Alic
Brown, Ed
OPTIONS
`Done Addressing
`View Contact00000000
`New Contact
`New Group
2. Select View Contact
3. Select one or more addresses.
A bullet (•) will be shown when you press ENTER for that name.
4. Press MENU to open the Options popup menu
OBrown, Tom*
• WA: 913224
• HE: tom@ho
AE: tb12@w
OPTIONS
`Update Contact
`Done Selecting000000
Select Update Contacts to save the changes permanently into the Address Book, or select
Done Selecting to use the changes for this message only.
m90User’s Guide
© 2005 Unication Co., Ltd.
25
5.2 Adding or Editing a Manual Address Entry
You can add an address manually, or edit a manual address you have already entered.
1. With the cursor in the To field, press MENU to open the Message Options popup menu.
2. Select Manual Entry to open the Manual Entry display.
3. Type the address (or edit an existing address).
MANUAL ENTRY
To: manual.
[ Press Enter to exit ]
[ to SEND A MESSAGE ]
4. Press ENTER to save text and exit the Manual Entry screen.
Alternatively, when the cursor is on the To field in the Send a Message screen, you may start
typing the manual address, and the device will automatically open up the Manual Entry screen.
5.3 Composing your Message
Move the cursor (press the down ARROW key) to the Msg field and type your message.
You can add Quick Text or Memos to your message (see Creating Quick Text for Messages on
page 33 and Creating a Memo on page 47). Quick Text is a phrase you have created and saved in
your Quick Text menu. Memos are text files you have created and saved in your Memos folder.
Add Quick Text or Memos to your Message
1. With the cursor in the Msg field, press MENU to open the Message Options popup menu.
OSEND A MESS
To: Tom@hotm
Msg:
Tom, Sally:
.
OPTIONS
`Send
`Insert Quick TextOOO
`Insert Memo
`Save to Draft
2. Select Insert Quick Text from the popup menu.
A list of Quick Text messages is displayed.
3. Select the desired Quick Text from the list.
The list closes and the Quick Text is inserted at the cursor in the message area.
You can also insert memos in a similar manner, by selecting Insert Memo from the popup menu
(see Creating a Memo on page 47).
Note: For shortcuts see Section 3.5 Shortcuts for Navigating, on page 14.

m90User’s Guide
26 © 2005 Unication Co., Ltd.
Save a Draft of your Message
At any time you can save your message for completing later.
1. While editing your message, press MENU to open the Options popup menu.
2. Select Save to Draft.
The message will be saved in your Drafts folder (see Managing Folders on page 49).
Later, you can go to the Drafts folder and edit, delete or send the draft message (see Managing
Draft Messages on page 50).
5.4 Sending your Message
1. When you have completed your message, press MENU to open the Message Options popup
menu.
2. Select Send.
The popup menu closes automatically when the message is sent.
You will see the Message Transmission status symbol flashing in the Main Menu display until the
message transmission is completed. Your sent message is saved in the OUTBOX.
For more information see Section 7 Managing Outgoing Messages on page 31.
m90User’s Guide
© 2005 Unication Co., Ltd.
27
6. Managing Incoming Messages
Received personal messages are stored in your Inbox. Each message has a symbol indicating its
current status:
Unread message
Read message
Message has been forwarded.
Message has been replied to.
Message forward or reply failed.
A brief preview of a selected message is displayed in the bottom two lines of the screen.
If you subscribe to a News service, news messages are not stored in the Inbox but are stored in
News. See Reading News on page 43.
Select INBOX in the Main Menu to display the personal messages that you have received.
Note: For shortcuts see Shortcuts for Navigating, on page 14.
6.1 Reading a Message
1. Select INBOX in the Main Menu.
A listing is displayed of all messages in your Inbox, organized from the newest (at the top) to
the oldest.
OINBOXO 4 of 4
Steve@infoserve.net Got your messa
Ellie@home.com We’ve finally decid
Can you pick up groceries on your
Tom@hotmail.com Bring your packo
[with you when you come. Jay ]
[ ]
Text in [brackets] at bottom of display is a
continuation of the highlighted message text.
2. Scroll through the Inbox menu of received messages to the desired message.
3. Press ENTER to open the message for viewing.
4. Press ESC to return to the INBOX when finished reading the message.
Reading a Message with Quickview
If a Quickview New Message Received popup is displayed, select “Yes” in the popup to display the
message.
Quickview is a quick way to read messages on your M90. The Quickview popup appears on the
display as soon as a new message arrives in the Inbox, and selecting “Yes” in the popup
immediately opens the message for viewing. For information on setting up the Quickview alert, see
Customizing the New Message Alert on page 34. Note that the Quickview popup does not allow
you to view the new message if you are currently editing a message or a memo.
m90User’s Guide
28 © 2005 Unication Co., Ltd.
6.2 Replying to a Message
1. Scroll to the desired message in your INBOX and press MENU to open the Inbox Options
popup menu.
OINBOXO OPTIONS
Steve@infos `ReplyOOOOoOOO
Ellie@home. `Forward
Can you pic `Delete
Tom@hotmail
[with you wh
[
`Move to Folder
`Mark as UnRead
`Delete Read Msgs
`Delete All Msgs
You can press MENU at any time to open a popup menu. If you open the Inbox Options popup
after opening a message, the menu will have different options listed than if you open the popup
menu before opening the message.
2. Select Reply to open the Reply Options menu.
oREPLY OPTIONSo
`ComposeOOOOOOOOOOOOOOOOOOOOOOOOOOOO
MORE
Yes
No
On my way
Will call later
Thank you
3. Select Compose to open the Reply screen;
Or:
Select an automatic response to automatically send the selected reply message. An automatic
response is any selection other than Compose.
You can have a set of system-generated automatic responses that are always there and
optional MCR (Multiple Choice Responses) responses that may or may not be available for any
particular message.
For example, “MORE” is an optional MCR that prompts the system to send the next portion of
a long message. If this MCR appears, you can continue to reply MORE until the entire
message has been received.
If you select an automatic response (for example, MORE, Yes, No, etc) the reply is
immediately sent. The reply screen will be closed and the user will be returned to the Inbox list
screen.

m90User’s Guide
© 2005 Unication Co., Ltd.
29
4. If Compose was selected, type your message, then press MENU to open the popup menu for
more options:
OCOMPOSE REP
Msg: I look
Regards, Ton
OPTIONS
`SendOOOOOOOOOOOOOOOO
`Insert Quick Text
`Insert Memo
`Save to Draft
5. Select Send to send the message.
6.3 Forwarding a Message
1. Scroll to a message in the INBOX menu and press MENU to open the Inbox Options popup
menu.
2. Select Forward from the popup menu.
3. Type an address in the To field, or,
select one or more names from the Address Book (see Selecting Contacts from the Address
Book on page 23).
4. Add any text to the Msg field to preface the forwarded message.
5. Press MENU to open the Message Options popup menu and select Send.
The message display and popup menu close automatically and the message is sent.
6.4 Deleting Messages
1. Scroll to the message you want to delete.
2. Press MENU to open the Inbox Options popup menu and select one of:
Delete to delete a single selected message; alternatively, you may press ALT-DEL
Delete All Msgs to delete all messages in your Inbox;
Delete Read Msgs to delete all messages that are marked as Read. Messages marked as
“Unread” will not be deleted.
If you have set the Confirm Delete option (PREFERENCES → Options → Confirm Delete) to
“Yes”, then you will be asked to confirm or cancel the deletion.
6.5 Erred Messages
An erred Message is a message with transmission errors. The system will eventually correct the
message by re-transmitting the missing or “erred” parts. When the message gets corrected, it will
be shown as an Unread message.

m90User’s Guide
30 © 2005 Unication Co., Ltd.

m90User’s Guide
© 2005 Unication Co., Ltd.
31
7. Managing Outgoing Messages
Messages that you send are stored in the Outbox. Each message has a symbol indicating its
current status:
message transmission in progress
message successfully sent
message transmission pending (transmitter may be off, or network is busy)
message transmission failed.
Select OUTBOX in the Main Menu to display your sent messages.
7.1 Reviewing Sent Messages
You can read messages that you have sent in the same way that you read received messages:
1. Select OUTBOX in the Main Menu and scroll to the desired message.
2. Press ENTER to select and open the message for viewing.
7.2 Resending a Message
You can resend a message that was not sent successfully.
1. Select OUTBOX in the Main Menu to view messages that you have sent.
2. Scroll to the message you wish to resend.
3. Press MENU to open the Outbox Options popup menu and select Resend to resend the
message to the same recipients as before.
7.3 Deleting Messages
Messages can be deleted from the Outbox.
1. Select OUTBOX in the Main Menu, and scroll to the message you want to delete. Note that you
cannot delete a “transmission in progress” message.
2. Press MENU to open the Outbox Options popup menu and select one of:
Delete to delete a single selected message; alternatively, you may press ALT-DEL
Delete All Msgs to delete all messages in your Outbox.
If you have set the Confirm Delete option (PREFERENCES → Options → Confirm Delete) to
“Yes”, then you will be asked to confirm or cancel the deletion.

m90User’s Guide
32 © 2005 Unication Co., Ltd.
m90User’s Guide
© 2005 Unication Co., Ltd.
33
8. Other Messaging Options
8.1 Creating Quick Text for Messages
Quick Text can be saved in your M90 so that you can quickly insert the text when composing
messages. This is a way to create quick access to frequently used sentences or phrases. You can
add or delete text items in the Quick Text menu.
Add a new Quick Text Item
1. Go to PREFERENCES → Quick Text.
OQUICK TEXTO
Where shall we meet?
Who will be there?
Thanks for your help.
2. Press MENU to open the Quick Text options popup menu.
OQUICK TEXTO
Where shall w
Who will be t
Thanks for yo
OPTIONS
`New Quick TextOOOOOO
`Edit
`Delete
`Delete All
3. Select New Quick Text and enter the text in the Quick Text screen.
OQUICK TEXTO
Text:
Meet me for lunch..
4. When done, press MENU and select Save, then press ESC to exit.
When text is saved in Quick Text, it is added to the top of the current list of phrases or sentences in
the Quick Text menu.
You can view your saved text by scrolling down through the menu, and pressing ENTER when the
desired text is highlighted.
m90User’s Guide
34 © 2005 Unication Co., Ltd.
Edit an Existing Quick Text Item
1. In the Quick Text submenu, select the Quick Text item to be edited.
2. Press MENU to open the Quick Text Options popup menu and select Edit.
OQUICK TEXTO
Where shall w
Who will be t
Thanks for yo
Meet me for l
OPTIONS
`New Quick Text
`EditOOOOOOOOOOOOOOOOO
`Delete
`Delete All
3. Make changes to the text in the Quick Text screen, and then press MENU and select Save.
When the edited text is saved in Quick Text, you can view the new version of the text by
scrolling down through the menu, and pressing ENTER when the desired text is highlighted.
Delete an Existing Quick Text Item
1. In the Quick Text submenu, select the item to be deleted.
2. Press MENU to open the Quick Text Options popup menu and select Delete.
3. Verify the deletion in the confirmation message that appears by selecting “Yes”.
The deleted text item no longer appears in the Quick Text submenu.
8.2 Customizing the New Message Alert
You can change your Inbox Alert settings or turn the alert on or off.
1. Go to PREFERENCES → Mailbox Alerts.
The Mailbox Alerts submenu is displayed.
OMAILBOX ALERTSO
Alerts: Yes
Volume: Medium
`Inbox
`Weather
`Stock Market
`Entertainment
`News Events
Arrow in upper right corner indicates that you
can scroll down to see more mailboxes.
2. Set Alerts to “Yes” or “No” to enable or disable all mailbox alerts.
3. Set the Volume level to either “Low”, “Medium”, or “High”.
These two options apply to alerts for all mailboxes (i.e. includes both incoming mail and news
messages).

m90User’s Guide
© 2005 Unication Co., Ltd.
35
4. Select Inbox.
The Inbox Alert submenu is displayed.
OINBOX ALERTO
Type: 1 Beep
Rebeep
Repeat: 2 times
Interval: 1 min
Quickview: Yes
5. Set Type to your desired option. This may be Silent, Vibrate, Short-Vibrate, Beep-Vibrate,
Beep 1, Double Beep, Chirp, Beethoven, Arpeggio, Attention, Wilhelm Tell, Dododo, Around,
or Up & Down. Press the SPACE key to play the alert; alternatively, you may play the alert
within the Options popup menu by pressing SPACE or pressing the right ARROW key.
6. Set Rebeep Repeat to either: “None”, a number from 1 to 5, or “Forever”.
The alert will repeat for the number of times selected; “None” means only the original alert will
sound (i.e. there is no rebeep).
7. Set Rebeep Interval to either: ”30 sec”, “1 min”, “2 min”, “5 min”, or “10 min”.
If the Rebeep Repeat option is set to 1 or more, then the alert will repeat at the interval
selected (every 30 seconds, 1 minute, 2 minutes, etc.).
8. Set Quickview to “Yes” or “No”.
If Quickview is set to “Yes”, then a New Message Received popup appears on the LCD display
when a new message arrives. This is a quick way to view incoming messages. You can open
the new message by selecting “Yes” in the popup, or you can close the popup by pressing any
key.
9. Press ESC to save and exit from Inbox Alert.
8.3 Setting a Message Timestamp
You can also have your M90 timestamp messages:
1. Go to PREFERENCES → Message Timestamp.
The Timestamp submenu is displayed.
OMESSAGE TIMESTAMPO
Timestamp: Yes
Time Format: 24hr
Date Format: Full
2. Set Timestamp to “Yes” (ON).
3. Set Time Format to “12hr” for 12-hour time format
or “24hr” for 24-hour time format.

m90User’s Guide
36 © 2005 Unication Co., Ltd.
4. Set Date Format to either: “Full” (Feb 28, 2003),
“dd/mm/yyyy” (28/02/2006) or
“mm/dd/yyyy” (02/28/2006).
5. Press ESC to save and exit from Timestamp.
8.4 Creating an Automatic Signature
You can create a personal signature and add it automatically to any outgoing message.
1. Go to PREFERENCES → Signature.
OSIGNATUREO
Append: Yes
Signature:
2. In the Append field, select “Yes”.
3. In the Signature field enter text for your personal signature. All of the text will be added to new
messages, but only the text up to the first carriage return will be added to reply messages. It is
a good policy to put your name, then a carriage return, followed by the rest of your signature
(separated by additional carriage returns if necessary).
4. Press ESC to save and exit from Signature.
8.5 Saving Messages in the Personal Folder
You can move any message to your Personal folder in FOLDERS. For more information on folders,
see Managing Folders on page 49.
1. Select INBOX or OUTBOX in the Main Menu, and scroll to the message you want to move.
2. Open the Inbox (or Outbox) Options popup menu and select Move to Folder.
3. Scroll to the subfolder you wish to store your message in and press ENTER to move the
message into that folder.
The message is moved from the Inbox (or Outbox, or News) to the selected folder.

m90User’s Guide
© 2005 Unication Co., Ltd.
37
9. Managing the Address Book
You can store names and email or wireless addresses on your M90 for quick access when sending
messages. You can also create groups that allow you to send messages to multiple recipients.
Select ADDRESS BOOK in the Main Menu to display the Address Book list of contacts.
Note: For shortcuts see Shortcuts for Navigating on page 14.
9.1 Adding a Contact to the Address Book
1. In the Address Book, press MENU to open the Options popup menu.
OADDRESS BOO
Brown, Tom*[
Doe, Sally*[
Anka, Alice[
Brown, Ed [W
OPTIONS
`New ContactOOOOOOOOO
`New Group
`Delete
2. Select New Contact to display the New Contact screen and type the person’s first name in the
First Name field:
ONEW CONTACTO
First Name: Mike.
Last Name:
Title:
Company:
Wireless Addr:
You can scroll down to see more fields to edit.
3. Continue to move down to each field and enter the appropriate text. Skip fields that you have
no information for.
4. Set the Usage option field to “Normal” or “Frequent”.
If Frequent is selected, the contact name will appear at the top of the Address Book list marked
with an “ * “.
m90User’s Guide
38 © 2005 Unication Co., Ltd.
5. When done, press MENU to open the Options popup menu and select Save to save the new
contact and return to the Address Book.
OADDRESS BOO
First Name: M
Last Name: La
Title: Servic
Wireless Addr
Home Email: M
OPTIONS
`Save
`Set Defaults
Or, press ESC to exit without saving.
9.2 Setting the Default Address within a Contact
When you create your contact if you don’t explicitly set your default address, the topmost filled in
address will become your default. A contact contains the following addressable fields:
• Wireless Address [WA]
• Work Email [WE]
• Home Email [HE]
• Alternate Email [AE]
• Work Phone [WP] (if enabled by your service provider)
• Home Phone [HP] (if enabled by your service provider)
• Mobile Phone [MP] (if enabled by your service provider)
• Fax Number [FX] (if enabled by your service provider)
For example, if you filled in Wireless Address and Home Email, then the default would be Wireless
Address for that contact. If you wish to change the default address, or make other addresses also
defaults, then do the following:
1. In the Options popup menu above, select Set Defaults. The Set Defaults screen is displayed:
OLamb, MikeO
•WA: 8876758
WA:MikeLamb@work.com
2. Select all addresses or phone numbers that you want to use as default.
• If more than address is selected, messages sent to this contact will be delivered to all
selected addresses
• Phone number options will only appear if enabled by your service provider.
• If you unselect all addresses, then the topmost address will be selected as the default.

m90User’s Guide
© 2005 Unication Co., Ltd.
39
3. When done, press MENU to open the Options popup menu and select Update Contacts to
save your selections and return to the Edit Contact display.
OLamb, MikeO
•WA: 8876758
•WA: MikeLam
OPTIONS
`Update Contacts
4. Press MENU again and select Save to save the new contact information and return to the
Address Book. The new contact appears in the Address Book list.
OADDRESS BOOKO 5 of 5
Brown, Tom* [WA]
Doe, Sally* [WA]
Anka, Alice [WA]
Brown, Ed [WE]
Lamb, Mike [WA, WE]000000000000000
9.3 Adding a Group to the Address Book
1. In the Address Book, press MENU to open the Options popup menu and select New Group.
2. In the New Group screen type a name for the group in the Name field.
3. Set Usage to “Normal” or “Frequent” (groups that are used most often and should appear at
the top of the Address Book list).
4. Press MENU to open the Options popup menu and select Edit Contact List to view a list of
existing contacts (but not groups) in your Address Book.
5. Scroll down the list and select each contact that you wish to add to the group.
OEDIT CONTACT LISTO 1 of 5
•Brown, Tom* [WA]OOOOOOOOOOOOOOOOOO
•Doe, Sally* [WA]
Anka, Alice [WA]
Brown, Ed [WE]
Lamb, Mike [WA, WE]
You cannot add a manual address to a group; you can only add contacts that you have already
created in your Address Book.
m90User’s Guide
40 © 2005 Unication Co., Ltd.
6. When done adding contacts, press MENU to open the Options popup menu and select Done
Selecting to save the contact list and return to the New Group screen.
7. Press MENU and select Save from the Options popup menu to save the new group and exit to
the Address Book.
Or, press ESC to exit without saving.
9.4 Viewing Contact or Group Information
1. In the Address Book, scroll to a contact or group you wish to view.
The contact or group name is highlighted.
OADDRESS BOOKO 1 of 5
Brown, Tom* [WA]000000000000000000
Doe, Sally* [WA]
Brown, Ed [WE]
Choir [grp]
Lamb, Mike [WA, WE]
• Contacts are listed alphabetically by last name, with frequent contact names (marked by
“ * “) at the top of the list.
• Group names are indicated by “[grp]”.
• The addresses that messages will be sent to are indicated for each contact:
[WA] Wireless Address [WP] Work Phone
[WE] Work Email [HP] Home Phone
[HE] Home Email [MP] Mobile Phone
[AE] Alternate Email [FX] Fax Number
• Phone number options will only appear if enabled by your service provider.
2. Press ENTER to display detailed information about the selected contact:
OBrown, Tom*O
President
*WA: 5467329812@carrier.com
_WE: tom.brown@work.org
_HE: tbrown@home.com
• The “ * “ in the top line indicates that this is a frequent contact name.
• “*WA” indicates that the Wireless Address is the address to which all messages for this
contact will be sent.
• “_WE“ indicates that messages will not be sent to the Work Email address.
3. Press ESC to return to the Address Book contact list.
m90User’s Guide
© 2005 Unication Co., Ltd.
41
9.5 Editing a Contact or Group
1. In the Address Book, scroll down to the contact or group that you wish to edit.
The contact or group name is highlighted.
2. Press ENTER to display address information for that contact or group.
3. Press MENU and select Edit in the Options popup menu.
OEDIT CONTACT
First Name: M
Last Name: La
Title: Servic
Wireless Addr
Home Email: M
OPTIONS
`EditOOOOOOOOOOOOOOOOO
`Set Defaults
The Edit Contact or Edit Group screen is displayed, and you can make changes in any field, as
required.
4. To edit a group contact list, press MENU and select Edit Contact List when the Edit Group
screen is displayed.
0EDIT GROUPO
Name: Choir
Usage: Norma
ebrown@home.
606670932@ve
513478890@ve
OPTIONS
`Save
`Edit Contact ListOOO
5. Press MENU again and select Save when done to save and exit to the Address Book, or press
ESC to exit without saving.
9.6 Deleting a Contact or Group
1. In the Address Book, scroll to the name of the contact or group that you wish to delete.
The contact or group name is highlighted.
2. Press MENU and select Delete in the Options popup menu. Alternatively, you may press ALT-
DEL. If you have set the Confirm Delete option (PREFERENCES → Options → Confirm
Delete) to “Yes”, then you will be asked to confirm or cancel the deletion.
The contact or group is deleted from the Address Book contact list.

m90User’s Guide
42 © 2005 Unication Co., Ltd.
m90User’s Guide
© 2005 Unication Co., Ltd.
43
10. Reading News
If you are subscribed to one or more news services, you can receive news messages.
Note: For shortcuts see Shortcuts for Navigating on page 14.
10.1 Reading a News Message
You can read a News message in the same way that you can read Inbox messages (see Reading
a Message on page 27).
If a Quickview popup is displayed, then select “Yes” to view a new (unread) News message.
Or:
1. Select NEWS in the Main Menu.
2. Select a News folder in the News submenu.
3. Highlight the message you wish to read and press ENTER to display it.
10.2 Forwarding News
1. While the News message is displayed, press MENU to open the News Options popup menu
and select Forward Message.
OSTOCK MARKET OPTIONS
*Market Upd `Forward 0000000OOOOOO
Market Upd `Delete
Market Up `Move to Folder
Market Upd `Delete All Read
Market Upd
[ate ---Dow
[Indu 2293.90
`Delete All Msgs
Status icons for News messages are the same as
the status icons for Inbox messages.
The Forward A Message screen is displayed.
2. Follow the instructions for Forwarding a Message on page 29.
m90User’s Guide
44 © 2005 Unication Co., Ltd.
10.3 Deleting News
You can delete any or all News messages. News messages will also be deleted automatically
when a new message is received and your News folder is already full.
Automatic Deletion when News is Full
When your News folders become full, your M90 will automatically delete News messages to make
room for a new incoming News message. The order of priority for automatic message deletion is:
1. The oldest messages marked as Read are deleted first.
2. If all Read messages have been deleted, then the oldest Unread messages will be deleted.
Note: Any News messages saved in the Personal folder will not be deleted.
Delete News Messages while in a News Subfolder
To delete News messages yourself:
1. While a News message is highlighted in the News menu, press MENU to open the News
Options popup menu and select one of:
Delete delete the selected message
Delete All Read delete all messages marked as Read in this folder
Delete All Msgs delete all messages in this folder.
OSTOCK MARKET OPTIONS
Market Upd `Forward
Market Upd `Delete OOOOOOO
Market Upd `Move to Folder
Market Upd `Delete All Read
M
arket Up
d
[ate ---Dow
[Indu 2293.90
`Delete All Msgs
Or:
After opening a News message for viewing, press MENU to open the News Options popup
menu and select Delete.
2. If you have set the Confirm Delete option (PREFERENCES → Options → Confirm Delete) to
“Yes”, then you will be asked to confirm or cancel the deletion.
Depending on the option selected, the selected News message, all News messages marked as
Read, or all News messages will be deleted.
m90User’s Guide
© 2005 Unication Co., Ltd.
45
Delete News Messages while in the News Menu
Alternately, you can delete messages as follows:
1. While a News folder is highlighted in the News menu, press MENU to open the News Options
popup menu and select one of:
Delete Read Msgs - delete all messages marked as Read in this News folder
Delete - delete all messages in this News folder
Delete All Read - delete all messages marked as Read in all News folders
Delete All Msgs - delete all messages in all News folders.
ONEWSO
Entertainme
MarketOOOOOO
Weather
Sports
OPTIONS
`Move Folder Up
`Move Folder Down
`Delete Read Msgs 0
`Delete
`Delete All Read
`Delete All Msgs
Note: News messages saved in the Personal folder in FOLDERS will not be deleted using any
of these Delete options.
2. If you have set the Confirm Delete option (PREFERENCES → Options → Confirm Delete) to
“Yes”, then you will be asked to confirm or cancel the deletion.
Depending on the Delete option selected, all News messages or all News marked as Read, will
be deleted in the selected folder, or in all folders (but not in the Personal folder).
10.4 Reordering News Folders
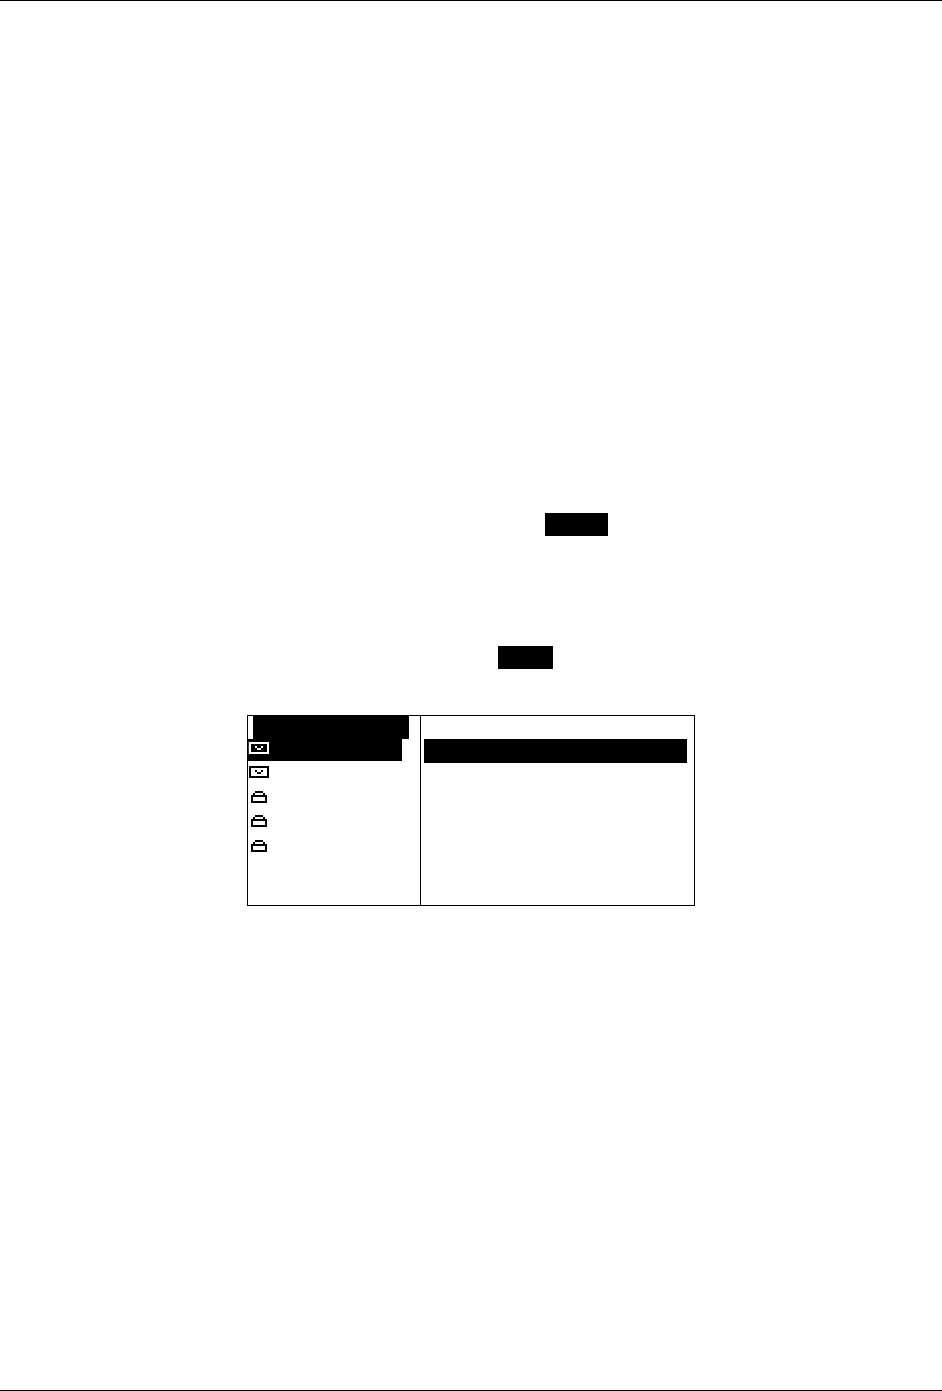
1. Select a News folder, press MENU to open the News Options popup menu and select one of:
Move Folder Up
Move Folder Down.
10.5 Customizing News Alerts
You can turn alerts on or off and change the volume for all alerts (both News and Inbox), or modify
the type of alert for different kinds of News messages.
1. Go to PREFERENCES → Mailbox Alerts.
The Mailbox Alerts submenu is displayed.
OMAILBOX ALERTSO
Alerts: Yes
Volume: Medium
`Inbox
`Weather
`Stock Market
`Entertainment
`News Events

m90User’s Guide
46 © 2005 Unication Co., Ltd.
2. Set Alerts to “Yes” (ON) or “No” (OFF) and set the Volume level to either “Low”, “Medium”, or
“High”.
Note: This affects both Inbox and News messages. Do not make changes to these two items
unless you intend them for all message alerts.
3. Select one of the News types (Weather, Stock Market, etc.) that you wish to set an alert for.
The News Alert Options submenu is displayed.
OWEATHER ALERTO
Service: Yes
Type: Vibrate
Quickview: Yes
History: 4
Set News Alert Options
1. Set Service to either:
“Yes” (receive a message and create folder for it) or
“No” (message will not be received and associated folder will be deleted).
2. Set Type to your desired option. This may be one of Silent, Vibrate, etc.
3. Set Quickview to either “Yes” or “No”.
If Quickview is set to “Yes”, then a New Message Received popup appears on the display
when a new message arrives. This is a quick way to view incoming News messages; you can
open the new message by selecting “View Message” in the popup, or you can close the popup
by pressing any ESC.
4. Set History to a number from 1 to 8 for the maximum number of messages to be stored in the
folder.
When the maximum number for a folder is reached, then your M90 will automatically delete
messages from that folder according to the deletion rules for Automatic Deletion when News is
Full on page 44. Messages will also be deleted when the M90 runs out of News message
memory.
10.6 Saving News in the Personal Folder
You can archive any News message in your Personal folder in FOLDERS. For more information on
folders, see Managing Folders on page 49.
1. After selecting the News message for viewing, press MENU to open the News Options popup
menu and select Move to Folder.
2. Scroll to the folder or subfolder where you wish to store your message and press ENTER to
move the message into that folder.
The message will be moved from your News folder to your Personal folder.
m90User’s Guide
© 2005 Unication Co., Ltd.
47
11. Creating and Managing Memos
You can create and save memos (i.e. text files) on your M90. These memos can be added to
messages that you send out.
Note: For shortcuts see Section 3.5 Shortcuts for Navigating on page 14.
11.1 Creating a Memo
You can create and store memos in Folders on your M90.
1. Go to FOLDERS → Memos and press MENU to open the Memo Options popup menu.
OMEMOSO
BudgetOOOOOOO
To Do List
Soccer Team
OPTIONS
`New MemoOOOOOOOOOOOO
`Edit
`Delete
`Delete All
2. Select New Memo to open the New Memo screen.
ONew MemoO
Label: .
Txt:
3. Enter a name for your memo in the Label field. For example: Shopping.
4. Enter the memo text in the Txt field. For example: Pickup tomato sauce, noodles, peppers.
5. Press MENU to open the Memo Options popup menu and select Save.
The memo and the popup menu close and the memo label (Shopping) appears in the Memos
folder.
Or, press ESC to exit without saving.
11.2 Viewing a Memo
To read a memo you have already created:
1. Go to FOLDERS → Memos and scroll to the desired memo.
2. Press ENTER to display the memo text.

m90User’s Guide
48 © 2005 Unication Co., Ltd.
11.3 Editing a Memo
1. Go to FOLDERS → Memos and scroll to the memo to be edited.
2. Press MENU to open the Memo Options popup menu and select Edit.
3. Make any changes in the Edit Memo screen.
4. Press MENU to open the Memos Options popup menu again and select Save.
The changes are saved and the memo and popup menu are closed.
Or, press ESC to exit without saving.
11.4 Deleting a Memo
1. Go to FOLDERS → Memos and scroll to the memo to be deleted.
2. Press MENU and select Delete in the Memo Options popup menu. Alternatively, you may press
ALT-DEL. If you have set the Confirm Delete option (PREFERENCES → Options → Confirm
Delete) to “Yes”, then you will be asked to confirm or cancel the deletion.
The memo is deleted from the folder submenu.
11.5 Inserting a Memo into a Message
You can insert a memo into an outgoing message (in SEND A MESSAGE).
1. With the cursor in the Msg field of a new outgoing message, press MENU to open the Options
popup menu.
OSEND A MESS
To: Tom@hotm
Msg:
Tom, Sally:
.
OPTIONS
`Send
`Insert Quick Text
`Insert MemoOOOOOOOOO
`Save to Draft
2. Select Insert Memo from the popup menu.
A list of memos is displayed.
3. Select the desired memo from the list.
The text of the memo is inserted at the cursor in the message field.
4. When done, press MENU to open the Message Options popup menu and select Send.
m90User’s Guide
© 2005 Unication Co., Ltd.
49
12. Managing Folders
You can store messages, news, memos and any text files in your M90 Folders. You can create
subfolders in the Personal subfolder for organizing the messages that you save there. When you
select FOLDERS from the Main Menu, four subfolders are displayed:
• Drafts - for messages being created or edited
• Memos - for memos that you create
• Personal - for storing mail and news messages.
• Help - for viewing help
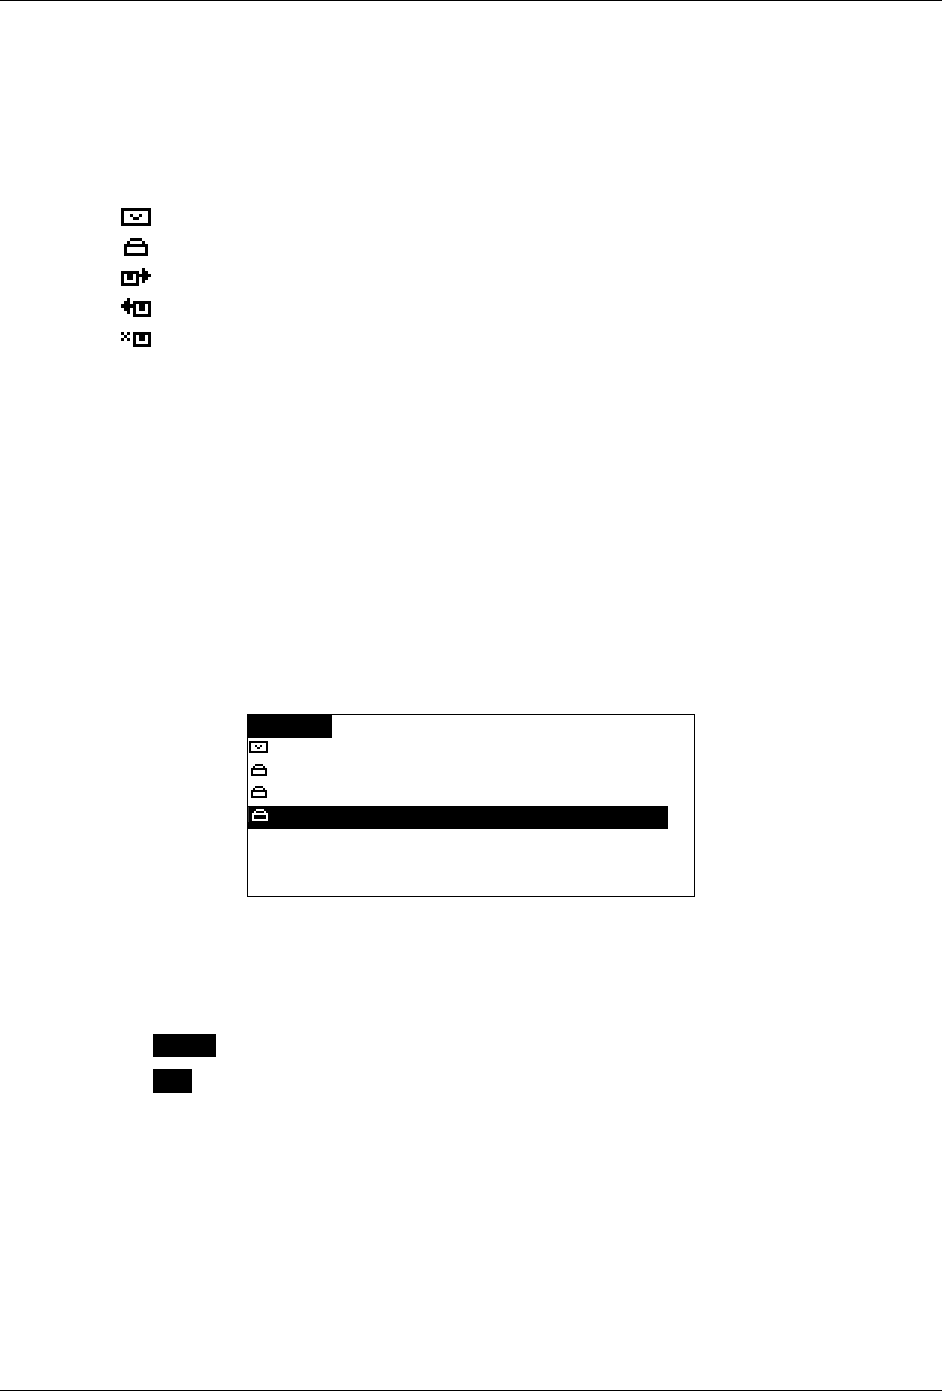
12.1 Creating a New Subfolder for Mail or News Messages
You can create subfolders in the Personal folder for organizing your saved mail or news messages.
1. Select
FOLDERS in the Main Menu.
2. Select the Personal folder.
You cannot create new subfolders in the Draft or Memos folders.
3. Press MENU to open the Folder Options popup menu.
OPERSONALO
`Default Fol
`Home
`Business
OPTIONS
`New FolderOOOOOOOOOO
`Rename Folder
`Delete Folder
`Delete Messages
`Move Folder Up
`Move Folder Down
4. Select New Folder in the popup menu to open the New Folder screen.
ONEW FOLDERO
Folder Name: New FolderA
5. Delete the default name ‘New Folder’ by pressing ALT then DEL. If you have set the Confirm
Delete option (PREFERENCES → Options → Confirm Delete) to “Yes”, then you will be
asked to confirm or cancel the deletion.
6. Type a name for the new subfolder.
m90User’s Guide
50 © 2005 Unication Co., Ltd.
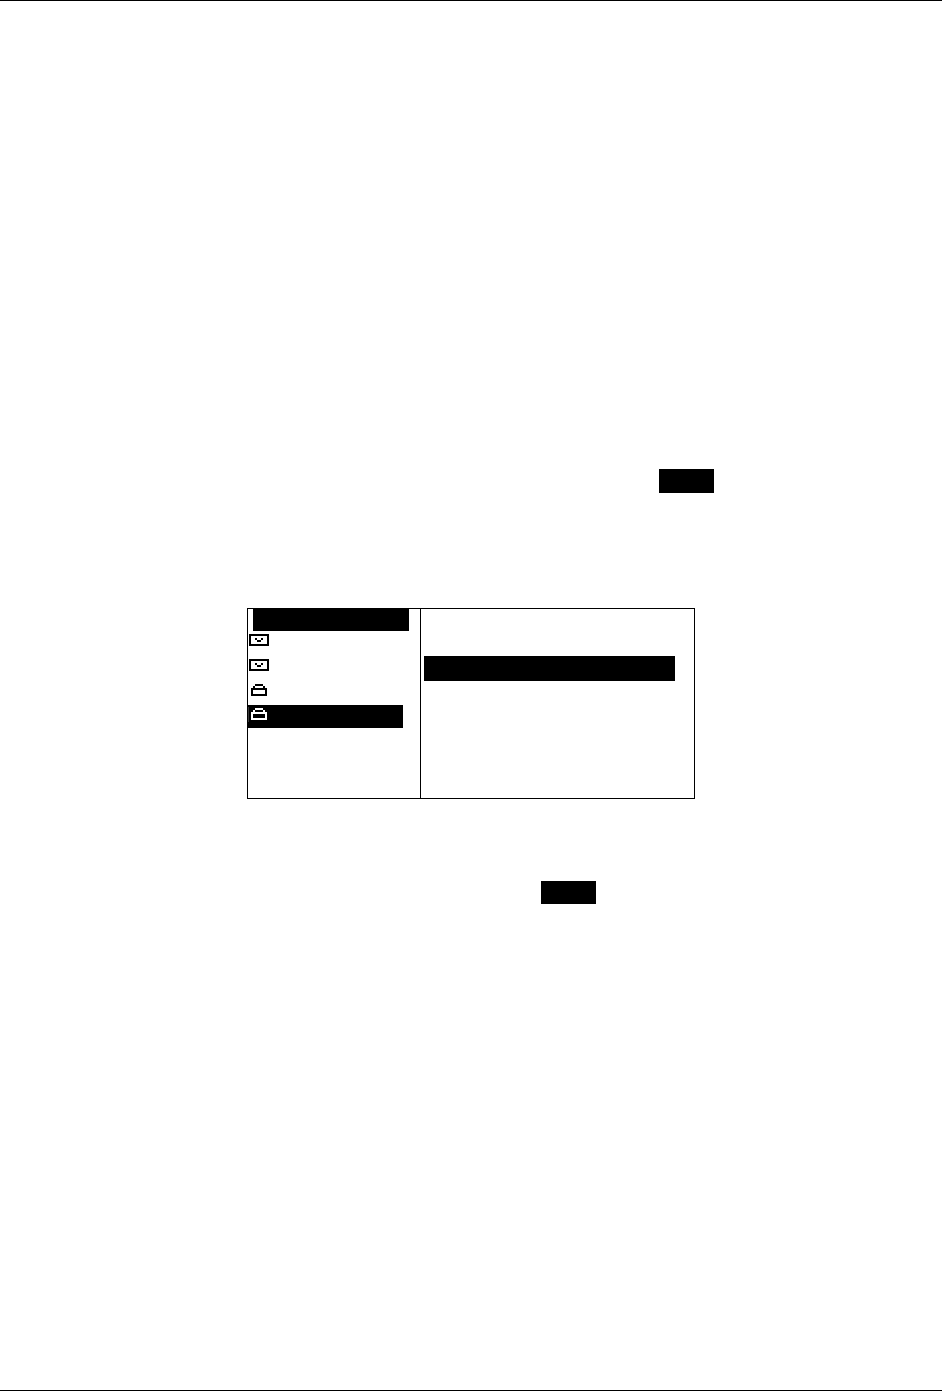
7. Press MENU to open the Folder Options popup menu again and select Save.
The New Folder submenu closes and the new subfolder appears in the Personal folder
submenu.
OPERSONALO
`Default Folder
`Home
`Business
`AppointmentsOOOOOOOOOOOOOOOOOOOOOO
Or, press ESC (or select Cancel from the Options popup menu) to exit without saving.
12.2 Editing a Subfolder Name
You can change any subfolder name by selecting it in the Folders menu, pressing MENU to open
the Folder Options popup menu, and selecting Rename Folder.
12.3 Deleting Subfolders
You can delete a subfolder by selecting Delete Folder in the popup menu. Note that you cannot
delete the Default Folder.
12.4 Managing Draft Messages
You can delete messages saved in the Drafts folder, by pressing MENU to open the Folder Options
popup menu, and then selecting Delete to delete the highlighted message or Delete All Msgs to
delete all messages in the folder.
ODRAFTSO
Please mee
Pick up gr
I will mee
OPTIONS
`Resume Composition
`DeleteOOOOOOOOOOOOOO
`Delete All Msgs
m90User’s Guide
© 2005 Unication Co., Ltd.
51
You can send messages saved in the Drafts folder, by viewing a draft message, pressing MENU to
open the Options popup menu, and then selecting Resume Composition.
ODRAFT MESSAO
Please meet m
OPTIONS
`Resume CompositionOO
`Delete
Resume Composition will move the message into the Send a Message application automatically.
You can continue composing your message and then send it.
12.5 Managing Personal Messages
Depending on the type of message, messages saved in your Personal folder can be Resent,
Forwarded, Replied To, Deleted or Moved to another folder.
• Messages saved from the Inbox can be Replied To and Forwarded
• Messages from the Outbox can be Forwarded and Resent
• Messages saved from News messages can be Forwarded.
All messages can be Deleted or Moved to another folder.
To Reply, Forward, Delete or Move a message:
1. Select FOLDERS in the Main Menu, then select the Personal folder.
2. Select the appropriate subfolder.
3. Select the message you want to work with, and press MENU to open the Folder Options popup
menu.
OHome0 OPTIONS
Steve@infos `ReplyOOOOoOOO
Ellie@home. `Forward
Can you pic `Delete
Tom@hotmail
[with you wh
[
`Move to Folder
`Delete All Msgs
Reply only appears for Received personal
messages
4. Select the desired option. For more information, see the same commands described in
Managing Incoming Messages on page 27, or Managing Outgoing Messages on page 31.

m90User’s Guide
52 © 2005 Unication Co., Ltd.
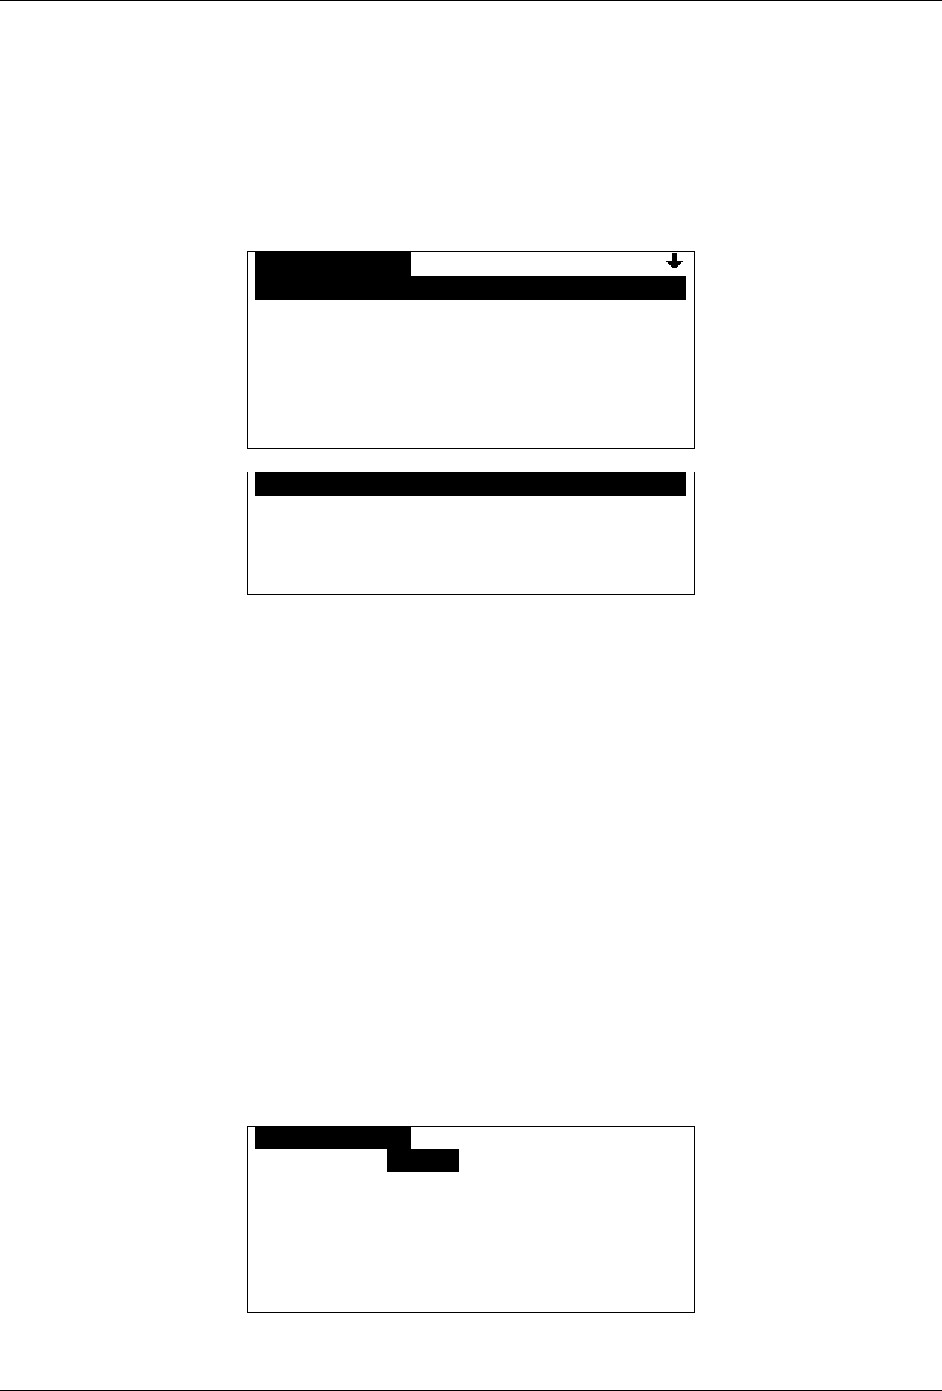
m90User’s Guide
© 2005 Unication Co., Ltd.
53
13. Setting Personal Options
Your M90 comes with certain options already set for you. You can change any of the options listed
in the Preferences Menu and save them.
To start, select PREFERENCES in the Main Menu.
OPREFERENCESO
`Alarm ClockOOOOOOOOOOOOOOOOOOOOOOOO
`Date and Time
`Mailbox Alerts
`Options
`Owner Information
`Private Time
`Quick Text
`Private TimeOOOOOOOOOOOOOOOOOOOOOOO
`Quick Text
`Message Timestamp
`Signature
`About
Arrow indicates that you can scroll DOWN to see
more.
“Alarm Clock”, “Options”, and “Private Time” settings are described in this chapter.
Other Preference settings are described in the following places:
• “Date and Time” settings on page 19
• “Mailbox Alerts” settings on page 34
• “Owner Information” settings on page 18
• “Quick Text” settings on page 33
• “Message Timestamp” settings on page 35
• “Signature” settings on page 36
• “About” information on page 17
13.1 Setting Up the Alarm Clock
You can set one or two alarms on your M90. For example, you may set Alarm #1 for a wake-up
time on weekdays and Alarm #2 for a weekend wake-up time.
1. Go to PREFERENCES → Alarm Clock.
The Alarm Clock menu is displayed.
OALARM CLOCKO
Volume: Medium
`Alarm #1: Off
`Alarm #2: On

m90User’s Guide
54 © 2005 Unication Co., Ltd.
2. Set Alert Volume to either “High”, “Medium”, or “Low”.
In the Alarm Clock menu, you can see whether either alarm is set On or Off. To set an alarm
that is currently Off, do the following:
3. Select Alarm #1 (which is currently set OFF) to open the Set Alarm #1 submenu.
OSET ALARM #1O
Alarm Clock: Off
Frequency: Once
Time: [HH] :[MM] [AM]
Alert Type: Beep 1
Snooze: Yes
Comment:
4. In the Alarm #1 submenu you can make the following changes:
• Alarm Clock: set to “On” or “Off”
• Frequency: set how often the alarm alert should sound
“Once” (only one occurrence, at the set time),
”Daily” (every day at the set time),
”Weekday” (every Mon., Tues., Wed., Thurs. and Fri. at the set time), or
”Weekend” (every Sat. and Sun. at the set time).
• Time:
If Date and Time Time Format is set to 12 hour format: set the hour (01–12), minute (00–
59) and AM or PM for the alarm alert
If Date and Time Time Format is set to 24 hour format: set the hour (00-23), and minute
(00–59) for the alarm alert
• Alert Type: set to your desired option. This may be one of Silent, Vibrate, etc.
• Snooze: “Yes” (alarm alert will sound up to 3 more times at 10 minute intervals) or “No”
(only one alarm alert at the set time). If Snooze is enabled then the alarm icon will flash in
the Main Menu when the alarm alert is triggered, and continues to flash until the alarm is
turned off.
• Comment: enter text to describe Alarm (e.g., Dental appointment); this will appear in the
Alarm Alert popup.
5. When done, save and exit from the Alarm #1 submenu and return to the Alarm Clock menu.
6. You can select Alarm #2 and make similar changes there as well.
7. Press ESC to save and exit from Alarm Clock.
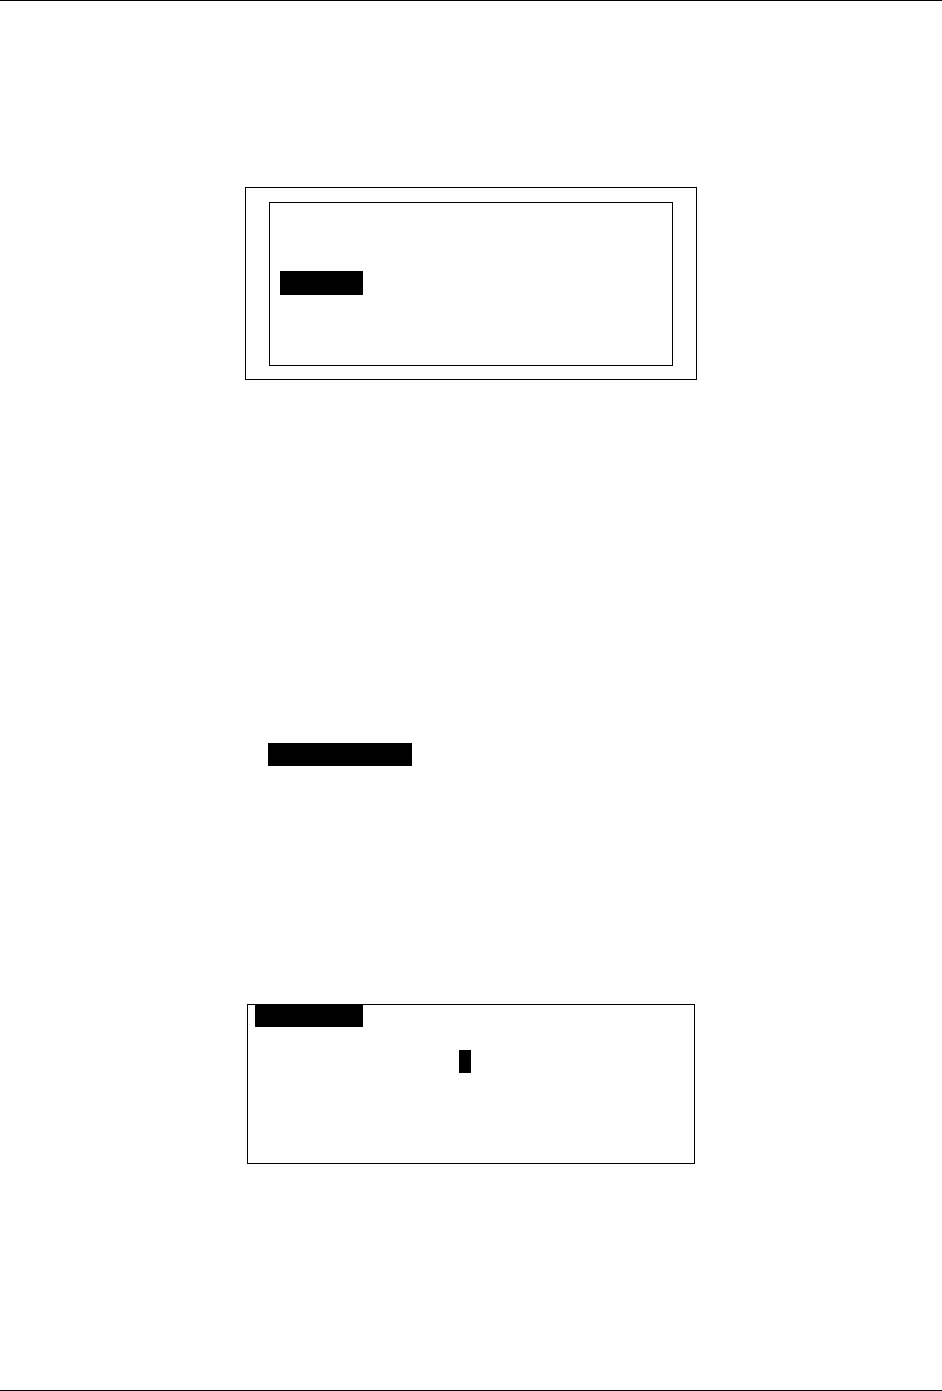
m90User’s Guide
© 2005 Unication Co., Ltd.
55
13.2 Alarm Alerts
When the alarm alert is triggered, an alarm alert screen appears on top of whatever was currently
being displayed. Press any key to stop the alarm. The popup remains onscreen until you close it or
turn off the alarm.
Alarm #1: 9:30AM
Dental Appointment
`Snooze
`Turn off Alarm #1
Close the Alarm Alert Popup
Select OK from the Alarm Alert popup menu (Snooze is OFF).
The popup will close and not reappear.
Or:
Select Snooze from the Alarm Alert popup menu (this option replaces “OK” when Snooze is ON).
The popup closes and will reappear in 10 minutes when the alarm alert is repeated.
The alarm icon in the Main Menu continues to flash between alerts.
Turn Off and Reset the Alarm
Select Turn Off Alarm from the popup menu. The alarm may also be silenced by pressing any
key, or by pressing the ALERT SILENCE button on the left side of the M90.
The alarm is set to the next alarm time (for example, next day at same time), if any, and the popup
is closed.
13.3 Customizing Display Features
You can customize your M90 display with a number of display options.
1. Go to PREFERENCES → Options to open the Options submenu.
OOPTIONSO
Font Size: 8-line
Contrast: 5
Confirm Delete: Yes
Keyclick: No
Screen Timeout: 30 sec

m90User’s Guide
56 © 2005 Unication Co., Ltd.
2. Make changes in the Options submenu as desired. Press the up or down ARROW keys to
move from field to field, and press ENTER to change options in each field.
• Font Size: Set to “5-line” for larger font or “8-line” (default) for smaller font.
OOPTIONSOOOOOOOOOOOOOOOO
Font Size: 5-line
Contrast: 5
Confirm Delete: Yes
Keyclick: No
Display screen with 5-line font selected
• Contrast: Set the LCD display contrast to a number from 1 (low) to 10 (high).
• Confirm Delete: for a confirmation message whenever you delete a message/memo/text,
set to “Yes”, or “No” (no confirmation message will be displayed).
• Keyclick: Set to “Yes” for an audible click whenever any key is pressed, or “No” for no
click.
• Screen Timeout: Set to “30 sec”, “60 sec” or “Off”.
After the M90 has been idle for the selected length of time, the LCD screen will go blank
to conserve energy. If the back light is on, it will turn off.
If set to “Off”, then the screen will remain on until the device is turned off.
• Message Privacy: If your M90 is enabled for Message Privacy, then you can set this
option to “Yes”. This means that if the network requests the “read” status of a message
sent to you, the device will inform the network that the device is currently set to private.
If set to “No”, or if Message Privacy is not enabled for your device, then the device will
respond to any network “read” status requests.
3. Press ESC to save and exit from Options.
13.4 Setting Private Time
Private Time allows you to turn off Inbox and News Message Alerts for a specified period of time
every day (for example, when you are asleep at night). To configure Private Time:
1. Go to PREFERENCES → Private Time.
OPRIVATE TIMEO
Private Time: No
Start Time: [HH]:[MM] [AM]
End Time: [HH]:[MM] [AM]
Alert at End: Yes
2. Set Private Time to “Yes” to turn on Private Time.

m90User’s Guide
© 2005 Unication Co., Ltd.
57
3. Enter the Start Time by clicking in each field until the desired number or option appears:
If Date and Time Time Format is set to 12 hour format: set the hour (01–12), minute (00–59)
and AM or PM
If Date and Time Time Format is set to 24 hour format: set the hour (00-23), and minute
(00-59)
4. Enter the End Time by clicking in each field until the desired number or option appears:
If Date and Time Time Format is set to 12 hour format: set the hour (01–12), minute (00–59)
and AM or PM
If Date and Time Time Format is set to 24 hour format: set the hour (00-23) and minute
(00-59)
5. Set Alert at End to “Yes” (default) or “No”.
When set to Yes, an alert sounds at the end of Private Time if new messages are in the Inbox.
6. Press ESC to save and exit from Private Time. Private Time is now turned on and will go into
effect for the selected time period (from Start Time to End Time).

m90User’s Guide
58 © 2005 Unication Co., Ltd.
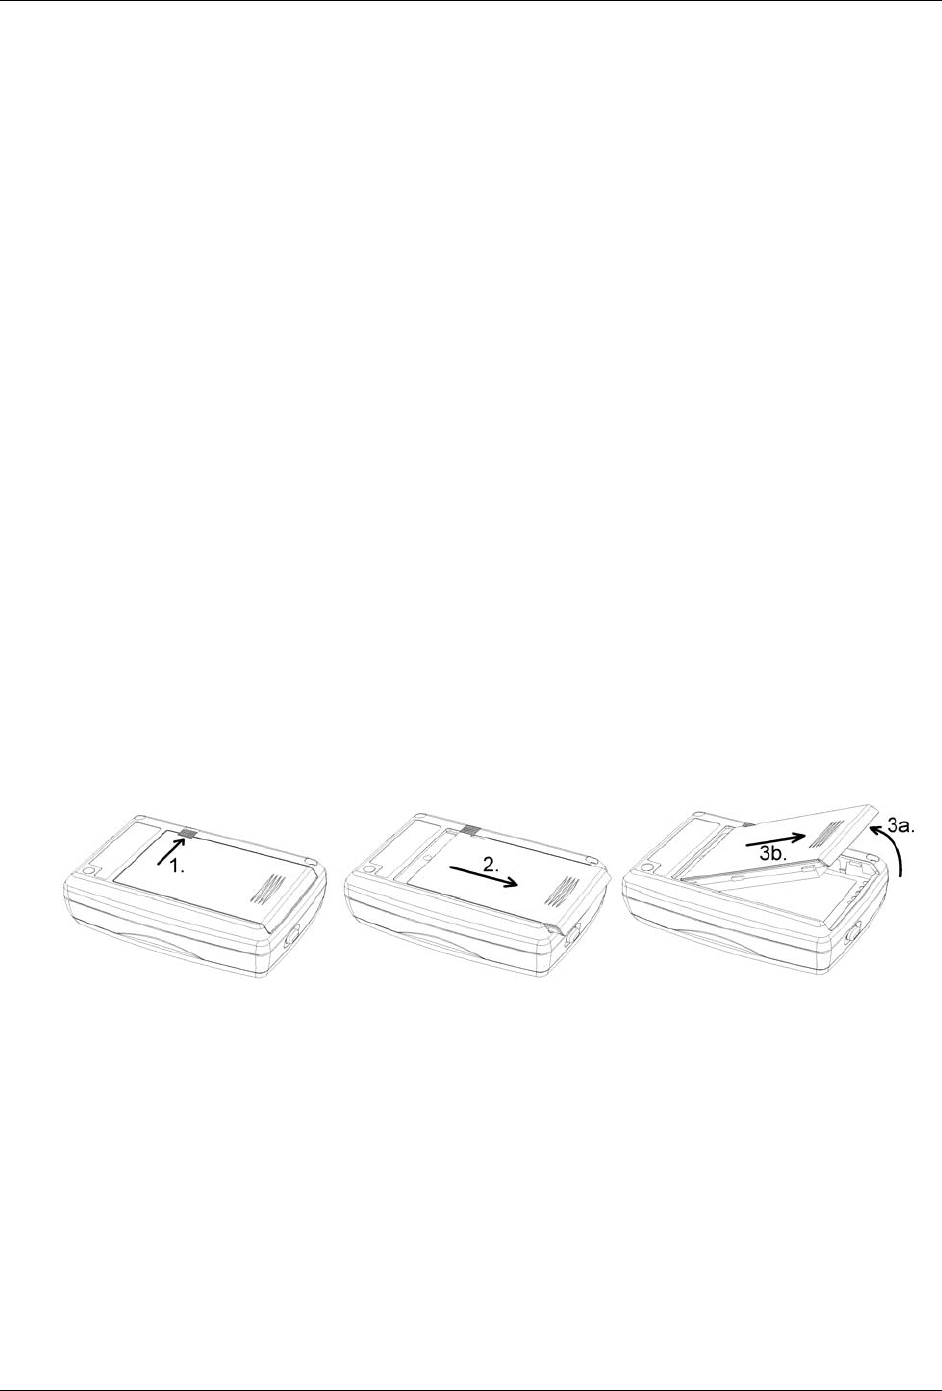
m90User’s Guide
© 2005 Unication Co., Ltd.
59
14. Maintenance
14.1 General Care
Clean with a soft cloth dampened with soap and water.
Do not immerse in water. Do not use alcohol, solvents or other cleaning solutions.
Do not expose to excessive heat, moisture or extreme shock.
14.2 Battery Care
The Battery Life Status Indicator will flash on the M90 LCD display screen when the battery needs
recharging. Charge the battery per the instructions in Section 2.3 Charging the Battery on page 7.
Removing and Replacing the Battery
Under normal circumstances your Unication lithium ion polymer battery should not need replacing
for many years. If you do need to replace it, follow these instructions. To prevent possible data loss
or corruption, you should power off the M90 prior to removing the battery.
• Power off the M90 (see Turning Your M90 Off and On on page 19).
• Remove the old battery from the rear of the M90 as shown in the illustrations below. First
slide the battery lock outwards to the unlocked position, then slide the battery in the
direction shown in step 2 until it stops (approximate position as shown in step 2). Finally, lift
the end of the battery up and pull the battery out of the housing as shown in steps 3a and
3b. The battery should slide and lift out of the housing easily. Do not force.
• Now, install the new battery per instructions in Section 2.2 Installing the Battery on page 7.

m90User’s Guide
60 © 2005 Unication Co., Ltd.

m90User’s Guide
© 2005 Unication Co., Ltd.
61
15. Troubleshooting
M90 does not turn on Device has been turned off. Press ALT then SPACE to turn the
M90 on.
Check the battery: ensure battery is charged, inserted properly,
and that the contacts are clean.
You can’t send messages Check the signal strength meter (if this feature has been enabled
by your service provider). If the signal is weak, move to an open
space or, if in a building, move close to a window.
Check your coverage icon. Ensure you have 2-way coverage; if
not then there may not be network coverage in your area.
Check your transmitter icon. Is the Transmitter Off? If so, turn on.
You can’t receive messages Check the signal strength meter (if this feature has been enabled
by your service provider). If the signal is weak, move to an open
space or, if in a building, move closer to a window.
Check your coverage icon. Ensure you have 2-way coverage; if
not then there may not be network coverage in your area.
Check your transmitter icon. Is the Transmitter Off? If so, turn on.
The battery won’t charge Check the charger. Ensure the charger is properly plugged in,
and that the wall outlet has power.
Check the battery contacts. Ensure contacts are clean.
Check the battery temperature. If it is warm, let it cool before
recharging.
Is it an old battery? Replace the battery.
Are you using an original Unication battery? The M90 is only
designed to work with Unication lithium ion polymer batteries.
Please note: A fully discharged battery may require charging up
to half an hour before the M90 powers on. For this period of time,
the display will be blank.
The battery loses charge
faster than normal Are you in an area of variable coverage? This consumes more
power.
Is it a new battery? A new battery needs two to three
charge/discharge cycles to attain normal performance.
Is it an old battery? Battery performance declines after several
years of use.
Are you using your M90 in extreme temperatures? At extremely
hot or cold temperatures, battery performance is significantly
reduced.

m90User’s Guide
62 © 2005 Unication Co., Ltd.

m90User’s Guide
© 2005 Unication Co., Ltd.
63
16. FCC / ICC Compliance Statement
This device complies with FCC 47 CFR Part 15 of the FCC rules and the Industry Canada (IC) Class B limits.
Operation is subject to the following two conditions:
1. This device may not cause harmful interference
2. This device must accept any interference received, including interference that may cause undesired
operation.
Class B emission limits are designed to provide reasonable protection against harmful interference in a
residential installation. This device generates, uses, and can radiate RF energy and, if not used in accordance
with the instructions, may cause harmful interference to radio communications. However, there is no
guarantee that interference will not occur due to a particular use of the device. If this device does cause
harmful interference to radio or television reception, which can be determined by turning the device off and on,
the user is encouraged to try to correct the interference by one or more of the following measures:
• Reorient or relocate the receiving antenna
• Increase the separation between the device and receiver
• Connect the device into an outlet on a circuit different from that which the receiver is connected
• Consult the dealer or an experienced radio/TV technician for help.
Users take note: Any changes made to the M90 device that are not expressly approved in writing
by Unication Co., Ltd. May render this device’s FCC/IC compliance invalid, and may void the user’s
authority to operate said device.

m90User’s Guide
64 © 2005 Unication Co., Ltd.

m90User’s Guide
© 2005 Unication Co., Ltd.
65
Index
address book
adding a new contact, 37
adding a new group, 39
deleting a contact or group, 41
editing a contact or group, 41
set default addresses, 38
shortcuts, 15
alarm clock
alert, closing and turning off, 55
indicators/icon, 10
setting snooze mode, 54
setting up, 53
alerts
alarm, closing and turning off, 55
inbox, 34
news, 45
playing, 35
setting indicator, 11
turn off/on, 20
ALT key, 13
automatic deletion
Inbox, 16
news, 44
personal memory, 16
back light, turning it on/off, 12
battery
care, 59
charge indicator, 11
charging, 7
installing, 7
loses charge too fast, 61
removing, 59
won't charge, 61
charging the battery, 7
confirm delete popup, setting, 56
contact list
in groups, 39
contacts
adding to address book, 37
sending messages to, 23
setting the default address, 38
control keys, 13
coverage indicator, 11
customizing display features, 55
date, setting, 19
DEL key, 13
deleting messages, 29, 31
display contrast, setting, 56
draft messages, editing, deleting, sending, 50
Drafts Folder, saving to, 26
ENTER key, 13
erred messages, 29
ESC key, 13
external connector, 12
folders
creating a subfolder, 49
deleting a memo, 48
deleting subfolders, 50
draft messages, managing, 50
editing a subfolder name, 50
insert memo in message, 48
moving mail messages to, 36
moving news messages to, 46
new memo, 47
personal messages, managing, 51
viewing a memo, 47
font size, setting, 56
forwarding messages, 29
function keys, 13
go to main menu, 13, 21
go to status icons, 21
groups, adding to address book, 39
help, 16, 49
inbox
customizing incoming message alert, 34
deleting messages, 29
erred messages, 29
forwarding a message, 29
reading a message, 27
replying to a message, 28
installing the battery, 7
keyboard
locking, 21
shortcuts, 14
using the, 12
keyclick, setting, 56
lanyard, 8
LCD display, 9
contrast adjustment, 56
customizing, 55
main menu icons, 10
status indicators/icons, 10
turning back light on/off, 12
lowercase/uppercase characters, typing, 13
main menu, 10
popup menu, 20
main menu icons on the LCD display, 10
memos
creating, 47
deleting, 48
inserting in messages, 48
shortcuts, 14

m90User’s Guide
66 © 2005 Unication Co., Ltd.
viewing, 47
MENU key, 13
messages
automatic deletion, 16
can't receive, 61
can't send, 61
deleting, 29, 31
erred, 29
forwarding, 29
new unread indicator, 10
privacy, 56
reading, 27, 31
replying to, 28
resending, 31
saving, 36
saving to Drafts Folder, 26
sending. See sending messages
shortcuts, 14
timestamp, 35
transmission, turn off/on, 20
navigating the e80 menus, 14
news
automatic deletion when news is full, 44
customizing news alerts, 45
deleting, 44
forwarding a news message, 43
reading a message, 43
reordering news folders, 45
saving messages in the personal folder, 46
numbers, typing, 13
outbox
deleting messages, 31
message symbols, 31
resending a message, 31
reviewing sent messages, 31
owner information, 18
personal folder, managing messages in, 51
personal memory, 16
power connector, 12
power off/on, 10, 13, 19
preferences menu, 53
about, 17
alarm clock, 53
mailbox alerts, 34, 45
options, 55
owner information, 18
private time, 56
signature, 36
timestamp, 35
privacy, 56
private time, setting up, 56
quick text
creating, 33
deleting, 34
editing, 34
shortcuts, 14
using in a message, 25
quickview
enabling, 35, 46
using, 27, 43
reading a message, 27
shortcuts, 14
reading a news message, 43
replying to a message, 28
resending a message, 31
reviewing sent messages, 31
safety information, 5
saving messages in folders, 36, 46
sending messages, 23
composing, 25
editing manual entries, 25
inserting a memo, 48
saving to Drafts Folder, 26
selecting contacts from Address Book, 23
to non-default contact addresses, 24
serial connector, 12
setting personal options, 53
setting up your e80, 17
SHIFT key, 13
shortcuts, 14
signal strength indicator, 11
signature, creating a, 36
snooze mode
indicator, 10
setting, 54
special characters, typing, 13
status indicators/icons, 10
subfolders. See folders
system status indicators/icons, 10
time, setting, 19
timeout, setting screen, 56
timestamp, setting a message, 35
transmission, message
indicator, 10
turn off/on, 20
transmitter off/on, 20
troubleshooting, 61
uppercase/lowercase characters, typing, 13
viewing system information, 17


Unication Co., Ltd.
www.uni.com.tw
User’s Guide Part Number:
9626-01006 Revision A