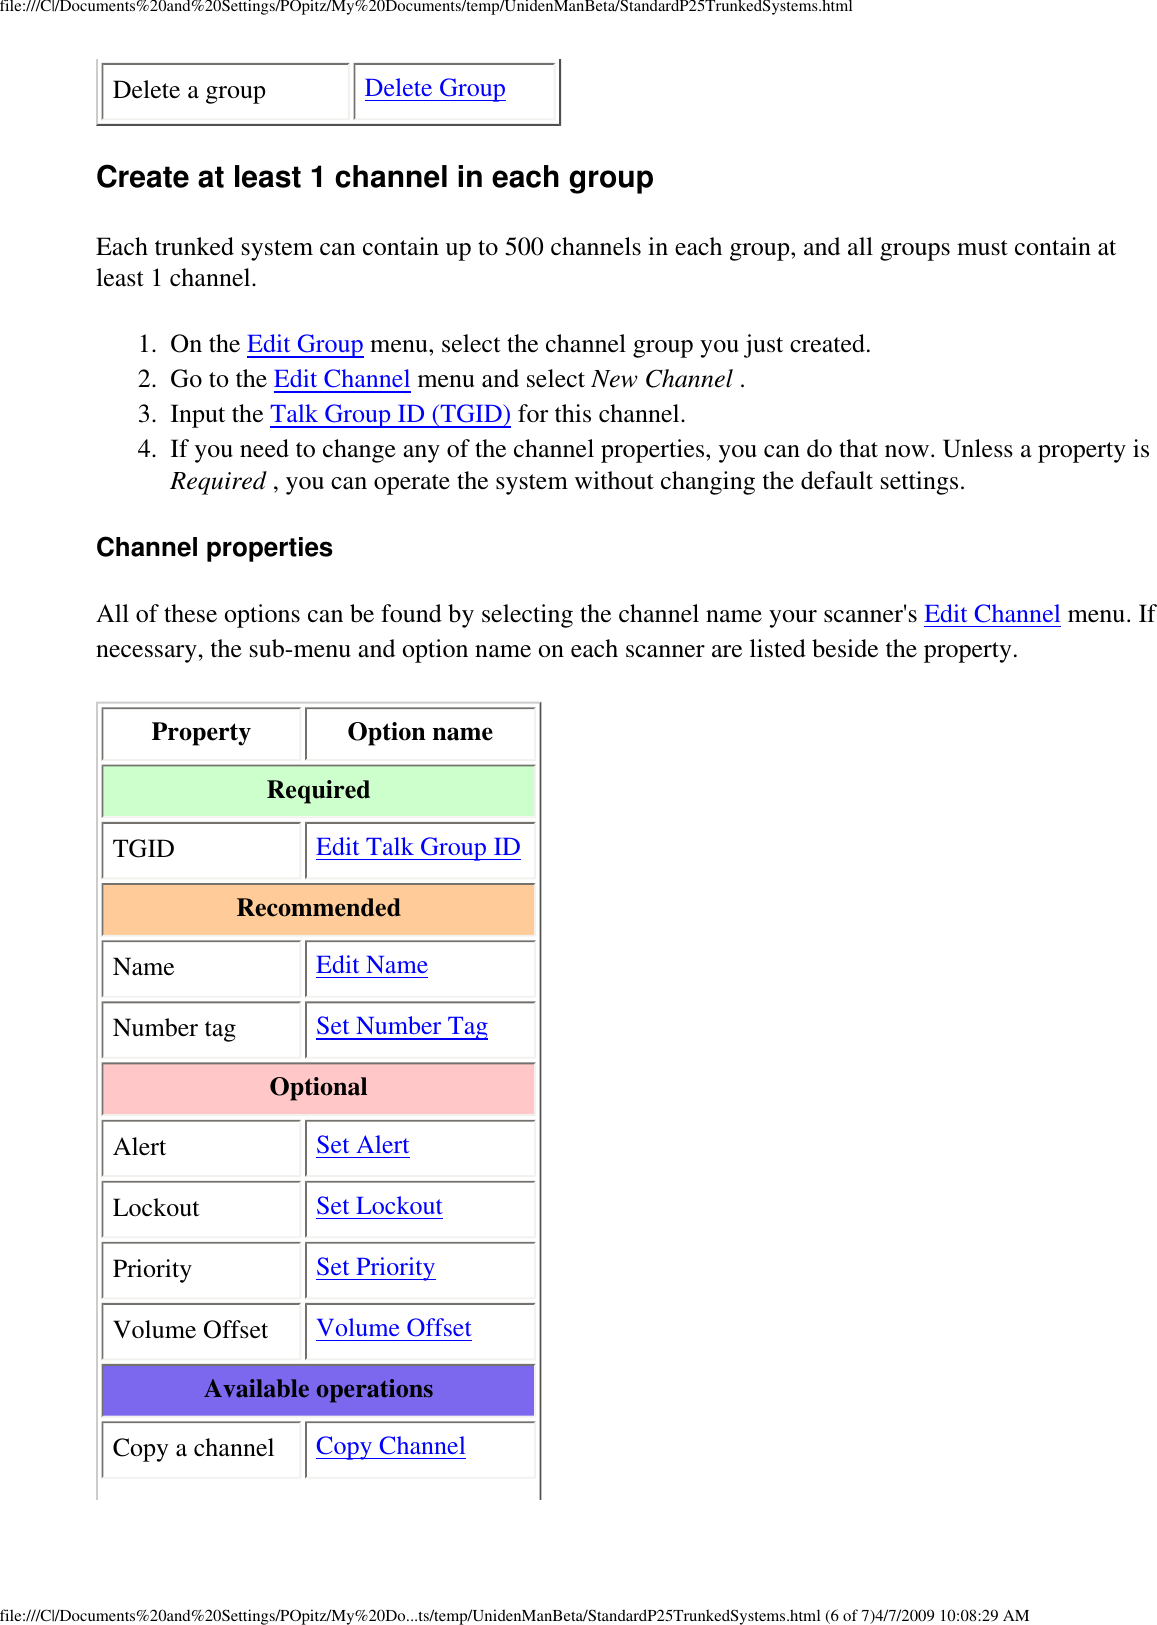
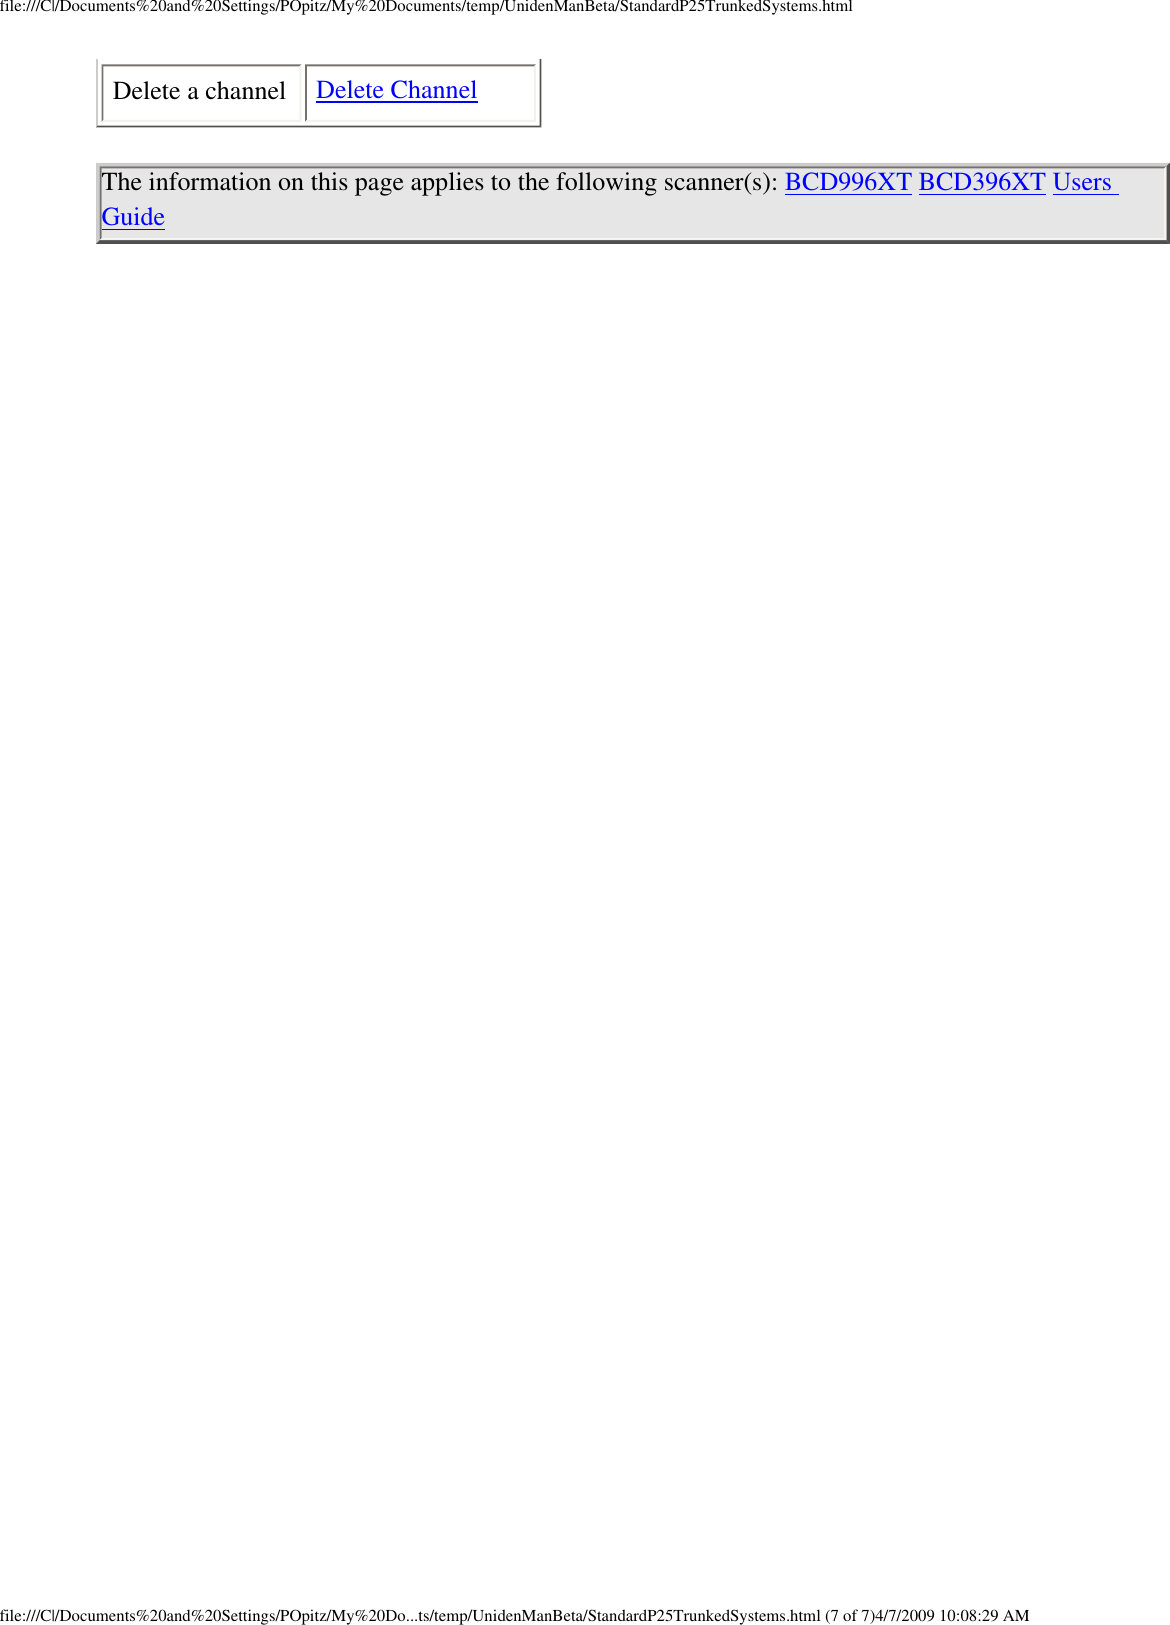
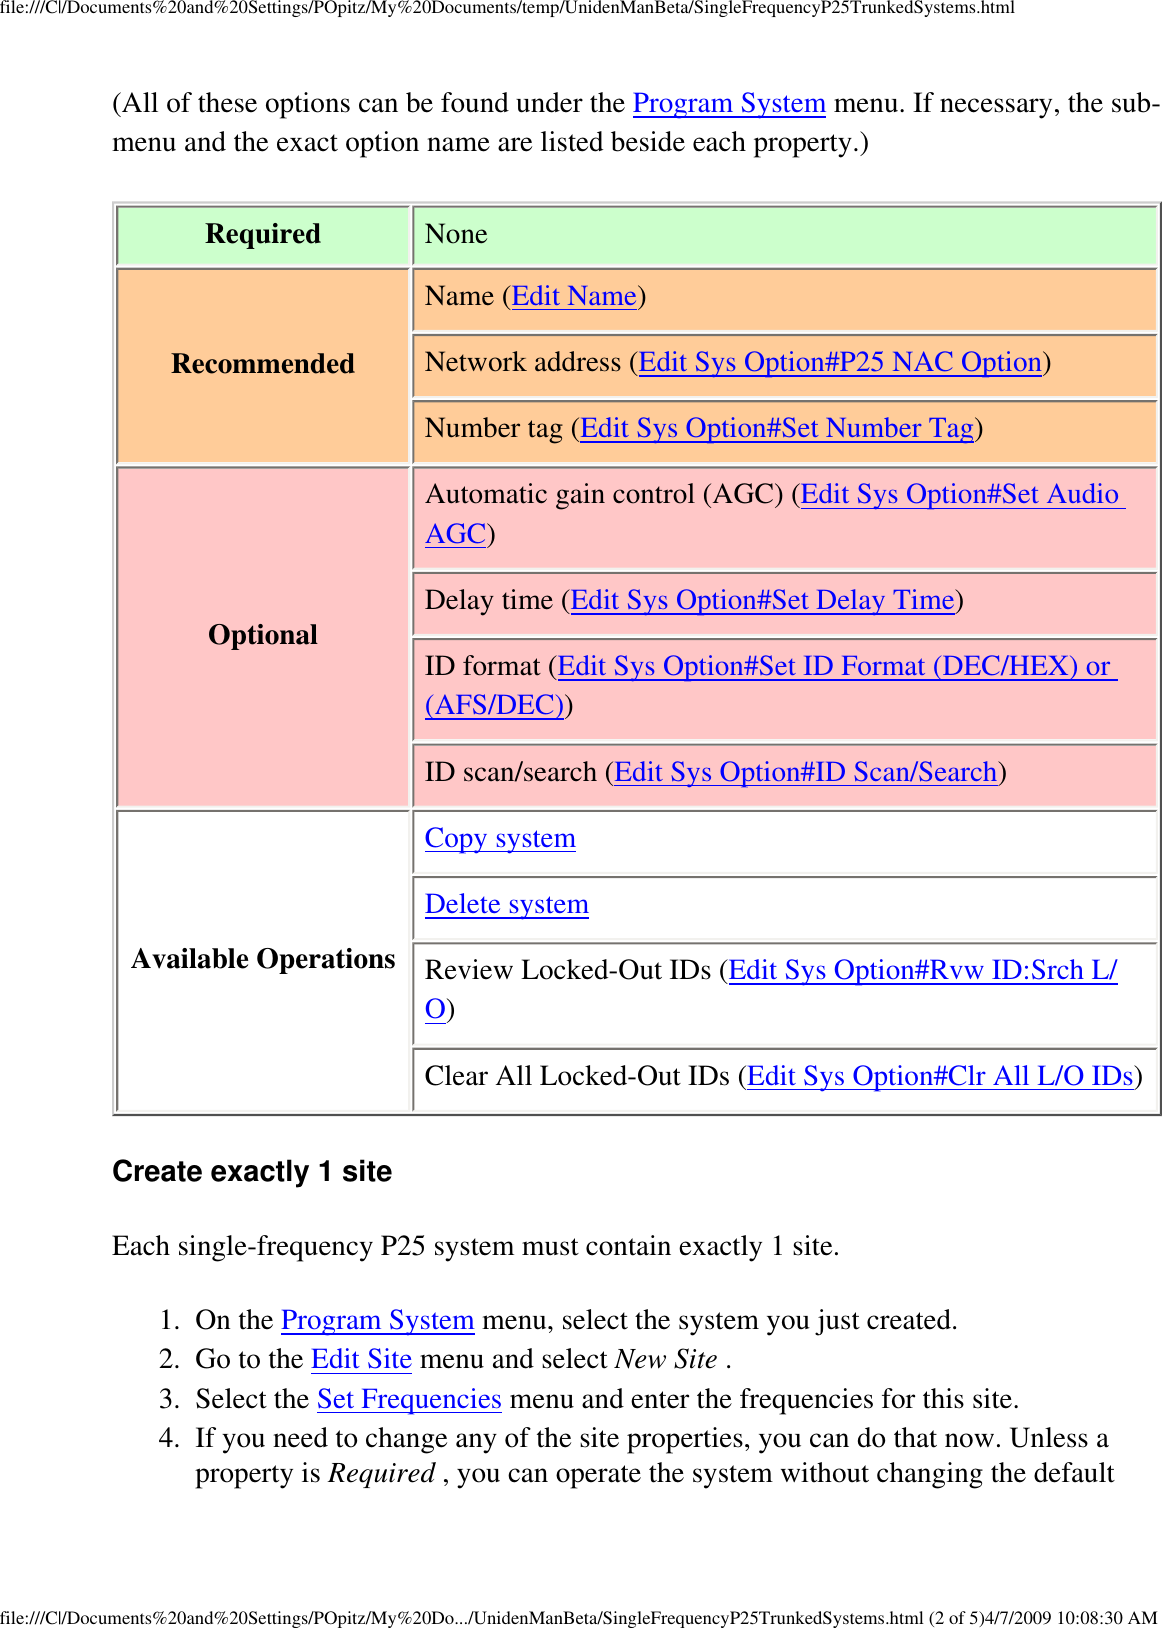
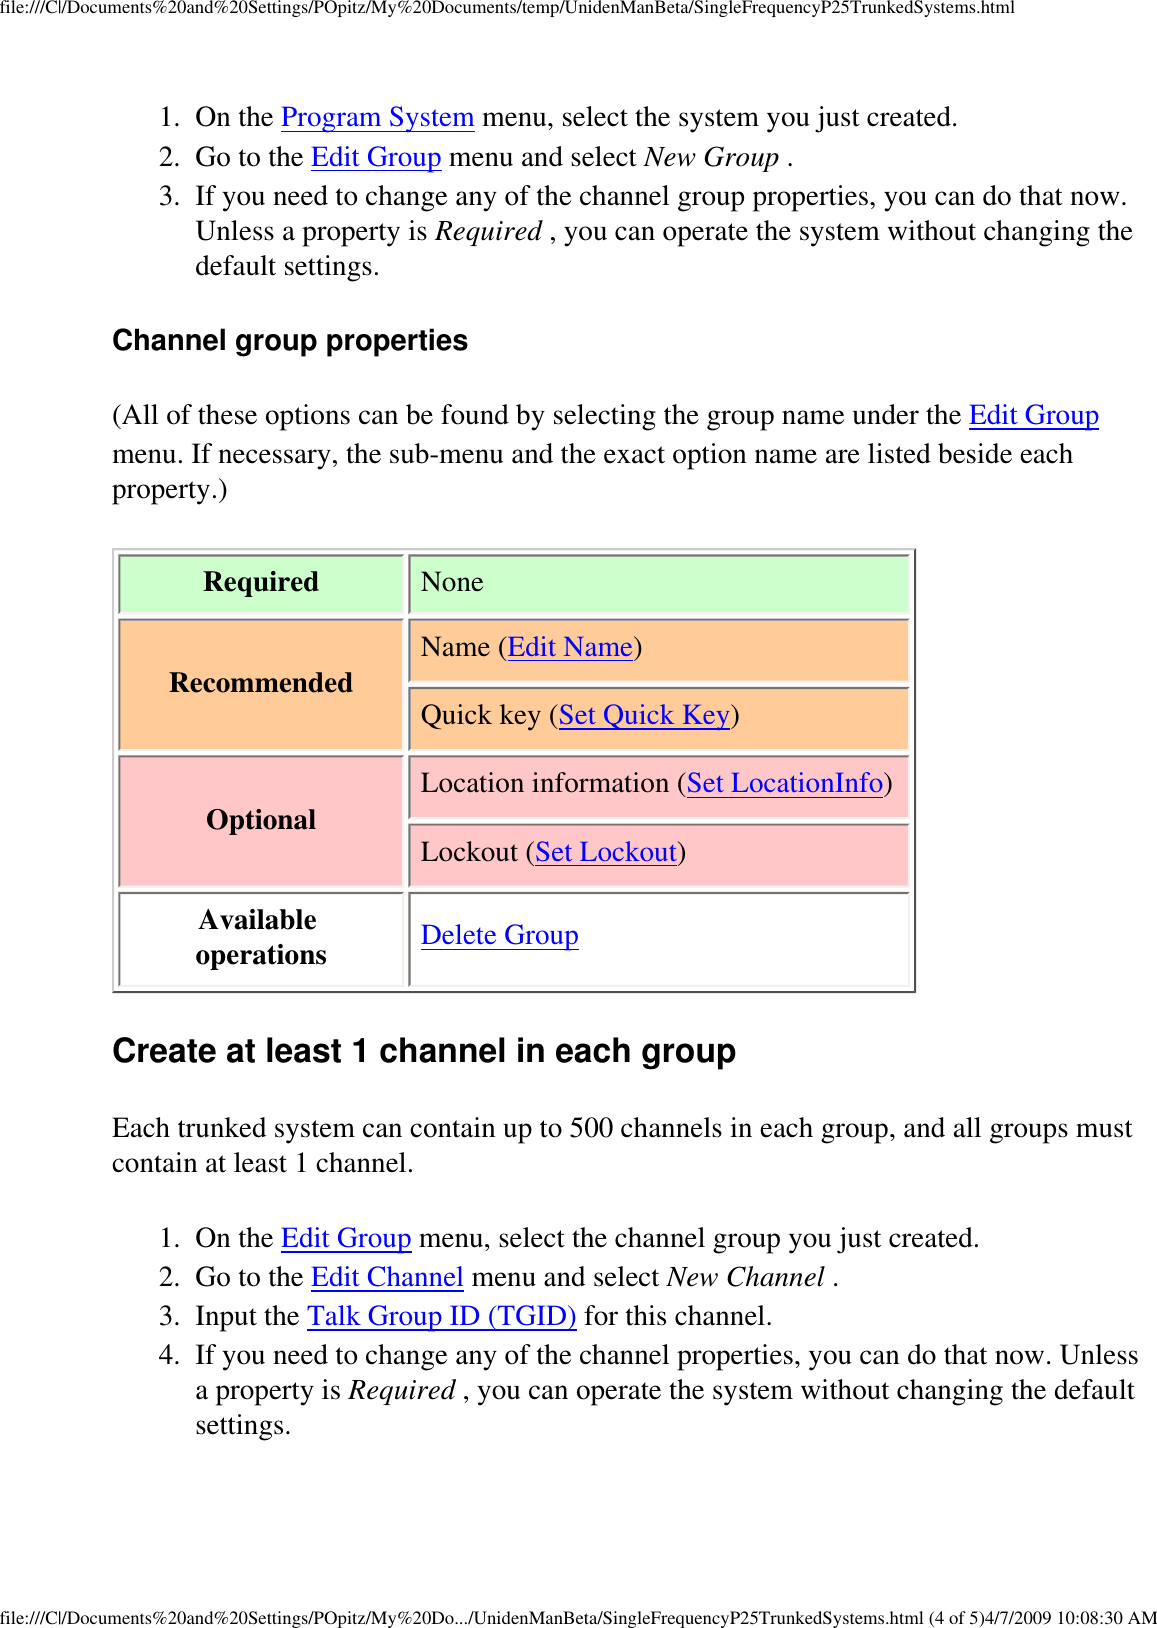
Uniden America UB360 DIGITAL MOBILE TRUNKING SCANNER User Manual
Uniden America Corporation DIGITAL MOBILE TRUNKING SCANNER Users Manual
UserManual.wiki
>
Uniden America
>
UB360 User Manual
Users Manual
Navigation menu
Upload a User Manual
Namespaces
Wiki Guide
HTML
PDF
Info
Views
User Manual
Discussion / Help
Navigation
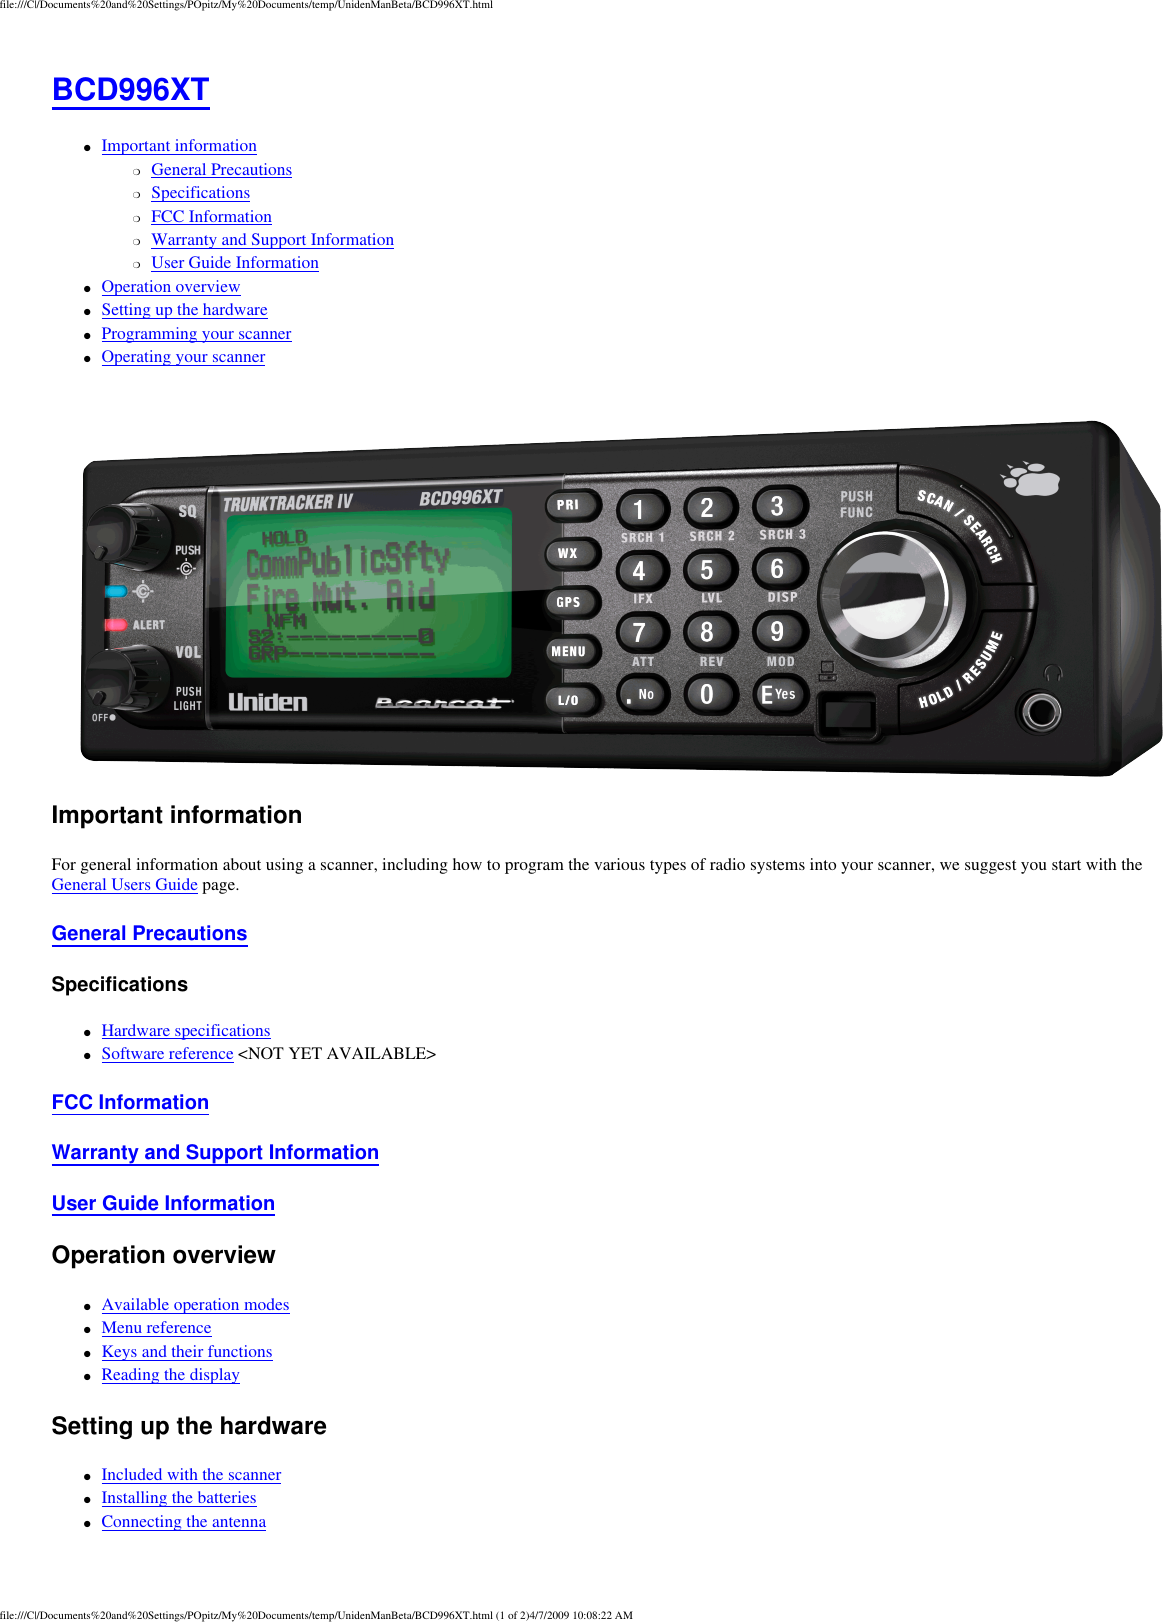

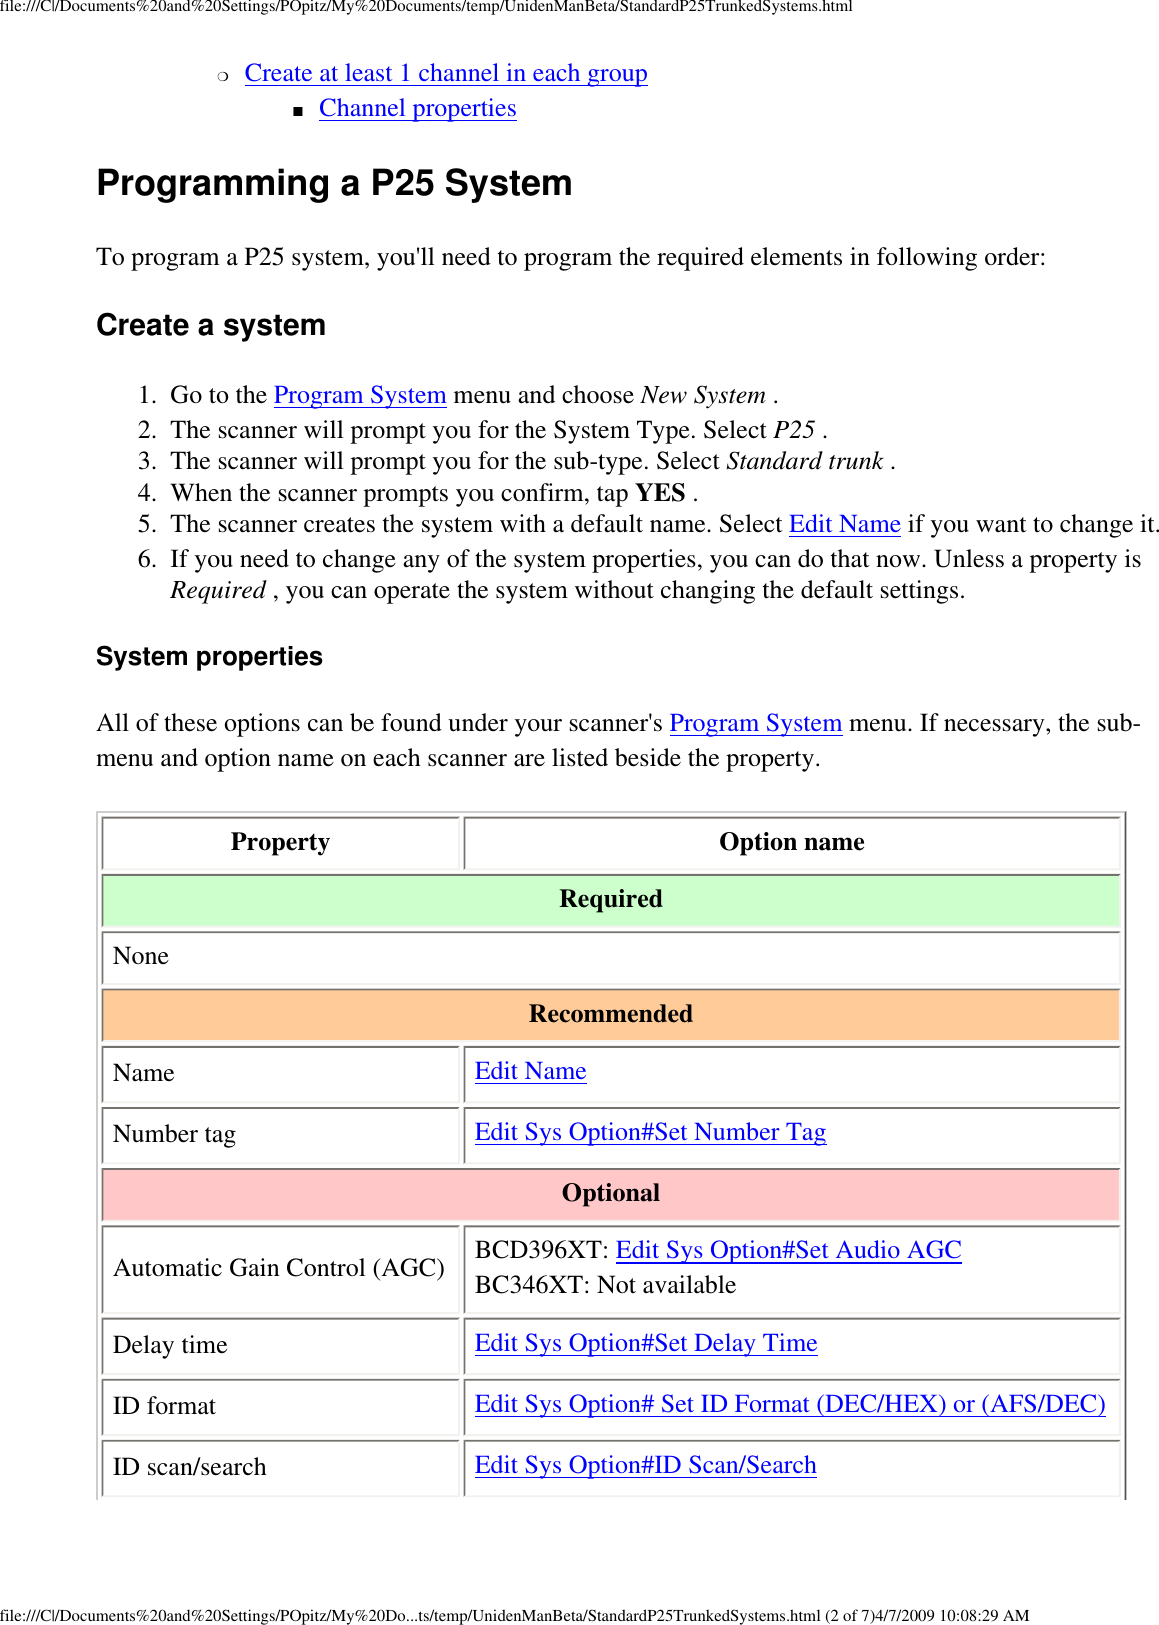


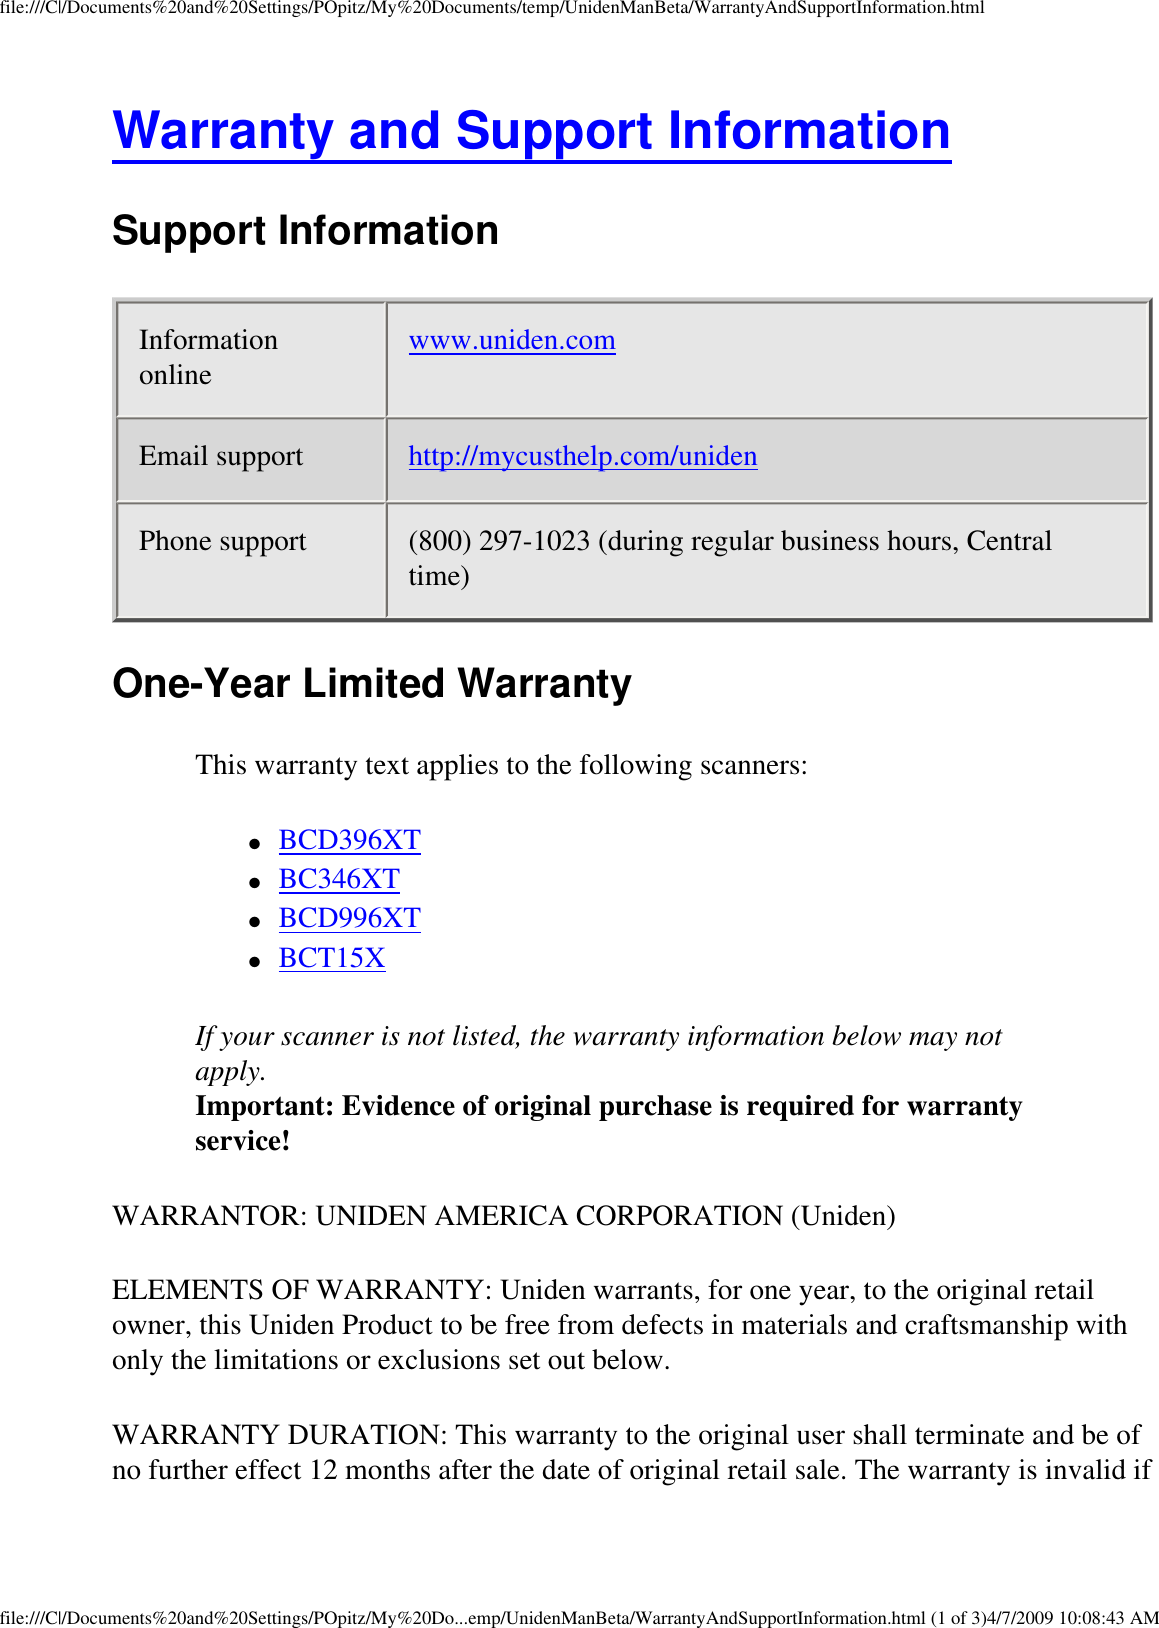


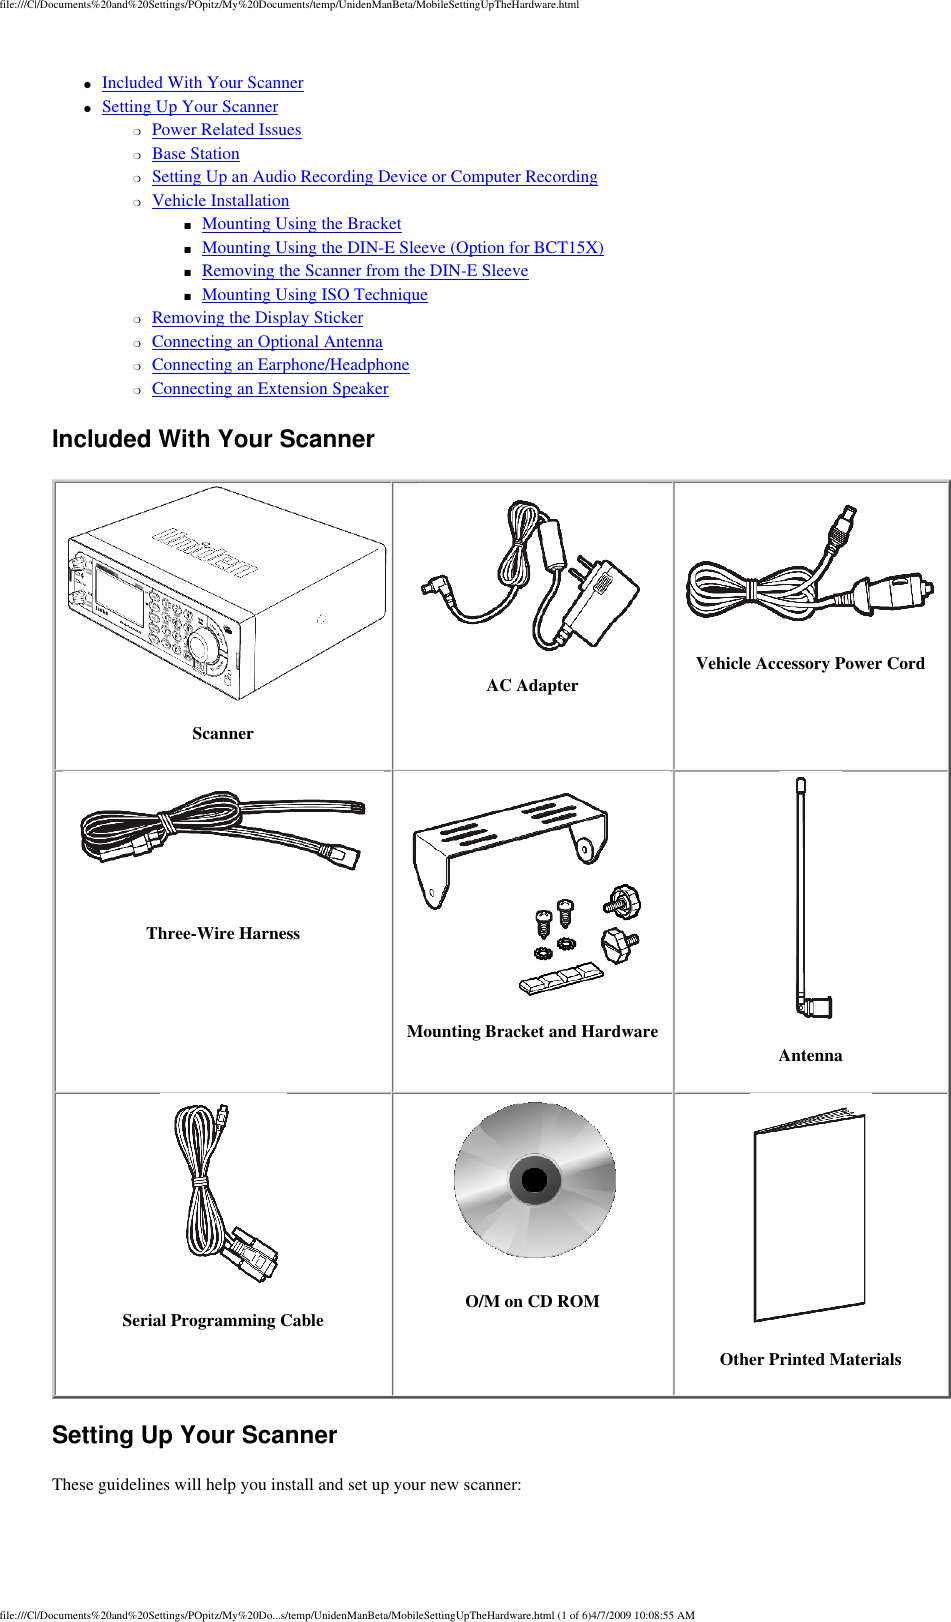
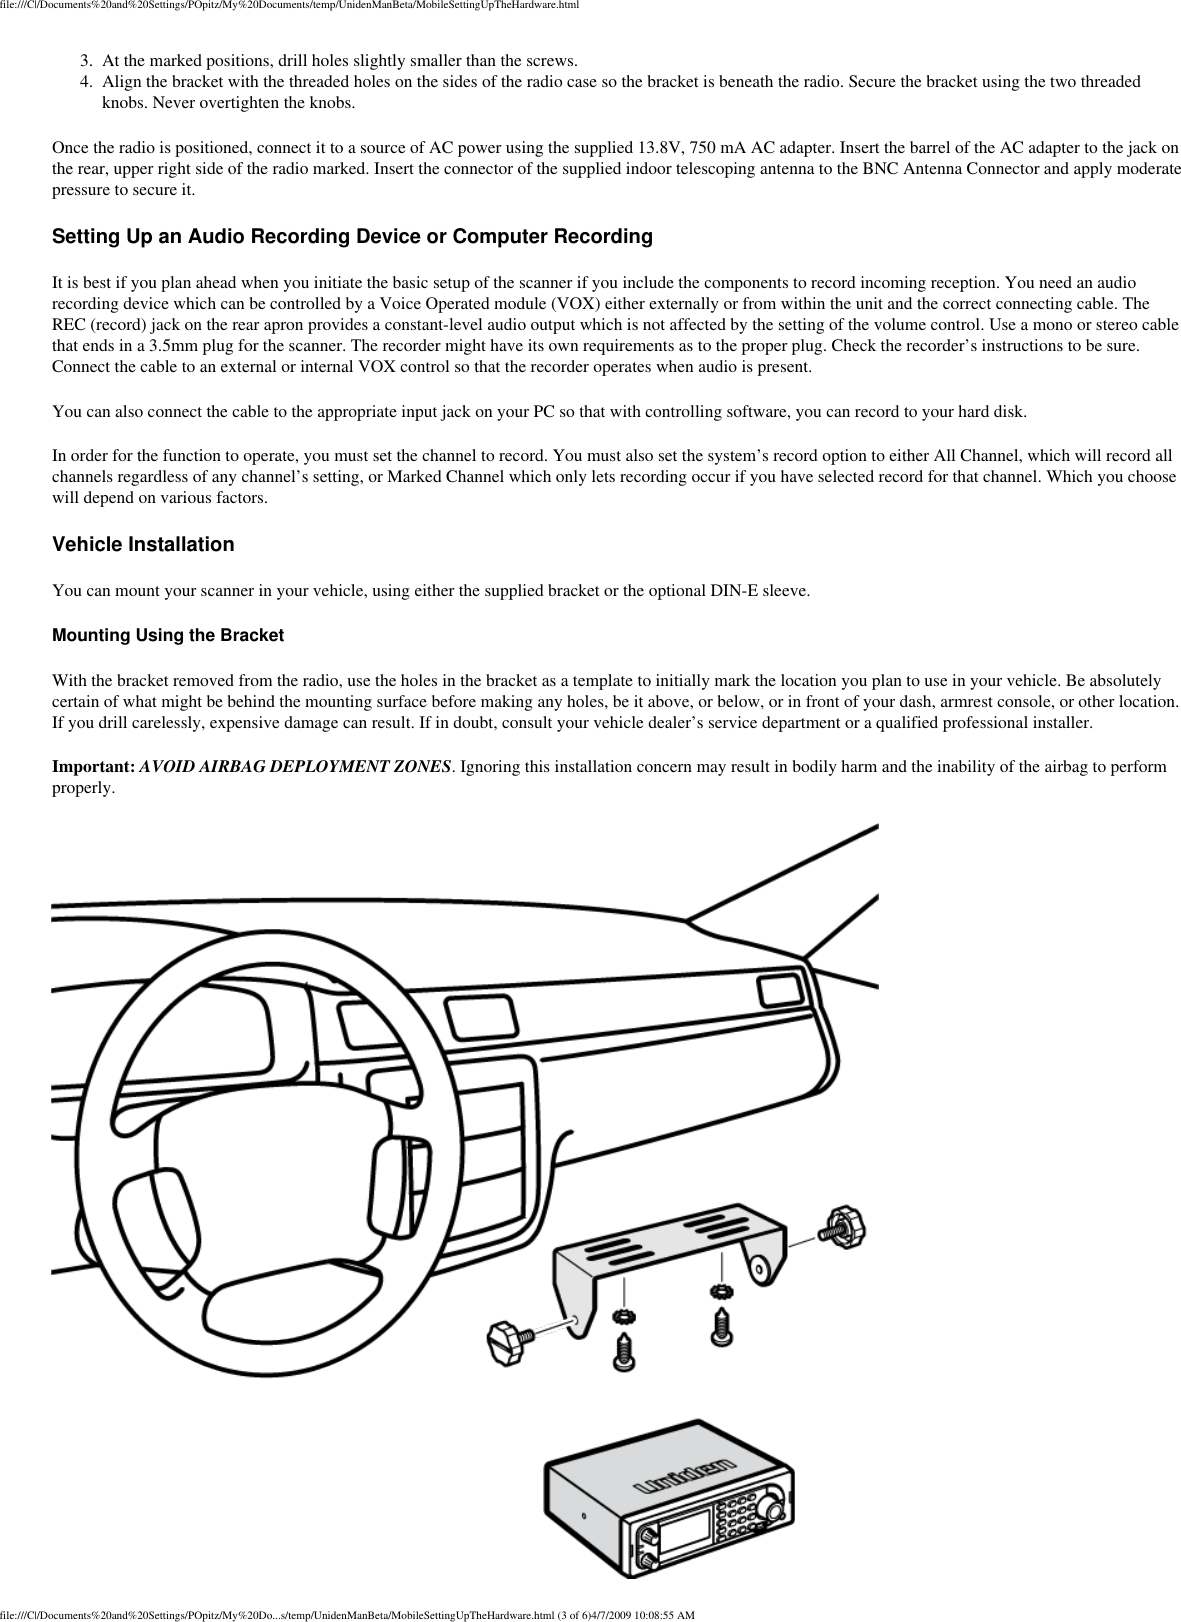
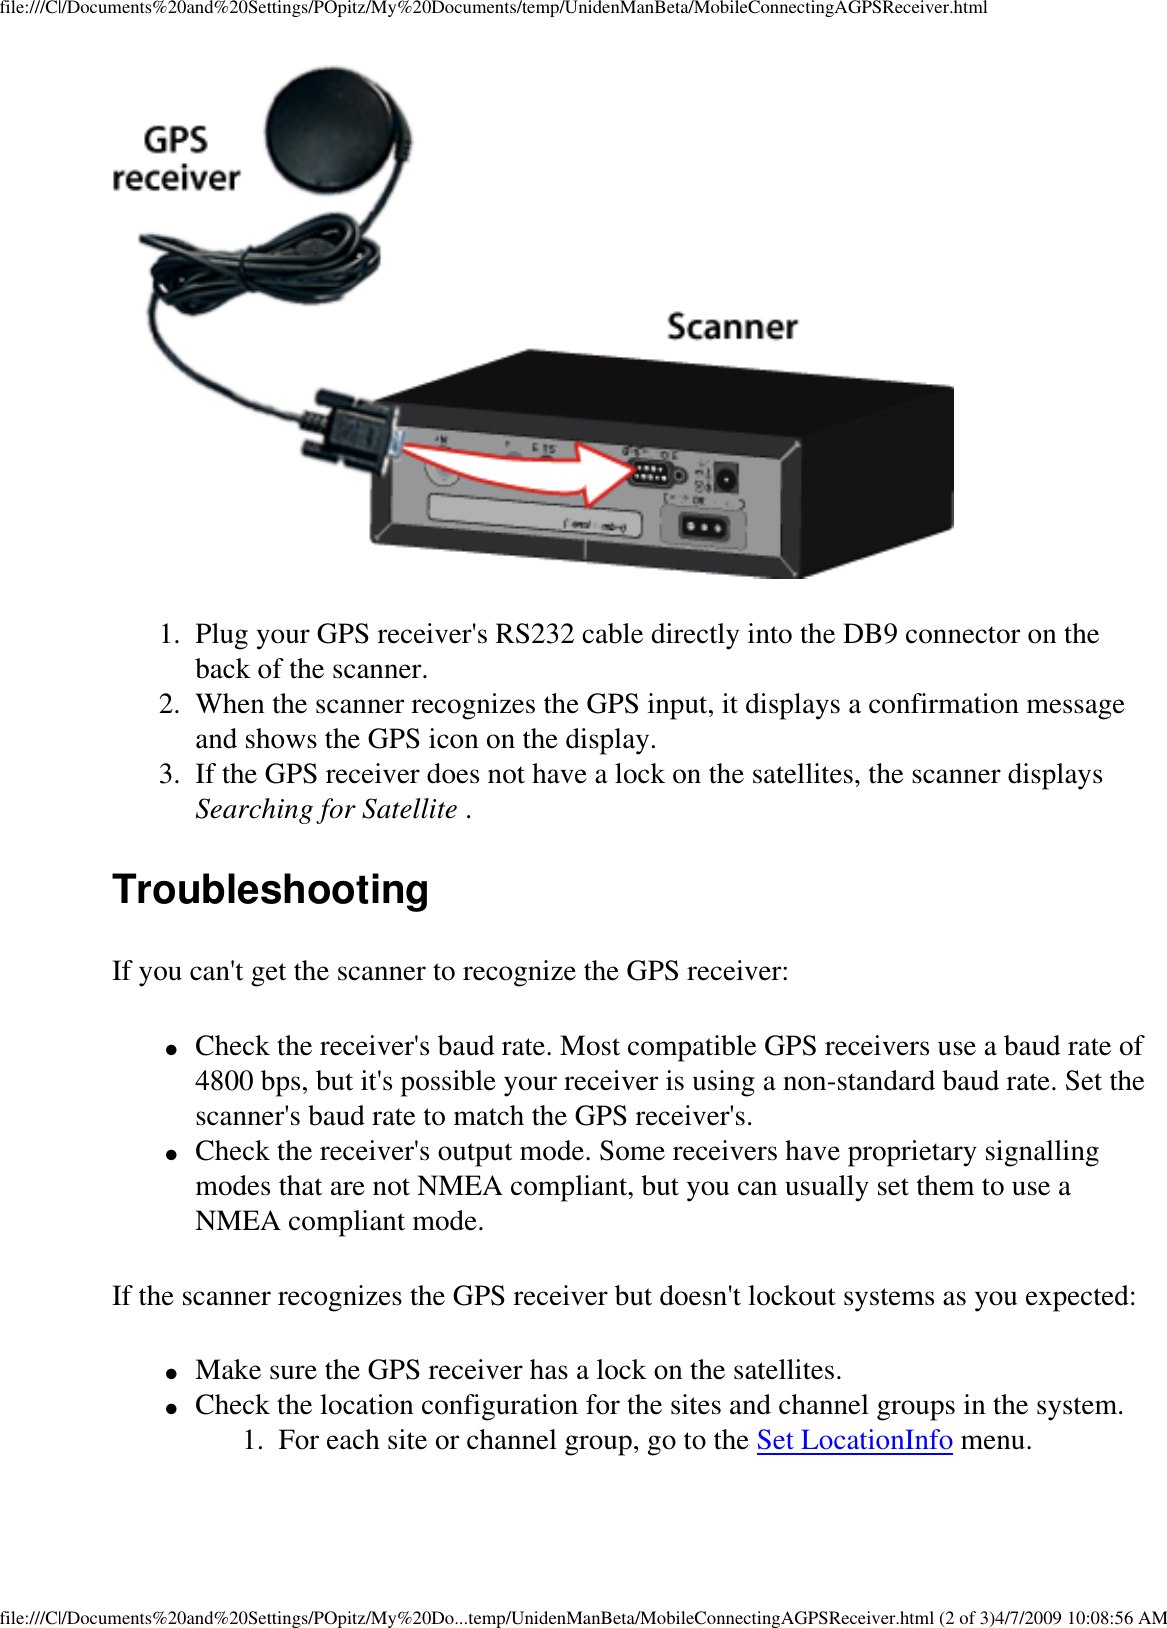
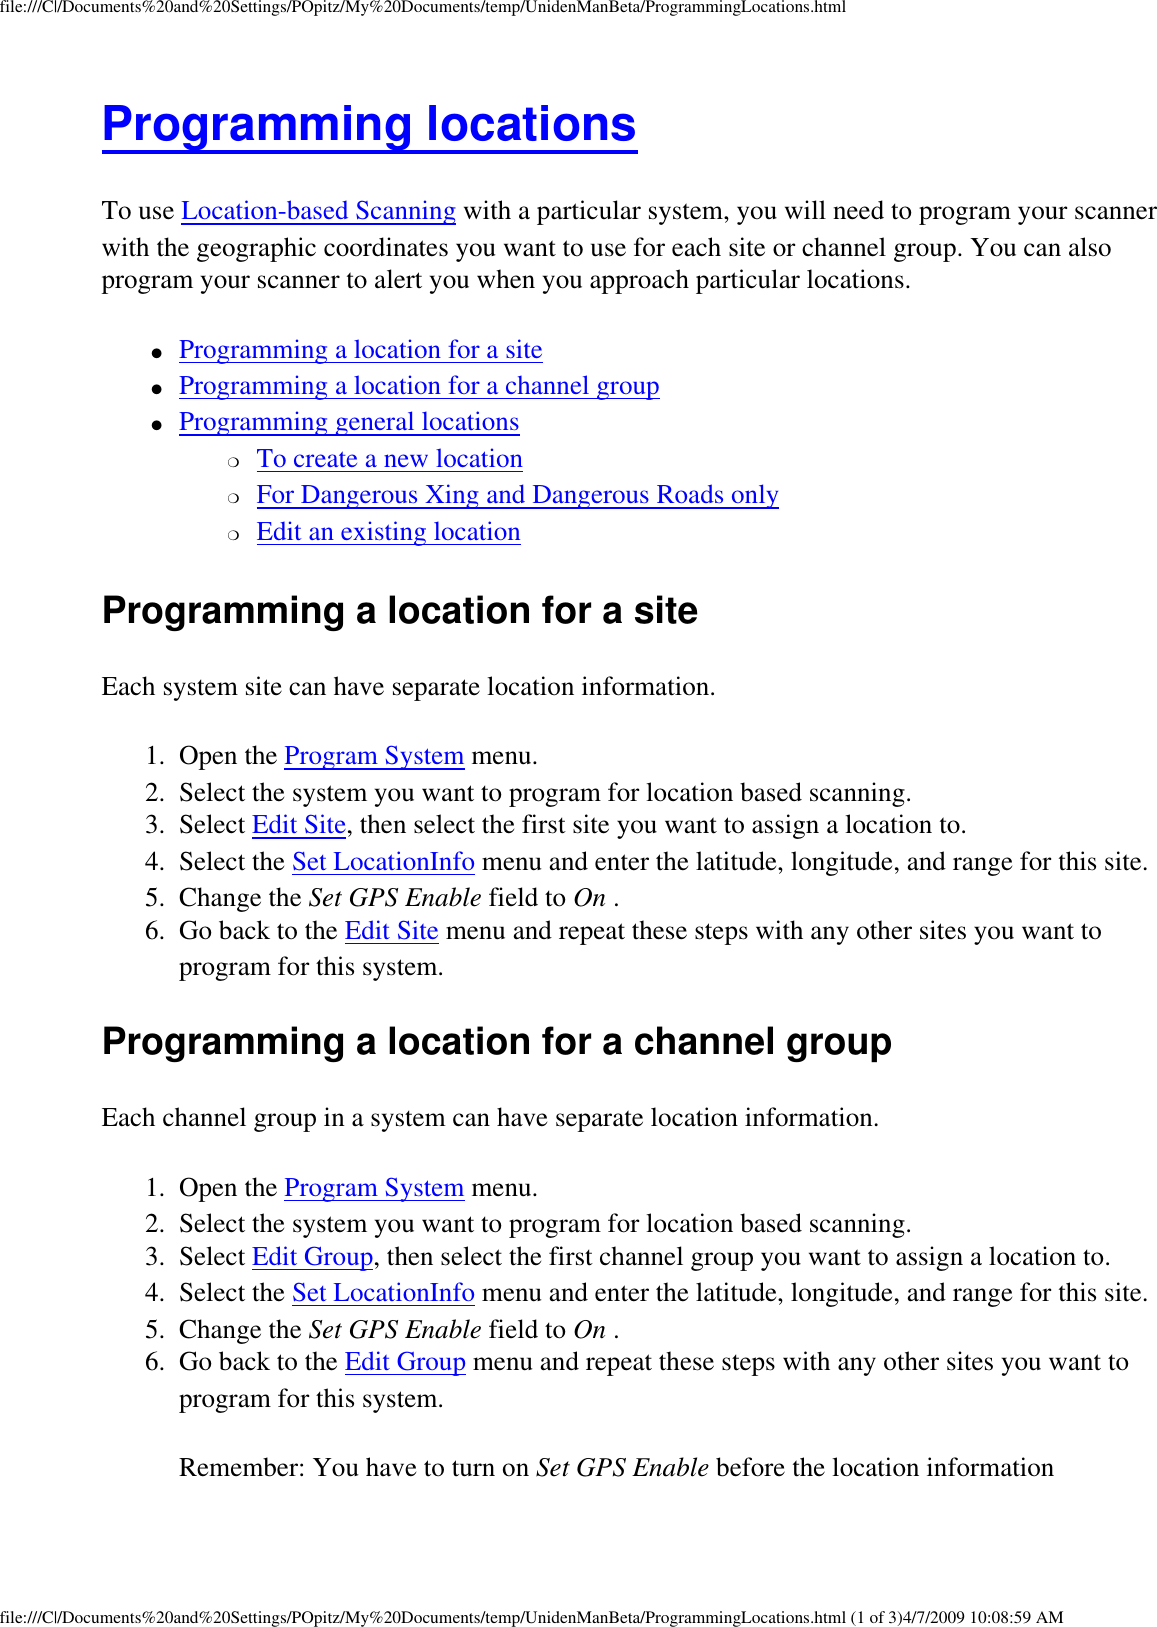
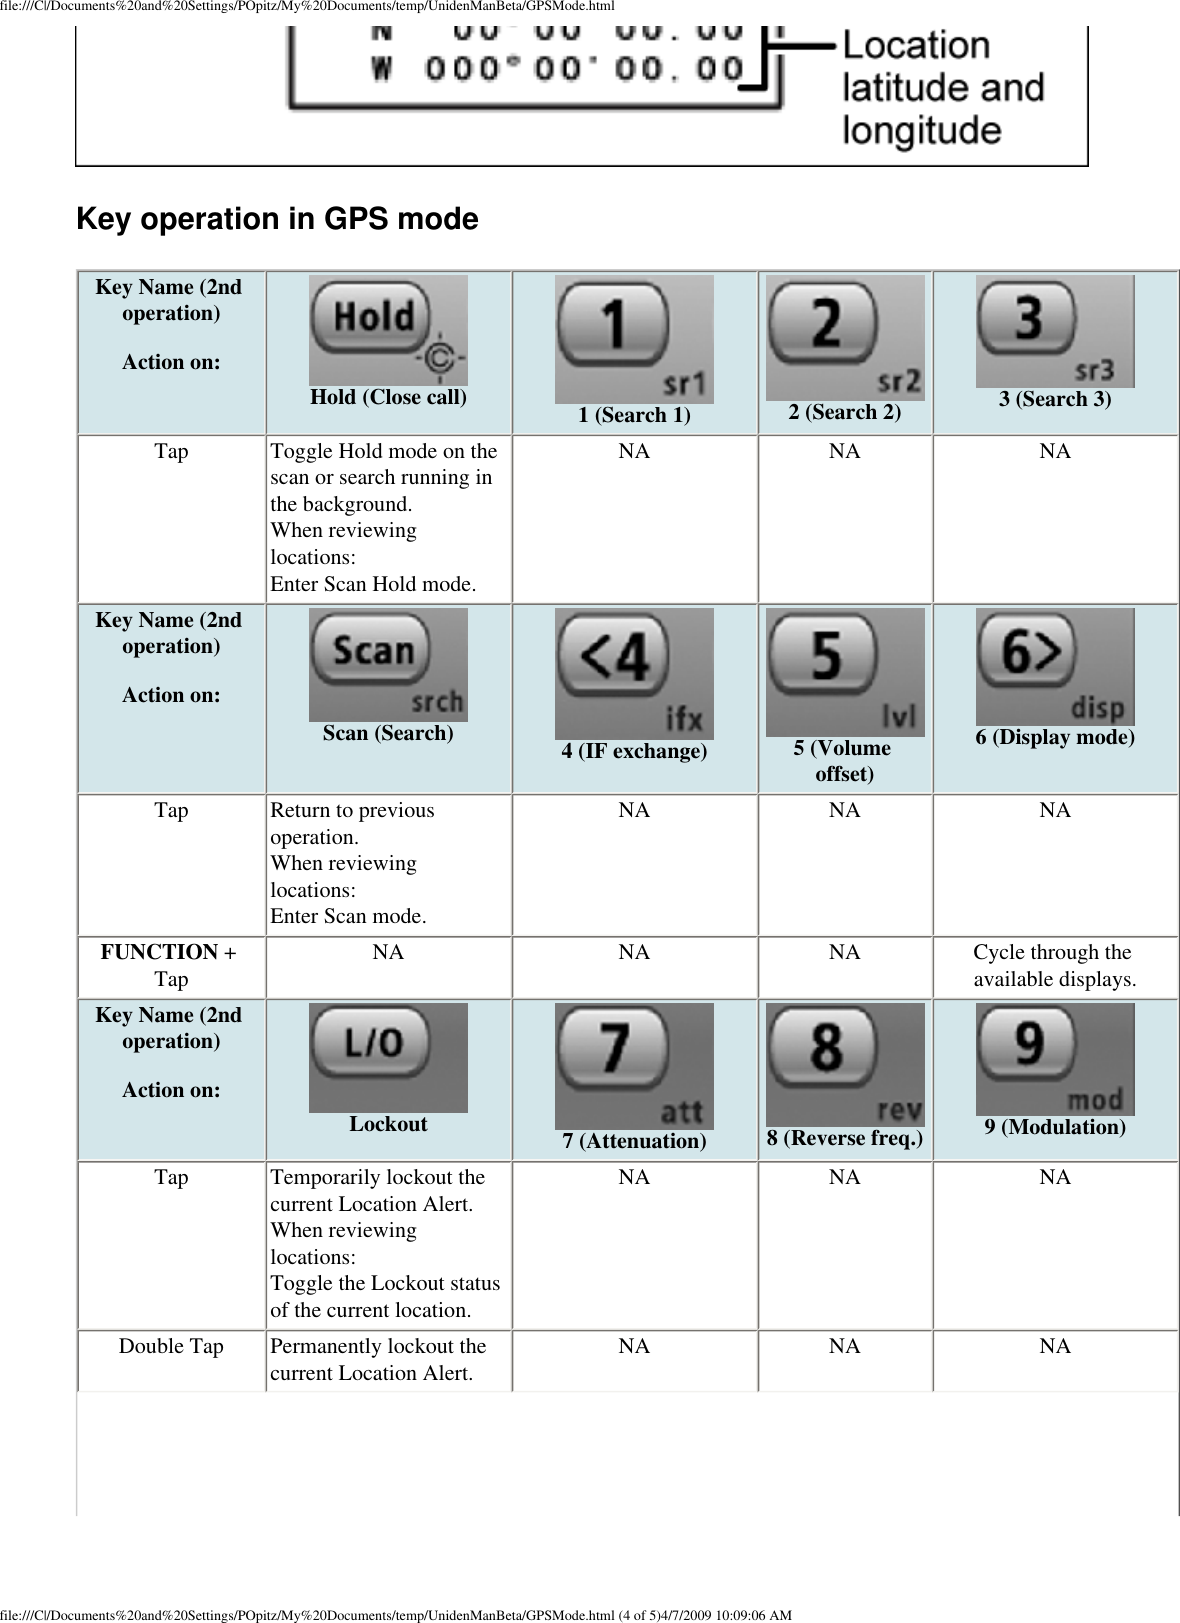
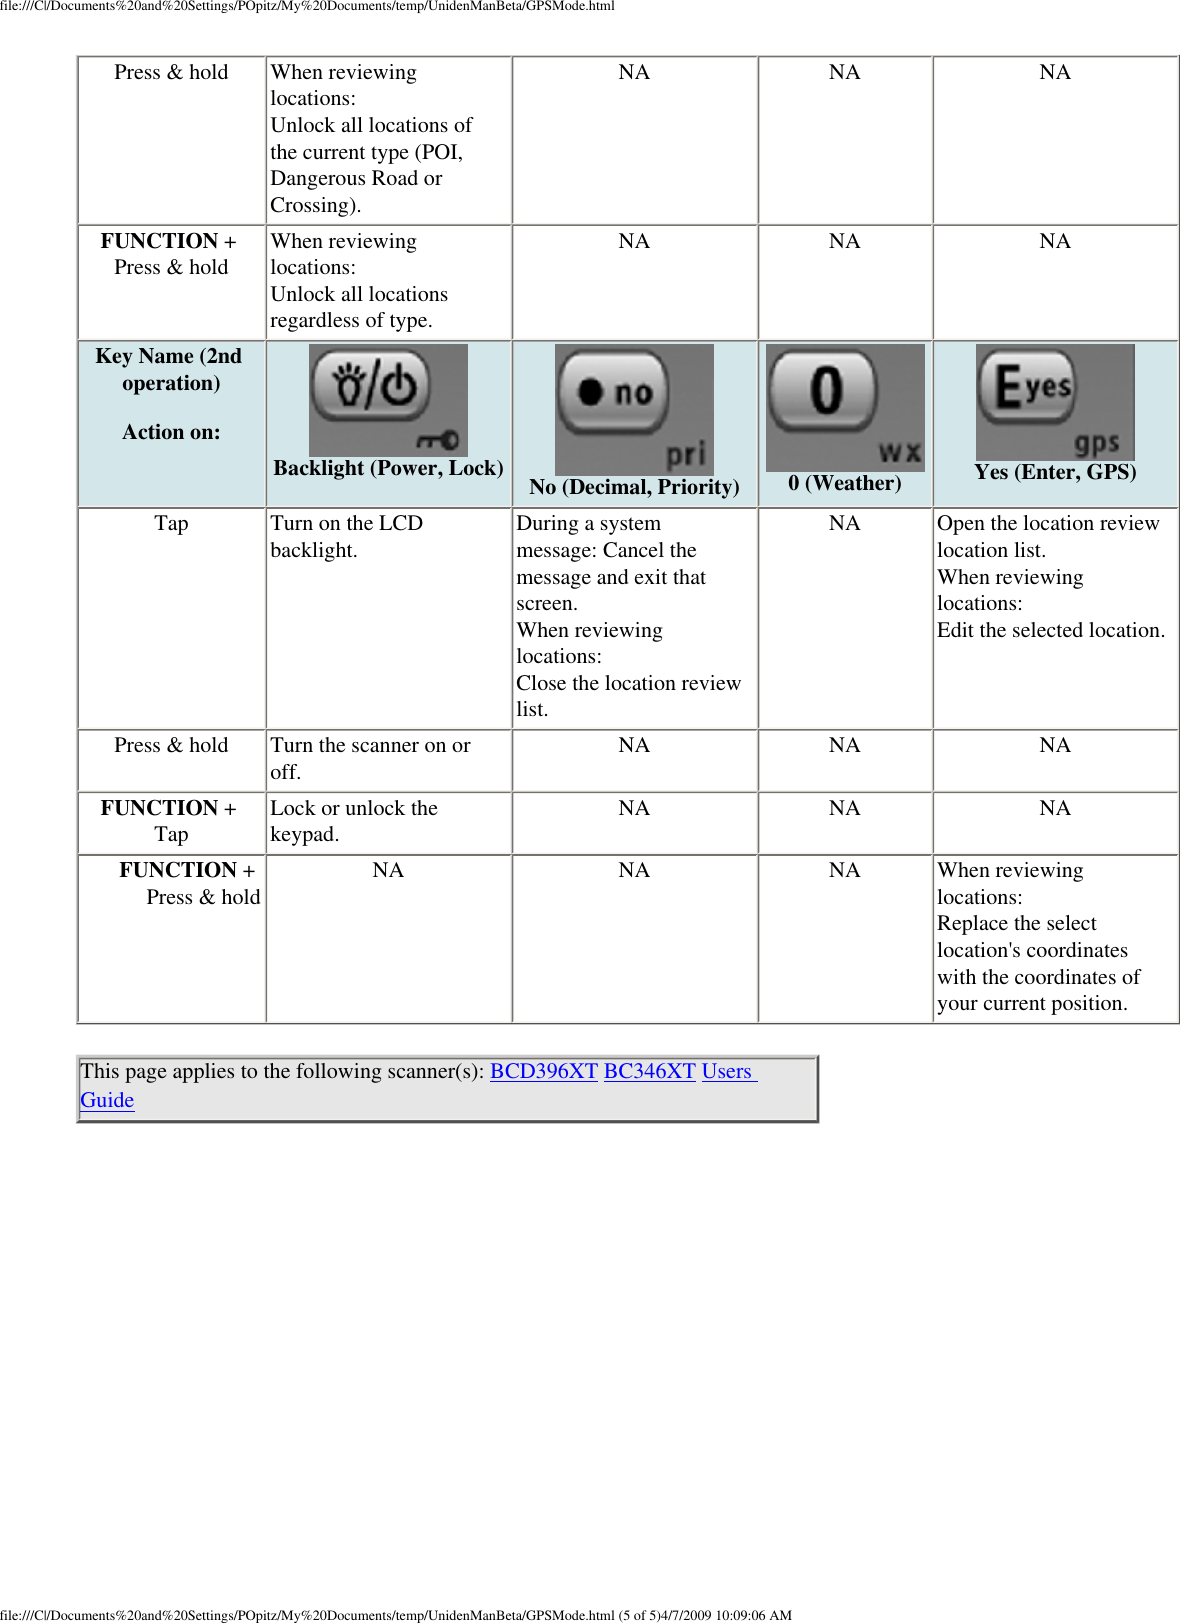
![file:///C|/Documents%20and%20Settings/POpitz/My%20Documents/temp/UnidenManBeta/MobileSettingUpTheHardware.htmlThe scanner can be placed on a convenient surface in your home as a base station, and connected to a standard outlet that supplies 120VAC, 60Hz. You must use either the supplied antenna or an electrically correct outdoor antenna, properly and safely mounted at your chosen site. The scanner is also designed to accommodate either DIN-E and ISO-DIN automotive mounting configurations. A DIN-E sleeve and keys, (Part Number DIN-0001) are optional and available from Uniden. The unit can also be placed above, beneath, or in the dash of your vehicle using the supplied bracket and mounting hardware. ● If your scanner receives interference or electrical noise, move the scanner or its antenna away from the source. ● To improve the scanner’s reception, use an optional external antenna designed for multi-band coverage. (You can purchase this type of antenna at a local electronics store). If the optional antenna has no cable, use 50-75 Ω coaxial cable for lead-in. A mating plug might be necessary for the optional antennas. ● Use an optional mono earphone or mono headset with proper impedance (32 Ω) for private listening. Read the precautions at General Precautions. ● Do not use the scanner in high-moisture environments such as the kitchen or bathroom. ● Avoid placing the scanner in direct sunlight or near heating elements or vents. Power Related Issues Important: To prevent memory from being corrupted, do not unplug the AC adapter during the time the memory is accessed for programming or auto store. Notes: ● If when you connect the AC adapter the [VOL] /Power Switch is ON, the scanner may not power on. Should this occur, simply turn the control OFF, then ON again. ● If the scanner loses power (as when you turn off your car’s ignition with the scanner’s power switch on), it can lose some system settings such as display color and backlight. To ensure that such settings persist, either change thesetting using the scanner’s menu or power the scanner off then back on using the power switch after making such setting changes. When you turn off the scanner using the power switch, the scanner remembers the last settings and mode. When you turn power back on, it resumes the previous mode. Base Station This is the simplest approach to let you get started quickly. Decide on a location that is convenient to a nearby wall outlet, has desk space to let you complete your programming worksheets, will safely allow the indoor antenna to be extended, or near a window to use an outdoor antenna. To secure the radio to a surface, by means of the mounting bracket, follow the steps below: 1. Attach the four protective mounting feet to the mounting bracket when you casually use the scanner on a flat surface. Should you desire to permanently mount the scanner, remove the feet and use wood screws through the bracket as described in Steps 2 and 3. 2. Use the bracket as a template to mark positions for the two mounting screws. file:///C|/Documents%20and%20Settings/POpitz/My%20Do...s/temp/UnidenManBeta/MobileSettingUpTheHardware.html (2 of 6)4/7/2009 10:08:55 AM](https://usermanual.wiki/Uniden-America/UB360/User-Guide-1109911-Page-92.png)