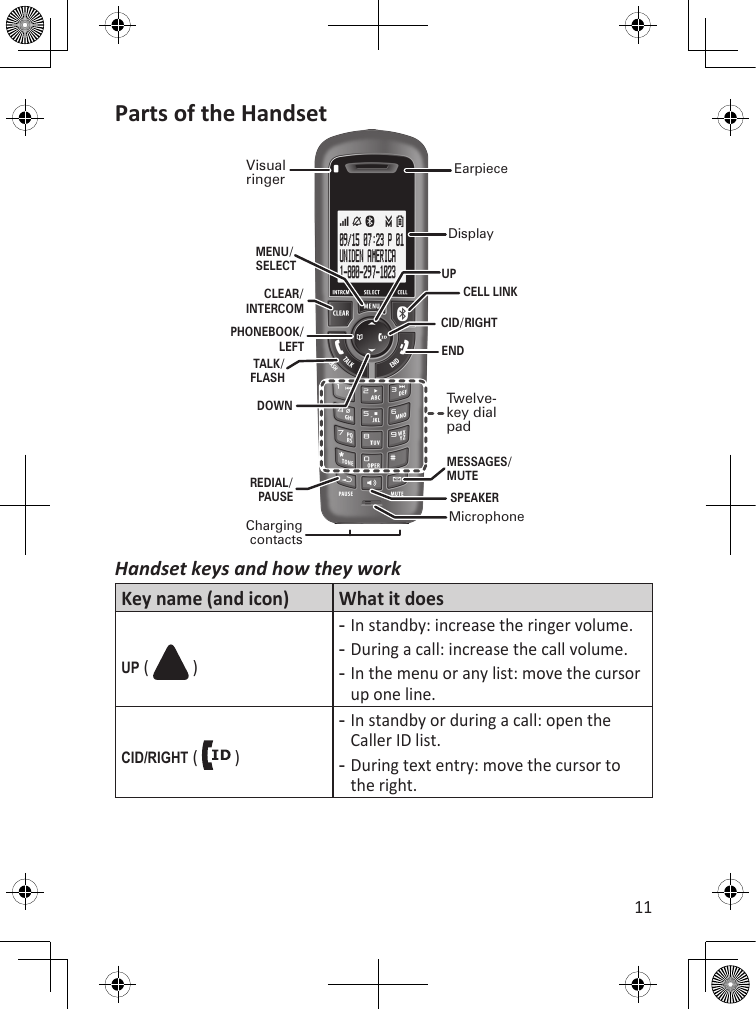
Uniden America UN110 BLUETOOTH INSIDE OF A DECT PHONE-BASE UNIT User Manual Owners Manual
Uniden America Corporation BLUETOOTH INSIDE OF A DECT PHONE-BASE UNIT Owners Manual
UserManual.wiki
>
Uniden America
>
UN110 User Manual
Owners Manual
Navigation menu
Upload a User Manual
Namespaces
Wiki Guide
HTML
PDF
Info
Views
User Manual
Discussion / Help
Navigation
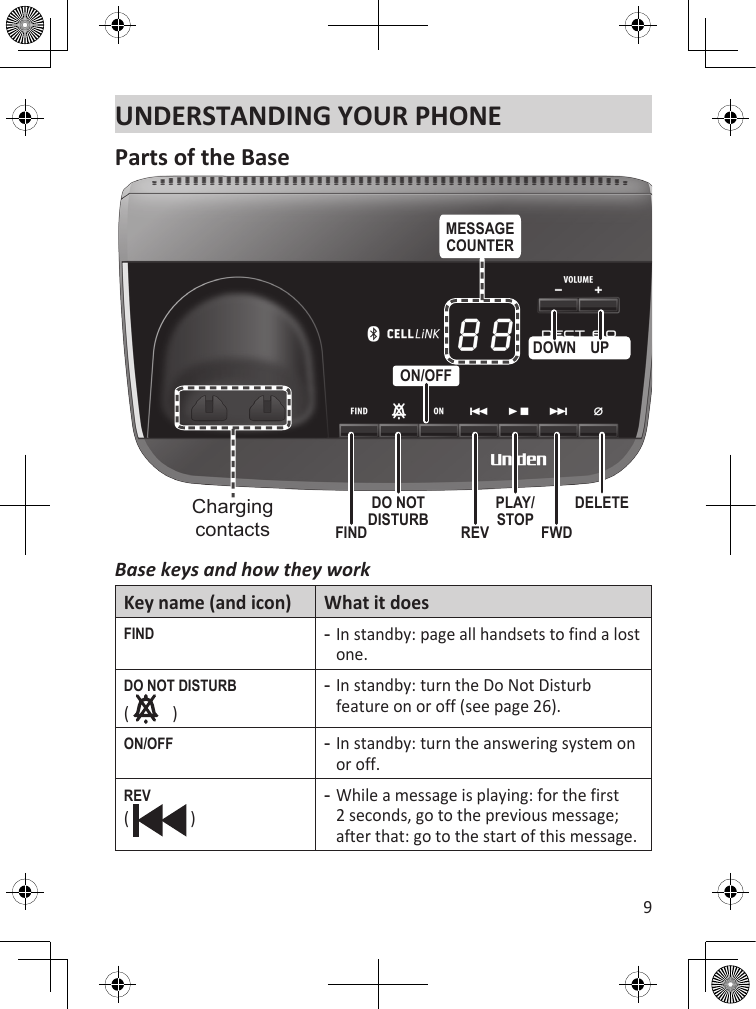

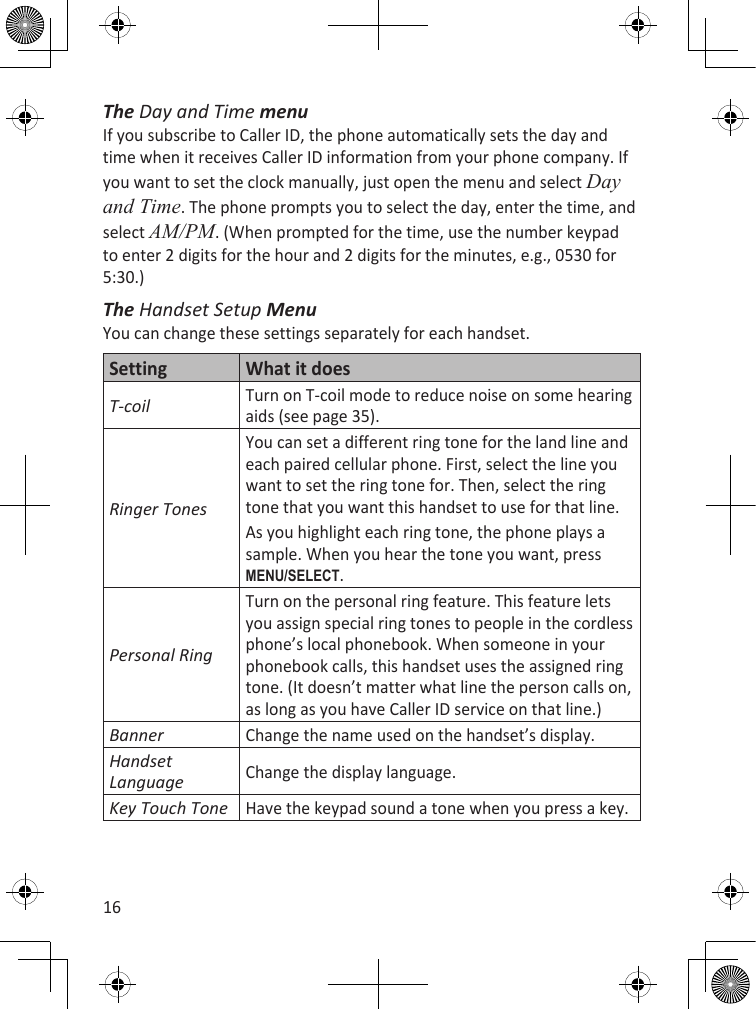
![14Icon What it means T-coil mode is on (see page 35).The battery is 1) empty, 2) getting low, 3) half charged, or 4) fully charged.The signal from the base is 1) weak, 2) low, 3) strong, or 4) very strong.[Aa] The handset enters capital letters first (see page 17).[aA] The handset enters lower-case letters first (see page 17).At least 1 cellular phone is paired to the DECT3181.Using the Menus Bluetooth Day & Time Handset SetupTo open the menu, press MENU/SELECT.Press MENU/SELECTto choose the highlighted option.press END toexit the menu.To go back a screen, press PHONEBOOK/LEFTThe cursor shows the highlightedoption.To move the cursor, use UP & DOWN.OR<BLUETOOTH> Add Cellular Paired Device Bluetooth Day & Time Handset SetupTo open the menu, press MENU/SELECT.Press MENU/SELECTto choose the highlighted option.press END toexit the menu.To go back a screen, press PHONEBOOK/LEFTThe cursor shows the highlightedoption.To move the cursor, use UP & DOWN.OR<BLUETOOTH> Add Cellular Paired Device](https://usermanual.wiki/Uniden-America/UN110/User-Guide-1331596-Page-14.png)

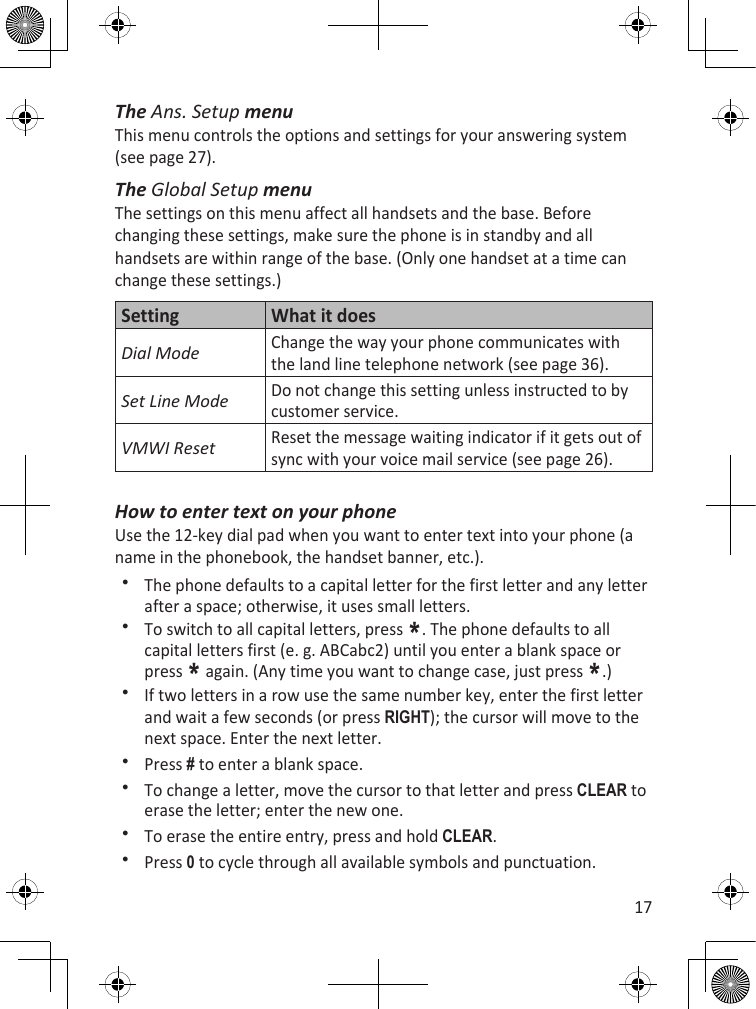
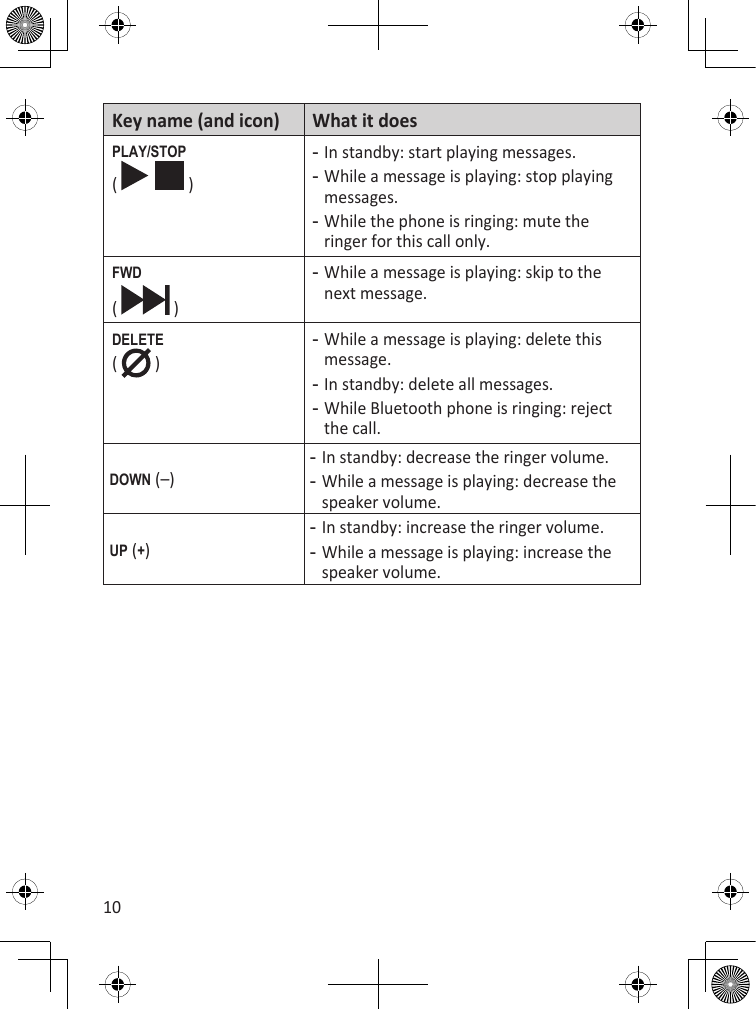
![28SettingWhat it does...Ans. On/offTurn your answering system on or off. (To turn your system on or off from the base, just press On/Off.)Accessing the Answering SystemYou can access your system from a handset whenever the phone is in standby.5:Stop [ / /select]Press MESSAGES/MUTEto start remote operation mode.Press MENU/SELECTto choose the displayedoption.Press END to exit remote operation mode.4:Delete3:Skip2:Play1:Repeat6:SelectGreeting8:RecNewGreetingUsePHONEBOOK/LEFT to go to the previous option:UseCALLER ID/ RIGHT to go to the next option:During remote operation, the phone beeps to let you know it's waiting for your next command.You can press the number key next to the commands instead of scrolling through them.If you don't press any keys for 30 seconds, the phone returns to standby.Only one handset can access the system at a time, and you can't access the system while another handset is on a land line or CellLink call. Personalizing Your GreengYour greeting can be between 2 seconds and 30 seconds long. If you don’t record an outgoing message, the system uses a pre-recorded greeting: ](https://usermanual.wiki/Uniden-America/UN110/User-Guide-1331596-Page-28.png)