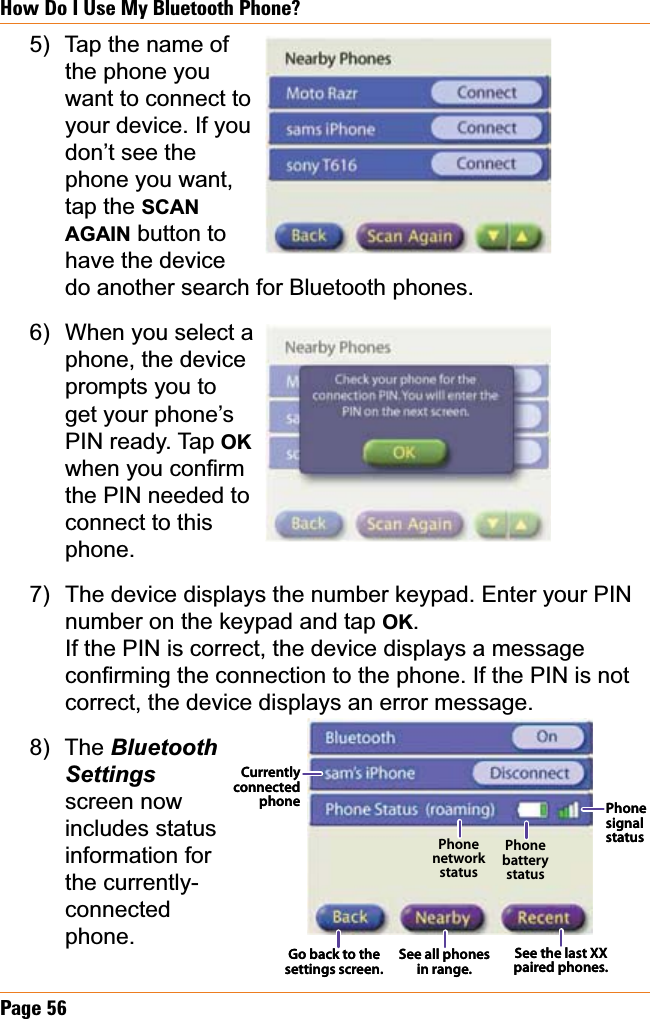
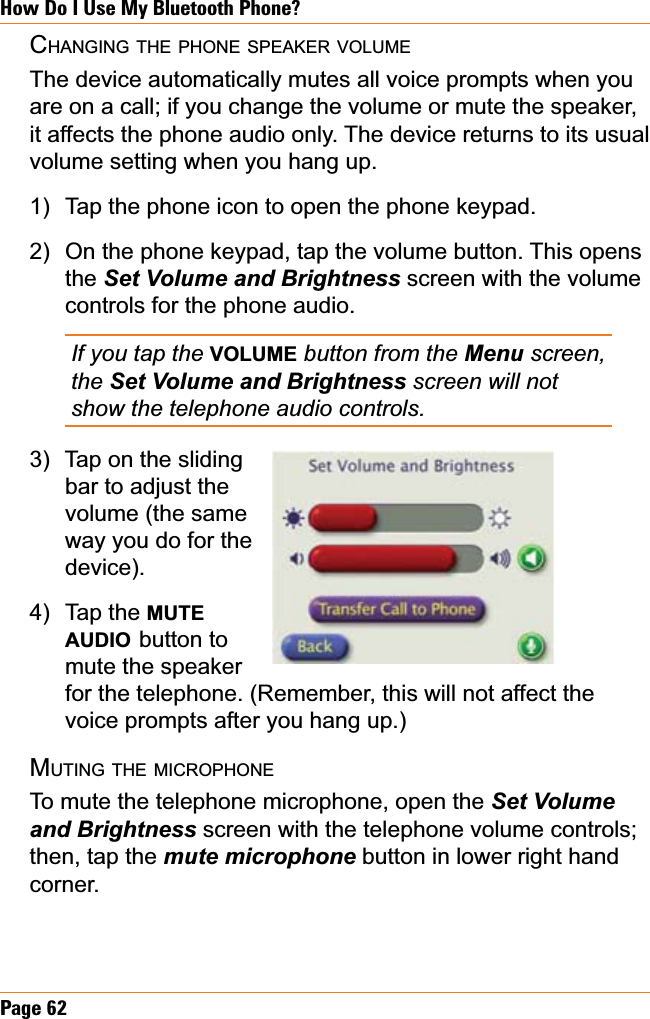
Uniden America US207 TRAX438 User Manual AMWUS207 warning statements
Uniden America Corporation TRAX438 AMWUS207 warning statements
UserManual.wiki
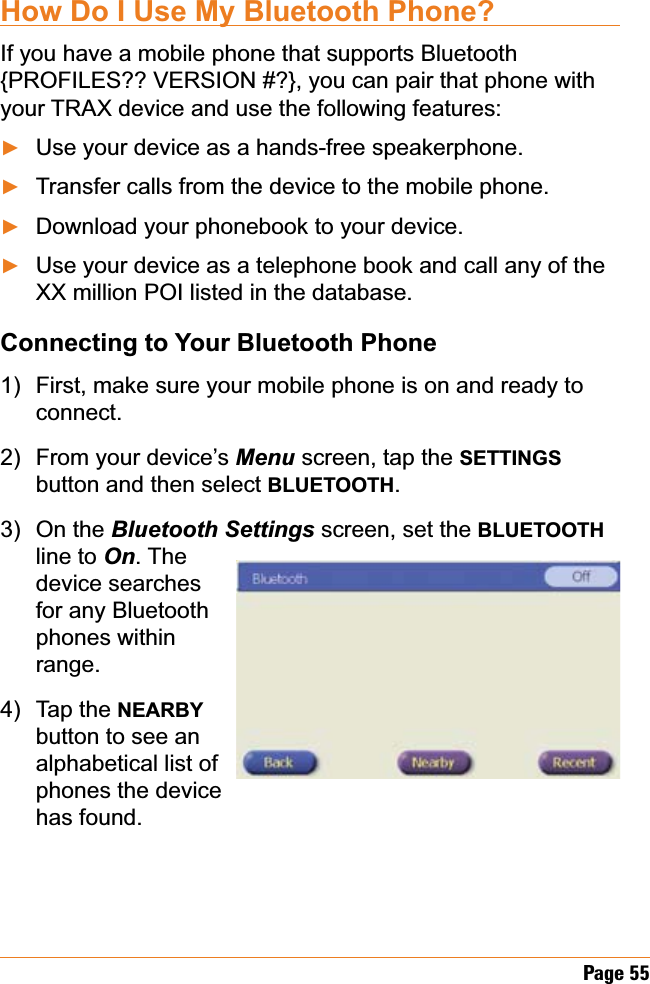
>
Uniden America
>
US207 User Manual
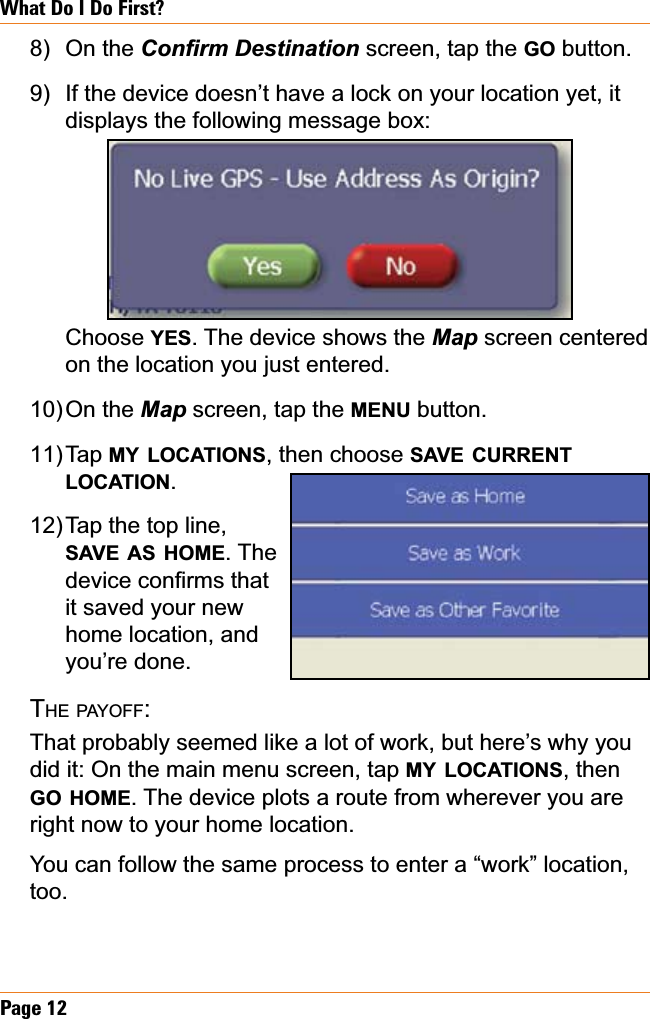
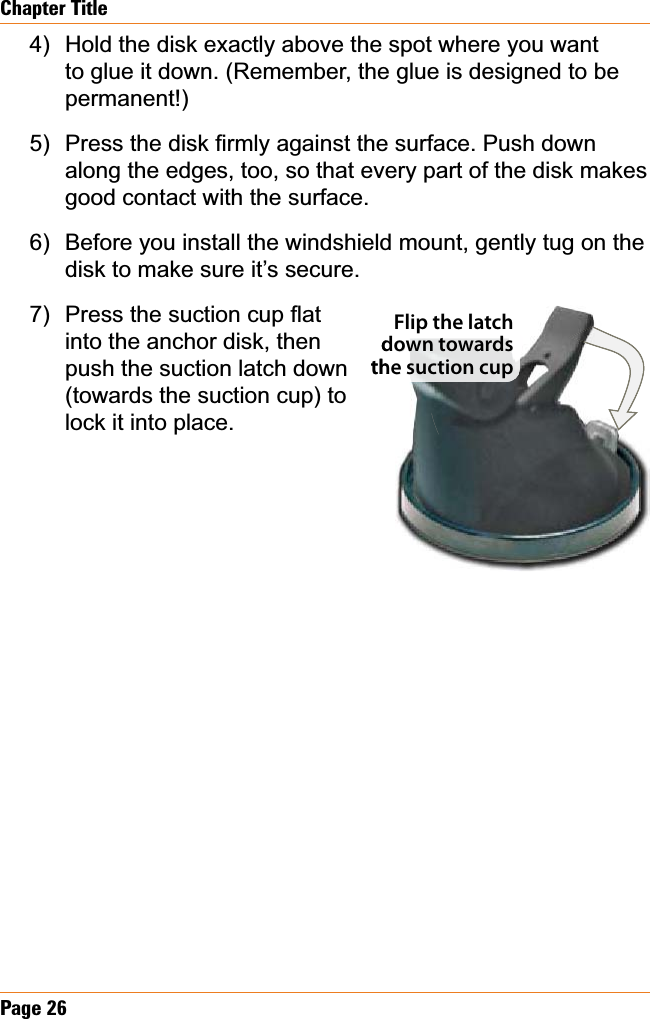
User Manual
Navigation menu
Upload a User Manual
Namespaces
Wiki Guide
HTML
PDF
Info
Views
User Manual
Discussion / Help
Navigation
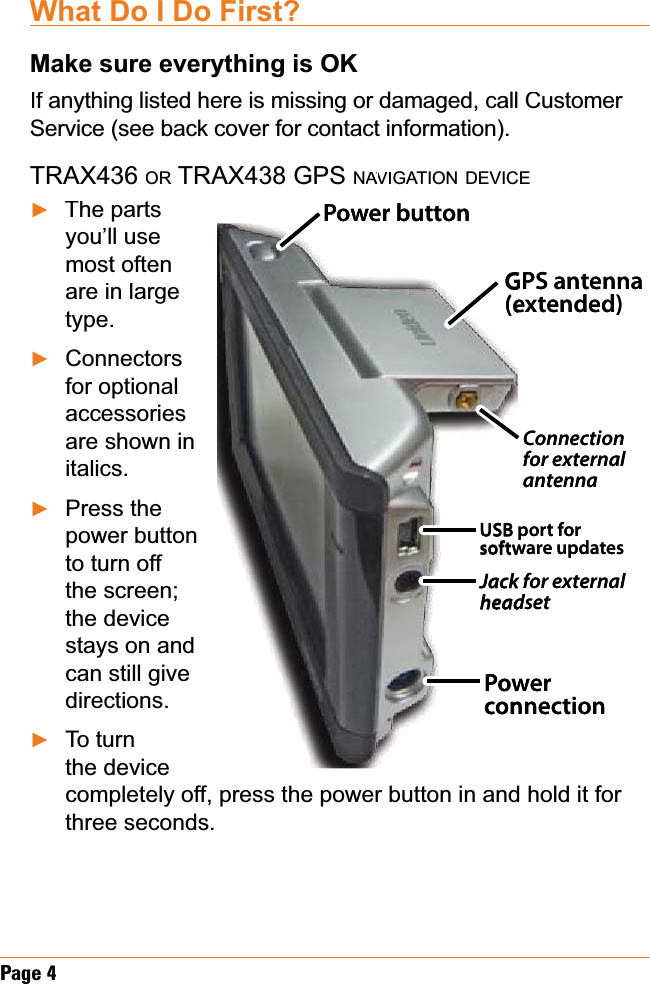
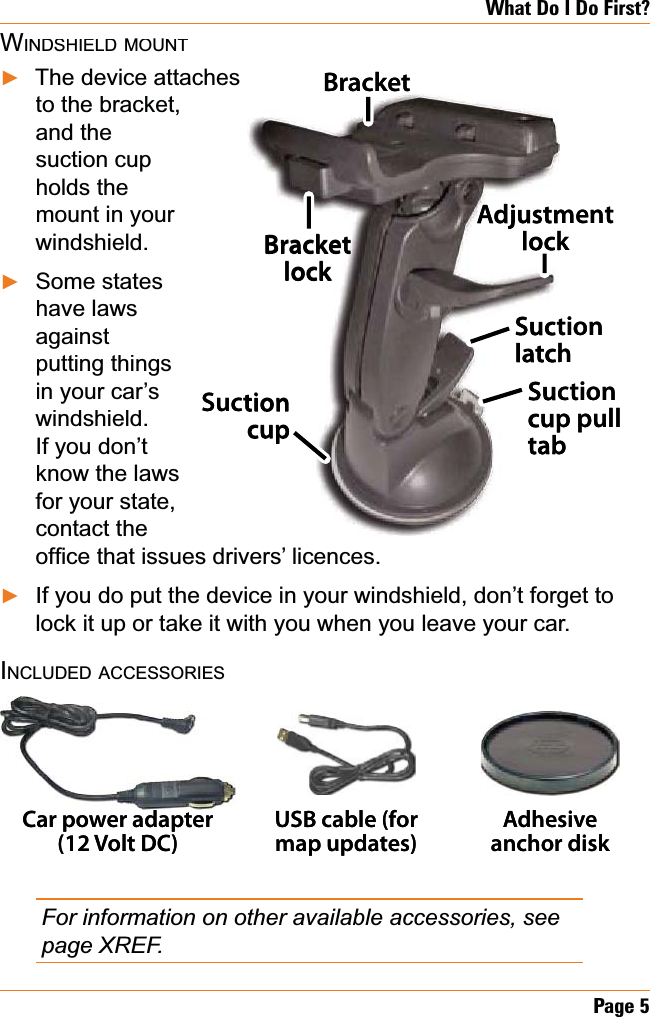
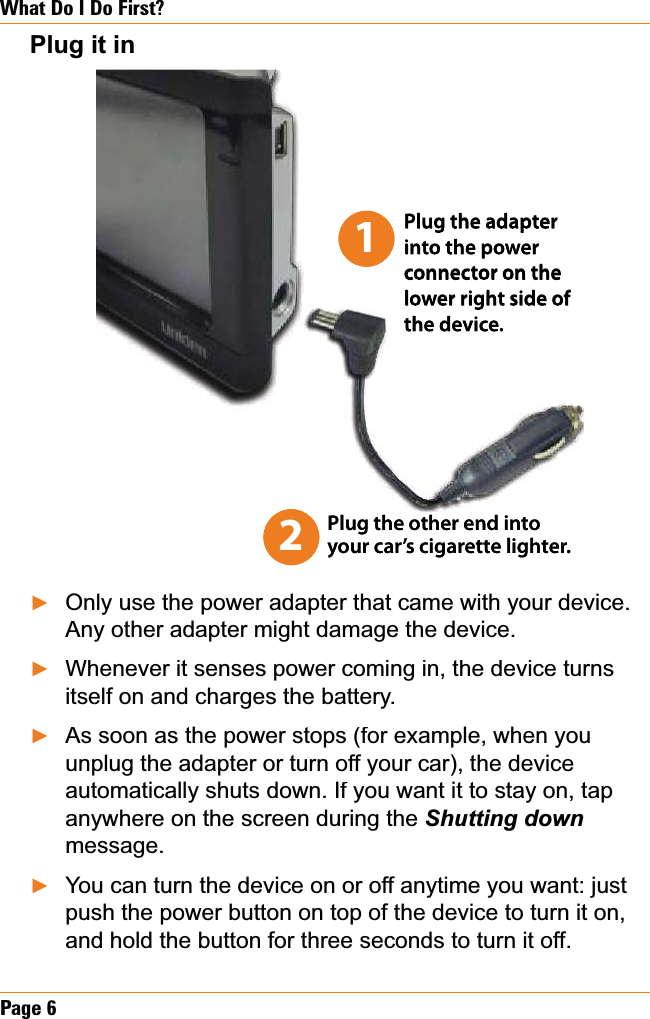
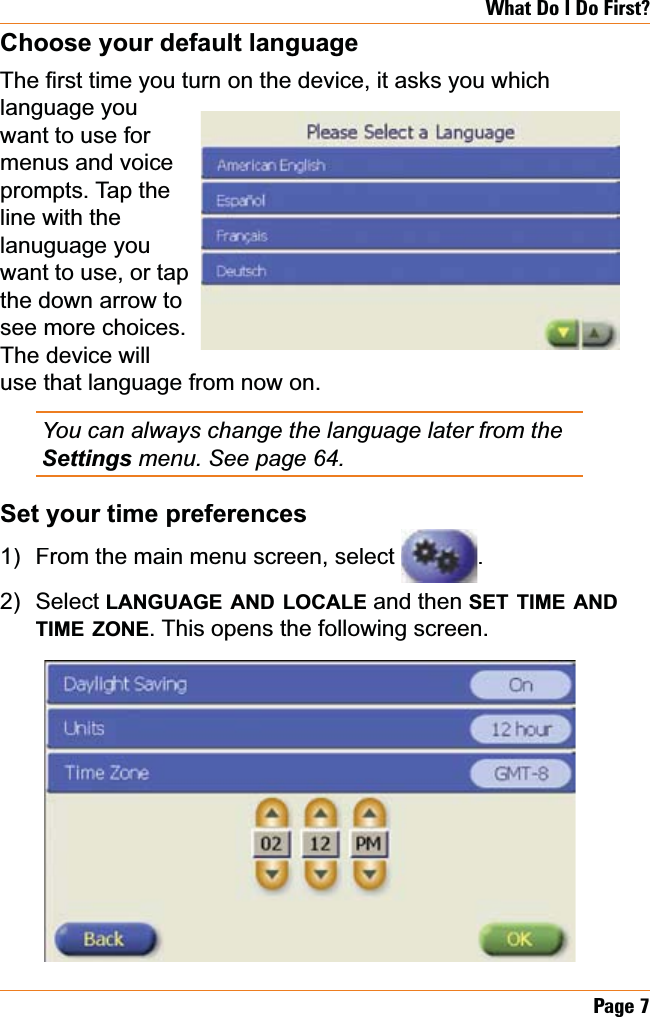
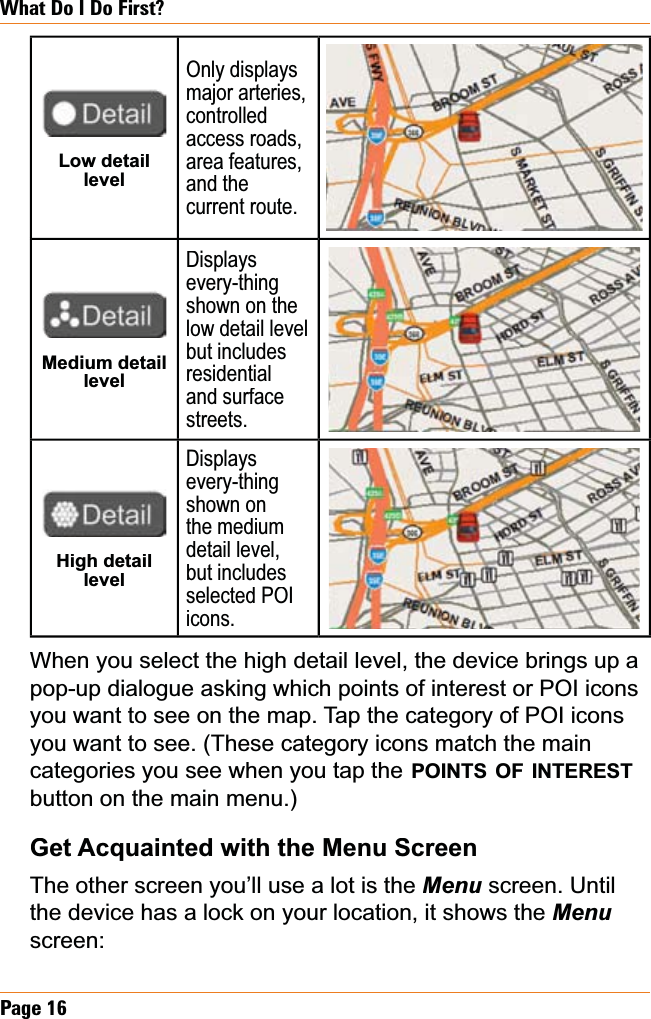
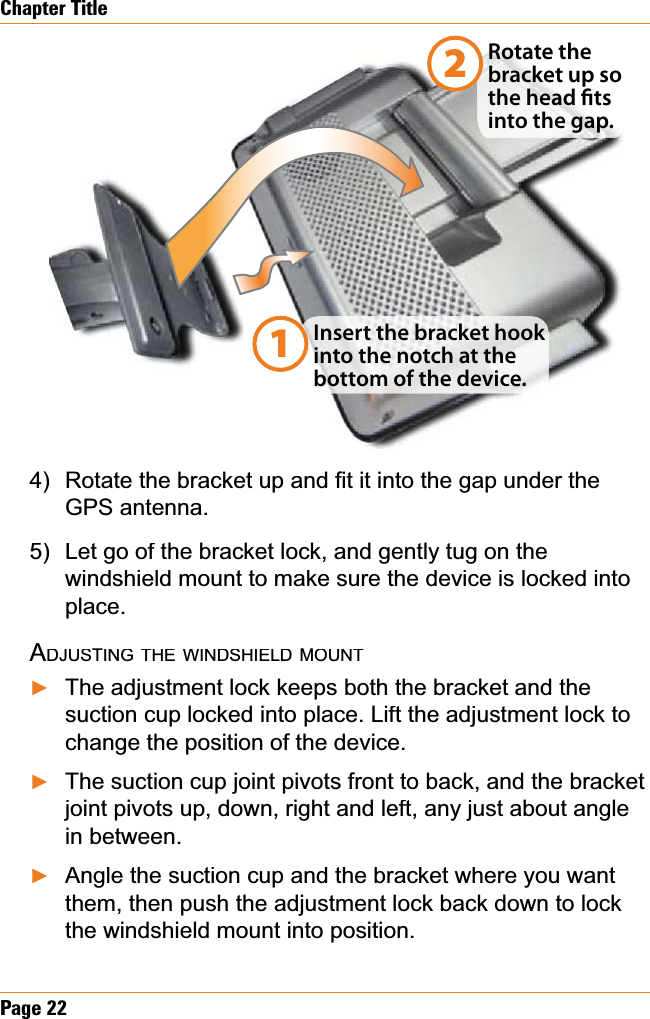
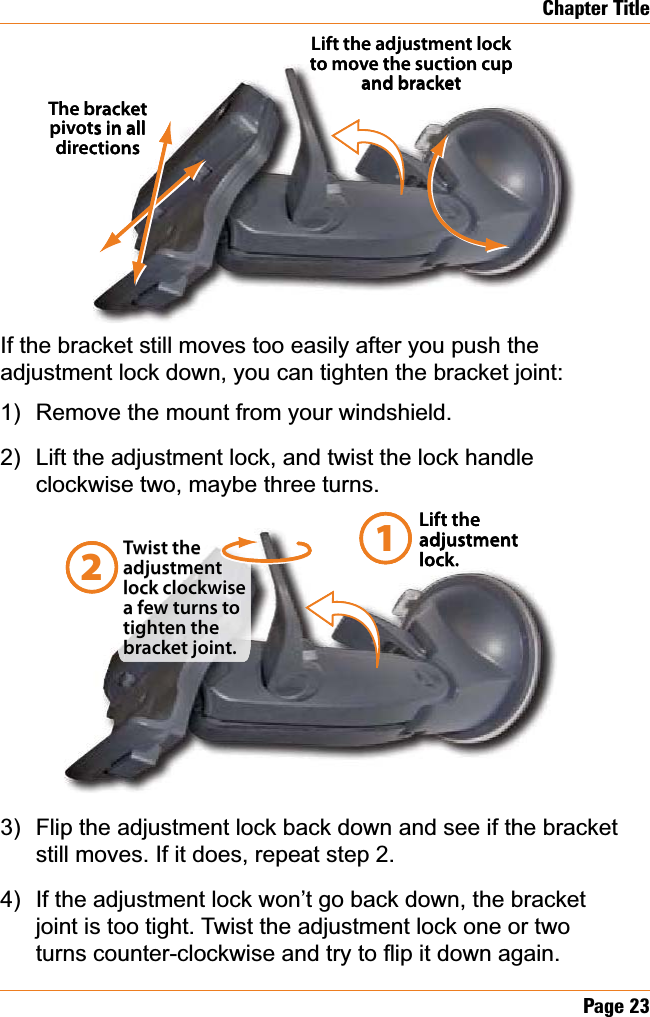


![Page 81What Else Do I Need to Know?&KDQJHVRUPRGL¿FDWLRQVWRWKLVSURGXFWQRWH[SUHVVO\DSSURYHGE\8QLGHQRUoperation of this product in any way other than as detailed by the owner’s manual, could void your authority to operate this product.CANADIAN REGULATORY COMPLIANCEICES003, PARA 6.2This Class B digital apparatus complies with Canadian ICES-003. Cet appareil numerique de la classe B est conforme a la norme NMB-003 du Canada.Important vehicle and product safety informationDRIVE SAFELY!Do not install any device where it might block your driving veiw or mirrors.Do not attempt to operate any device while you are driving a vehicle.5HPDLQDOHUWWRDFWXDOURDGFRQGLWLRQVREH\DOOORFDOWUDI¿FODZVDQGSRVWHGsigns.Do not use this product for any purpose where a failure of the product could lead to harm to any person or property.ELECTRICAL SAFETY WARNINGS:DUQLQJ5LVNRI¿UHRUHOHFWULFVKRFNUHDGDQGIROORZDOOinstructions carefully!THIS DEVICE IS NOT WATERPROOF. Do not immerse the device in water or expose it to moisture.Only use the power adapter that came with your device; use of any other SRZHUDGDSWHUPLJKWGDPDJHWKHGHYLFHRUFUHDWHDVKRFNRU¿UHKD]DUG••••••TRAX425-430om_noANTHS.indb 11/26/2007 4:35:49 PM - 81 - (Cyan)TRAX425-430om_noANTHS.indb 11/26/2007 4:35:49 PM - 81 - (Magenta)TRAX425-430om_noANTHS.indb 11/26/2007 4:35:49 PM - 81 - (Yellow)TRAX425-430om_noANTHS.indb 11/26/2007 4:35:49 PM - 81 - (BlacK)](https://usermanual.wiki/Uniden-America/US207/User-Guide-887874-Page-57.png)