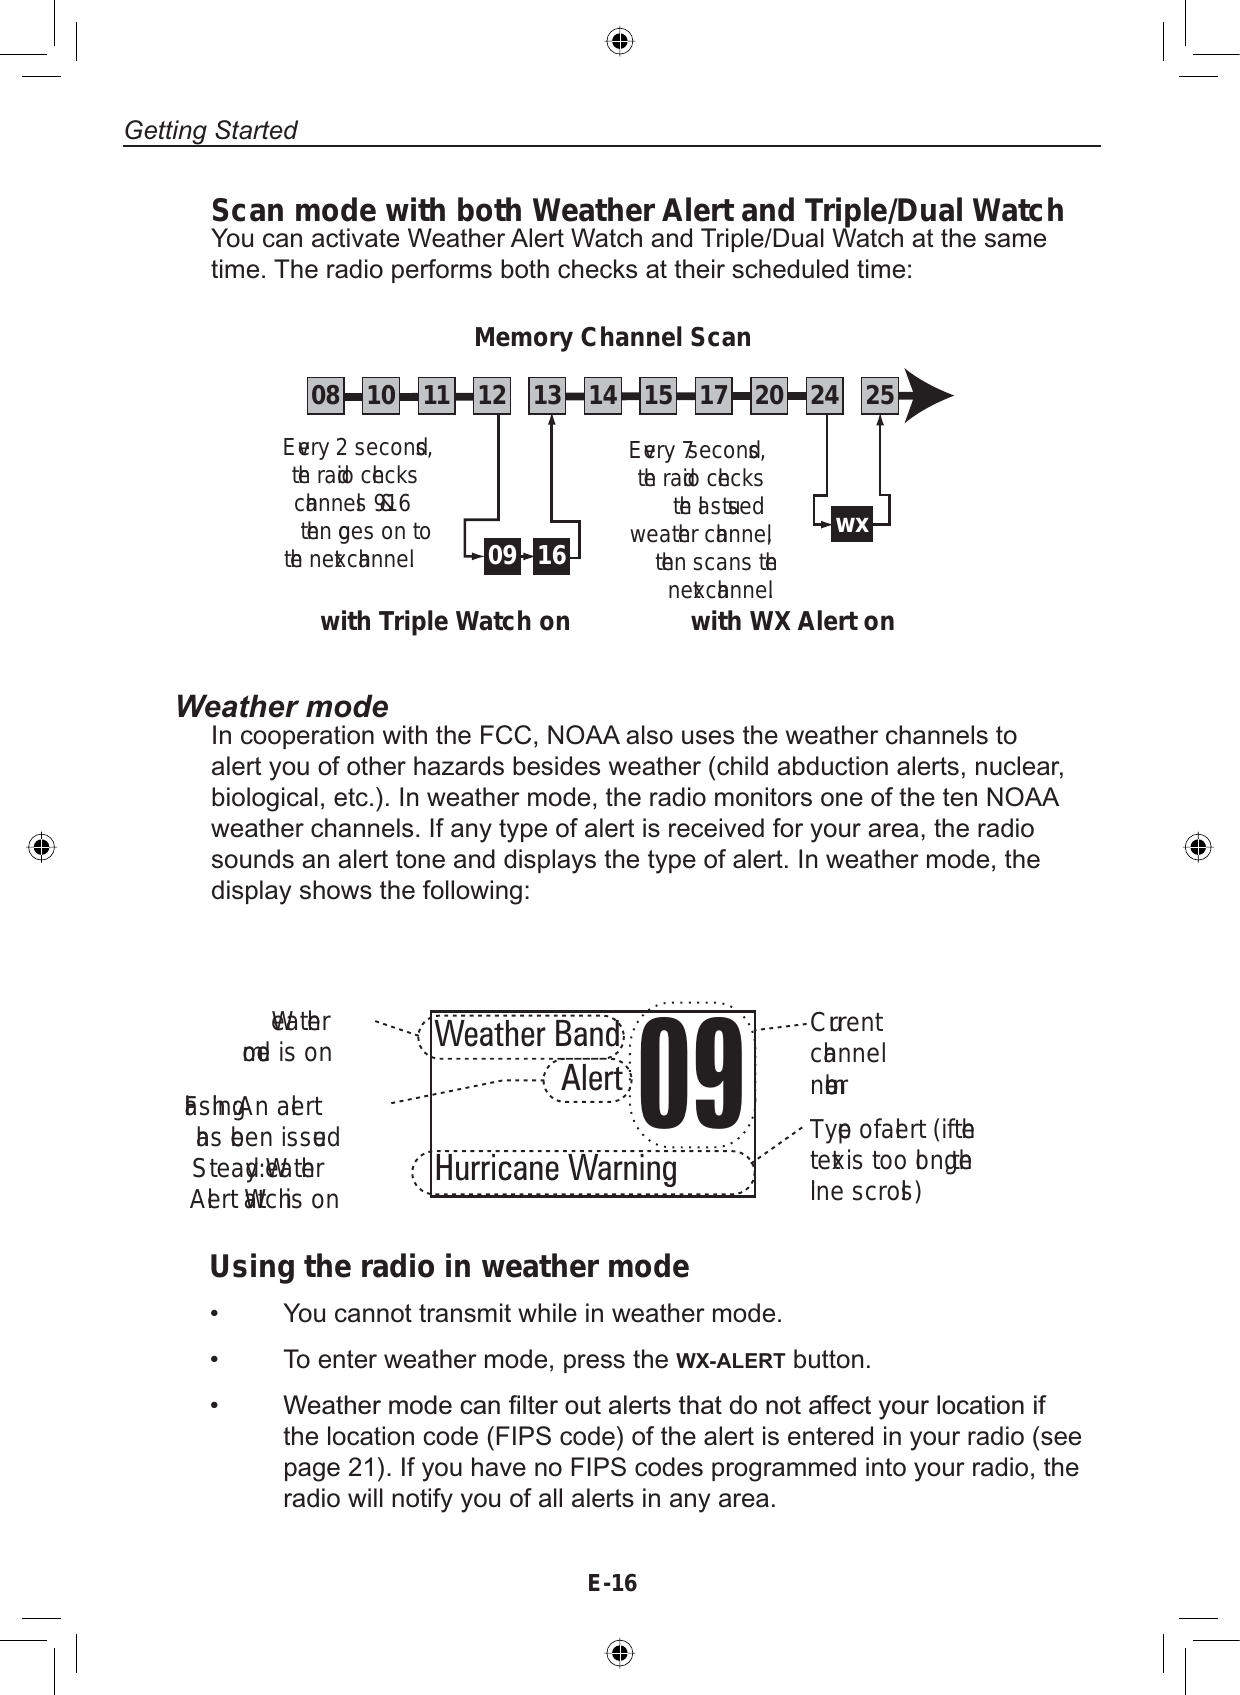
Uniden America UT621 Mobile Marine Transceiver User Manual users manual
Uniden America Corporation Mobile Marine Transceiver users manual
UserManual.wiki
>
Uniden America
>
UT621 User Manual
users manual
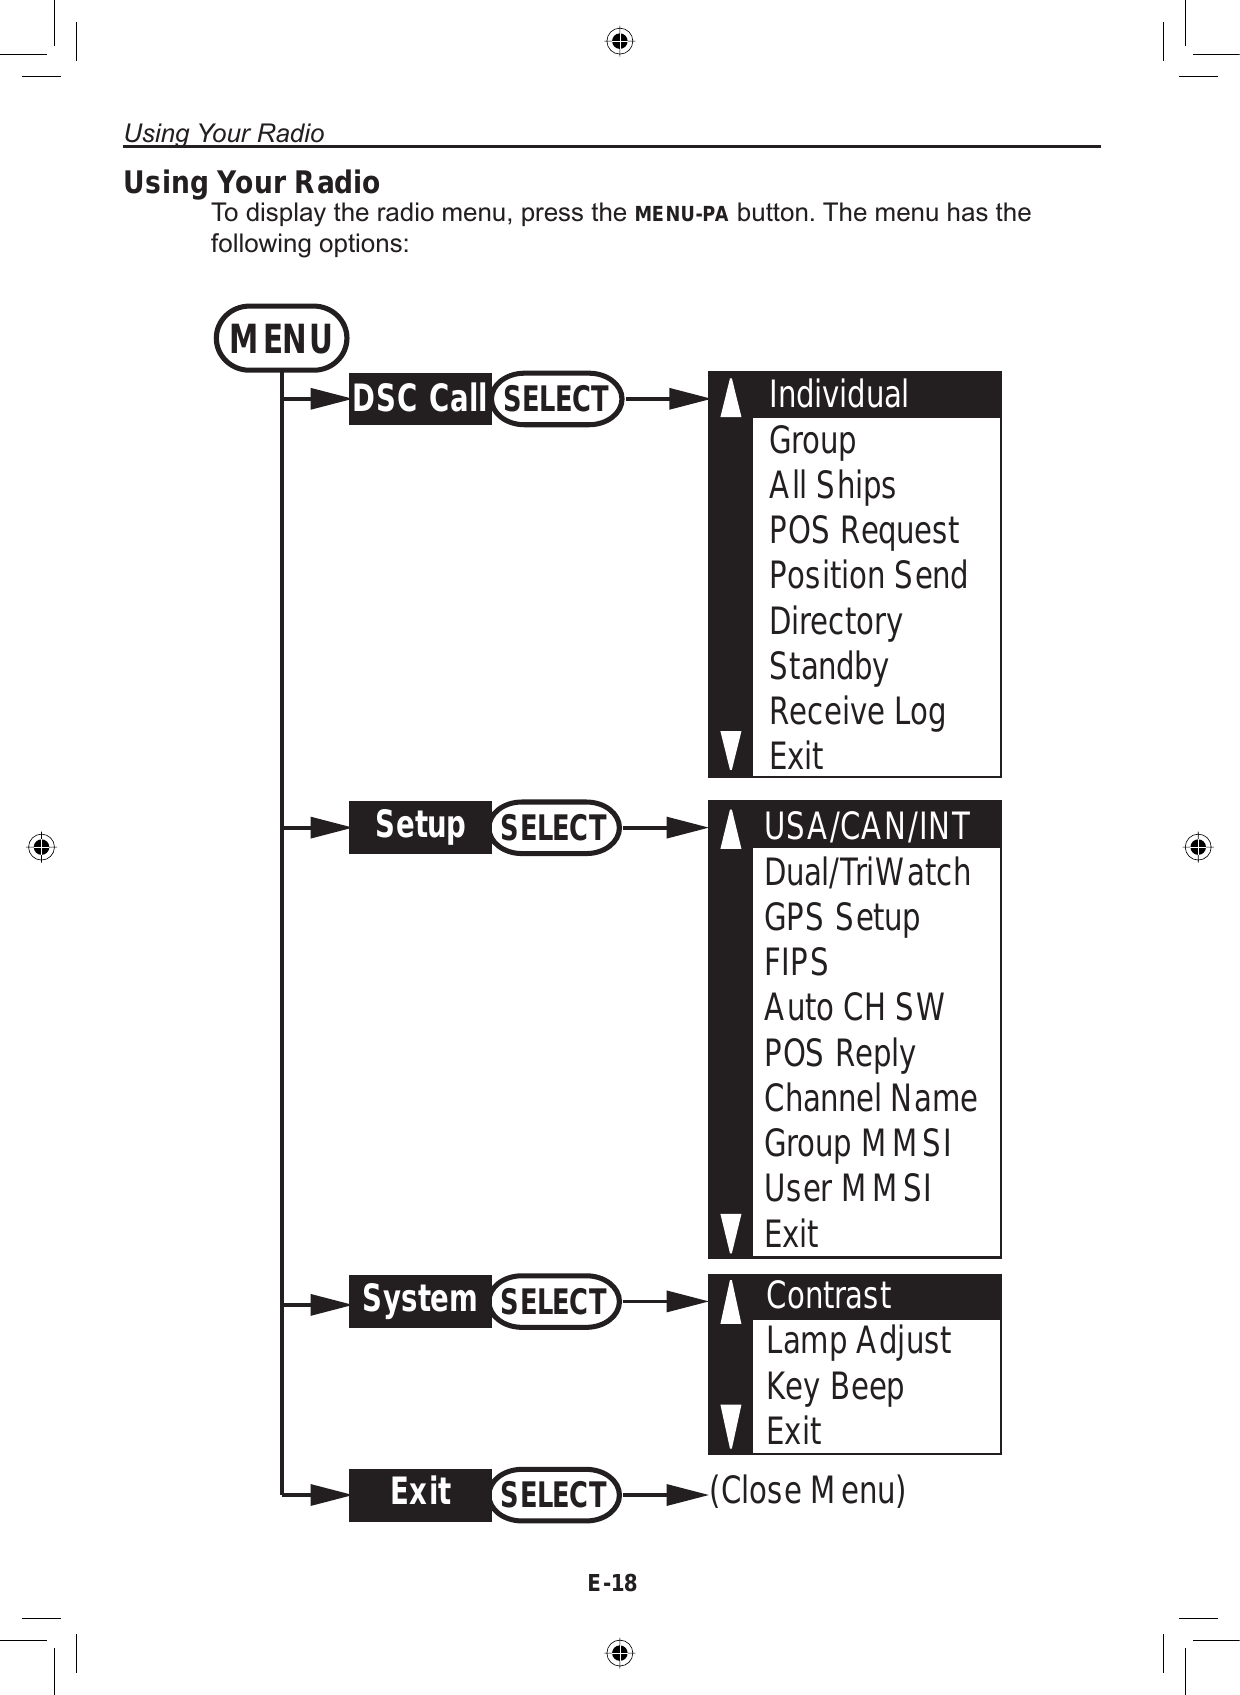
Navigation menu
Upload a User Manual
Namespaces
Wiki Guide
HTML
PDF
Info
Views
User Manual
Discussion / Help
Navigation


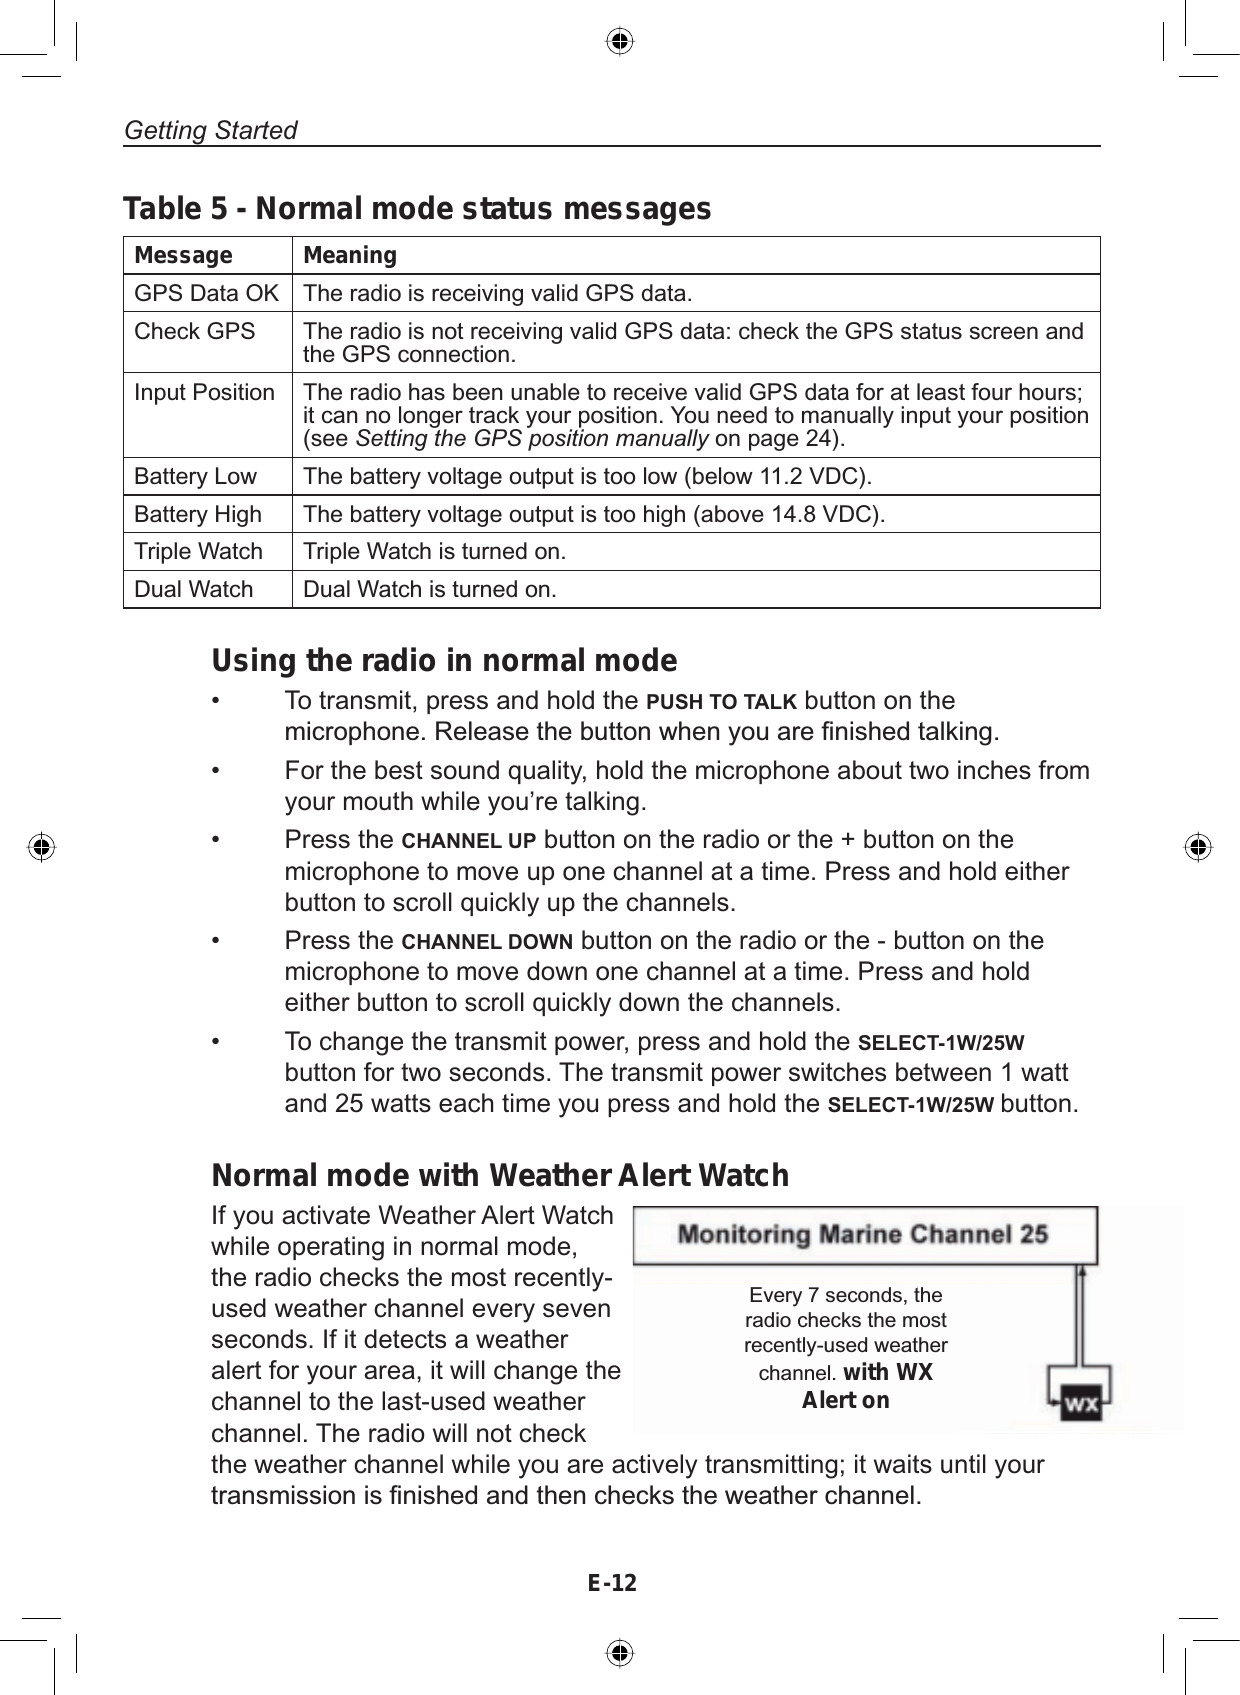
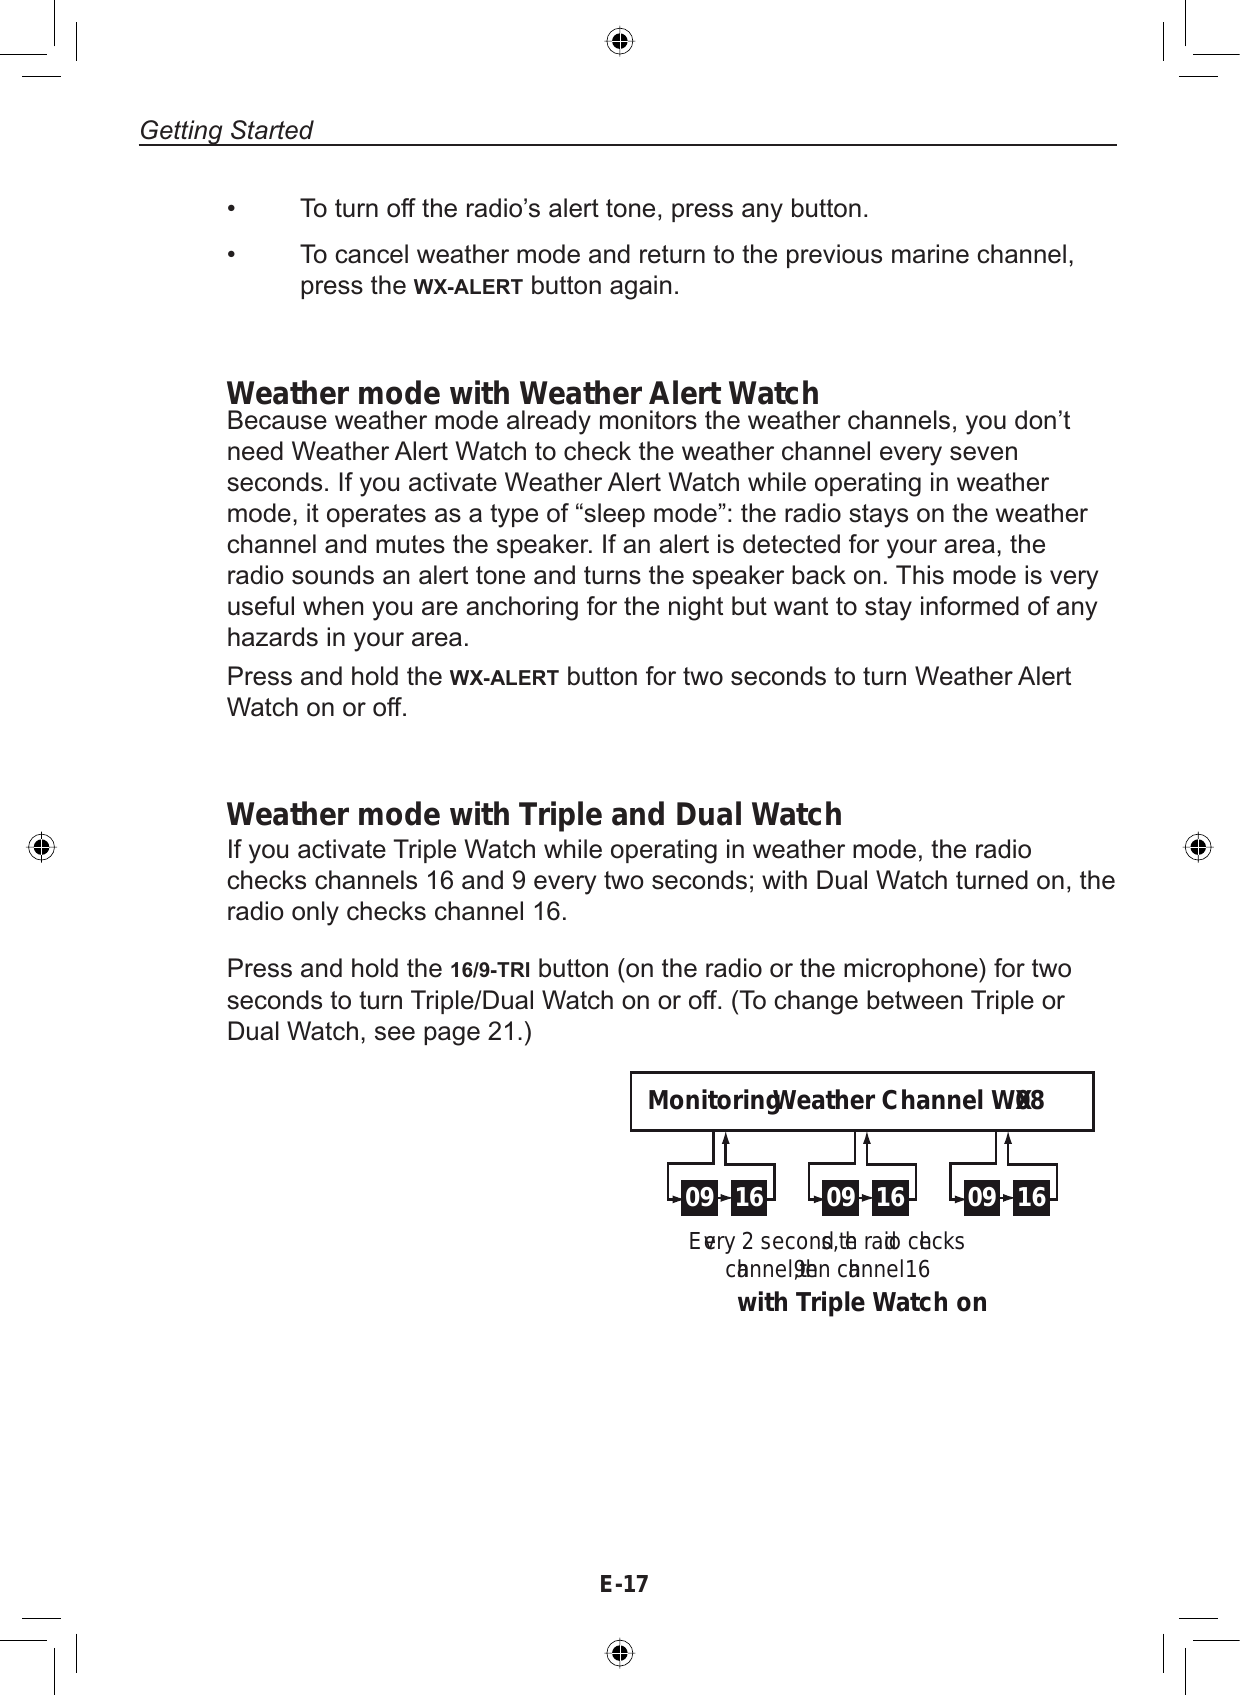
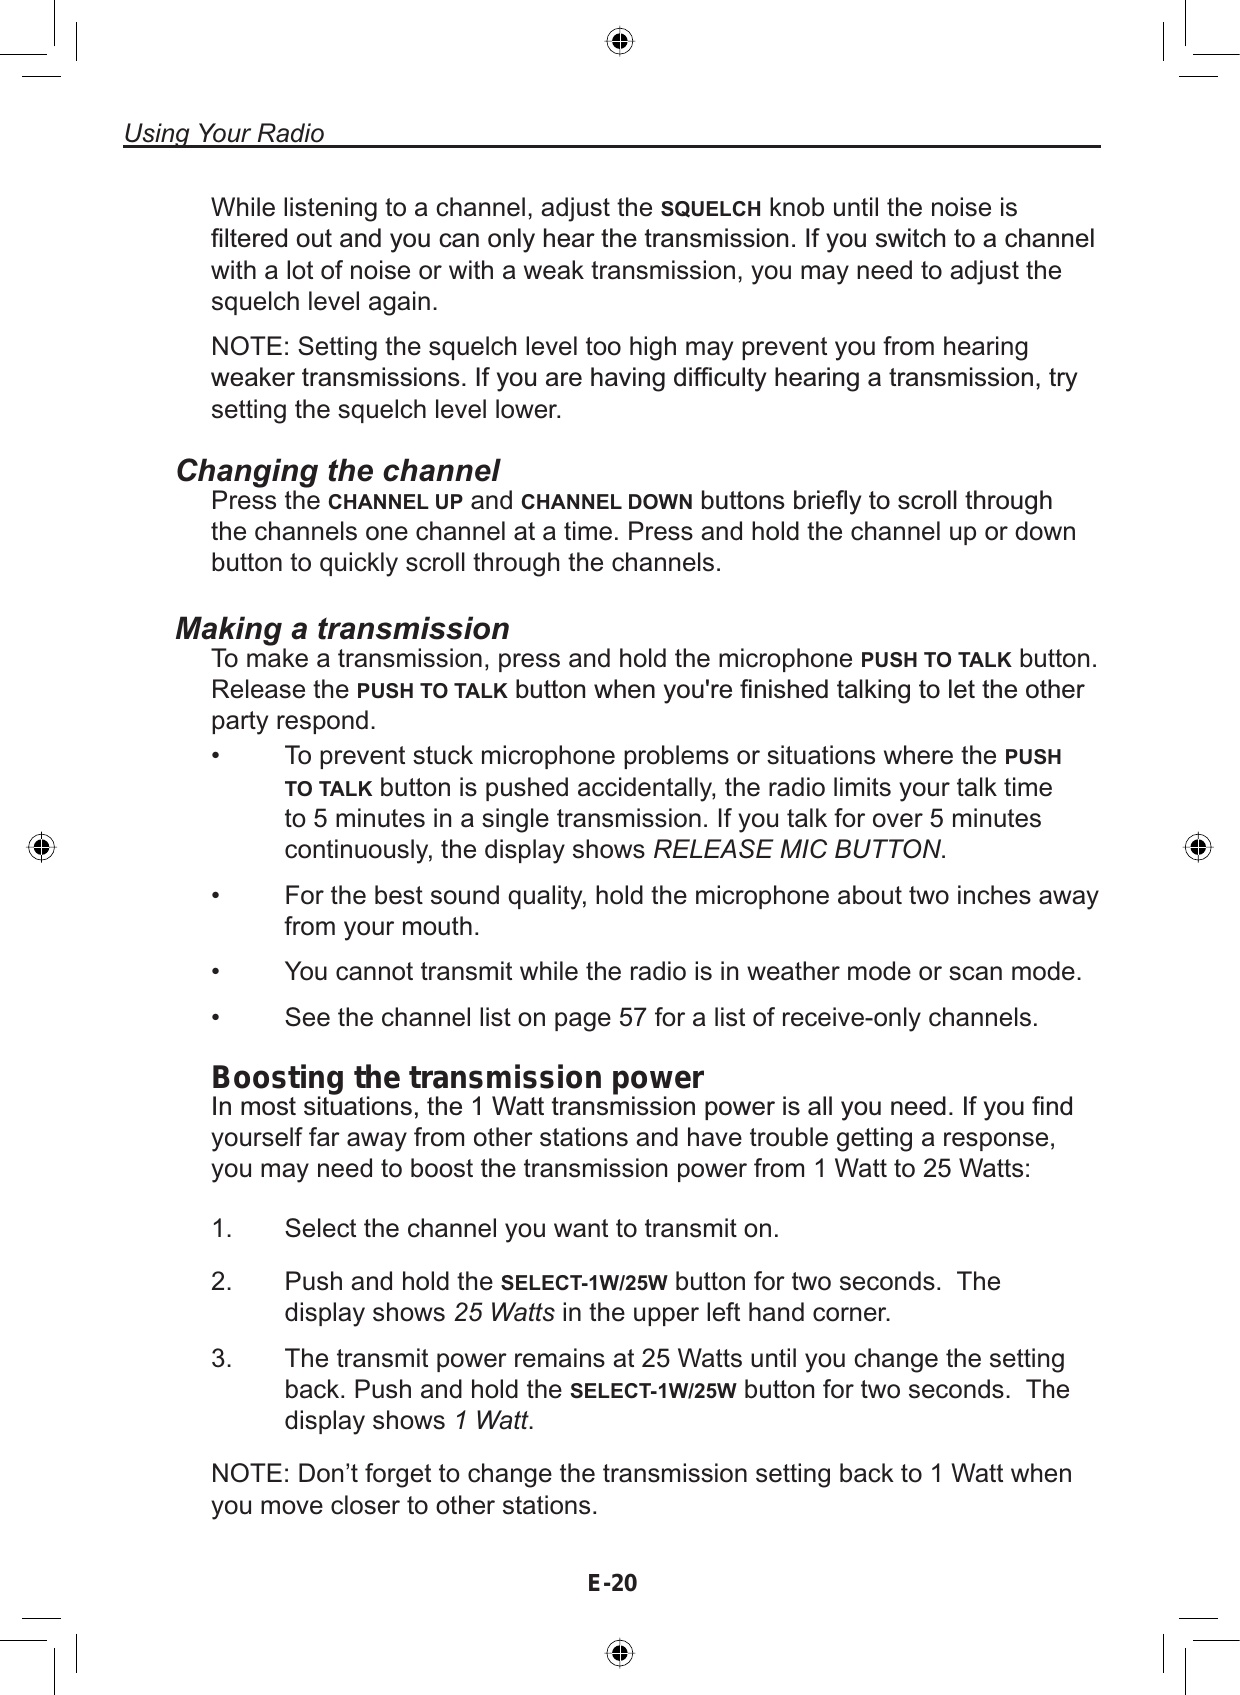
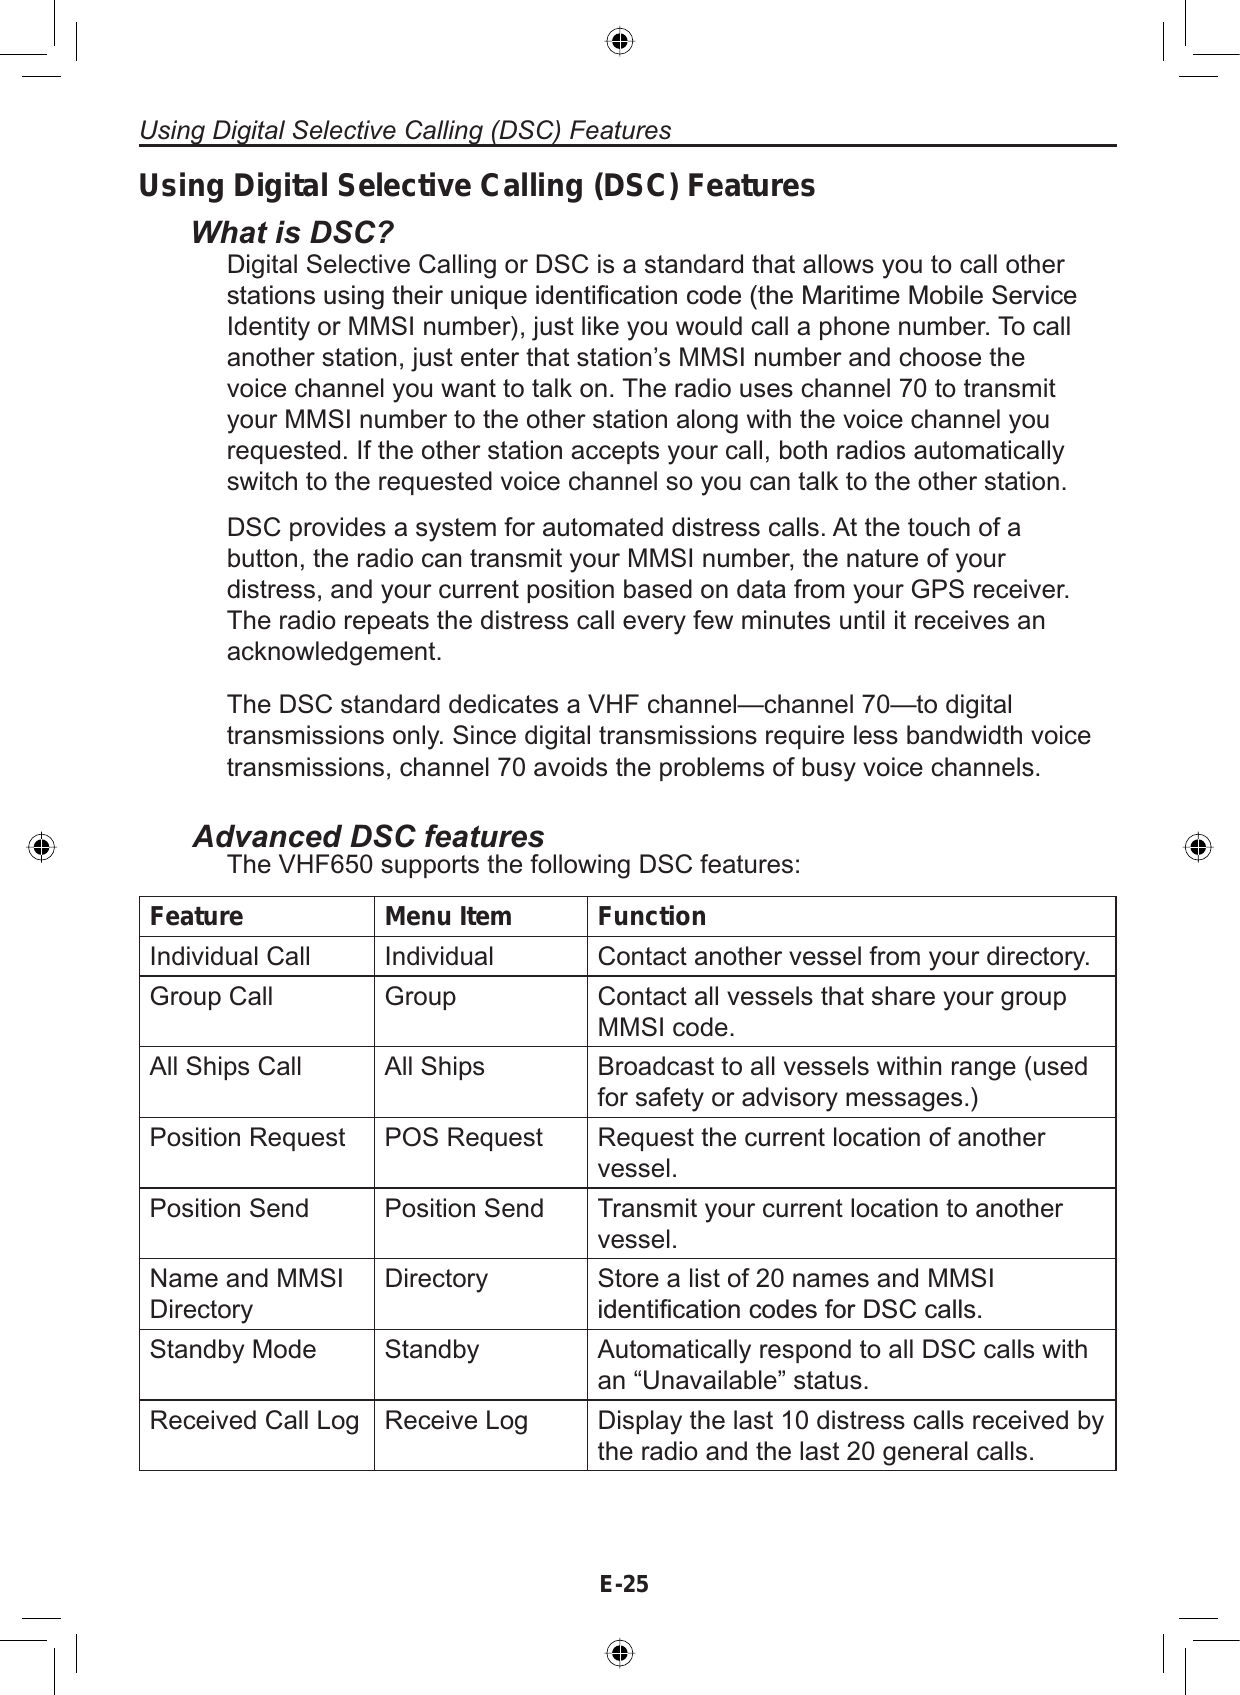
![E-21Using Your RadioNOTE: By default, when you change to channel 16, the radio automaticallyboosts the power to 25 Watts. Be sure to change the power back to 1 Watt ifyou are not making an emergency transmission.6RPHFKDQQHOVIRUH[DPSOHFKDQQHOVDQGOLPLWWKHSRZHURItransmission to 1 Watt so that there is less interference between boatersattempting to use the channel at the same time. If you switch to one of thesechannels, the radio changes back to 1 Watt automatically. See the channellist on page 57 for a list of power-restricted channels.Choosing Triple Watch or Dual Watch,Q7ULSOH:DWFKPRGHWKHUDGLREULHÀ\FKHFNVFKDQQHOVDQGHYHU\WZRseconds. In Dual Watch mode, the radio checks channel 16 only. Generally,Triple Watch is used in areas where channel 9 is used as a hailing frequency,while Dual Watch is used in areas where channel 16 is used for distress andhailing. Your radio comes set to use Triple Watch; if you want to use DualWatch instead, you will have to select it in the setup:88ADual WatchTriple Watch[Exit]Dual/TriWatchMENU SetupSELECTDual/TriWatchSELECTPress the MENU-PA button to display the menu.Select Setup and then Dual/Tri Watch.Highlight Dual Watch and press the SELECT-1W/25W button. The radioactivates the new setting and returns to the Setup menu.To reactive Triple Watch, repeat the procedure described above, butchoose Triple Watch in step 3.1.2.3.4.Using FIPS codes for weather alertsThe US National Weather Service established 6-digit Federal Information3URFHVVLQJ6\VWHP),36FRGHVWRLVVXHZHDWKHUDOHUWVLQVSHFL¿FDUHDVYou can choose which areas you want to hear alerts for by entering theseFIPS codes in your radio. This can prevent you from being bothered byevents that are far from where you are boating. The radio only sounds thealert tone if an incoming FIPS code matches one of the areas you selected.](https://usermanual.wiki/Uniden-America/UT621/User-Guide-764111-Page-22.png)
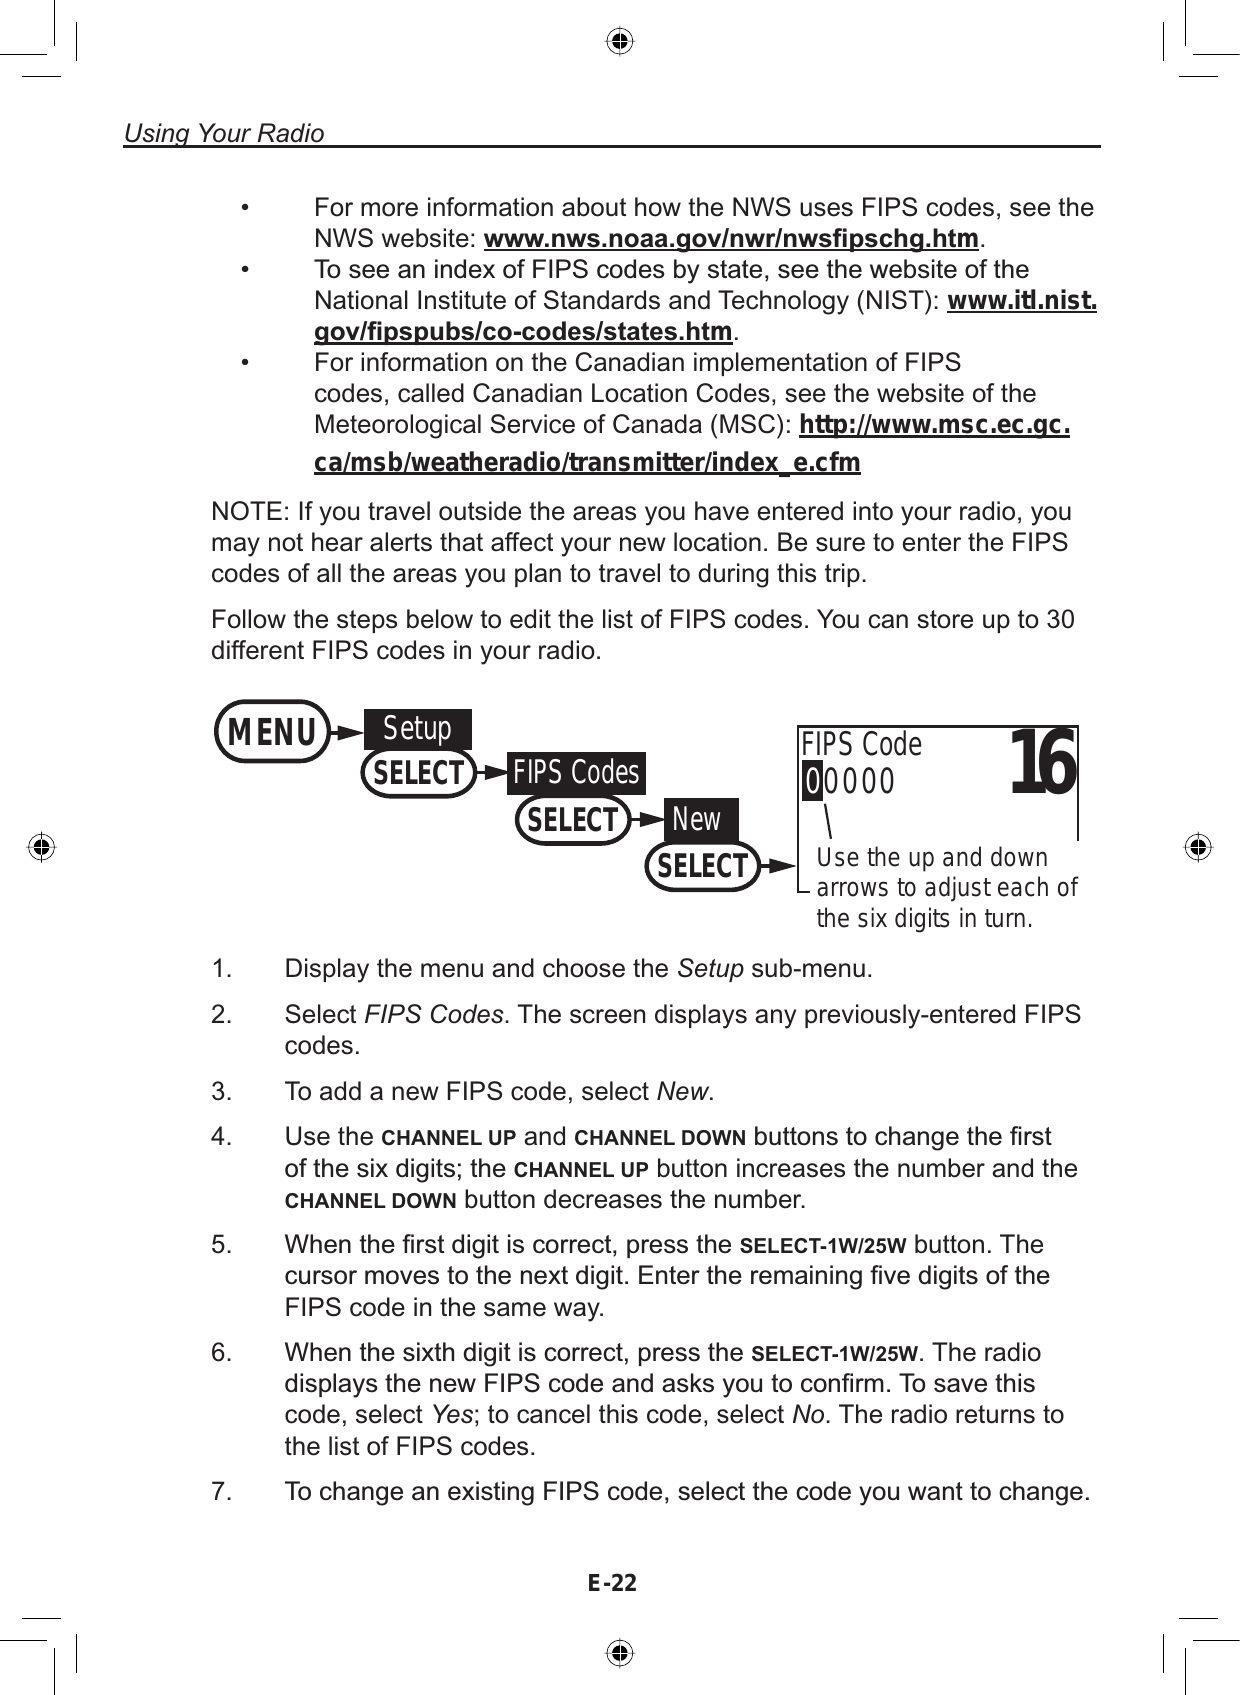
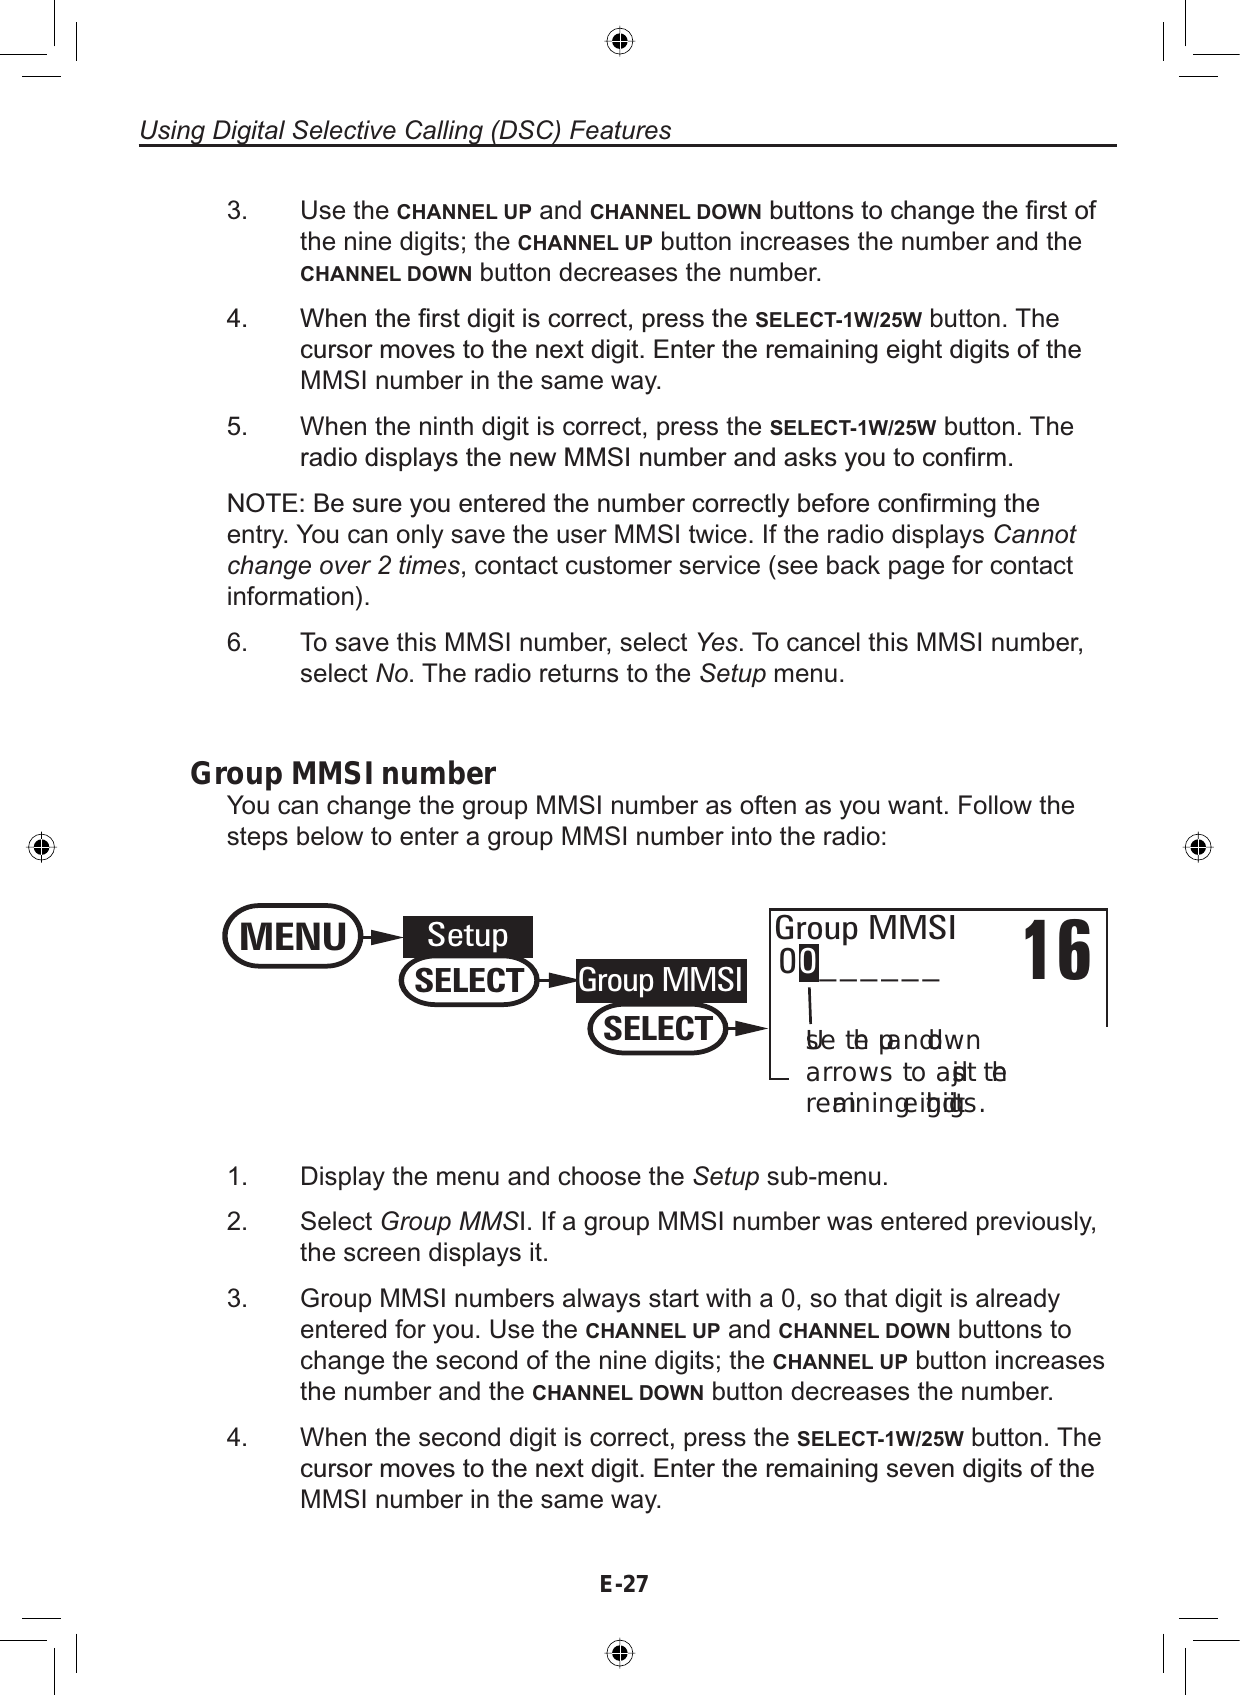
![Using Digital Selective Calling (DSC) FeaturesE-26Getting an MMSI numberIn order to use DSC features, you must be assigned an MMSI number andprogram that number into your radio. There are two kinds of MMSI numbers:individual numbers for use by single boats and group numbers for use byÀHHWVERDWLQJRUJDQL]DWLRQVHYHQWFRRUGLQDWRUVHWFYou can get more information on MMSI numbers at these resources:The dealer where you purchased the radioRecreational boaters can obtain an MMSI number from the BoatOwner’s Association of the U.S. (http://www.boatus.com/mmsi/ or call 800-536-1536) or Sea Tow Services International (http://www.seatow.com/boatingsafety/mmsiinfo.htm)Commercial boaters need a ship station license to get an MMSInumber. For more information, visit the Federal CommunicationsCommission (FCC) website at http://wireless.fcc.gov/marine/fctsht14.html.•••Entering MMSI numbersIndividual or user MMSI numberFollow the steps below to enter your individual or user MMSI number into theradio:NOTE: Be sure you have the correct User MMSI number before entering it inthe radio. The radio only allows you to enter the user MMSI twice. If you needto enter the User MMSI number for the third time, contact customer service(see back page for contact information).16User MMSIUse the up and down arrows to adjust each of the nine digits in turn.0_______MENU SetupSELECTUser MMSISELECT1. Display the menu and choose the Setup sub-menu.2. Select User MMSI. If an MMSI number was entered previously, thescreen displays it.](https://usermanual.wiki/Uniden-America/UT621/User-Guide-764111-Page-27.png)
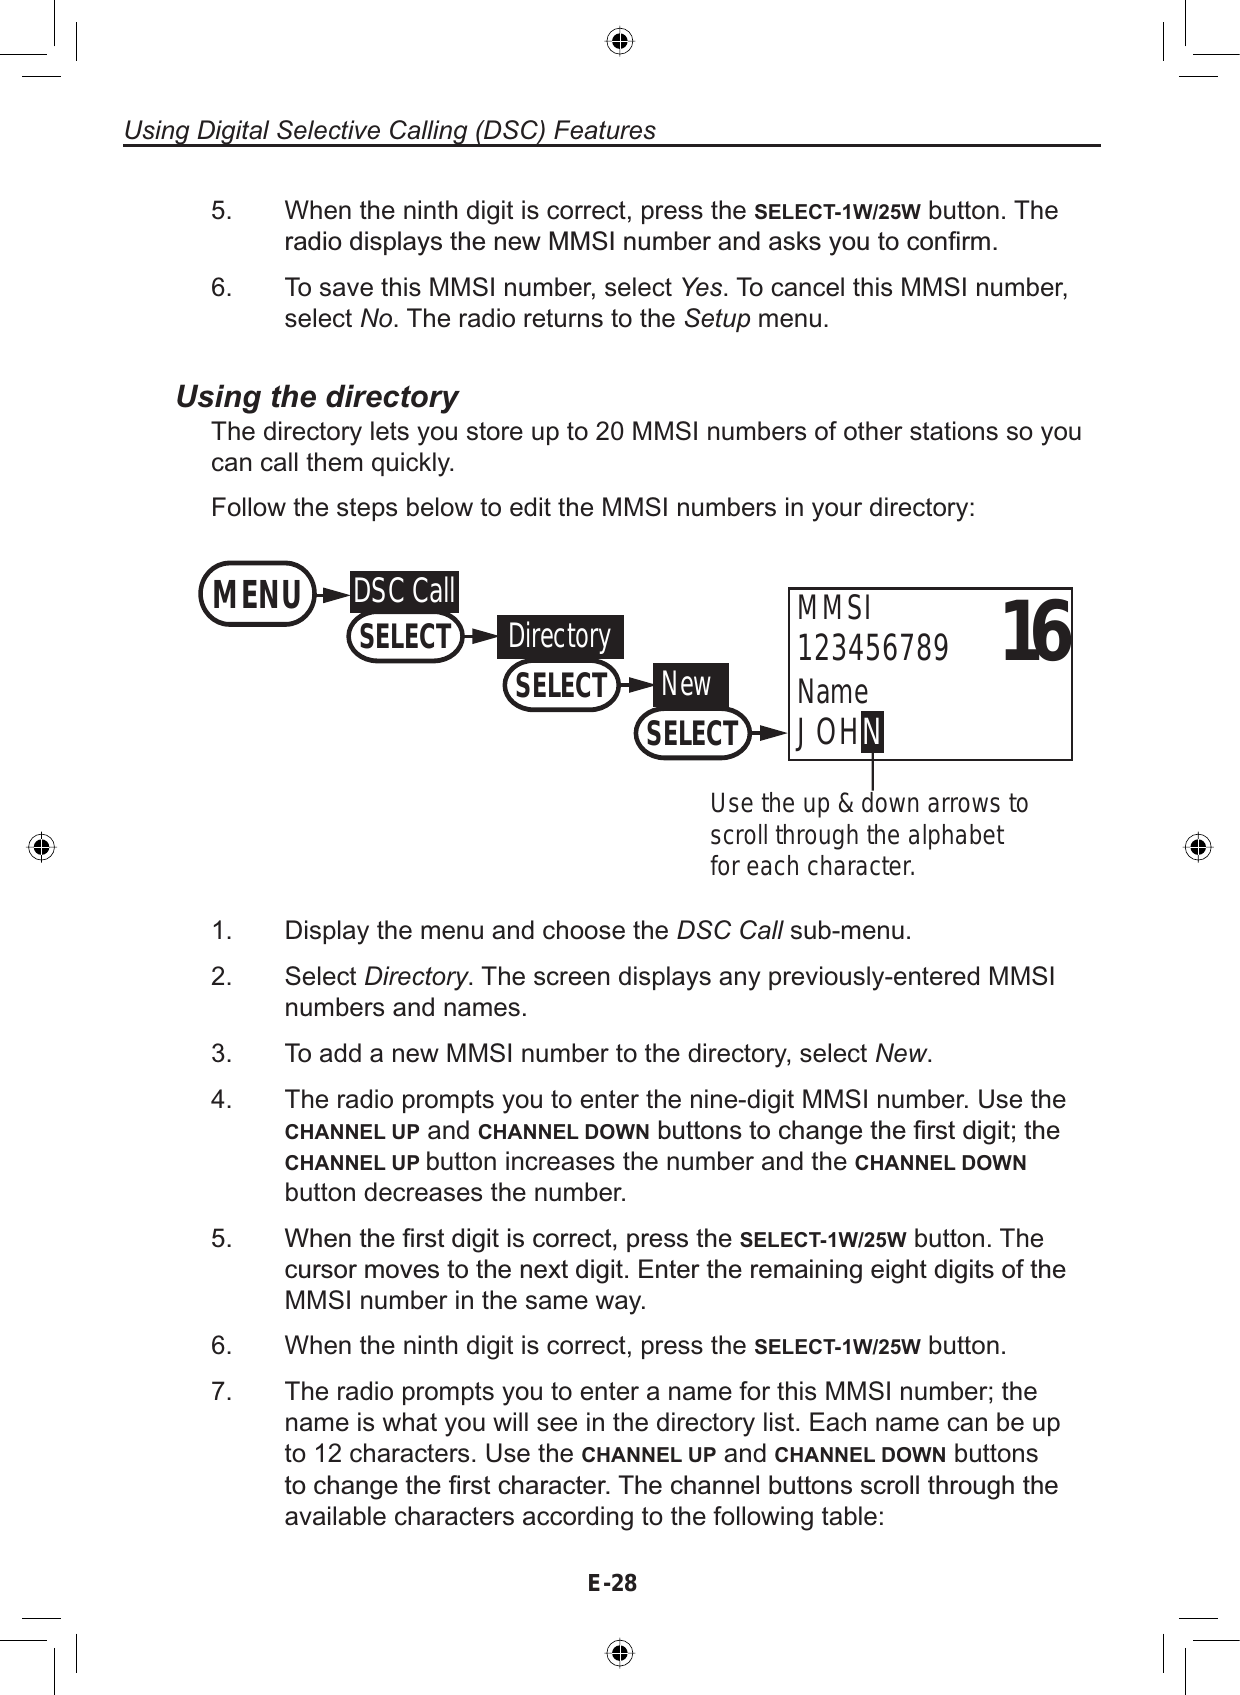

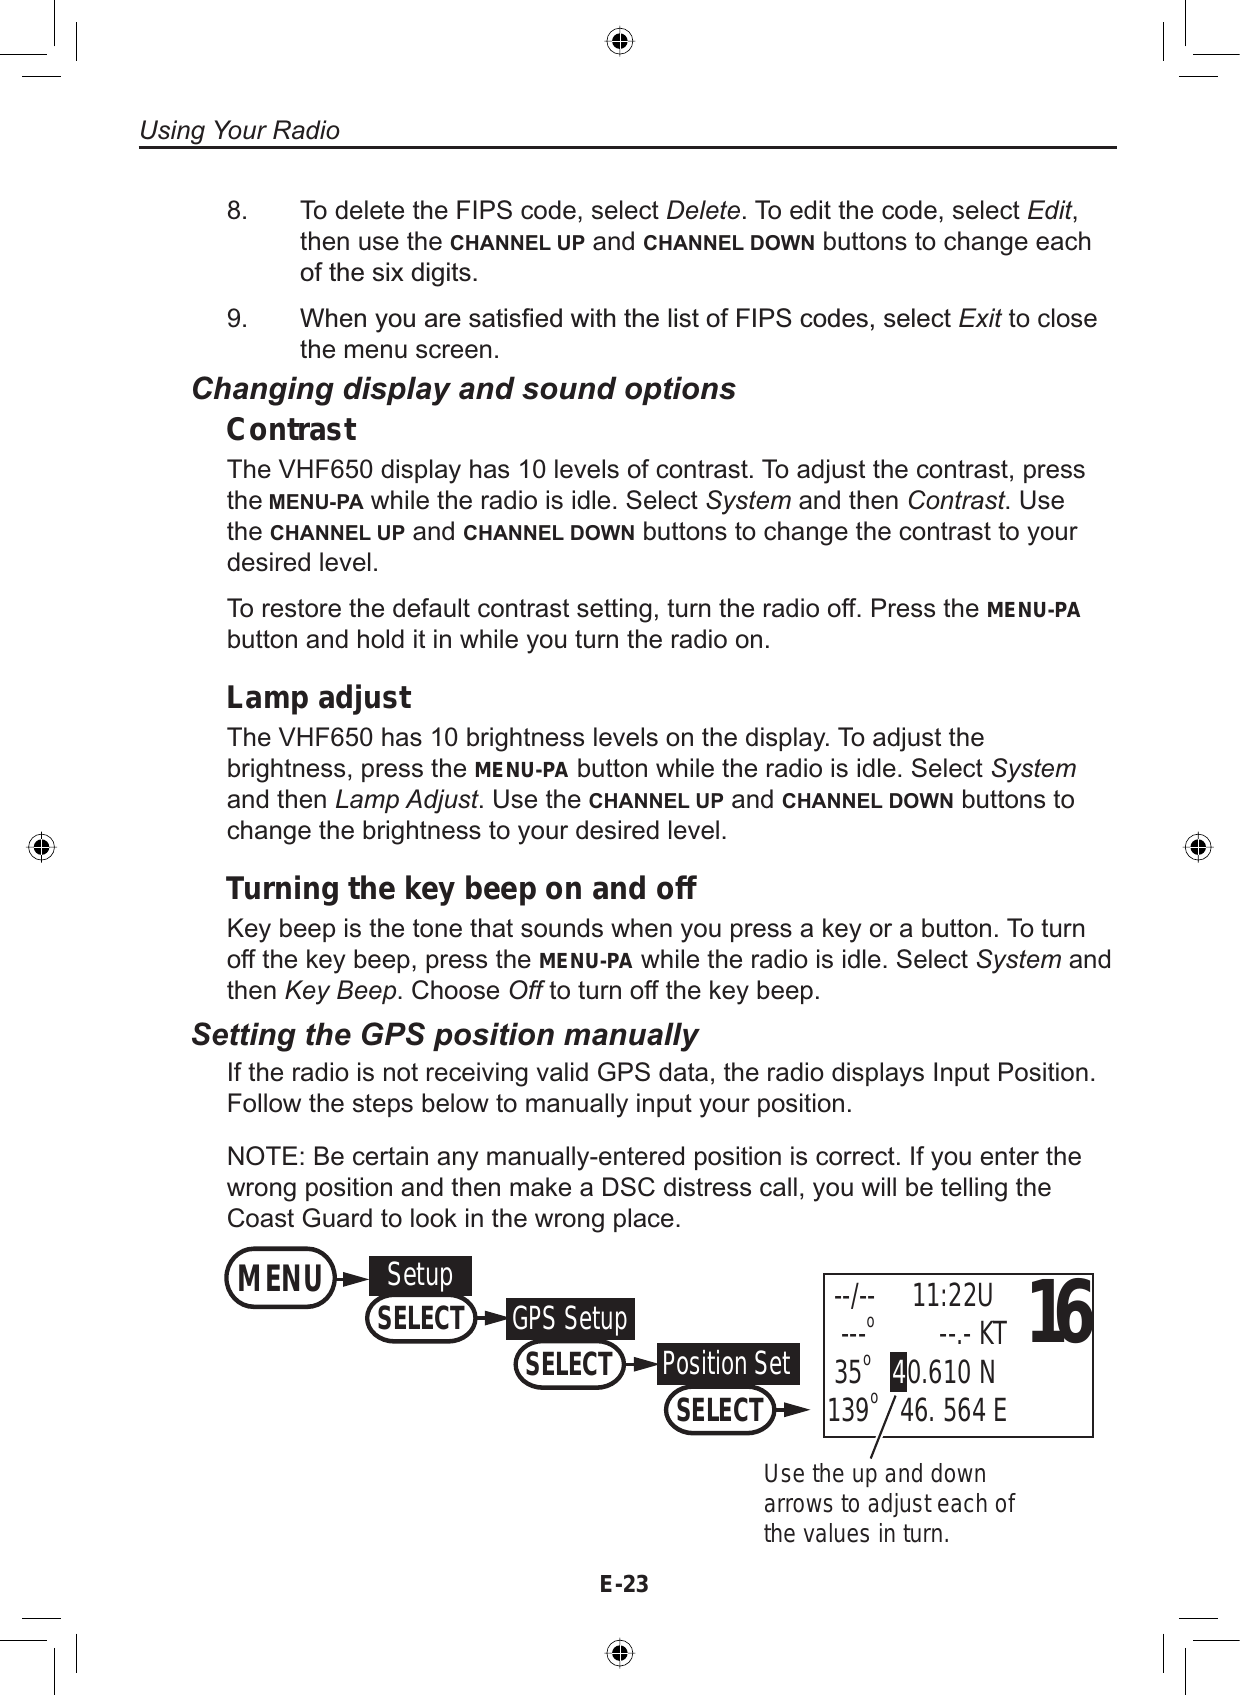
![Using Digital Selective Calling (DSC) FeaturesE-34Receiving a DSC callIf your radio receives an individual DSC call from another station, it soundsan incoming call tone and displays the name or MMSI number of the stationcalling you. To respond to the call, select Send: Able-Comply; the radio sendsan acknowledgement and automatically switches to the designated responsechannel. To reject the call, select Send: Unable-Comply; the radio advises theother station that you are unable to respond to the call.If the DSC request contains a response channel that you are not allowed touse, the radio displays Not Support CH; your only response option is Send:Unable-Comply.If the radio receives a group or all ships call, it sounds an incoming call toneand automatically switches to the designated response channel.Receive logJust like your telephone’s caller ID list, your radio keeps track of the calls youreceive but do not answer. The receive log is useful if you have been off yourboat or away from your radio and want to see who has tried to contact you.The radio displays the last 10 distress calls and the last 20 non-distress callsthat it received.88A123456789987654321[Exit]Distress LogMENUDSC CallSELECTReceive LogSELECTDistressSELECTPress the MENU-PA button to display the menu.Choose the DSC Call sub-menu and then select Receive Log.Select Distress to see the last 10 distress call received by the radio.Select Other to see the last 20 normal calls received by the radio, thenchoose from Individual,Group or All Ships calls.Calls are listed in the order they were received, with the newest callVKRZQ¿UVW7KHGLVSOD\EOLQNVLIWKHUHDUHQHZFDOOV\RXKDYHQRWreviewed.Select the call you want to see the details of. Use CHANNEL UP andCHANNEL DOWN buttons to see all of the information. The log displaysdifferent information depending on type of call received. See the tablebelow for the information stored for each type of call:1.2.3.4.5.](https://usermanual.wiki/Uniden-America/UT621/User-Guide-764111-Page-35.png)