Unilock LL92PRN Digital lockerlock User Manual LL92PR Instruction Guide 201603
Unilock Co., Ltd. Digital lockerlock LL92PR Instruction Guide 201603
UserManual.wiki
>
Unilock
>
LL92PRN User Manual
User Manual
Navigation menu
Upload a User Manual
Namespaces
Wiki Guide
HTML
PDF
Info
Views
User Manual
Discussion / Help
Navigation
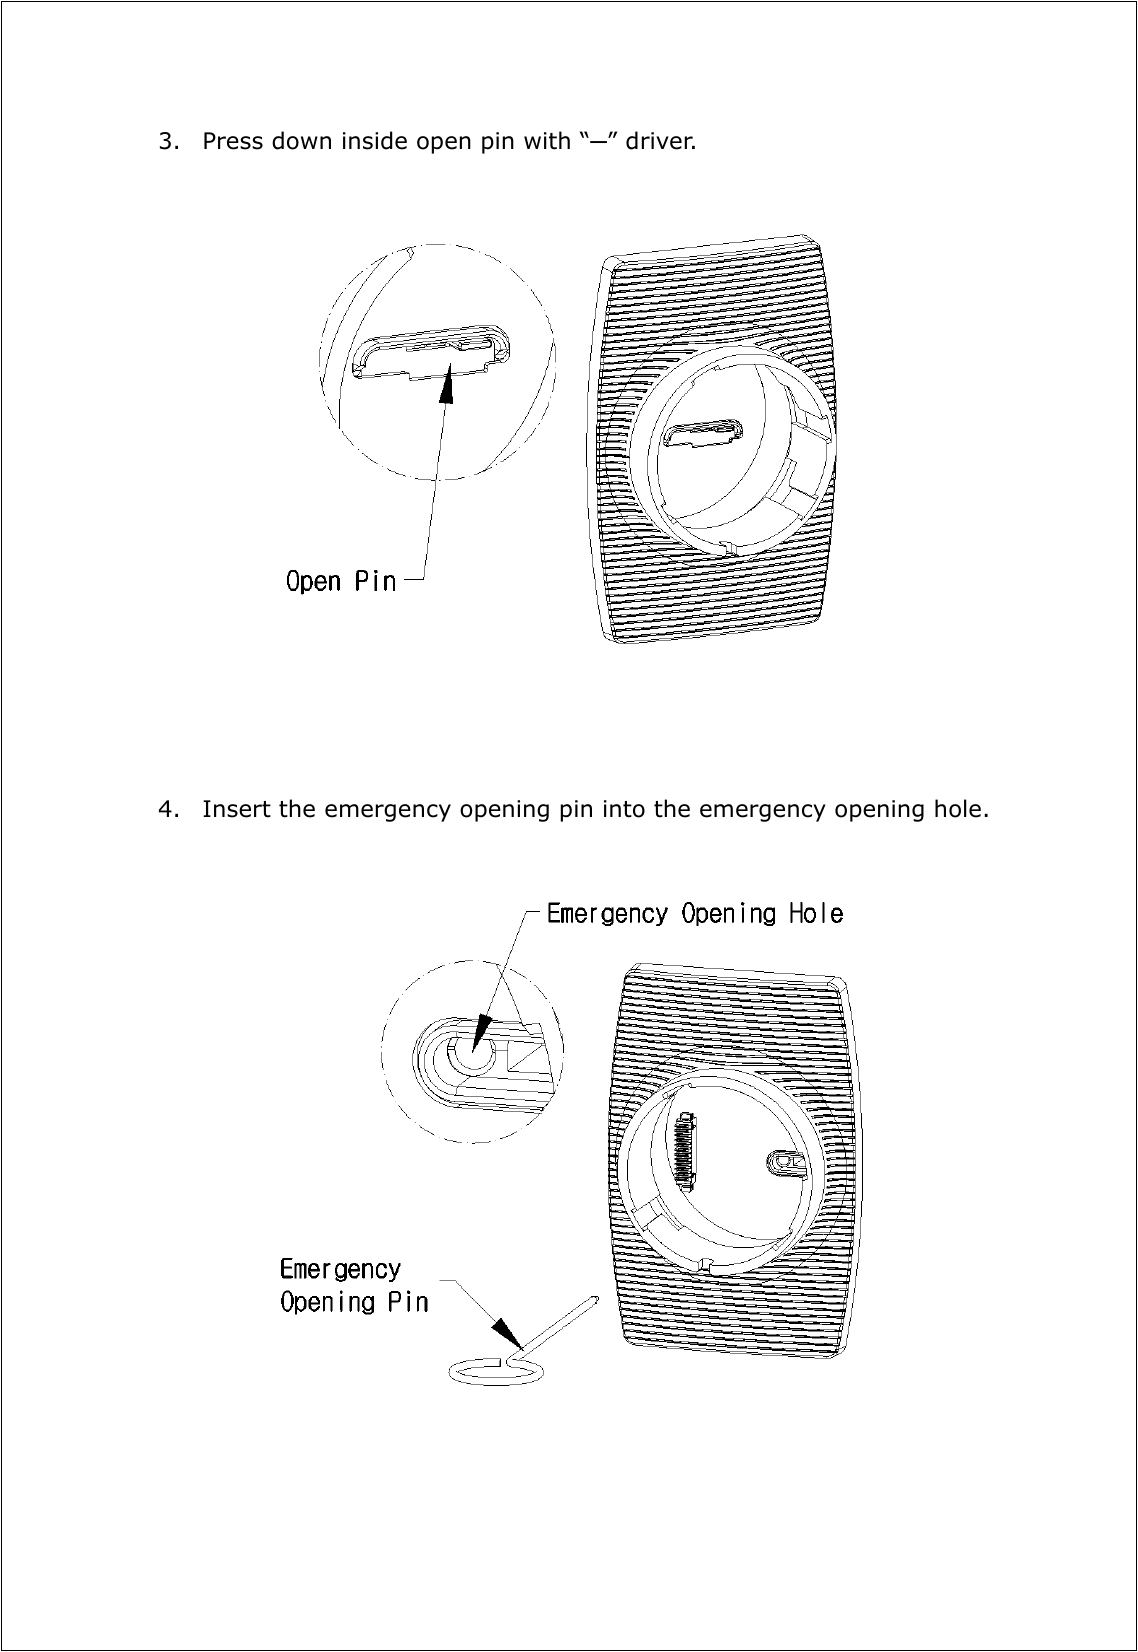
![5. Press the emergency opening pin to the right end and open the door. The lock does not work at all after this emergency opening. Return the lock to the authorized dealer for rework. [END]](https://usermanual.wiki/Unilock/LL92PRN/User-Guide-2985671-Page-10.png)