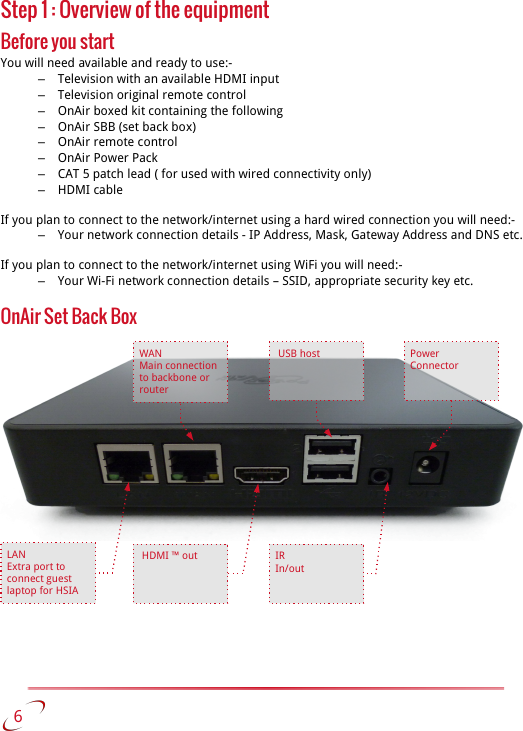
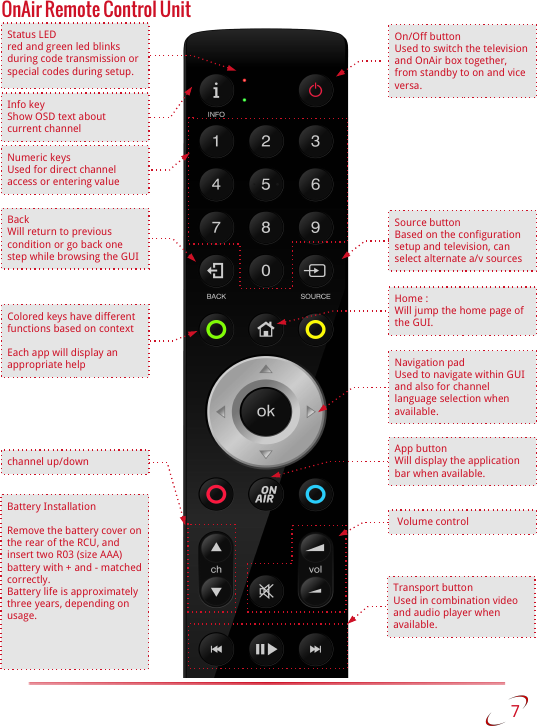
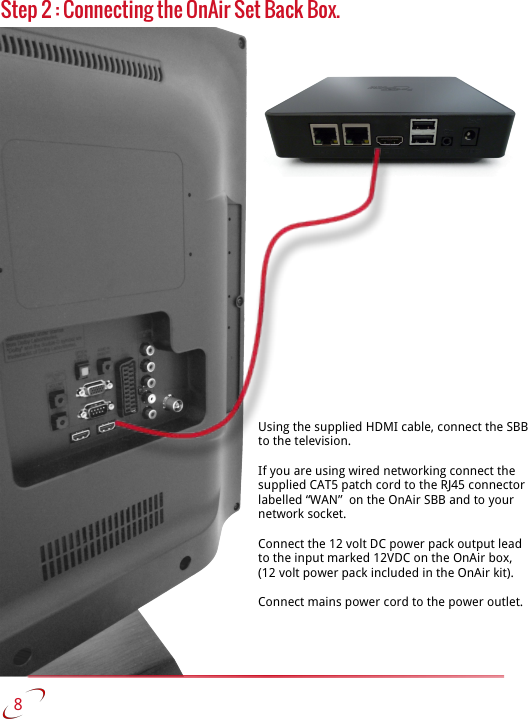
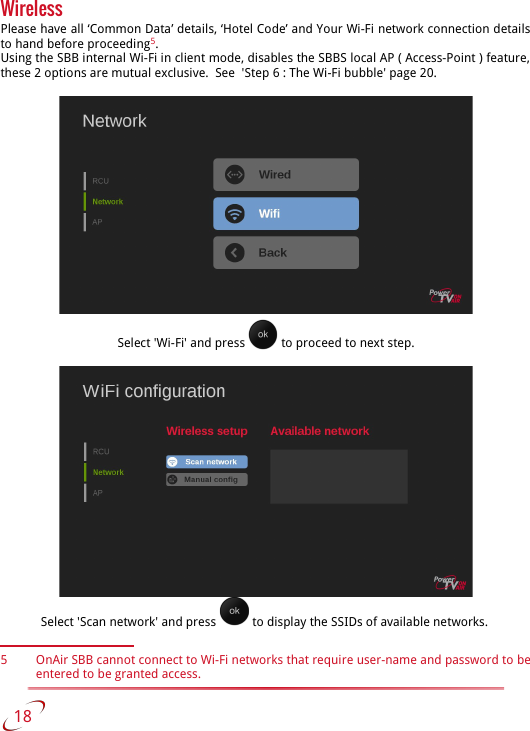
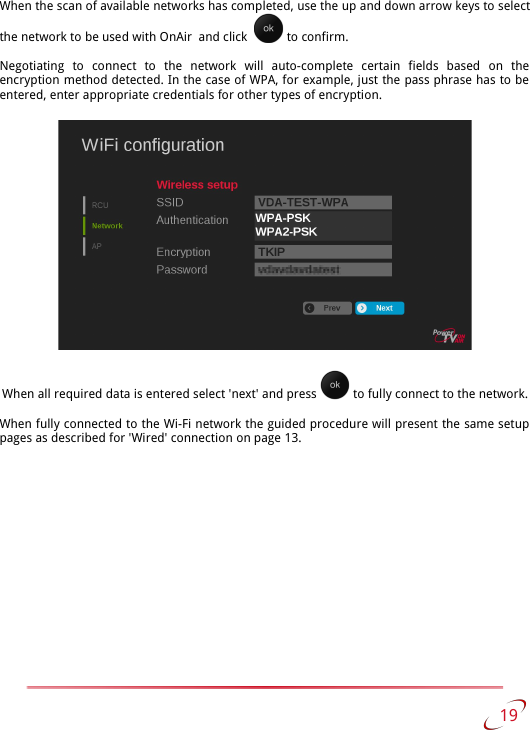
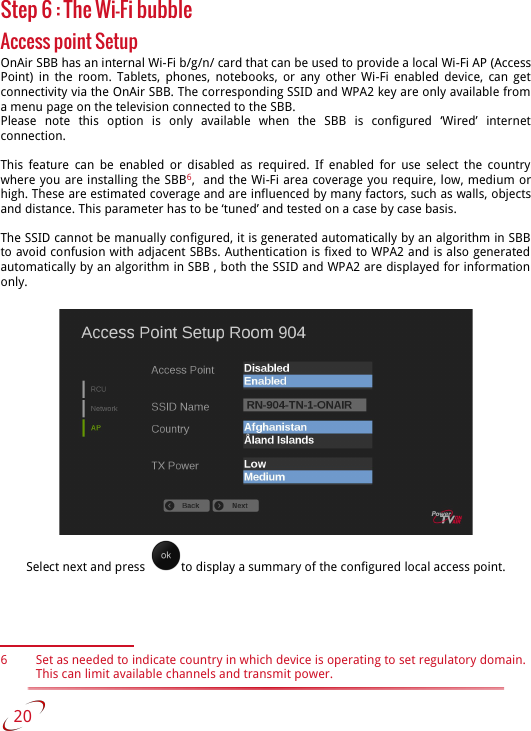
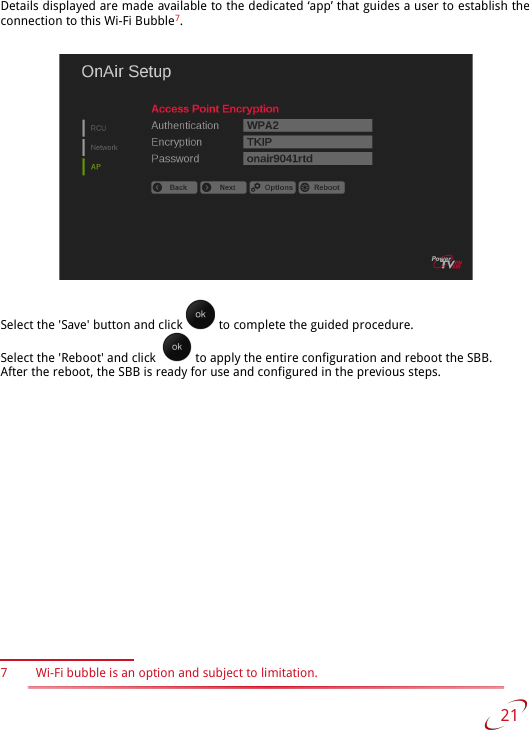
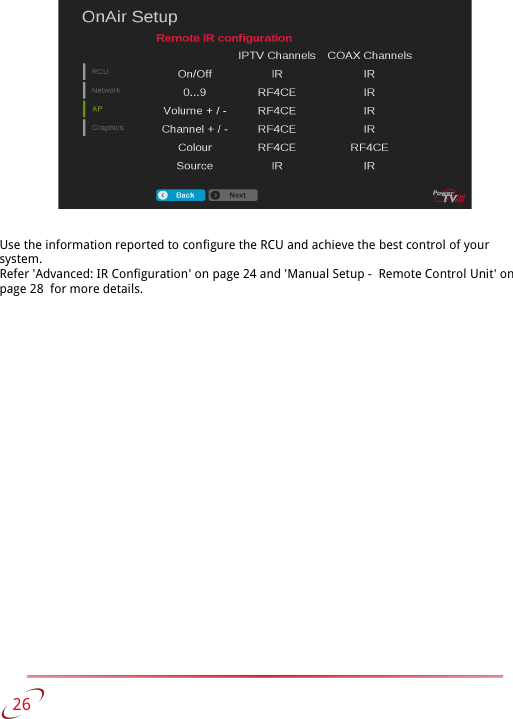
VDA MULTIMEDIA 65000W0 PowerTV ON AIR User Manual OnAir quick setup guide
VDA MULTIMEDIA SPA PowerTV ON AIR OnAir quick setup guide
UserManual.wiki
>
VDA MULTIMEDIA
>
65000W0 User Manual
Users Manual
Navigation menu
Upload a User Manual
Namespaces
Wiki Guide
HTML
PDF
Info
Views
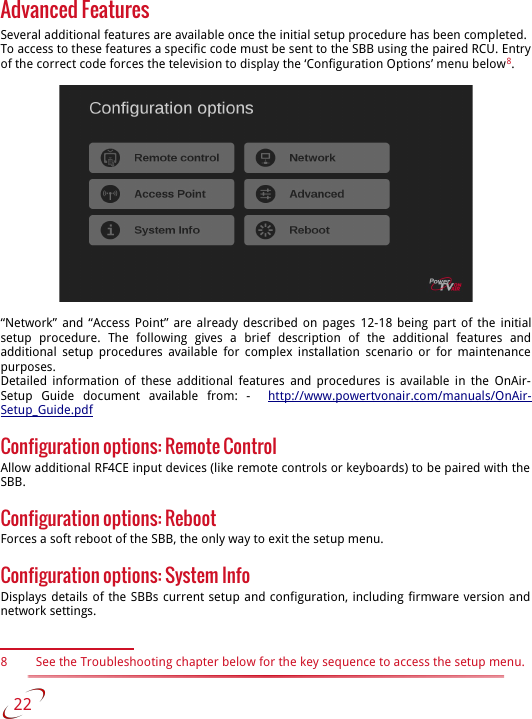
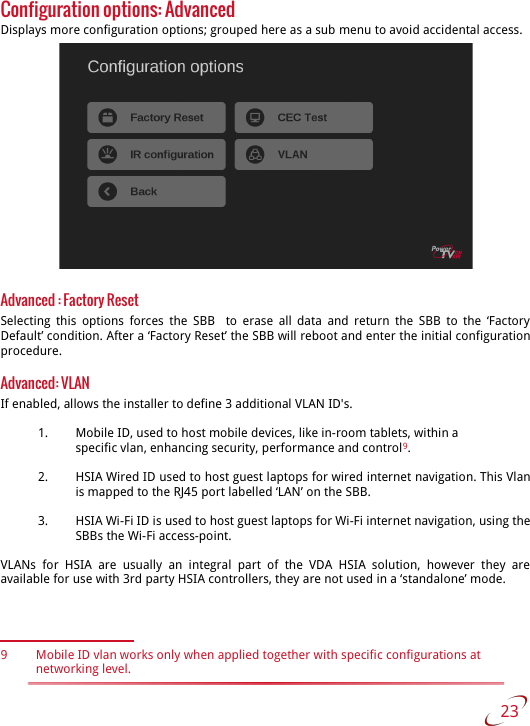
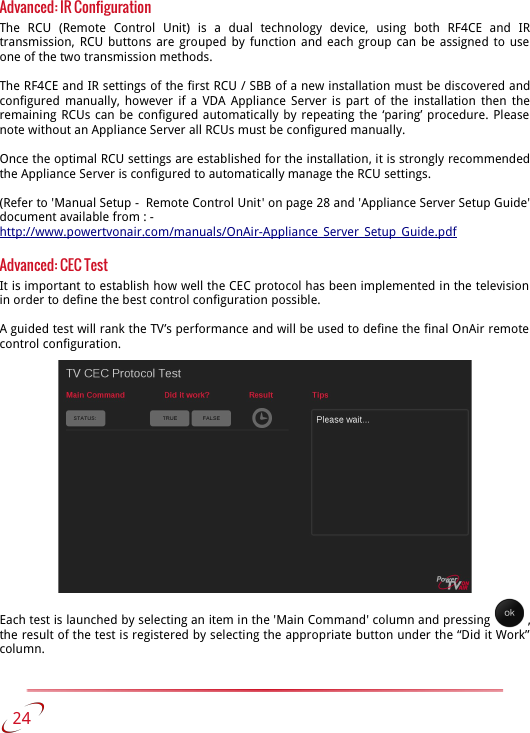
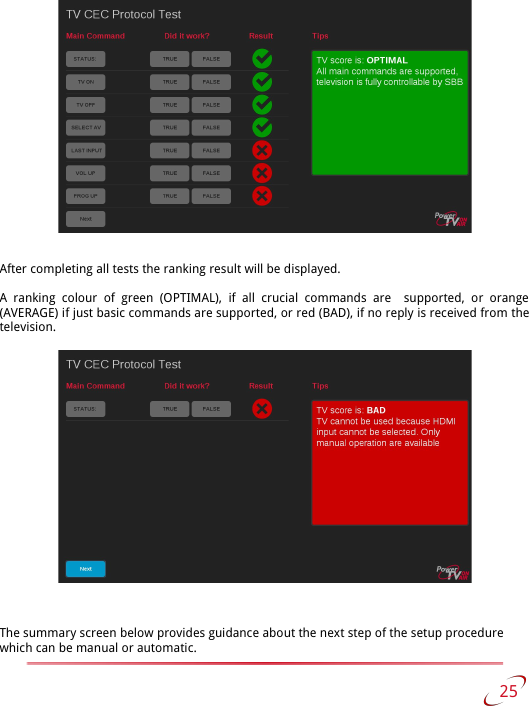
User Manual
Discussion / Help
Navigation