VISUAL LAND PRESTIGE11Q 11.6 inch TABLET User Manual part 2
VISUAL LAND INC. 11.6 inch TABLET part 2
Contents
- 1. User manual part 1
- 2. User manual part 2
- 3. User manual part 3
User manual part 2
ANDROID QUICK START GUIDE ESSENTIALS 14
What you can ask Google to do for you
When you use Google Now, you can speak to your device to
search, get directions, and create reminders. For example, say
“Ok Google, do I need an umbrella tomorrow?” to see if there’s
rain in the weather forecast.
Turn “Ok Google” on or off
You can start a search or task by saying “Ok Google.” To turn it
off or on, open Google Now or the Google app and touch Menu >
Settings > Voice > OK Google detection.
Display
Change the display settings on your device by following these
steps:
1. Go to Settings > Device > Display.
2. Choose from the following settings. Some of these settings
may vary by your device and version of Android. All can affect
battery life. See “Manage battery life” on page 8 for more
information.
• Brightness level: Move the slider to set the brightness
level on your device.
• Adaptive brightness: Turn on adaptive brightness to au-
tomatically optimize the brightness level on your device
based on the available light around you. Adaptive bright-
ness is on by default. You can still adjust your brightness
when needed.
• Sleep: Change how long it takes for your device’s screen to
go black when you’re not using it. Learn more about Sleep
Settings.
• Daydream: Set up screensavers that display photos, color-

ANDROID QUICK START GUIDE ESSENTIALS 15
ful backgrounds, and more when your device is charging or
docked.
• if you want your tablet to wake up when you pick it up or
when a notication arrives.
Sound & notication
You can change the sound and notication settings on your de-
vice by going to Settings > Device > Sound & notication.
Notications alert you to the arrival of new messages, calen-
dar events, and alarms, as well as ongoing events, such as
downloads:
• Interruptions. Prioritize sound notications so they don’t inter-
rupt you.
• When device is locked. Manage whether notications can be
seen when your tablet is locked, and whether sensitive con-
tent in a notication can be seen. Sensitive content includes
things like the title of a song you downloaded, who sent you an
email, or the details of a calendar event. For more information,
visit the Help Center.
• App Notications. Modify the notication settings individu-
ally for apps such as Gmail. The setting under When device
is locked will always take precedence over the setting for an
individual app.
• Notication access. See which apps can access your
notications.

ANDROID QUICK START GUIDE ESSENTIALS 16
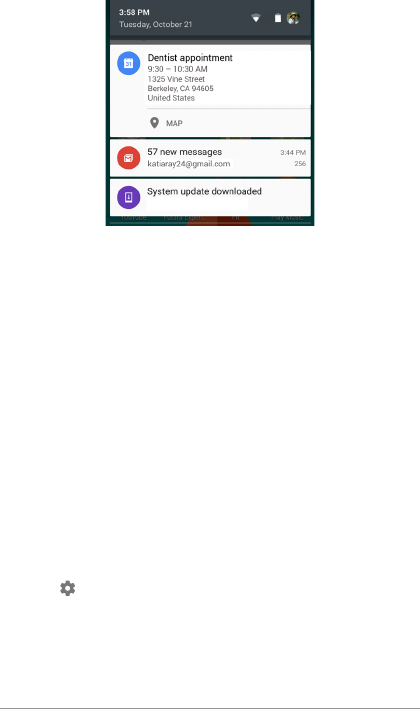
When a notication arrives, its icon appears at the top of the
screen. Icons for pending notications appear on the left, and
system icons showing things like the Wi-Fi signal, mobile carrier
signal, or battery strength are on the right:
Notications Wi-Fi signal Battery
Certain notications can be expanded to show more information,
such as email previews or calendar events. The one at the top is
always expanded when possible. To expand a notication, posi-
tion one nger inside it and swipe down slowly.
To open the related app, touch the notication icon on the left.
Some notications also allow you to take specic actions by
touching icons within the notication. For example, Calendar
notications allow you to Snooze (remind you later) or send email
to other guests.
When you’re nished with a notication, swipe it away. To dismiss
all notications, touch Dismiss at the very bottom of the noti-
cations list.
ANDROID QUICK START GUIDE ESSENTIALS 17
Manage accounts on your device
You can add accounts so that information associated with that
account automatically syncs with your device. You’ll need to set
up an account on your device if you want to get email or get apps
on Google Play.
You can also add multiple users for your device, like if several
people share a tablet. Adding users is different from adding
accounts. Each user has separate settings and can’t access the
accounts of other users, whereas a single user can have multiple
accounts and switch between them anytime they’re signed in.
Make sure you’re signed in as the correct user before adding or
removing any account information.
Add an account
1. Go to Settings > Personal > Accounts. Touch “Add
account.”
2. Touch the type of account you want to add. You may be able
to choose from choices like “Google,” “Personal (IMAP),” or
“Personal (POP3).” If you’re not sure whether to choose IMAP

ANDROID QUICK START GUIDE ESSENTIALS 18
or POP3, try IMAP first. Many email services use IMAP.
i. Choose “Google” if you want to add your Google Account.
When you sign in with a Google Account, all the email, con-
tacts, calendar events, and other data associated with that
account are automatically synced with your device.
ii. Follow the on-screen instructions to add the account.
To change the settings of any of the accounts you added, follow
these steps:
1. Go to Settings > Personal > Accounts.
2. Select your account. If you’re using a Google Account, touch
Google and then your account.
Remove an account
When you remove an account that you’ve added to your device,
everything associated with that account, including email, con-
tacts, and settings is also deleted. You can’t remove the account
you used to initially set up your device.
To remove an account from your device, follow these steps:
1. Check to see if the account you want to remove is the account
you used to set up your device.
• If it’s not, go to step 2 and follow the instructions.
• If it is, reset your device to its factory settings instead of
following the steps below. This erases all of the data from
your device and you’ll need a Google Account to set up your
device again.
2. Open the Settings menu on your device.
ANDROID QUICK START GUIDE ESSENTIALS 19
3. Under “Accounts,” touch the name of the account you want to
remove. If you’re using a Google Account, touch Google and
then the account.
• When you sign out of your Google Account, all the email,
contacts, Calendar events, and other data associated with
that account will no longer automatically sync with your
device.
4. Touch Menu in the top right corner of the screen.
5. Touch Remove account.
Share your device with other users
You can easily share your device with family and friends by creat-
ing a separate user for each person. Each person has their own
space on the device for custom Home screens, accounts, apps,
settings, and more. You must be the device owner to add users.
To add a new user, follow these steps:
1. Go to Settings > Device > Users.
2. Touch Add user, then touch OK.
i. If you’re with the new user: Touch “Set up now” and you’ll
be taken to the lock screen. Select the new user, unlock the
screen, and allow them to set up their Google Account and
other details.
ii. If the new user isn’t around: Touch “Not now.” A “New user”
will appear in the list. The next time you’re with the user, go
back to the user list and select “New user” or click the user
image on the lock screen.
After a user is set up, when you go to the lock screen, you’ll see a
second user prole picture or avatar in the status bar. To choose
a user, touch the picture and unlock the screen. Each user can set
their own screen lock.
ANDROID QUICK START GUIDE ESSENTIALS 20
Switch users
To switch users, swipe down from the top of any screen twice to
open Quick Settings. Touch the image of the current user in the
top right corner of the screen, then touch another user’s image.
Remove a user
The device’s owner can delete any user that they added:
1. Go to Settings > Device > Users.
2. Touch Settings next to the user’s name, then touch Re-
move user.
Other users can only delete their own space.
1. Go to Settings > Device > Users.
2. Touch Menu > Delete username from this device.
Guest user
If someone wants to temporarily use your device, but they don’t
need to be set up as a regular user, they can use it as a guest.
Guest users don’t have access to your mail, your apps, or any
content on your device that’s tied to your account, like photos or
downloaded les. You must be the device’s owner to add a guest.
1. Go to Settings > Device > Users.
2. Touch Guest.
When your guest is nished using your device, you can switch
back to another user.
To switch to another user: Swipe down from the top of any
screen, and then touch the bar at the top to open Quick Settings.
To choose another user, touch the image in the top right corner of
the screen, then touch another user’s image.

ANDROID QUICK START GUIDE ESSENTIALS 21
Security
If a lock is set for your screen, the screen goes dark and locks
when the display goes to sleep or if you press the Power button.
You can set locks of different strengths using Screen Lock
settings:
1. Go to Settings > Personal > Security > Screen
lock.
2. Touch the type of lock you’d like to use.
Even when your screen is locked, you can perform certain
activities.
• Quick Settings: Slide down from the top of the screen to open
Quick Settings without entering your password.
• Camera: Slide from right to left to open the Camera.
If you have a device that’s set up for more than one user, you may
need to touch your image at the bottom of the screen to see your
own locked screen.
For more information, visit Customize the screen lock.
Smart Lock
You can turn on Smart Lock to keep your device unlocked when
it’s clear that you have it with you—for example, when it’s con-
nected to your Bluetooth watch or when it recognizes your face.

ANDROID QUICK START GUIDE ESSENTIALS 22
Trusted devices and face matching
You can set your device to stay unlocked while connected to a
Bluetooth device—like a watch, tness tracker, headset, or car
speaker system. You can also set your device to unlock when it
touches an NFC tag.
You can also have your device unlock when it recognizes your
face. After setting a trusted face, every time you turn on your
device, it will search for your face and unlock if it recognizes you.
Keep in mind that someone who looks similar to you could unlock
your tablet.
Note: Face matching doesn’t store any photos of you. Data used to
recognize your face is only stored on your device and is not acces-
sible by apps or backed up on Google servers.
Protect against harmful apps
Apps from Google Play are always veried by Google to protect
you and your device from harm. By default, your device doesn’t al-
low the installation of apps from sources other than Google Play.
If you choose to allow the installation of apps from unknown
sources and install apps from sources other than Google Play, it’s
more likely that apps will be installed that could harm you or your
device.
If you allow the installation of apps from unknown sources, the
Verify Apps feature protects you when installing apps outside
of Google Play by continually checking your device to make sure
that all apps installed are behaving in a safe manner, even after
installation.

ANDROID QUICK START GUIDE ESSENTIALS 23
Chromecast
Chromecast is a small device that plugs into the back of your TV.
It allows you to send videos and music straight from your tablet
to your TV. You can use Chromecast with apps like:
• YouTube
• Netflix
• Google Play Movies & TV
• Google Play Music
• Hulu Plus
To see more apps, visit chromecast.com/apps.
When using Chromecast, make sure your tablet is using the same
Wi-Fi network as your Chromecast, and that Chrome-cast is
selected as your TV’s source input.
To display content from your tablet on your TV:
1. Open the video or music in one of the apps listed above.
2. Touch Cast.
3. Play the content as usual to stream it to your TV.
ANDROID QUICK START GUIDE ESSENTIALS 24
File storage
Android 5.0 makes it easy to store and browse through pictures,
videos, and other les on your device and attach them to an
email, Hangout message, and so on. You can also use stored
images as your Home screen wallpaper.
For example, to attach an image to an email you’re composing,
touch the Paper Clip in the top right and choose to either
Attach le or Insert from Drive to select stored images in your
Drive folder.
From here, you can view any of these sources:
• Recent shows you the photos or videos you’ve taken or
opened most recently.
• Drive lets you attach any les stored in Google Drive.
• Images displays any photos, videos, or other images on your
device.
• Downloads includes most les (excluding Play content) you’ve
downloaded from emails or the Web
• Photos lets you browse all the images and videos that are on
your device or have been uploaded to your Google account.
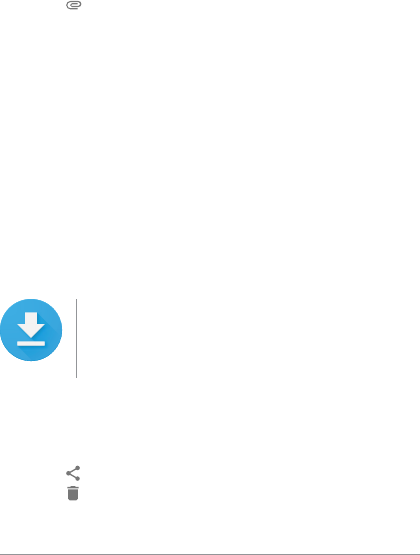
Use the Downloads app to view, reopen, or delete
les you download from Gmail or other sources
(excluding Google Play books, videos, magazines,
and other media.)
In the Downloads app:
• Touch an item to open it.
• In your list of downloads, touch & hold an item to select it.
Touch Share and choose a sharing method from the list.
Touch to delete.
ANDROID QUICK START GUIDE ESSENTIALS 25
Google Play streams purchases and rentals via the Internet. So
the purchases and rentals don’t always occupy storage space
when you play them. Although you can download content in
Google Play apps to access offline, Google Play content never
appears in Downloads.
Screenshots
To take a screenshot:
1. Make sure the image you want to capture is displayed on the
screen.
2. Press the Power and Volume down buttons simultaneously.
The screenshot is automatically saved in your Photos.
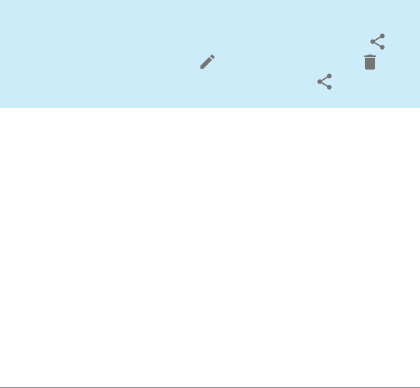
TIP: To easily share your screenshot via Gmail, Google+,
and more, select your screenshot in Photos and touch
Share at the bottom. Touch Edit to modify. Touch to
delete. For Google Play edition devices, touch Share.
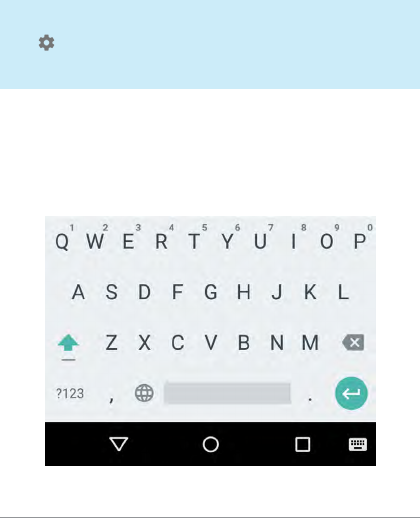
ANDROID QUICK START GUIDE USE THE KEYBOARD 27
Keyboards on tablets work in a similar way. To make the keyboard
go away, touch the Back button below it.
Some apps open the keyboard automatically. In others, you rst
need to touch where you want to type.
Basic editing
Change
where you
want to type
Touch the cursor, then touch and drag the
tab that appears below it to the new position.
Select text Touch and hold or double-tap within the text.
The nearest word highlights, with a tab at
each end of the selection. Drag the tabs to
change the selection.
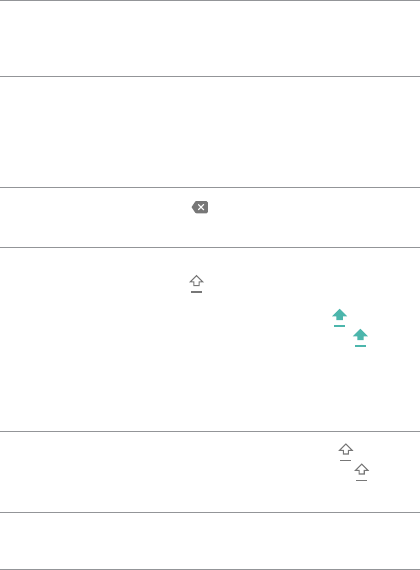
Delete text Touch the Delete key to delete the char-
acters before the cursor or selected text.
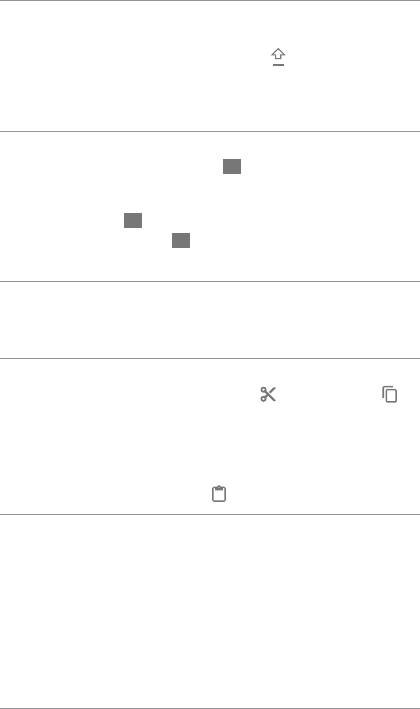
Type capital
letters
To switch to capital letters for one letter,
touch the Shift key once.
You can also touch and hold the Shift key
while you type or you can touch the Shift
key and slide to another key.
When you release the key, the lowercase
letters reappear.
Turn caps
lock on
Double-tap or touch and hold the Shift
key so that it changes to. Touch the Shift
key again to return to lowercase.
ANDROID QUICK START GUIDE USE THE KEYBOARD 28
Change word
capitalization
If you want to quickly change the capitaliza-
tion of a word you’ve already typed, you can
select it and touch the Shift key.
You’ll have the option to select the capital-
ized word or the word in all capital letters.
Type a
symbol or
character
To switch to symbol keys for one word, touch
the symbol key ?123 once.
You can also touch and hold the symbol key
?123 while you type or you can touch thesym-
bol key ?123 and slide to another key. When
you release the key, the letter keys reappear.
View more
symbols and
characters
Touch and hold symbols or characters to get
accented characters or additional symbols.
Cut, copy,
paste
Select the text you want to cut or copy. Then
touch the Cut button or Copy button .
To paste, touch the space where you want
to paste your text and then touch Paste. If
you want to replace other text with the text
you copied, highlight the text, then touch the
Paste button .
Emoji
Use Google Keyboard to choose from a variety of small, colorful
images used to express emotion (known as emoji) to add some
fun to your messages.
Depending on your device, you may need to touch and hold the
Return key and then slide your nger to the happy face to display
emoji. On a tablet, just touch the emoji symbol at the lower right.
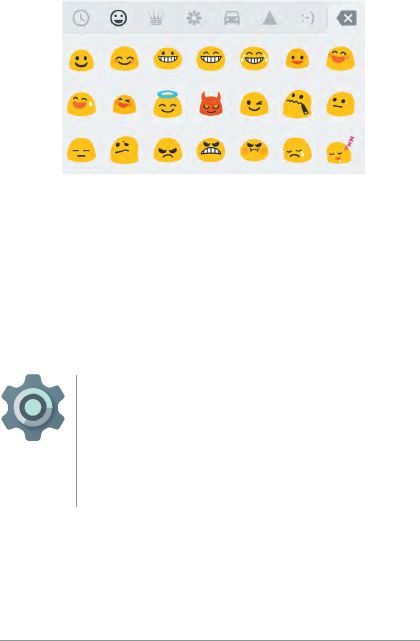
ANDROID QUICK START GUIDE USE THE KEYBOARD 29
You’ll see a panel like this. To move between categories, swipe
left or right or touch the symbols in the top row. To type an emoji,
touch it:
Use next-word suggestions
1. Touch the location where you want to input text.
2. Start typing out a word. When the word you want is displayed
in a list above the keyboard, touch it.
3. Continue to touch words unless the one you want doesn’t
appear. If so, type it.
Android continues to suggest words as you type.
To change your keyboard and input methods, go to
Settings > Personal > Language & input.
To turn next-word suggestions on or off, go to Set-
tings > Personal > Language & input > Keyboard &
input methods > Google Keyboard > Text correction
> Next-word suggestions.
ANDROID QUICK START GUIDE USE THE KEYBOARD 30
Gesture Typing
Gesture Typing works best for English. Quality varies for other lan-
guages, and some don’t support it yet.
To input a word using Gesture Typing:
1. Touch the location where you want to type to open the
keyboard.
2. Slide your nger slowly across the letters of the word you want
to input.
3. Release your nger when the word you want is displayed in
the floating preview or the middle of the suggestion strip. To
select one of the other words in the suggestion strip, touch it.
If the word you want isn’t shown while using Gesture Typing,
you can type it out manually. If you gesture a word and want to
change it, touch the word to see other choices in the suggestion
strip.
TIP: If there are letters you want to emphasize, like repeat-
ed letters, such as the “e” in sleep, pause over the “e” slight-
ly longer before moving on to the next letter.
Use Gesture Typing without the space bar
When you use Gesture Typing, there’s no need to use the space
bar — just continue to slide your nger across the letters you want
to input, then lift your nger to start the next word.
To change Gesture Typing settings, go to Set-
tings > Language & input > Keyboard & input meth-
ods > Google Keyboard> Gesture Typing.
ANDROID QUICK START GUIDE USE THE KEYBOARD 31
Keyboard dictionaries
To manage keyboard dictionaries, go to Settings > Personal >
Language & input.
Personal dictionary
You can add your own words to your personal dictionary so that
your device remembers them. To add a word or phrase, including
an optional shortcut, go to Settings > Personal > Language &
input > Google Keyboard > Text Correction > Personal dictio-
nary and the language of the dictionary you want to modify, then
choose Add and type in the word. When you use the optional
shortcut when typing, your word or phrase appears as an option
in the suggested words above the keyboard.
Add-on dictionaries
1. Go to Settings > Personal > Language & input > Google
Keyboard > Text Correction > Add-on dictionaries.
2. You’ll see dictionaries for other languages that you can down-
load to your device.
3. Touch the dictionary you want, then Install.
Type by speaking
You can speak to enter text in most places where you can enter
text with the onscreen keyboard.
1. Touch a text eld, or a location in the text you’ve already en-
tered in a text eld.
2. Touch the Microphone key on the onscreen keyboard.
3. When you see the microphone image, speak what you want to
type.
In some languages, you can also enter punctuation by speaking
it, like “comma,” “period,” “question mark,” “exclamation mark,”