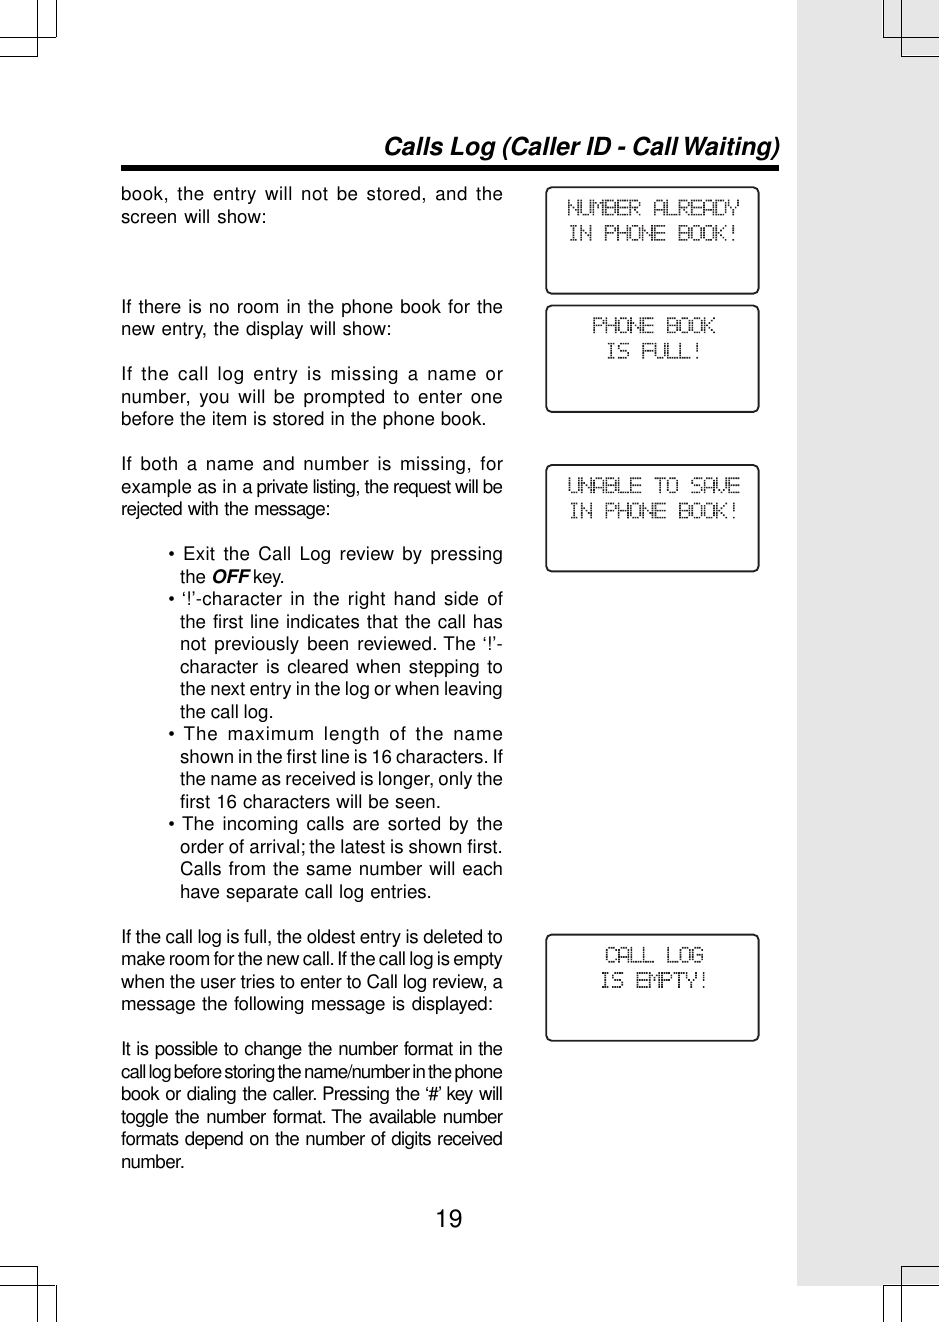
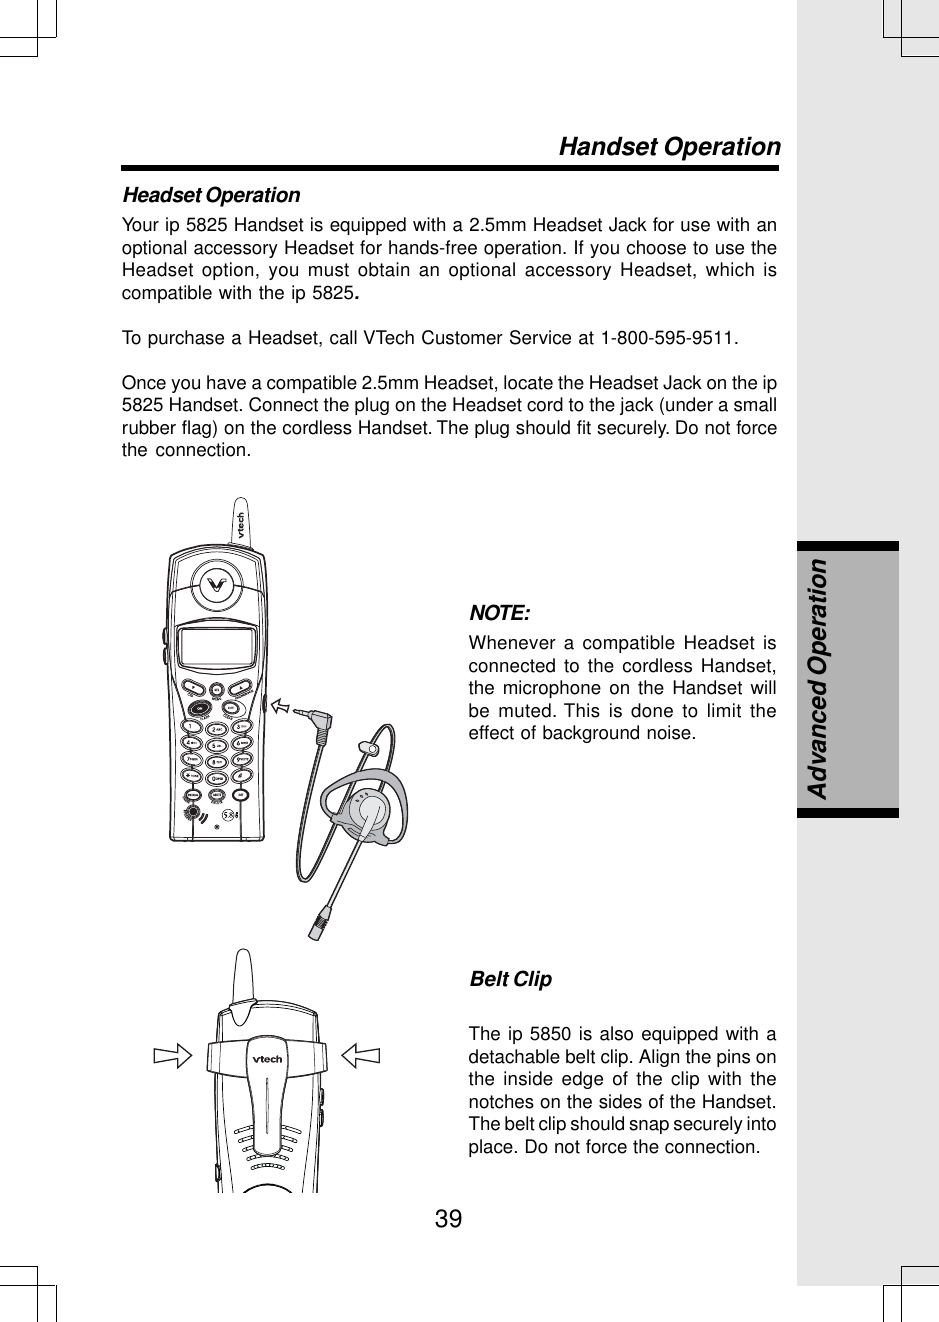
VTech Telecommunications 80-5348-01 VTech 5825 & 5850 Handsets User Manual 91 5473 10 00 p65

VTech Telecommunications Ltd VTech 5825 & 5850 Handsets 91 5473 10 00 p65

Revised 5850 user manual Part 2
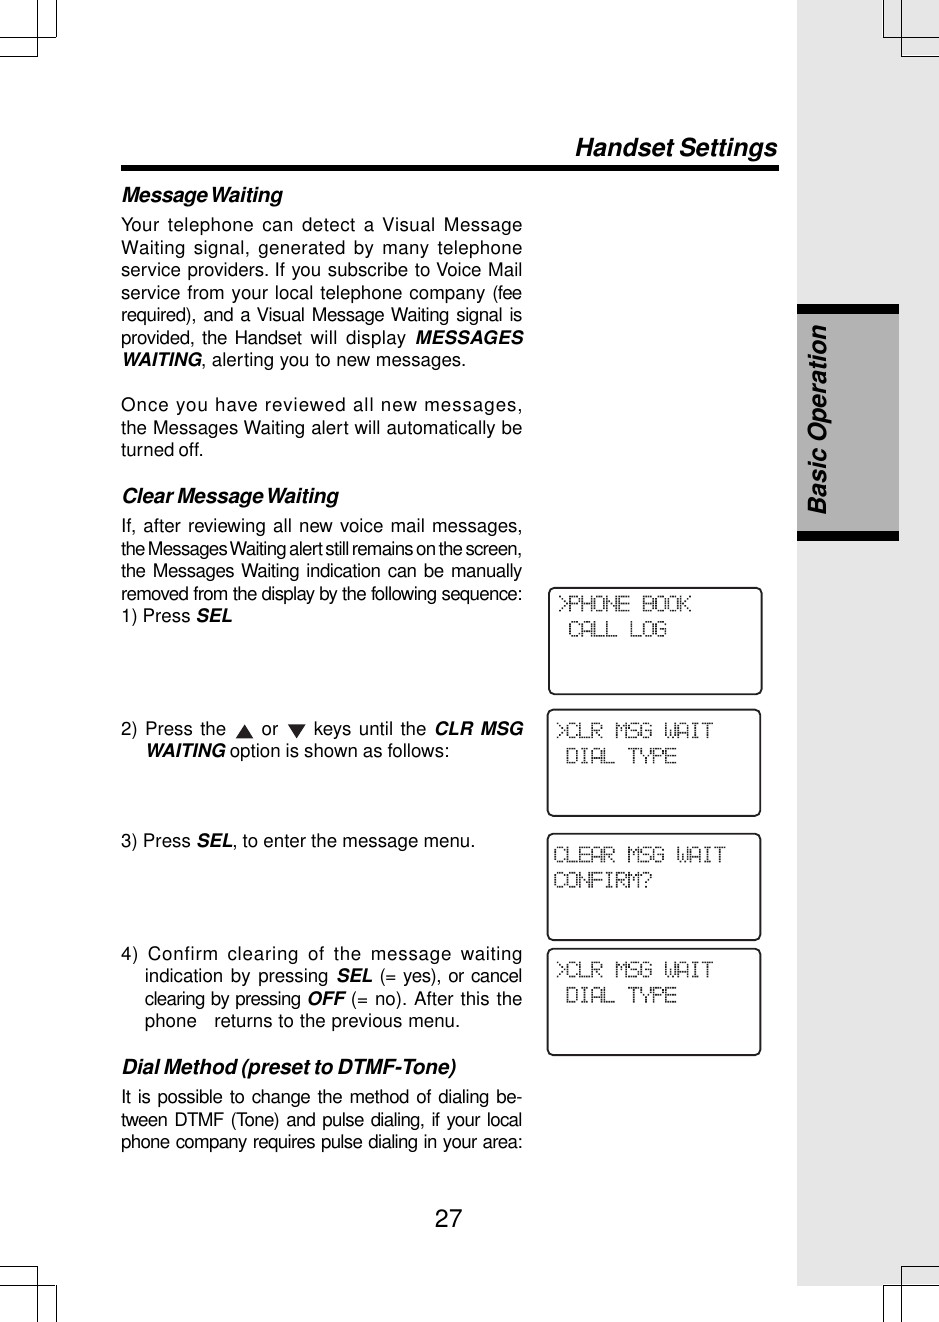
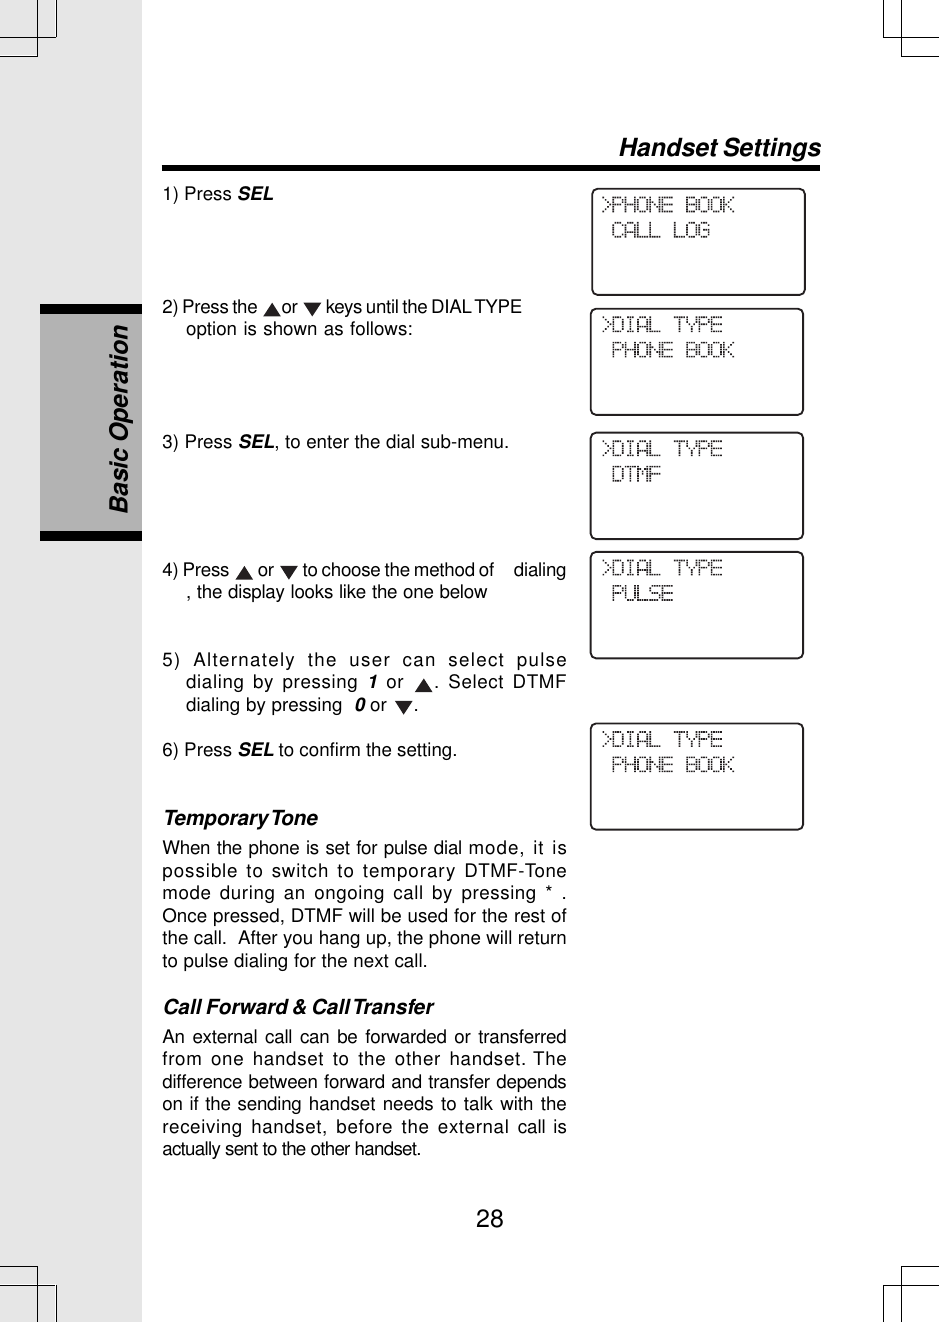
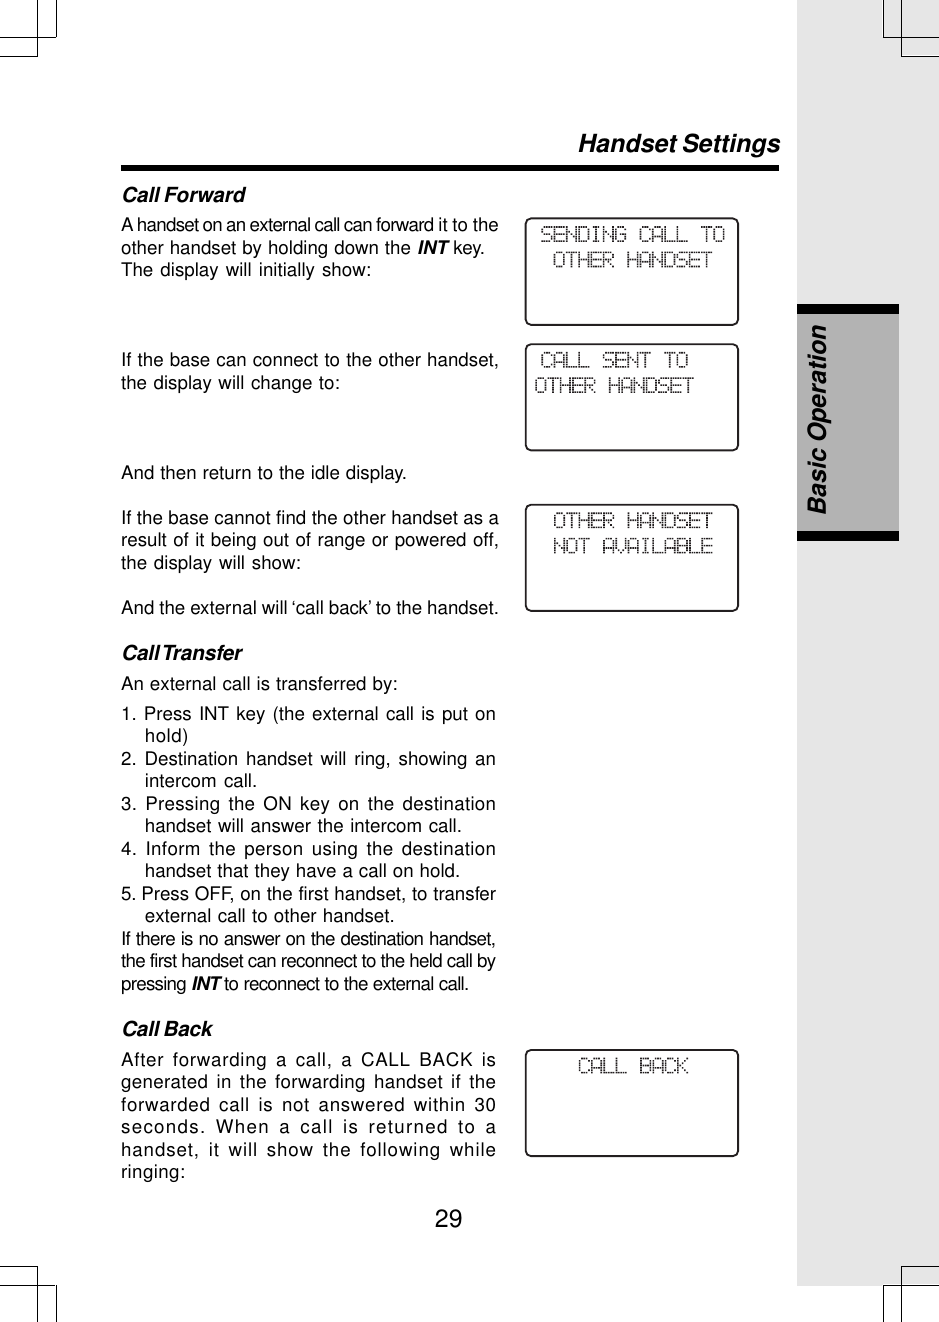
11Handset and Base IndicatorsBasic OperationHandset LEDs         LED                     Description.Base LEDs         LED                     DescriptionIN USECHARGINGPAGEMAILBOX1,2,3VOLUME^/vMENUCHANGETIME/SETREC/MEMODELETEREPEAT/SLOWSKIP/QUICK•    On when the phone is off hook.•      Flashes when an extension phone or the TAD is off hook.•    On when the handset is charging in the cradle.•    Will perform a global page.•    Flashes when new messages are in the appropriatemailbox. On when only old messages are in theappropriate mailbox. Off when no messages are inthe appropriate mailbox.•    Adjusts the ITAD speaker volume. There are 7 volumelevels.•   This key is used to scroll through the ITAD menuoptions•     This key is used to select the various menu options.•    When pressed in idle mode, the current time will beannounced.  When pressed in menu mode, thecurrent setting will be confirmed or reviewed.•     This key will put the ITAD into record mode to recordthe OGM or a memo.•     This key will cause the ITAD to erase the ICM, OGMor memo.  One or all messages can be erased.•   This key is used to repeat a message or play a mes-sage slowly. If the key is pressed and released, themessage will be repeated. If the key is held, themessage will play back at half the normal speed.•    This key is used to skip a message or play a mesagequickly. If the key is pressed and released, themessage will be skipped.  If the key is held, themessage will play back at twice the normal speed.Base Unit Icons         Icon                     Description•     Speaker LED (Orange)•     LED is on when in a handsfree mode.
12Making Calls•    Press ON (or, SPEAKERPHONE to use theHandset Speakerphone feature). Dial thephone number.                                   -OR-•   Dial the phone number first; then press ON(or SPEAKERPHONE).•   Press OFF to end your callHandset OperationAnswering CallsFrom the Handset•    Press any key except OFF and the softkeys.•   Press OFF to end your call.Intercom CallPressing INT key when the handset is idle ini-tiates an intercom call.•   Press INTThe call is performed and when the otherhandset answers, the display will change to:If the other handset is out of range, turned off oron an external call, the display will show and abusy tone will be heard on the earpiece, orthrough the speaker if in handsfree mode.An intercom call is terminated by:• Pressing OFF or INT,• Placing the handset in the chargerAfter terminating an INTERCOM CALL, thedisplay on both handsets will show:On the handset that did not terminate the call,a busy tone will be heard, indicating the otherhandset has ended the call. After severalseconds the display will return to idle and thebusy tone will stop.Basic Operation
13The handsets share a common phone book, which is stored in the base station.This means that entries inserted by one handset are available for both handsets,and if one deletes a phone book entry, it will disappear from both handsets.The phone book size will hold 50 entries, with names of a maximum length of 16characters and a 32-digit maximum phone number.The phone book entries are sorted and presented to the user in alphabeticalorder.Names are entered using the numerical keys. Multiple key presses of the dialingdigit keys is used to generate characters, see the table below. The cursor movesto the next position if another numerical key is pressed or by pressing the   key.The last entered character is deleted by pressing DELETE or  . The entirename is cleared by holding down DELETE.Key      Characters by number of key pressesBasic Operation1234567890*#1spaceADGJMPTW0*#21BEHKNQUX?‘3CFILORVY!,423456S8Z/-5adgjm7t9(.6behknpuw)&7          8        9cfiloq           r         svx           y         zThe phone book is entered via the menu, as described below or by pressing the/\ key in idle (quick access key) whereby the handset jumps directly to the phonebook search menu.The phone book is accessed as follows:1) Press SEL, to enter the menu.2) SEL, to enter the Phone book sub-menu.Phone Book Operation
14Storing a new entry1) Press the   key in idle, or scroll through thesub-menu with the   and   keys and pressSEL with “STORE” in the first line.2) If the phone book is full the screen will show,3) If the phone book is not full, the user will beprompted to enter the phone number to be storedas shown below:4) Enter the number, up to 32 digits. PressDELETE to backspace.In cases the number exceeds 16 digits, the topline will be used to show the entire number.5) Press SEL to confirm the number. If there isduplicate number in the phone book, thescreen will show:and the Handset will return to the ‘STORENUMBER’ screen. If the number is unique, youwill move to the name entry screen,6) Enter the associated name. Use 1 to add aspace and DELETE to backspace.7) Press SEL to confirm the name. A name mustbe entered, or you cannot proceed to the nextstep. Unlike phone numbers, duplicatenames are allowed. The new record will bestored in the phone book.Basic OperationPhone Book Operation
15The user can press CLEAR to return to the phonebook operation screen, which will show the lastoperation:Dialing from the phone bookA number can be recalled and dialed from thephone book by:1) Press the   key in idle, or scroll through themenu with the   &   keys and press SELwith “REVIEW” in the first line. The first phonebook entry will be shown.2) Scroll through the phone book entries using and   keys or enter first character of thename to be searched (using the dial digit keys)and continue navigating using the   or   asscroll keys, until you reach the entry to be dialed.3) Press ON or SPK, to dial the number.Editing a phone book entry1) Press the   key in idle, or scroll through themenu with the   &   keys and press SELwith “REVIEW” in the first line.2) Scroll through the phone book entries using and   keys or enter first character of thename to be searched (using the dialing keys)and continue navigating using the   or   asscroll keys, until you reach the entry to be edited.3) Press SEL to enter number edit mode4) Edit the number as required, using the followingoptions:When editing or storing a number, you may doany of the following:• Enter a digit by pressing 0-9,Basic OperationPhone Book Operation
16Basic OperationPhone Book Operation• Enter a pause by holding REDIAL,• Delete a digit by pressing DELETE,• Delete the entire string by holdingDELETE,• Position the cursor to another locationby pressing   or  ,• Insert a number from the redial list bypressing REDIAL.5) Press SEL to confirm the number and entername edit mode.6) Edit the name as required, using the followingoptions:• Enter characters using the keys 0-9, * and# (See the key/characters table),• Press DELETE to delete the characterunder the cursor, or to the left if at theend of the string.• Hold DELETE to delete the entire string,• Press   and   to position move toanother character.7) Press SEL to confirm change.Delete a phone book entry1) Press the   key in idle, or scroll through thesub-menu with the   &   keys and press SELwith “REVIEW” in the first line.2) Scroll through the phone book    entries using and   keys or enter first character of thename to be searched (using the dial digitkeys) and continue navigating using the or   as scroll keys, until you reach the entryto be removed.3) Press DELETE to delete the entry. The phonereturns to the previous entry, or the next  entryif the first entry was the entry that wasdeleted.
17Additional note on long phone numbers.When reviewing the phone book the second lineof the display will display phone number up to 16digits. For numbers larger than 16 digits only thelast 13 digits will be displayed, as shown in thefollowing example:The “<*” indicates there are additional digits tothe left, and the * key can be pressed to scroll thedisplay over to see them.“<“ and “>” indicate additional digits of the left orright side respectively, and the keys “*” or “#” canbe used to scroll the phone number to see theadditional digits,Calls Log (Caller ID - Call Waiting)All incoming calls with valid caller ID number arestored in a call log. Name and time/date information isalso stored in the call log if the central office sends itout.The number of entries stored in the call log isindicated in idle mode:The number of unanswered calls (new), if any, isindicated:The new call indication is removed when all callsin the call log have been reviewed. The NEWicon indicates, in all screens, that there are newcalls log entries that have not been reviewed.The call log is entered via the menu, asdescribed below or by pressing the   key in idle(quick access key) whereby the handset jumpsdirectly to the call log review.The call log is reviewed as follows:1) Press SEL, to enter the menu.Phone Book OperationBasic Operation
18Calls Log (Caller ID - Call Waiting)2) Press   to get to the call log option3) SEL, to enter the CALL LOG menu.4) The caller name is shown in the first line of thedisplay, and the number in the second line. Iftime and date  information is contained in theCID and there are three lines in the display, it isshown in the third line.The name contained in the received CID isreplaced by the name in the phone book, if thephone book contains a matching number, i.e.the phone book name takes precedence.5) Scroll through the Call Log entries using and   keys.The following actions are possible from theCall Log:• Dialing the caller displayed by pressingthe ON or SPK keys.• Deleting the caller displayed by pressingthe DELETE key. The phone returns tocall log review.• Deleting all entries in the call log bypressing and holding DELETE. Afterthis, you will be asked for confirmationby either accepting the deletion with SEL(= yes) or canceling it with OFF (= no).If you press SEL, all entries in the call log willbe deleted and the handset indicates the calllog is  empty and then returns to the idle state.If you select OFF, the phone returns to the lastviewed entry.• Storing the caller displayed in the phonebook by pressing the SEL key. If the calllog entry has a name and a number itwill be added to the phone book andthe screen will show:before returning the call log entry.If the phone number already exists in the phone
19Calls Log (Caller ID - Call Waiting)book, the entry will not be stored, and thescreen will show:If there is no room in the phone book for thenew entry, the display will show:If the call log entry is missing a name ornumber, you will be prompted to enter onebefore the item is stored in the phone book.If both a name and number is missing, forexample as in a private listing, the request will berejected with the message:• Exit the Call Log review by pressingthe OFF key.• ‘!’-character in the right hand side ofthe first line indicates that the call hasnot previously been reviewed. The ‘!’-character is cleared when stepping tothe next entry in the log or when leavingthe call log.• The maximum length of the nameshown in the first line is 16 characters. Ifthe name as received is longer, only thefirst 16 characters will be seen.• The incoming calls are sorted by theorder of arrival; the latest is shown first.Calls from the same number will eachhave separate call log entries.If the call log is full, the oldest entry is deleted tomake room for the new call. If the call log is emptywhen the user tries to enter to Call log review, amessage the following message is displayed:It is possible to change the number format in thecall log before storing the name/number in the phonebook or dialing the caller. Pressing the ‘#’ key willtoggle the number format. The available numberformats depend on the number of digits receivednumber.
20Up to 10 ‘quick dial ‘numbers may be enteredinto each handset. It is possible to ‘quick dial’numbers with just a single key press.The quick dial list in each handset is unique tothat handset and is not shared with the otherhandset.Entering a Quick Dial number1) Press SEL when the handset is idle to enterthe menu system.2) Move down to the quick dial option bypressing the   key.3) Then press SEL to enter the quick dial submenu.4) Select a quick dial key location using the 0-9keys. If that location is empty the screen willshow:where ‘x’ is the location that was  selected(0-9). At this point pressing OFF will returnyou to the quick dial select screen as shownin Step 2, or pressing SEL will allow youenter a phone number into the selectedlocation. The user will then be prompted toenter a phone number to be dialed, as shown,A phone number can be entered in much thesame way as the phonebook. The followingoptions are also available, if the displayednumber has no digits:• Press   to select an entry from thephone book.You are presented with the phone book reviewscreen. You can navigate to a desired entry asBasic OperationQuick Dialing
21described in the phone book section. PressingSEL will copy the stored number to the quick dialnumber.• Press   to select an entry from the calllog.You are presented with the call log reviewscreen. You can navigate to a desired entryas describe in the call log section. PressingSEL will copy the phone number shown intothe quick dial number.• Press RDL to select an entry from theredial list.You are presented with the call log reviewscreen. You can navigate to a desired entryas describe in the call log section. PressingSEL will copy the phone number shown intothe quick dial number.If all cases, while reviewing phone book, call logor redial list to copy to the quick dial, pressingOFF will return the user to the quick dial numberentry screen.5) The user presses SEL to confirm the number.Once confirmed, a quick dial number cannot beedited, only dialed or deleted.Reviewing quick dial numbers1) Press SEL when the handset is idle to enterthe menu system2) Move down to the quick dial option by pressingthe   key,Quick DialingBasic Operation
223) Then press SEL to enter the quick dial submenu.4) Select a quick dial key location using the 0-9 keys. If that location has a number assignedto it, it will be displayed as follows:               orAt this point, you have the following options:• Press OFF to return to the main menu.• Press 0-9 to review another quick diallocation.• Press SEL to edit the currently shownlocation. The procedure to edit thenumber is the same as for editing aphone book number.• Press DEL to delete the currently shownlocation. The following will be shown:Where x is the quick dial location number.Pressing OFF will return to the quick dial reviewas shown above. Pressing SEL will confirm thedeletion andwill be shown, indicating the  locationhas been deleted.• Press ON or SPK to dial the displayednumber.Dialing a Quick Dial numberA quick dial number can be dialed in two ways.1. While reviewing the quick dial numbers aspreviously shown.Quick DialingBasic Operation
232. While the handset is idle or in pre-dial, asfollows:While the handset is idle the user can performa quick dial by holding down the desired quickdial location key (0-9).  If the location is emptythenwill be shown for a few seconds before returning tothe idle or pre-dial screen.If the location does have an entry, then thatnumber will be added to any pre-dialed digitsand the phone will go off-hook and begin dialing.Audio VolumeAudio volume is adjusted during an active call bythe following key sequence:Pressing the volume   or   keys on the side ofthe unit. Separate volume settings aremaintained for normal, handsfree and headsetmodes. When the volume keys are pressedduring a call the screen will show:As the volume is increase the number of blocksshown will increase. As the volume is decreasedfewer blocks will be shown.Ring VolumeThe volume of the ringer signal can be adjusted bythe following key sequence:1) Press SEL2) Press the   key until the following is shownon the display.3) Press SEL to enter the ring volume sub-menu.4) Enter volume 0 - 6, or adjust using   and keys. The current ring tone/melody is playedBasic OperationHandset Settings
24each time the setting is adjusted.5) Press SEL to confirm the setting.With no bars displayed (Volume Level 0), the ringerhas been turned OFF.A “ringer off” ICON   is shown in the displaywhen the ringer has been switched off.Ring toneThe ring tone of an incoming external/intercom callcan be changed by the following key sequence:1) Press SEL2) Press the   or   keys until the RING TONEoption is shown as follows:3) Press SEL, to enter the ring pattern menu.4)  Press the   &   keys followed by the SEL keyto choose either OUTSIDE or INTERCOM ringtone setting. or5) Enter setting 0 - 9, or adjust using   and keys. When changed the indicated ring tonewill be played in the speaker.6) Press SEL, to confirm the setting.Handset SettingsBasic Operation
25Key Click (preset to ON)When you press a key on the Handset, you hear aconfirmation ‘click’. You can turn this feature Offand On by doing the following:1) Press SEL2) Press the   or   key until the KEY CLICKoption is shown as follows:3) Press SEL, to enter the key click sub-menu.4) Enable key click by pressing 1 or  , or dis-able key click by pressing the 0 or   key.5) Press SEL, to confirm the setting.Handset NameIt is possible to gives each handset its own uniquename. The name is shown in the first line duringidle replacing the “VTECH”, normally shownwhen the Handset is idle.The name can be a maximum of 16 charactersin length.The handset naming procedure is as follows:1) Press SEL2) Press the   or   keys until the HANDSETNAME option is shown as follows:Handset SettingsBasic Operation
263) Press SEL, to enter the handset name sub-menu.4) Enter Handset name (characters are enteredin the same way as for the phone book).5) Press SEL, to confirm the setting.When returning to idle the display shows:Language (preset to English)You can change the language on the Handsetdisplay:1) Press SEL2) Press the   or   key until theLANGUAGE option is shown as follows:3) Press SEL, to enter the language selectionmenu. The current language is shown in thesecond line. Select Spanish, French orEnglish by pressing   or   key.4) Press SEL, to confirm the setting. The phonereturns to the previous menu.Handset SettingsBasic Operation
27Message WaitingYour telephone can detect a Visual MessageWaiting signal, generated by many telephoneservice providers. If you subscribe to Voice Mailservice from your local telephone company (feerequired), and a Visual Message Waiting signal isprovided, the Handset will display MESSAGESWAITING, alerting you to new messages.Once you have reviewed all new messages,the Messages Waiting alert will automatically beturned off.Clear Message WaitingIf, after reviewing all new voice mail messages,the Messages Waiting alert still remains on the screen,the Messages Waiting indication can be manuallyremoved from the display by the following sequence:1) Press SEL2) Press the   or   keys until the CLR MSGWAITING option is shown as follows:3) Press SEL, to enter the message menu.4) Confirm clearing of the message waitingindication by pressing SEL (= yes), or cancelclearing by pressing OFF (= no). After this thephone   returns to the previous menu.Dial Method (preset to DTMF-Tone)It is possible to change the method of dialing be-tween DTMF (Tone) and pulse dialing, if your localphone company requires pulse dialing in your area:Handset SettingsBasic Operation
281) Press SEL2) Press the  or   keys until the DIAL TYPEoption is shown as follows:3) Press SEL, to enter the dial sub-menu.Handset SettingsBasic Operation4) Press   or   to choose the method of     dialing, the display looks like the one below5) Alternately the user can select pulsedialing by pressing 1 or  . Select DTMFdialing by pressing  0 or  .6) Press SEL to confirm the setting.Temporary ToneWhen the phone is set for pulse dial mode, it ispossible to switch to temporary DTMF-Tonemode during an ongoing call by pressing * .Once pressed, DTMF will be used for the rest ofthe call.  After you hang up, the phone will returnto pulse dialing for the next call.Call Forward & Call TransferAn external call can be forwarded or transferredfrom one handset to the other handset. Thedifference between forward and transfer dependson if the sending handset needs to talk with thereceiving handset, before the external call isactually sent to the other handset.
29Call ForwardA handset on an external call can forward it to theother handset by holding down the INT key.The display will initially show:If the base can connect to the other handset,the display will change to:And then return to the idle display.If the base cannot find the other handset as aresult of it being out of range or powered off,the display will show:And the external will ‘call back’ to the handset.Call TransferAn external call is transferred by:Handset SettingsBasic Operation1. Press INT key (the external call is put onhold)2. Destination handset will ring, showing anintercom call.3. Pressing the ON key on the destinationhandset will answer the intercom call.4. Inform the person using the destinationhandset that they have a call on hold.5. Press OFF, on the first handset, to transferexternal call to other handset.If there is no answer on the destination handset,the first handset can reconnect to the held call bypressing INT to reconnect to the external call.Call BackAfter forwarding a call, a CALL BACK isgenerated in the forwarding handset if theforwarded call is not answered within 30seconds. When a call is returned to ahandset, it will show the following whileringing:
30If the returned call is not answered within 30  seconds, the phone automatically goeson hook, dropping the external call.ConferenceIt is possible to establish a conference between two handsets and the external line.If a handset already has a connection to the external line, and another handset goesoff-hook, a conference is immediately established. Both  handsets will show:Basic OperationHandset SettingsBoth handsets connected to the external line are allowed to transmit DTMF digits /dialing pulses to the line.If a handset is on the process of transferring a call to the other handset it ispossible to conference with both calls by holding down the INT key. Holding INTwhen connected to either party, when transferring, or call toggling, willimmediately conference both handsets and external line.A handset can leave the conference by going on-hook, by pressing OFF, orplacing the handset on the base or charging cradle. The connection continuesbetween the remaining handset and the external party.Redial at On-Hook statePressing REDIAL while the handset is idle or pre-dialing will access the lastdialed number. Subsequent presses of REDIAL will access previously dialednumbers. After the fifth number the redial list will cycle back to the most recentlydialed number. Alternately, you can use the   and   keys to scroll through the5 previously dialed numbers.Pressing OFF will cancel the redial list review.Pressing ON or SPK will add the shown redial number to any pre-dialed digits,go off-hook and start dialing.Pressing SEL add just add the shown redial to any pre-dialed digits.Redial at Off-Hook statePressing REDIAL when on an external call will display the last dialed number.After two second the shown number will be automatically dialed. If during thistime, REDIAL is pressed again the display will return to the external callpresentation, and the number will not be dialed.
31FlashDuring an ongoing external call, press the FLASH/ON key to flash the line (torespond to a Call Waiting signal, for example).MuteIt is possible to mute the microphone during a conversation by pressing the DELETE/MUTE key. The microphone is un-muted by pressing DELETE/MUTE again.In case the external line is muted, when establishing an intercom connection,the line is un-muted automatically after the intercom call is terminated. The lineis also un-muted after the FLASH feature is used.Handset SettingsA text message in the display indicateswhen the microphone is first muted.The MUTE icon will also be shown when-ever the microphone is muted.When mute is disabled, this message willbriefly be shown:And the MUTE icon will turn off.Advanced Operation
32PageThe page function is used as an aid to locate thehandsets. It can be only done from the Base.To activate paging the user presses the PAGEbutton on the base.All handsets not currently active on a call willshow:and start the paging sound.Either handset can cancel the page by pressingany of the PHONE, 0-9, *, # or SPK keys.Or, press PAGE at the Base to cancel the page.Handset SettingsAdvanced Operation
33SETTING UP YOUR ANSWERING SYSTEMSet outgoing Message (Your Greeting)Press MENU. Voice prompt will say “Set Outgoing Message”.Press any MAILBOX key to hear your greeting.To Erase your Outgoing MessagePress MENU. Voice prompt will say “Set Outgoing Message”.Press any MAILBOX key to hear your greeting.Press ERASE while your greeting is playing.  Voice prompt: ‘Outgoing messagehas been erased.’Pre-recorded Outgoing MessagesIf you do not record your own Outgoing Message(s), your Answering Systemprovides the following greetings:(With Announce Only set to OFF) ‘Hello! I’m unable to answer your call rightnow. Please leave your name, number and the message after the tone.’(With Announce Only set to ON)  ‘Hello! I’m unable to answer your call rightnow. Please call again. Thank you!’HINT FOR RECORDING OUTGOING MESSAGESIf you want to use the Mailbox feature of your answering system, instruct yourcaller to press 1, 2 or 3 before leaving a message. By doing this, the messagewill be stored in the corresponding mailbox.  For example: “Howdy!  We can’t come to the phone right now. To leave a message forTex, press 1 now; to leave a message for Gomer, press 2 now; or, to leave amessage for Fabio, press 3 now; or, just wait for the beep, and start talkin’.Thanks, pardner!”If your caller does not select a mailbox, the message will be recorded in Mailbox1.Set Security CodeA 2-digit security is required to access your answering system from a remotelocation.Press MENU until  ‘Set Security Code’ or  ‘Change remote access code’ promptis heard.Press SELECT to hear the current setting.Press SELECT again to advance the setting by 1; or press and hold to advancein increments of 10.Press TIME/SET to confirm your setting.SET AUDIBLE MESSAGE ALERT MODE (preset to ON)This feature generates a beep tone at the Base every 10 seconds, alerting youto new messages.Answering System Operation At the BaseAdvanced Operation
34To set AUDIBLE MESSAGE ALERT:Press MENU until ‘Set Audible Message Alert’ is heard.Pressing SELECT; the current setting will be announced.Press SELECT again to toggle the between ON & OFF.Press TIME/SET to confirm your setting.SET ANNOUNCE-ONLY MODE (preset to OFF)If you want your outgoing message to be heard by callers, but not take messages,set Announce Only to ON.  However, if you want your callers to leave youmessages, Announce Only must be set to OFF.To set ANNOUNCE-ONLY:Press MENU until: ‘Set Announce Only’ is heard.Pressing SELECT; the current setting will be announced.Press SELECT again to toggle between ON & OFF.Press TIME/SET to confirm your selection.SET CALL SCREENING MODE (preset to ON)Call Screening lets you listen to the incoming message at the Base, as the callerleaves it.To set CALL SCREENING:Press MENU until: ‘Set Call-Screening’ is heard.Pressing SELECT; the current setting will be announced.Press SELECT again to toggle the between ON & OFF.Press TIME/SET to confirm your selection.SET BASE RINGER MODE (preset to ON)The Base Unit has its own ringer, which operates independently of the Handset ringer.To set the BASE RINGER:Press MENU until: ‘Set Base Ringer’ is heard.Pressing SELECT; the current setting will be announced.Press SELECT again to toggle between ON & OFF.Press TIME/SET to confirm your selection.SET NUMBER OF RINGSThe Answering System has 4 ‘rings-to-answer’ settings:2 rings The incoming call is answered after 2 rings.4 rings The incoming call is answered after 4 rings.6 rings The incoming call is answered after 6 rings.Toll Saver The incoming call is answered after 2 rings only if there are newmessages/memos present in memory; otherwise, the call is answered after 4rings. Thus, if Toll Saver is active, and your system rings 3 times when you call,you can hang-up to avoid any long distance charges.To set NUMBER OF RINGS:Press MENU: ‘Set Number of Rings’ is heard.Pressing SELECT;  the current setting will be announced.Press SELECT again to select 2, 4, 6 & Toll Saver.Press TIME/SET to confirm your selection.Answering System Operation At the BaseAdvanced Operation
35LEAVING A MESSAGE (Announce Only set to OFF)If your caller presses 1, 2 or 3 as instructed by your outgoing greeting, he willhear ‘Mailbox _, Now Recording’, followed by a beep.  If no mailbox is chosen,the message will be stored in Mailbox 1.If, after recording has begun, the caller does not speak, or hangs up, the recordingwill terminate in approximately 6 seconds.The maximum length of each message or memo is 4 minutes. The maximumstorage capacity of old & new messages / and memos is 99.  Total capacity fromall sources (Greetings, Messages and Memos) is approximately 15 minutes.RECORDING A MEMOPress REC/MEMO at the Base. You will hear ‘Please select mailbox’.  Pressthe desired Mailbox key.You will hear ‘Now recording’. Speak towards the Base Unit.  During recording,the Message Window will count the recording time in seconds. If it exceeds 99seconds, it will flash [99].  Press any Mailbox key when finished.PLAYING MESSAGES & MEMOSDuring IDLE mode, press MAILBOX x (x=1, 2 or 3).  You will hear  ‘Mailbox X.You have XX new messages and XX old messages.’ (if there are newmessages) or   ‘Mailbox X.You have XX old messages.’ (if there are only old messages) or ‘Mailbox X.You have no messages.’ (if there are no messages).  Next, the system will playthe messages in mailbox 1, 2 or 3. If there are old and new messages, only newones are played back. If there are only old messages, all of them are playedback.  Each message is preceded by a date-time stamp.NOTE:  If the system has less than 5 minutes recording time remaining, it willannounce the remaining recording time to alert the user after all messages hasbeen played. For example, if the system has less than 3 minutes of storage, itwill announce: ‘Remaining recording time is 2 minutes’.ERASE (ALL OLD MESSAGES & MEMOS)During IDLE mode, press ERASE. You will hear ‘Please select mailbox’, thenpress MAILBOX x (x=1,2 or 3) to erase all the old messages in the correspondingmailbox.ANNOUNCE DAY & TIMEDuring IDLE mode, press TIME/SET to hear the current day and time. After theannouncement, the system will say: ‘To change clock, press Time/Set.’ If TIME/SET is pressed again within 10 seconds, the system will enter DATE &TIMESETTING MODE;  otherwise, it will return to IDLE mode.DATE & TIME SETTING MODEThe Day and Time defaults to Monday 12:00am during power-up. The MessageWindow will show ‘CL’flashing to indicate that clock setup is necessary. During day & time setting, thewindow will show ‘CL’ steadily.Answering System Operation At the BaseAdvanced Operation
36#1Play all messages inmailbox 1#4Repeat Message#7   /   *7Play Greeting / RecordGreeting#2Play all messages inmailbox 2#5Stop*8Record Meno#0Answering System On/Off#3Play all messages inmailbox 3#6Skip the message.*9Erase current messageAnswering System Operation At the BaseTo Set the Day and Time:Press TIME/SET twice.  The DAY will be announced.Press SELECT until you hear the correct day, then press TIME/SET.The hour is announced.  Press SELECT until you hear the correct hour. PressTIME/SET.The minute is announced.  Press SELECT until you hear the correct minute.  Toincrement the minutes by 10, press and hold SELECT.When finished, press TIME/SET.  The day and time setting will be announced foryou.REMOTE ACCESS (calling your line from a remote location)First, from a remote location, call your Answering System’s line. When itanswers, enter your 2-digit Security Code (aka Remote Access Code).Remember, you must do this from a touch-tone phone. The system willannounce ‘You have X / No new message(s).’  Now you can use the remotecommands below to access various system functions, such as playing messages.If no command is received within 10 seconds, the system will provide a VoiceMenu, and then wait for another 20 seconds. If no more command is receivedwithin these 20 seconds, the system will automatically hang up and terminateremote access.ENTER YOUR SECURITY CODE (when System is Off or Full)If the ANSWERING SYSTEM is OFF, the unit will connect to the line after 10rings, announcing: ‘Please enter your security code’, and wait for the 2-digitsecurity code to be entered.If the memory is full, the unit will connect to line after 10 rings, and announce:‘Memory full. Please enter your security code’. Enter your remote accesscode.REMOTE COMMANDS:Advanced Operation
37Other functions:#4 twice*5*0Skip back to previous messageHelp menuHang upRECORD OUTGOING MESSAGE (GREETING) [*7]This mode is entered if [*7] is pressed during REMOTE MODE. Whether yourgreeting is stored as OGM1 or OGM2 will depend on whether ANNOUCE ONLYis set to OFF or ON.Voice prompt:  ‘Now recording.’MEMO RECORDING (MAILBOX x) [*8]This mode is entered if [*8] is pressed during REMOTE  MODE. The system willthen prompt you tochoose a mailbox (1/2/3). By pressing [1], [2] or [3], your Memo will be saved inthe corresponding mailbox.(Remark: Recordings less than 1 second is not stored. Maximum length of eachrecording is 4 minutes. Themaximum number of old & new messages / memo is 99.)Voice prompt: [*8] > ‘Please select mailbox’ > pressing [1], [2] or [3] > ‘Nowrecording.’OUTGOING MESSAGE (GREETING) PLAYBACK [#7]This mode is entered if “#7” is pressed during REMOTE MODE. Outgoing Message 1or 2 is played, depending on whether ANNOUCE ONLY is set to OFF or ON.MAILBOX 1/2/3 PLAYBACK  [#1, #2 or #3]This mode is entered if [#1], [#2] or [#3] is pressed during REMOTE MODE.NOTE: If the system has less than 5 minutes recording time remaining, it willannounce the remaining recording time to alert the user after all messages hasbeen played. For example, if the system has less than 3 minutes capacityremaining, it will announce: ‘Remaining recording time is 2 minutes’.VOICE MENU [*5]Press [*5] for voice menu and press [*5] again for next page of voice menu.Hence, pressing [*5] alternatively can play back the following menus: —The simple voice menu is as follows:• Press [#1] to play mailbox 1.• Press [#2] to play mailbox 2.• Press [#3] to play mailbox 3.• Press [#5] to stop• Press [#4] to repeat the message• Press [#6] to skip the message• Press [#9] to erase the message; or Press [#9] to delete the messageAnswering System Operation At the BaseAdvanced Operation
38• Press [*5] for other functions; or Press [*5] for helpThe advance voice menu is as follows:• Press [#7] to review outgoing message; or Press [#7] to review announcement• Press [*7] to record outgoing message; or Press [*7] to record announcement• Press [*8] to record a memo• Press [#4] twice to repeat previous message• Press [#0] to turn the system on or off; or Press [#0] to turn the machine on oroff• Press [*5] for other functions; or Press [*5] for helpERASE [#9]In MAILBOX 1/2/3 PLAYBACK mode, messages can be erased by pressing [#9]during playback. The next message, if any, will be announced after erasing thecurrent message.SYSTEM ON/OFF  [#0]This function is activated if [#0] is pressed during REMOTE MODE. The systemwill toggle betweenON & OFF.Voice prompt: ‘Answering machine on (or off)’END REMOTE MODE [*0]This function is activated if [*0] is pressed during REMOTE MODE. TheREMOTE MODE will end and the line is released after a beep tone. The unit willthen return to IDLE MODE.#1Play all messages inmailbox 1#4Repeat Message#7   /   *7Play Greeting / RecordGreeting#2Play all messages inmailbox 2#5Stop*8Record Meno#0Answering System On/Off#3Play all messages inmailbox 3#6Skip the message.*9Erase current messageOther functions:#4 twice*5*0Skip back to previous messageHelp menuHang upAnswering System Operation At the BaseAdvanced Operation
39Headset OperationYour ip 5825 Handset is equipped with a 2.5mm Headset Jack for use with anoptional accessory Headset for hands-free operation. If you choose to use theHeadset option, you must obtain an optional accessory Headset, which iscompatible with the ip 5825.To purchase a Headset, call VTech Customer Service at 1-800-595-9511.Once you have a compatible 2.5mm Headset, locate the Headset Jack on the ip5825 Handset. Connect the plug on the Headset cord to the jack (under a smallrubber flag) on the cordless Handset. The plug should fit securely. Do not forcethe connection.NOTE:Whenever a compatible Headset isconnected to the cordless Handset,the microphone on the Handset willbe muted. This is done to limit theeffect of background noise.Belt ClipThe ip 5850 is also equipped with adetachable belt clip. Align the pins onthe inside edge of the clip with thenotches on the sides of the Handset.The belt clip should snap securely intoplace. Do not force the connection.Handset OperationAdvanced Operation
40Taking Care Of Your TelephoneYour cordless telephone contains sophisticated electronic parts, so it must betreated with care.Avoid rough treatmentPlace the Handset down gently. Save the original packing materials to protectyour telephone if you ever need to ship it.Avoid waterYour telephone can be damaged if it gets wet. Do not use the Handset outdoorsin the rain, or handle it with wet hands. Do not install your Base Unit near a sink,bathtub or shower.Electrical stormsElectrical storms can sometimes cause power surges harmful to electronicequipment.  For your own safety, use caution when using electric appliancesduring storms.Cleaning your telephoneYour telephone has a durable plastic casing that should retain its luster for manyyears.  Clean it only with a soft cloth slightly dampened with water or a mild soap.Do not use excess water or cleaning solvents of any kind.Remember that electrical appliances can cause serious injury if usedwhen you are wet or standing in water. If your Base Unit should fall intowater, DO NOT RETRIEVE IT UNTIL YOU  UNPLUG THE POWER CORDAND TELEPHONE LINE CORDS FROM  THE WALL. Then pull the unit outby the unplugged cords.In Case Of DifficultyIf you have difficulty operating your phone, the suggestions below should solvethe problem. If you still have difficulty after trying these suggestions, call VTECHCommunications at 1-800-595-9511. In Canada, call VTECH TelecommunicatiosCanada Ltd at 1-800-267-7377.The Phone Doesn’t Work At All•   Make sure the Power Cord is plugged in.•    Make sure the telephone line cord is plugged firmly into the Base Unit and thetelephone wall jack.•   Make sure the batteries are properly charged. If  you get a ‘LOW BATTERY’message or indication, the battery pack needs charging.No Dial Tone•   First check all the suggestions above.•    If you still don’t hear a dial tone, disconnect the Base Unit from the telephonejack and connect a different phone. If there is no dial tone on that phone either,the problem is in your wiring or local service. Contact your local telephonecompany.MaintenanceAdditional Information
41You Get Noise, Static, Or A Weak Signal Even When You¡¯re Near TheBase Unit•   Household appliances plugged into the same circuit as the Base Unit cansometimes cause interference. Try moving the appliance or the Base Unit toanother outlet.You Get Noise, Static, Or A Weak Signal When You’re Away From TheBase Unit•     You may be out of range. Either move closer to the Base, or relocate the BaseUnit.•    The layout of your home may be limiting the range. Try moving the Base Unitto another position.The Handset Does Not Ring When You Receive A Call•    Make sure you have the ringers activated. Refer to the section(s) on settingthe ringer in this User's Manual.•    Make sure the telephone line cord is plugged firmly into the Base Unit and thetelephone jack. Make sure the power cord is plugged in.•    You may be too far from the Base Unit.•    You may have too many extension phones on your telephone line to allow allof them to ring. Try unplugging some of the other phones.Your Handset vibrates or shakes when a call comes in ( applies only to modelswith the Handset Vibrate Control  feature)•   It is likely that your Vibrating Handset Ringer option has been set to ON. Ifyou¡¯dlike to turn it off, see the section on VIBRATE CONTROL in this User'sManual.You Hear Other Calls While Using Your Phone•   Disconnect your Base Unit from the telephone jack, and plug in a regulartelephone.  If you still hear other calls, the problem is probably in your wiringor local service. Call your local telephone company.You Hear Noise In The Handset, And None Of The Keys Or ButtonsWork• Make sure the power cord is plugged in.Common Cure For Electronic EquipmentMaintenancethenAdditional InformationIf the unit does not seem to be responding normally,then try putting the Handset in the cradle. If it doesnot seem to respond, do the following (in the orderlisted):1.  Disconnect the power to the Base.2.  Disconnect the Handset battery, and spare     battery pack, if applicable.3.  Wait a few minutes.4.  Connect power to the Base.5.  Re-install the battery pack (s)6.  Watch for Handset to display: “FOUND BASE”.
42What does this limited warranty cover?•    The manufacturer of this VTech product, VTech Communications, warrants tothe holder of a valid proof of purchase (“Consumer” or “you”) that the productand all accessories provided by VTech in the sales package (“Product”) are freefrom material defects in material and workmanship, pursuant to the following termsand conditions, when installed and used normally and in accordance withoperation instructions, This limited warranty extends only to the Consumerfor Products purchased and used in the United States of America.What will VTech Communications do if the Product is not free frommaterial defects in materials and workmanship during the limitedwarranty period (¡°Materially Defective Product¡±)?•  During the limited warranty period, VTech¡¯s authorized service representativewill repair ot replace at VTech¡¯s option, without charge, a Materially DefectiveProduct. If we repair this product, we may use new or refurbished replacementparts. If we choose to replace this product, we may replace it with a new orrefurbished product of the same or similar design. VTech will return repaired orreplace-ment products to you in working condition. VTech will retain defectiveparts, modules, or equipment. Repair or replacement of Product, at VTech¡¯soption, is your exclusive remedy. You should expect the repair or replacementto take approximately 30 days.How long is the limited warranty period?•   The limited warranty period for the product extends for ONE(1) YEAR from thedate of purchase if we repair or replace a Materially Defective Product underthe terms of this limited warranty. This limited warranty also applies to repairedor replacement Products for a period of either (a) 90 days from the date therepaired or replacement Product is shipped to you or (b) the time remainingon the original one-year warranty; whichever is longer.What is not covered by this limited warranty?This limited warranty does not cover1.  Product that has been subjected to misuse, accident, shipping or other physicaldamage, improper installation, abnormal operation or handling, neglect,inundation, fire, water or other liquid intrusion; or2. Product that has been damaged due to repair, alteration or modification byanyone other than an authorized service representative of VTech; or3. Product to the extent that the problem experienced is caused by signalconditions, network reliability or cable or antenna systems; or4. Product to the extent that the problem is caused by use with non-VTechelectrical accessories; or5. Product whose warranty/quality stickers, Product serial numbers plates orelectronic serial numbers have been removed, altered or rendered illegible; orWarranty StatementAdditional Information
436. Product purchased, used, serviced, or shipped for repair from outside theUnited States, or used for commercial or institutional purposes (including butnot limited to Products used for rental purposes); or7. Product returned without vallid proof of purchase (see 2 below); or8. Charges for installation or set up, adjustment of customer controls, andinstallation or repair of systems outside the unit.How do you get warranty service?•   To obtain warranty service in the United States of America, call 1 800-595-9511 for instructions regarding where to return the Product. Before calling forservice, please check the user’s manual. A check of the Product controls andfeatures may save you a service call.•    Except as provided by applicable law, you assume the risk of loss or damageduring transit and transportation and are responsible for delivery or handlingcharges incurred in the transport of Product(s) to the service location. VTechwill return repaired or replaced product under this limited warranty to you,transportation, delivery or handling charges prepaid. VTech assumes no riskfor damage or loss of the Product in transit.•   If the Product failure is not covered by this limited warranty, or proof of purchasedoes not meet the terms of this limited warranty, VTech will notify you and willrequest that you authorize the cost of repair and return shipping costs for therepair of Products that are not covered by this limited warranty.What must you return with the Product to get warranty service?1. Return the entire original package and contents including the Product to theVTech service location along with a description of the malfunction or difficulty;2. Include alid proof of purchase” (sales receipt) identifying the Product purchased(Product model) and the date of purchase or receipt; and3. Provide your name, complete and correct mailing address, and telephonenumber.Other Limitations•   This warranty is the complete and exclusive agreement between you andVTech. It supersedes all other written or oral communications related to thisProduct. VTech provides no other warranties for this product. The warrantyexclusively describes all of VTech’s responsibilities regarding the product.There are no other express warranties. No one is authorized to makemodifications to this limited warranty and you should not rely on any suchmodification.State Law Rights: This warranty gives you specific legal rights, and you mayalso have other rights, which vary from state to state.Warranty StatementAdditional Information
44Limitations: Implied warranties, including those of fitness for a particularpurpose and merchantability (an unwritten warranty that the product is fit forordinary use) are limited to one year from date of purchase. Some states do notallow limitations on how long an implied warranty lasts, so the above limitationmay not apply to you.•     In to event shall VTech be liable for any indirect, special, incidental, consequential,or similar damages (including, but not limited to lost profits or revenue, inability to use the product, or other associated equipment, the cost of substituteequipment, and claims by third parties) resulting from the use of this product, somestates do not allow the exclusion or limitation of incidental or consequentialdamages, so the above limitation or exclusion may not apply to you.FCC, ACTA and IC RegulationsThis equipment complies with Parts 15 of the Federal Communications Commission(FCC) rules for the United States. It also complies with regulations RSS210 andCS-03 of Industry and Science Canada. Operation is subject to the followingtwo conditions: (1) this device may not cause interference, and (2) this devicemust accept any interference, including interference that may cause undesiredoperation of the device.A label is located on the underside of the Base Unit containing either the FCCregistration number and Ringer Equivalence Number (REN) or the IC registrationnumber and Load Number. You must, upon request, provide this information toyour local telephone company.This equipment is compatible with inductively coupled hearing aids.Should you experience trouble with this telephone equipment, please contact:VTech Communications IncCUSTOMER SERVICE at 1-800-595-9511. In Canada, call  VTechTelecommunications Canada Ltd. at 1-800-267-7377.For repair/warranty information. The telephone company may ask you to disconnectthis equipment from the line network until the problem has been corrected.FCC Part 15Warning: Changes or modifications to this unit not expressly approved by the partyresponsible for compliance could void the user’s authority to operate the equipment.The equipment has been tested and found to comply with part 15 of the FCC rules.These limits are designed to provide reasonable protection against harmfulinterference in a residential installation. This equipment generates, uses and canradiate radio frequency energy and, if not installed and used in accordance with theinstructions, may cause harmful interference to radio communications.Warranty StatementAdditional Information
45However, there is no guarantee that interference will not occur in a particularinstallation. If this equipment does cause harmful interference to radio ortelevision reception, which can be determined by turning the equipment off andon, the user is encouraged to try and correct the interference by one or more ofthe following measures:• Reorient or relocate the receiving antenna.• Increase the separation between the equipment and receiver.• Connect the equipment into an outlet or on a circuit different from that to whichthe receiver is connected.• Consult the dealer or an experienced radio/TV technician for help.To ensure safety of users, the FCC has established criteria for the amount of radiofrequency energy that can be safely absorbed by a user or bystander according tothe intended usage of the product. This product has been tested and found tocomply with the FCC criteria. The handset has such a low power that it doesnotrequire testing. It may be safely held against the ear of the user. The base unit shallbe installed & used such that parts of the user’s body ther than the hands shouldbe maintained at a comfortable distance of approximately 20 cm or more.FCC and ACTA InformationIf this equipment was approved for connection to the telephone network prior to July 23,2001, it complies with Part 68 of the Federal Communications Commission (FCC)rules. If the equipment was approved after that date, it complies with the Part 68 rulesand with Technical Requirements for Connection of Equipment to the TelephoneNetwork adopted by the Administrative Council for Terminal Attachments (ACTA). Weare required to provide you with the following information.1. Product identifier and REN informationThe label on the back or bottom of this equipment contains, among other things,an identifier indicating product approval and the Ringer Equivalence Number(REN). This information must be provided to your local telephone company uponrequest. For equipment approved prior to July 23, 2001, the product identifier ispreceded by the phrase “FCC Reg No.” and the REN is listed separately. Forequipment approved after that date, the product identifier is preceded by “US”and a colon (:), and the REN is encoded in the product identifier without adecimal point as the sixth and seventh characters following the colon. Forexample, the product identifier US:AAAEQ01B123XYZ would indicate an RENof 0.3. The REN is used to determine how many devices you may connect toyour telephone line and still have them ring when you are called. In most, but notall areas, the sum of all RENs should be five (5.0) or less. You may want tocontact your local telephone company for more information.2. Connection and use with the nationwide telephone networkThe plug and jack used to connect this equipment to the premises wiring and theFCC, ACTA and IC RegulationsAdditional Information
46telephone network must comply with the applicable Part 68 rules and technicalrequirements adopted by ACTA. A compliant telephone cord and modular plugis provided with this product. It is designed to be connected to a compatiblemodular jack that is also compliant. An RJ11 jack should normally be used forconnecting to a single line and an RJ14 jack for two lines. See InstallationInstructions in the user’s manual. This equipment may not be used with CoinTelephone Lines or with Party Lines. If you have specially wired alarm dialingequipment connected to your telephone line, ensure the connection of thisequipment does not disable your alarm equipment. If you have questions aboutwhat will disable alarm equipment, consult your telephone company or aqualified installer.3. Repair instructionsIf this equipment is malfunctioning, it must be unplugged from the modular jackuntil the problem has been corrected. Repairs to this telephone equipment canonly be made by the manufacturer or its authorized agents. For repairprocedures, follow the instructions outlined under the Limited Warranty.4. Rights of the telephone companyIf this equipment is causing harm to the telephone network, the telephone companymay temporarily discontinue your telephone service. The telephone company isrequired to notify you before interrupting service. If advance notice is not practical, youwill be notified as soon as possible. You will be given the opportunity to correct theproblem and the telephone company is required to inform you of your right to file acomplaint with the FCC. Your telephone company may make changes in its facilities,equipment, operation, or procedures that could affect the proper functioning of thisproduct. The telephone company is required to notify you if such changes are planned.5. Hearing aid compatibilityIf this product is equipped with a corded or cordless Handset, it is hearing aidcompatible.6. Programming/testing of emergency numbersIf this product has memory dialing locations, you may choose to store police, firedepartment and emergency medical service telephone numbers in theselocations. If you do, please keep three things in mind:a  We recommend that you also write the telephone number on the directorycard, so that you can still dial the emergency number manually if the memorydialing feature doesn’t work.b  This feature is provided only as a convenience, and the manufacturerassumes no responsibility for customer reliance upon the memory feature.c  Testing the emergency telephone numbers you have stored is notrecommended. However, if you do make a call to an emergency number:FCC, ACTA and IC RegulationsAdditional Information
47• You must remain on the line and briefly explain the reason for the callbefore hanging up.• Programming/testing of emergency numbers should be performedduring off-peak hours, such as in the early morning or late evening,when the emergency services tend to be less busy.IC (Industry Canada)This telephone is registered for use in Canada.The term “IC:” before the radio certification number only signifies that IndustryCanada technical specifications were met.Notice:This equipment meets the applicable Industry Canada Terminal EquipmentTechnical Specifications. This is confirmed by the registration number. Theabbreviation, IC, before the registration number signifies that registration wasperformed based on a Declaration of Conformity indicating that Industry Canadatechnical specifications were met. It does not imply that Industry Canadaapproved the equipment.Notice:The Ringer Equivalence Number (REN) for this terminal equipment is 0.1. TheREN assigned to each terminal equipment provides an indication of the maximumnumber of terminals allowed to be connected to a telephone interface. Thetermination on an interface may consist of any combination of devices subjectonly to the requirement that the sum of the Ringer Equivalence Numbers of allthe devices does not exceedfive.Repairs to certified equipment should be made by an authorized Canadianmaintenance facility designated by the supplier. Any repairs or alterations made by theuser to this equipment, or equipment malfunctions, may give the telecommunicationscompany cause to request the user to disconnect the equipment.Users should ensure for their own protection that the electrical ground connections ofthe power utility, telephone lines and internal metallic water pipe system, if present, areconnected together. This precaution may be particularly important in rural areas.Caution:Users should not attempt to make such connections themselves, but should contactthe appropriate electrical inspection authority, or electrician, as appropriate.Your Cordless Phone is designed to operate at the maximum power allowed bythe FCC and IC. This means your Handset and Base Unit can communicate onlyover a certain distance - which will depend on the location of the Base Unit andHandset, weather, and the construction and layout of your home or office.FCC, ACTA and IC RegulationsAdditional Information
48The RBRC   SealThe RBRC® Seal on the nickel-metal-hydride battery indicatesthat VTech Communications, Inc. is voluntarily participating inan  industry program to collect and recycle these batteries at theend of their useful lives, when taken out of service within theUnited States and Canada.The RBRC®  program provides a convenient alternative to placing used nickel-metal-hydride batteries into the trash or municipal waste, which may be illegal inyour area.VTech’s partnership in RBRC® makes it easy for you to drop off the spentbattery at local retailers participating in the RBRC®   program or at authorizedVTech product service centers. Please call 1-800-8-BATTERY for informationon Ni-MH battery recycling and disposal bans/restrictions in your area. VTech’sinvolvement in this program is part of its commitment to protecting ourenvironment and conserving natural resources.RBRC® is a registered trademark of Rechargeable Battery RecyclingCorporation.The RBRC   SealAdditional Information
49FREQUENCY CONTROLCrystal controlledPLL synthesizerTRANSMIT FREQUENCYBase : 5744.736 - 5825.952 MHzHandset: 2401.056 - 2482.272 MHzRECEIVE FREQUENCYBase: 2401.056 - 2482.272 MHzHandset : 5744.736 - 5825.952 MHzCHANNELS95 ChannelsNOMINAL EFFECTIVE RANGEMaximum power allowed by FCCand IC. Actual operating range mayvary according to environmentalconditions at the time of use.SIZEHandset : 182mm x 55.3mm x 40mm                   (including antenna)Base : 115.8mm x 112.2mm x 62.6mmCharger: 77mm x 79mm x 45mmWEIGHTHandset : 146 grams(excluding Batteries)Base : 210 gramsCharger : 225 gramsPOWER REQUIREMENTSHandset : 3.6V 750mAh NiMH                  (3 AAA cells)Base : 9 VDC @ 600mACharger : 9 VDC @ 150mAMEMORYSpeed Dial: 50 Memory locations; upto 32 digits per locationCID : Alphanumeric Display50 Memory locationsSPECIFICATIONS ARE TYPICALAND MAY CHANGE WITHOUTNOTICE.Technical Specifications
50IMPORTANT SAFETY INSTRUCT.....................................................3INTRODUCTION..................................................................................3Parts Check List.......................................................................................................4The Handset Layout................................................................................................5The Base Unit Layout..............................................................................................6GETTING STARTED............................................................................7Setup.........................................................................................................................7Connecting power to Base Unit/Handset Charger..............................................7Installation of Battery Cells in Handset...........................................................8Charging of the Handset Battery Cells............................................................8Connecting to phone line......................................................................................9Checking for dial tone........................................................................................9Wall Mounting........................................................................................................10BASIC OPERATION............................................................................11Handset and Base Indicat.ors.............................................................................11Handset Icons.......................................................................................................11Handset LEDs.....................................................................................................11Base Unit Icons.....................................................................................................11Base LEDs...............................................................................................................11Handset Operation................................................................................................12Making Calls.........................................................................................................12Answering Calls..................................................................................................12Intercom Call.....................................................................................................12Phone Book Operation..........................................................................................13Storing a new entry.................................................................................................14Dialing from the phone book............................................................................15Editing a phone book entry..................................................................................15Delete a phone book entry................................................................................16Calls Log (Caller ID).............................................................................................17Quick Dialing.........................................................................................................19Entering a Quick Dial number..............................................................................19Reviewing quick dial numbers...........................................................................21Dialing a Quick Dial number.............................................................................22Handset Setting......................................................................................................23Ring Volume.........................................................................................................21Ring tone..................................................................................................................22Key Click..............................................................................................................23Handset Name.................................................................................................24Language..........................................................................................................26Clear Message waiting......................................................................................27Dial Method............................................................................................................27Call Forward & Call Transfer..............................................................................28Call Forward..........................................................................................................29Call Transfer............................................................................................................29Table Of Contents
51Call Back.................................................................................................................29Conference........................................................................................................30Redial at On-Hook state........................................................................................30Redial at Off-Hook state..................................................................................30Flash......................................................................................................................31Mute.....................................................................................................................31Page.......................................................................................................................31ADVANCED OPERATION...................................................................33Answering System Operation At the Base.......................................................33Set Outgoing Message.......................................................................................33OGM Playback Submode..................................................................................33OGM Recording Submode................................................................................33OGM Erase Submode........................................................................................33SET SECURITY CODE MODE..........................................................................33SET AUDIBLE MESSAGE ALERT MODE........................................................33SET ANNOUNCE-ONLY MODE........................................................................34SET CALL-SCREENING MODE........................................................................34SET BASE RINGER MODE...............................................................................34SET NUMBER OF RINGS MODE.....................................................................34LEAVING A MESSAGE.....................................................................................35RECORDING A MEMO.......................................................................................35LOCAL MEMO RECORDING MODE (MAILBOX x)....................................35LOCAL MEMO / ICM PLAYBACK MODE...........................................................35LOCAL MEMO / ICM ERASE MODE (ALL OLD MESSAGES)......................35DATE & TIME ANNOUNCEMENT MODE..........................................................35DATE & TIME SETTING MODE...........................................................................35SECURITY CODE ENTRY MODE....................................................................36REMOTE MAIN MODE........................................................................................36OGM1/2 RECORDING MODE [*7].....................................................................37MEMO RECORDING MODE (MAILBOX x) [*8]..............................................37OGM1/2 PLAYBACK MODE [#7]......................................................................37MAILBOX 1/2/3 PLAYBACK MODE [#1, #2 or #3]........................................37VOICE MENU MODE [*5].....................................................................................37REMOTE ERASE FUNCTION [#9]................................................................38SYSTEM ON/OFF FUNCTION [#0].....................................................................38QUIT REMOTE FUNCTION [*0].......................................................................38Headset Operation...............................................................................................39ADDITIONAL INFORMATION...........................................................40Maintenance..........................................................................................................40In Case Of Difficulty...............................................................................................40Warranty Statement..............................................................................................42FCC, ACTA and IC Regulations..........................................................................44The RBRC Seal....................................................................................................48Technical Specifications (this part will change accordingly).........................49Table Of Contents..
52VTECH TELECOMMUNICATIONS LTD.A member of THE VTECH GROUP OF COMPANIES.Distributed in the U.S.A. by VTech Communications, Inc. Beaverton,Oregon, 97008Distributed in Canada by VTech Telecommunications Canada Ltd. 7671Alderbridge Way, Richmond, B.C. V6X 1Z9.91-5473-10-00issued 0

Navigation menu