VTech Telecommunications 80-5587-01 Vtech 5829 & 5851 Handset User Manual ia 5839 Manual PM 102204
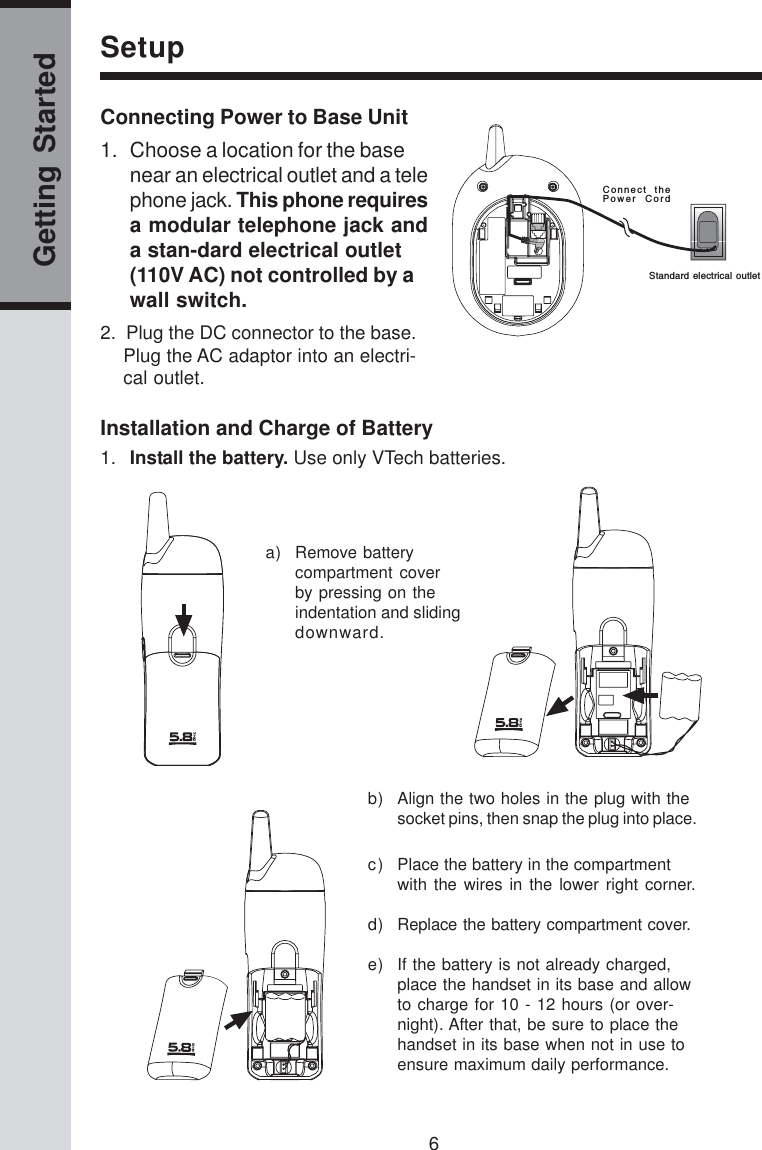
VTech Telecommunications Ltd Vtech 5829 & 5851 Handset ia 5839 Manual PM 102204
Contents
- 1. users manual 5829
- 2. users manual 5851
- 3. warning statement
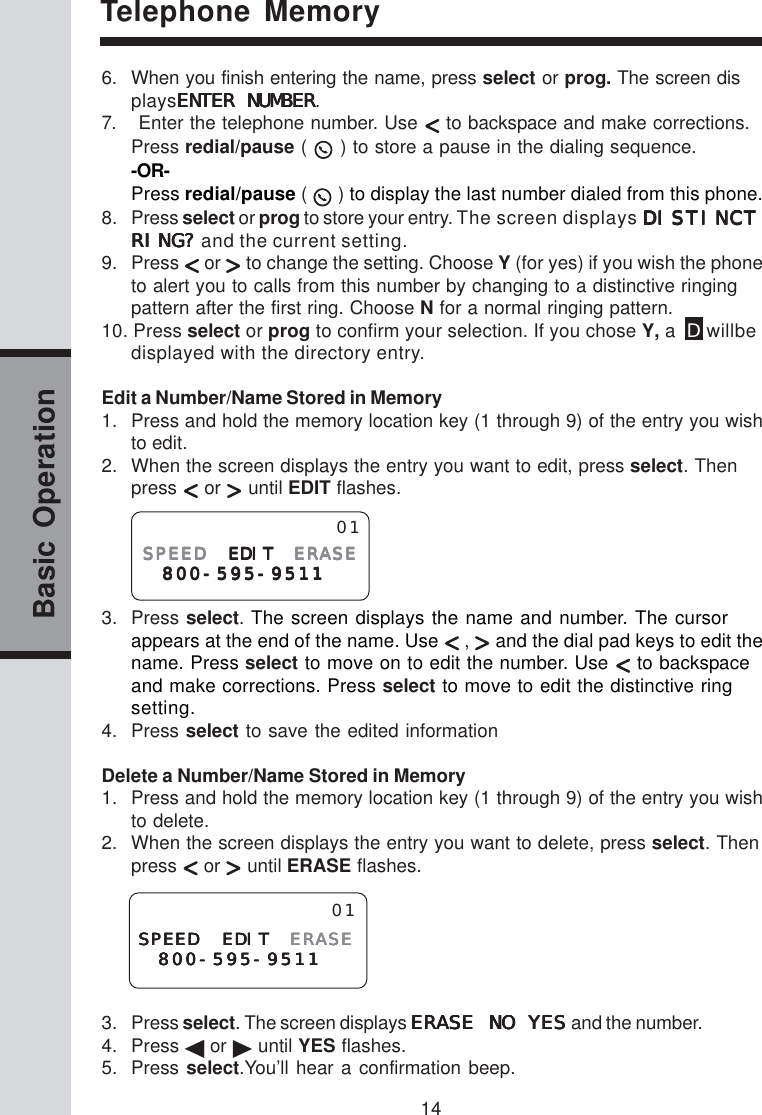
- 4. Users Manual I
- 5. Users Manual II
users manual 5829