VTech Telecommunications 80-6292-00 Cordless Phone with Instant Messaging User Manual I
VTech Telecommunications Ltd Cordless Phone with Instant Messaging Users Manual I
UserManual.wiki
>
VTech Telecommunications
>
80-6292-00 User Manual
>
Users Manual I
Contents
1.
Users Manual I
2.
Users Manual II
Users Manual I
Navigation menu
Upload a User Manual
Namespaces
Wiki Guide
HTML
PDF
Info
Views
User Manual
Discussion / Help
Navigation
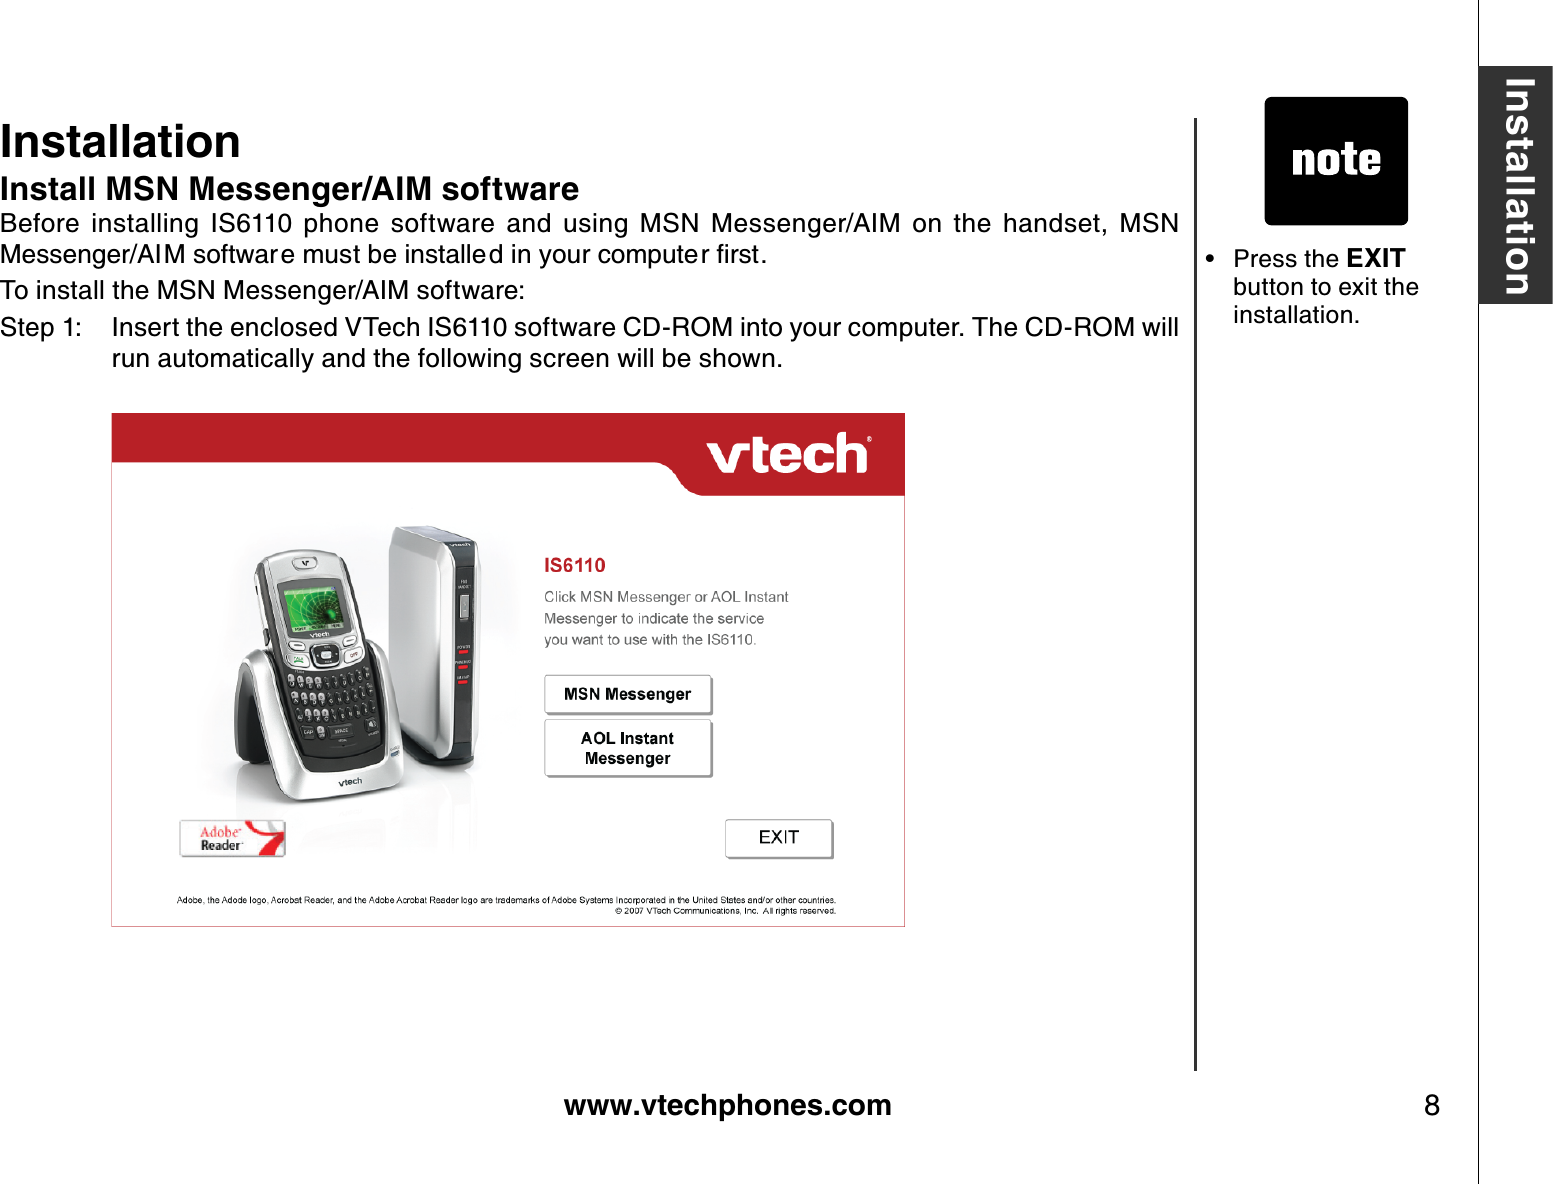
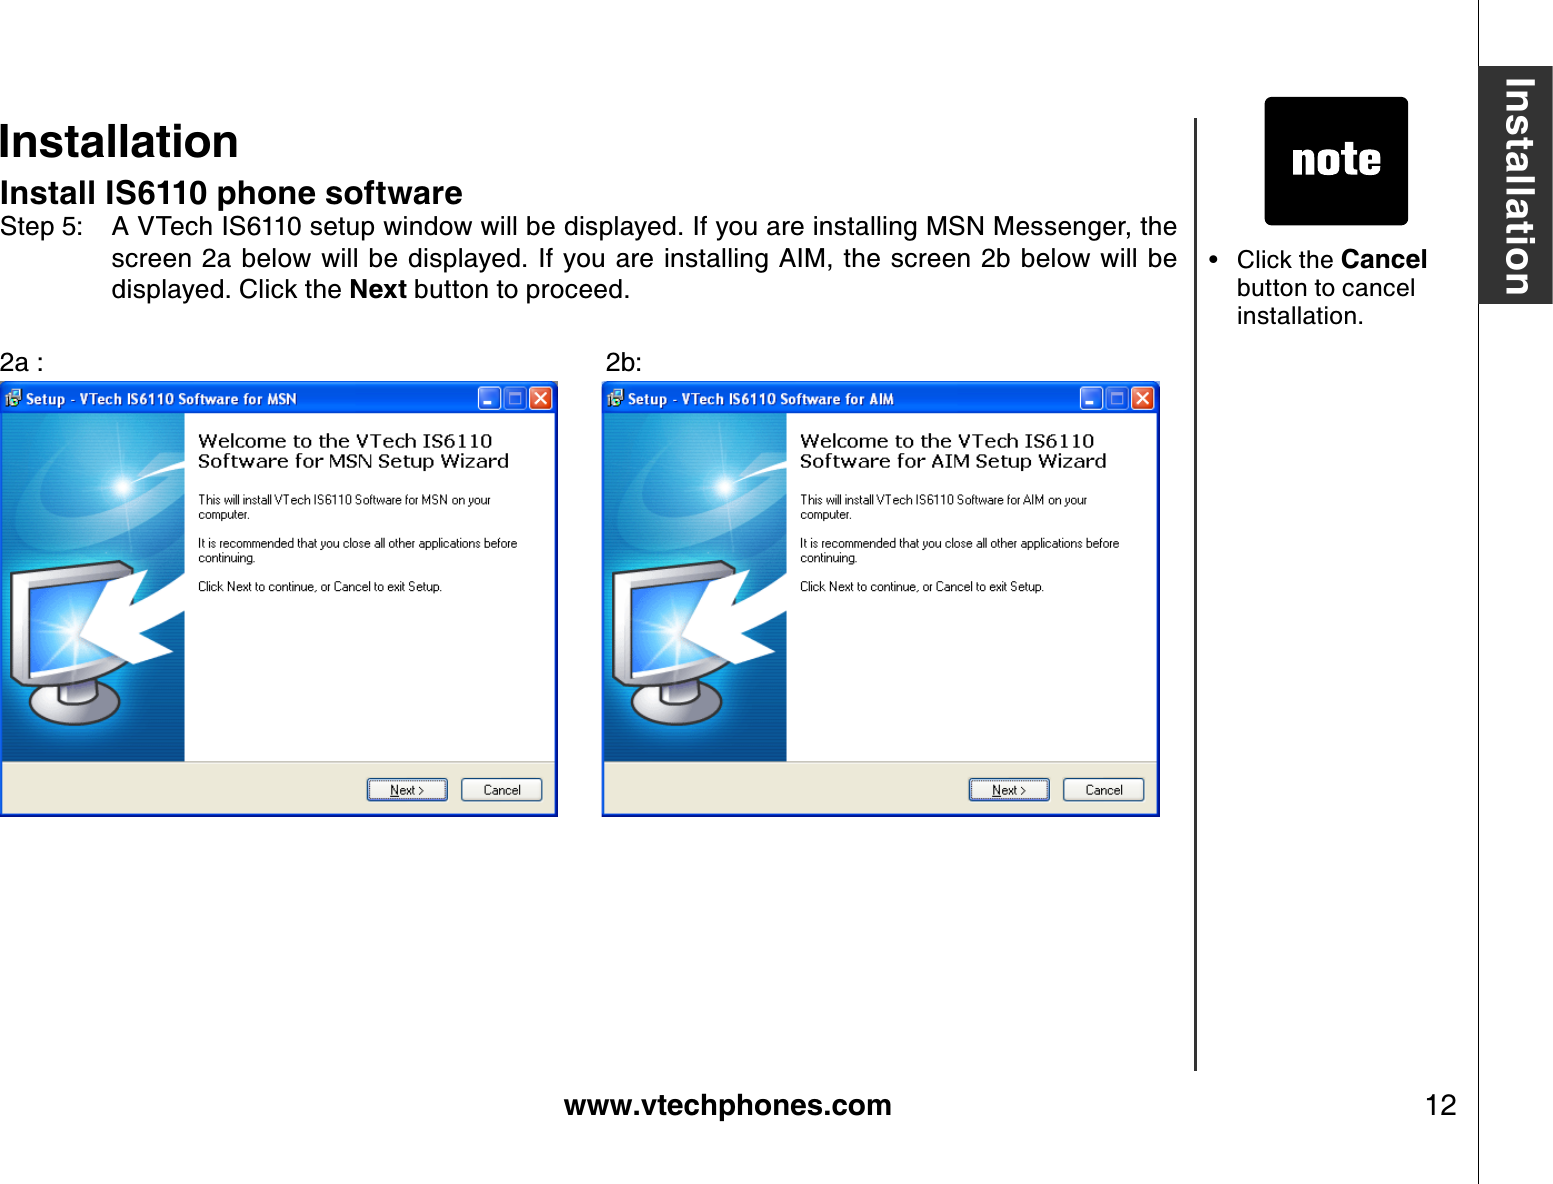
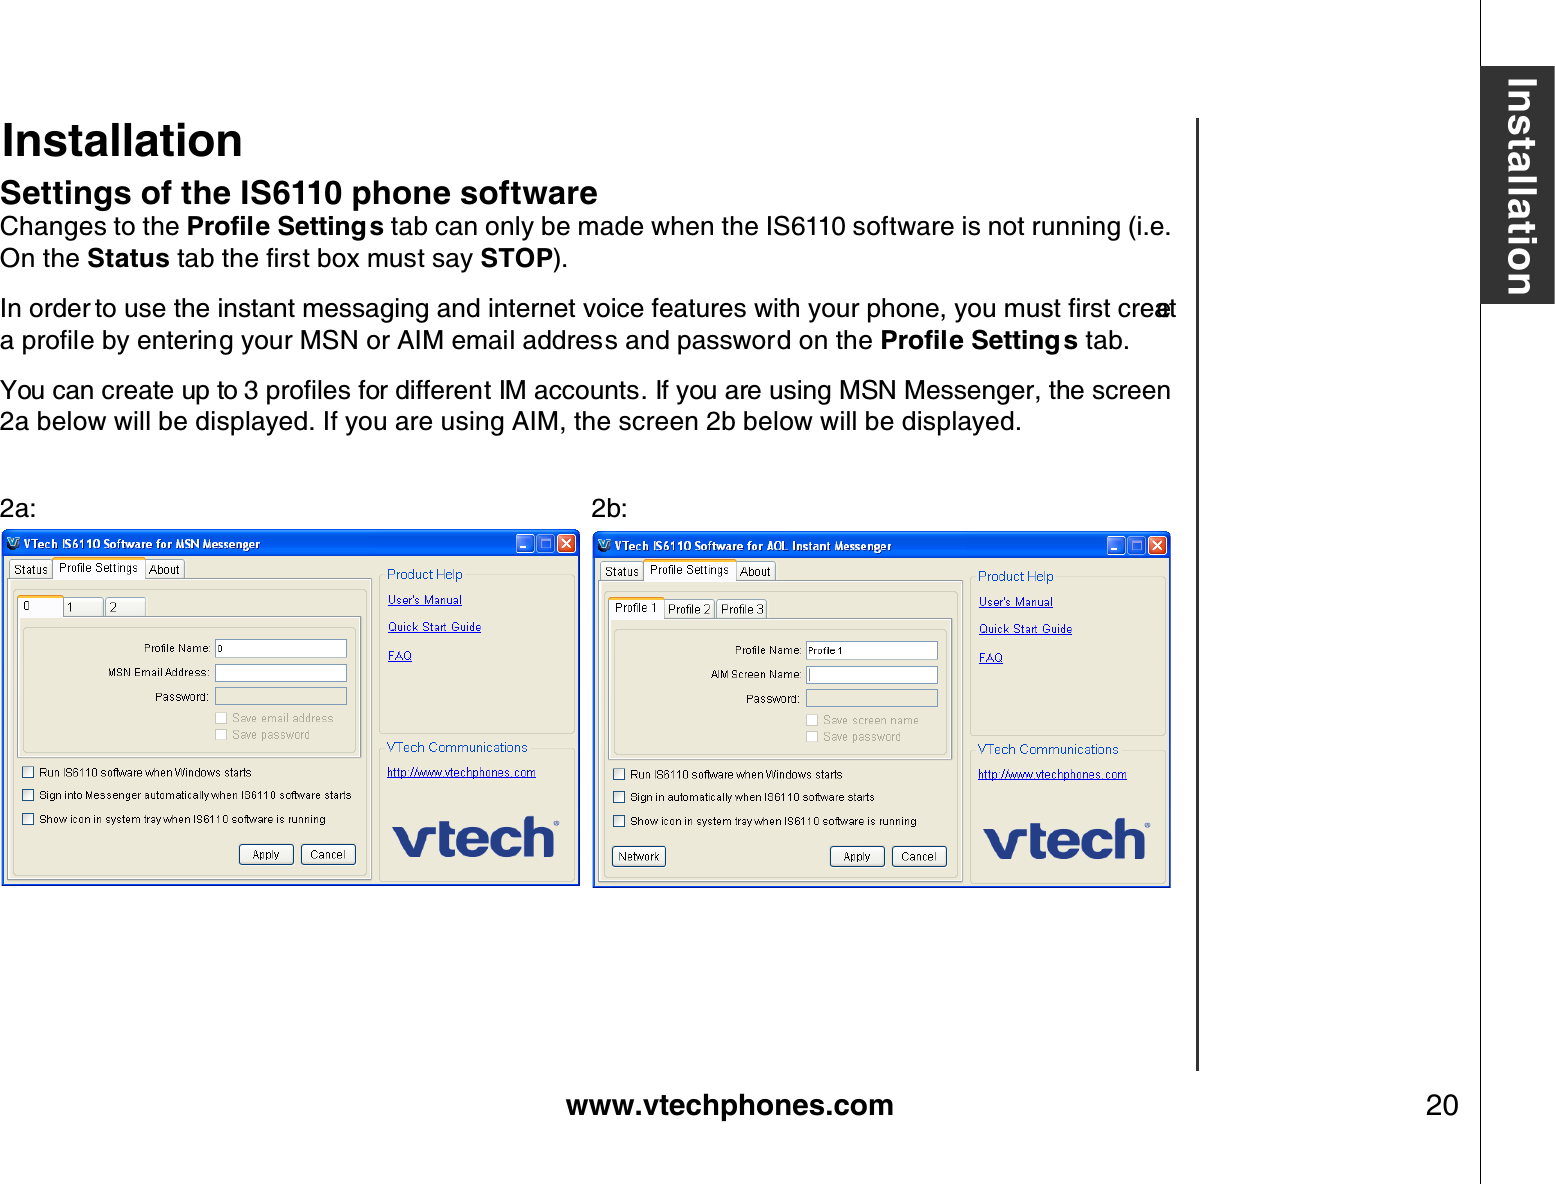
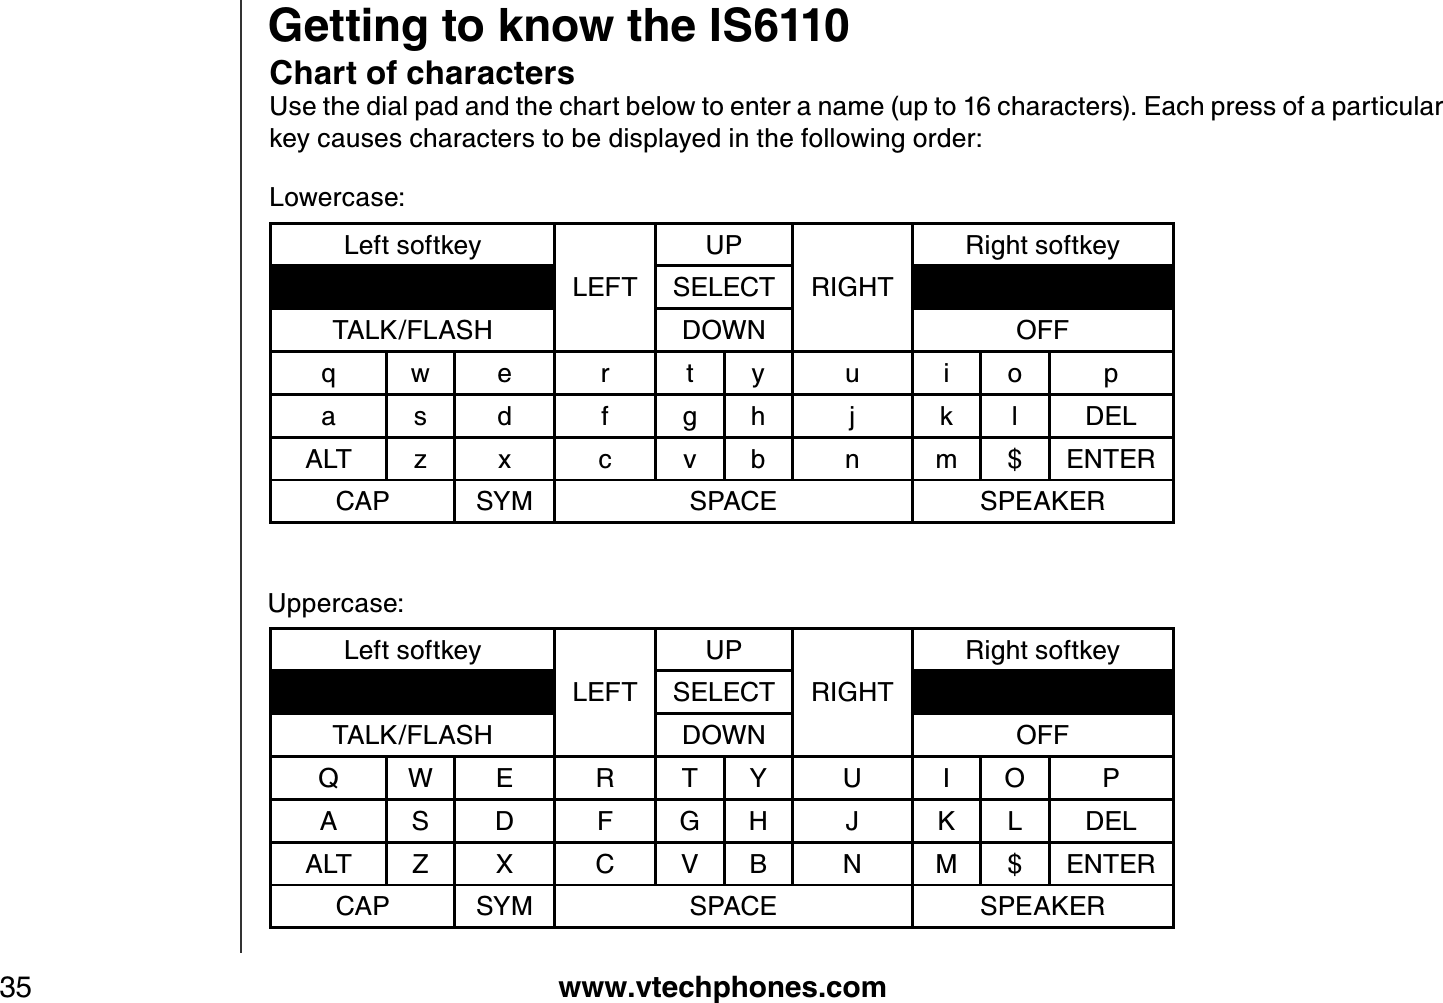
![www.vtechphones.com 36Getting to know the IS6110Left softkeyLEFTUPRIGHTRight softkeySELECTTALK/FLASH DOWN OFF# 1 2 3 ( ) _ - + @* 4 5 6 / : ; ‘ “ DELALT 7 8 9 ? ! , . % ENTERCAP SYM SPACE SPEAKERLeft softkeyLEFTUPRIGHTRight softkeySELECTTALK/FLASH DOWN OFF~ ` ^ & ¥ ¦ |\ [ ] { } £ eDELALT ¢ « » < = > ŝENTERCAP SYM SPACE SPEAKERNumeric mode:Symbol mode:Getting to know the IS6110Chart of characters](https://usermanual.wiki/VTech-Telecommunications/80-6292-00.Users-Manual-I/User-Guide-867356-Page-40.png)
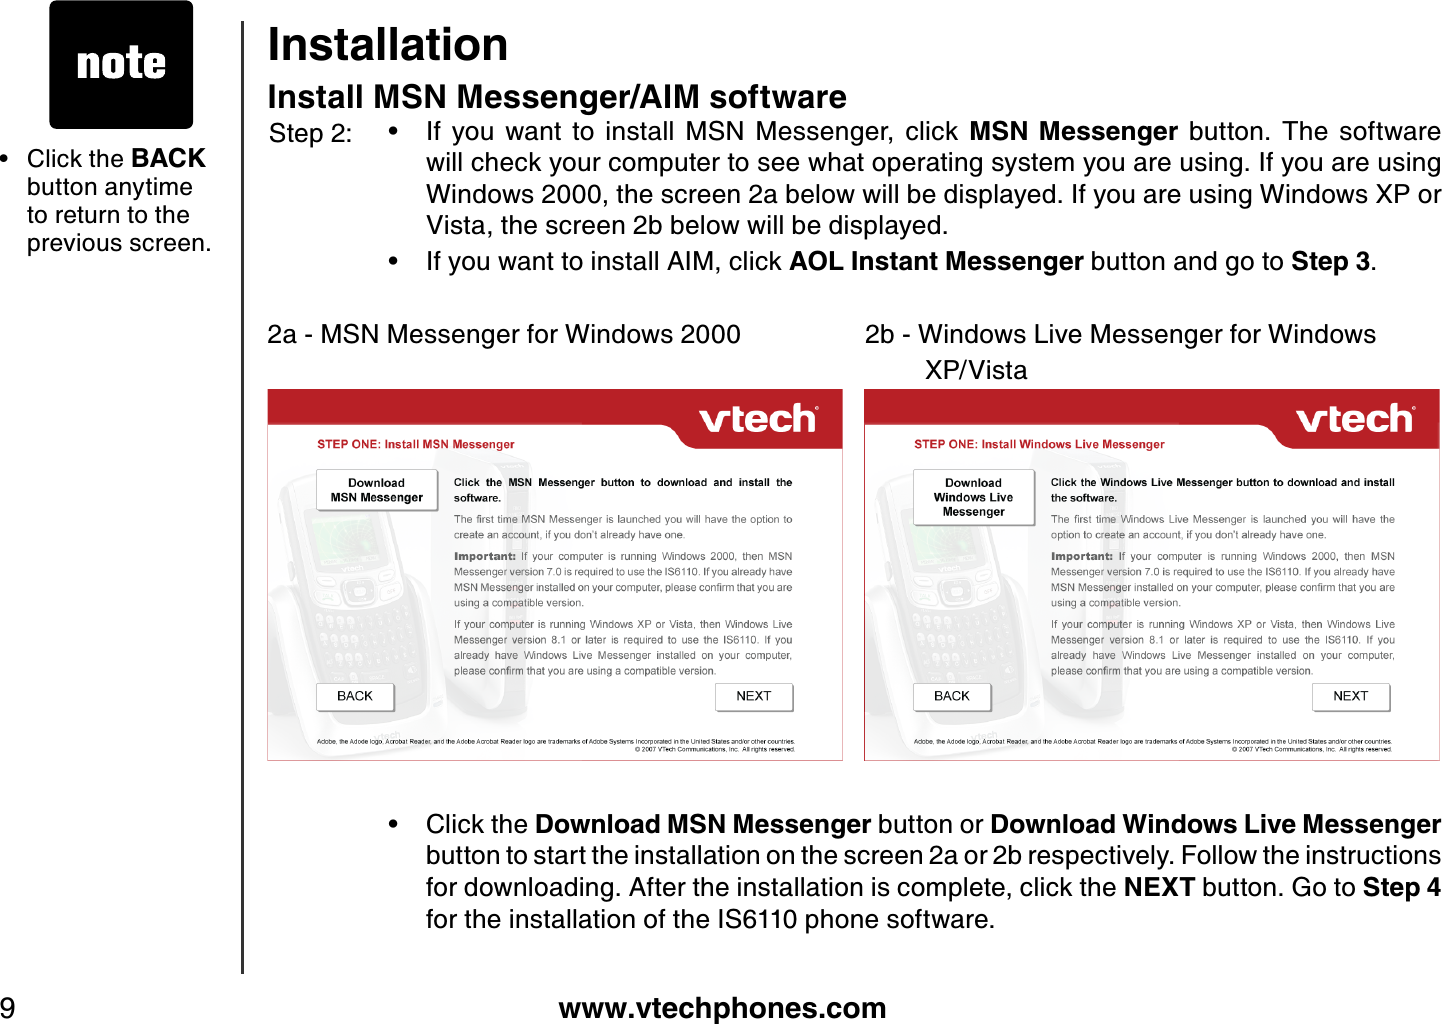
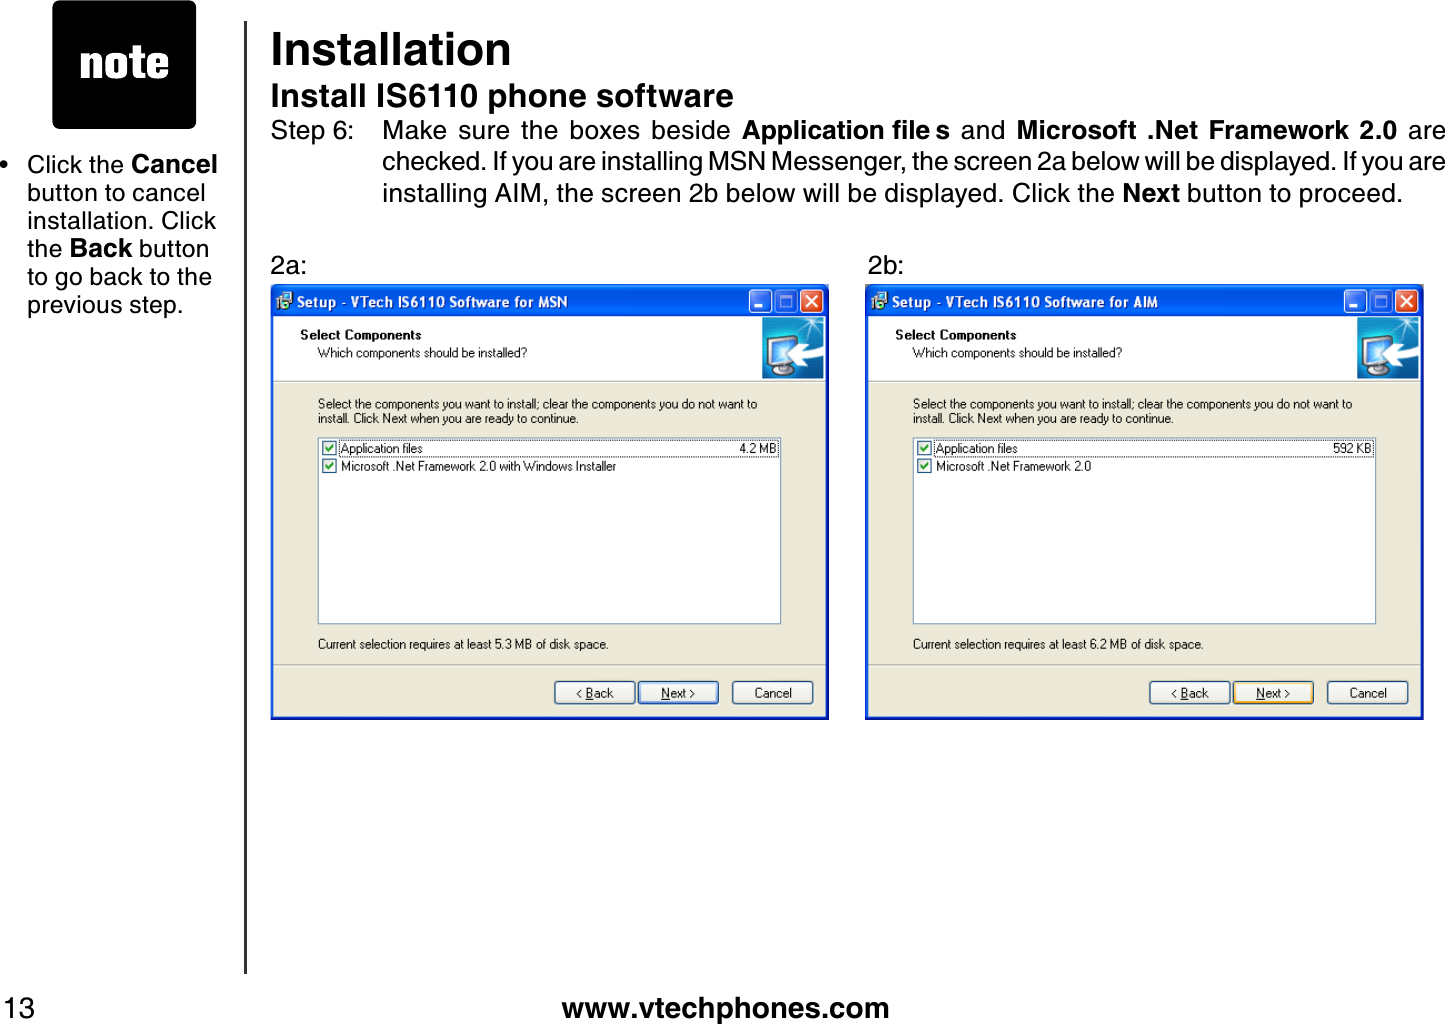
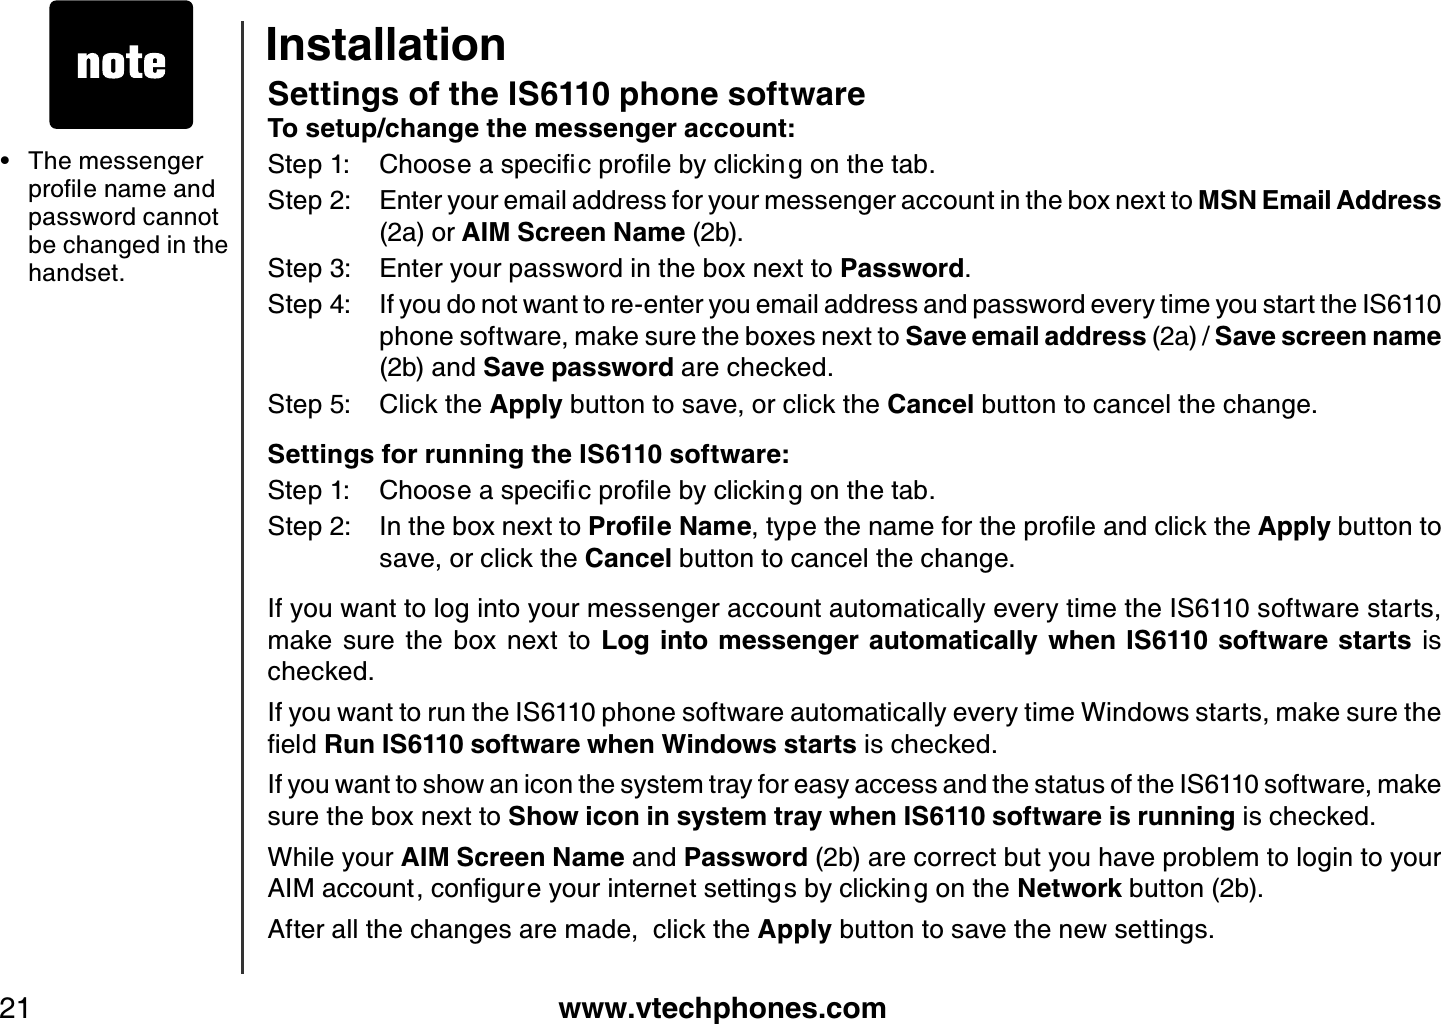
![www.vtechphones.com37Symbol tablePressing SYM while in text entry mode will generate a chart of different symbols as shown in the following table. Getting to know the IS6110~ ` ^ & ¥ ¦ |\ [ ] { } £ e¢ « » < = > ŝ](https://usermanual.wiki/VTech-Telecommunications/80-6292-00.Users-Manual-I/User-Guide-867356-Page-41.png)