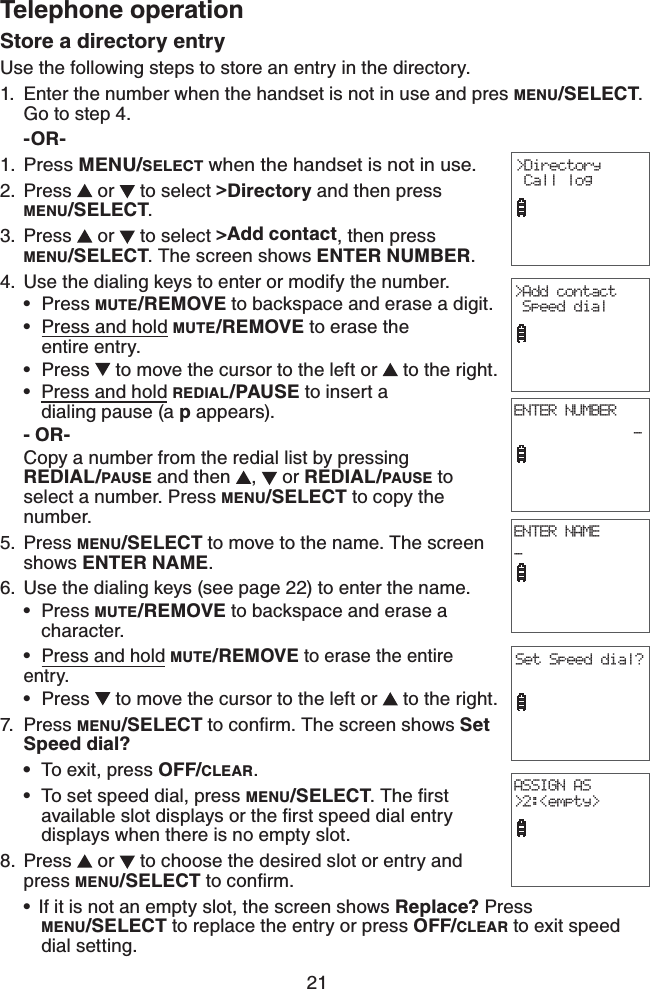
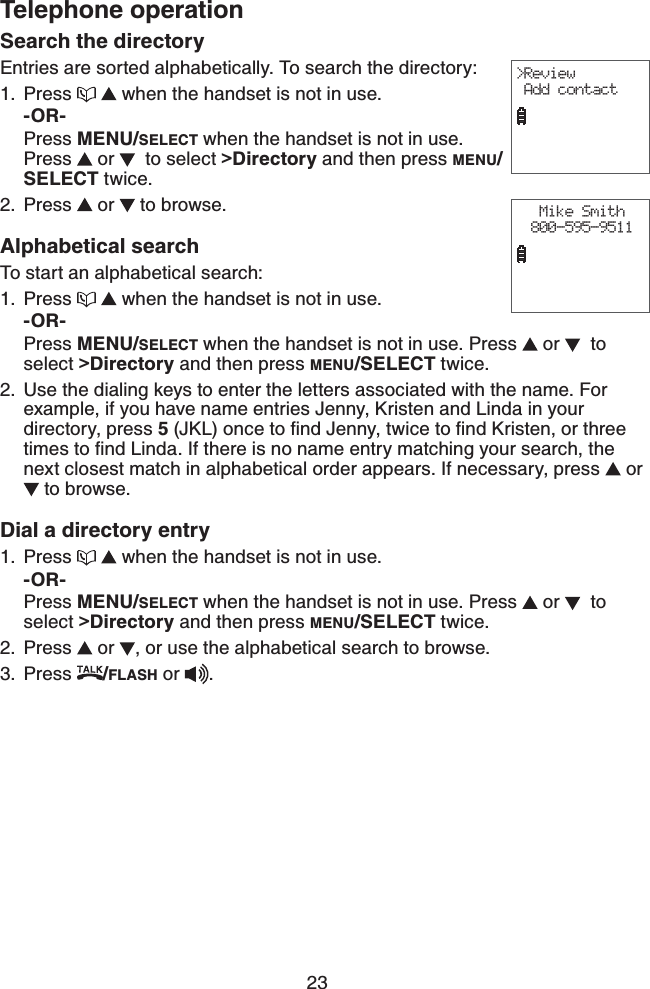
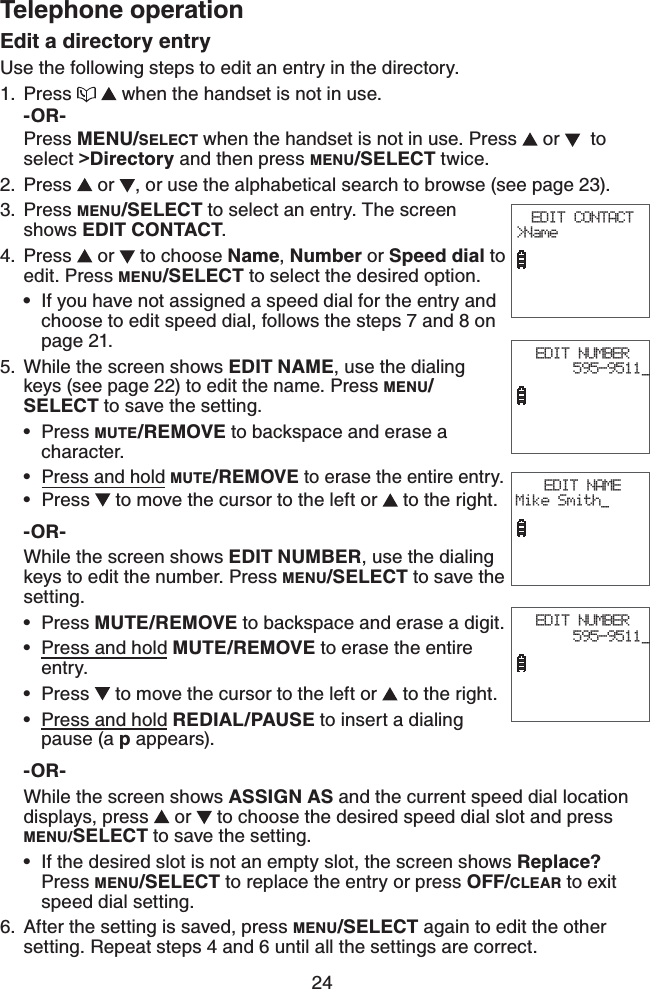
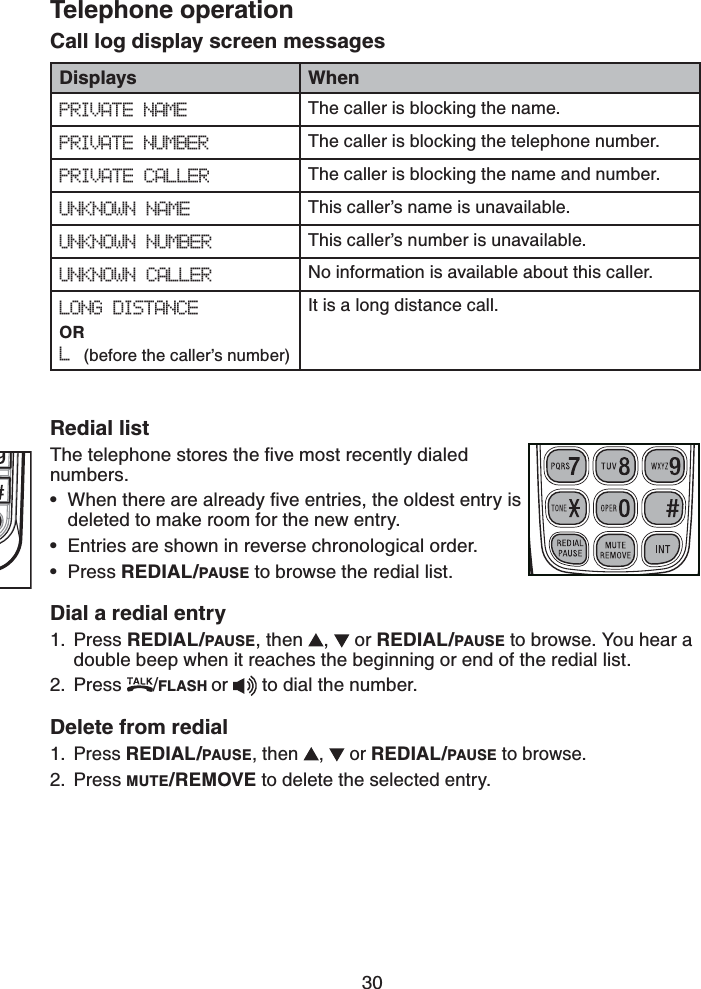
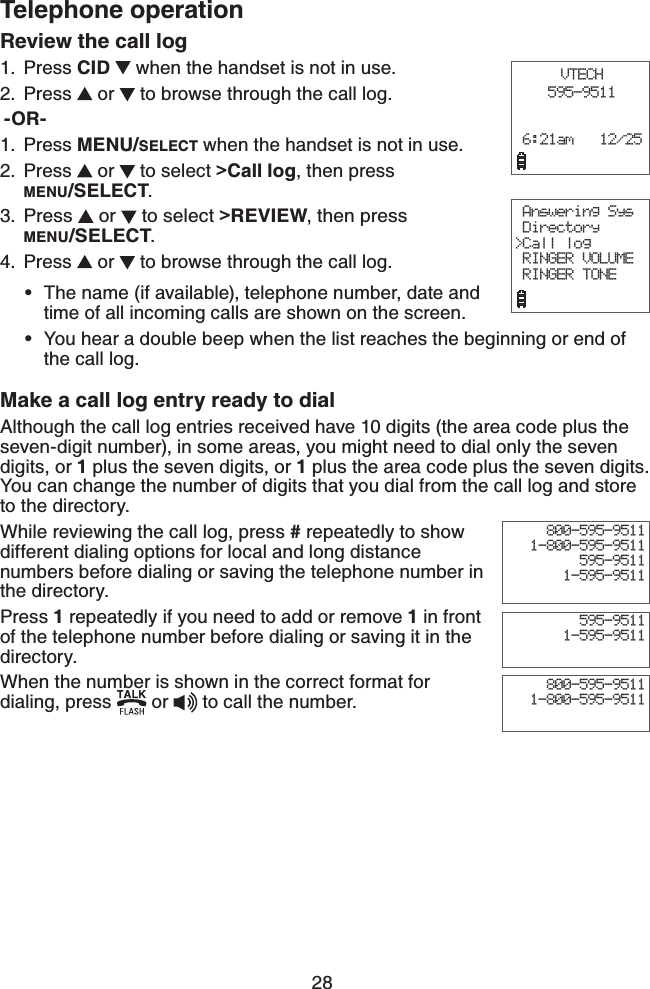
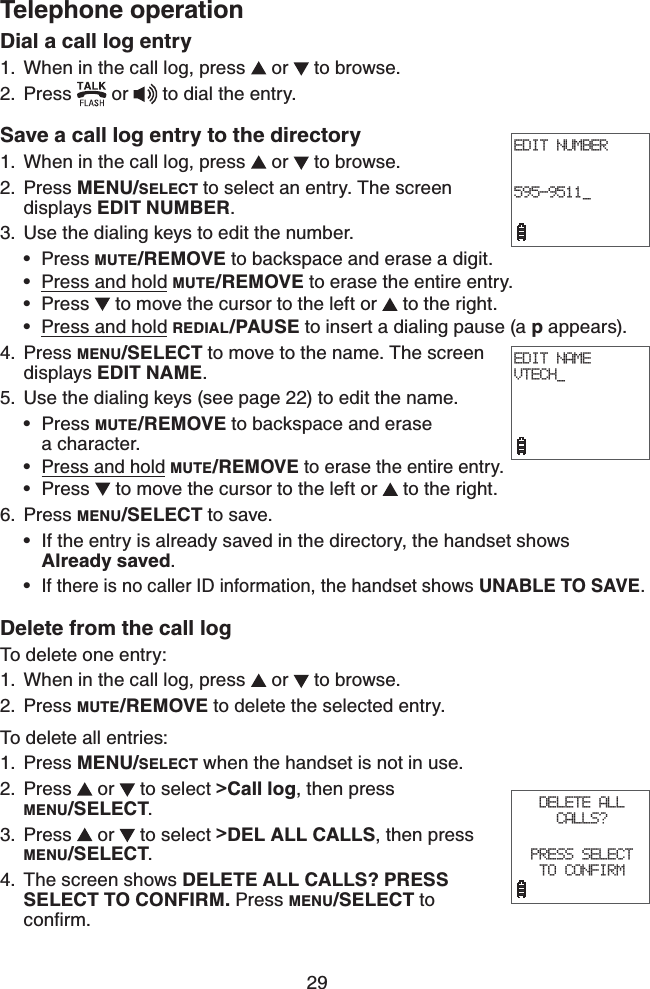
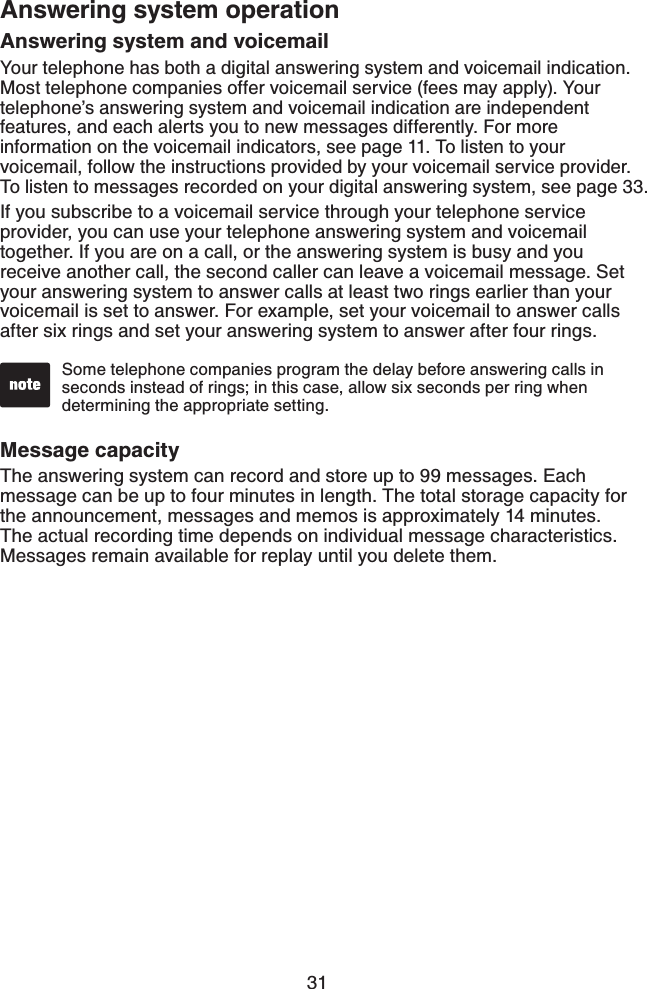
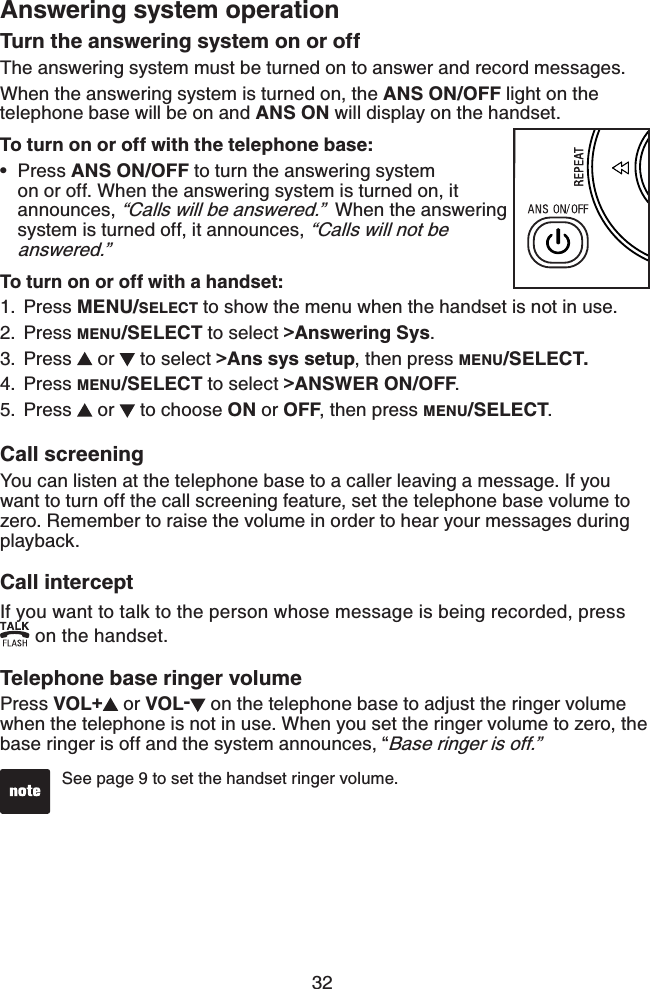
VTech Telecommunications 80-7269-00 1.9GHz CORDLESS PHONE User Manual CS6319 X IC approval 27 July 09 pdf
VTech Telecommunications Ltd 1.9GHz CORDLESS PHONE CS6319 X IC approval 27 July 09 pdf
UserManual.wiki
>
VTech Telecommunications
>
80 7269 00 User Manual
Users Manual
Navigation menu
Upload a User Manual
Namespaces
Wiki Guide
HTML
PDF
Info
Views
User Manual
Discussion / Help
Navigation


![39AppendixHandset and telephone base indicatorsHandset lightsOn when the handset speakerphone is in use.CHARGE On when the handset is charging in the telephone base or charger.Telephone base lightsIN USE Flashes when there is an incoming call or another telephone sharing the same line is in use.On when the handset is in use.VOICEMAIL Flashes when you have new voicemail from your telephone company.ANS ON/OFF On when the answering system is on.ANS ON Answering system is turned on.MUTE Microphone is muted.Handset ringer off.New answering system messages.Message number currently playing and total number of messages recorded.NEW New call log entries.NEW VOICEMAIL New voicemail received from the telephone company.SPEAKER Speakerphone is in use.(Battery indicator) Cycles (low, medium, and full) when the handset battery is charging.Flashes when the battery is low and needs charging.Solid when the battery is fully charged.Handset iconsMSG#[ 1/13]](https://usermanual.wiki/VTech-Telecommunications/80-7269-00/User-Guide-1162427-Page-35.png)


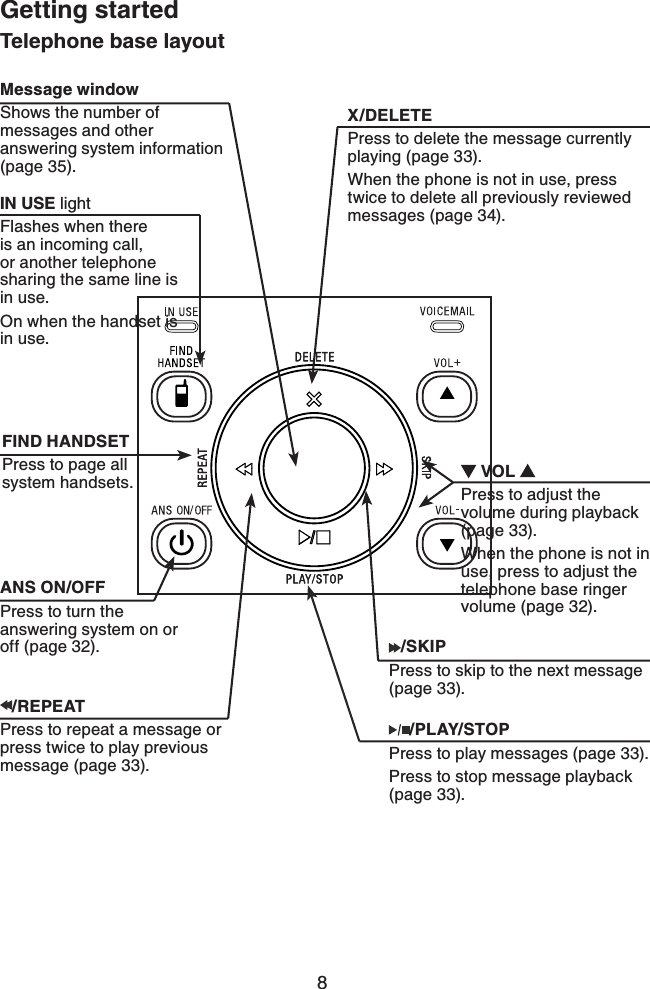


![39AppendixHandset and telephone base indicatorsHandset lightsOn when the handset speakerphone is in use.CHARGE On when the handset is charging in the telephone base or charger.Telephone base lightsIN USE Flashes when there is an incoming call or another telephone sharing the same line is in use.On when the handset is in use.VOICEMAIL Flashes when you have new voicemail from your telephone company.ANS ON/OFF On when the answering system is on.ANS ON Answering system is turned on.MUTE Microphone is muted.Handset ringer off.New answering system messages.Message number currently playing and total number of messages recorded.NEW New call log entries.NEW VOICEMAIL New voicemail received from the telephone company.SPEAKER Speakerphone is in use.(Battery indicator) Cycles (low, medium, and full) when the handset battery is charging.Flashes when the battery is low and needs charging.Solid when the battery is fully charged.Handset iconsMSG#[ 1/13]](https://usermanual.wiki/VTech-Telecommunications/80-7269-00/User-Guide-1162427-Page-98.png)