VTech Telecommunications 80-8052-00 1.9GHz Cordless Phone User Manual
VTech Telecommunications Ltd 1.9GHz Cordless Phone Users Manual
UserManual.wiki
>
VTech Telecommunications
>
80 8052 00 User Manual
Users Manual
Navigation menu
Upload a User Manual
Namespaces
Wiki Guide
HTML
PDF
Info
Views
User Manual
Discussion / Help
Navigation


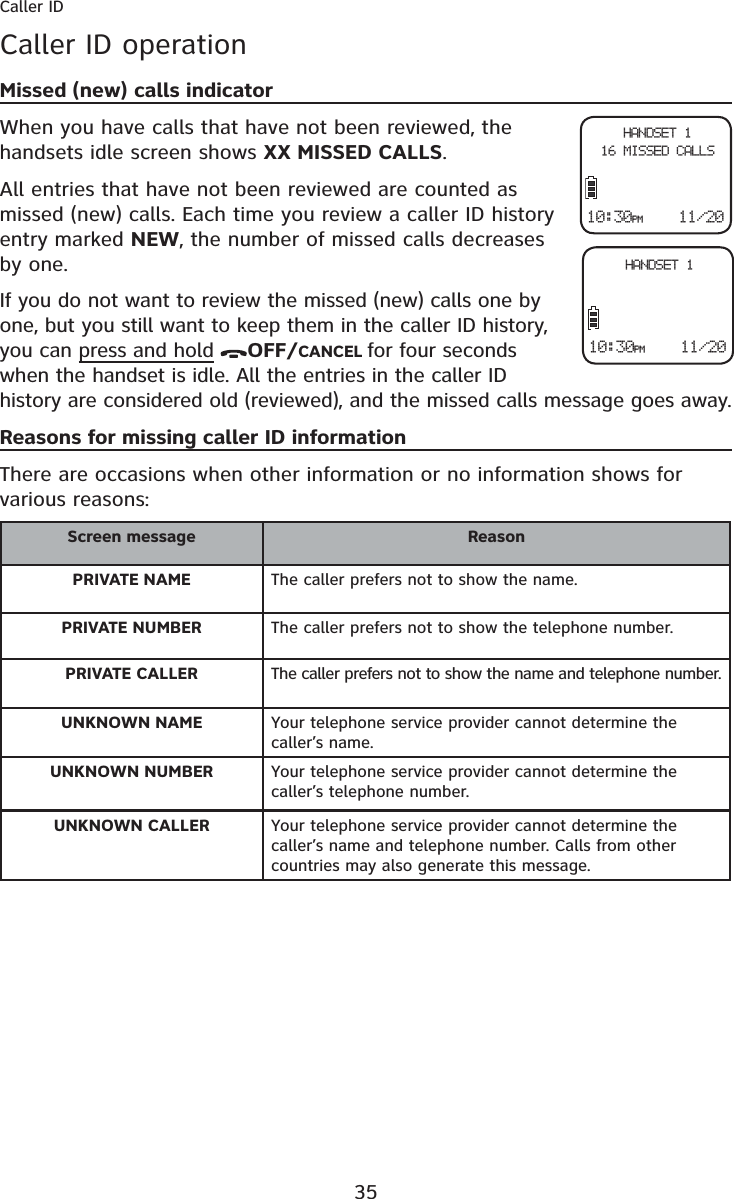
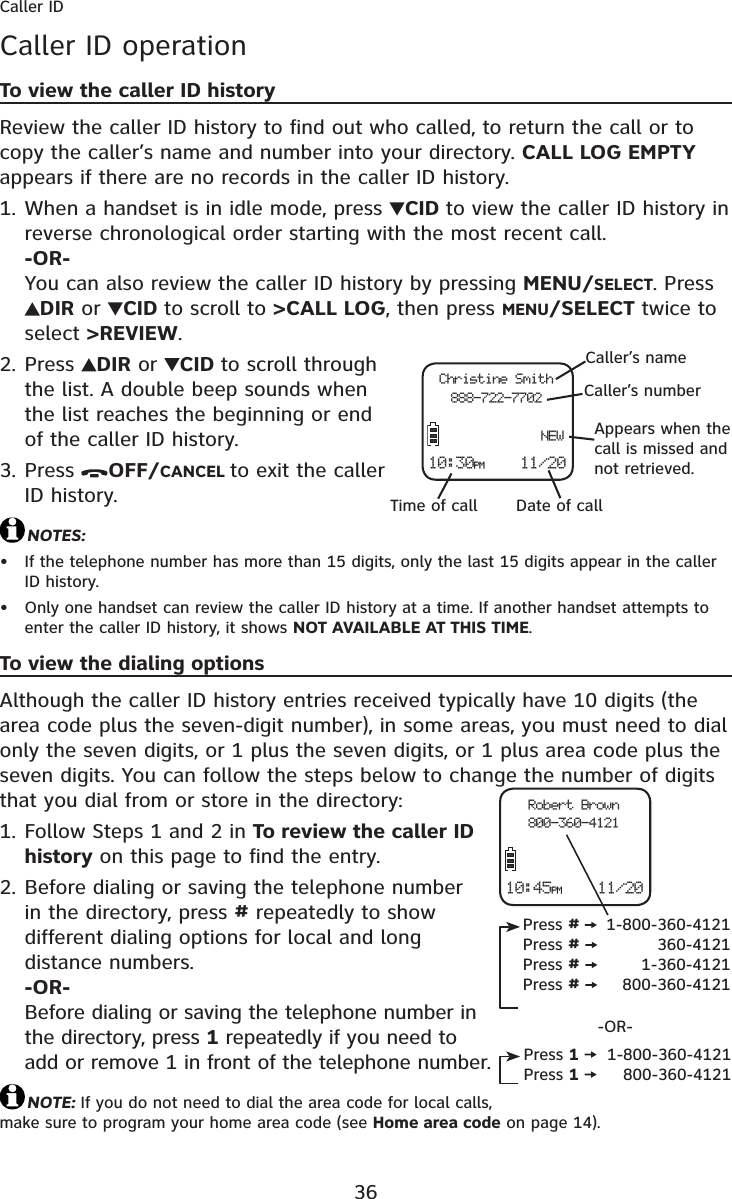
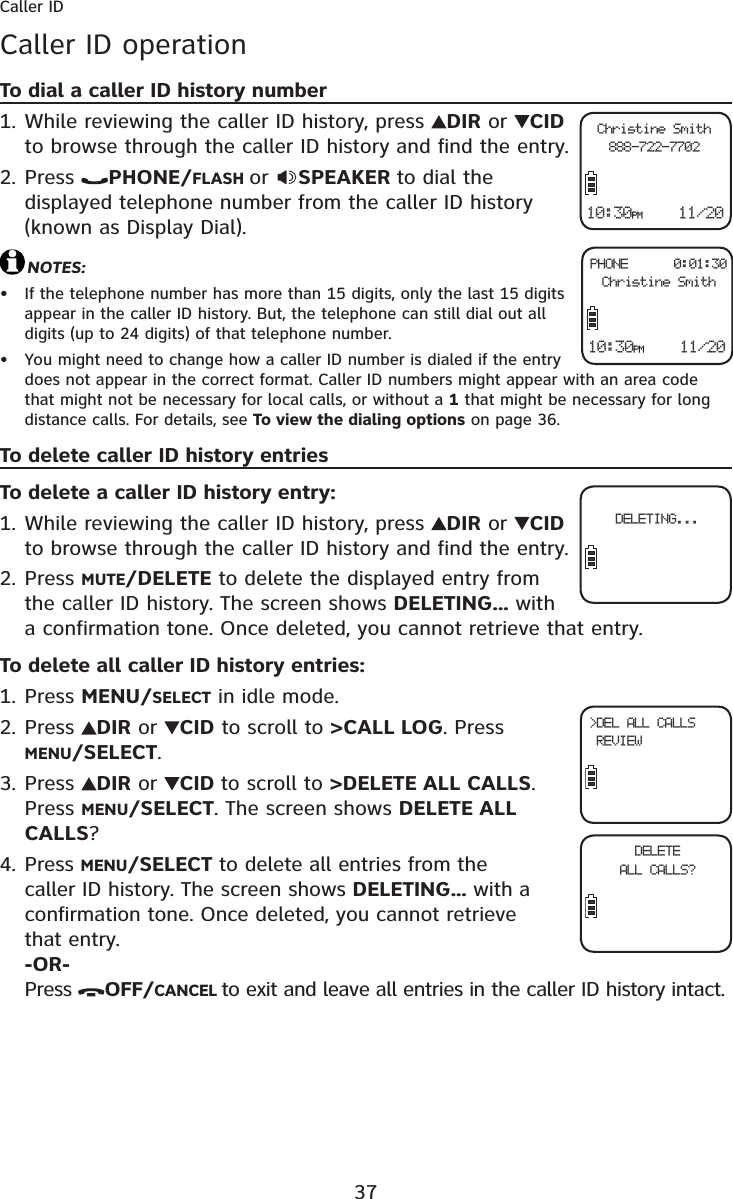
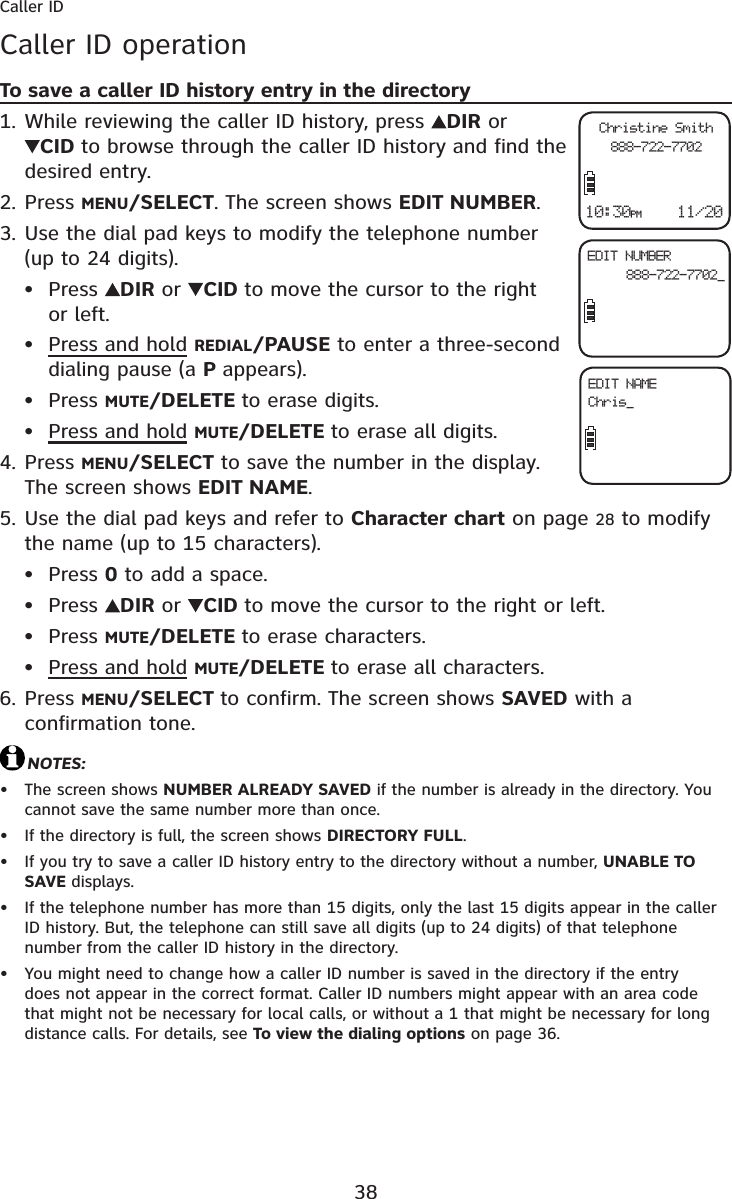
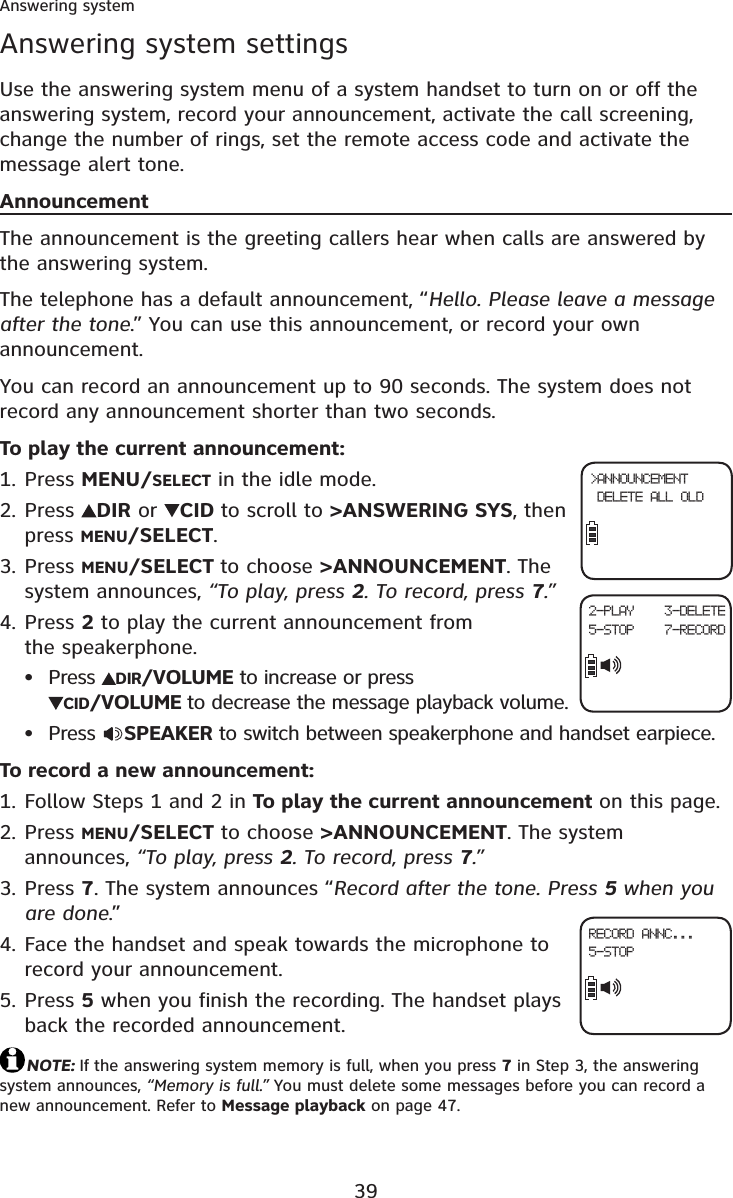
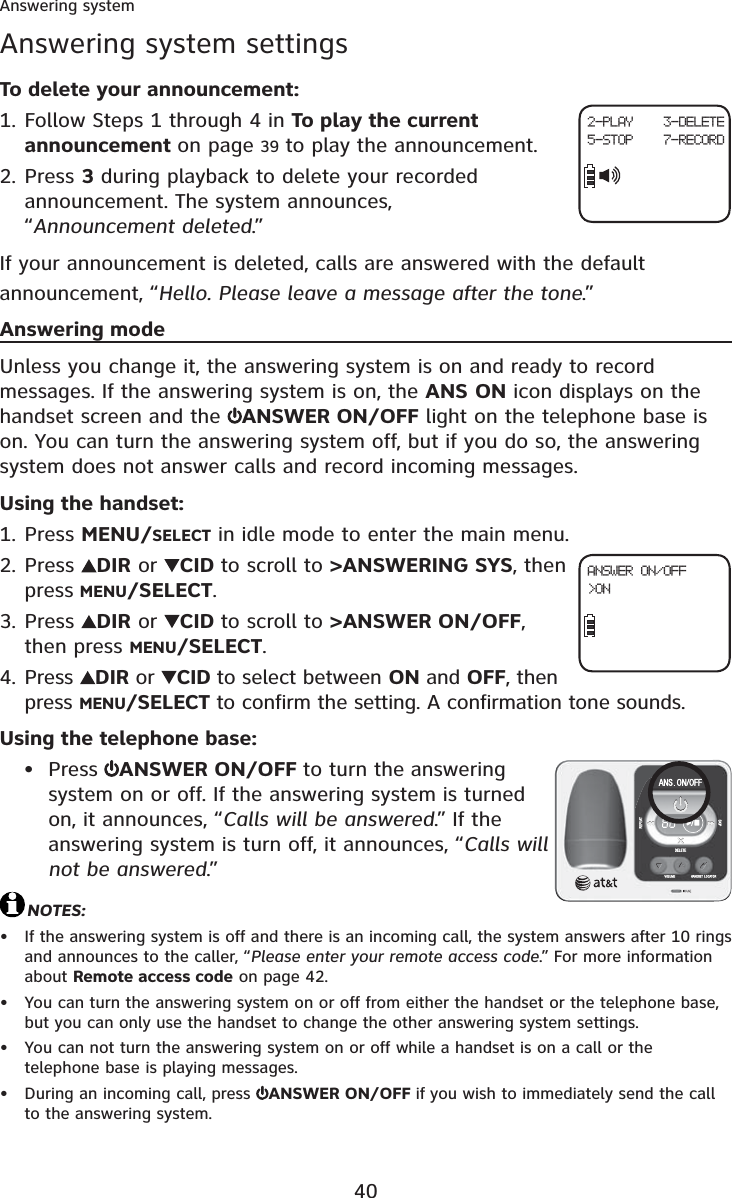
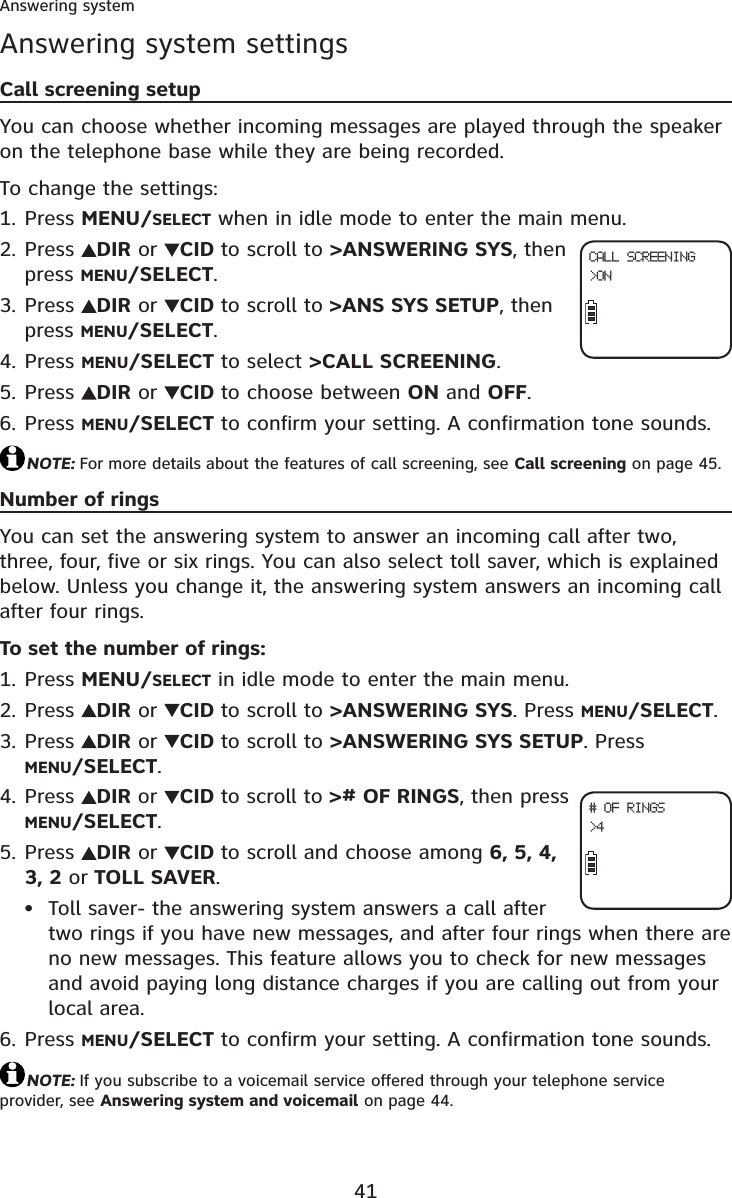
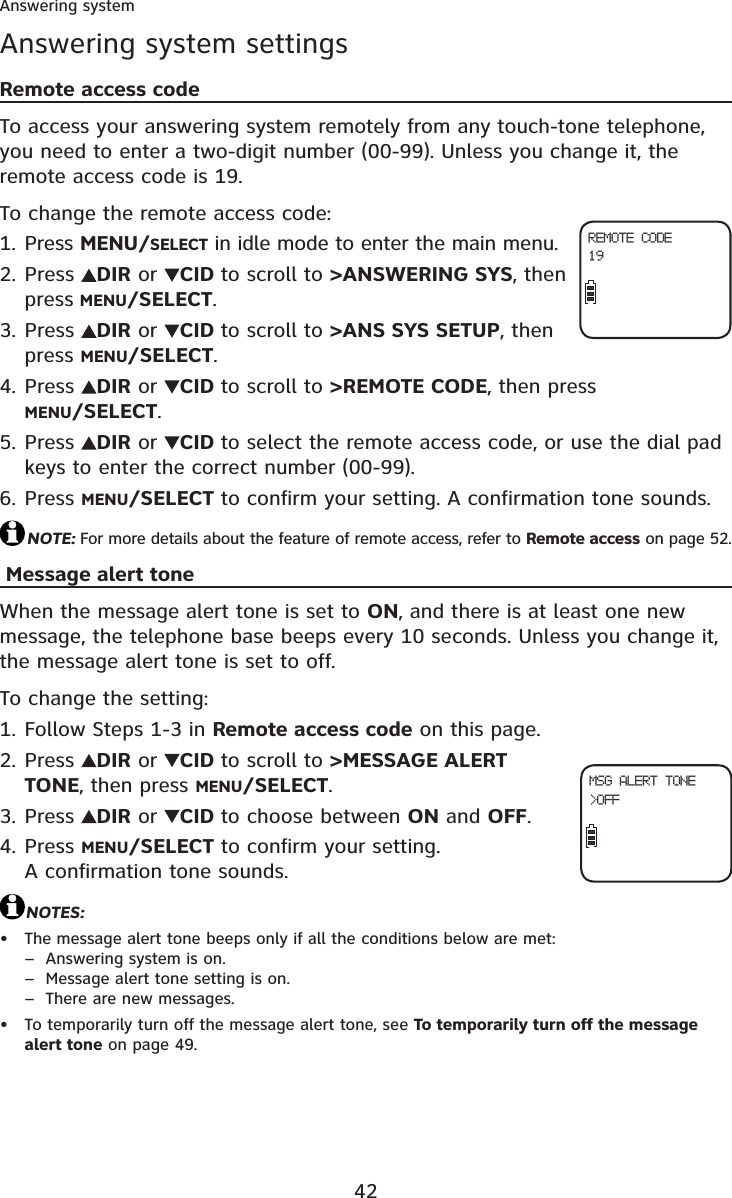
![46Answering systemAnswering system overviewCall screening at handset:If answering system is set to ON, when there is an incoming call and it is answered by the answering system, the handset screen shows “To screen the call, press [select].” By pressing MENU/SELECT, you can call screen the call at handset.Call interceptWhile call screening, you can press PHONE/FLASH orSPEAKER on the handset to stop recording and speak to the caller.](https://usermanual.wiki/VTech-Telecommunications/80-8052-00/User-Guide-1380738-Page-51.png)