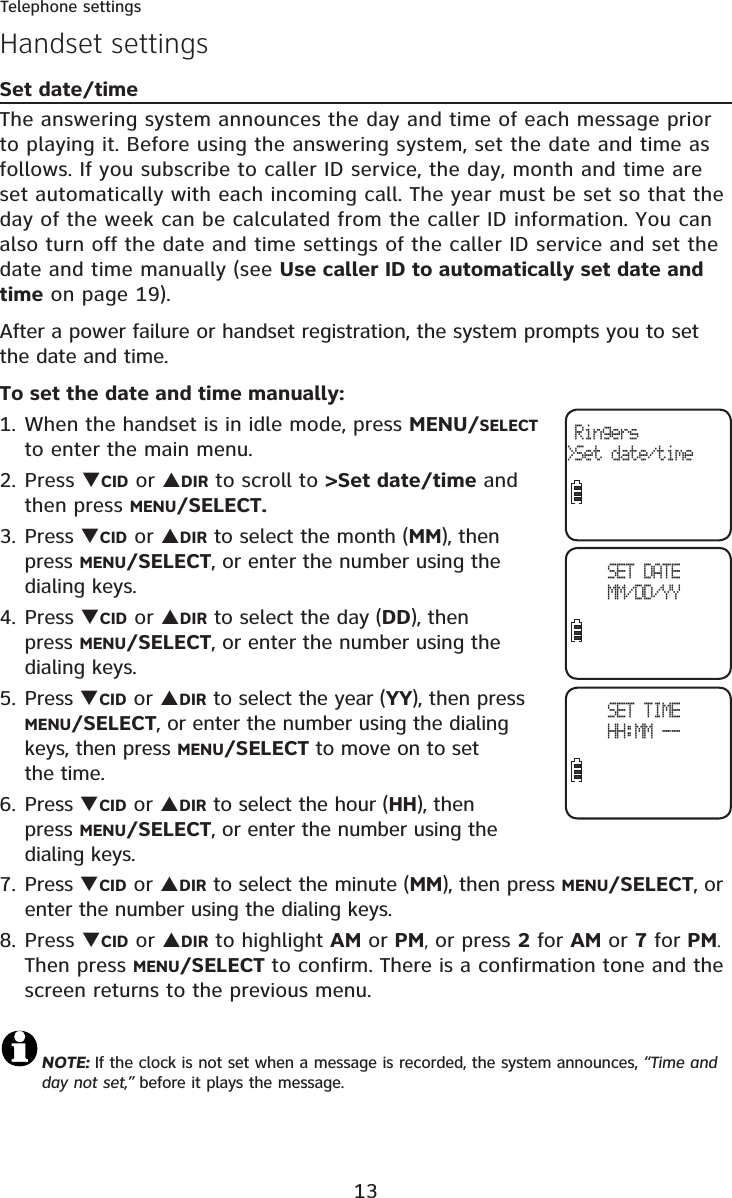
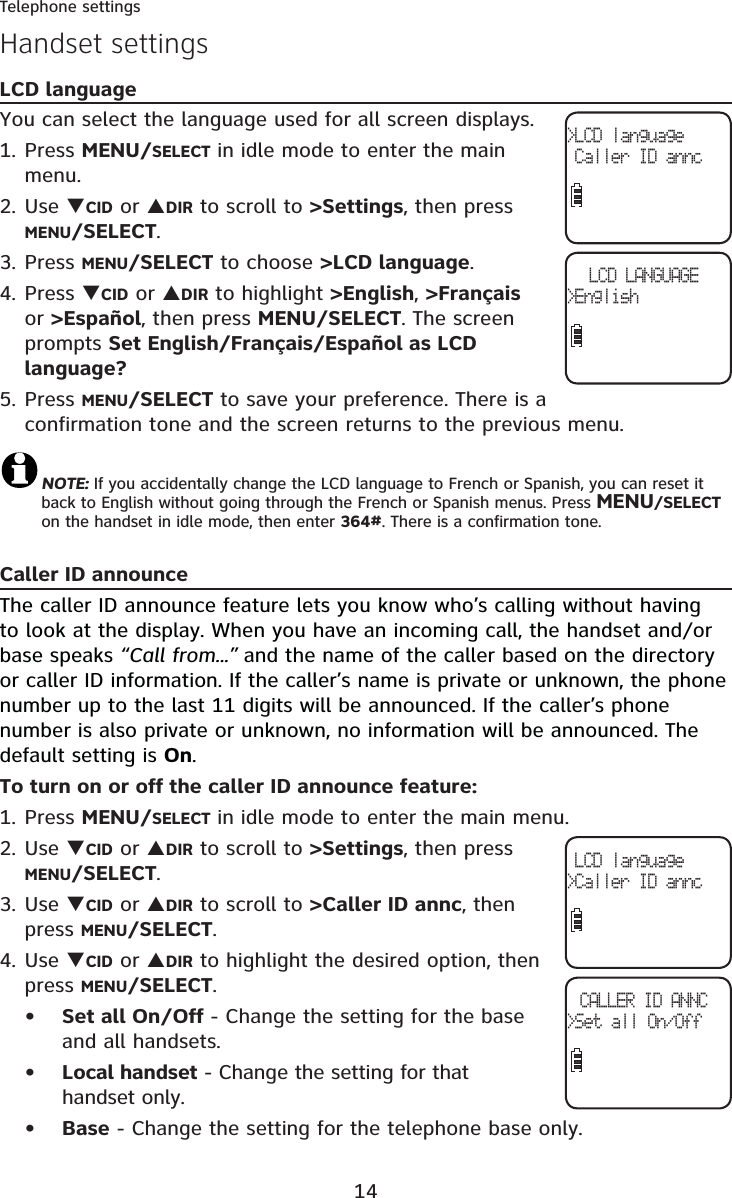
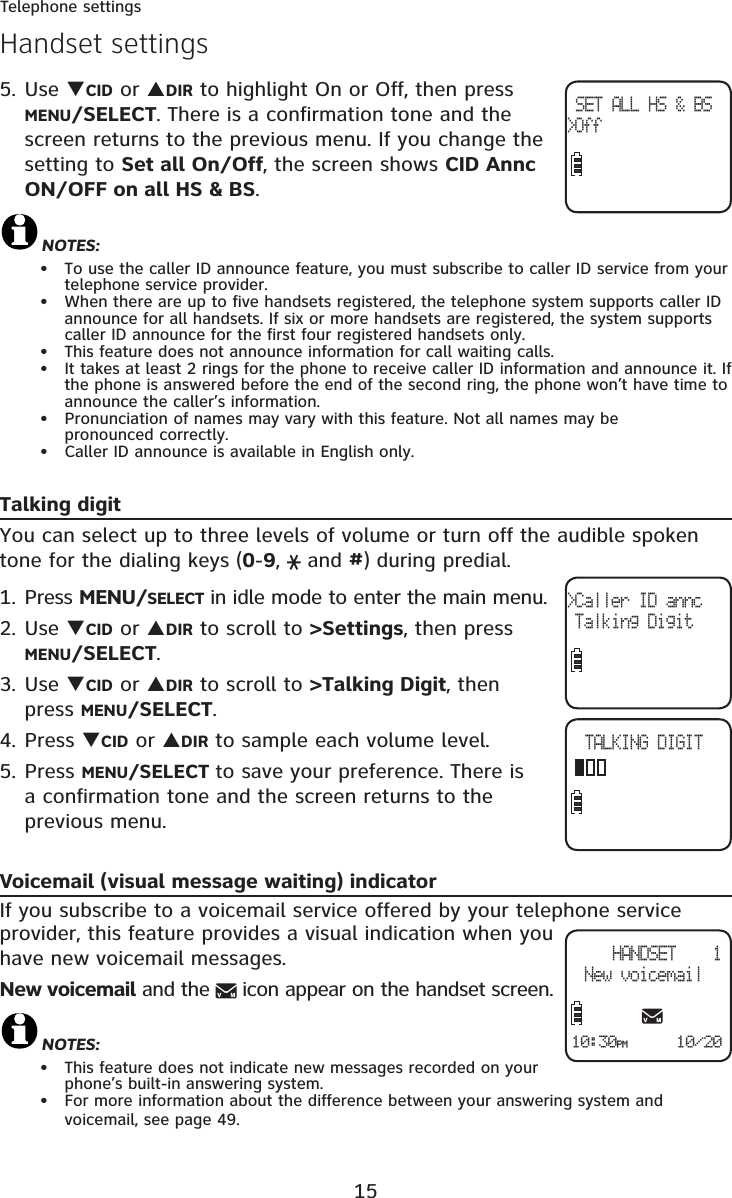
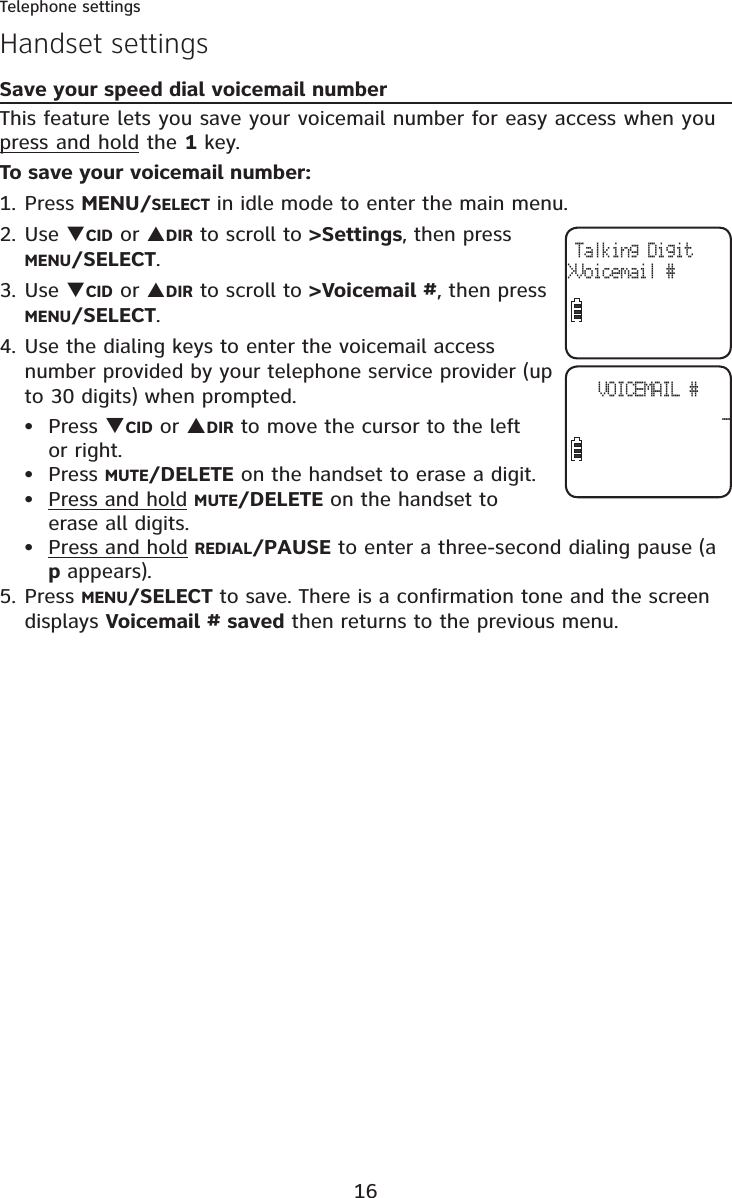
VTech Telecommunications 80-8564-00 1.9GHz DECT Cordless Phone User Manual CRL32X02 CCIB i1 20120110 UL
VTech Telecommunications Ltd 1.9GHz DECT Cordless Phone CRL32X02 CCIB i1 20120110 UL
UserManual.wiki
>
VTech Telecommunications
>
80 8564 00 User Manual
User Manual
Navigation menu
Upload a User Manual
Namespaces
Wiki Guide
HTML
PDF
Info
Views
User Manual
Discussion / Help
Navigation


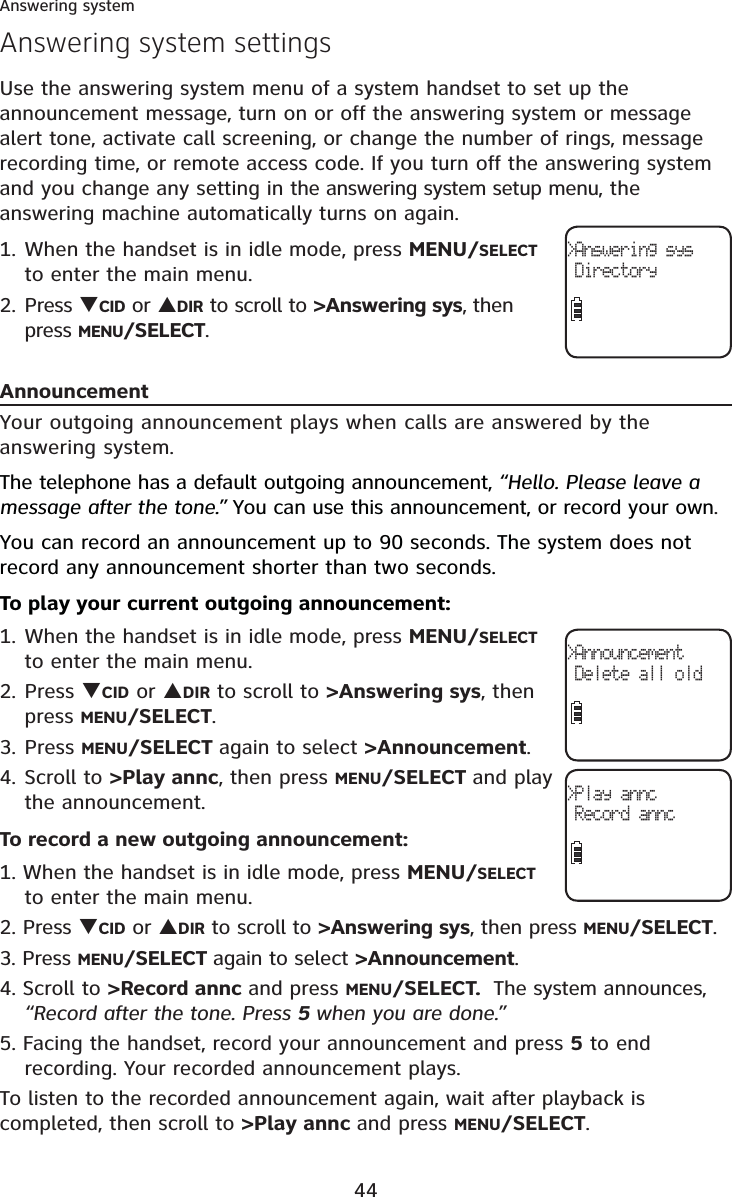
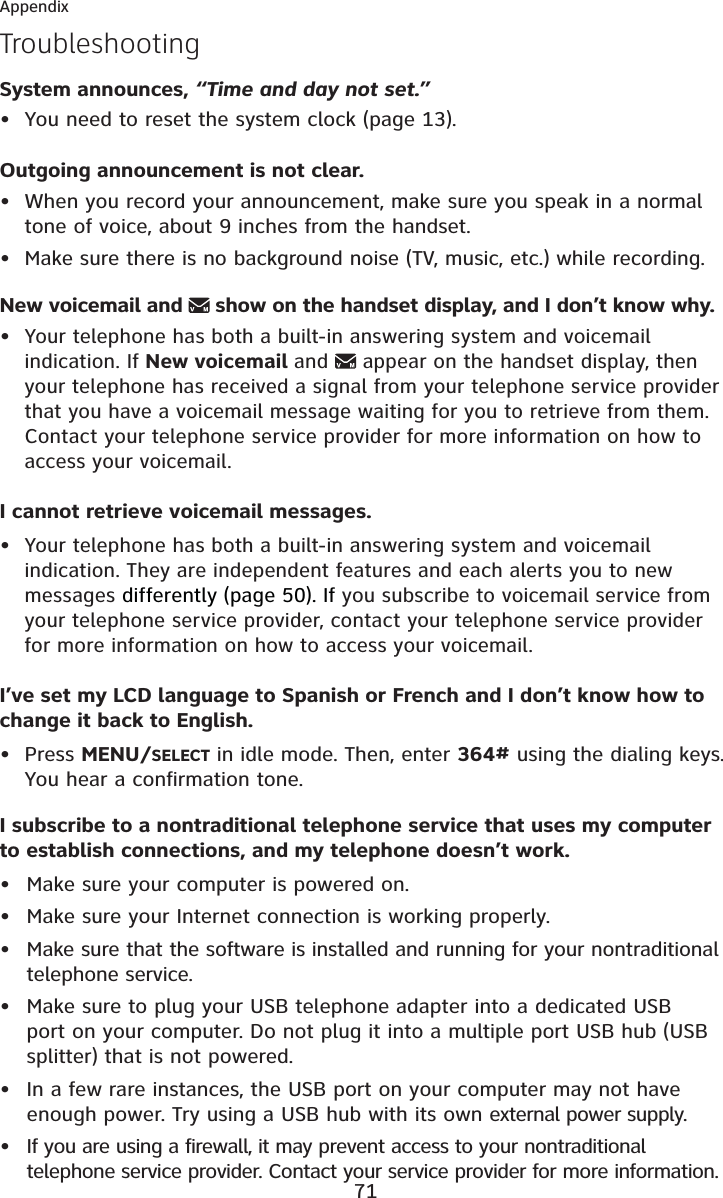
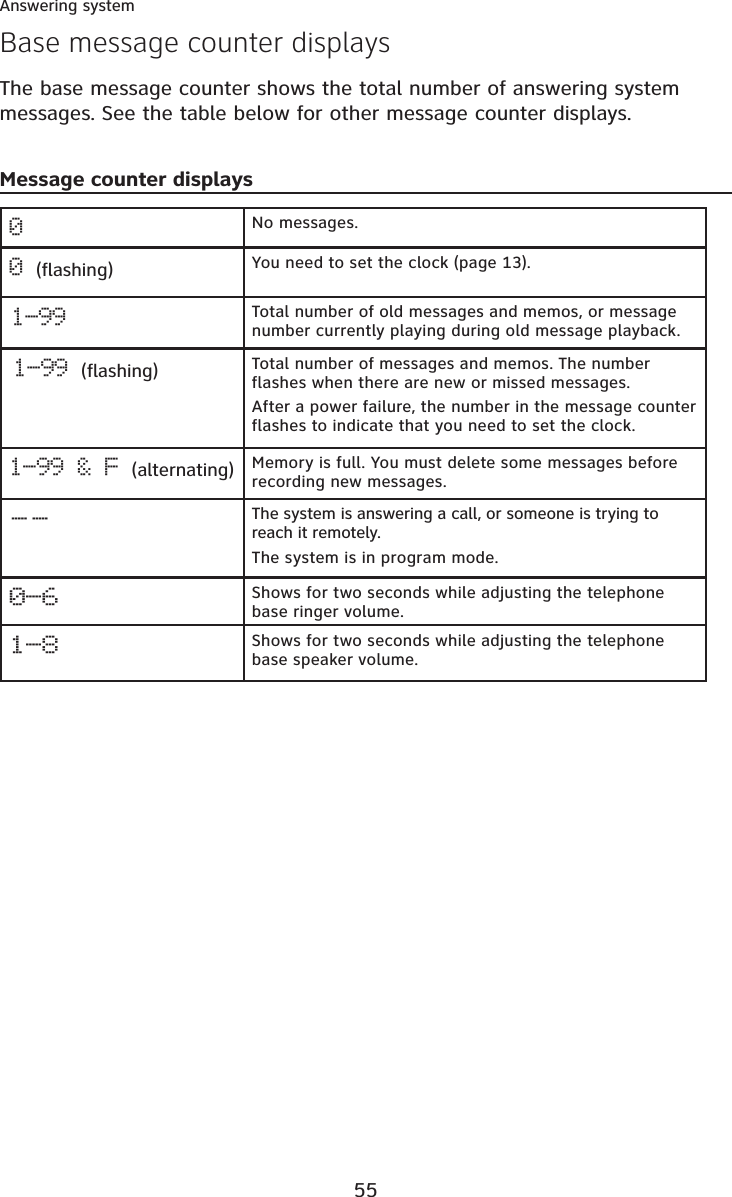
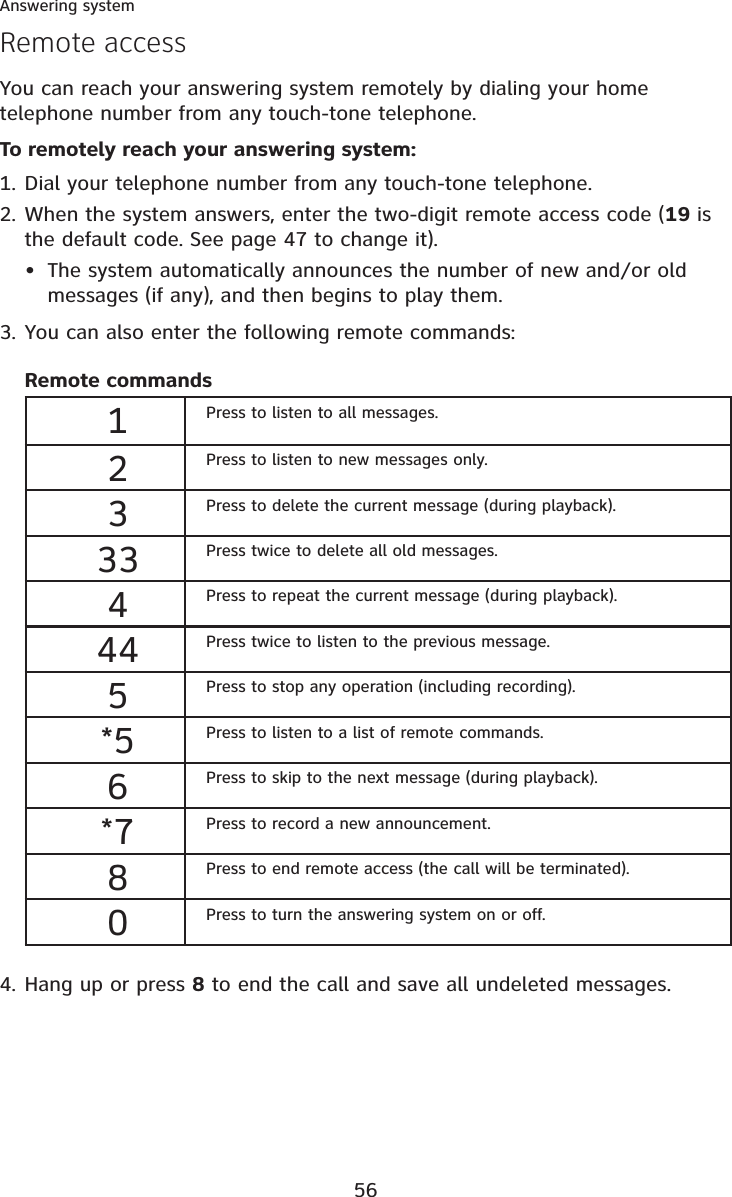
![51Answering systemAbout the answering systemCall screening at the handsetIf the answering system is on, you can hear the announcement and the incoming message with the handset when a call is answered by the answering system. While a message is being recorded, the handset shows To screen call, press [SELECT]. Press MENU/SELECT to screen the call.Call interceptWhile screening a call, you can stop recording and speak to the caller by pressing PHONE/FLASH on the handset.Base ringerPress VOL T or VOL S on the telephone base to adjust the ringer volume when the telephone is not in use.You hear a sample of the ringer while adjusting the volume. The telephone base announces, “Base ringer is off,” when you set the volume to 0.Temporarily turning off the message alert toneIf the new message alert tone is turned on, the telephone base beeps every 10 seconds when there are new or missed messages. Pressing any telephone base key (except /HANDSET LOCATOR) temporarily silences the message alert tone. If you press X/DELETE when in idle mode to temporarily turn off the message alert tone, there is a voice prompt directing you to press X/DELETEagain to delete all old messages. The message alert tone is temporarily off. Only press X/DELETE a second time if you wish to erase all old messages in your answering system.The message alert tone resumes when you receive another message.](https://usermanual.wiki/VTech-Telecommunications/80-8564-00/User-Guide-1630492-Page-56.png)
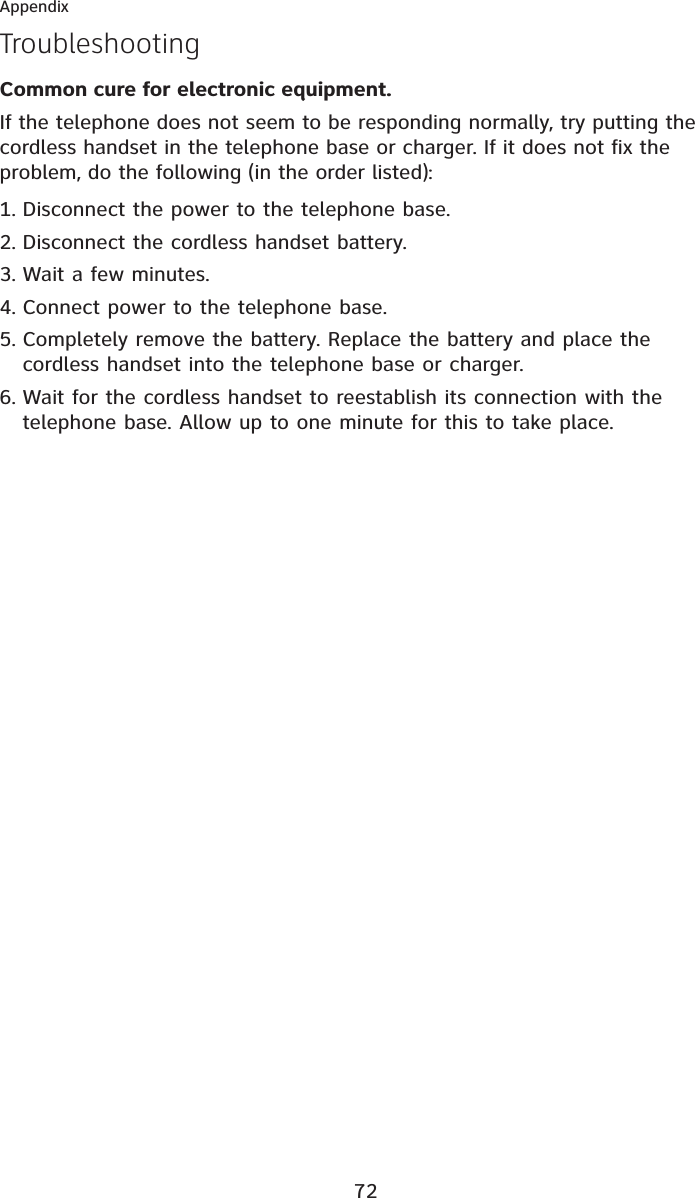
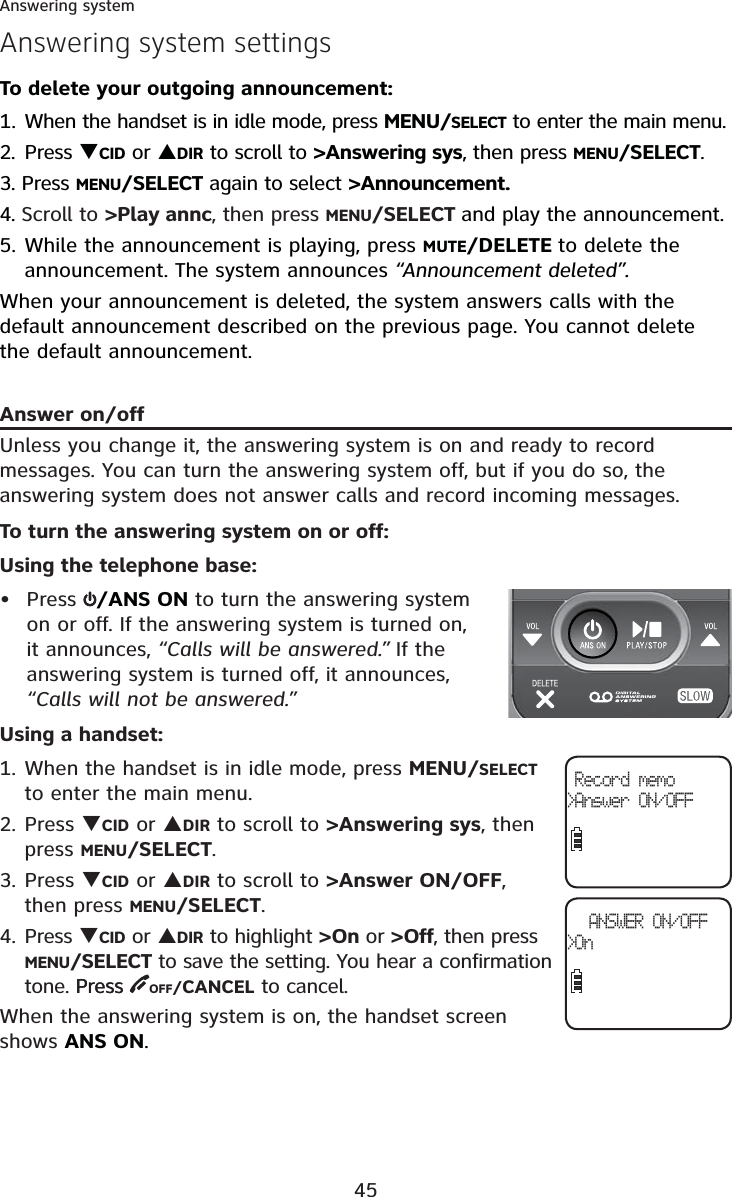
![64AppendixNumber already savedThe telephone number you have entered is already in the directory.Not availableat this timeSomeone else is already using the directory or caller ID history.Other handset is calling(for systems with 2handsets)The other handset is calling.Out of range OR No pwr at baseThe telephone base has lost power, or the handset is out of range.** Paging ** The cordless handset is paged by the telephone base.Phone The handset is on a call.Place in charger The battery is very low. The handset should be charged.Rec mem full The system recording time is full. Rec mem low The system recording time is low. Registering... Please waitThe handset is registering to the telephone base.Registration failedThe handset registration is not successful.Ringer off The ringer is turned off.Ringer muted The ringer is off temporarily while the handset is ringing.Saved An entry has been successfully saved in the directory.Speaker The handset speakerphone is in use.To register HS,see manual.Screen display before handset registration.To screen call,press [SELECT]Press MENU/SELECT to activate call screening.TRANSFER TO:(for systems with 3 or more handsets)You have started transferring a call, and need to enter the desired handset number or choose all handsets.Unable to call. Line in useFailed phone call (the telephone line is in use). Unable to call. Try againYou try to join a call when there are already 4 handsets on that call.You try to make an outside call when another handset is transferring a call with the intercom feature.XX Missed calls There are new calls in the caller ID history.XX New messages There are new messages in the answering system.Handset display screen messages](https://usermanual.wiki/VTech-Telecommunications/80-8564-00/User-Guide-1630492-Page-69.png)