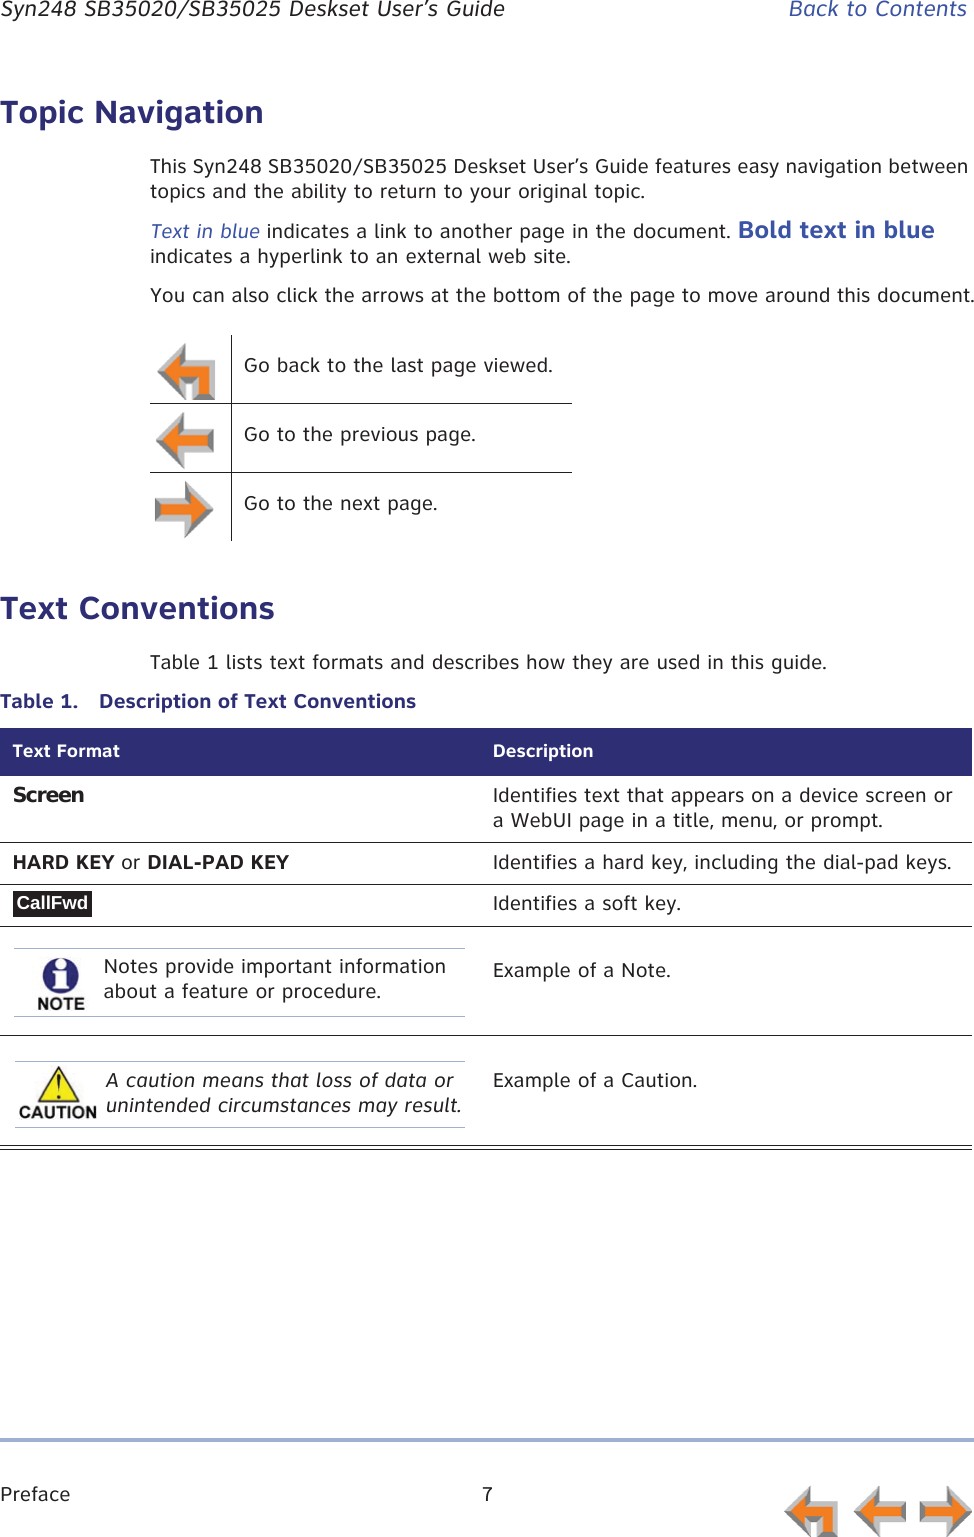
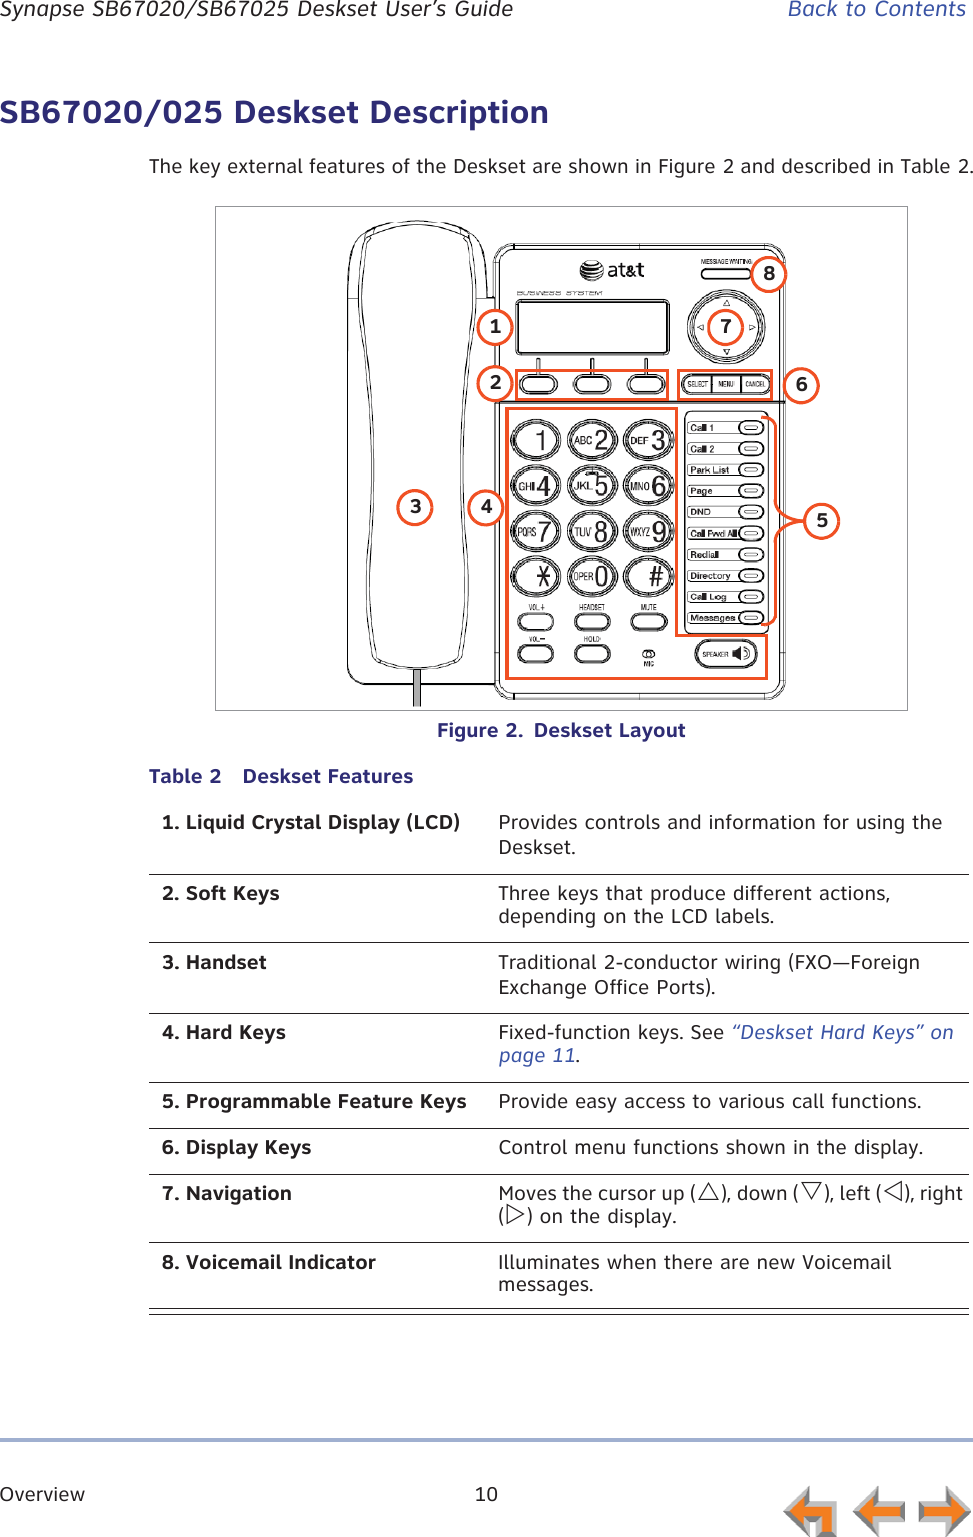
VTech Telecommunications 80-9098-00 1.9GHz DECT Deskset User Manual SB35020 025 DUG
VTech Telecommunications Ltd 1.9GHz DECT Deskset SB35020 025 DUG
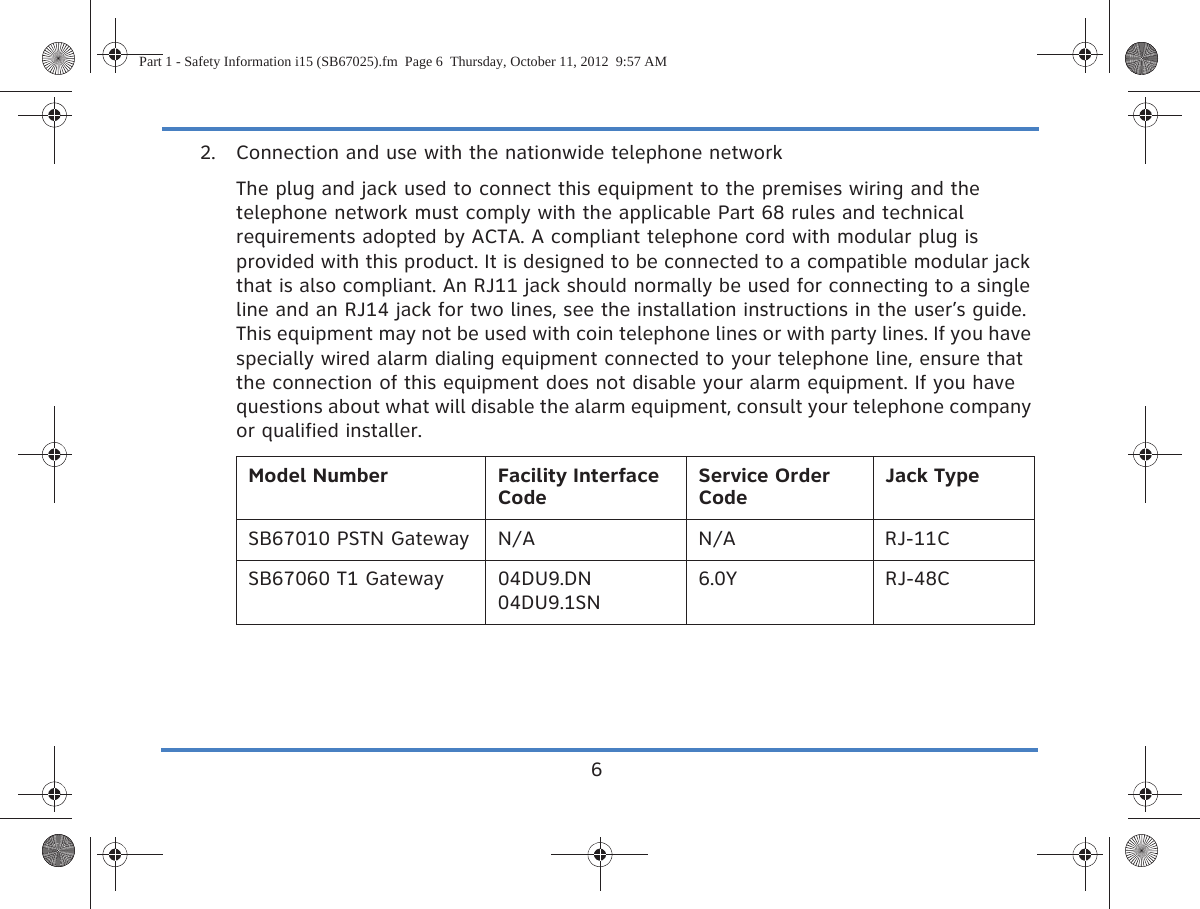
UserManual.wiki
>
VTech Telecommunications
>
80 9098 00 User Manual
User Manual
Navigation menu
Upload a User Manual
Namespaces
Wiki Guide
HTML
PDF
Info
Views
User Manual
Discussion / Help
Navigation
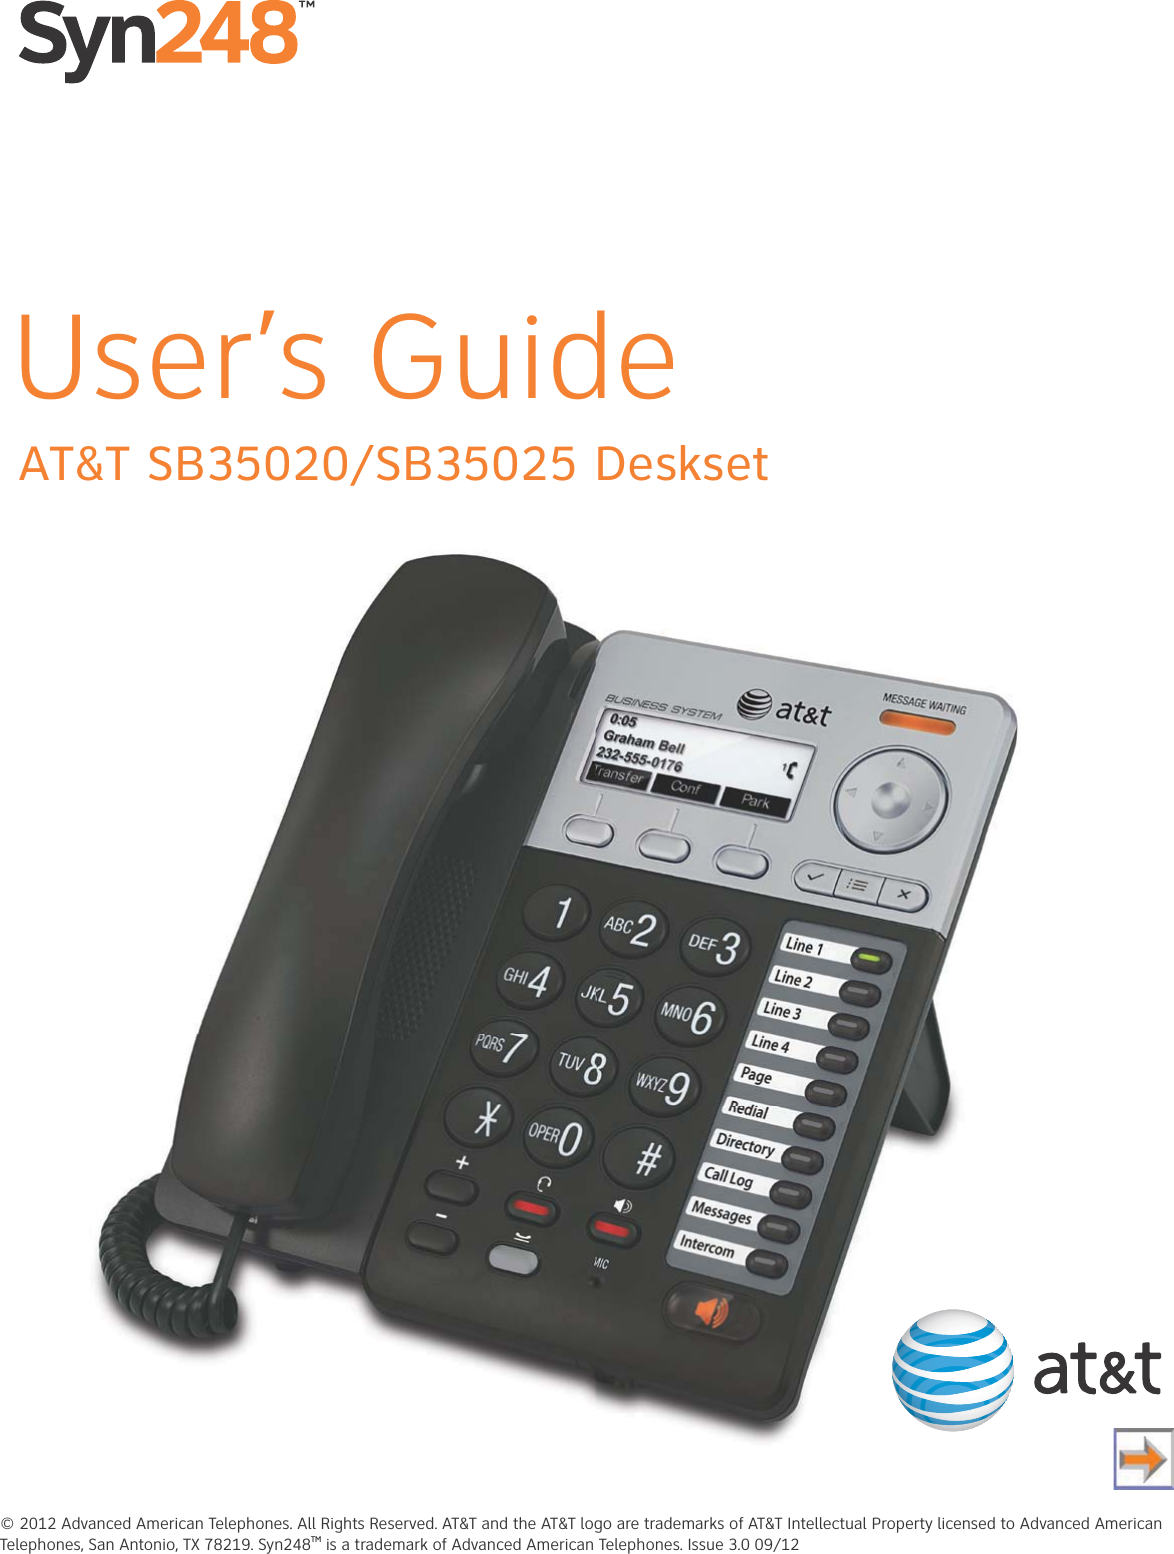


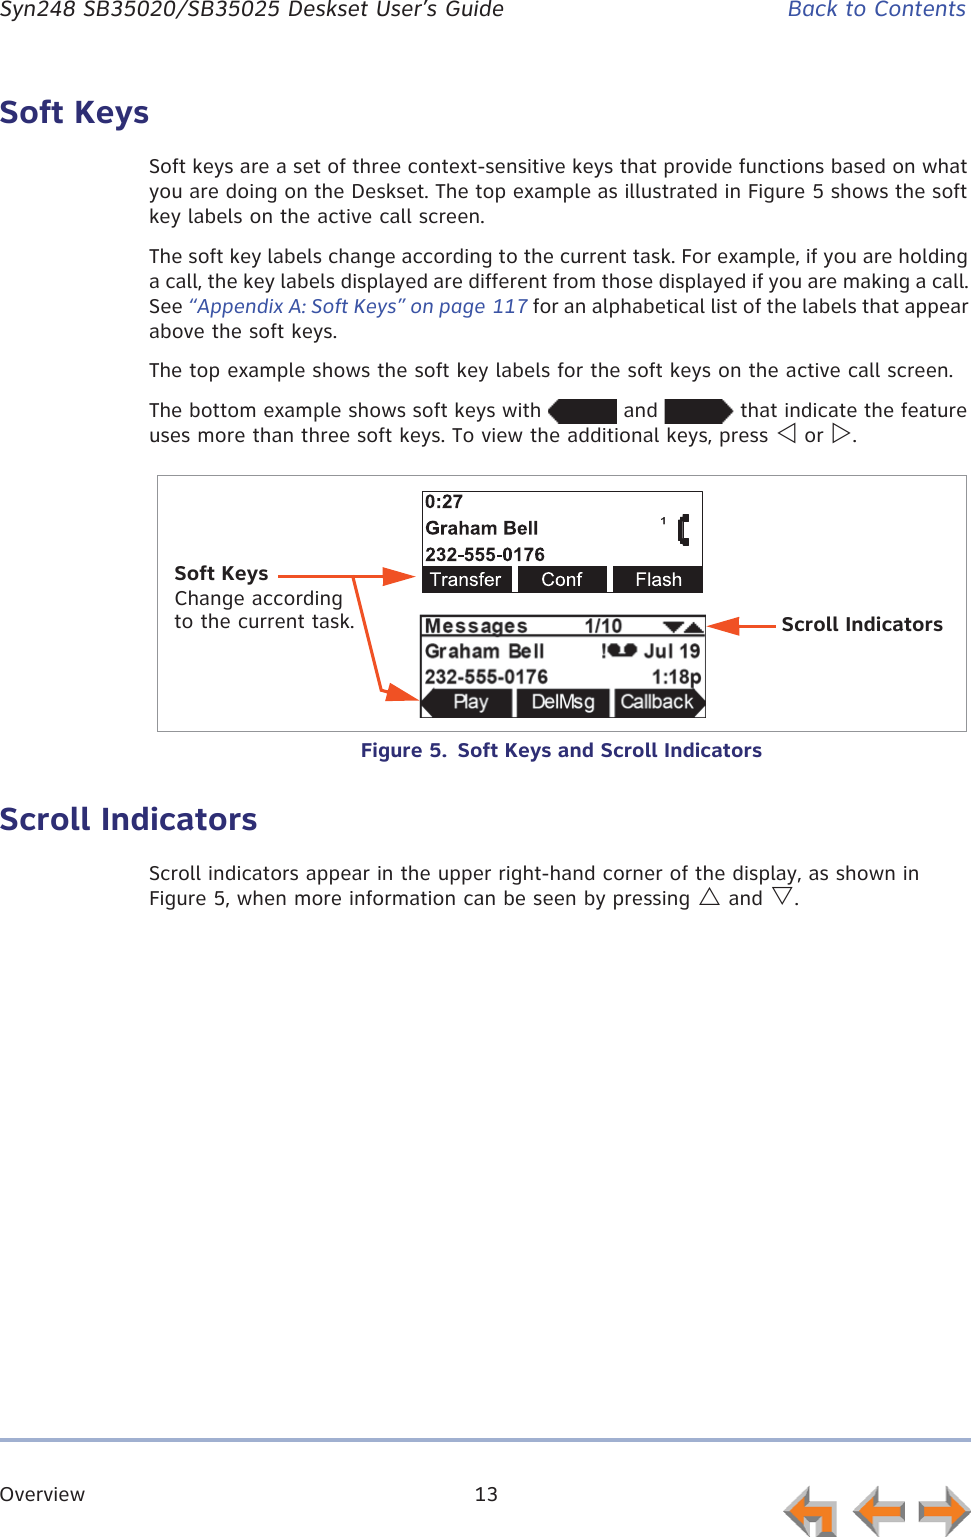

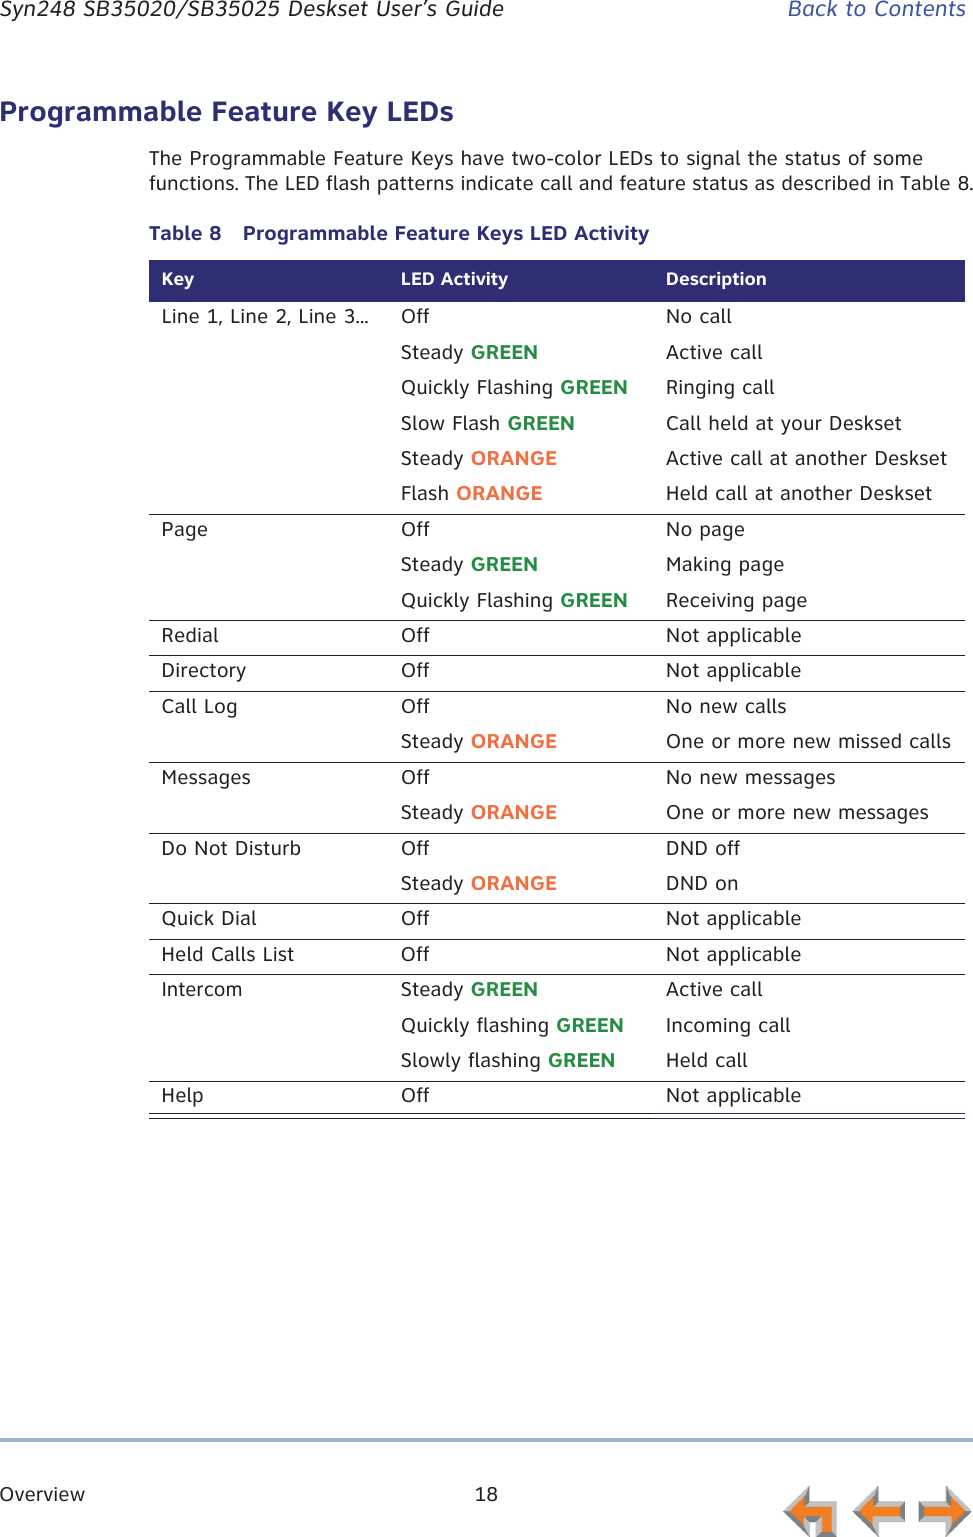


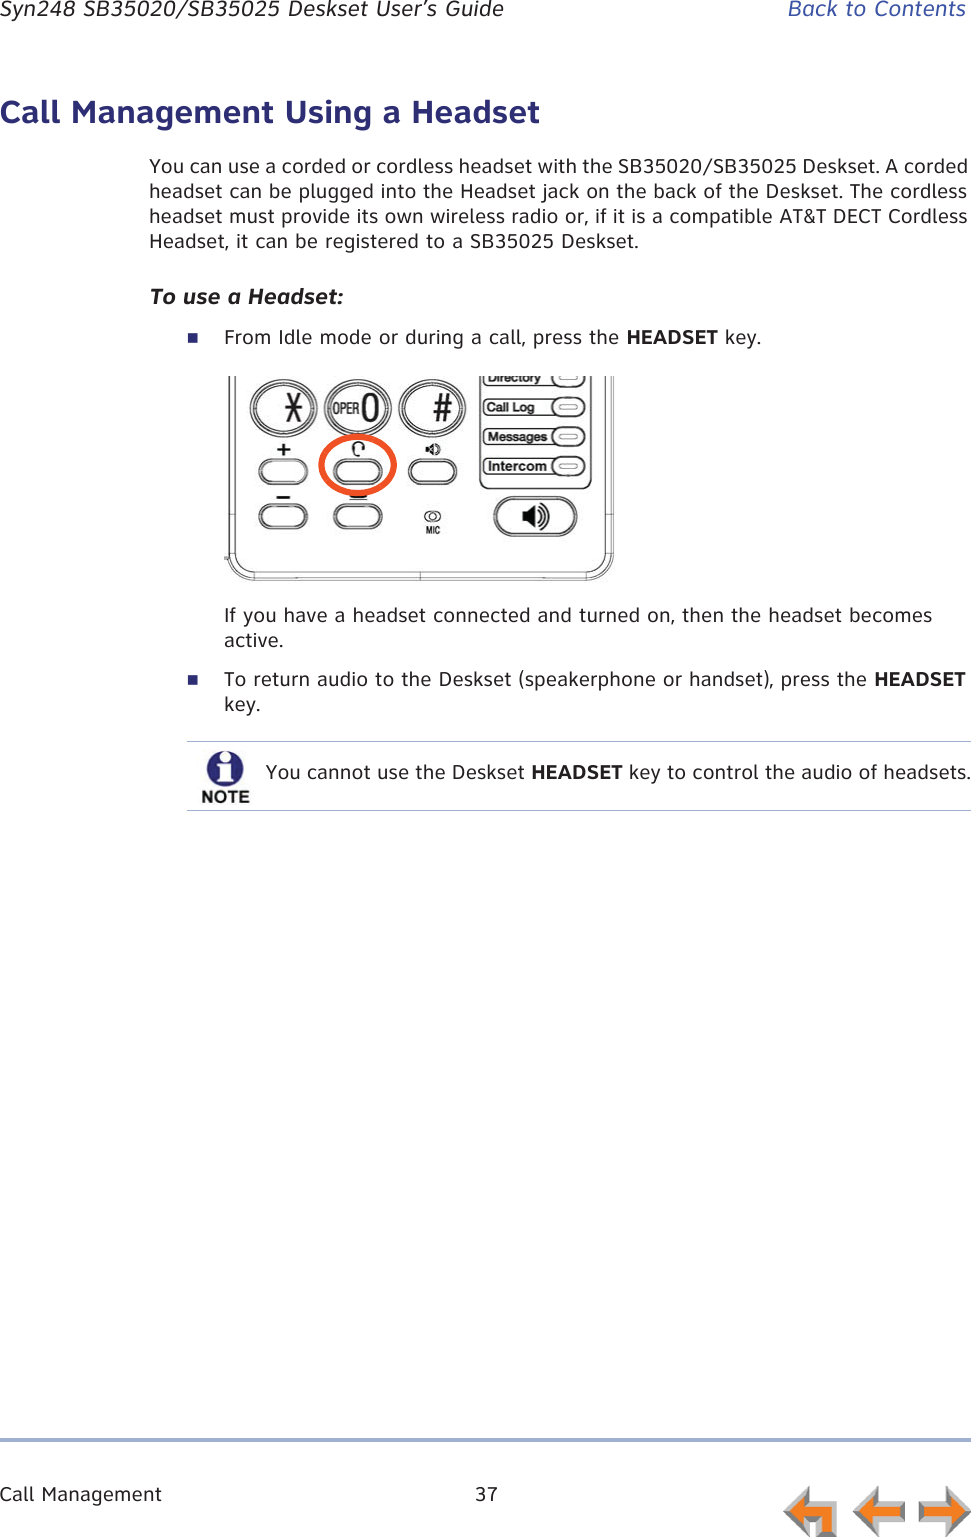
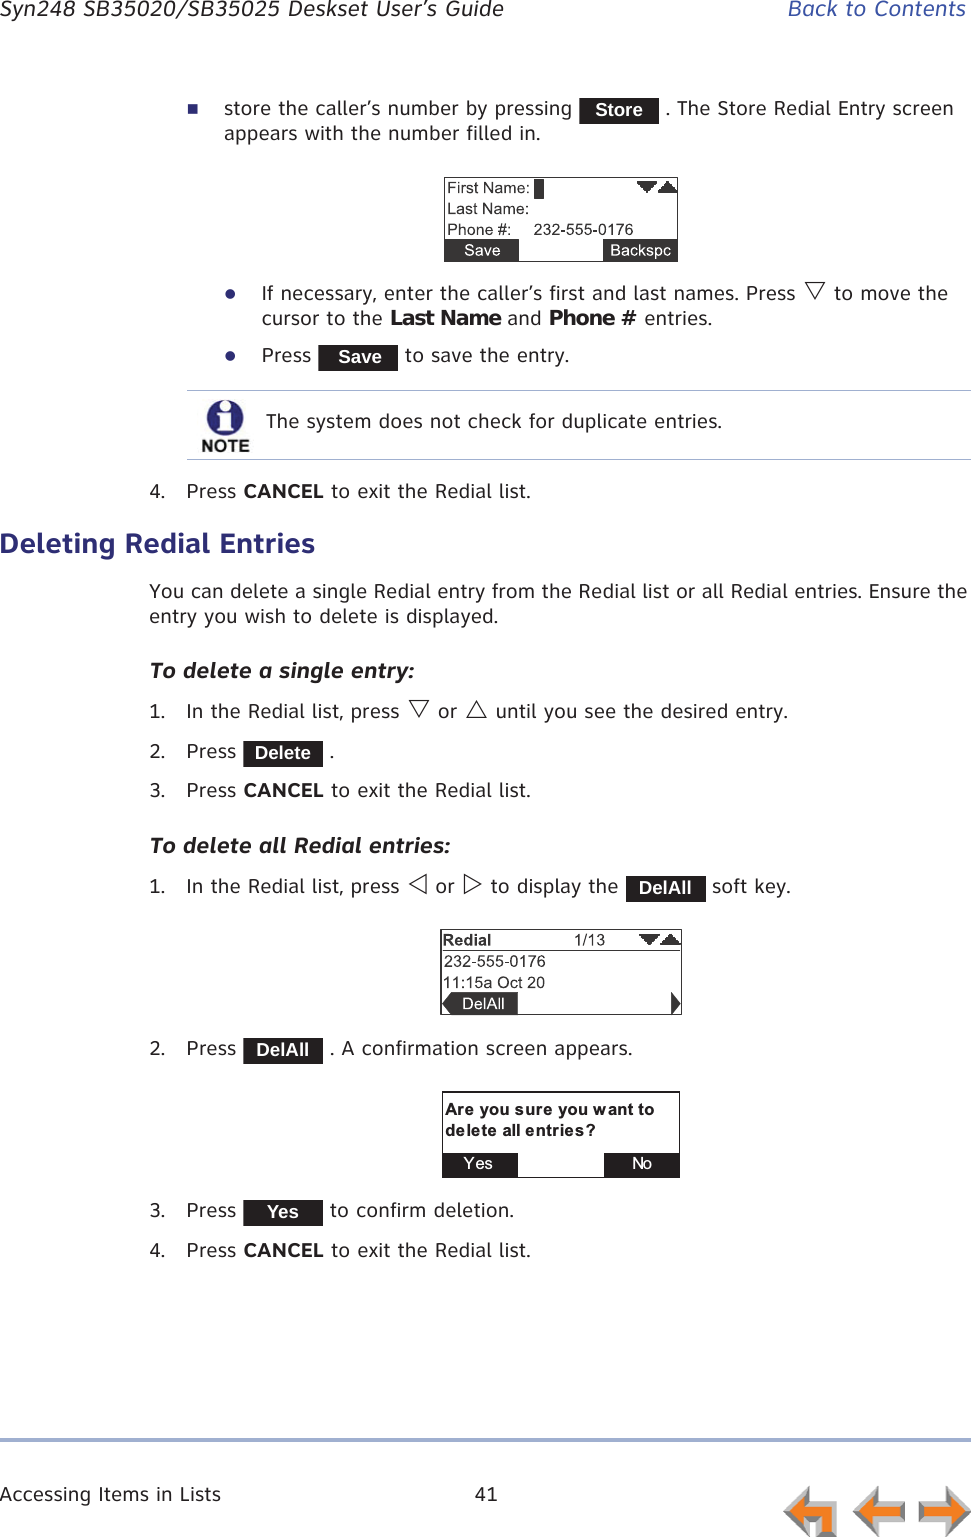
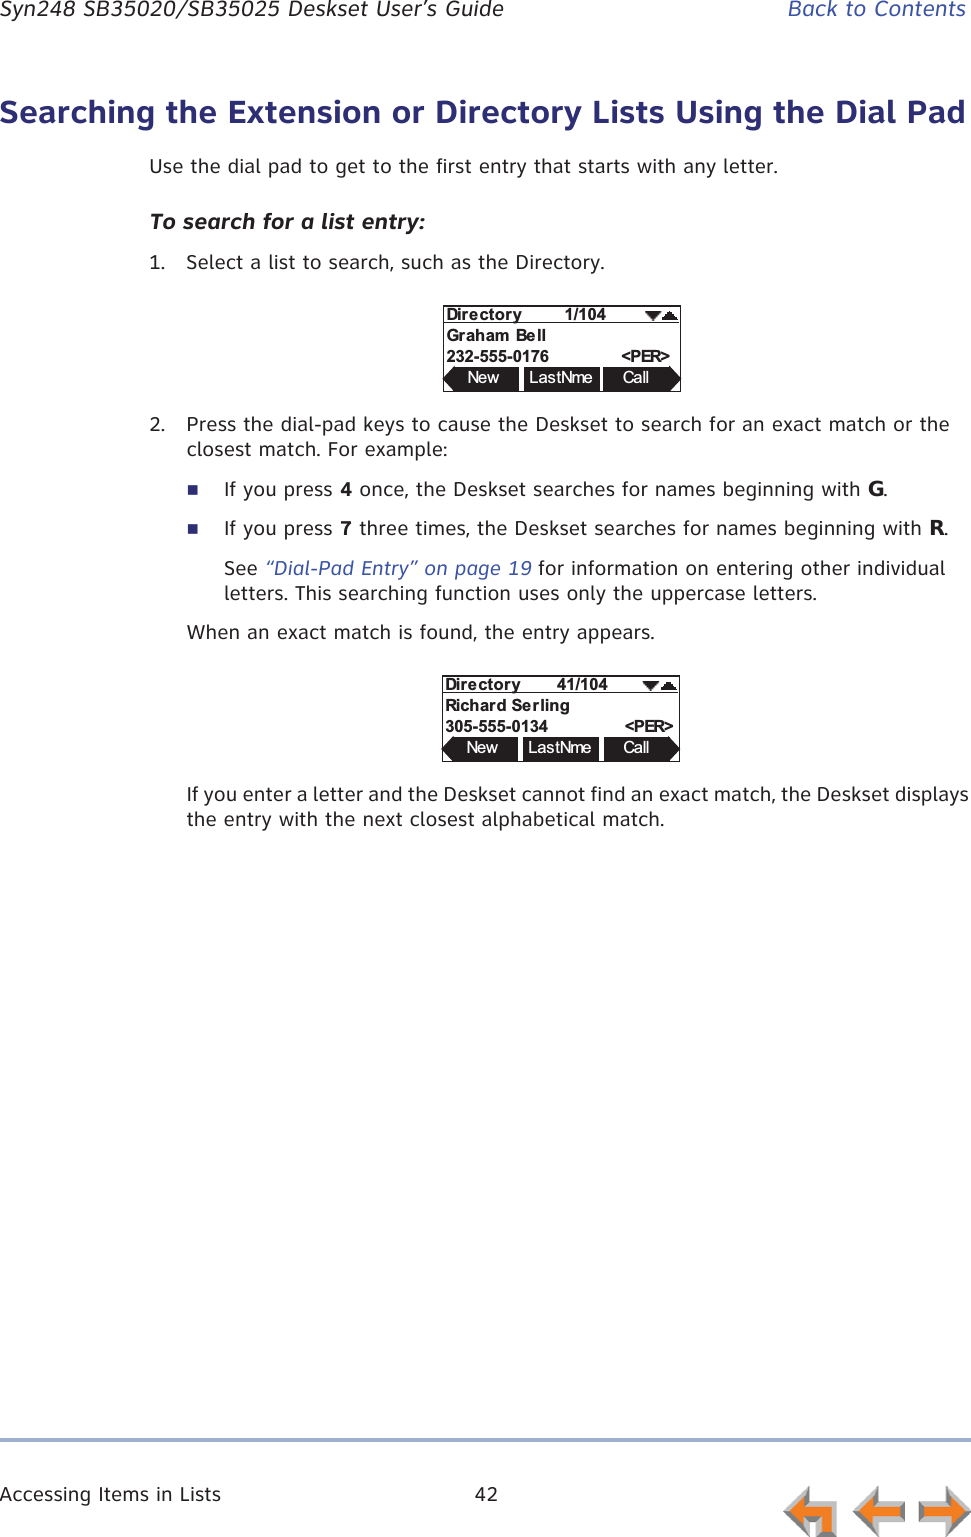
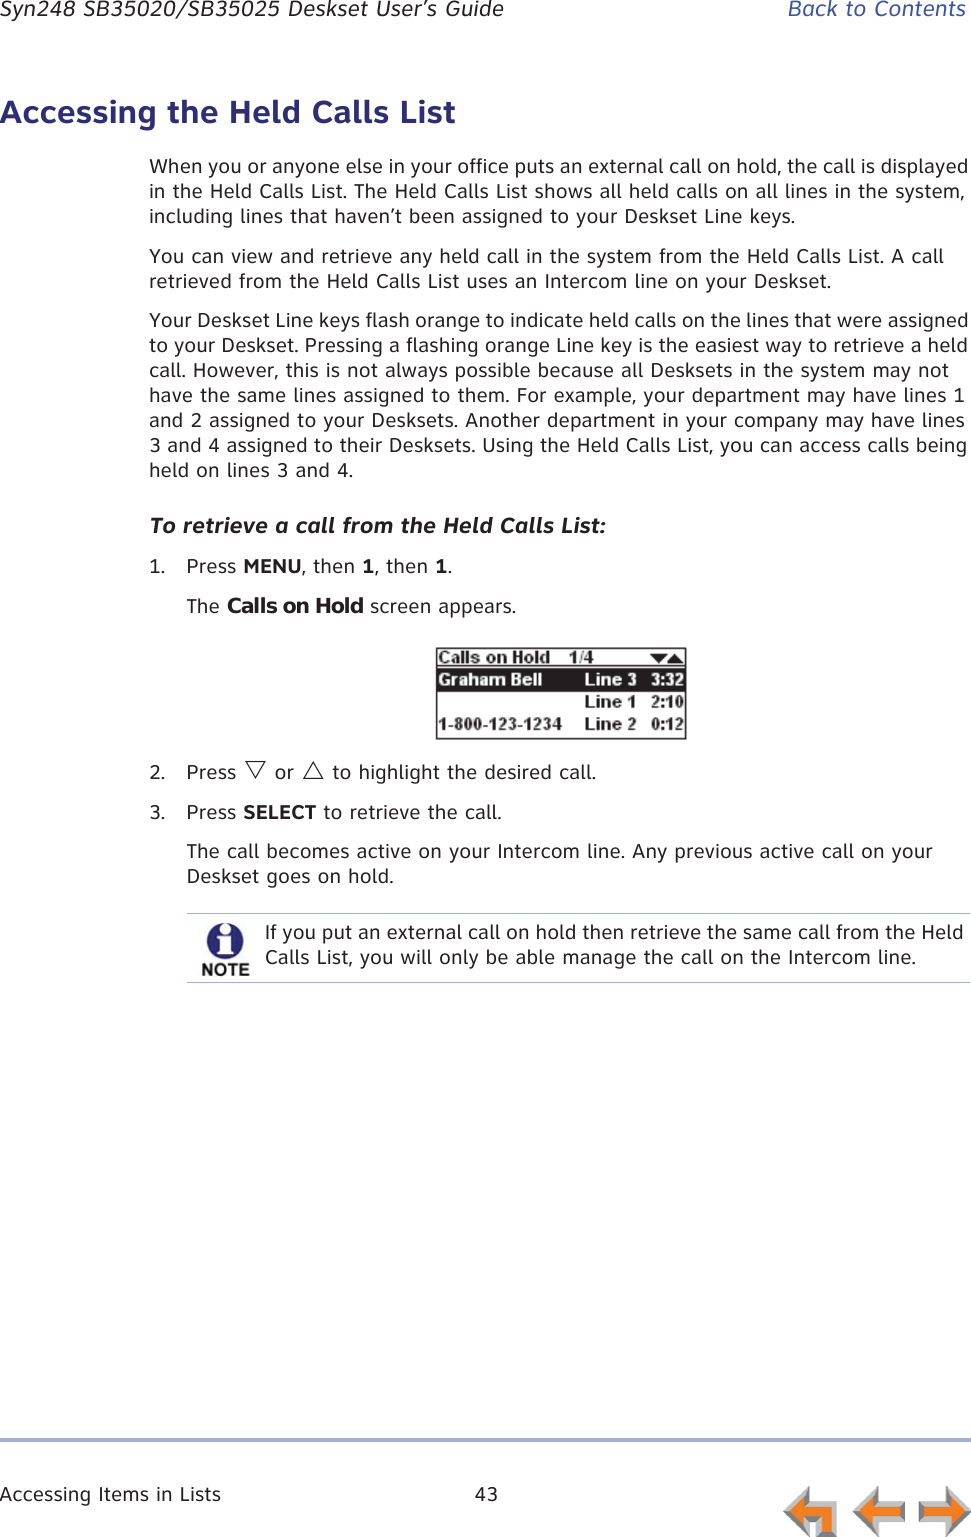
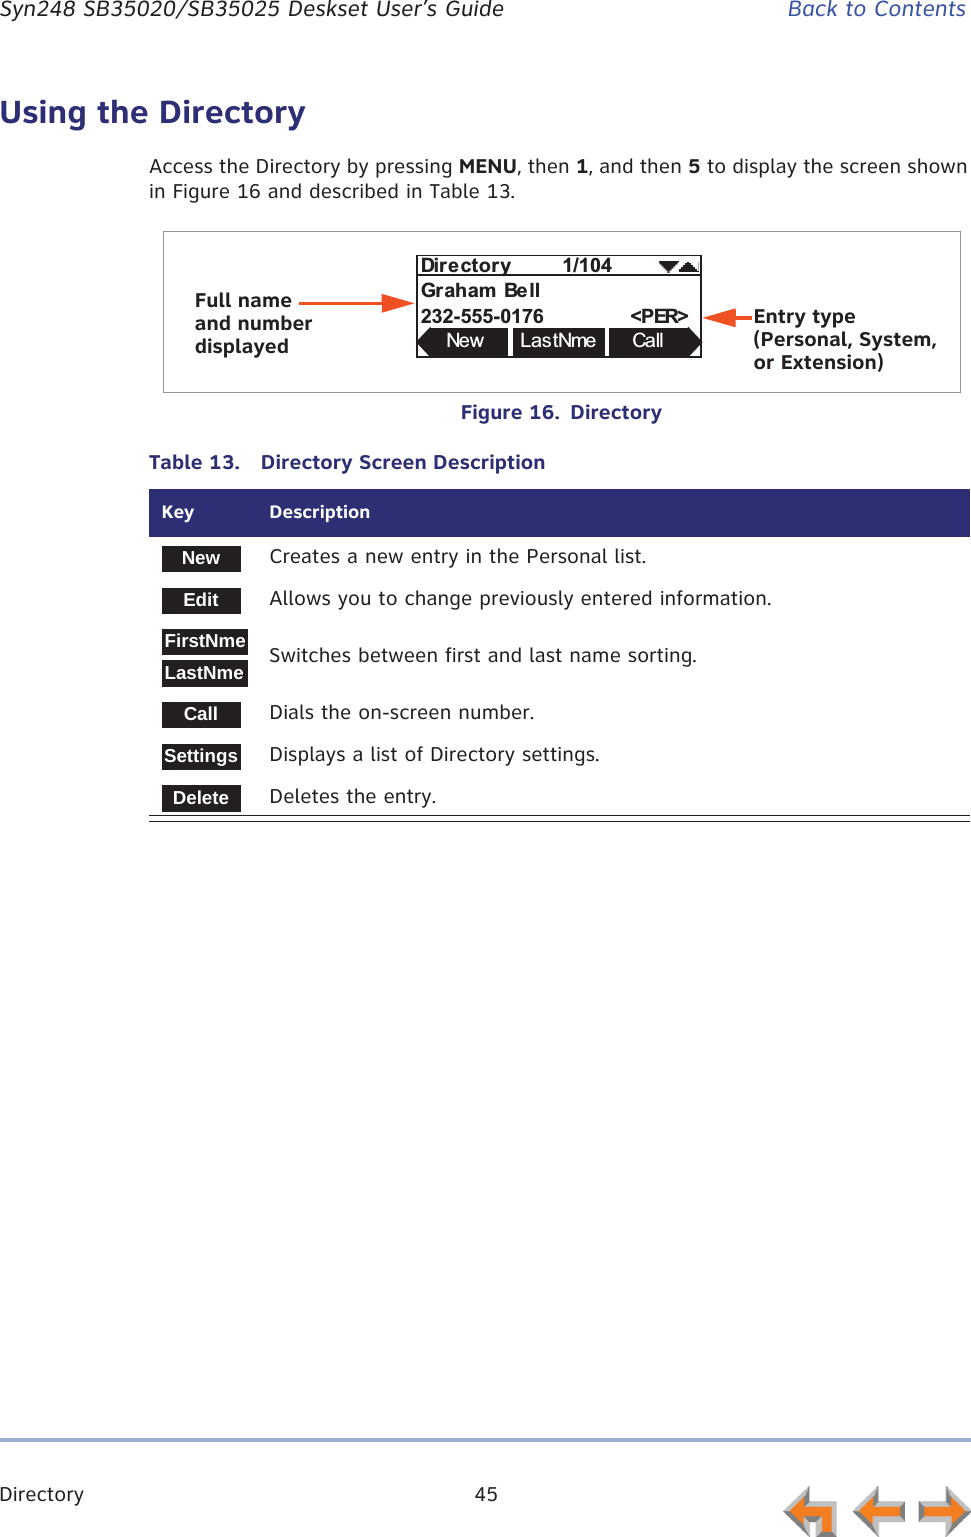

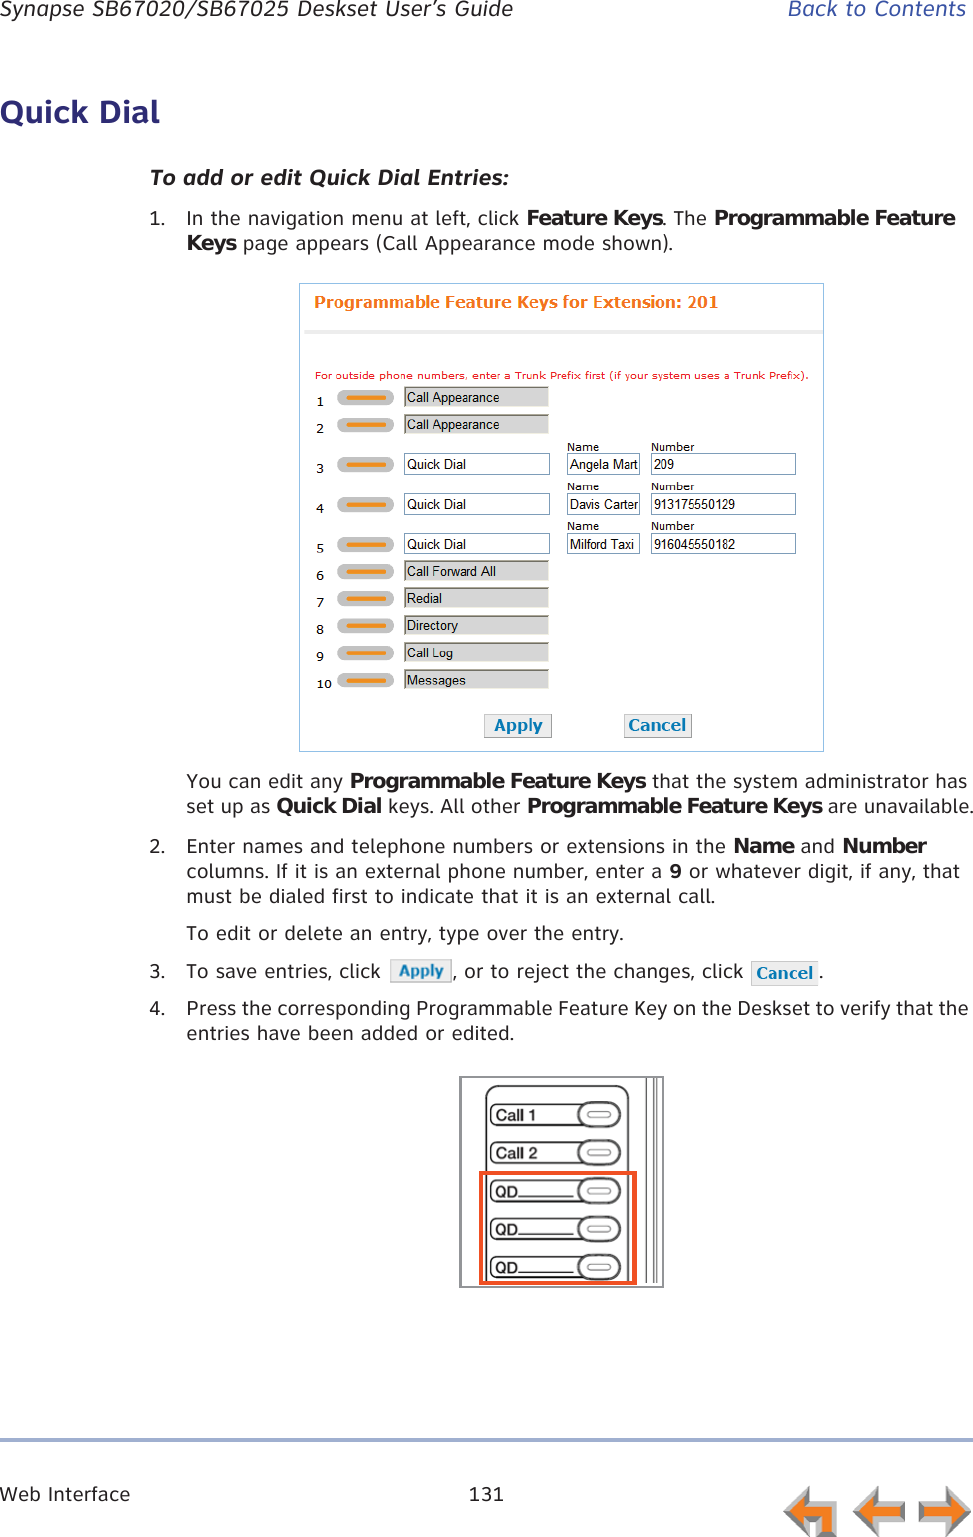
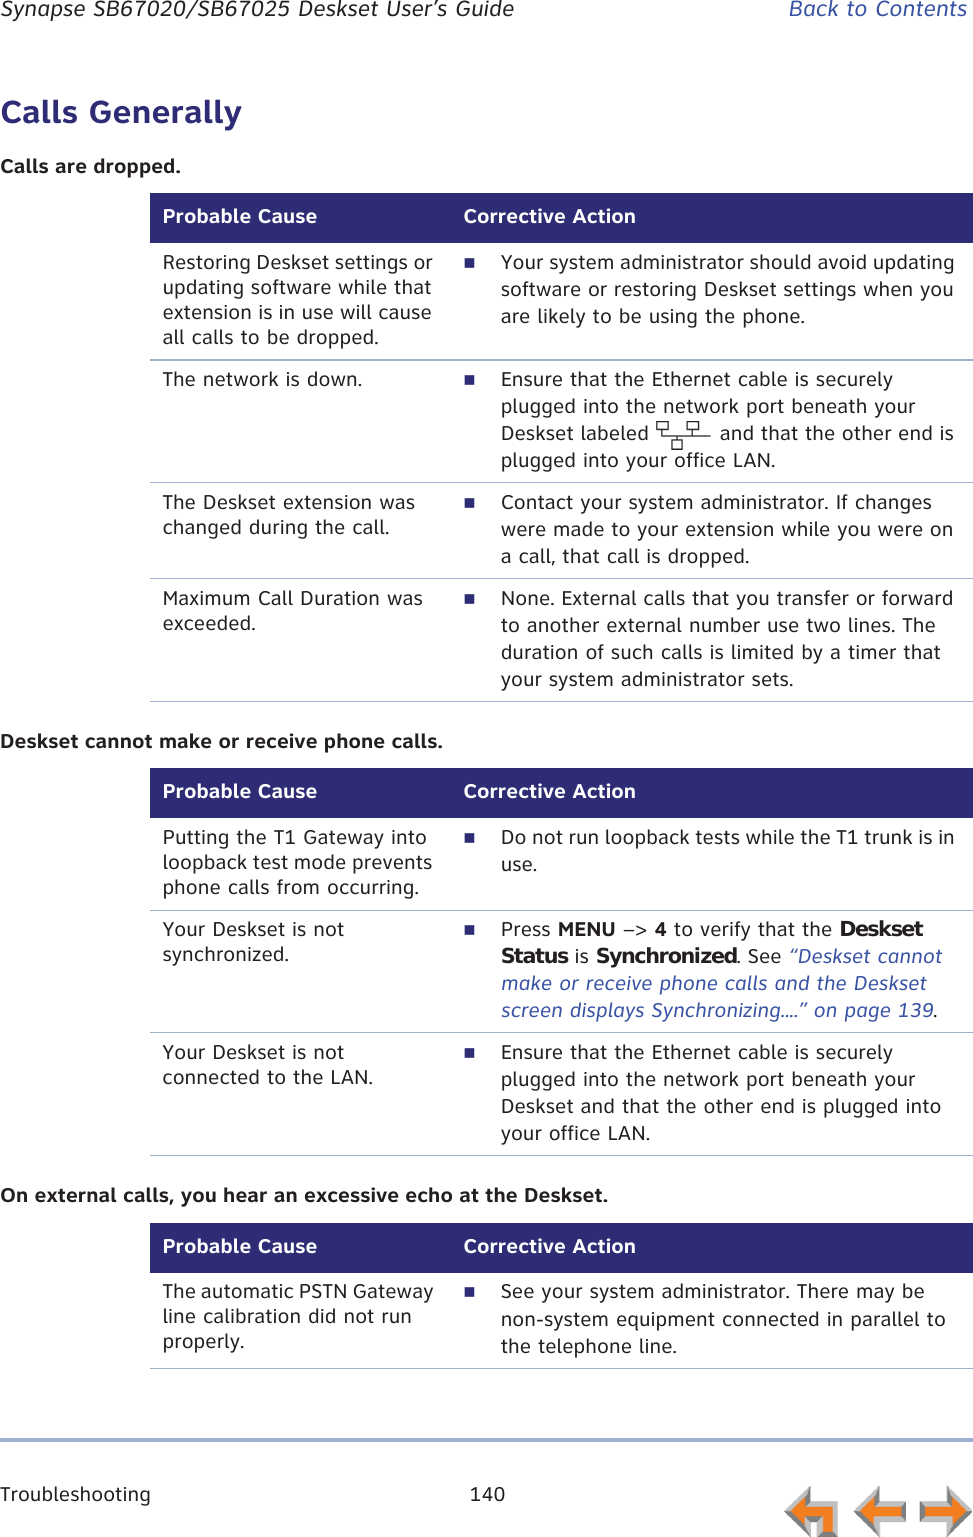
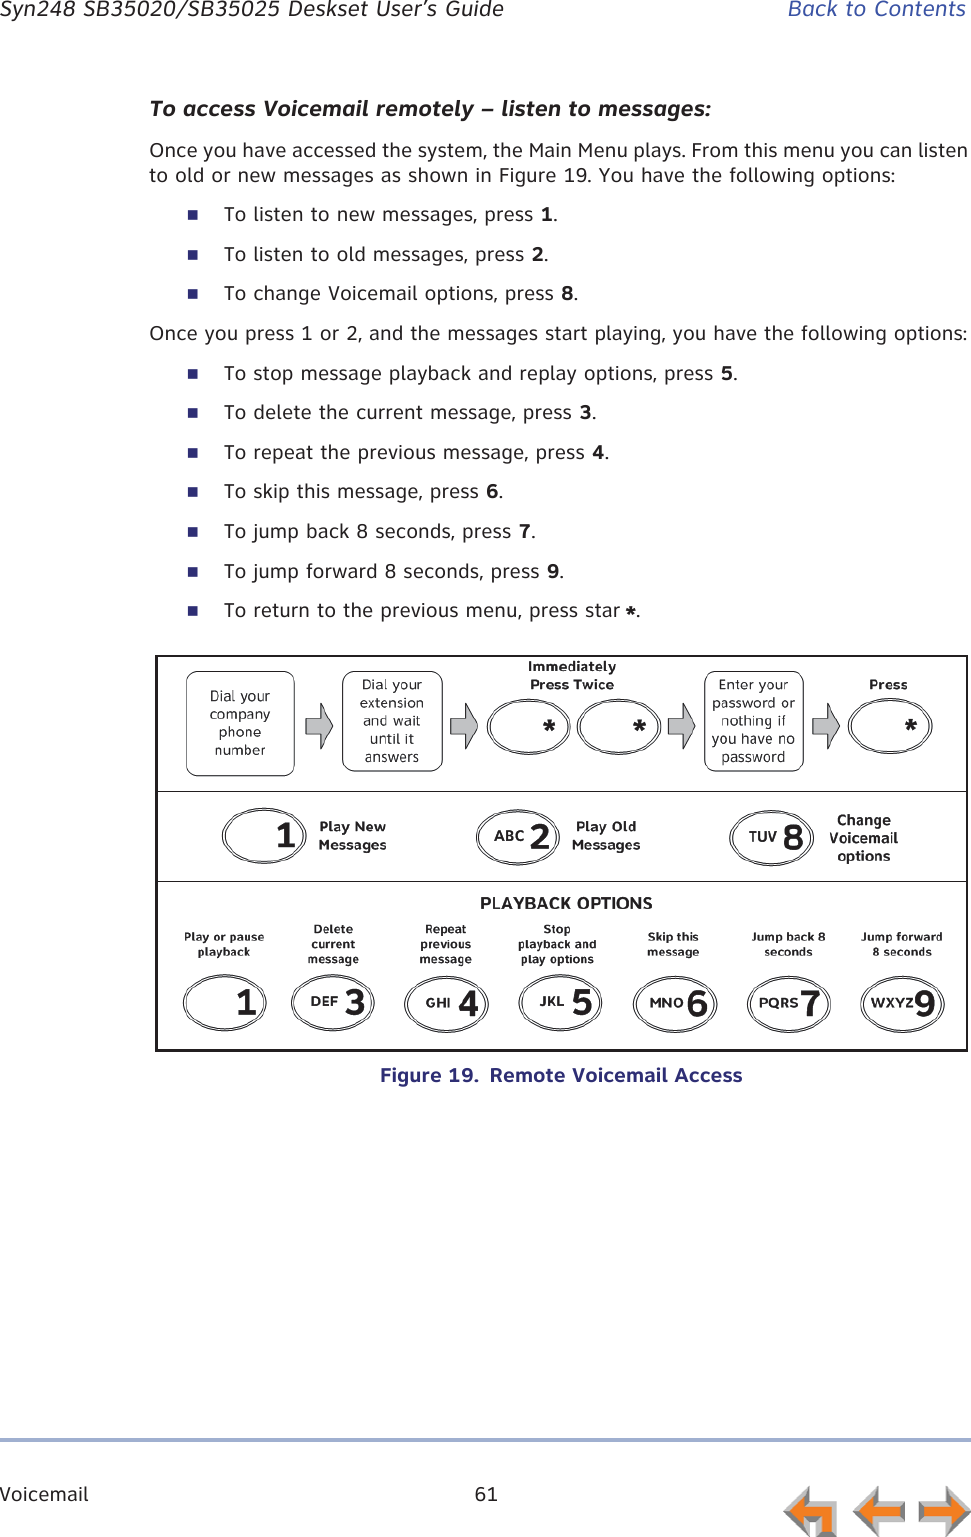
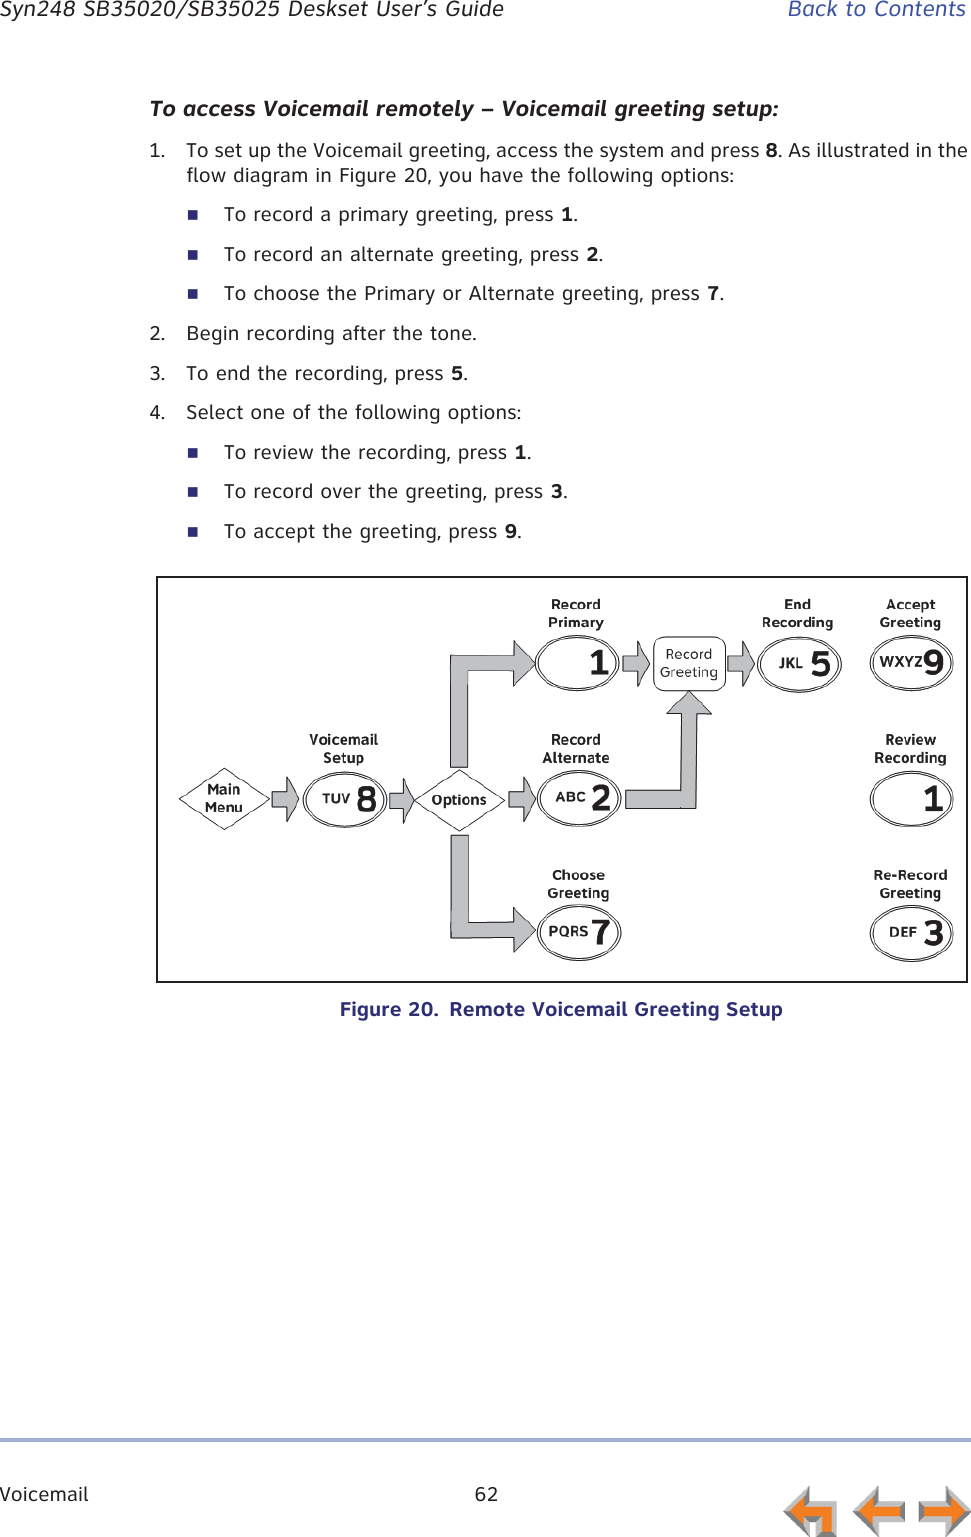
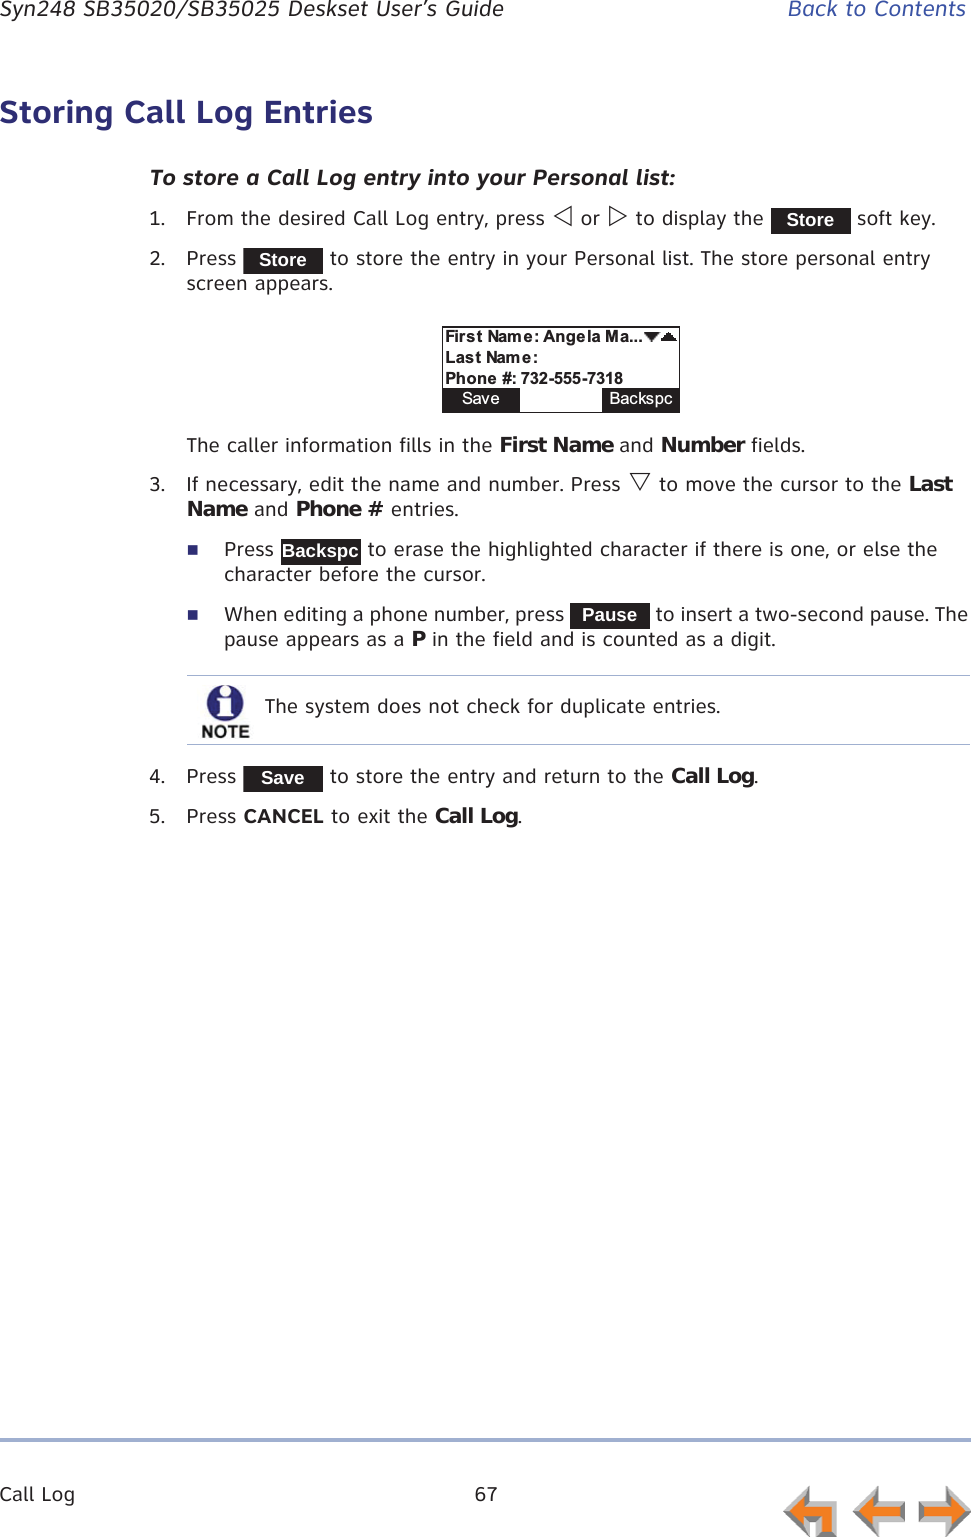
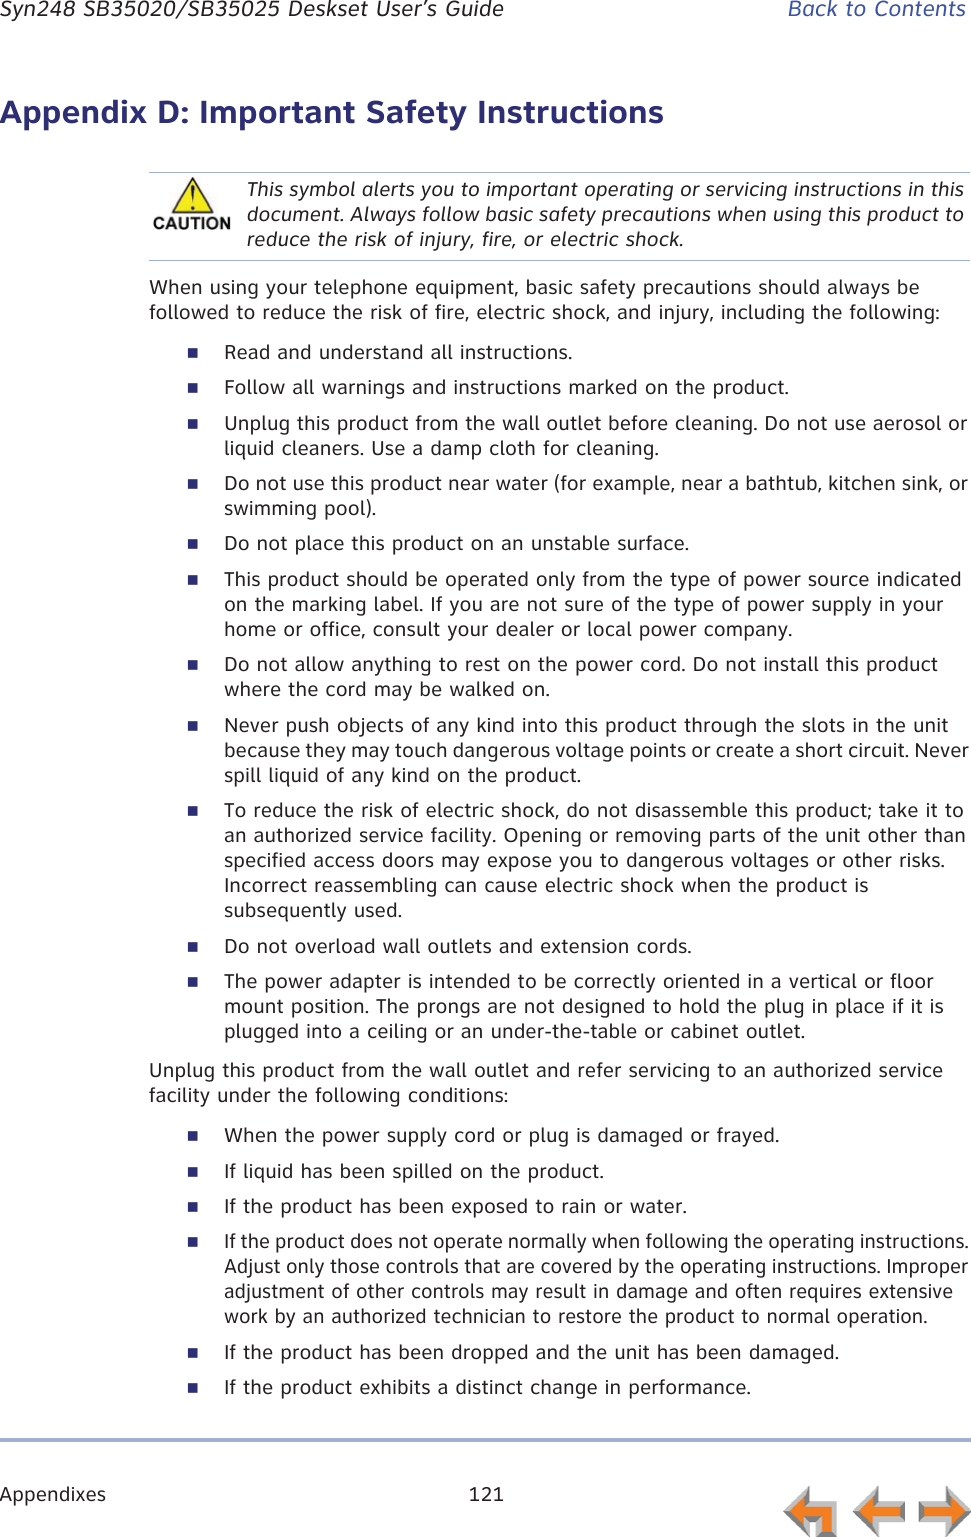
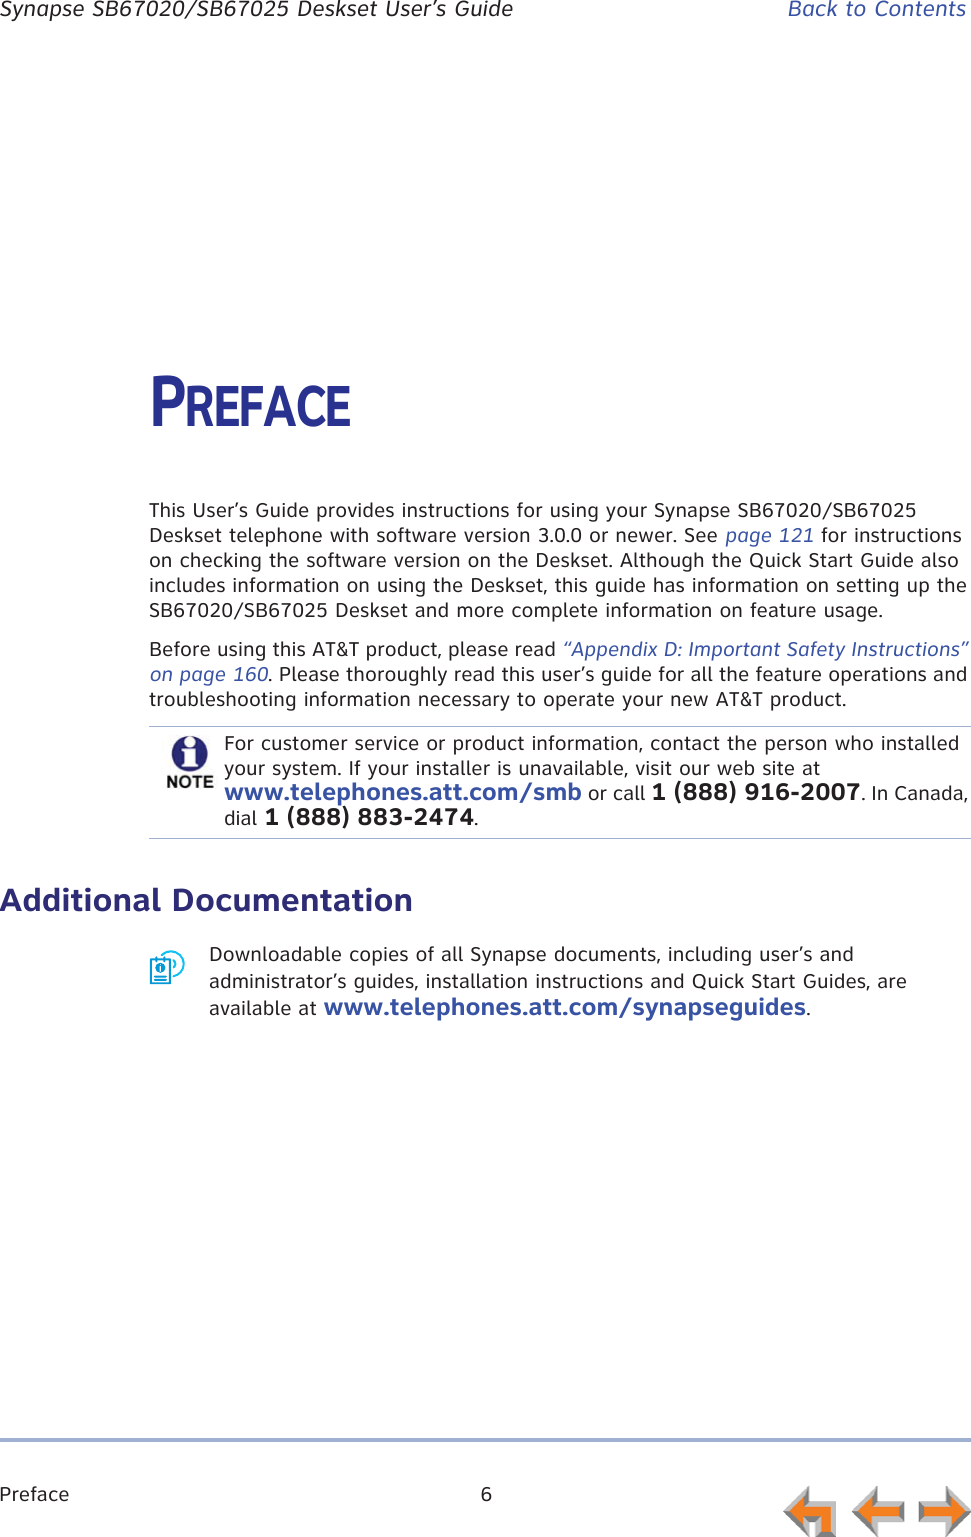
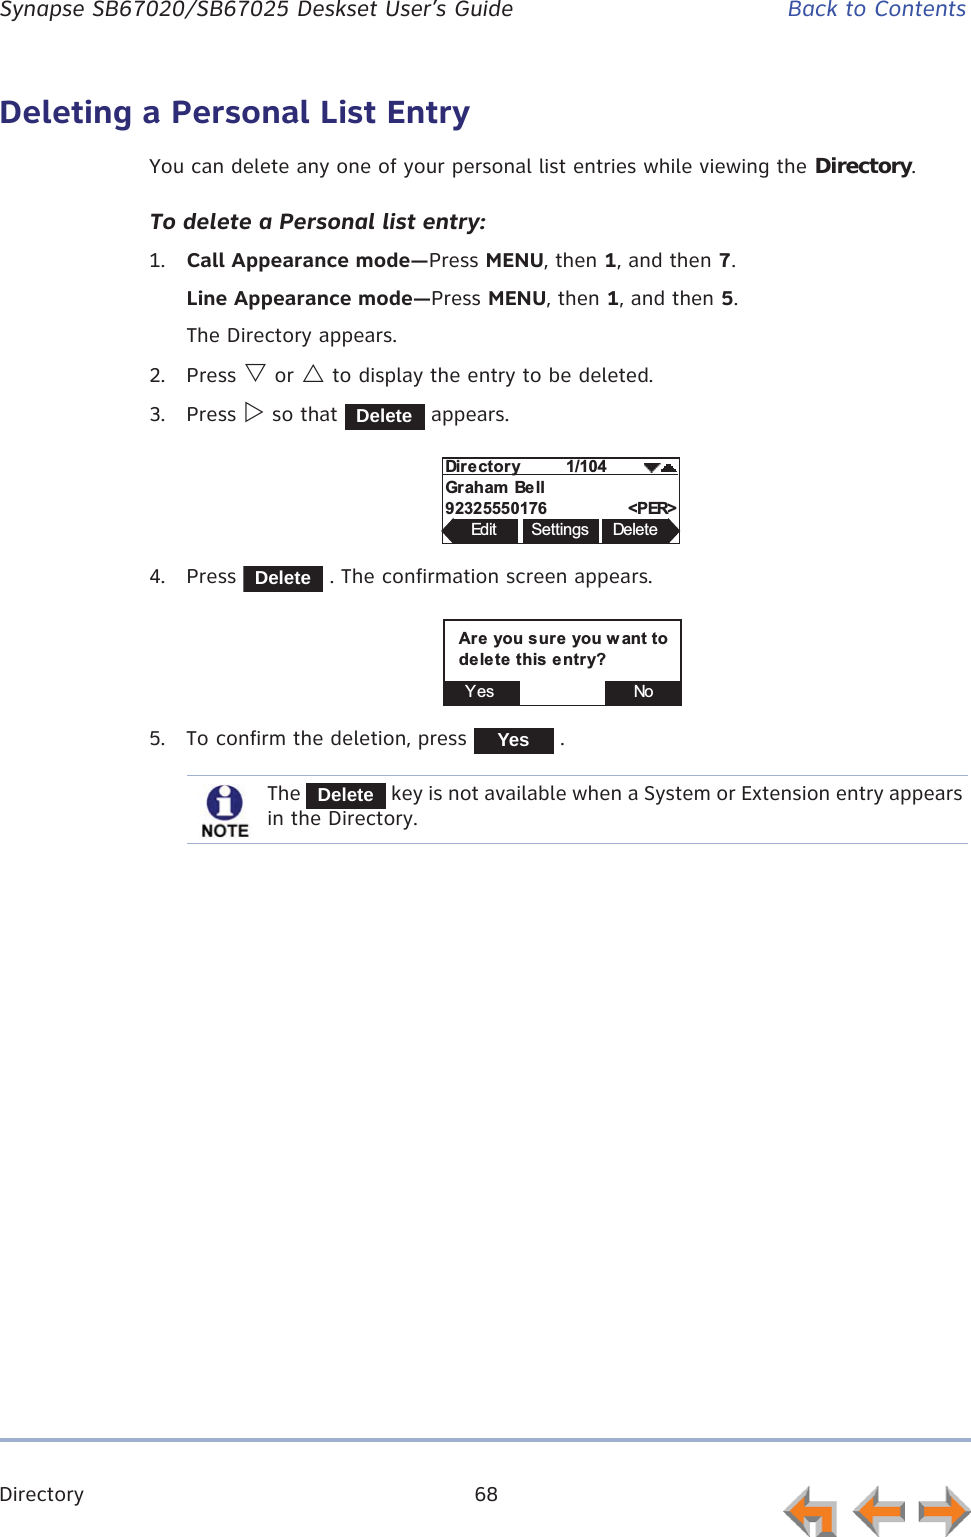
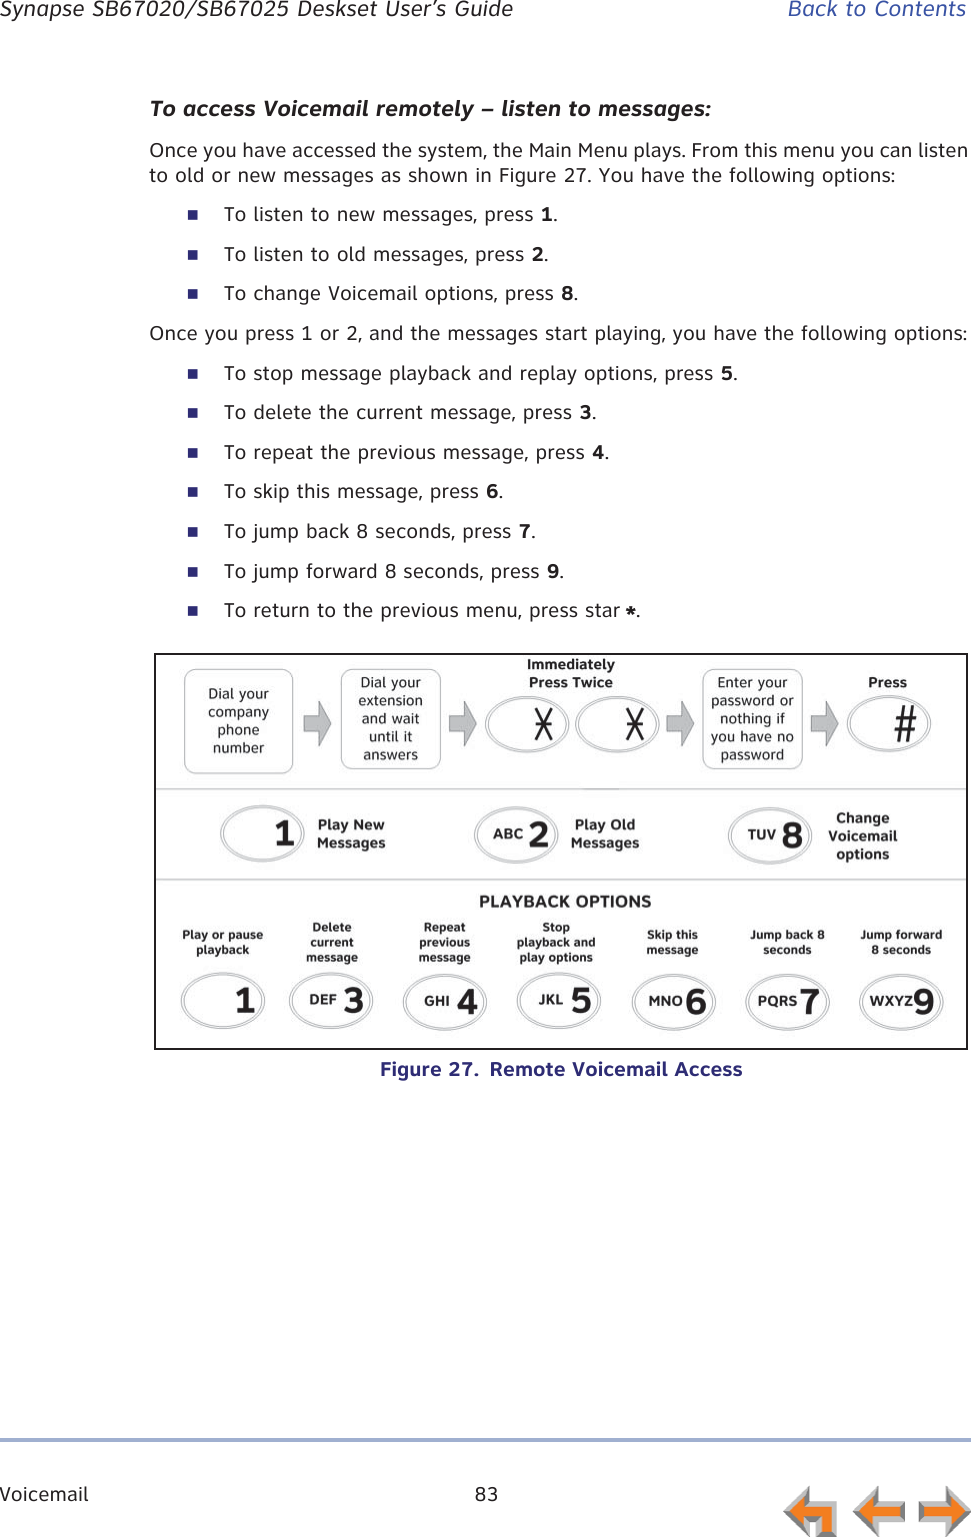
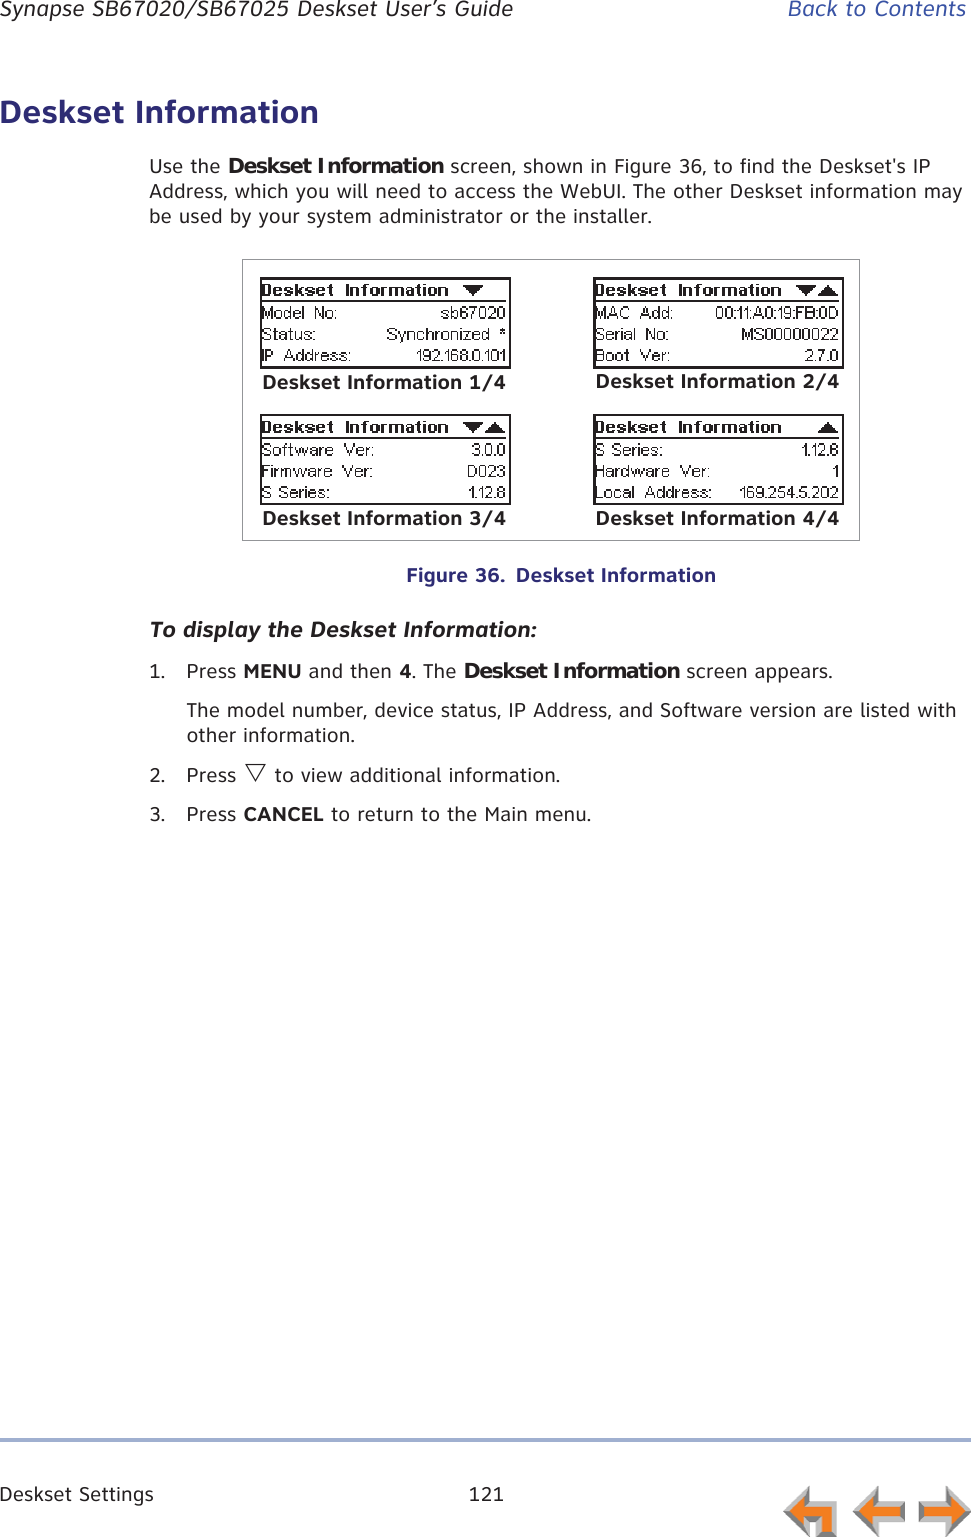
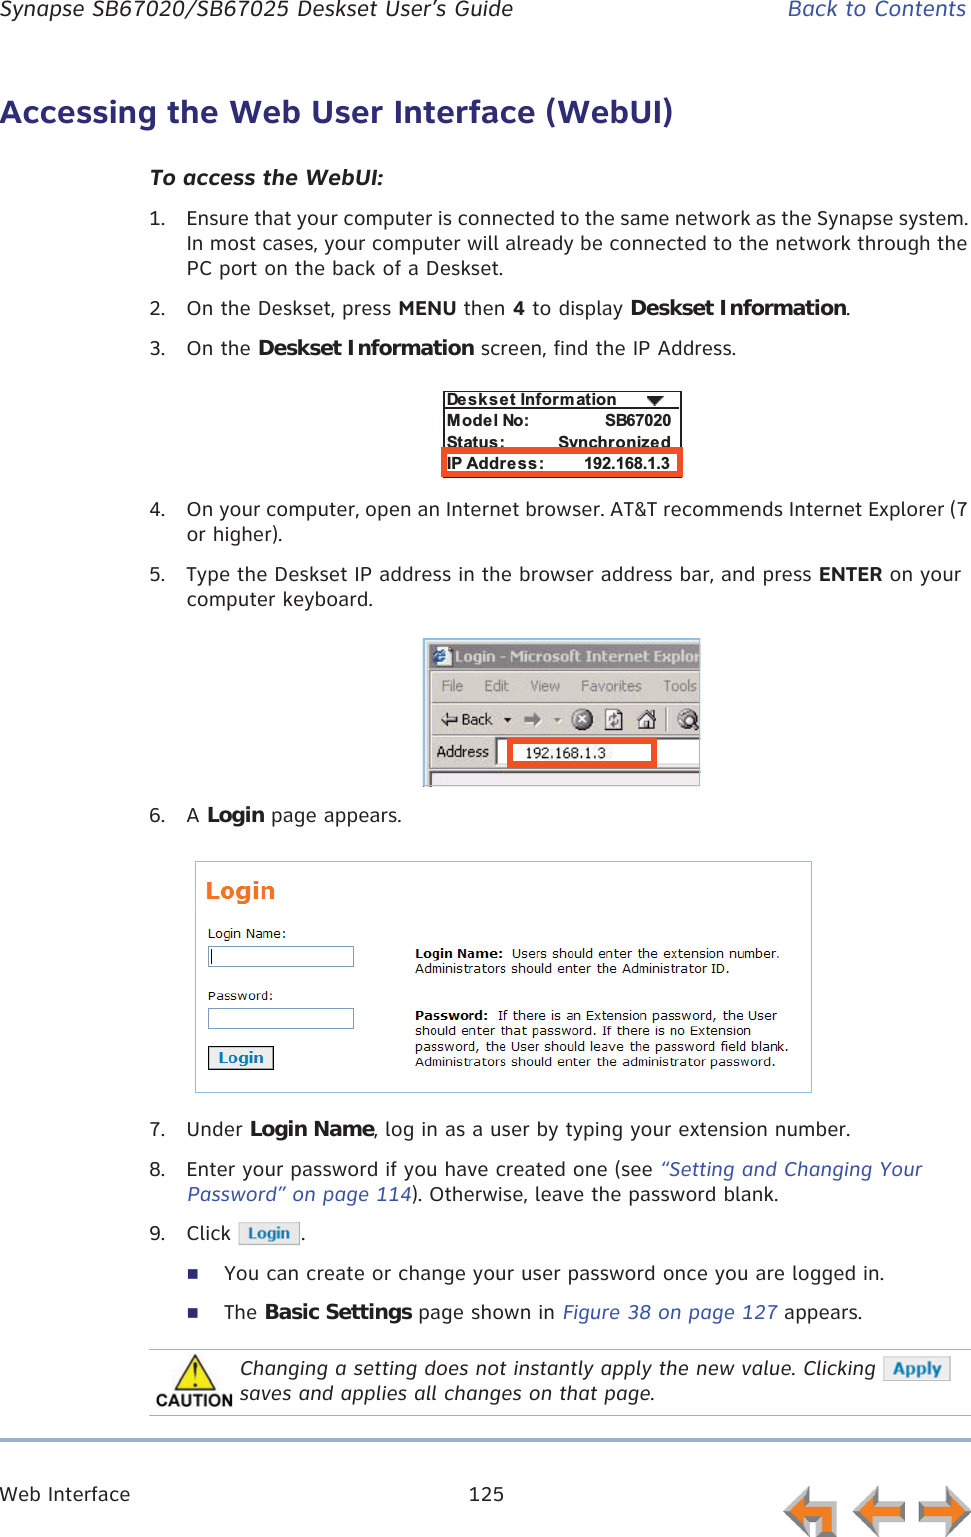
![Voicemail 55 Syn248 SB35020/SB35025 Deskset User’s Guide Back to ContentsTo activate a greeting:1. Press MENU, then 2, then 1, and then 1 to display the Voicemail Greetings menu.Press U or V to highlight the Primary, Alternate, or Pre-Set greeting to be played to outside callers.2. Press to make the highlighted greeting the greeting played to callers. The system checks to see if the selected greeting has been recorded.If the selected greeting has been recorded, [ACTIVE] appears beside the selected greeting.If a greeting has not been recorded, Greeting not recorded appears. To record a Primary or Alternate greeting, see “To record a Primary or Alternate greeting:” on page 54.Accessing Your MessagesTo access an entry from Voicemail:1. Press MENU, then 1, and then 3.If necessary, use the dial pad to enter your user password and press SELECT.The Messages screen appears.2. Press V or U until you see the desired Messages entry.3. Press CANCEL to exit the Voicemail list.When you highlight the Pre-Set greeting, the PlayRec soft key changes to Play. You cannot delete or record over the Pre-Set greeting.ActivateOnce you have entered your password, you do not have to enter it again while you are reviewing messages. However, if you exit the Messages screen, you will need to enter your password to access the Message list.Mess ages 1/10Graham Bell Jul 19232-555-0176 1:18pPla y DelMs g Callback!](https://usermanual.wiki/VTech-Telecommunications/80-9098-00/User-Guide-1845770-Page-55.png)


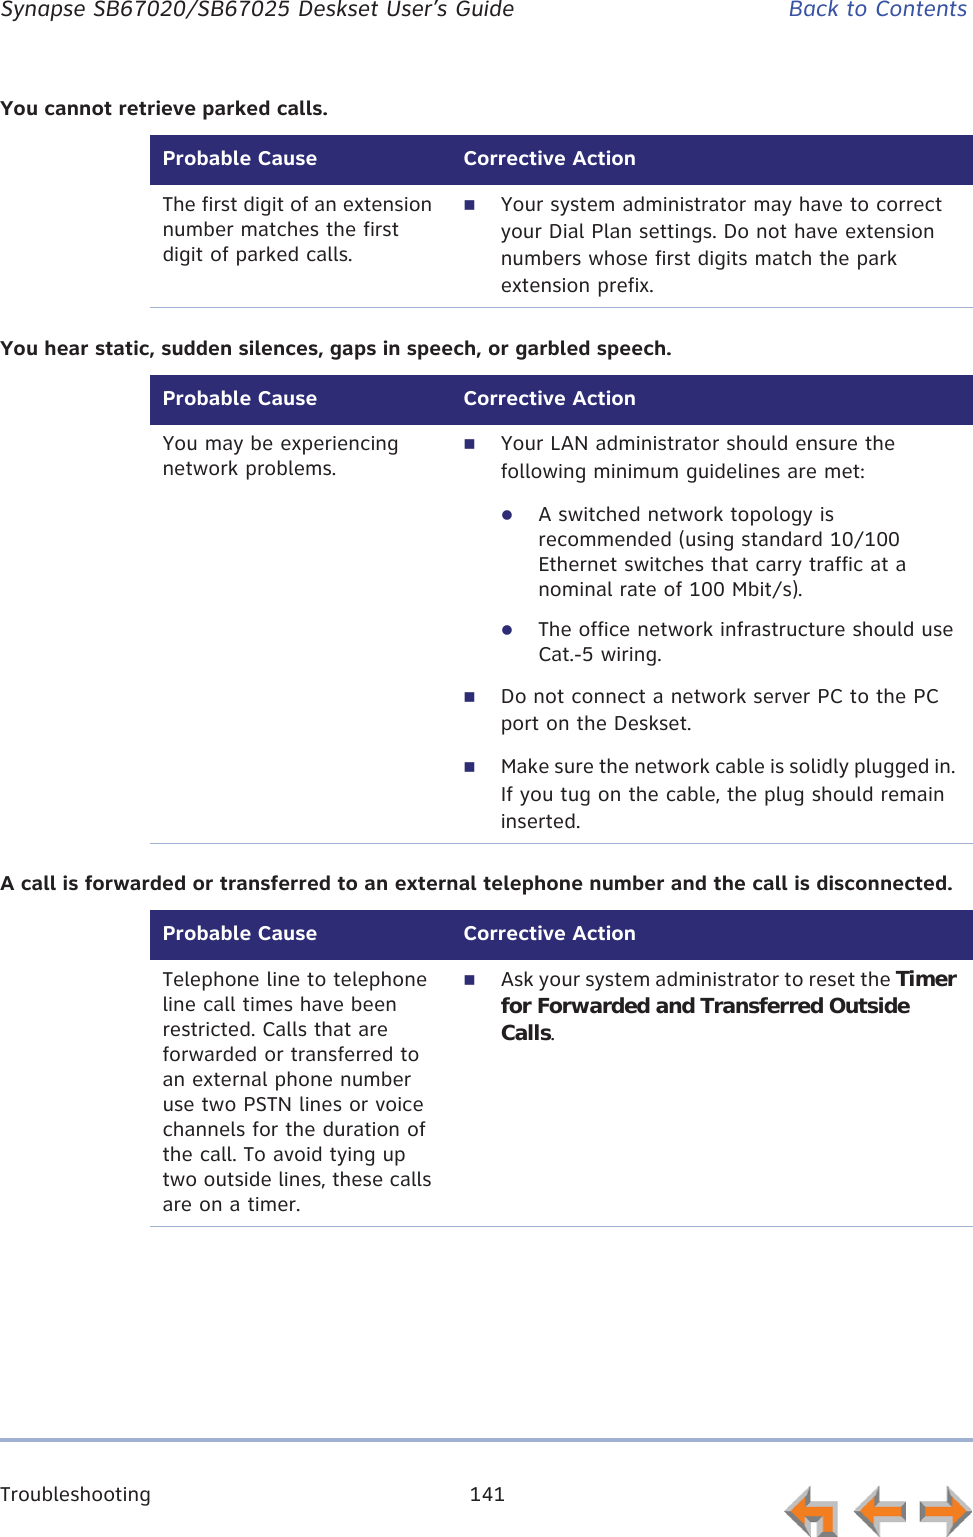
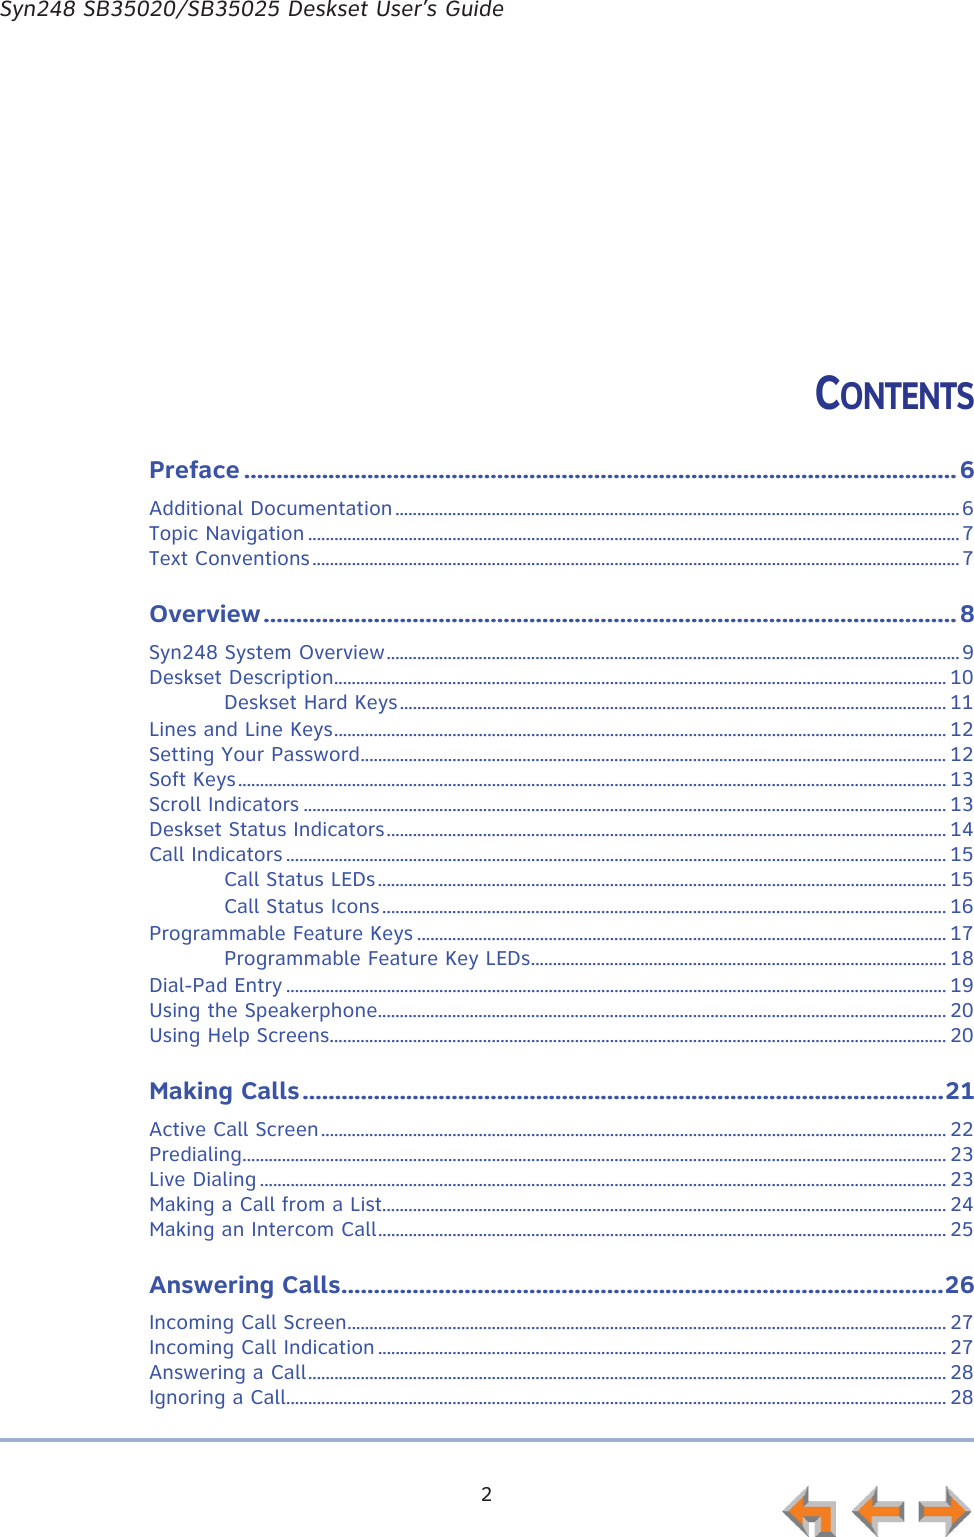
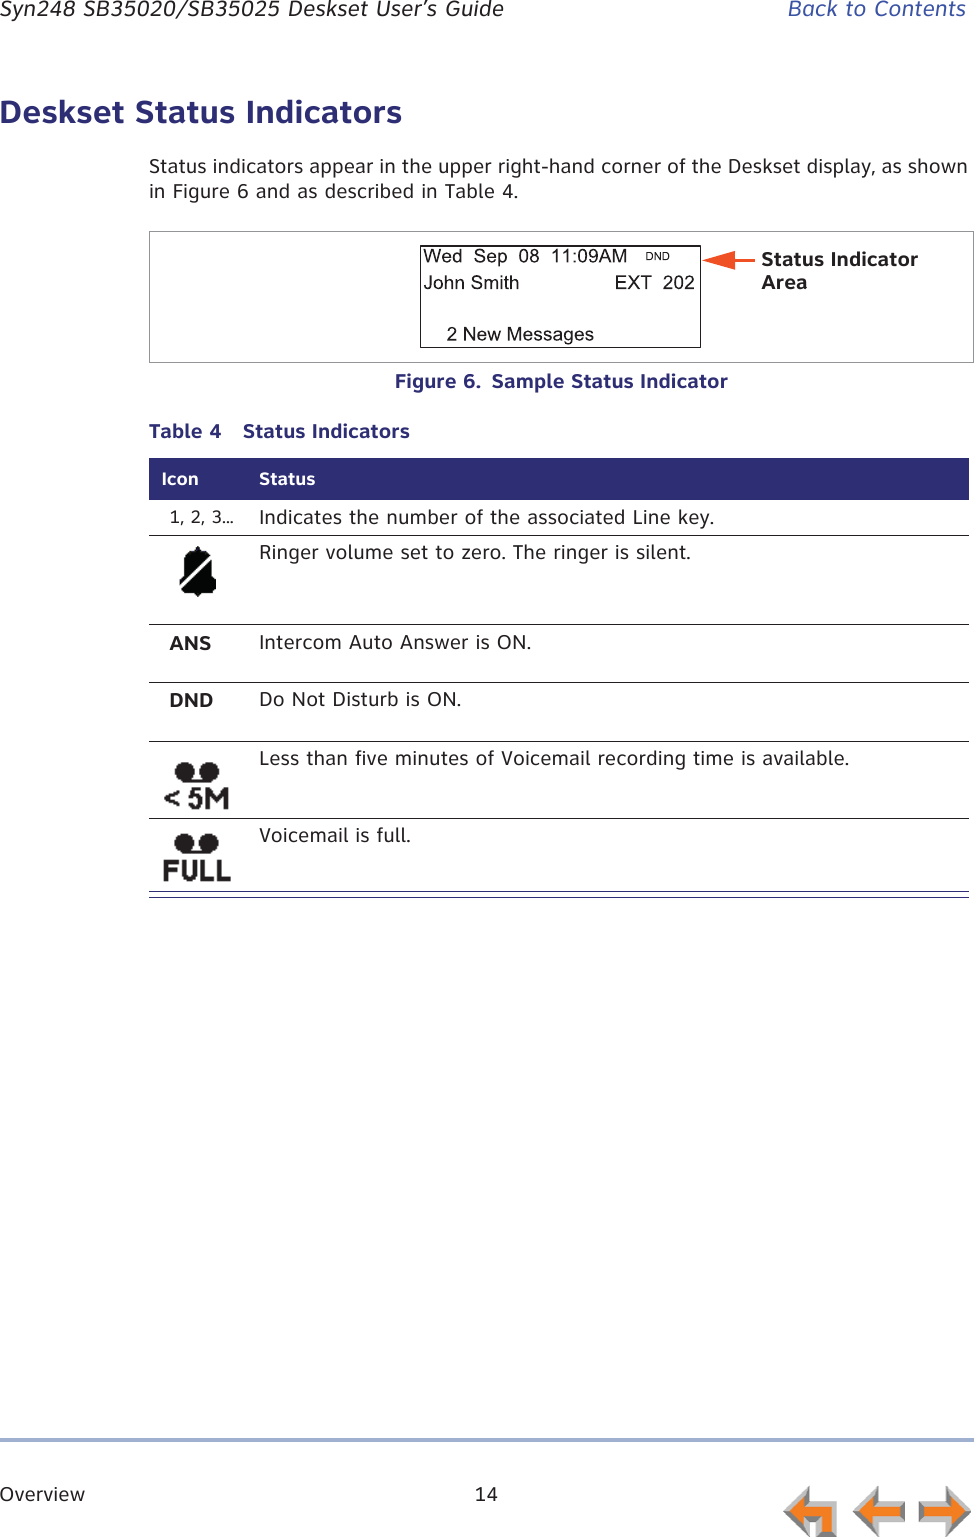
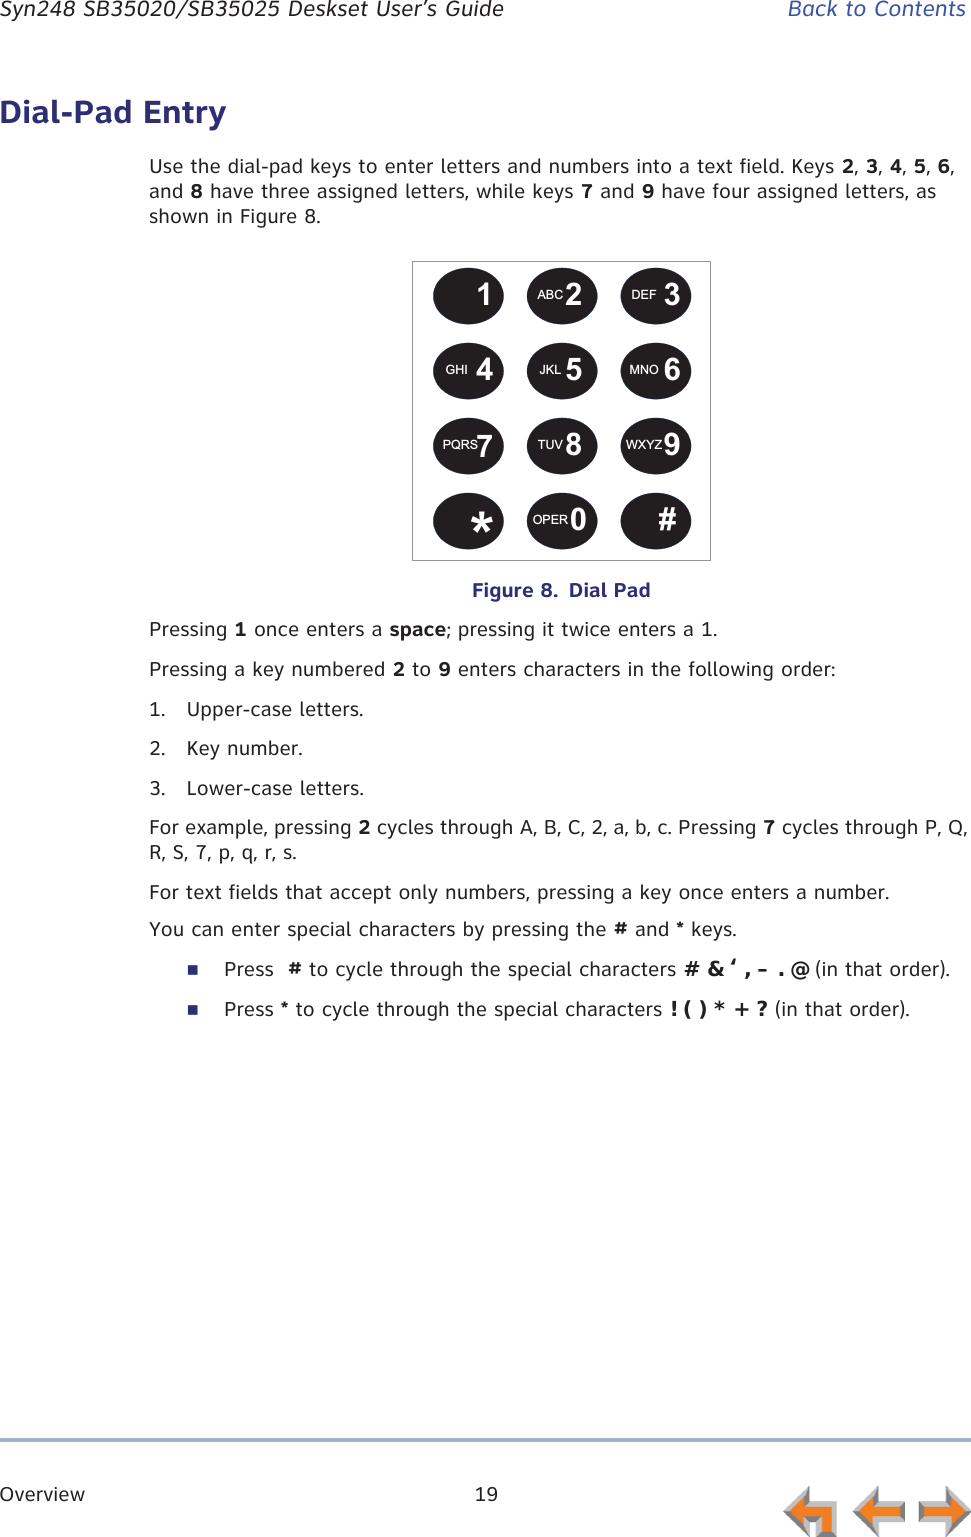
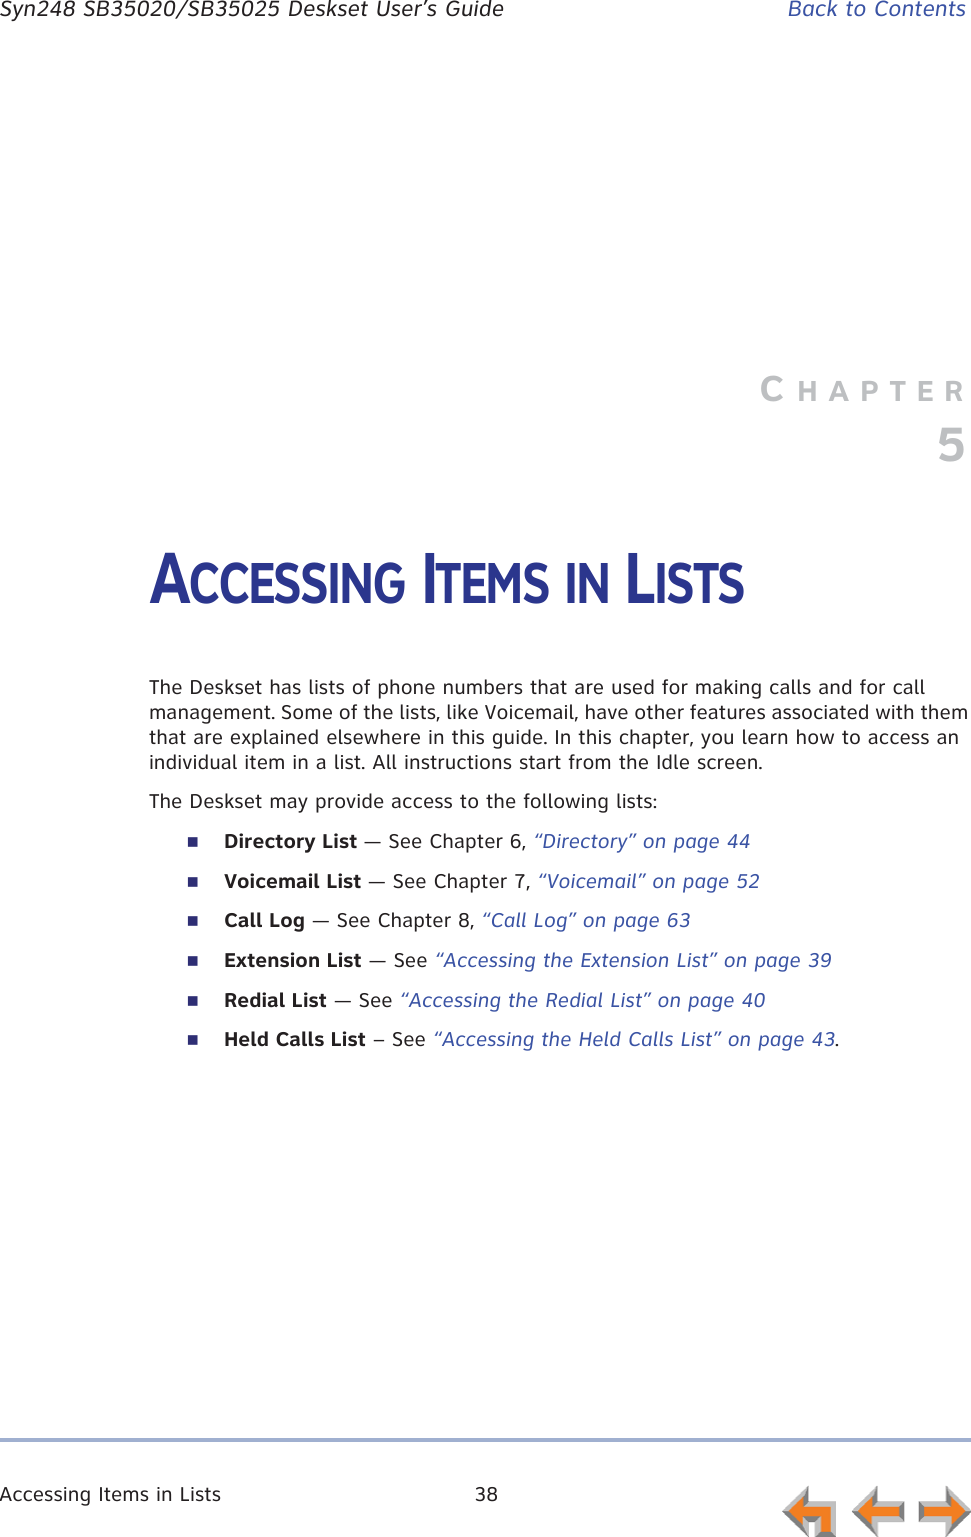
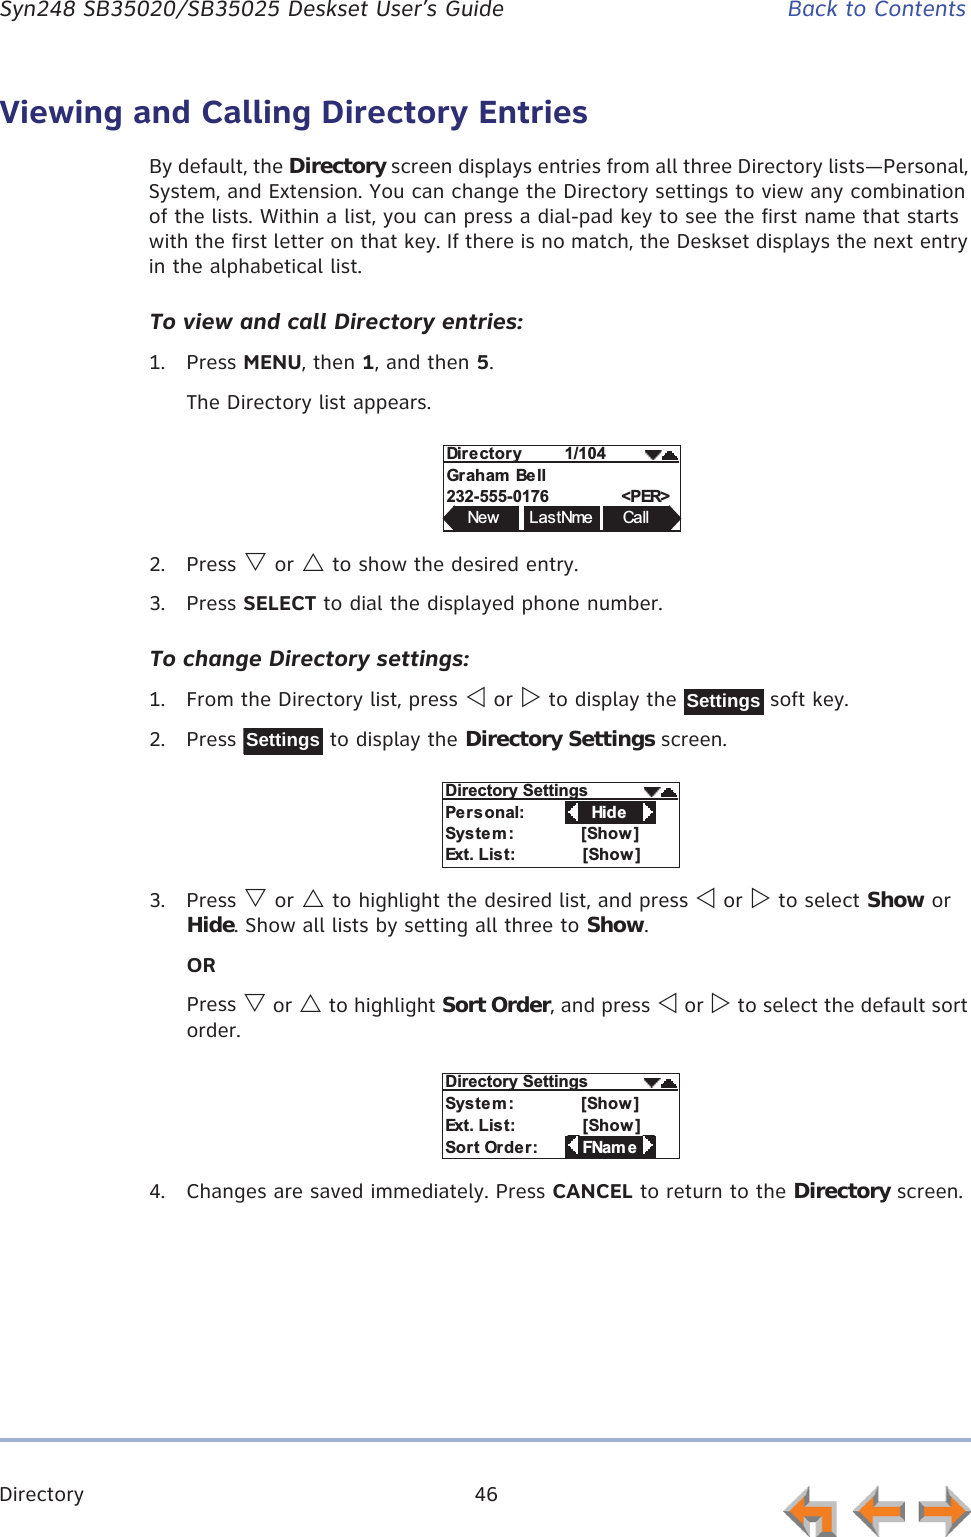
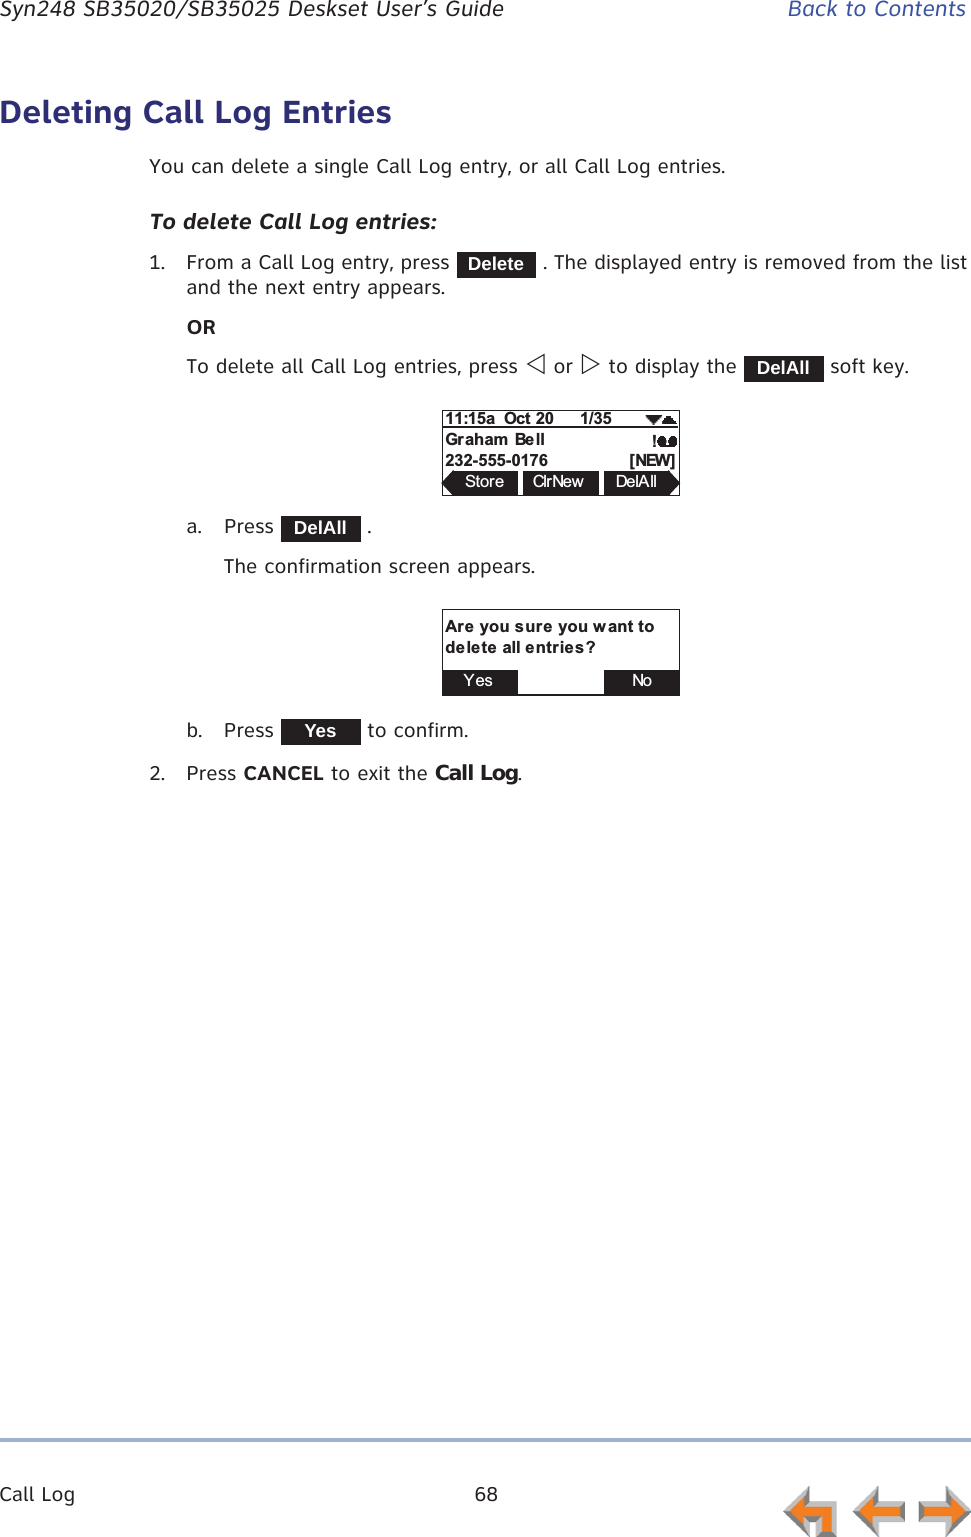
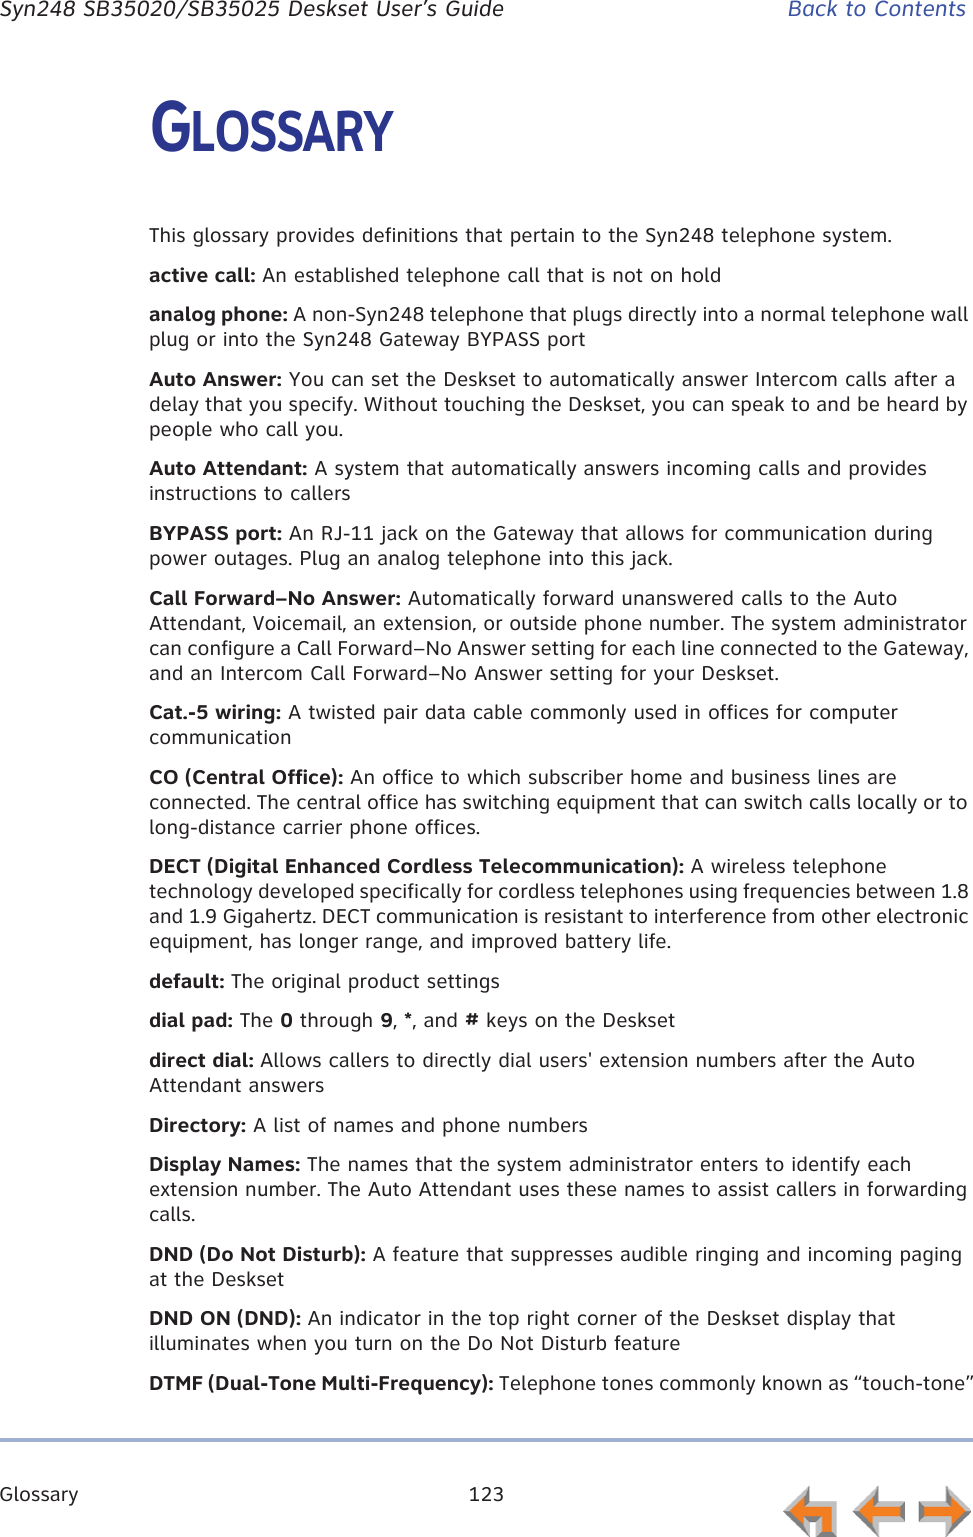
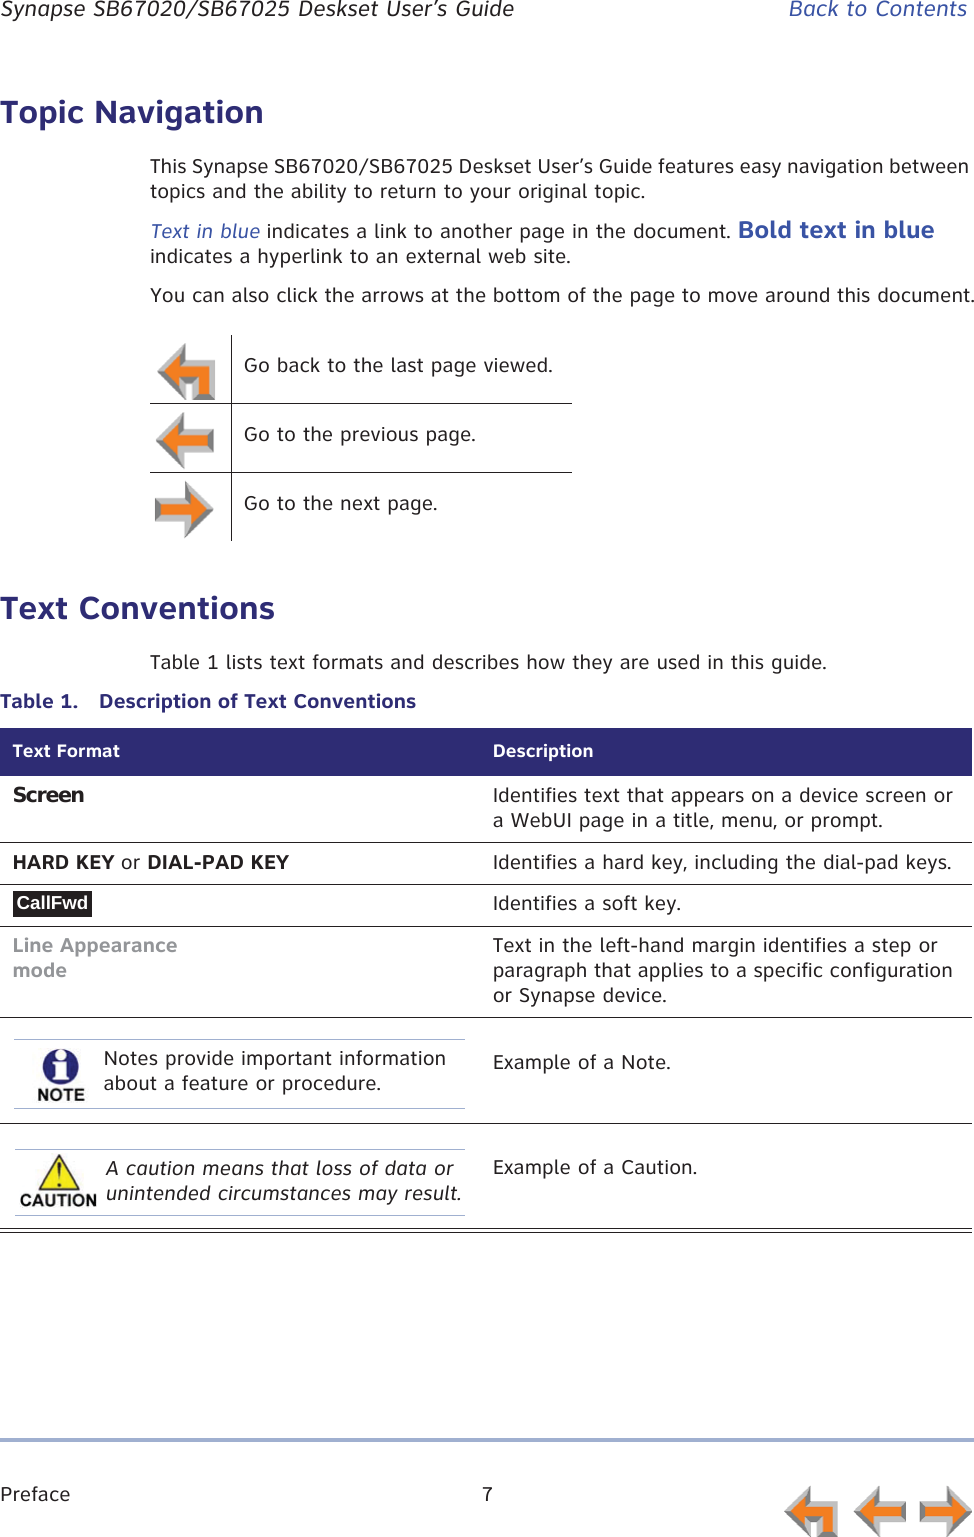
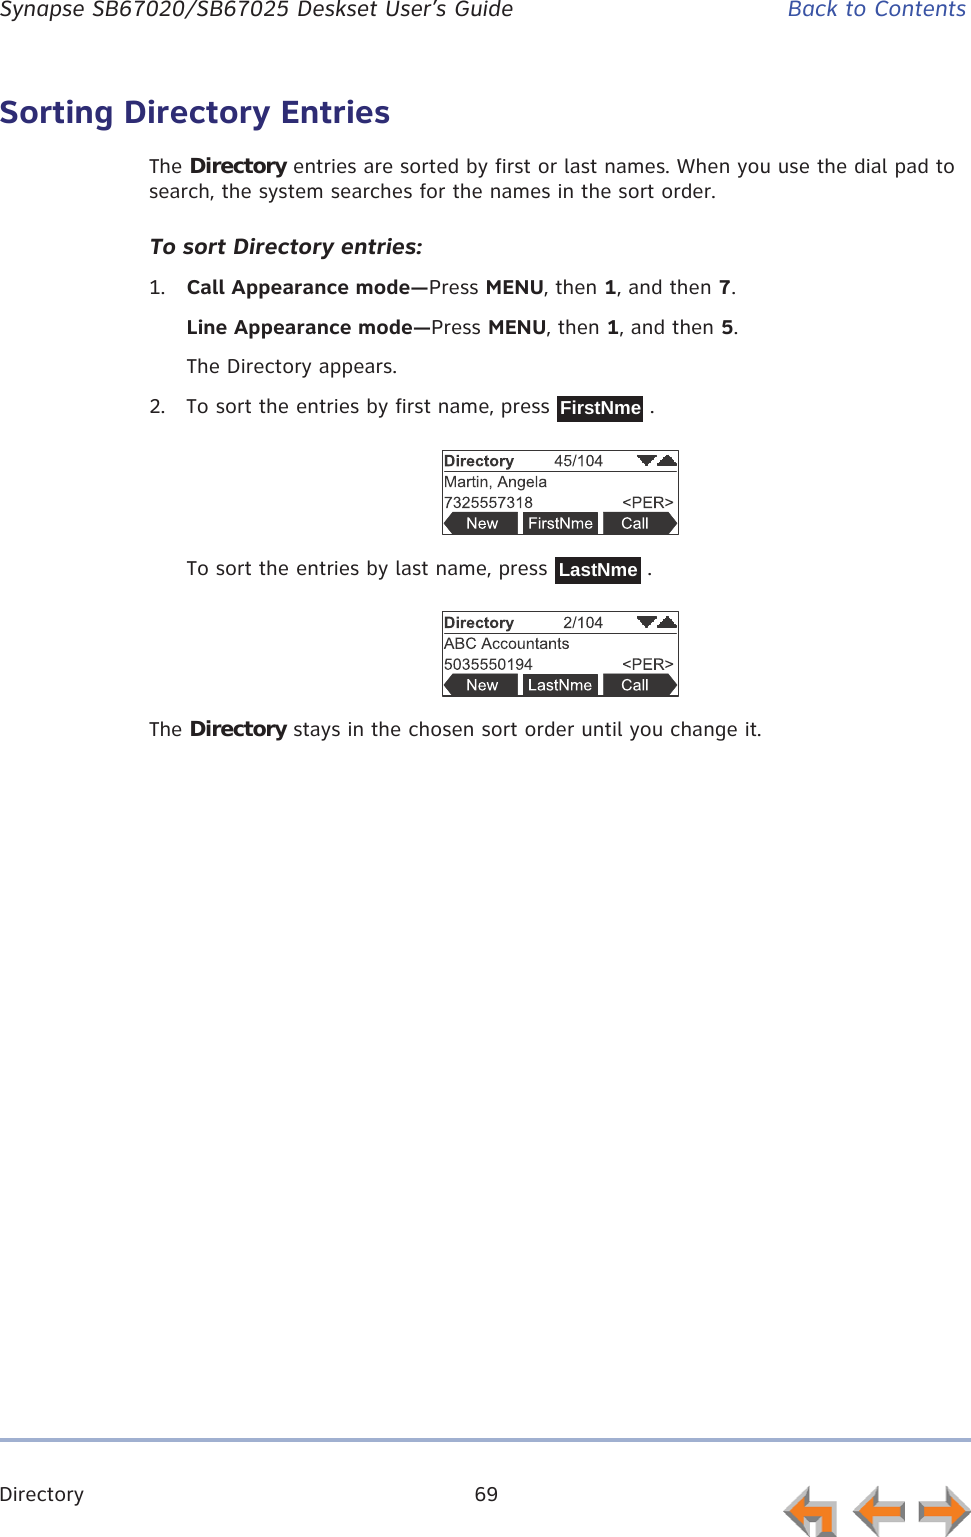
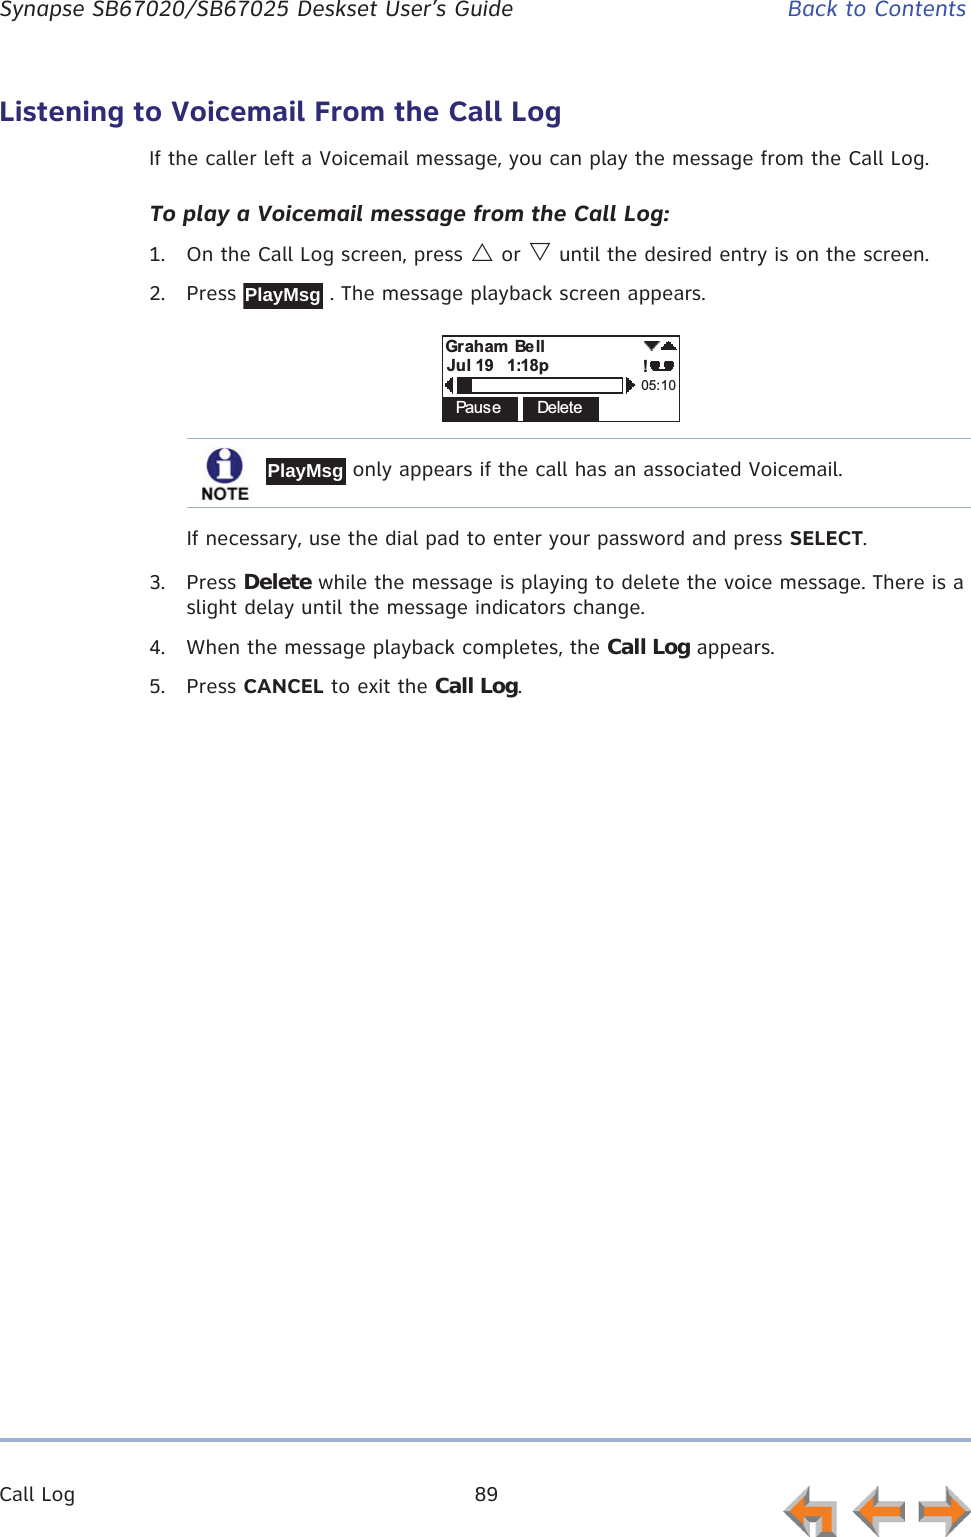
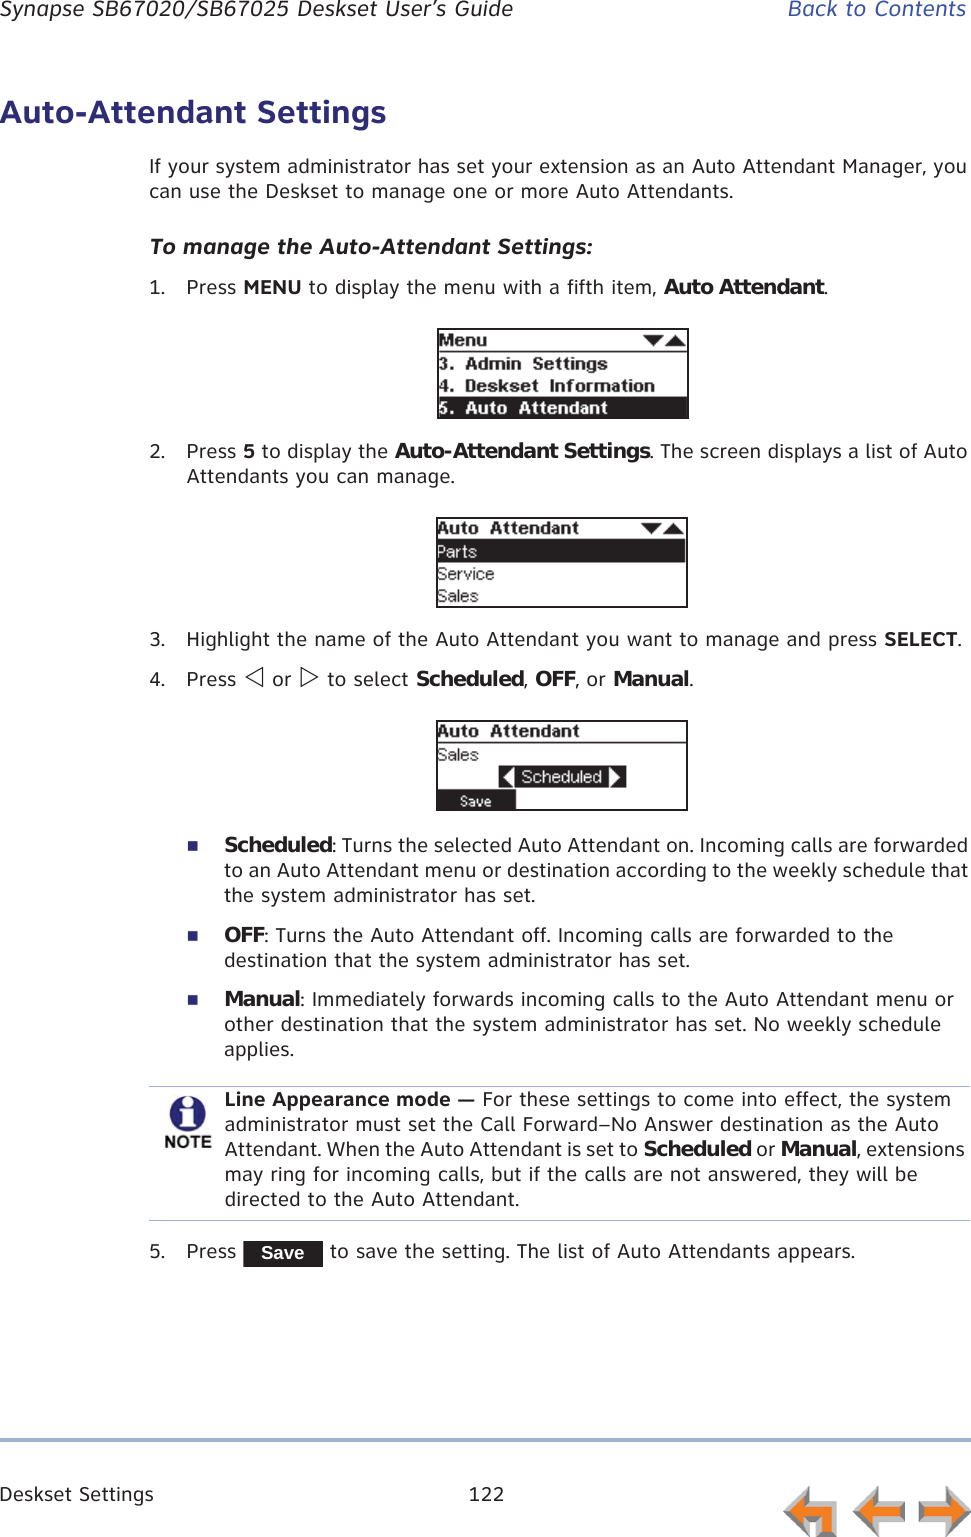
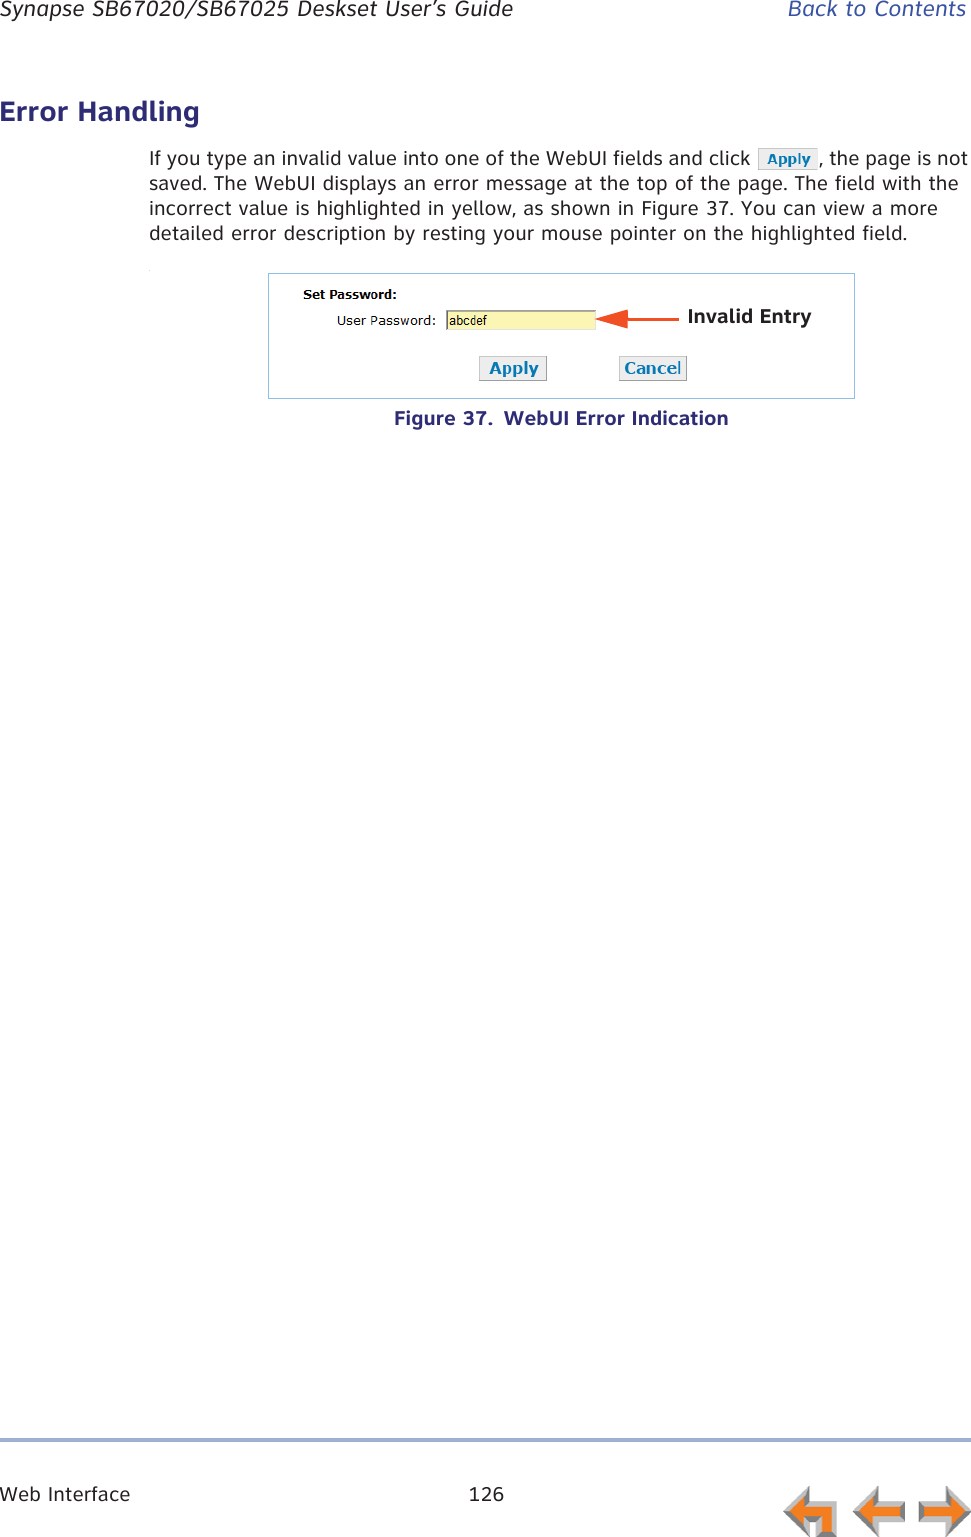
![Call Log 64 Syn248 SB35020/SB35025 Deskset User’s Guide Back to ContentsUsing the Call LogThe Call Log soft keys, as shown in Figure 21 and described in Table 15, are available whenever the Call Log has at least one entry.Figure 21. Call Log FunctionsThe Voicemail message icon appears in call entries where the caller left a message. The icon remains until you delete the message. An ! icon indicates the message is new.If your company has caller ID, the caller information appears. If the caller ID information is absent because it is unavailable, UNKNOWN NAME and UNKNOWN NUMBER appear. If the caller chooses not to send the information, PRIVATE NAME and PRIVATE NUMBER appear.1. Current Call Log entry number/ total number of entries50/50 maximum.2. Name and number3. Voicemail message available for playback. Exclamation mark (!) indicates the message is new.4. NEW Indicates the call was not answered and has not been reviewed.Table 15. Call Log Soft keysKey Description Key DescriptionPlays message. Appears only when there is a message.Deletes the entry.Dials the entry. Stores number in your Personal list.Clears [NEW] indication from the displayed entry.Deletes all entries.2431PlayMsgDeleteCallbackStoreClrNewDelAll](https://usermanual.wiki/VTech-Telecommunications/80-9098-00/User-Guide-1845770-Page-64.png)
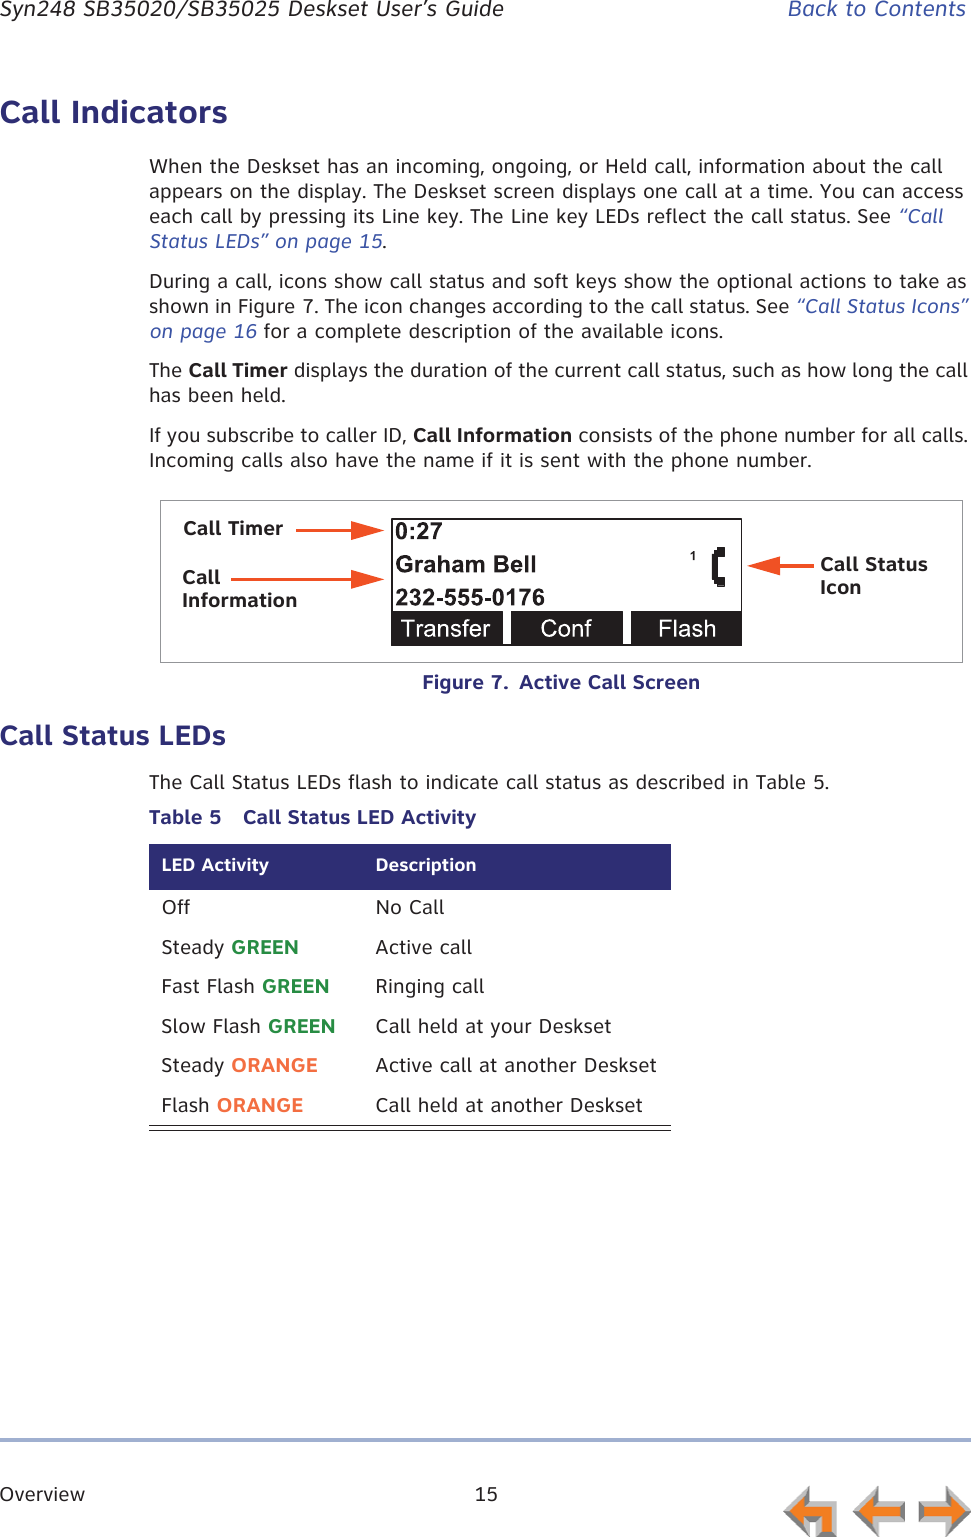
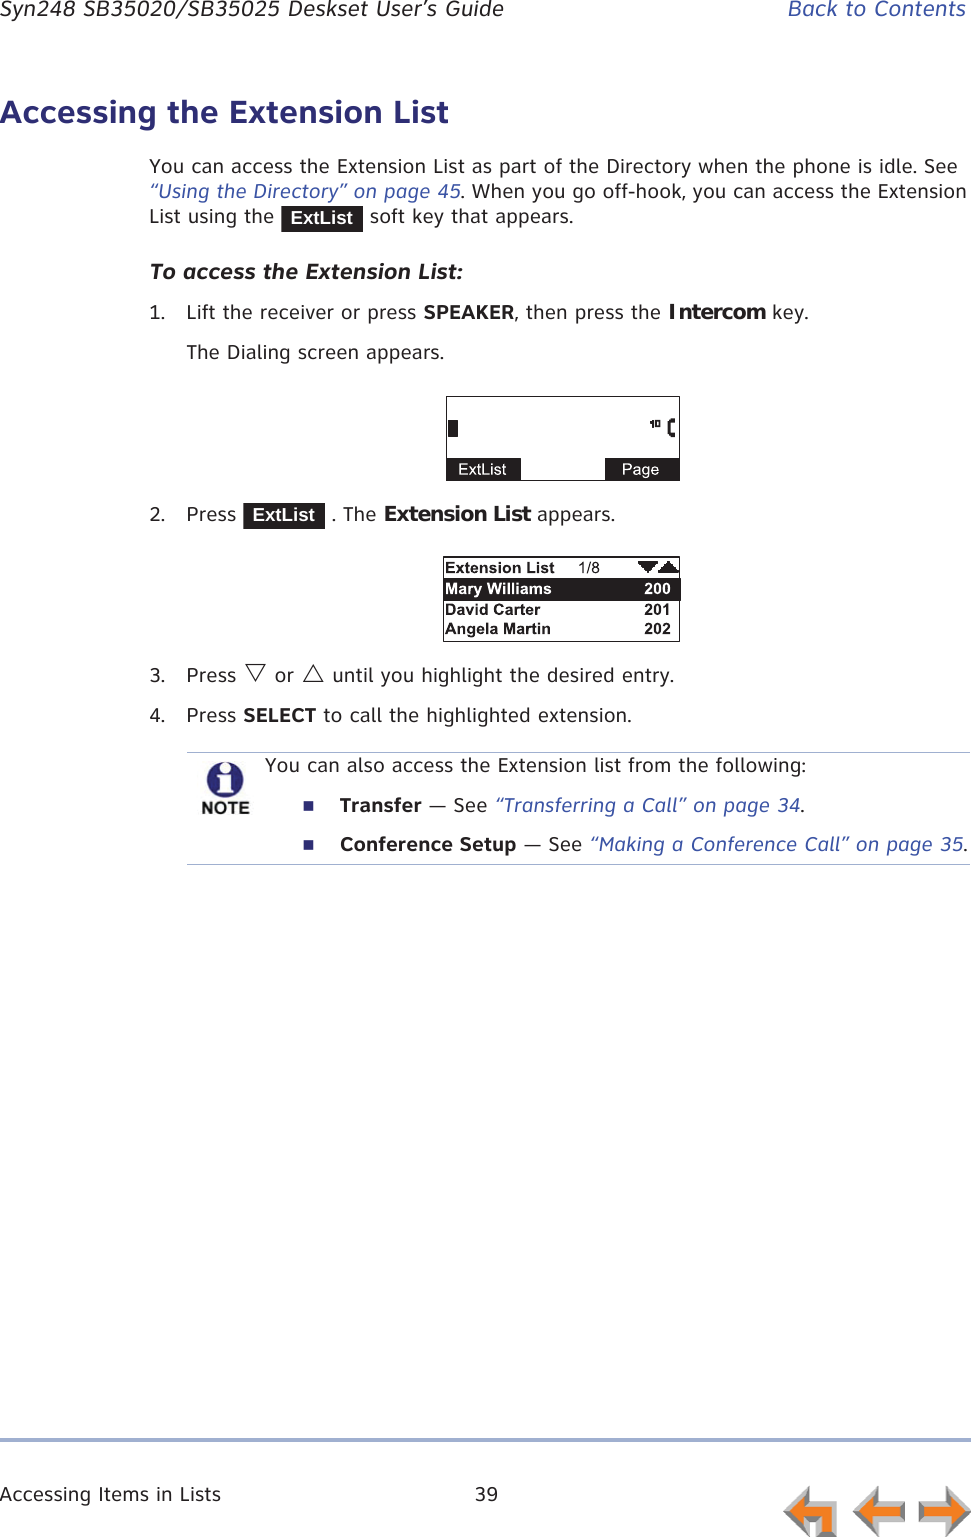
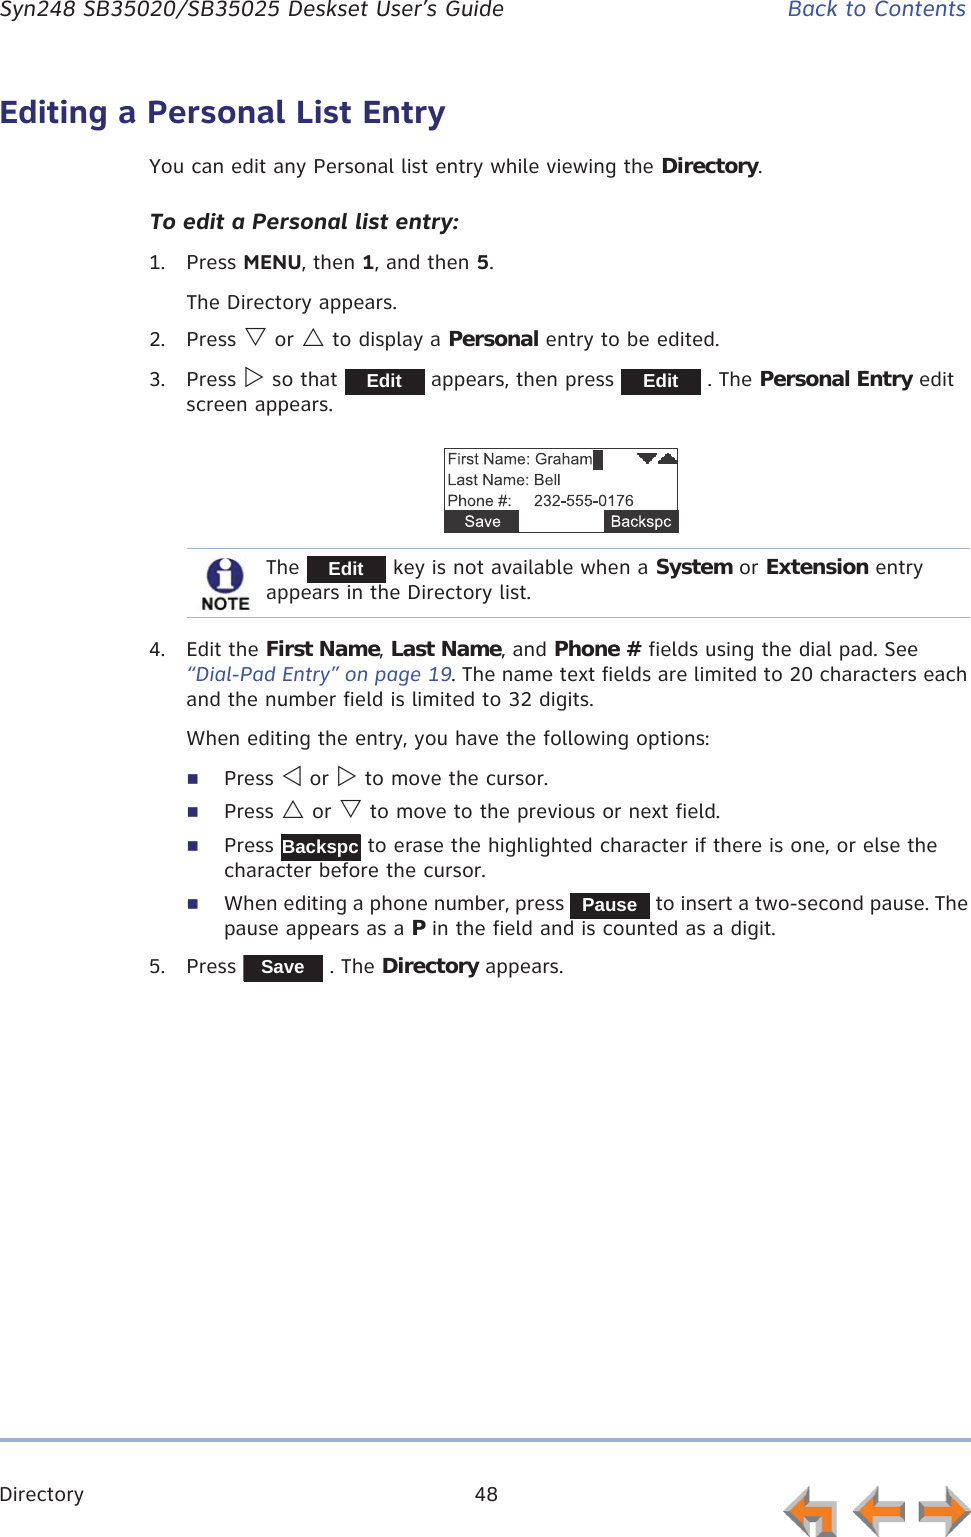
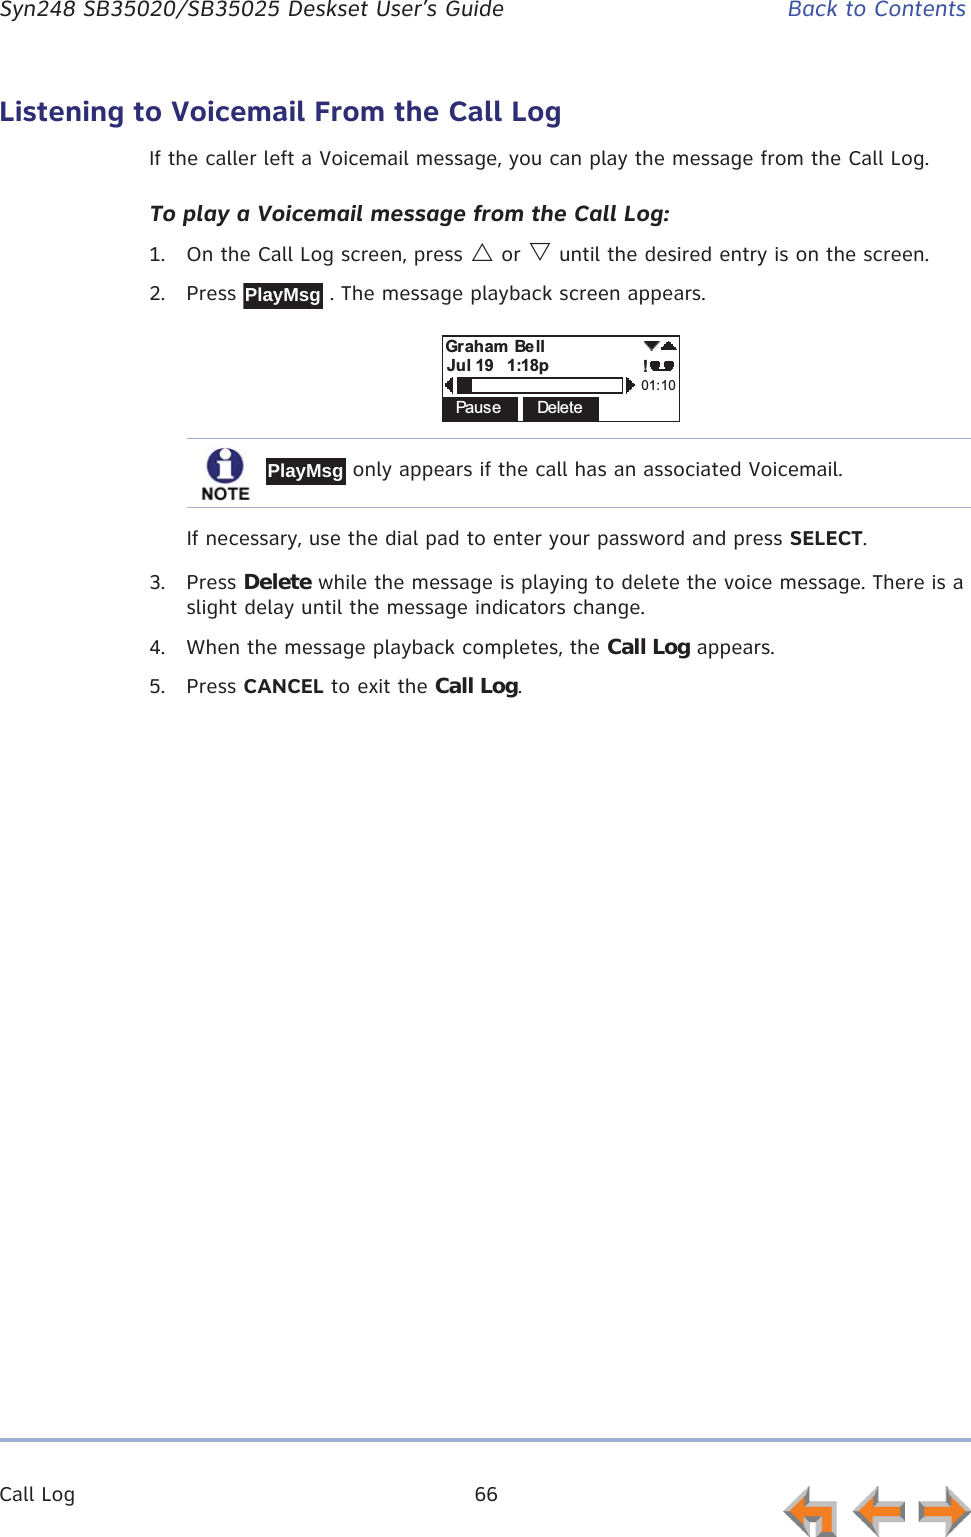
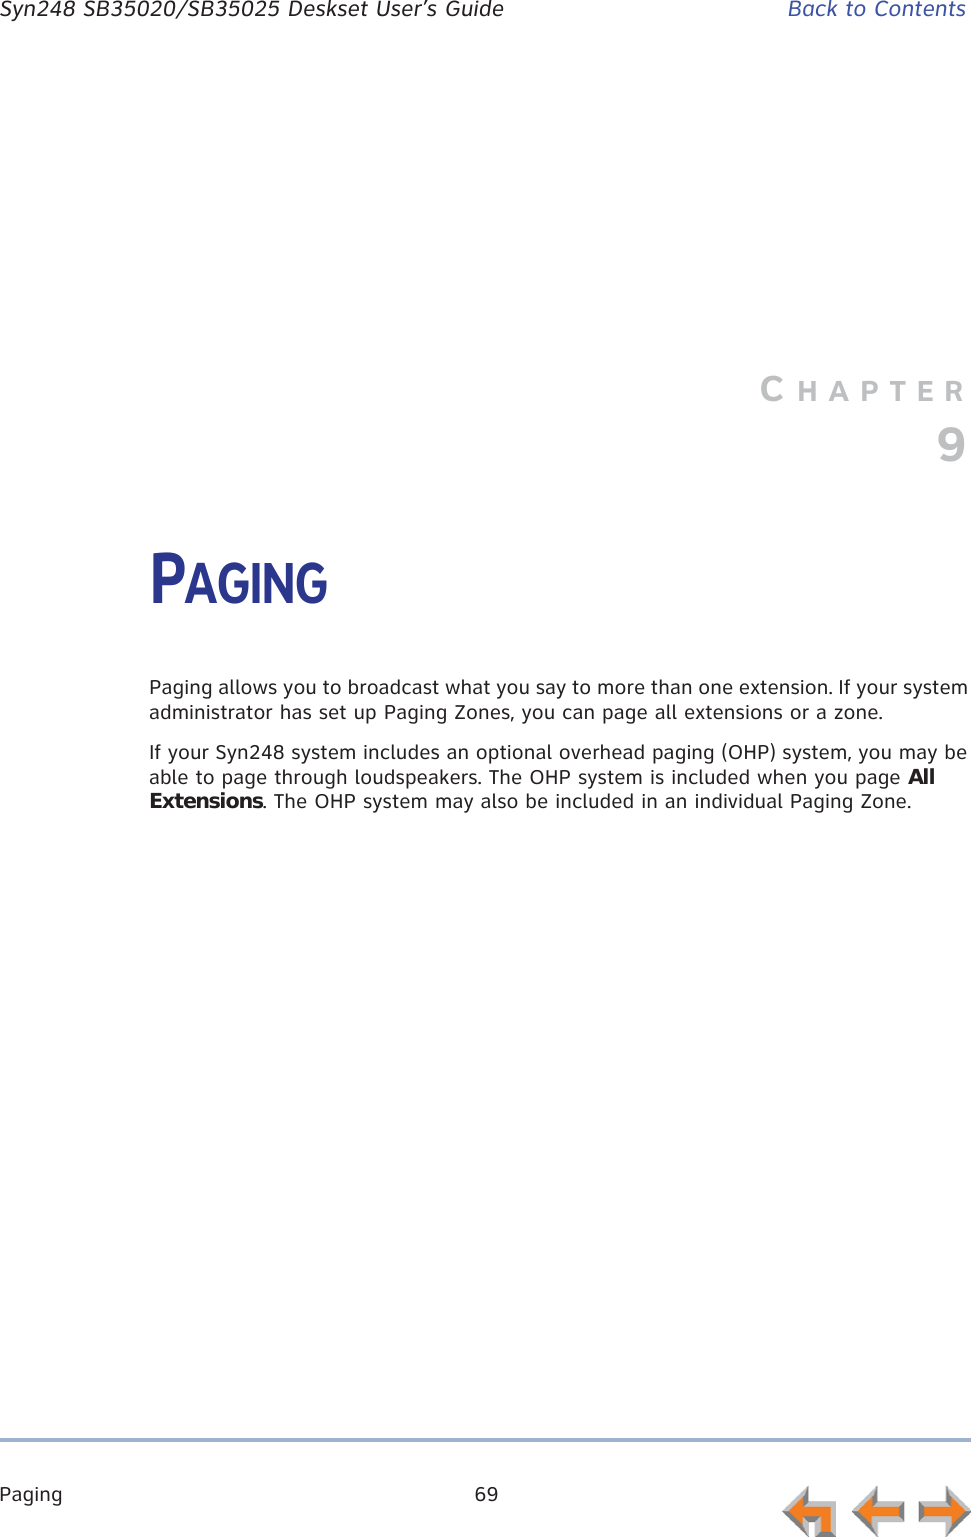
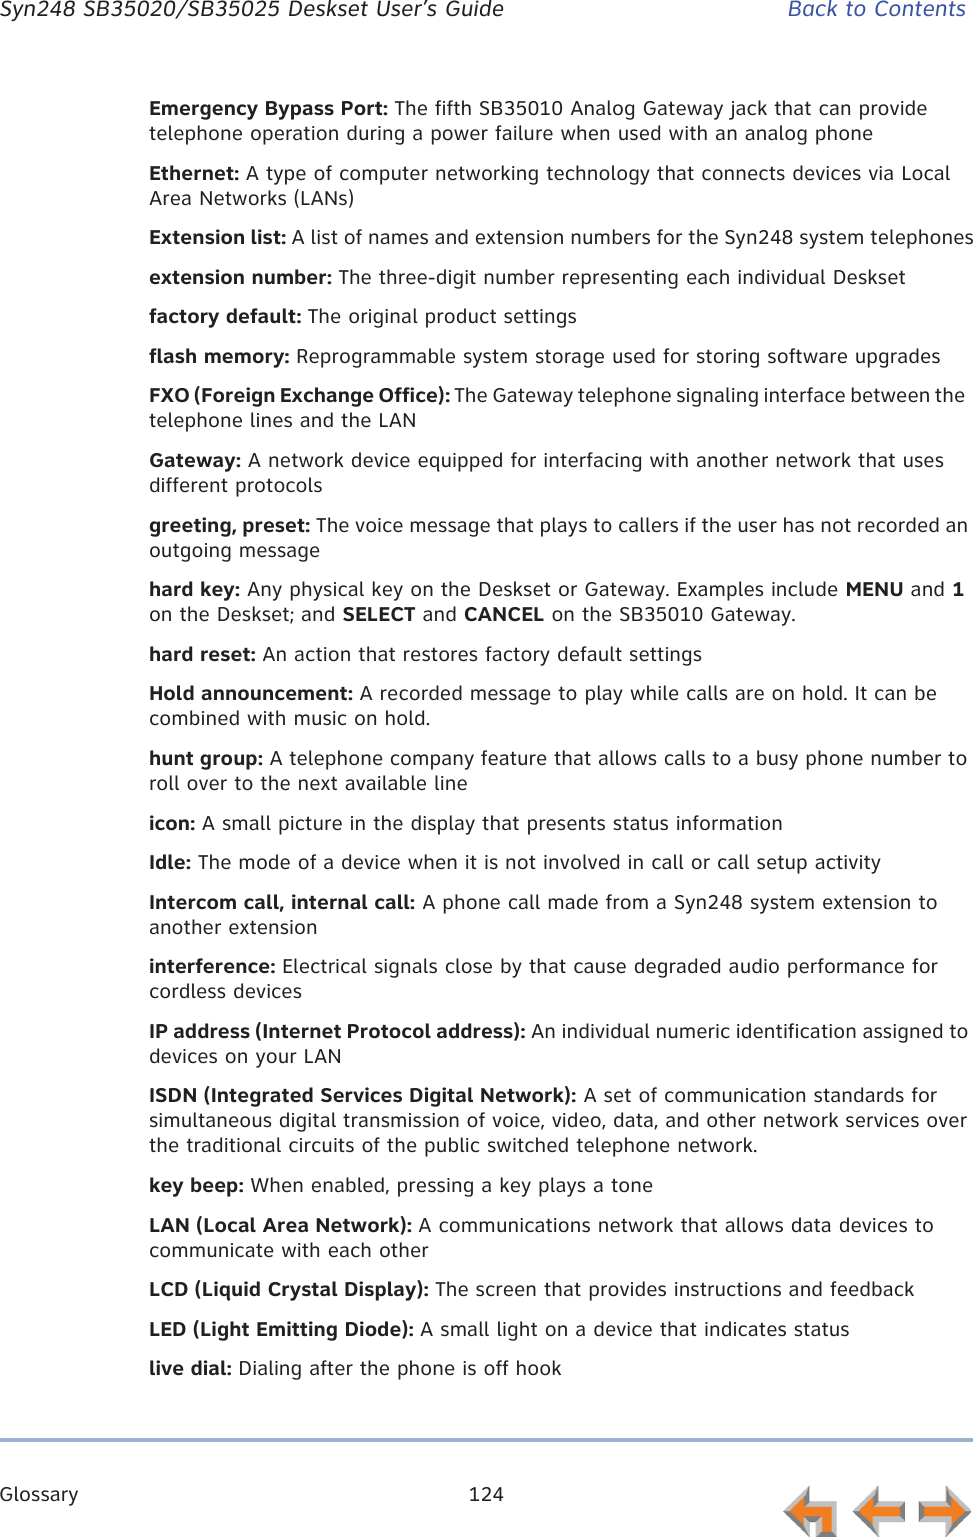
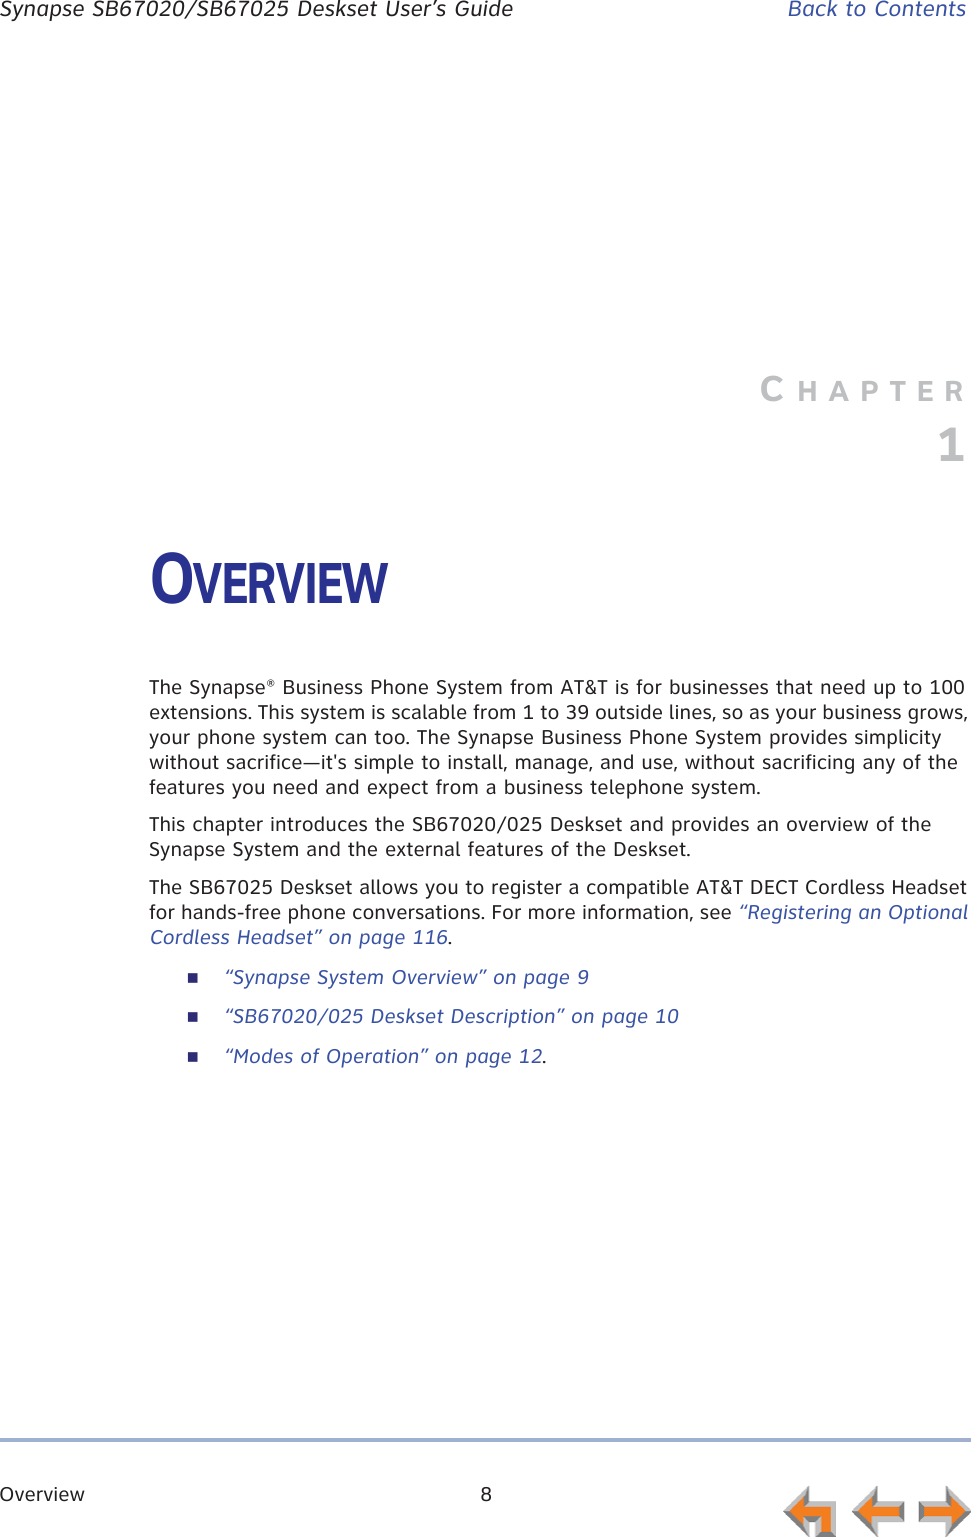
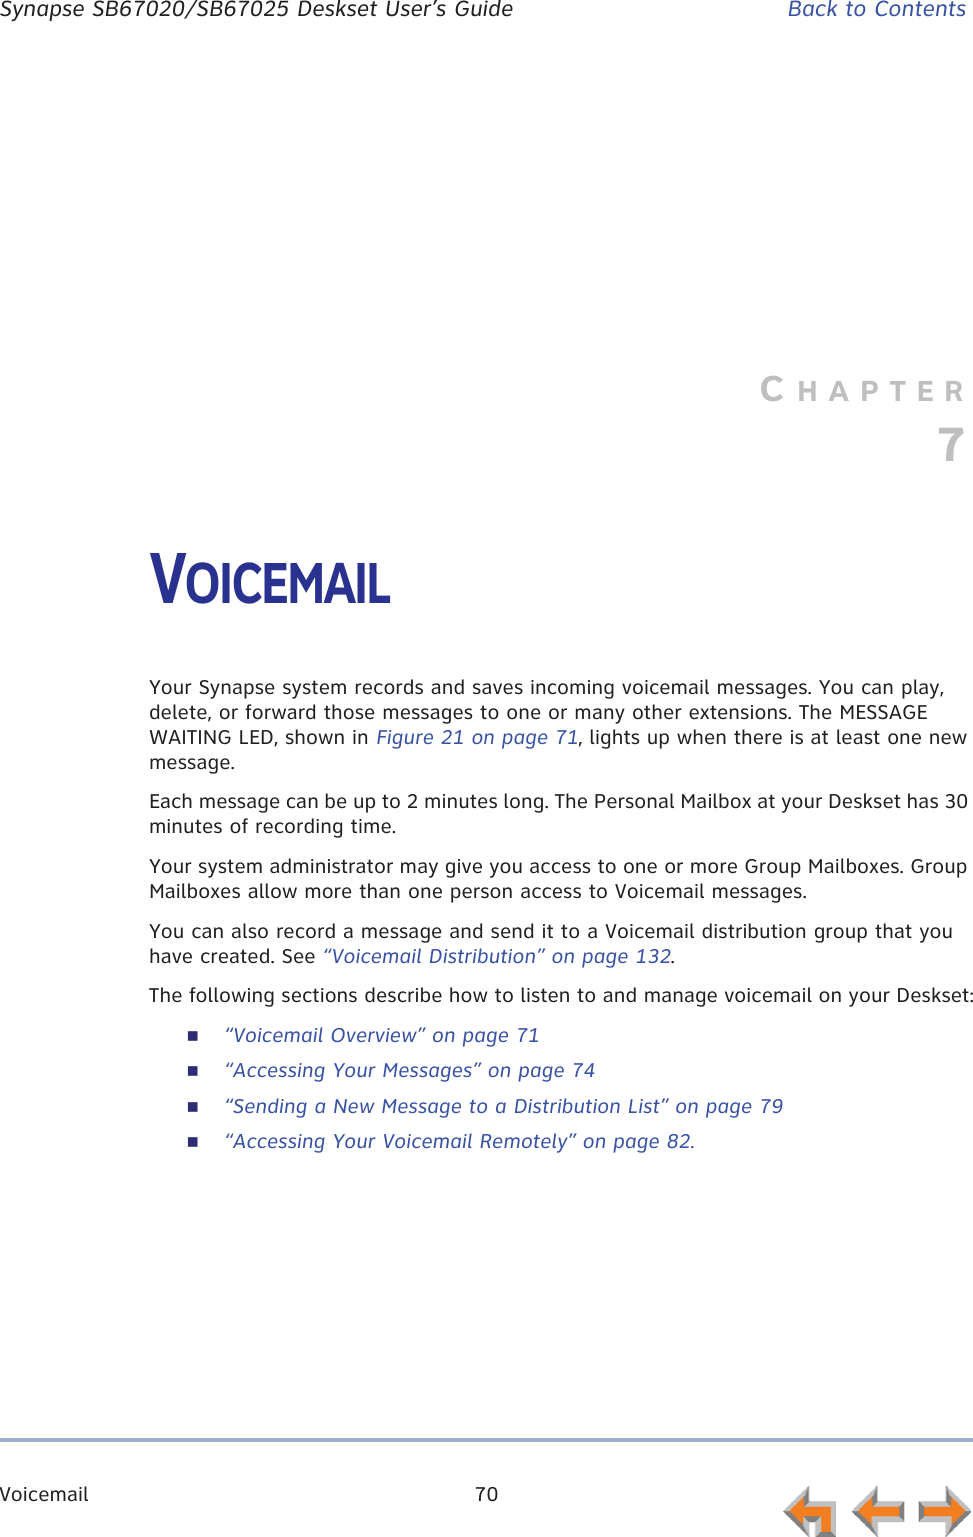
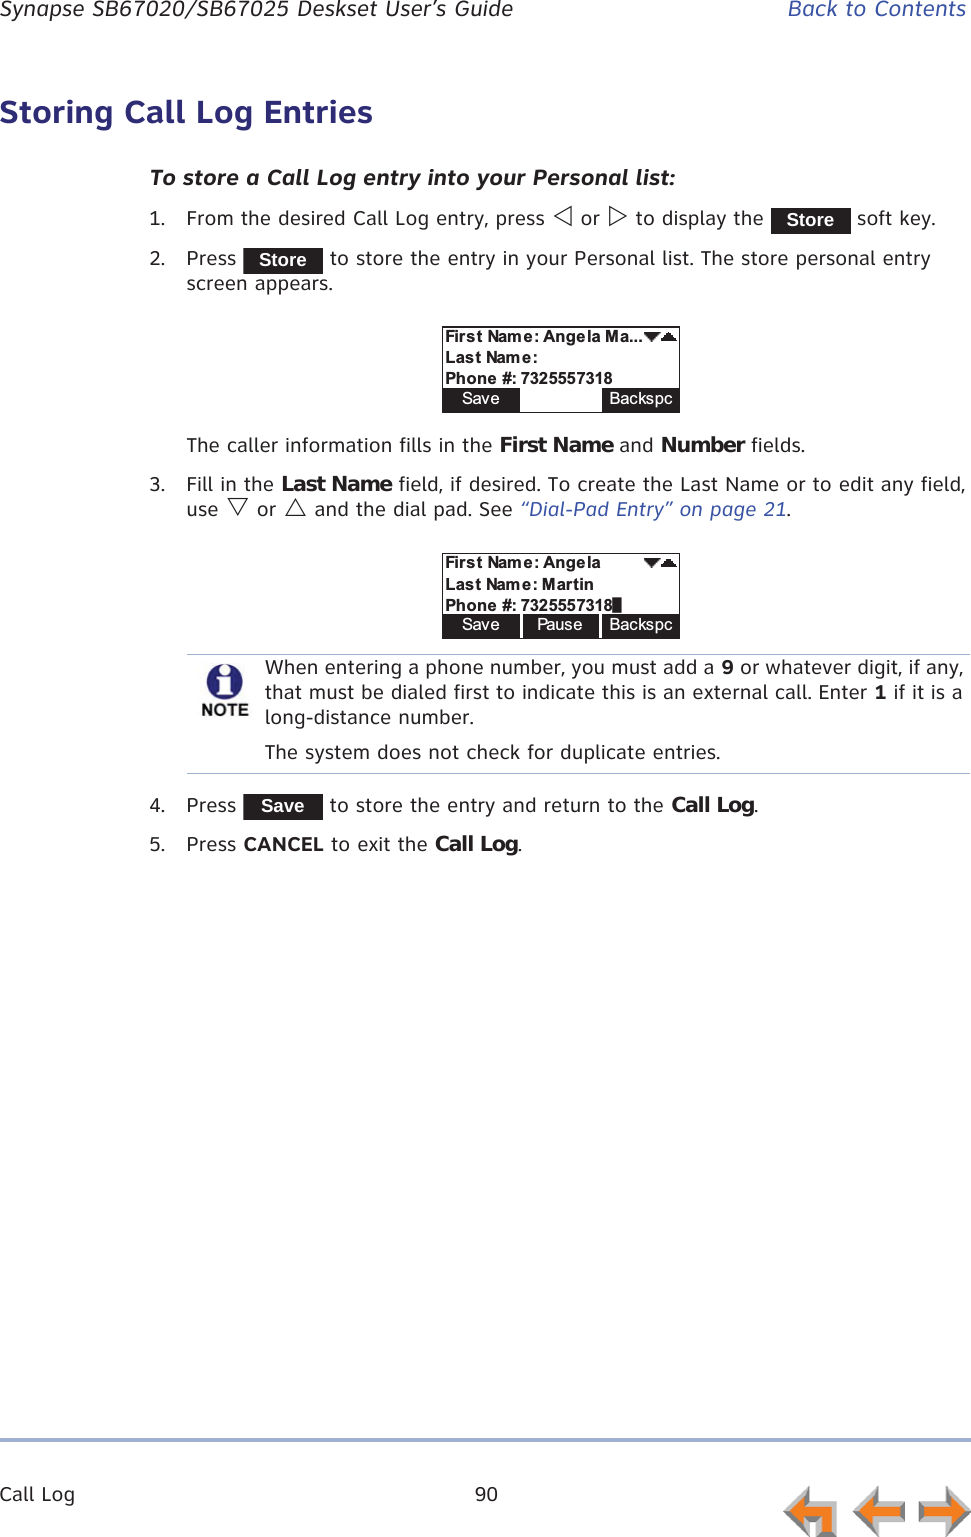
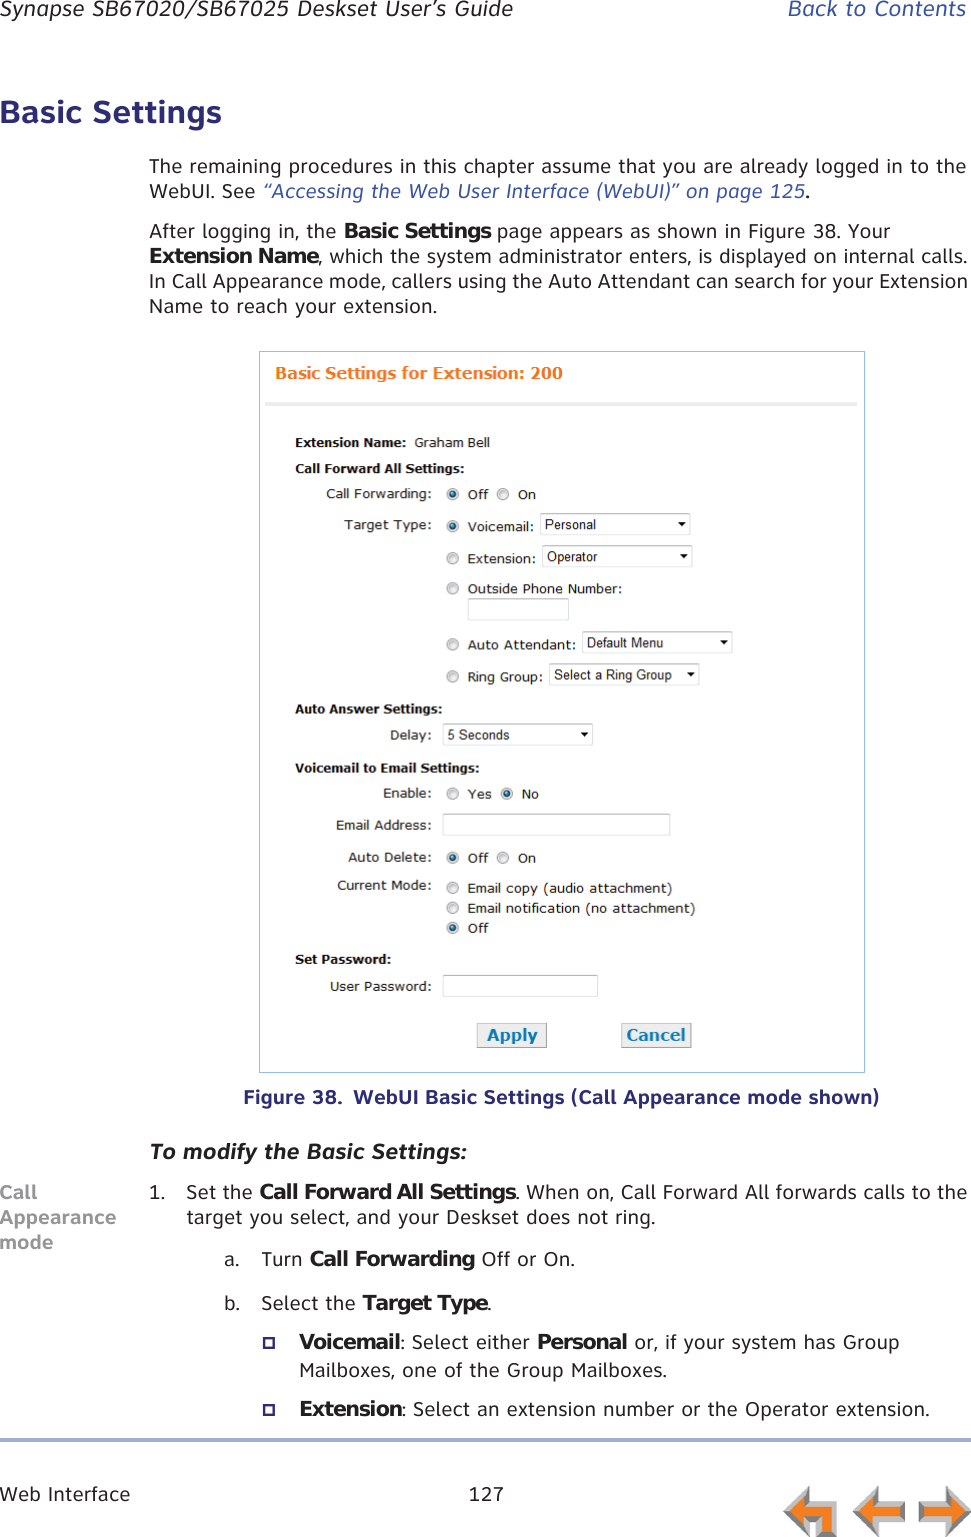
![Call Log 65 Syn248 SB35020/SB35025 Deskset User’s Guide Back to ContentsTo access the Call Log:1. Press MENU, then 1, and then 6.The most recent Call Log entry appears.2. Press V or U until the desired entry is on the screen.3. Press CANCEL to exit the Call Log.Managing Missed CallsAll incoming calls are recorded in the Call Log. Unanswered calls that have not been reviewed are indicated by [NEW].To review and make calls from the Call Log:1. On the Call Log screen, press V or U to see the desired entry.Press to access dialing options before calling a number and to dial the displayed number. The Call Back screen appears.zPress to dial the on-screen number.zCall Log entries may not be in the proper format for dialing. In some areas, you need to remove the area code or add or remove a 1. Press Y or Z to view the dialing options. The following dialing options are available:nnn-nnnn (7 digits)1-nnn-nnnn (8 digits)nnn-nnn-nnnn (10 digits)1-nnn-nnn-nnnn (11 digits).Press to delete the displayed entry.2. Press CANCEL to exit the Call Log.CallbackCall StoreCall BackAngela Martin 732-555-7318 CallDelete](https://usermanual.wiki/VTech-Telecommunications/80-9098-00/User-Guide-1845770-Page-65.png)
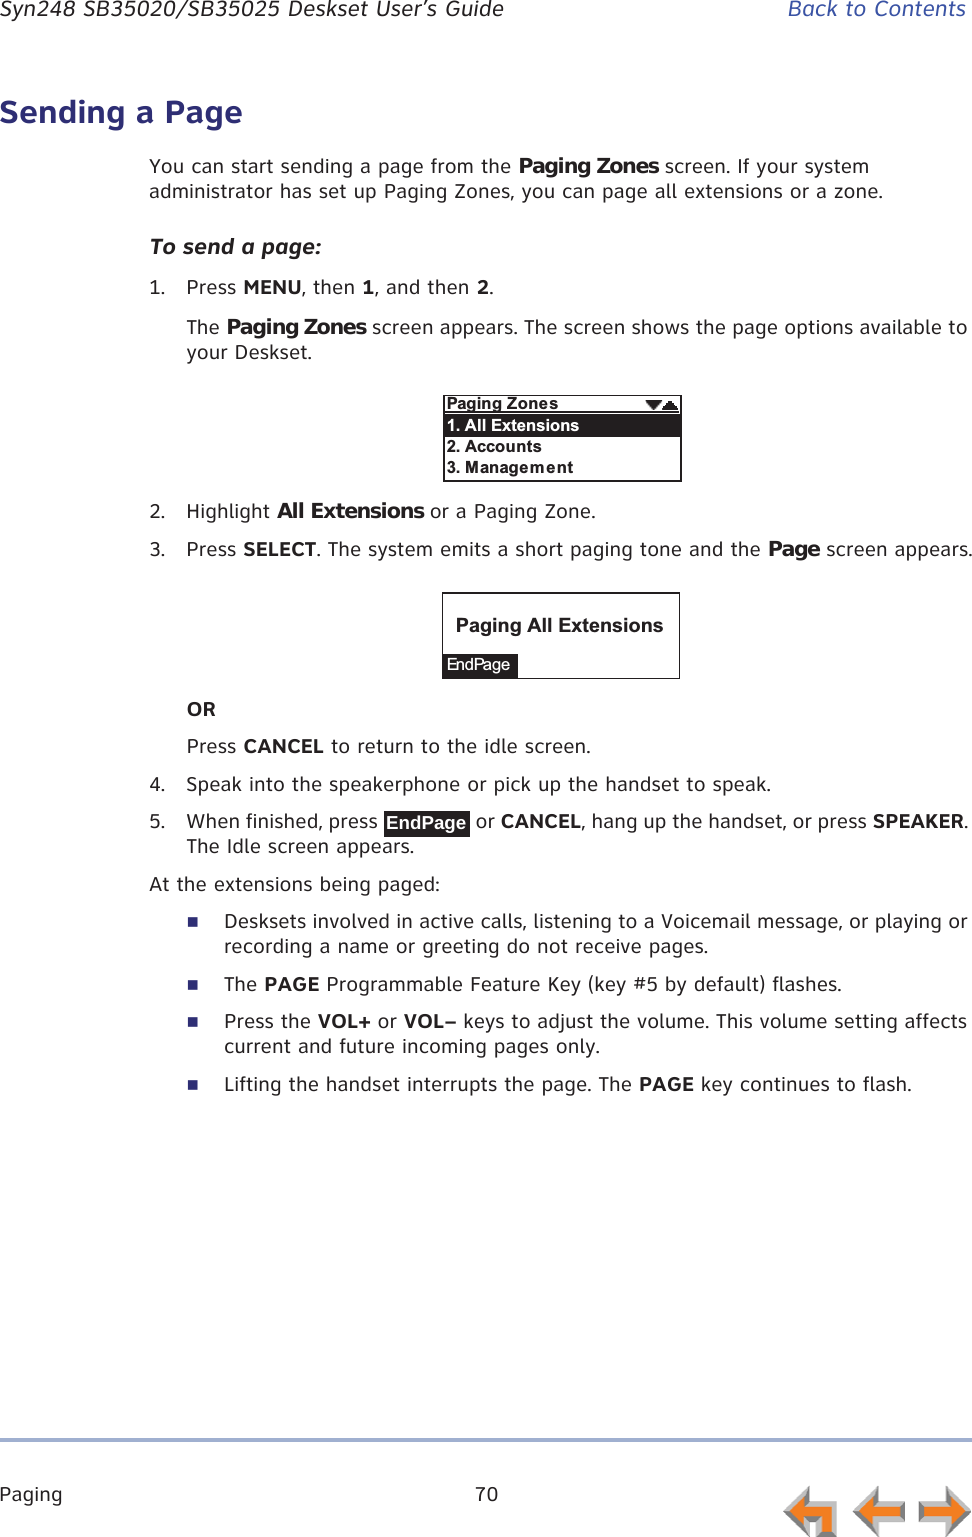


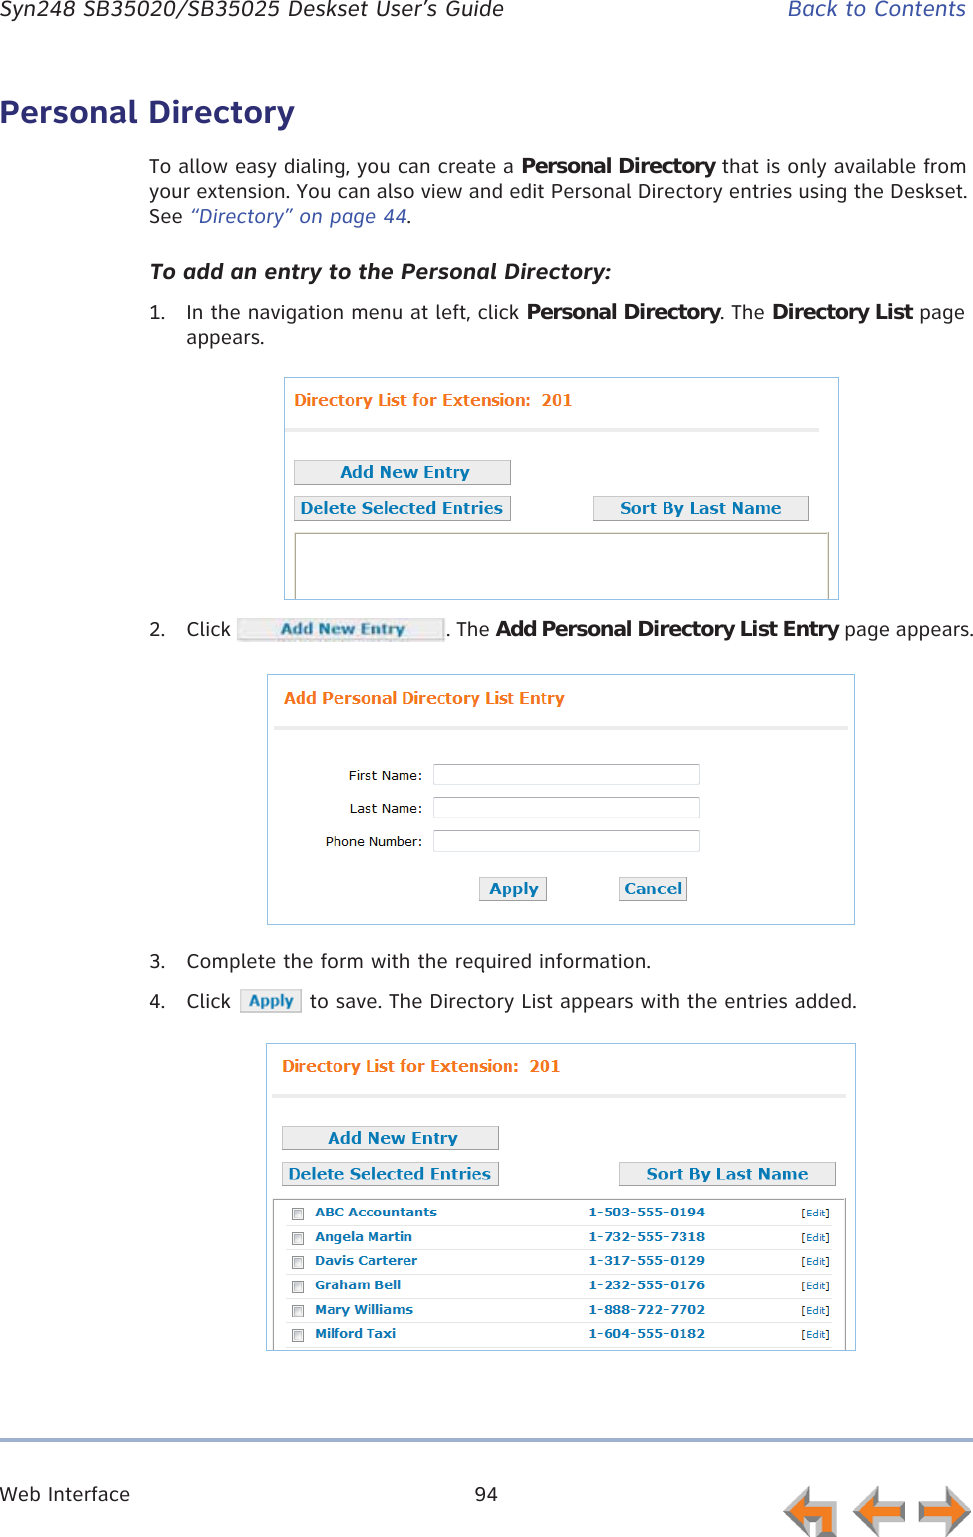
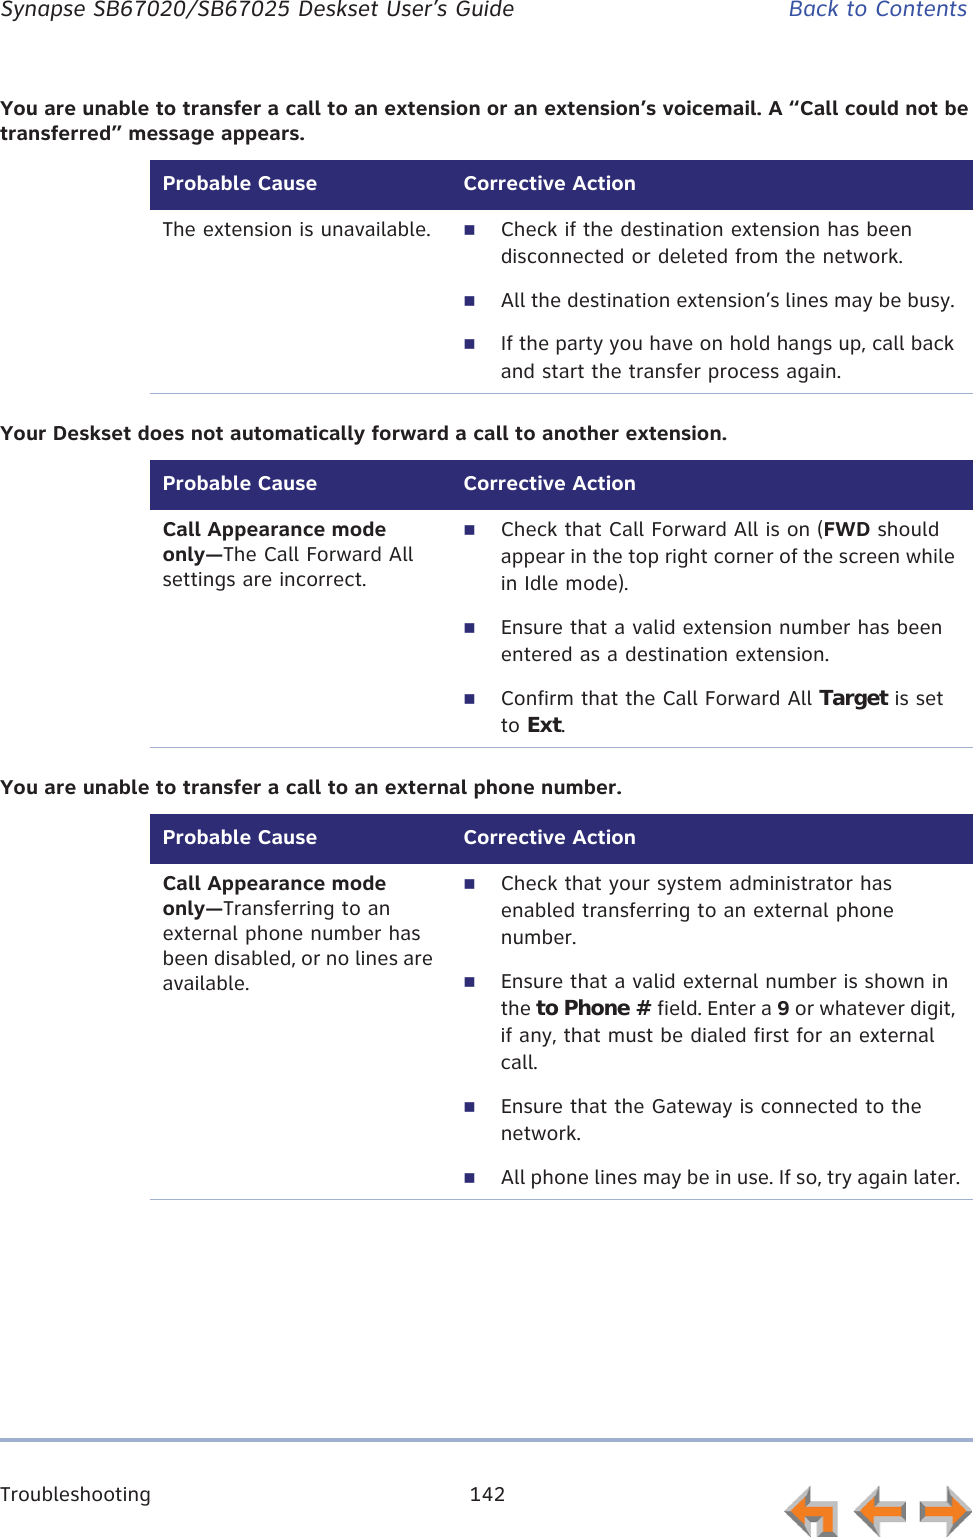
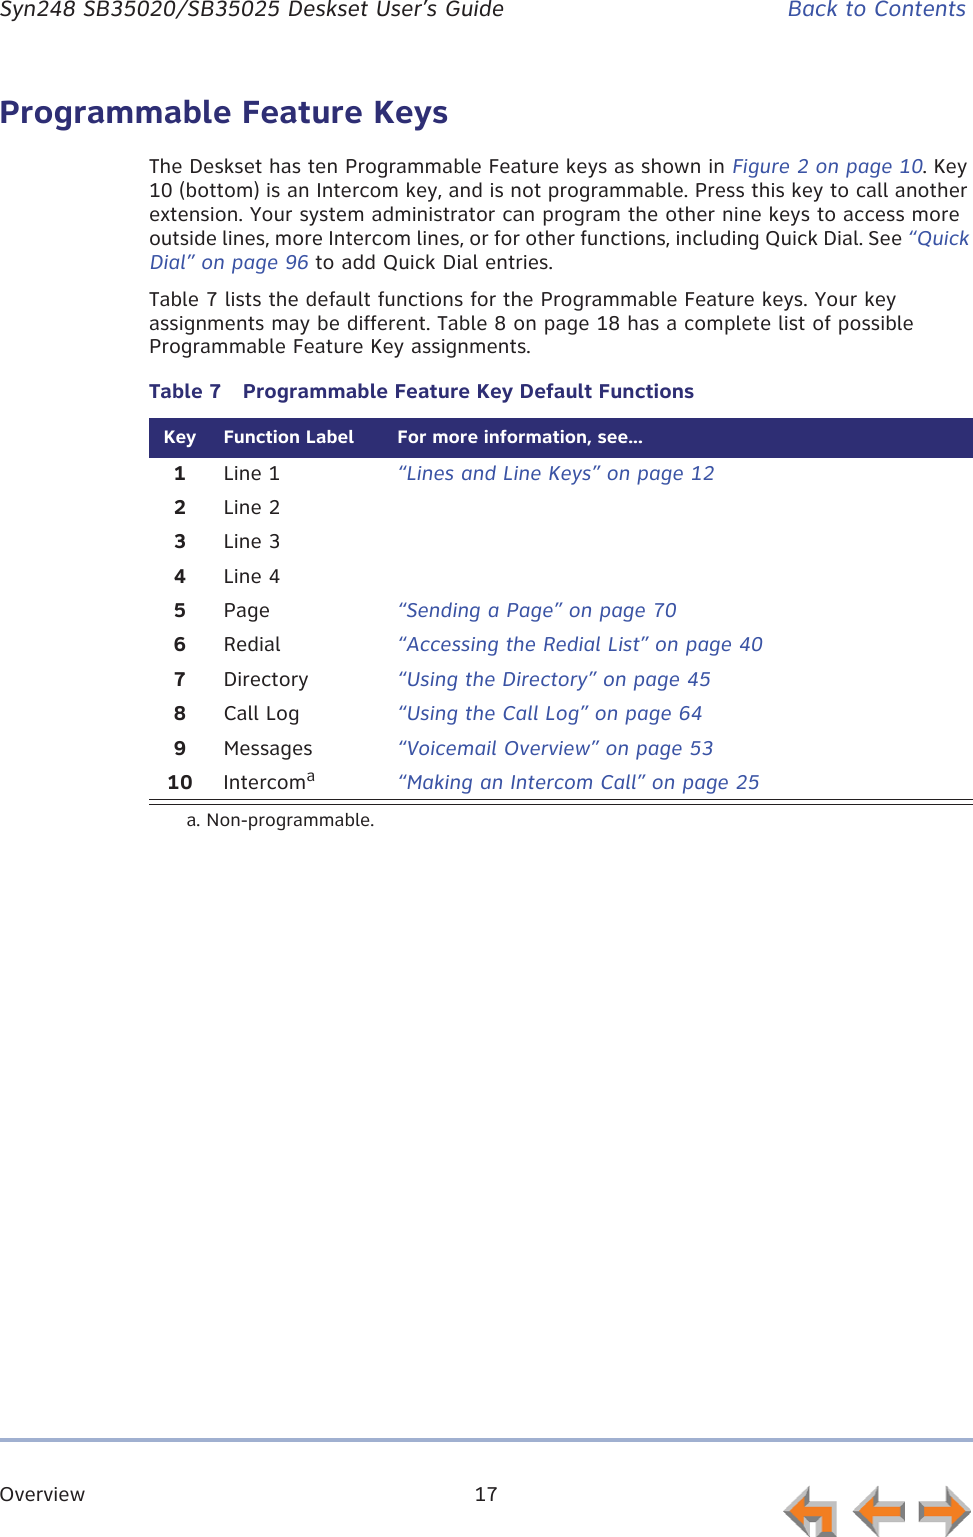
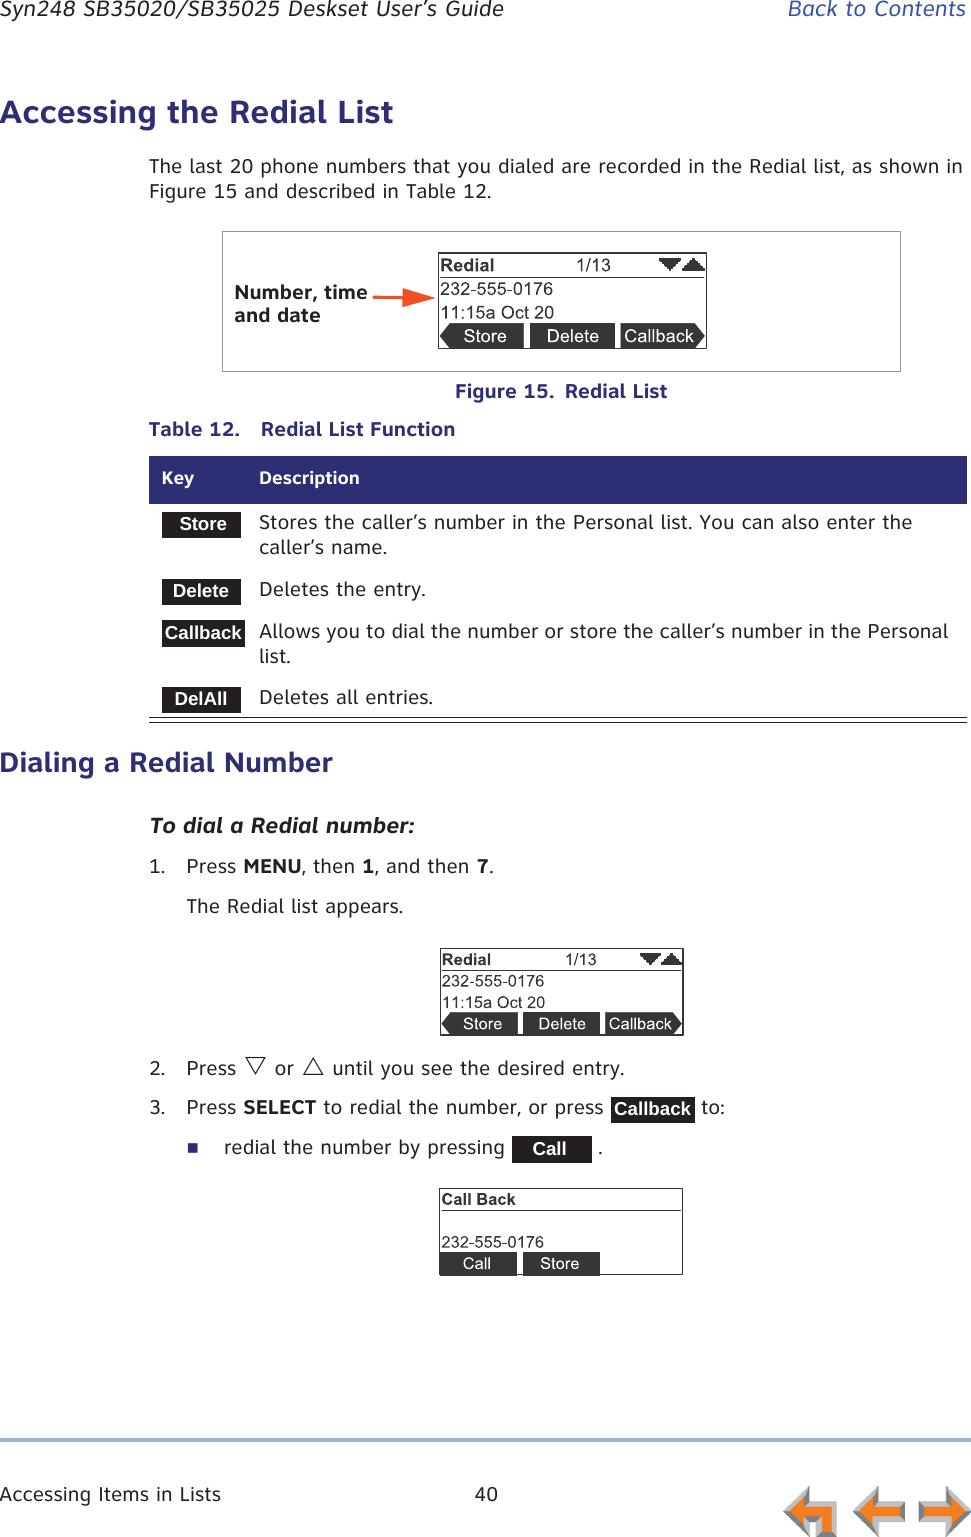
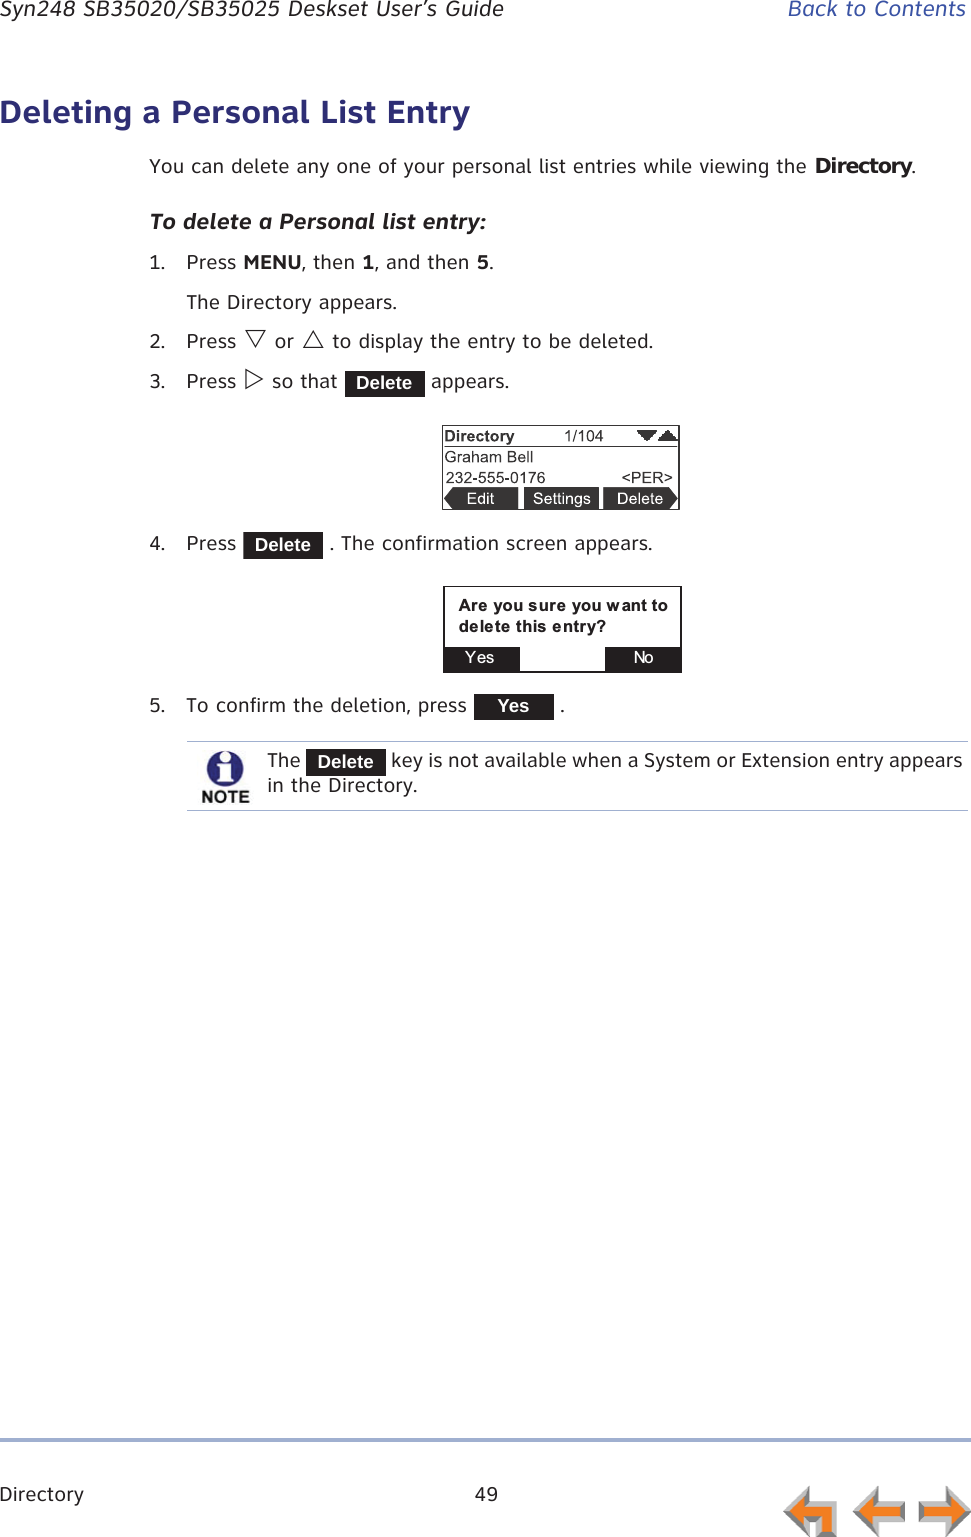
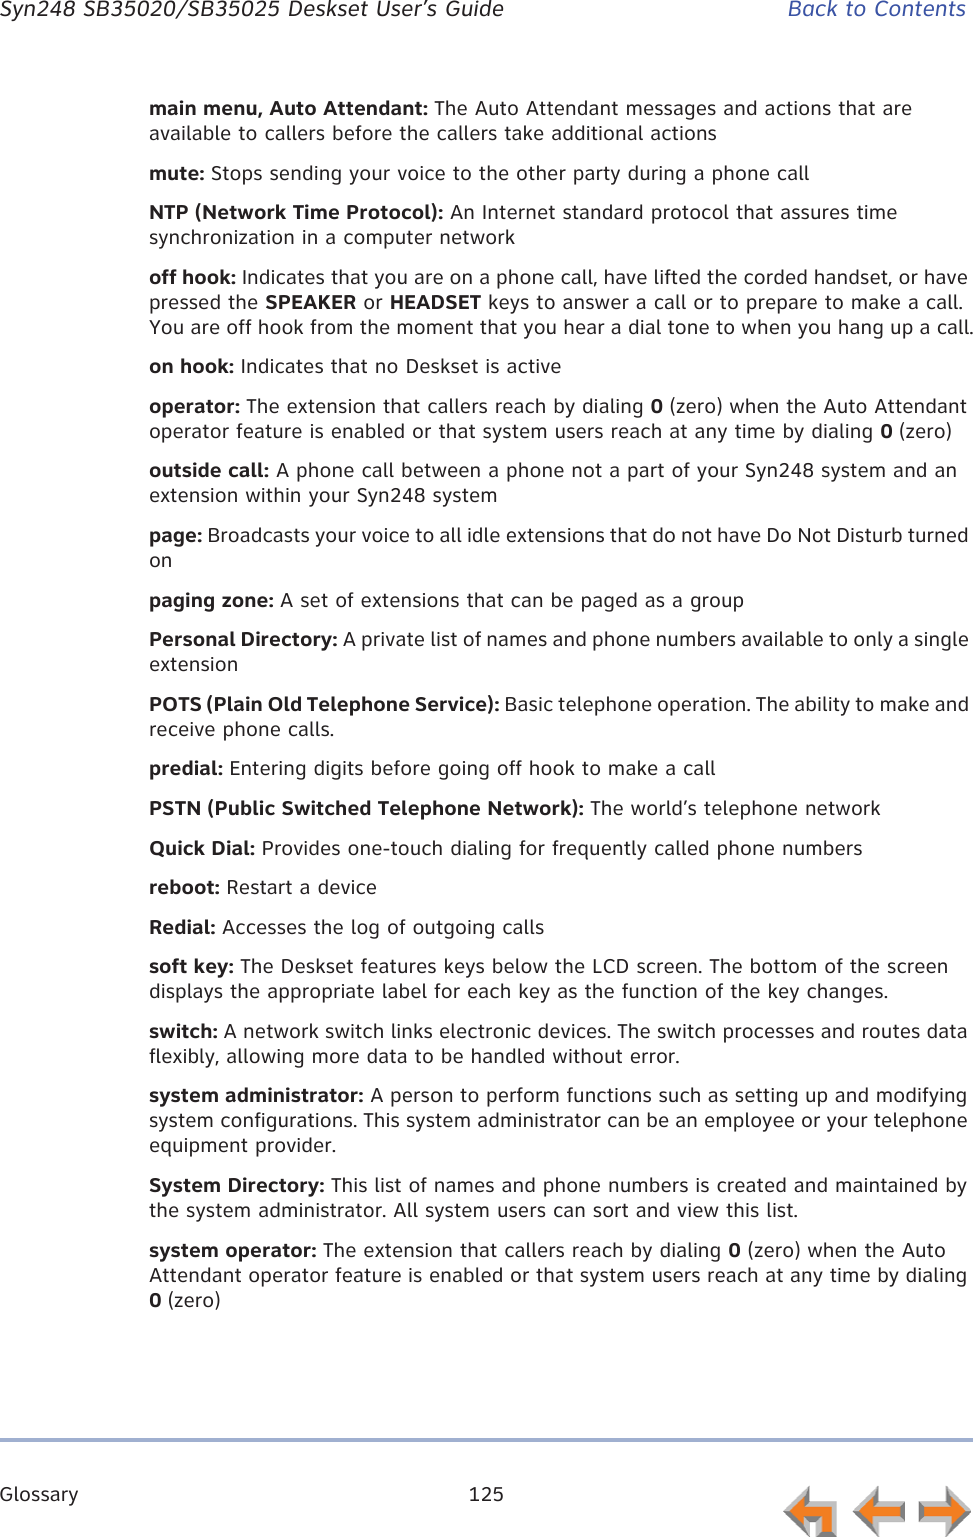
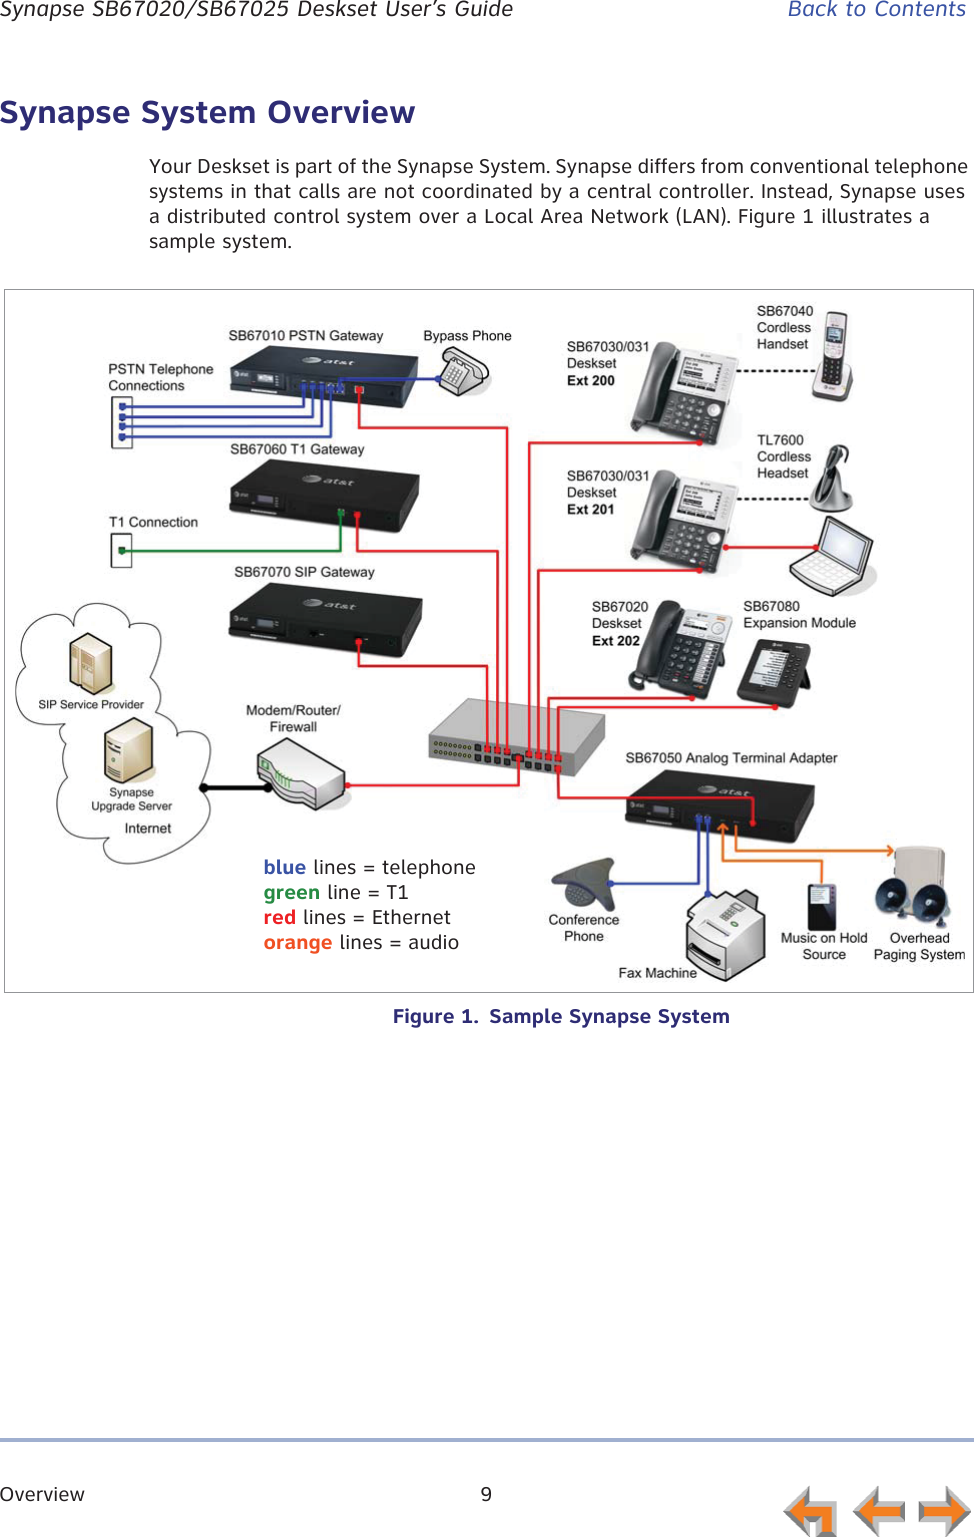
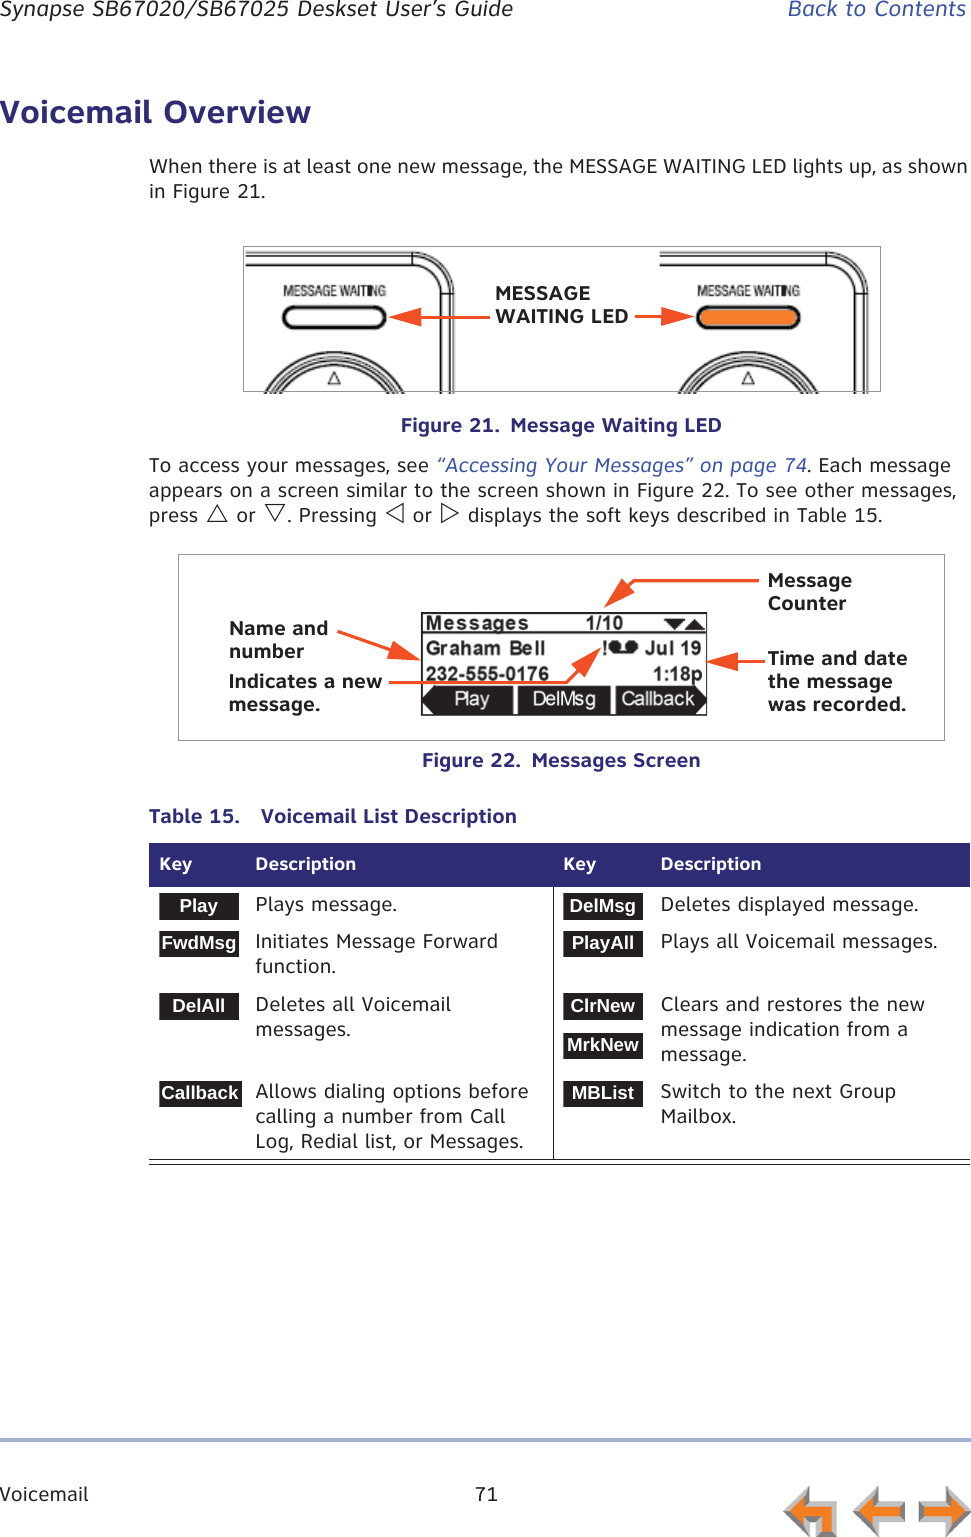
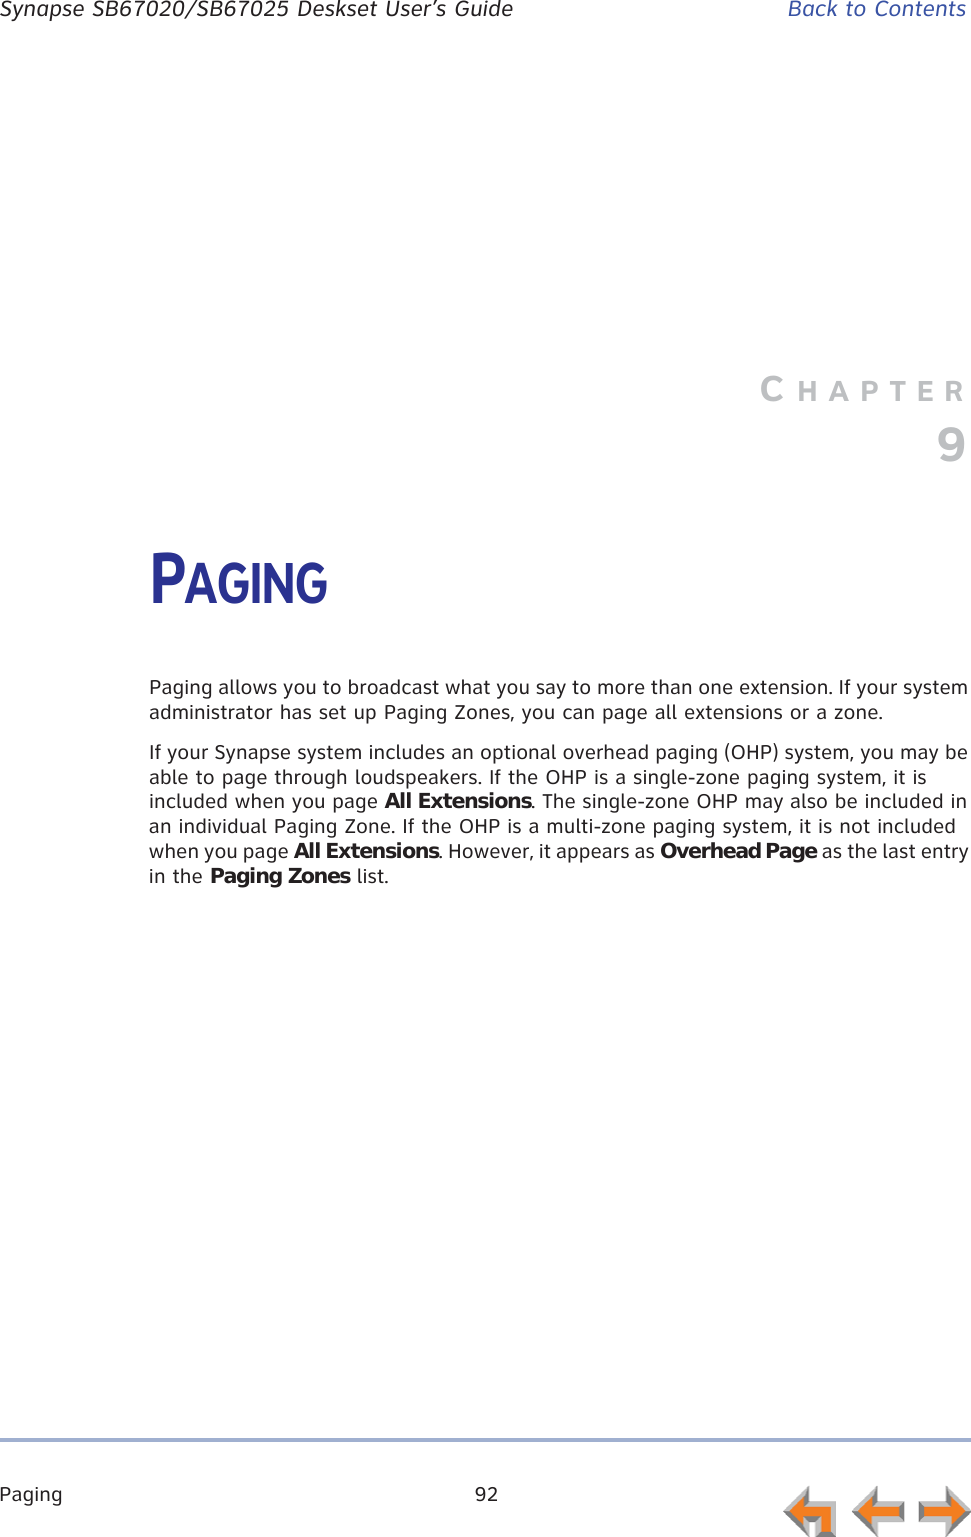
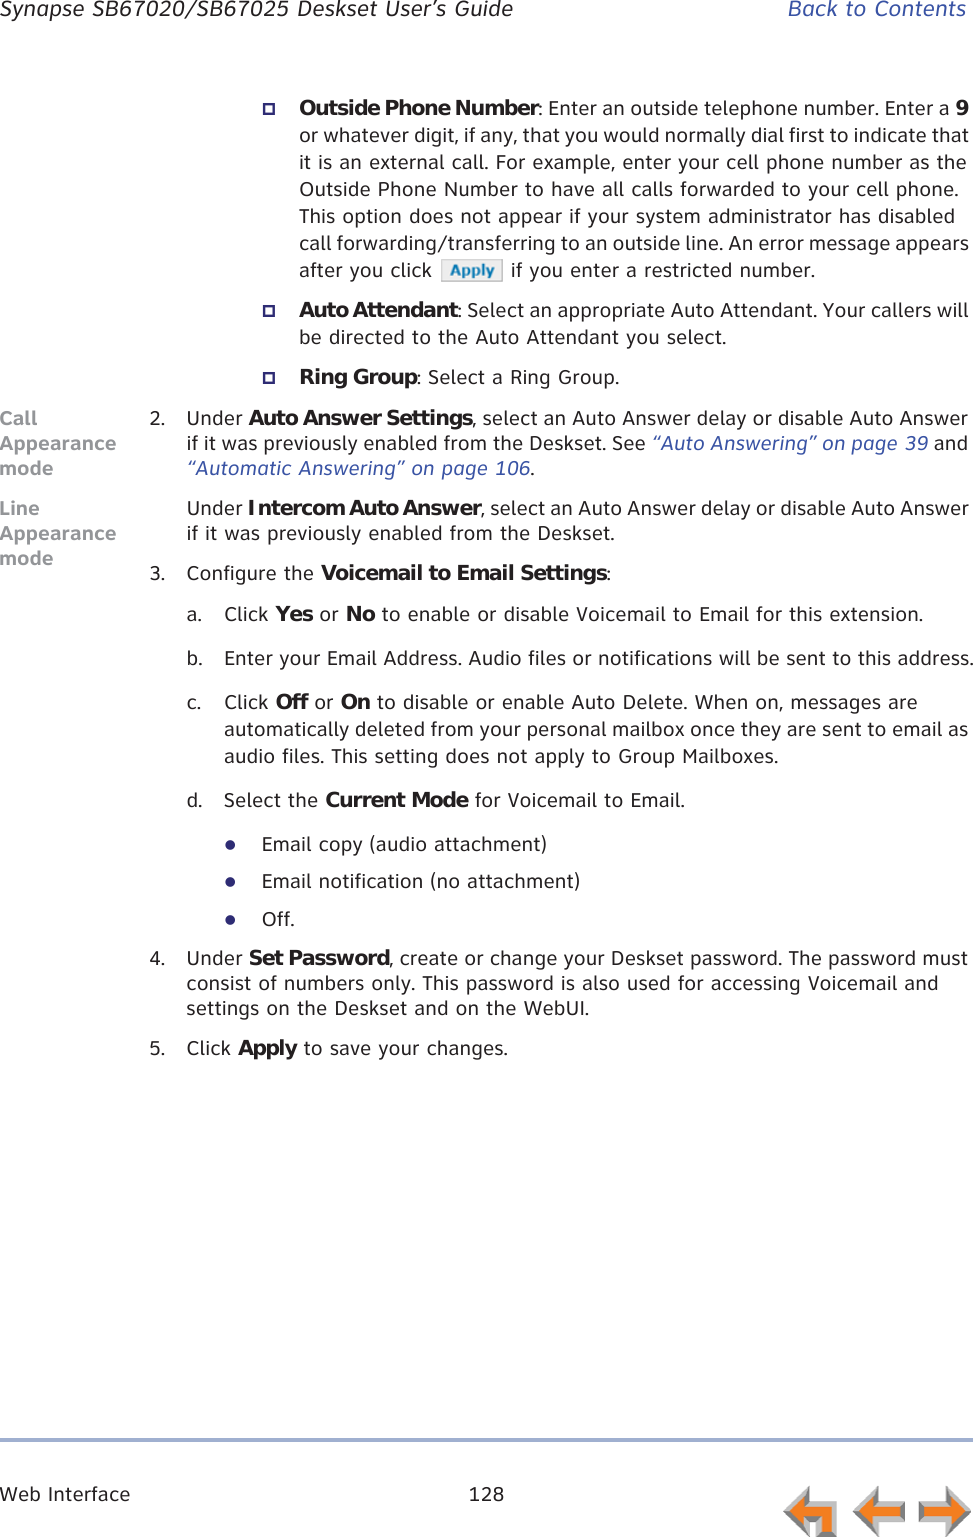
![Web Interface 95 Syn248 SB35020/SB35025 Deskset User’s Guide Back to ContentsTo edit Personal Directory entries:1. In the navigation menu at left, click Personal Directory. The Directory List page appears.2. Click [Edit] next to the entry to be edited. The Edit Personal Directory List Entry page appears.3. Complete the form with the desired information.4. Click to accept your changes or to reject the changes.To sort and delete Personal Directory entries:1. In the navigation menu at left, click Personal Directory to display the Directory List.2. To sort entries by last name, click . The button then changes to . This action only works during the current session. The sort order reverts to listing the names by first name when you log in the next time.3. To delete Directory entries:a. Click the check boxes for the entries you want to delete.b. Click . All of the selected entries are removed.](https://usermanual.wiki/VTech-Telecommunications/80-9098-00/User-Guide-1845770-Page-95.png)


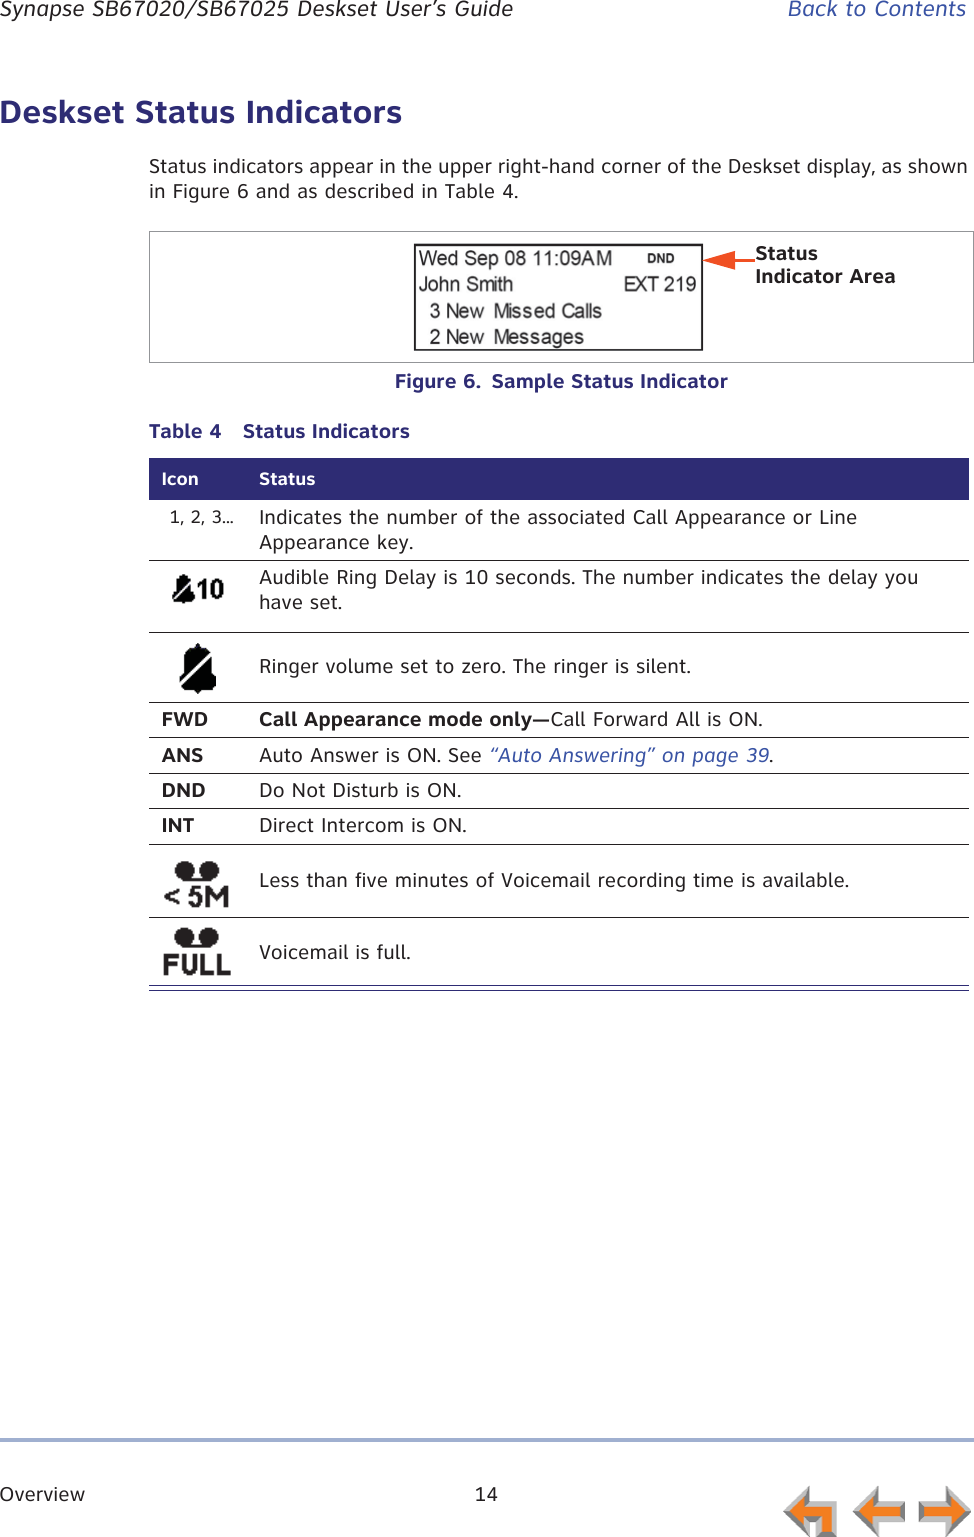
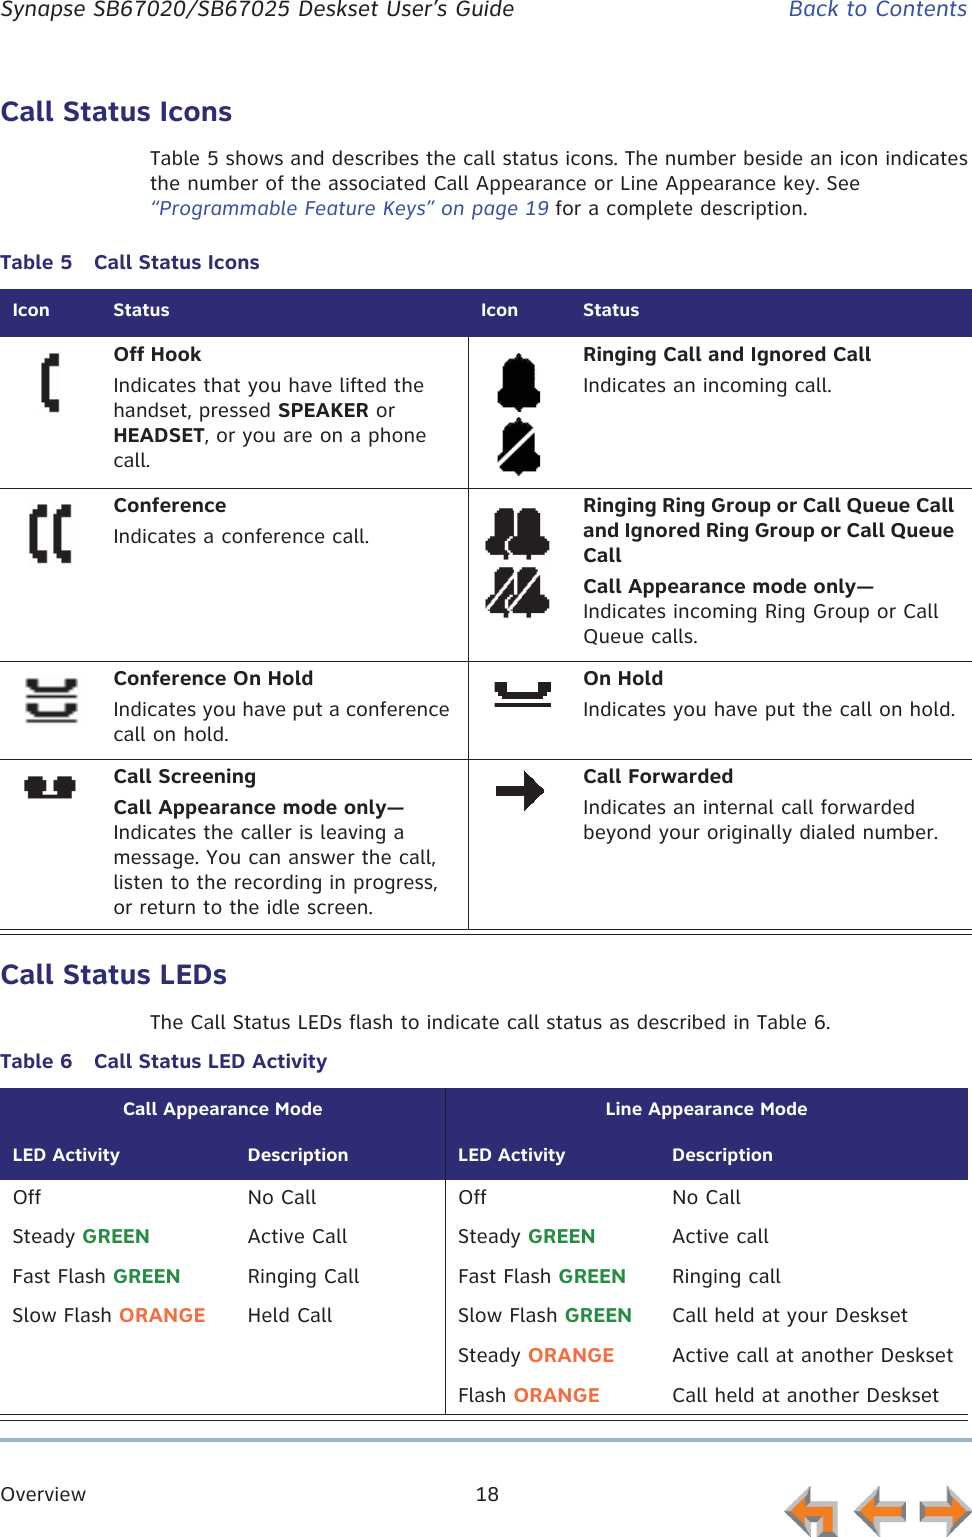


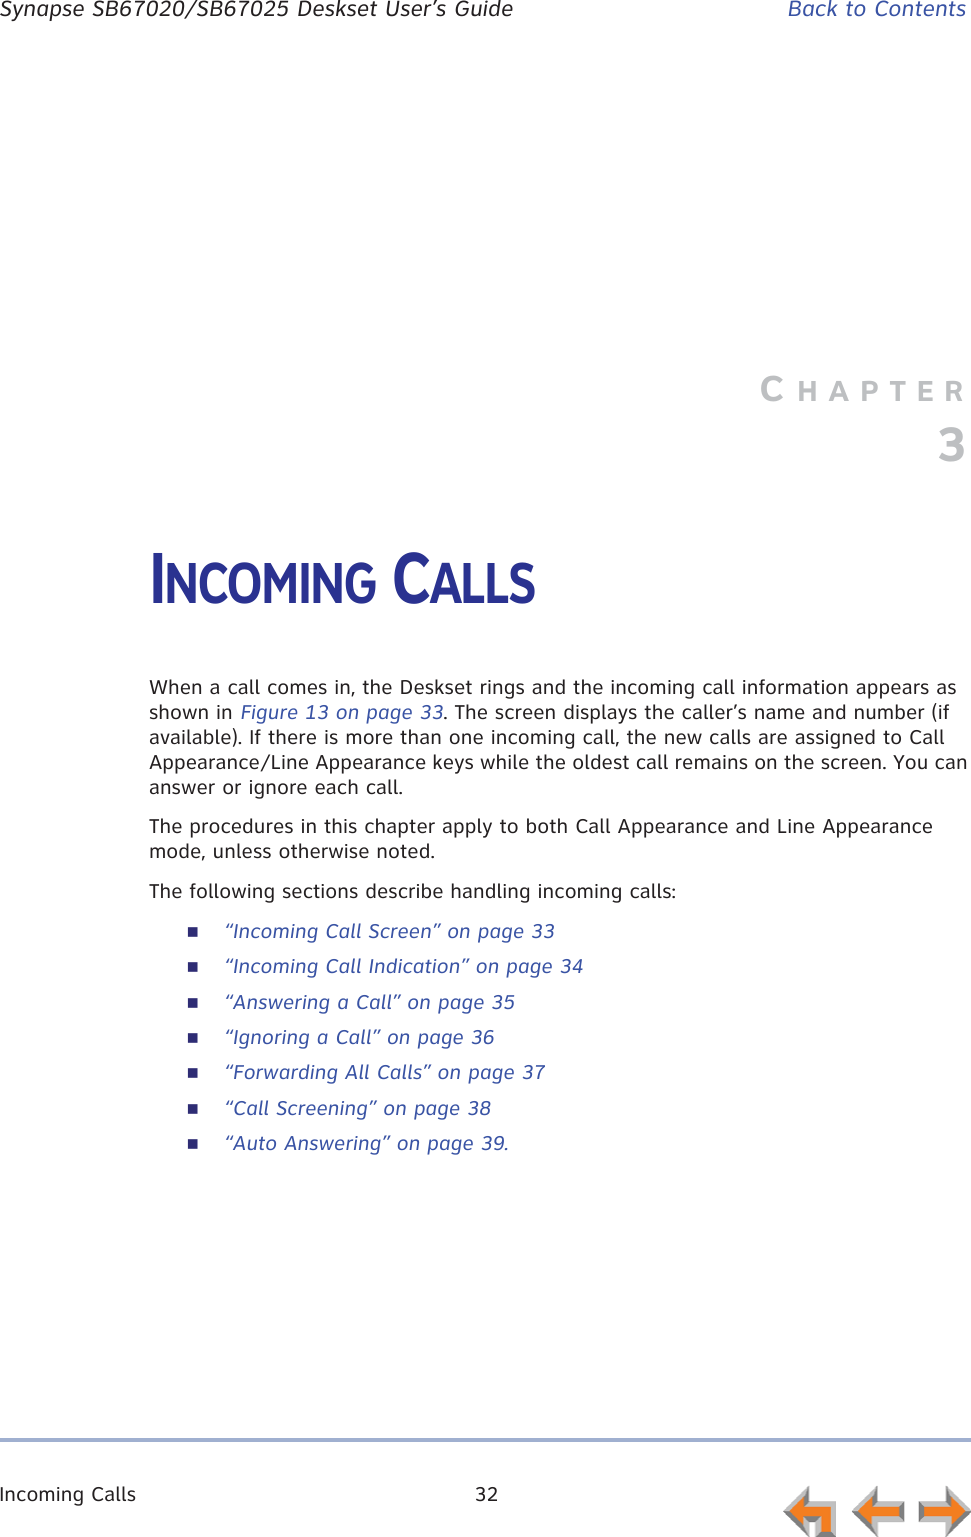
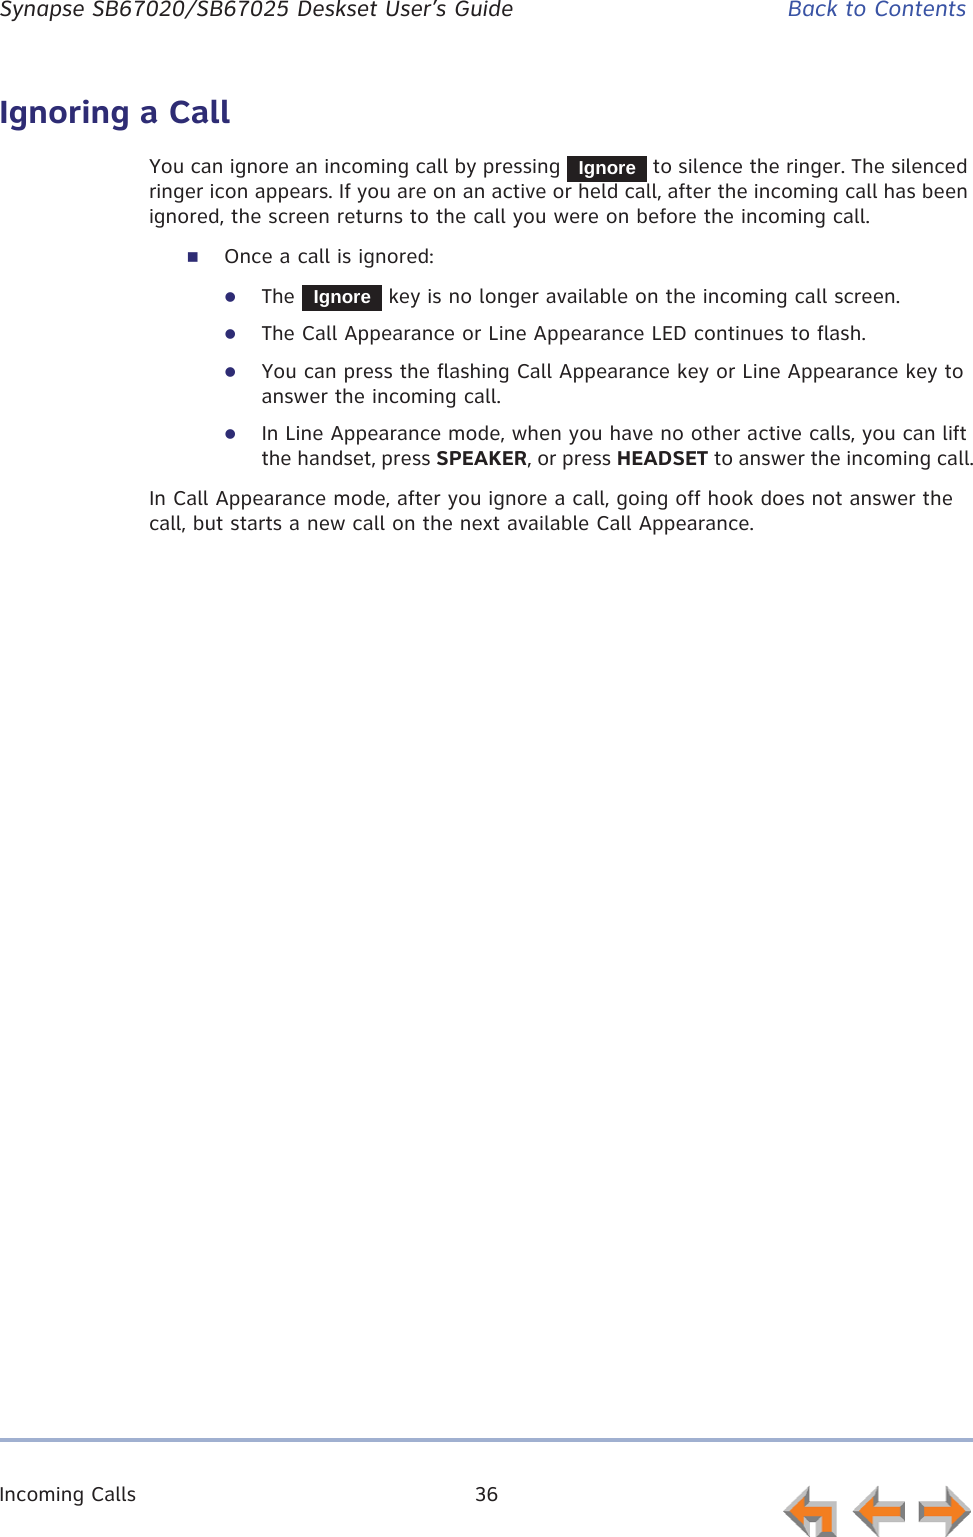

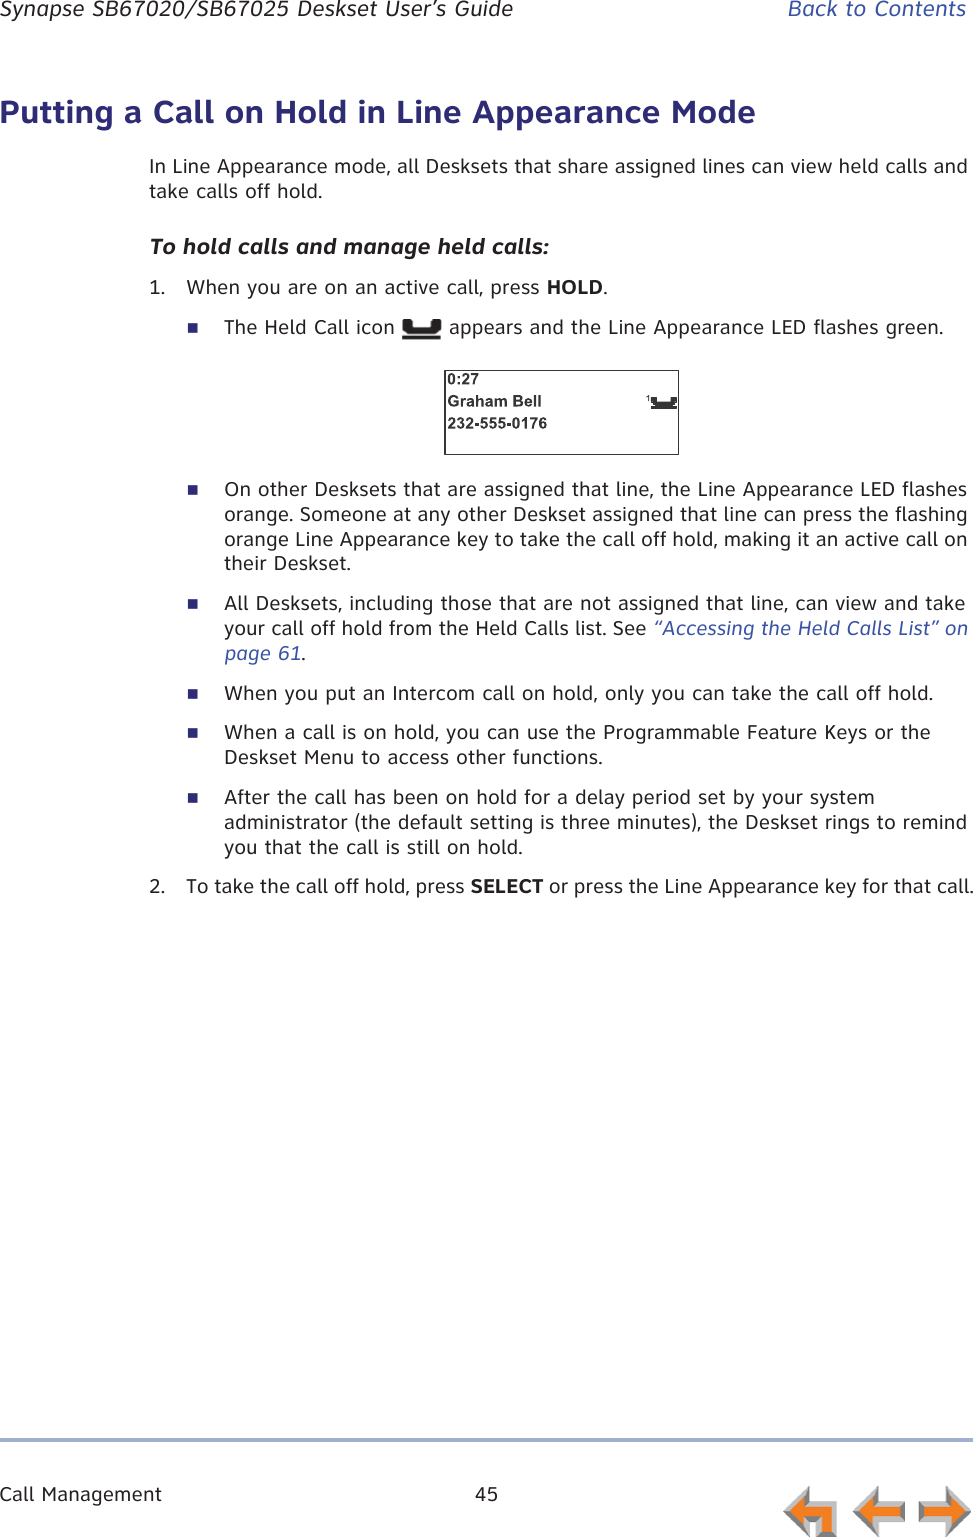
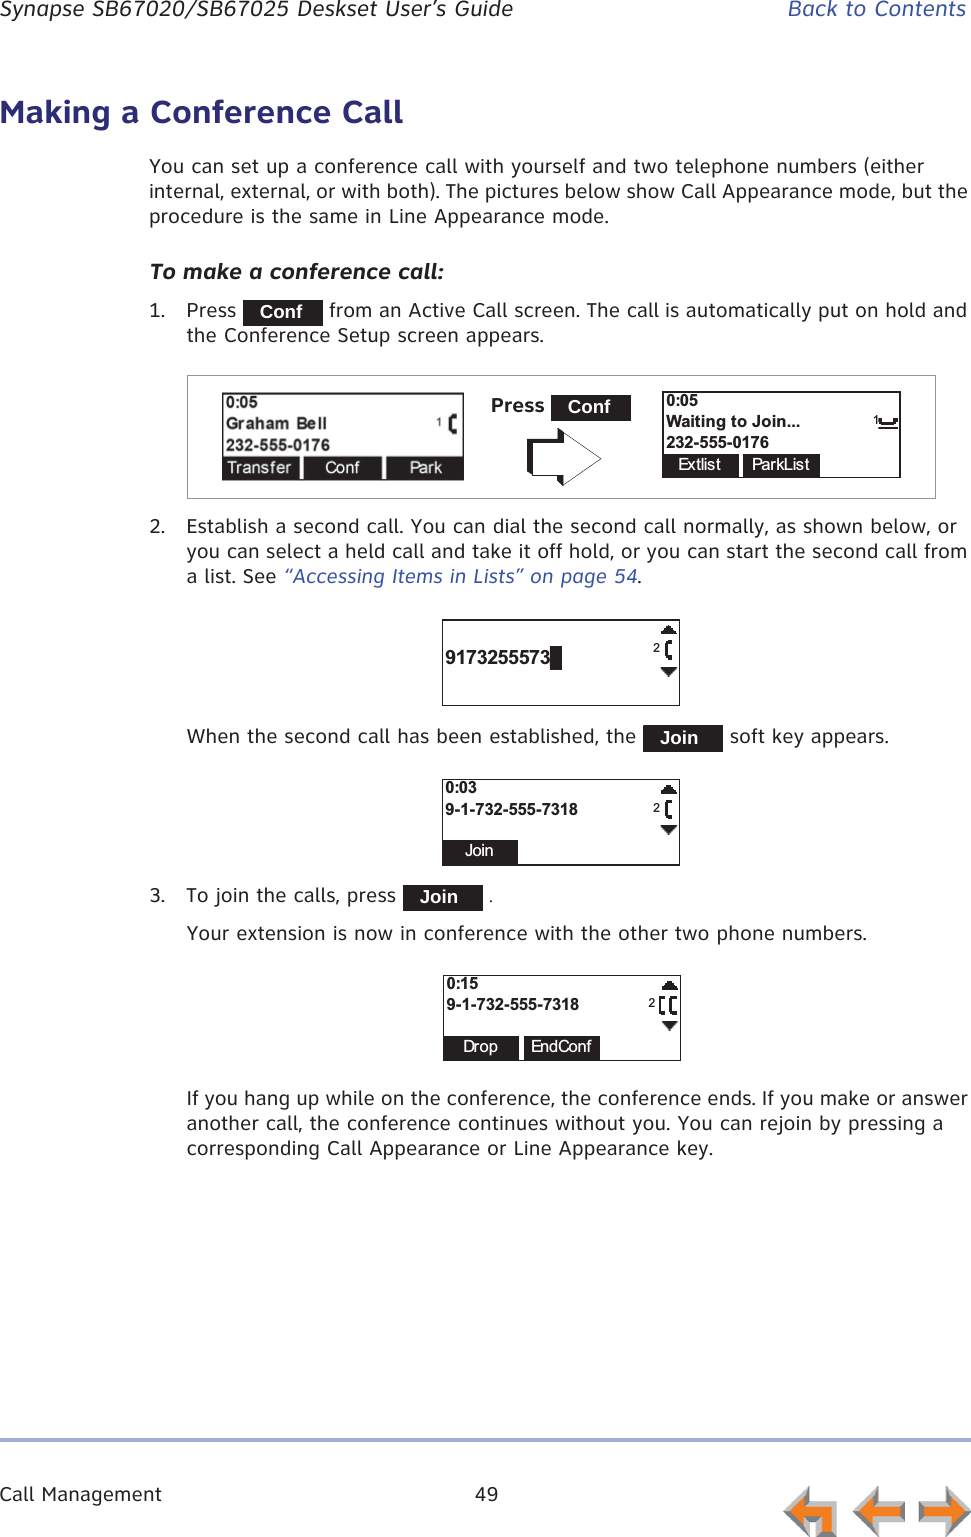
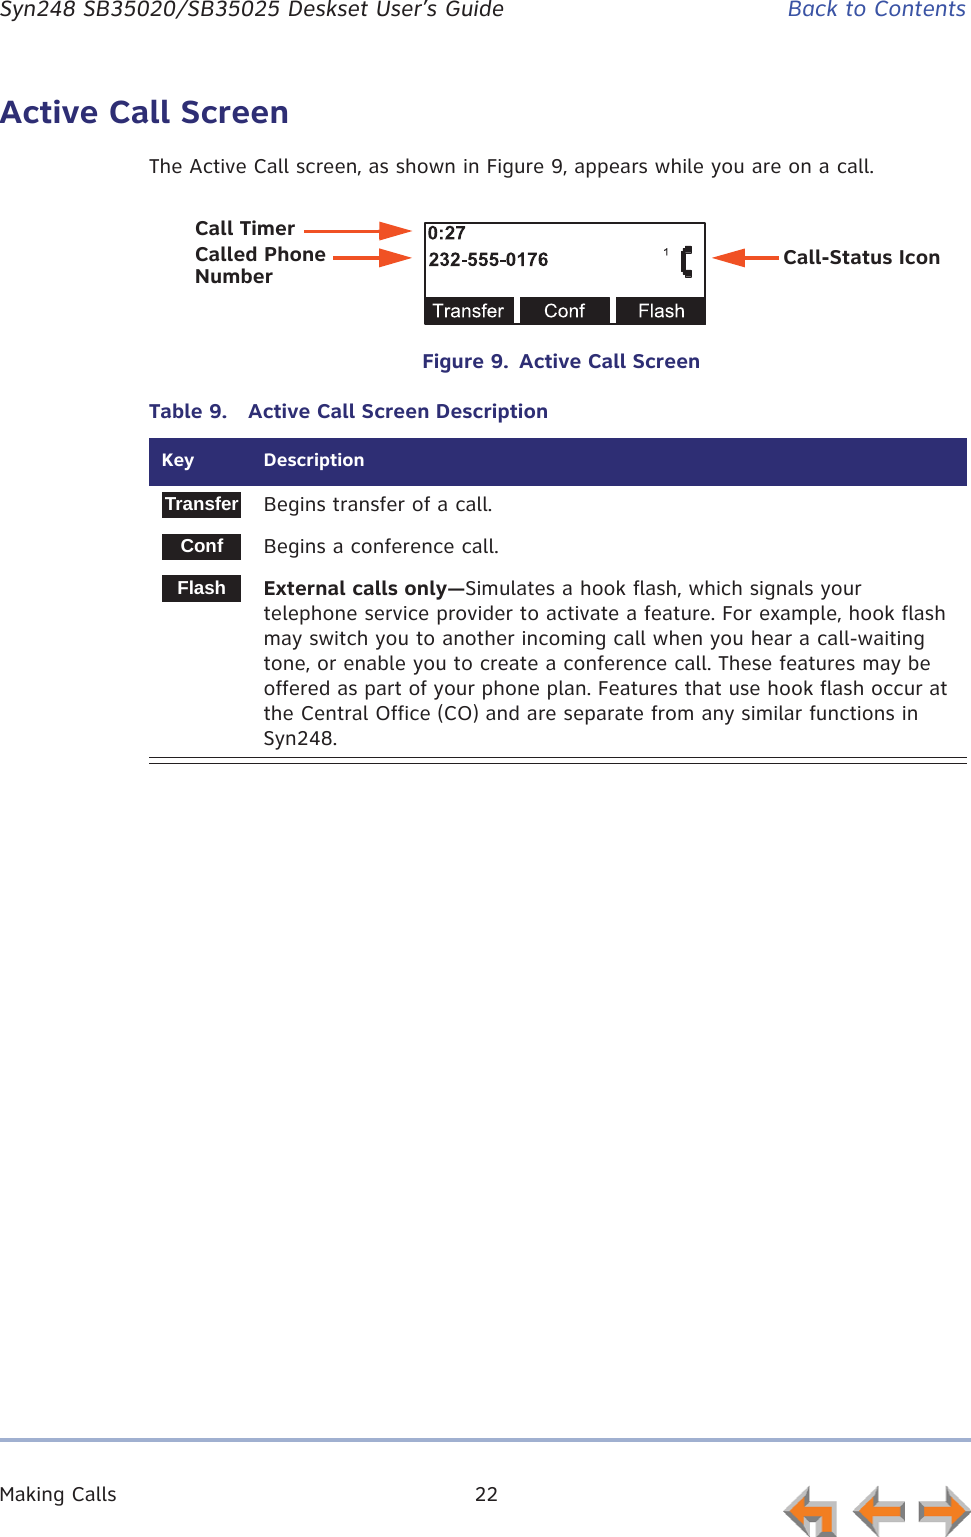
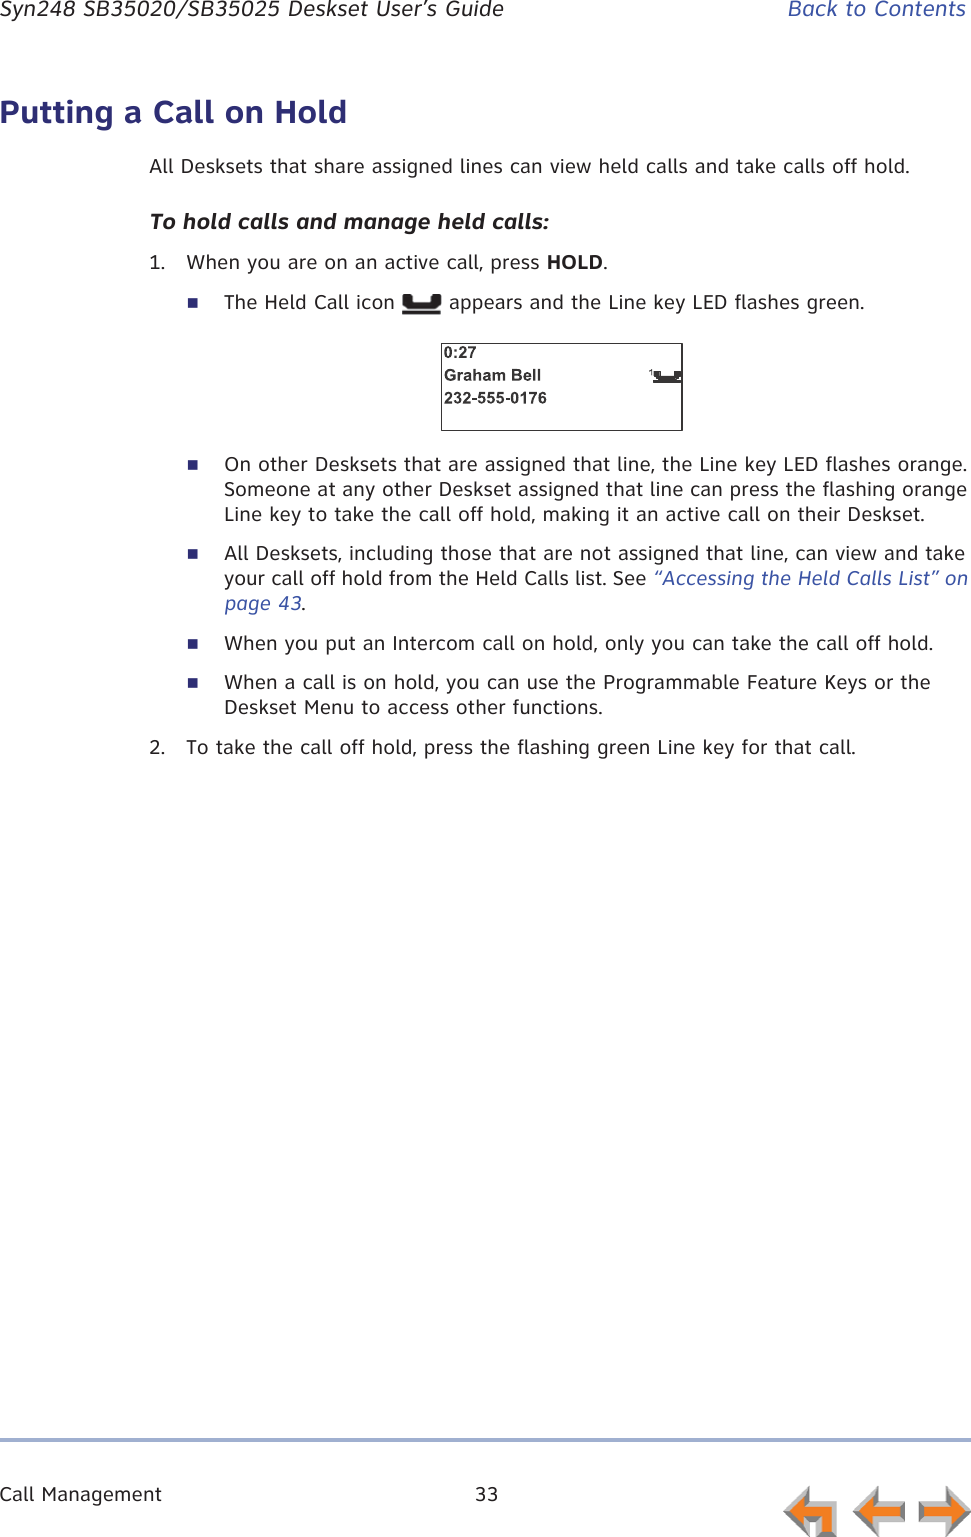
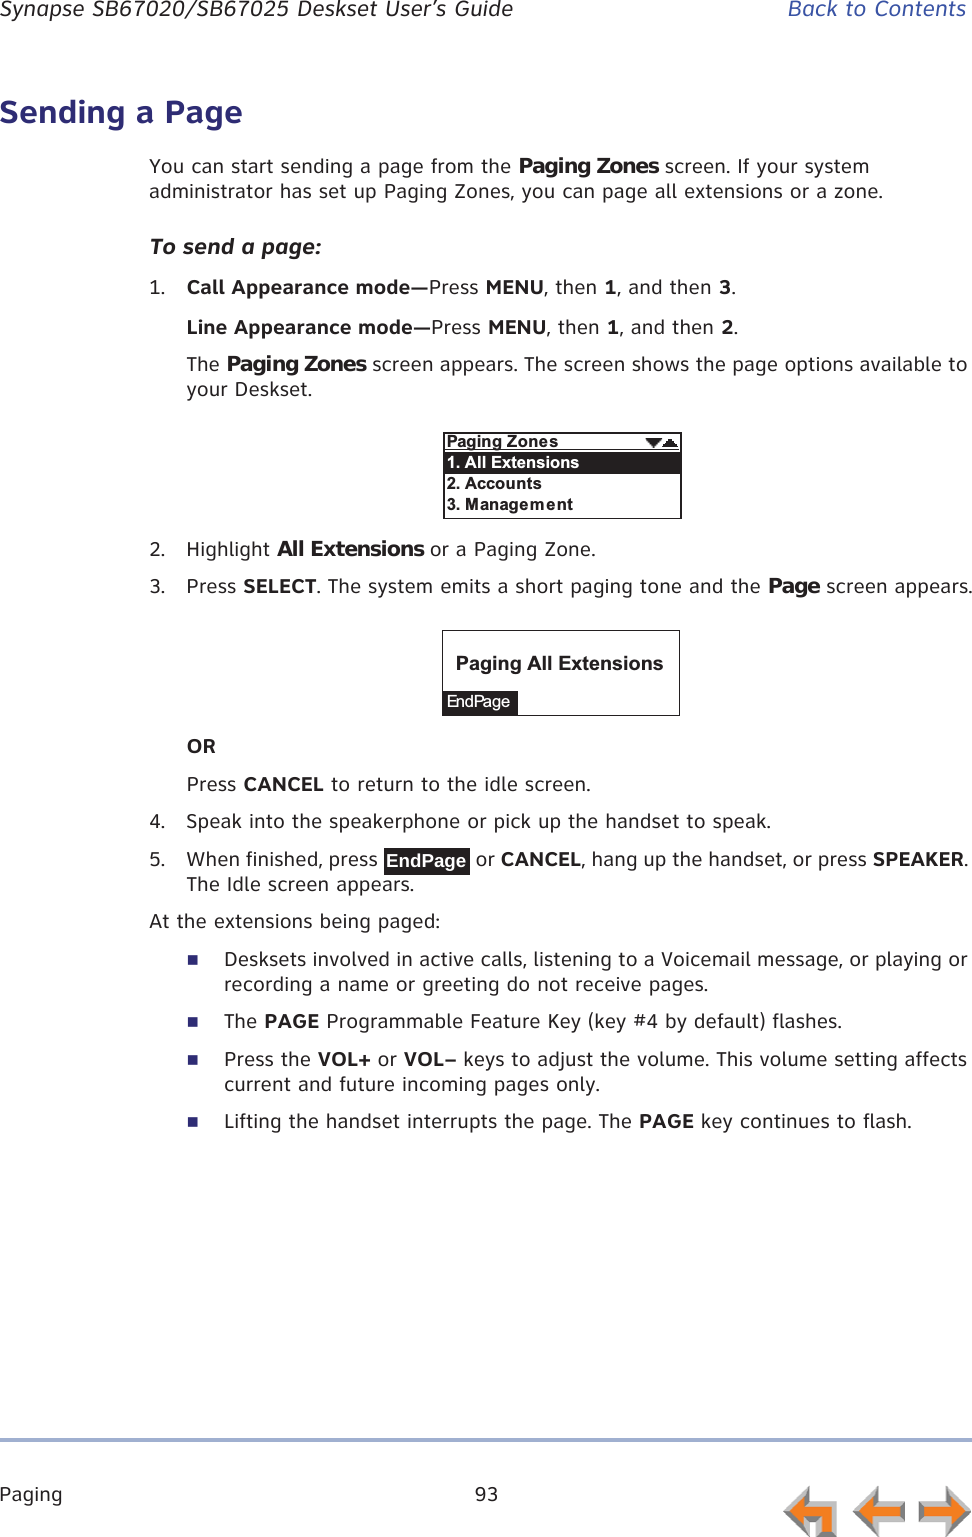
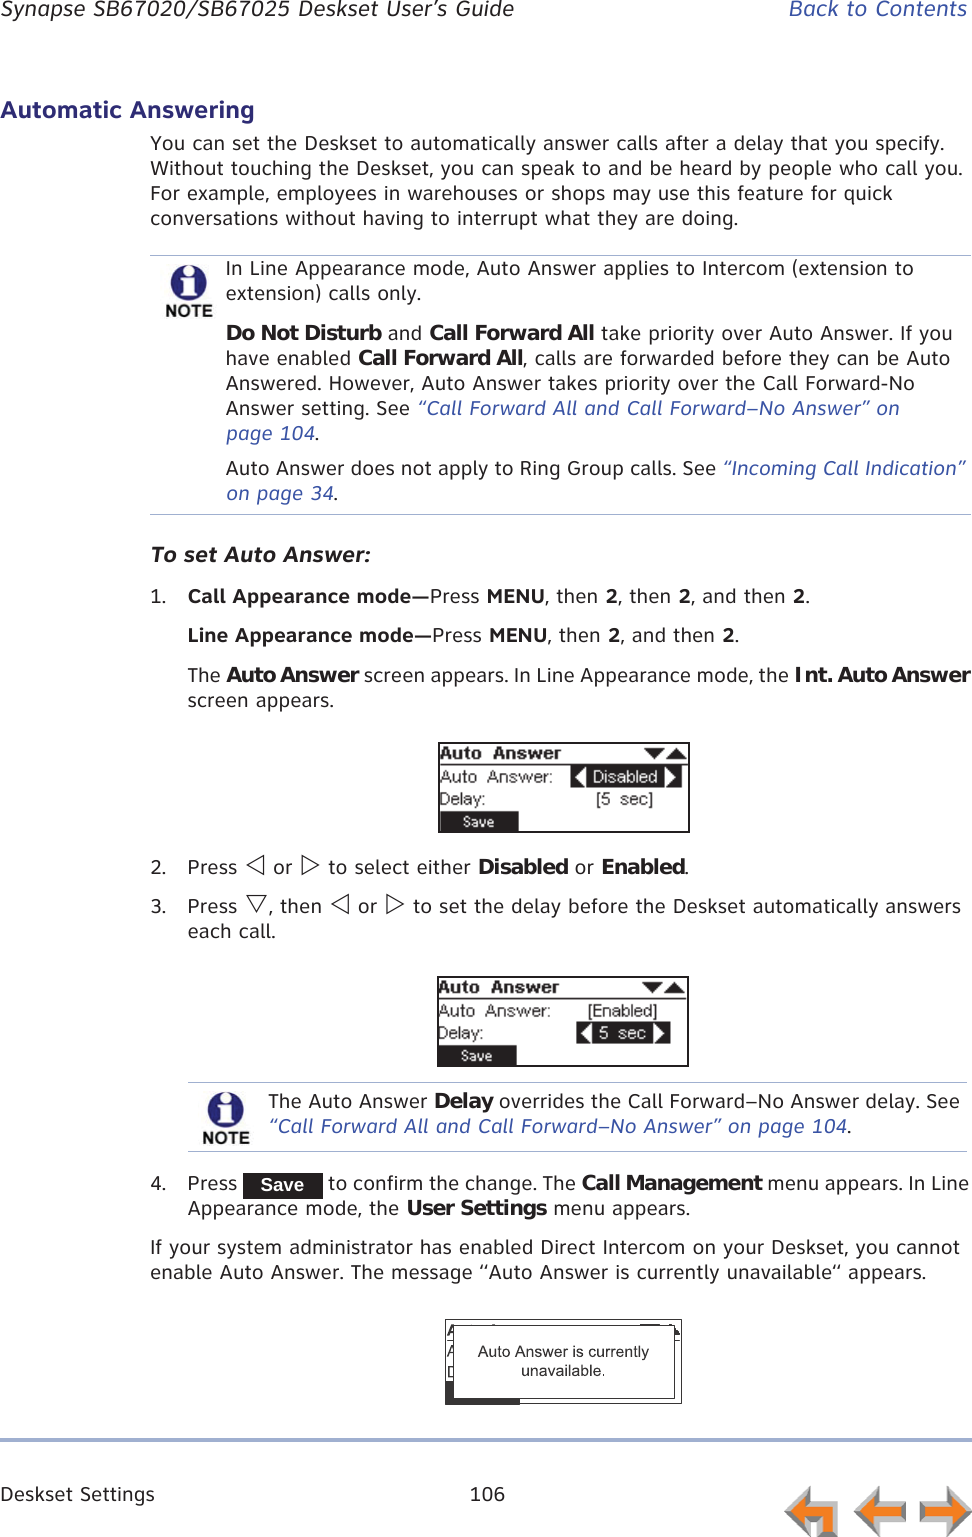
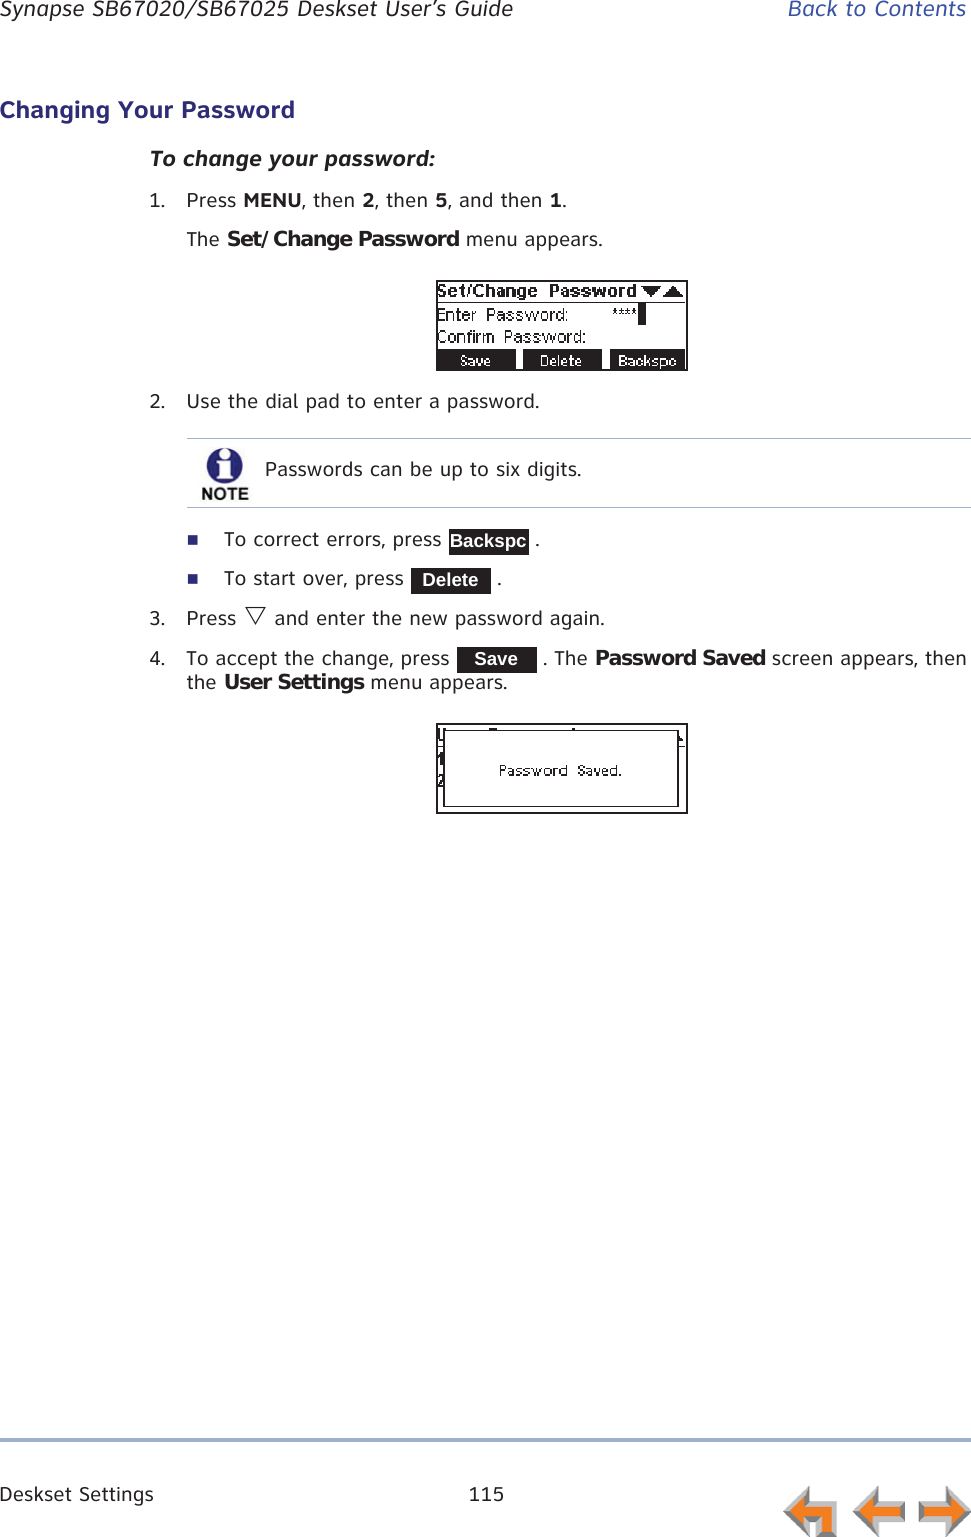
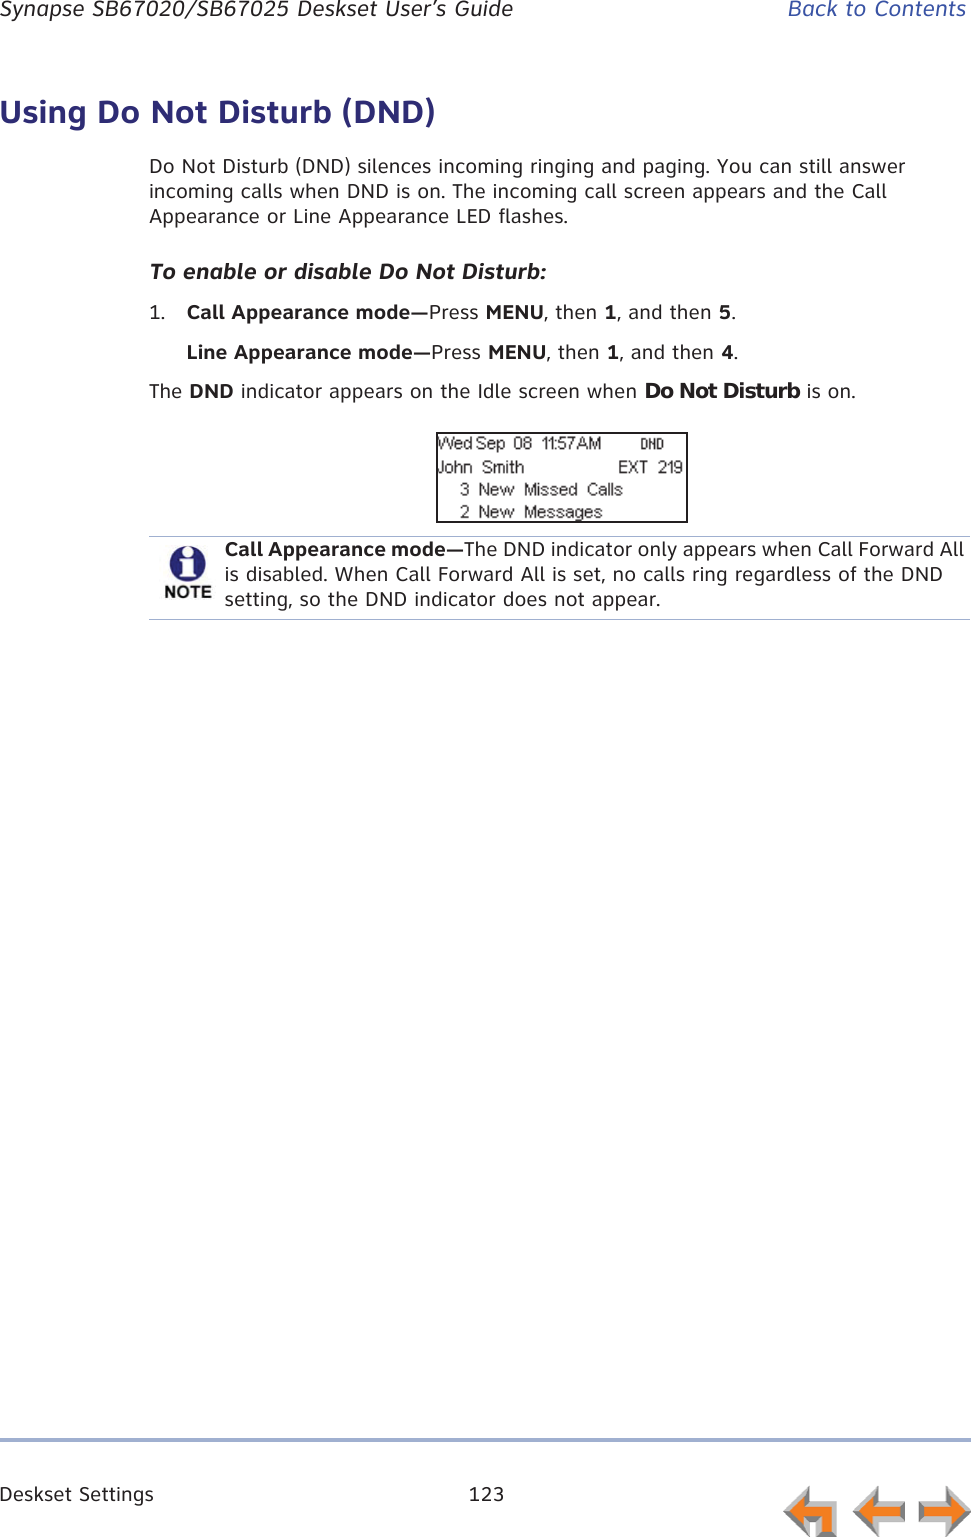
![Call Management 51 Synapse SB67020/SB67025 Deskset User’s Guide Back to ContentsParking a CallParking a call is similar to putting a call on Hold, but any extension on the system can retrieve a parked call. You can park external calls only.To park a call:1. Press V or U to display the active or held external call you want to park.2. Press .The Call parked screen appears for five seconds, then the Idle screen appears.If no one retrieves the parked call after a time delay set by your system administrator (the default setting is three minutes), your Deskset rings and the parked call appears. To answer the call, press .This feature applies to Call Appearance mode only.Park0:05Graham Be ll232-555-0176TransferConfPa r k1Call parked on Extension 101.Answer[PARKED CALL]Graham Be ll232-555-01761Answ er Fw dV M Ign or e](https://usermanual.wiki/VTech-Telecommunications/80-9098-00/User-Guide-1845770-Page-197.png)


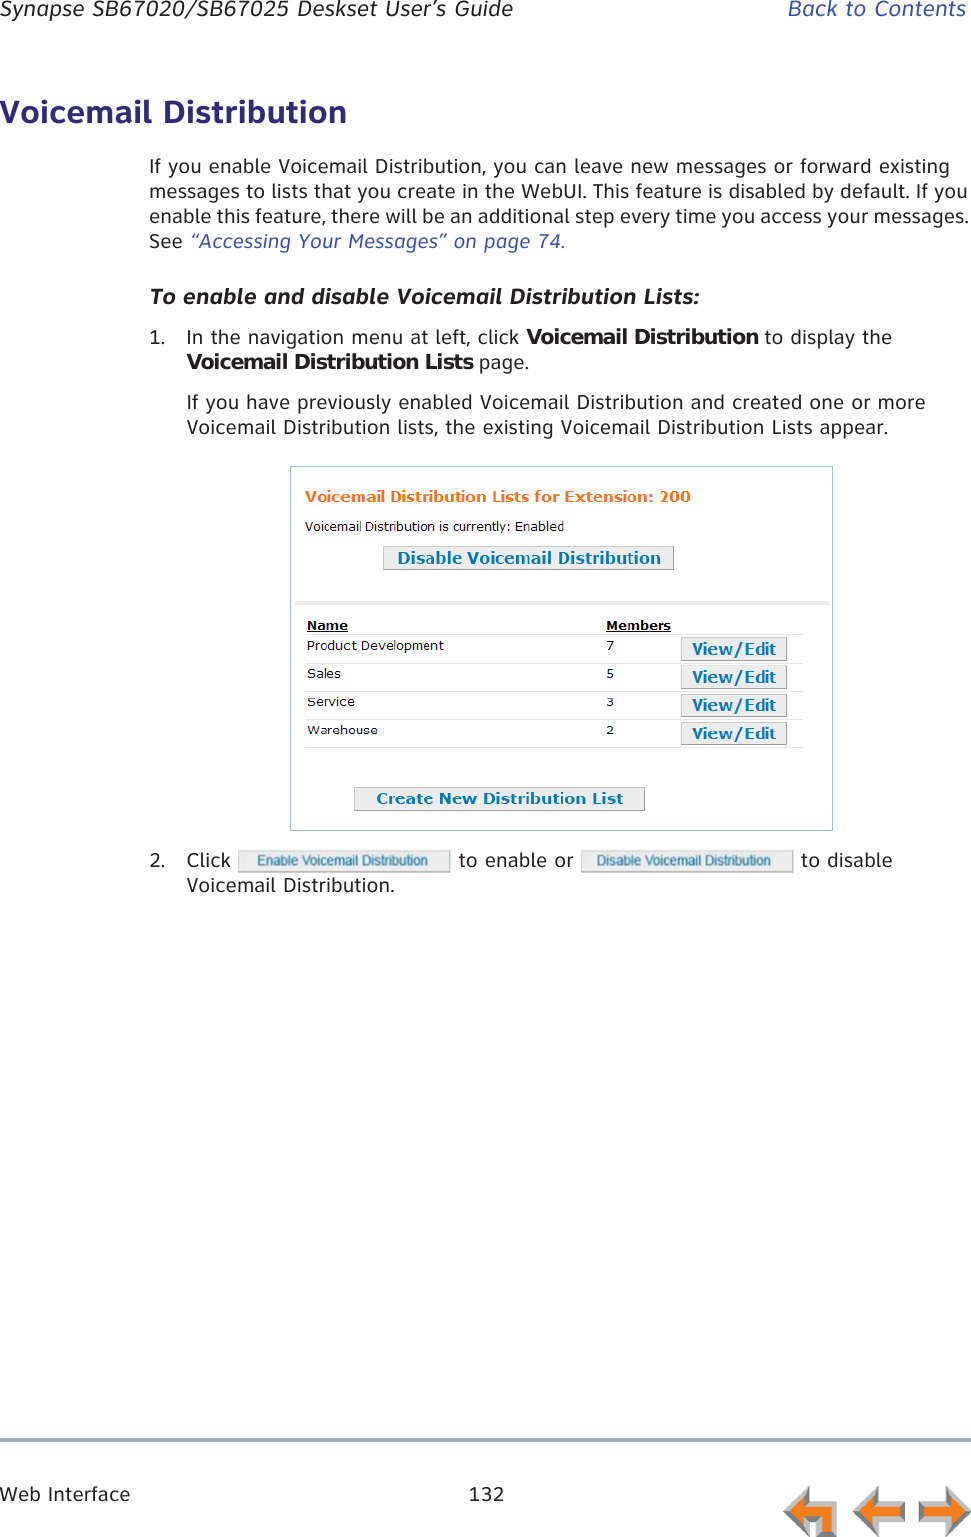
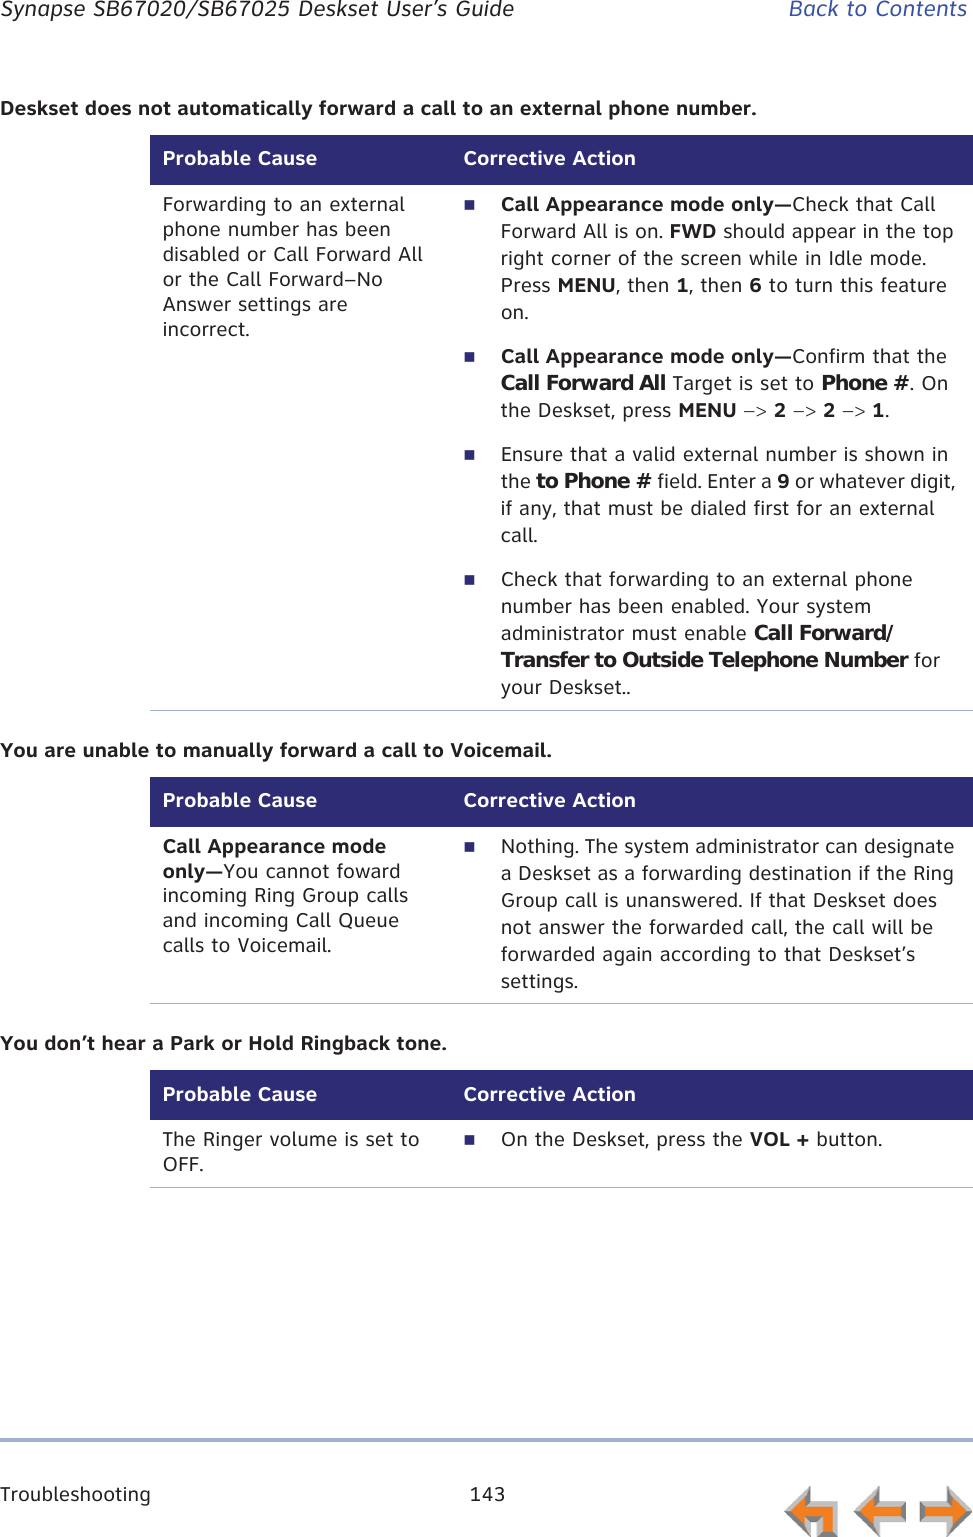
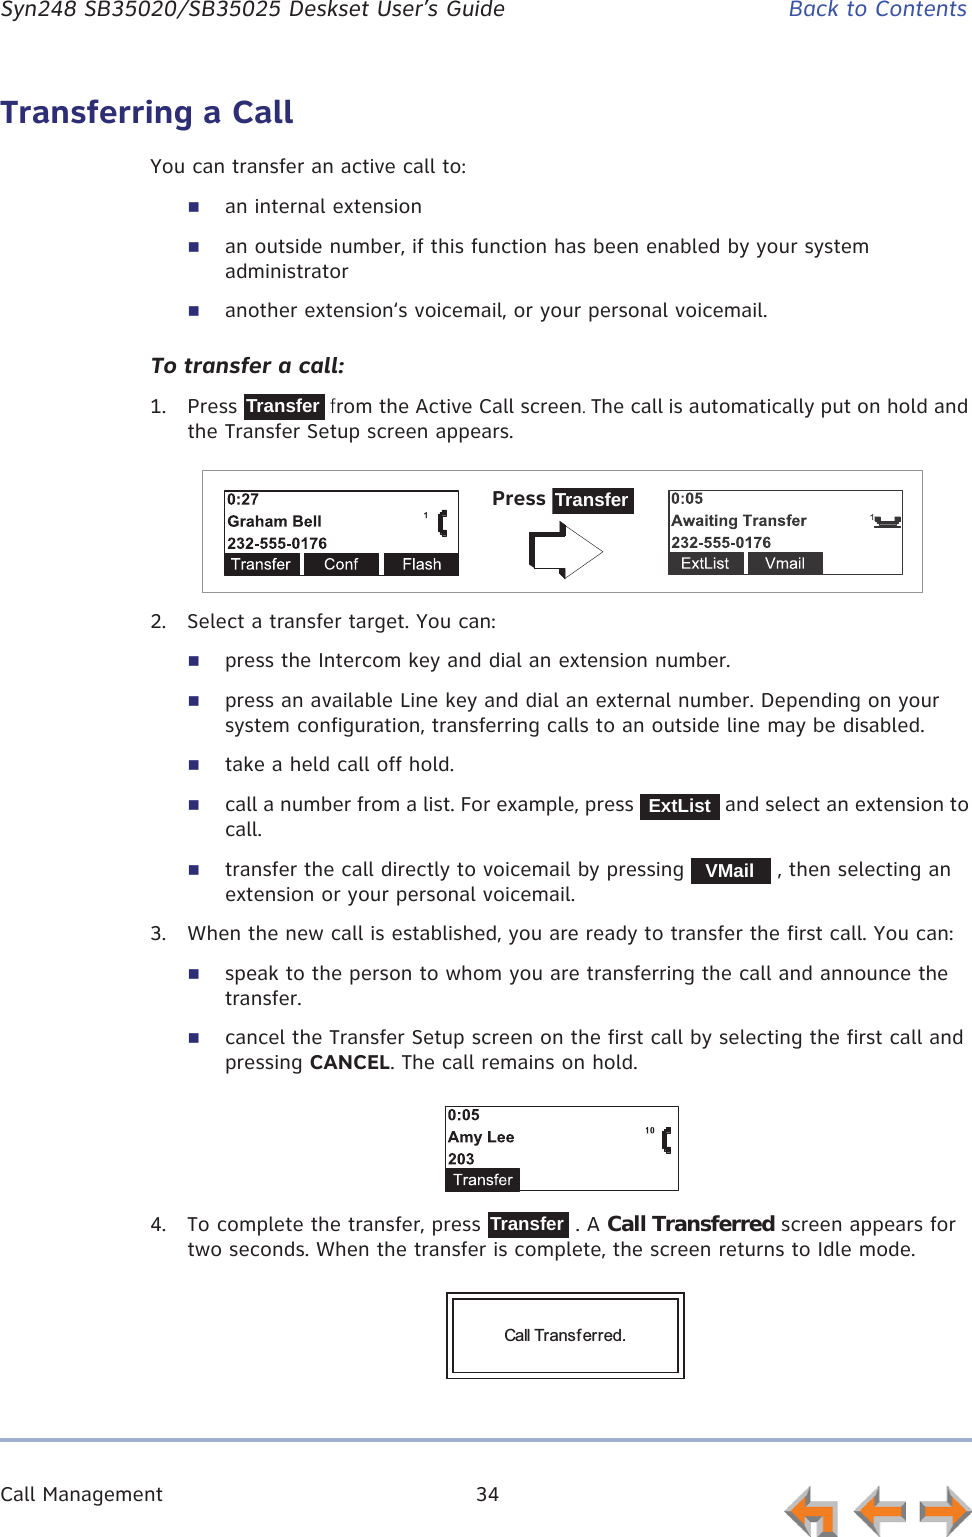
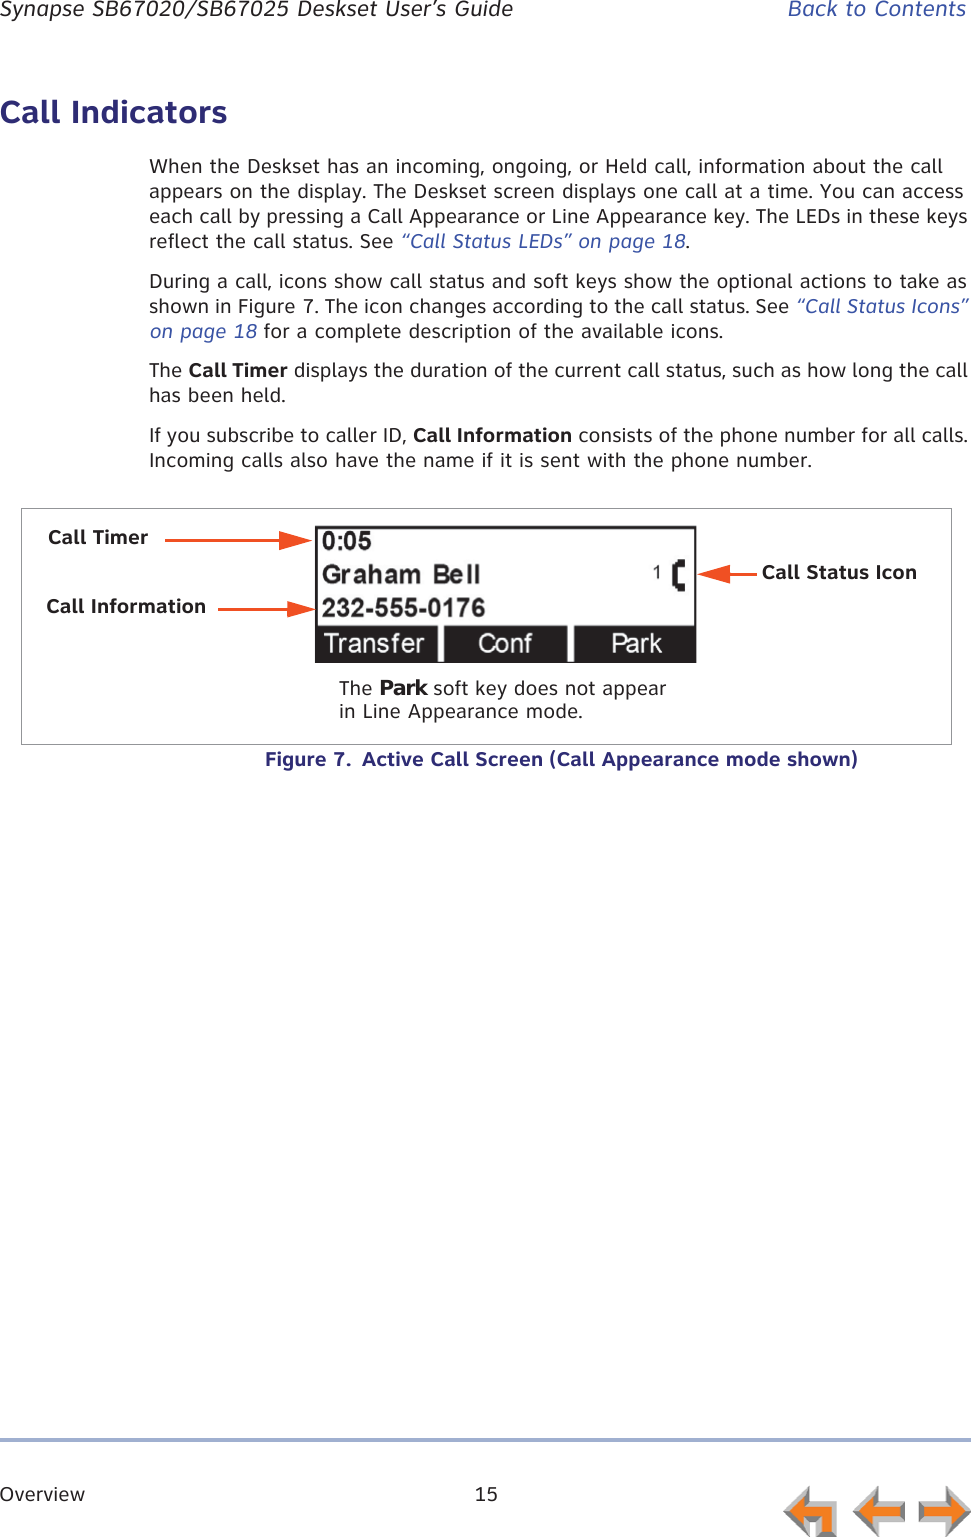
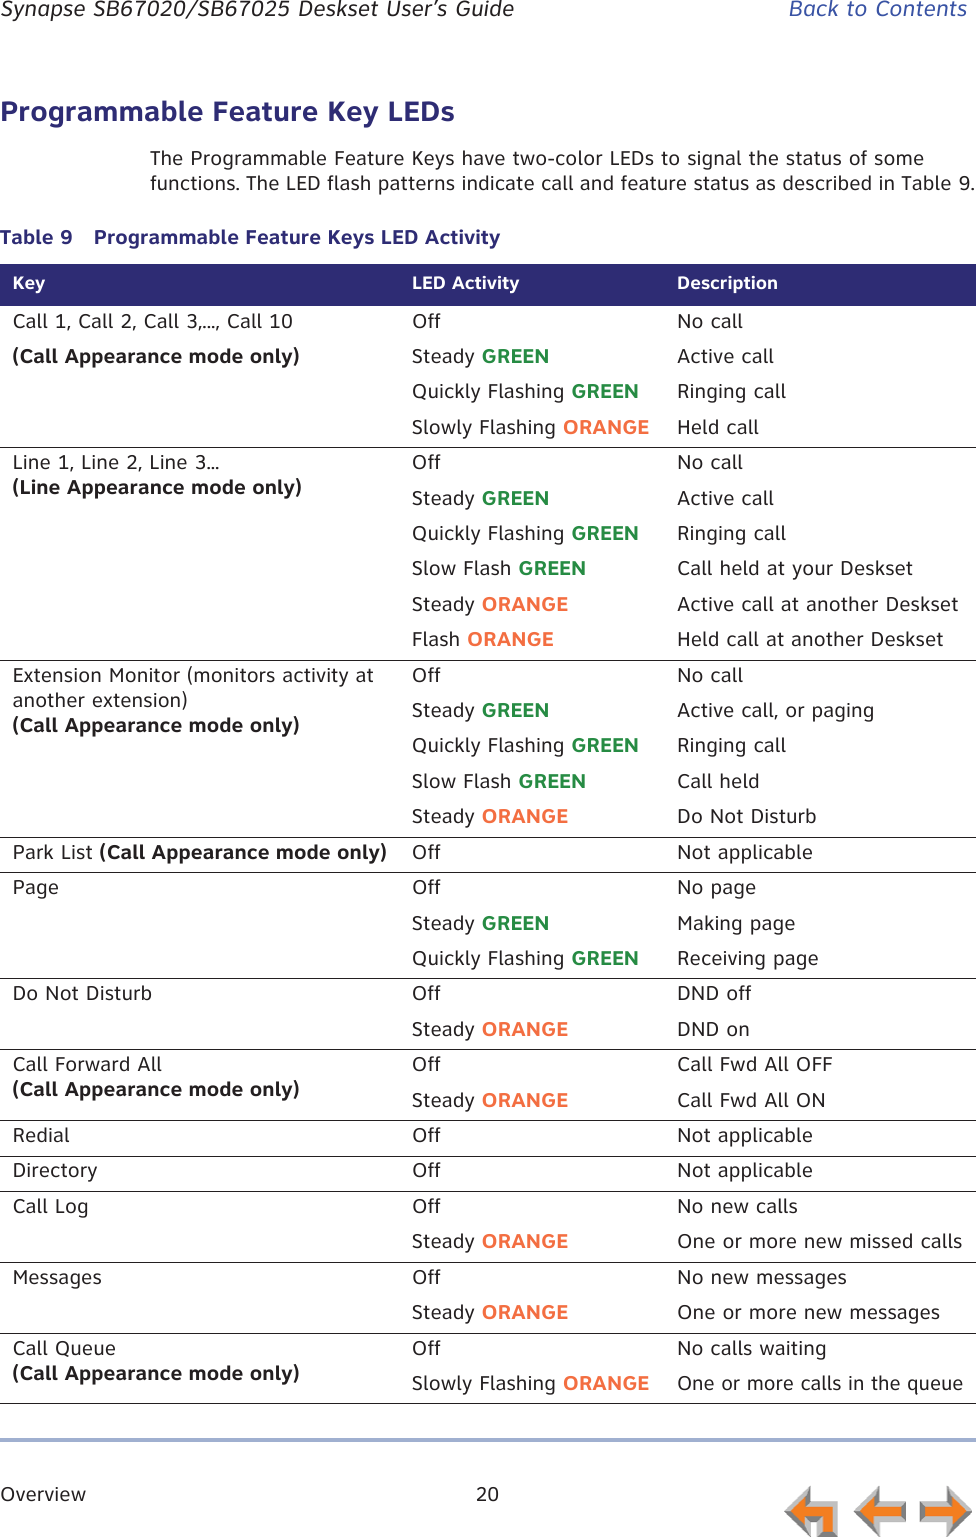
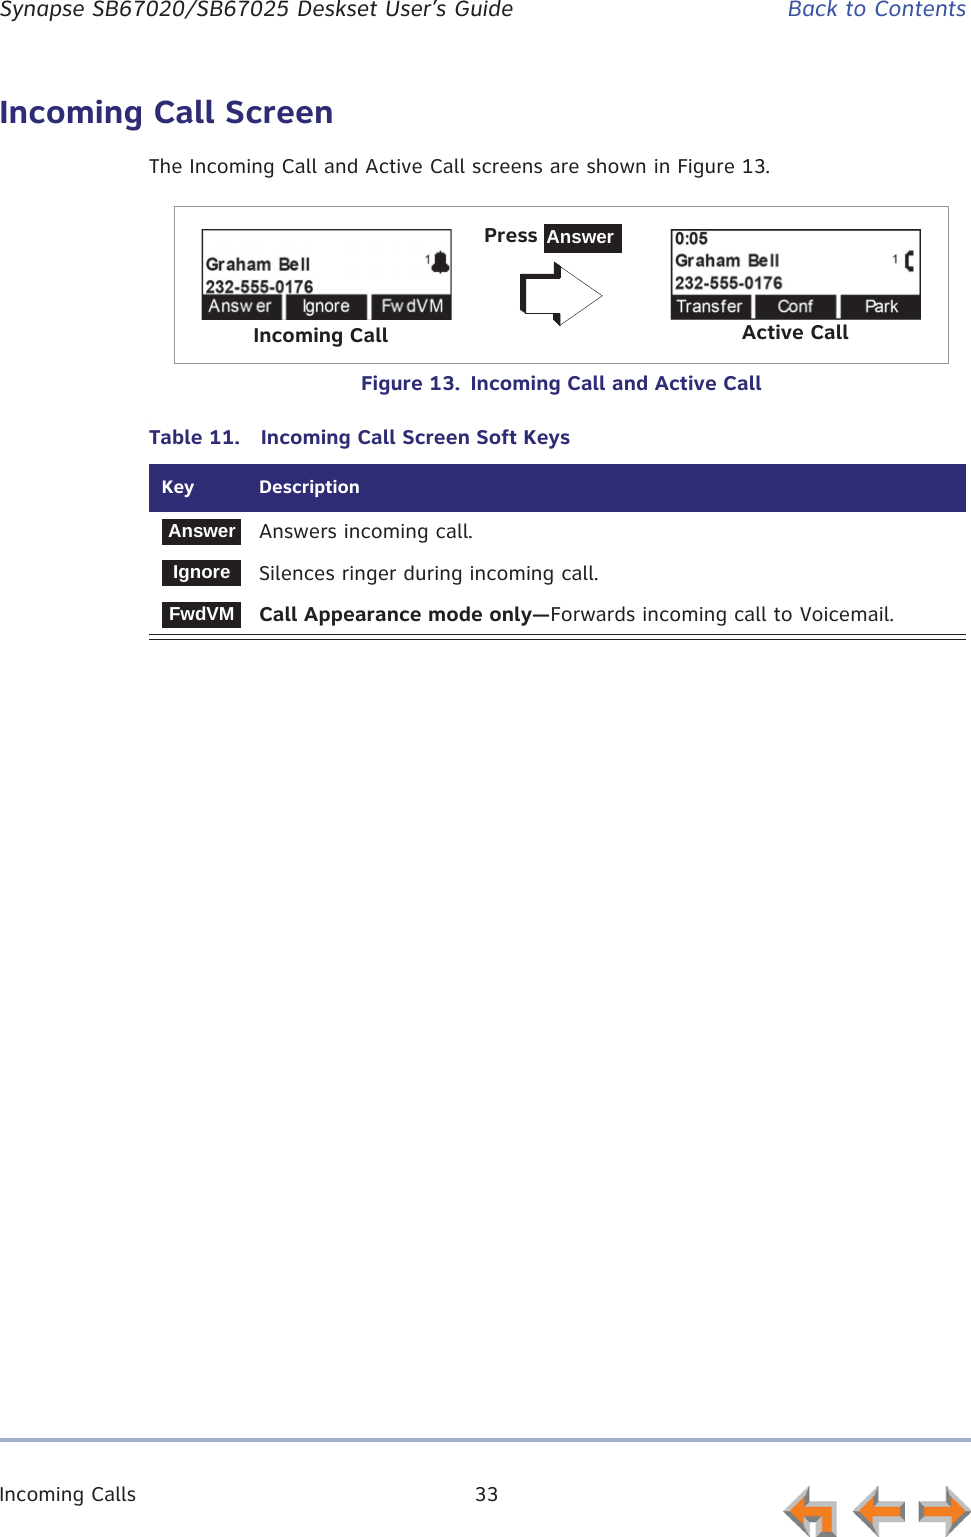
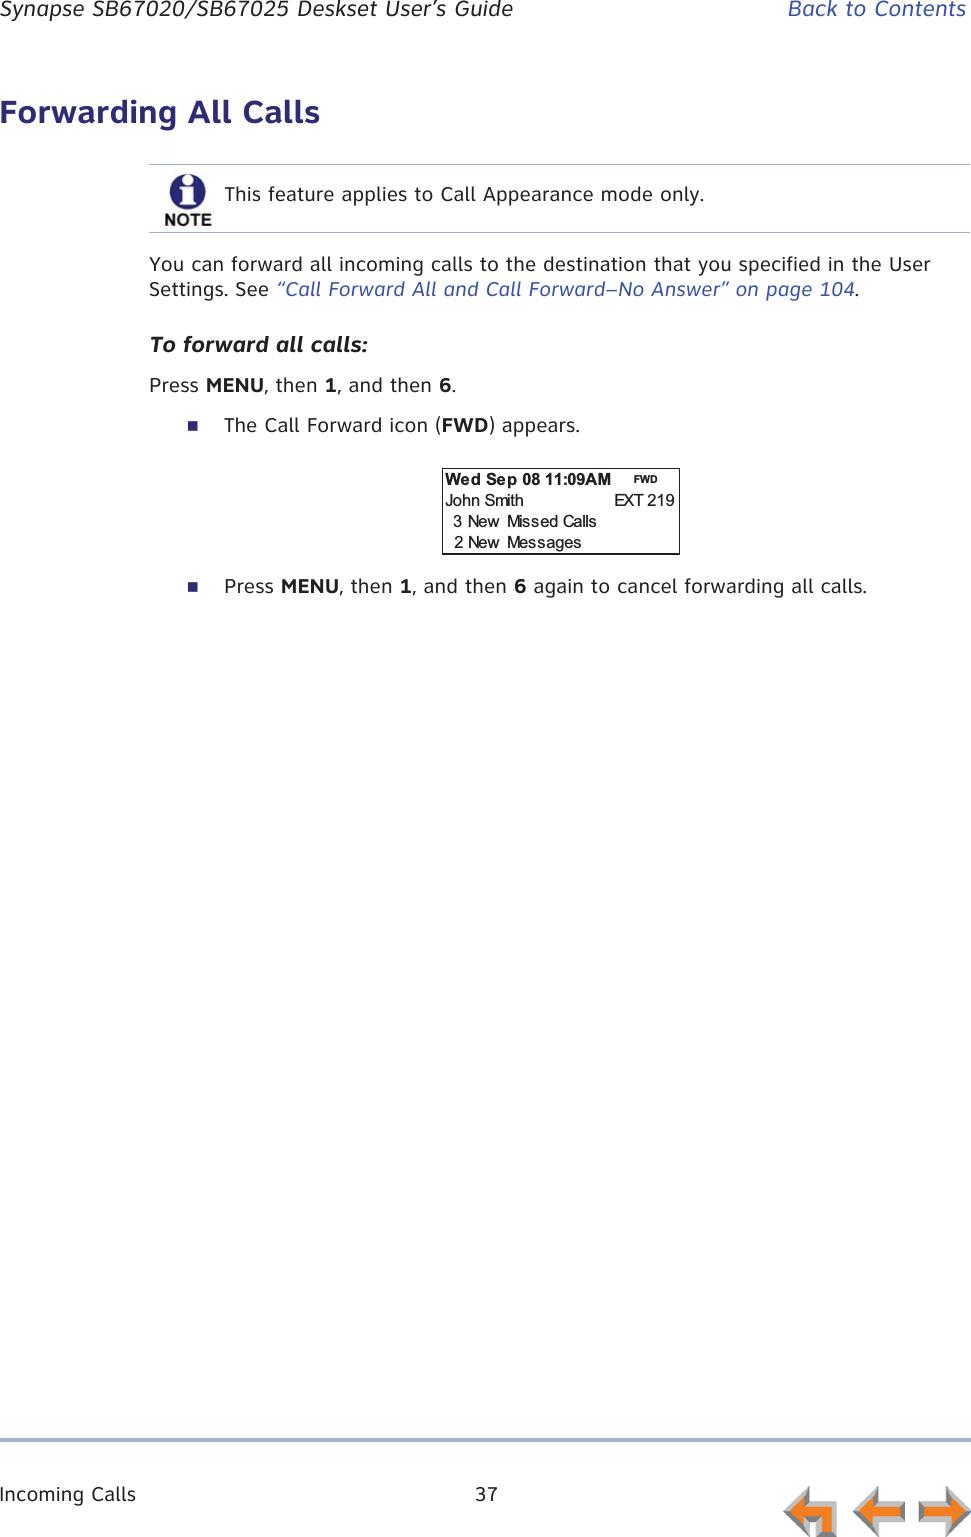
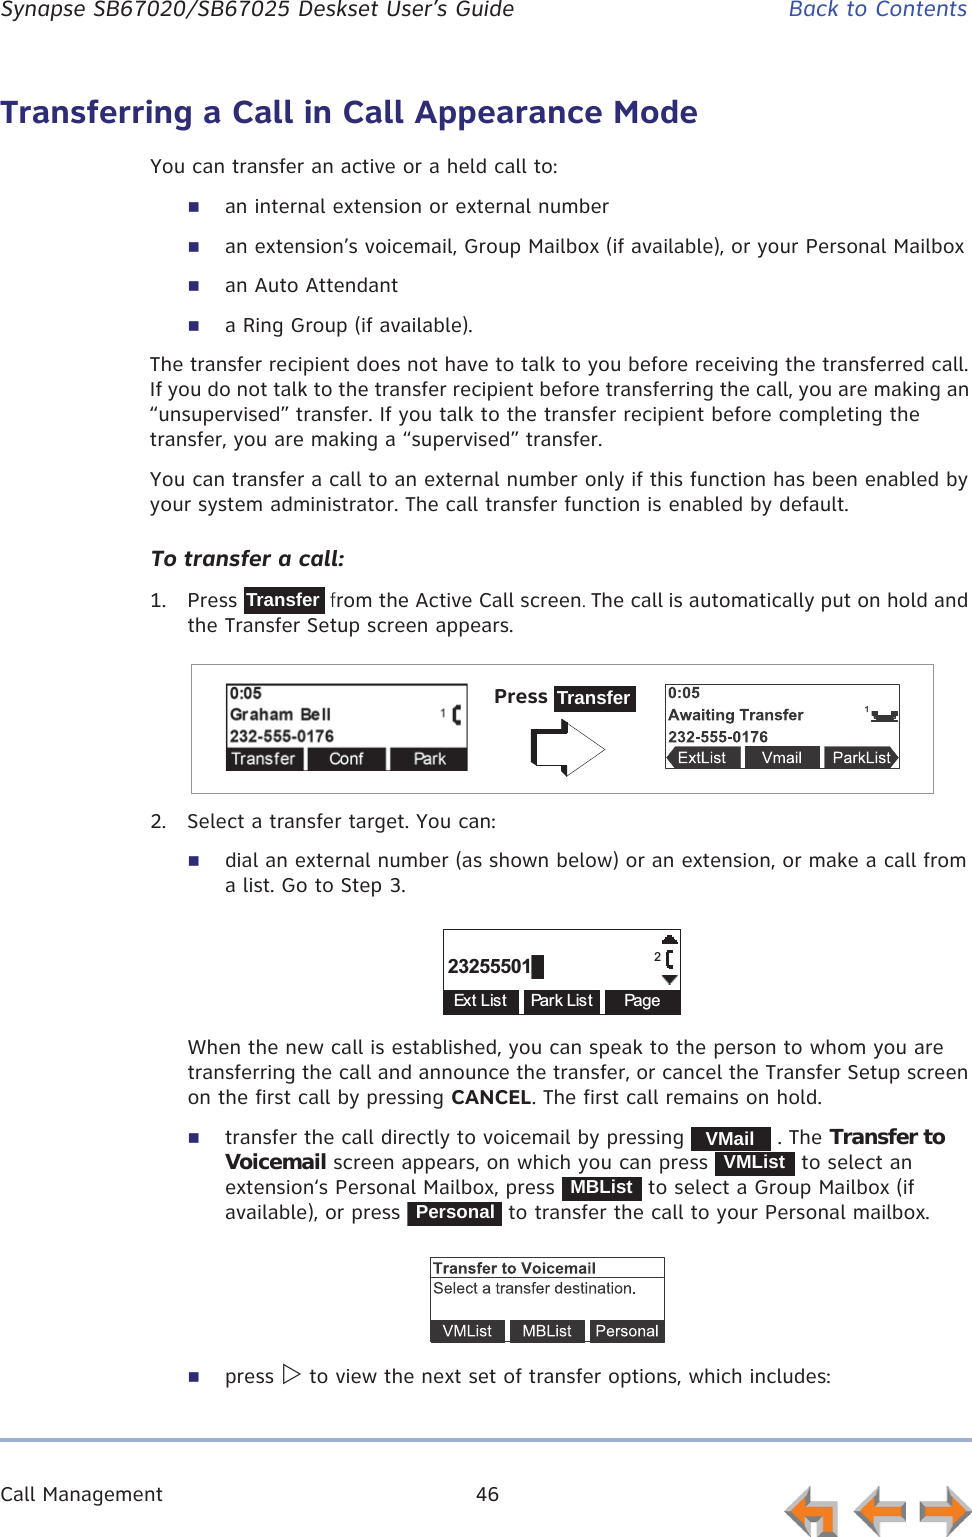
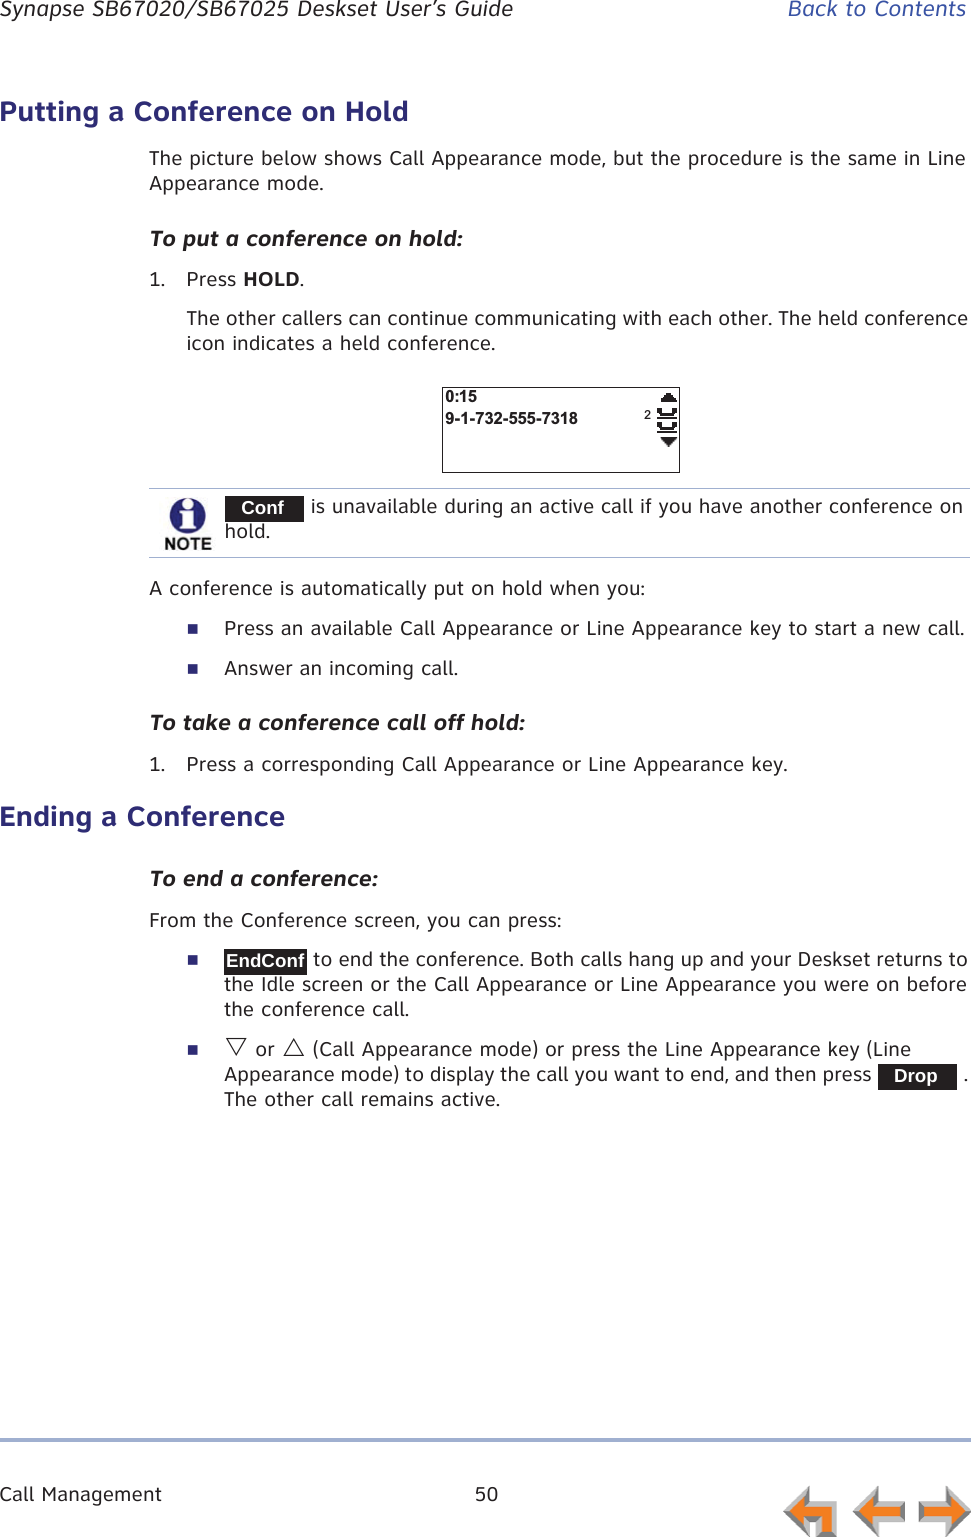
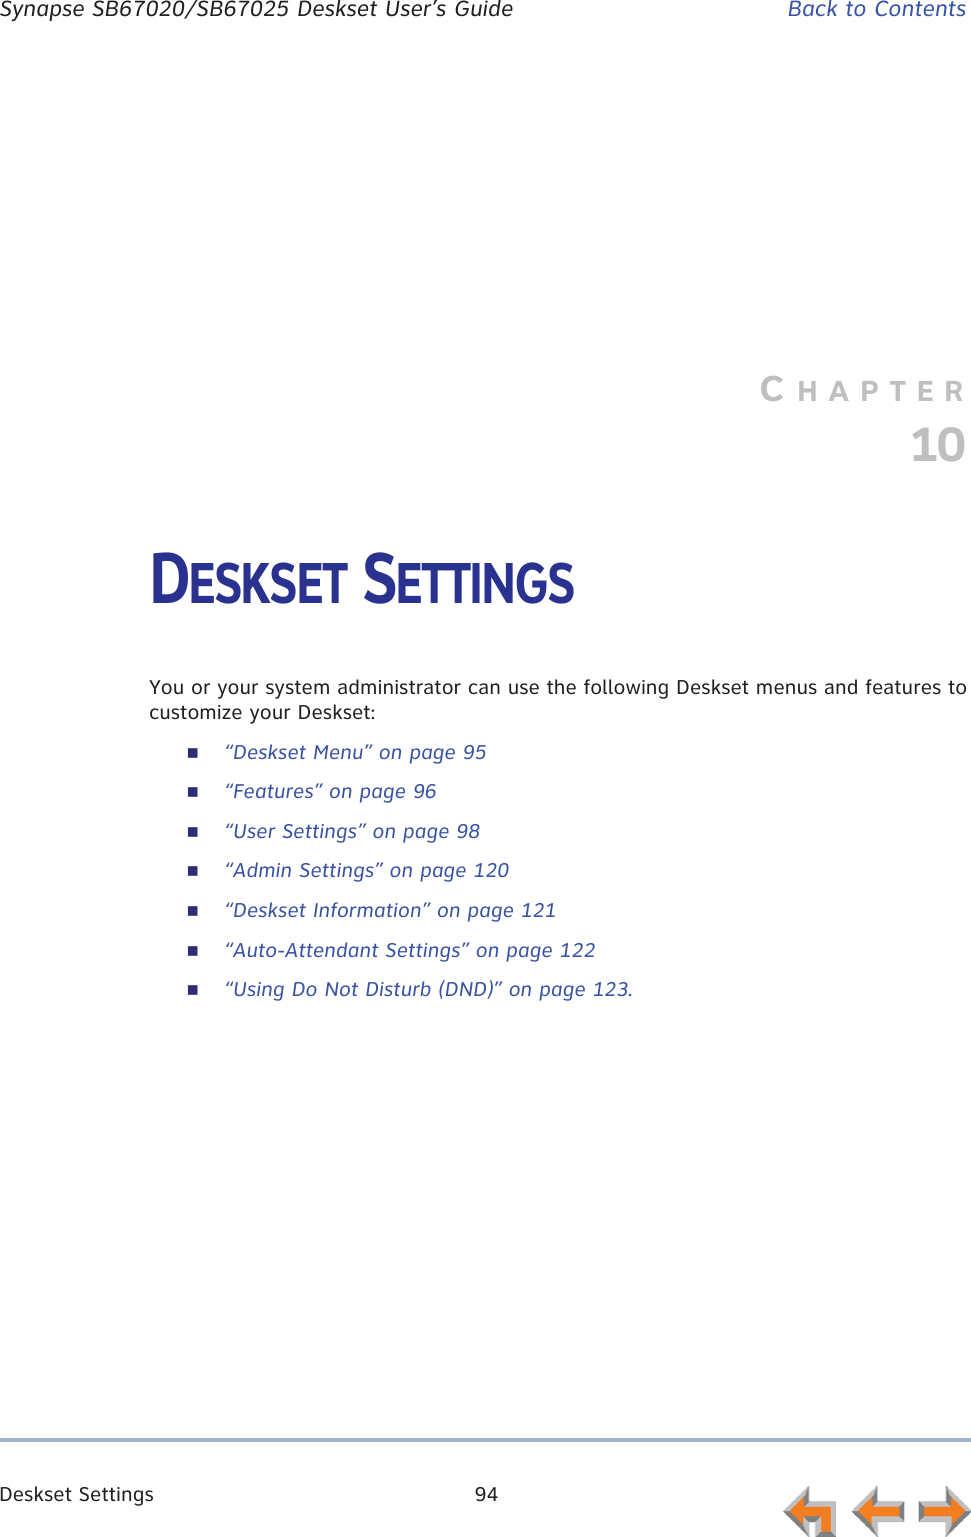
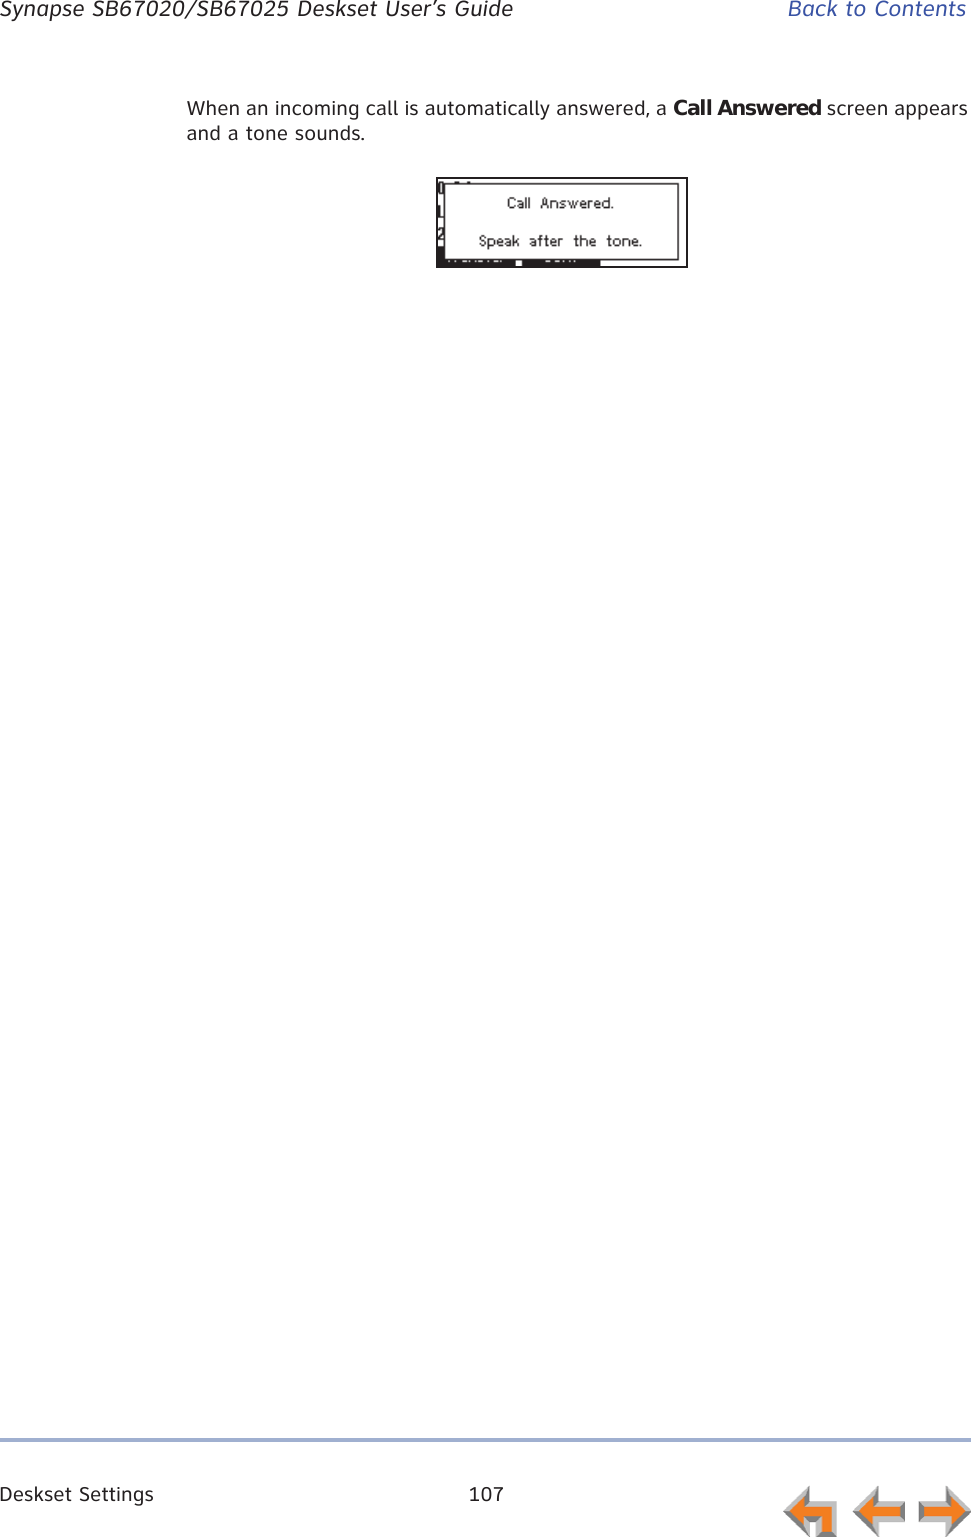
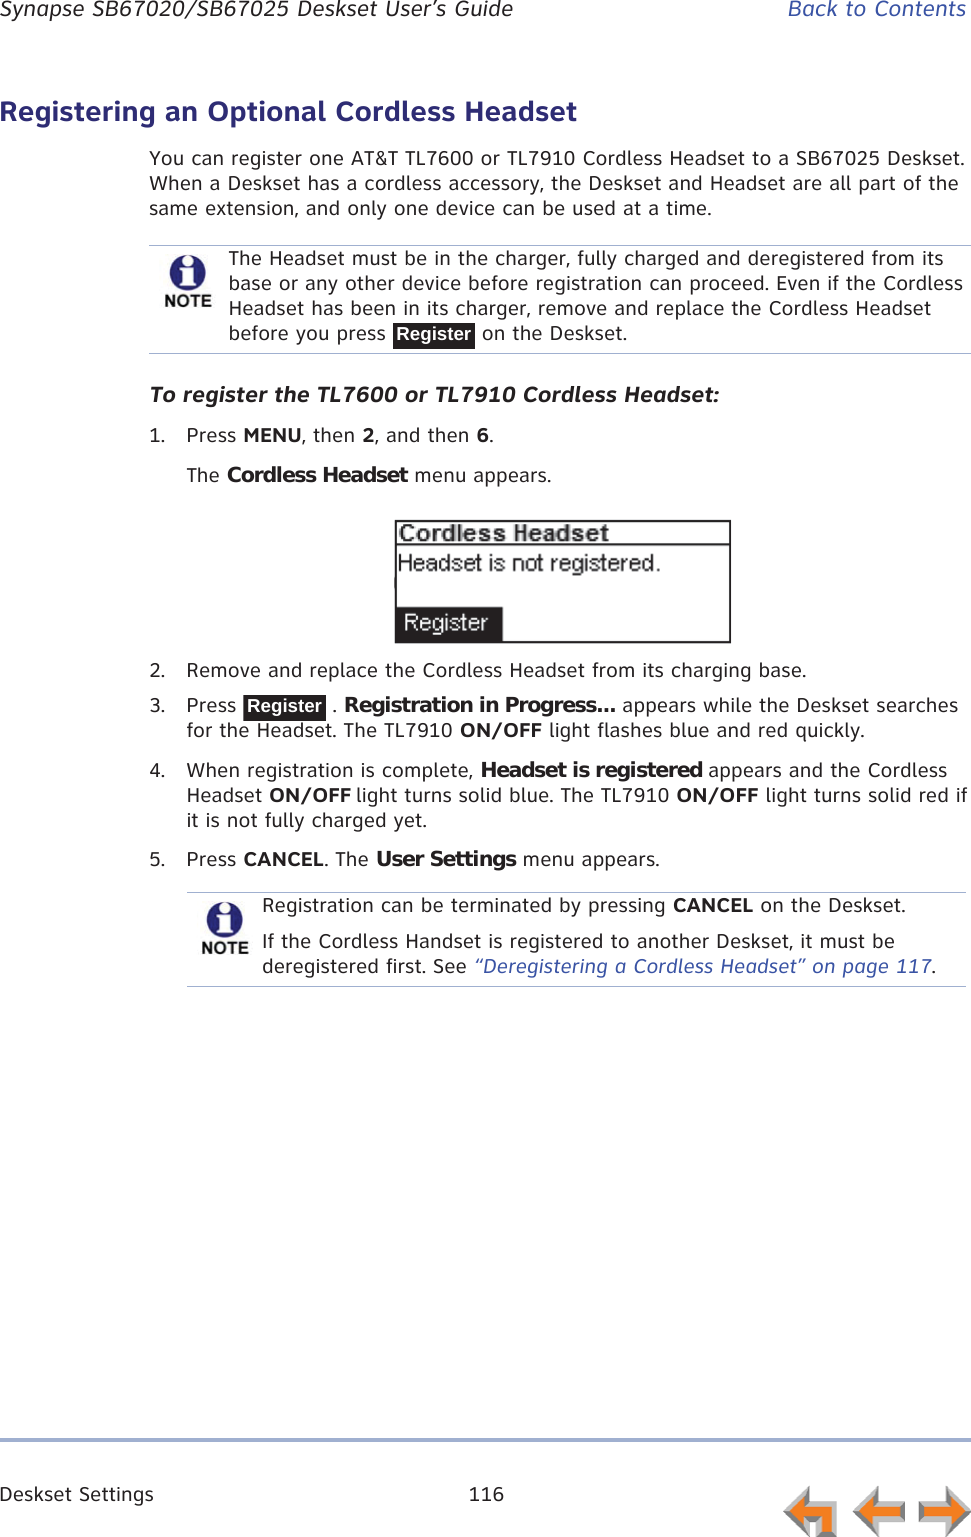
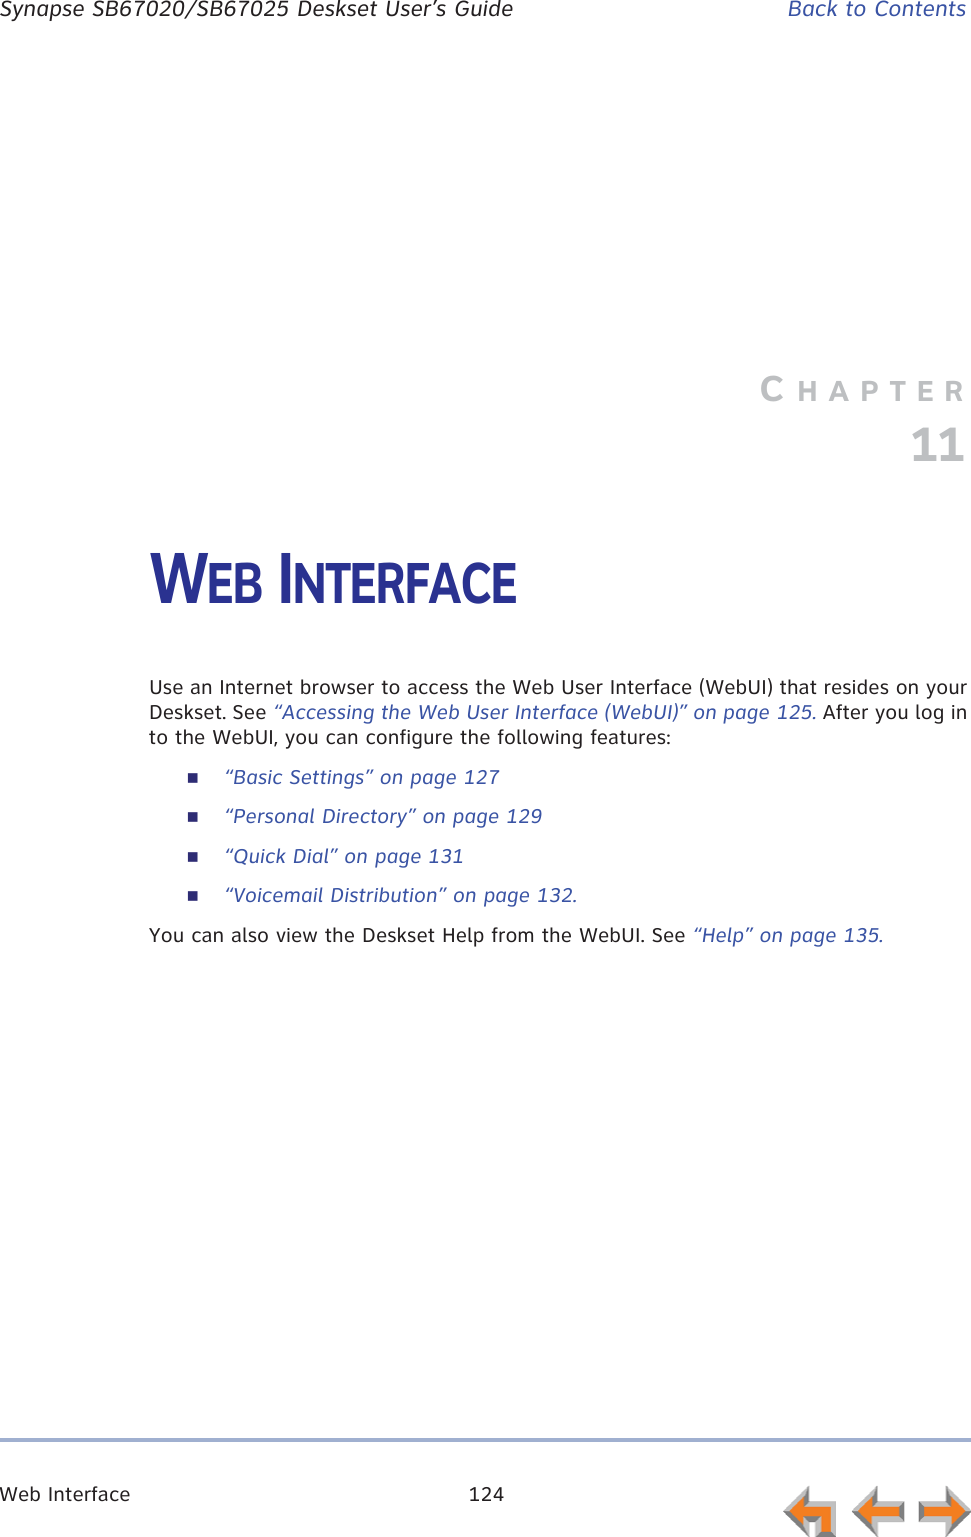
![Voicemail 72 Synapse SB67020/SB67025 Deskset User’s Guide Back to ContentsGroup Mailbox OverviewGroup Mailboxes provide general delivery of Voicemail messages to a group within an organization. Group Mailboxes are different from your Personal Mailbox in that messages in Group Mailboxes are not stored in your Deskset. Even if your Personal Mailbox is full, there may be space available in some of your Group Mailboxes.If your system administrator has given you access to a Group Mailbox, the # New Messages count on the Idle screen includes your new private messages and new messages in any Group Mailboxes to which you are assigned.If you press MENU, then 1, and then 4 (Call Appearance mode) or MENU, then 1, and then 3 (Line Appearance mode) and have not enabled Voicemail distribution, a list of mailboxes appears, as shown in Figure 23.Figure 23. Group Mailbox ListIf you have enabled Voicemail Distribution, the Leave New or Listen screen appears, as shown in Figure 24, allowing you to press to see the list of mailboxes.Figure 24. Leave New or Listen ScreenFrom the Mailbox list screen, you can access your personal Voicemail and messages stored in Group Mailboxes, such as the sales department shown in Figure 23. Your Personal Mailbox is always at the top of the list of mailboxes.Select a mailbox to access the messages stored in that mailbox.The first message in that Mailbox appears, as shown in Figure 25. When you access a Group Mailbox, the name of the Group Mailbox appears at the top of the screen.Figure 25. Messages ScreenAdditionally, the following conditions apply when you access a Group Mailbox:When a mailbox is nearly full, [<5 Min] appears, and when it is full, [Full] appears next to that Personal Mailbox or Group Mailbox as shown in Figure 26. Delete messages to make more room.Figure 26. Mailbox Full ScreenMessagesPersonal 1 NewSales 0 NewCustom er Supp... 10 Ne wListenDo you w ish to leave a new message or listen to your messages?Lv Msg ListenMess ages 1/10Graham Bell Jul 19232-555-0176 1:18pPla y DelMs g Callback!MessagesPersonal 1 NewSales [FULL]Custom er Supp... [<5 Min]](https://usermanual.wiki/VTech-Telecommunications/80-9098-00/User-Guide-1845770-Page-218.png)
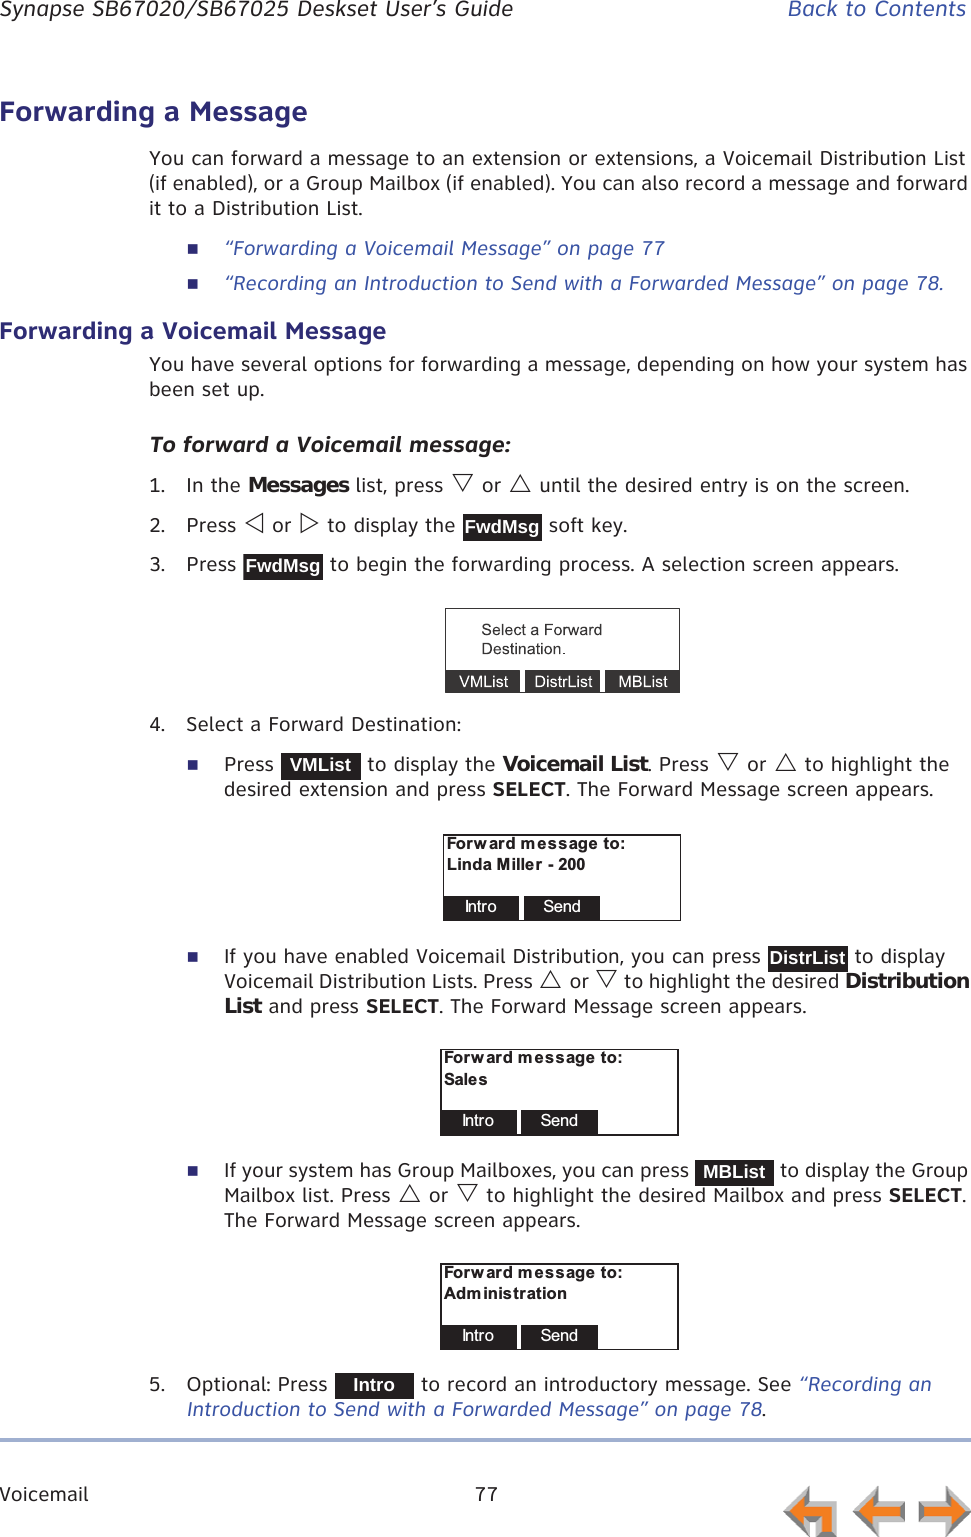
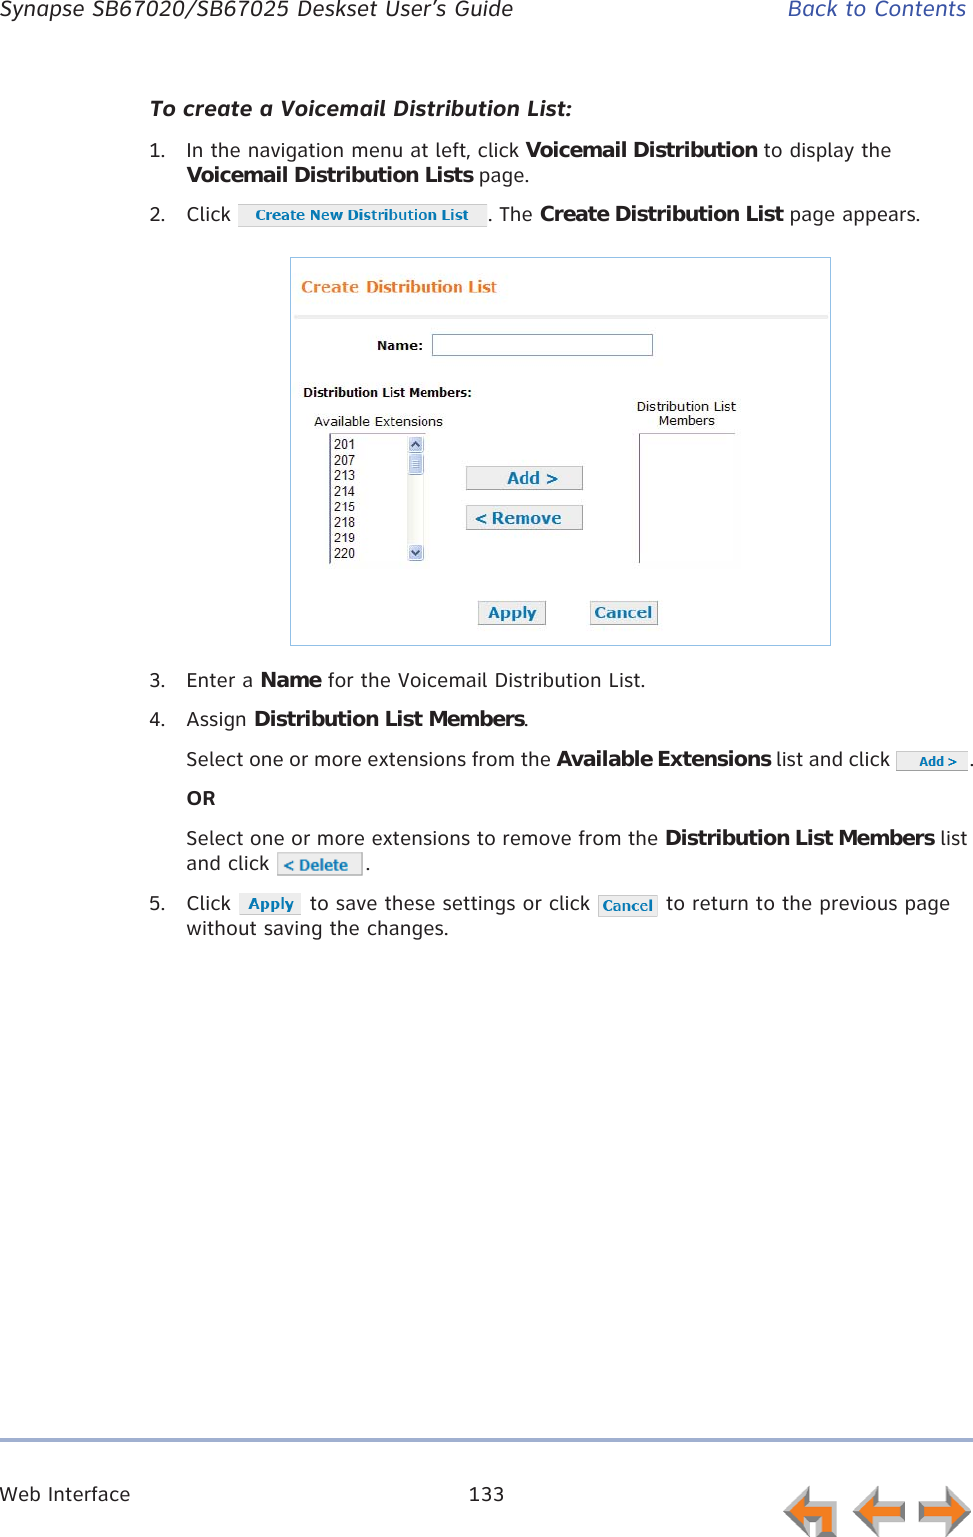
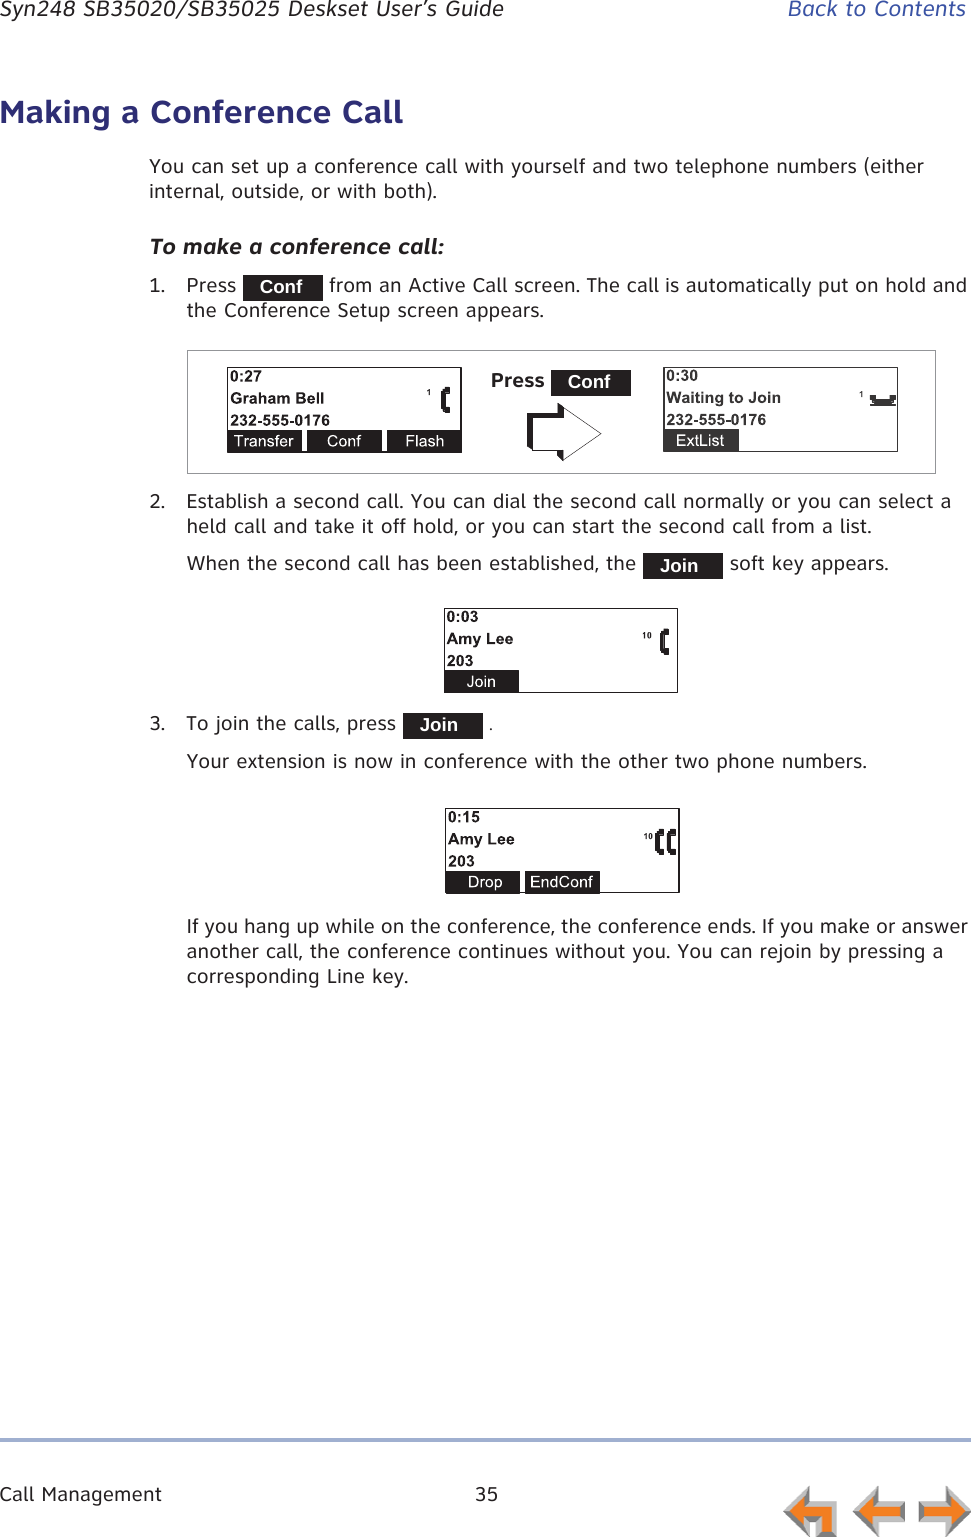
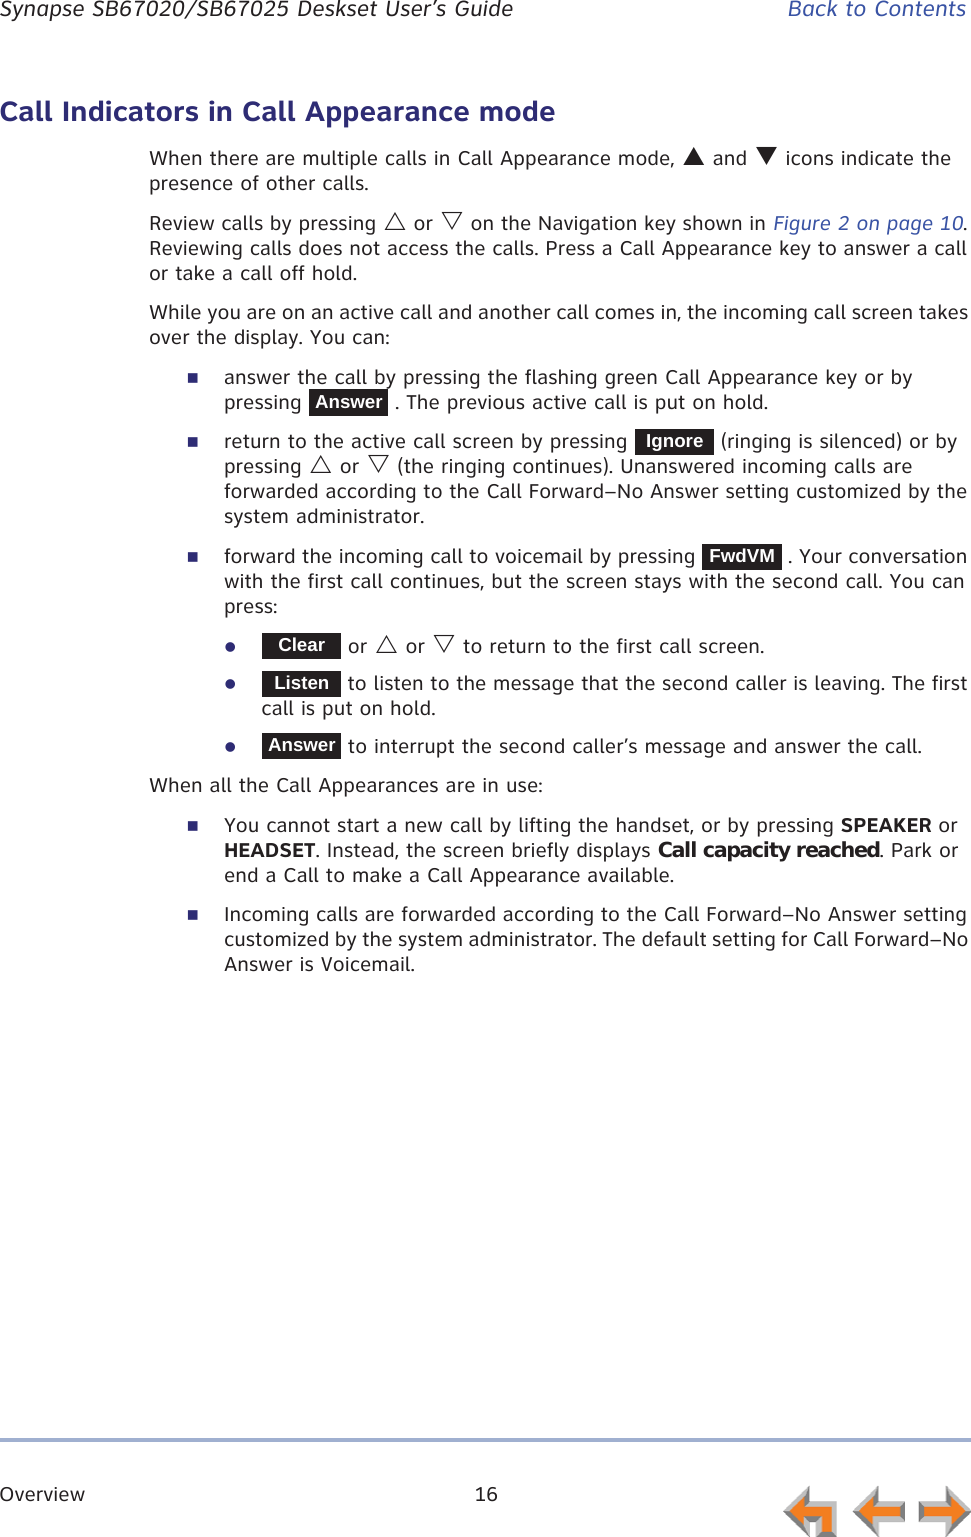
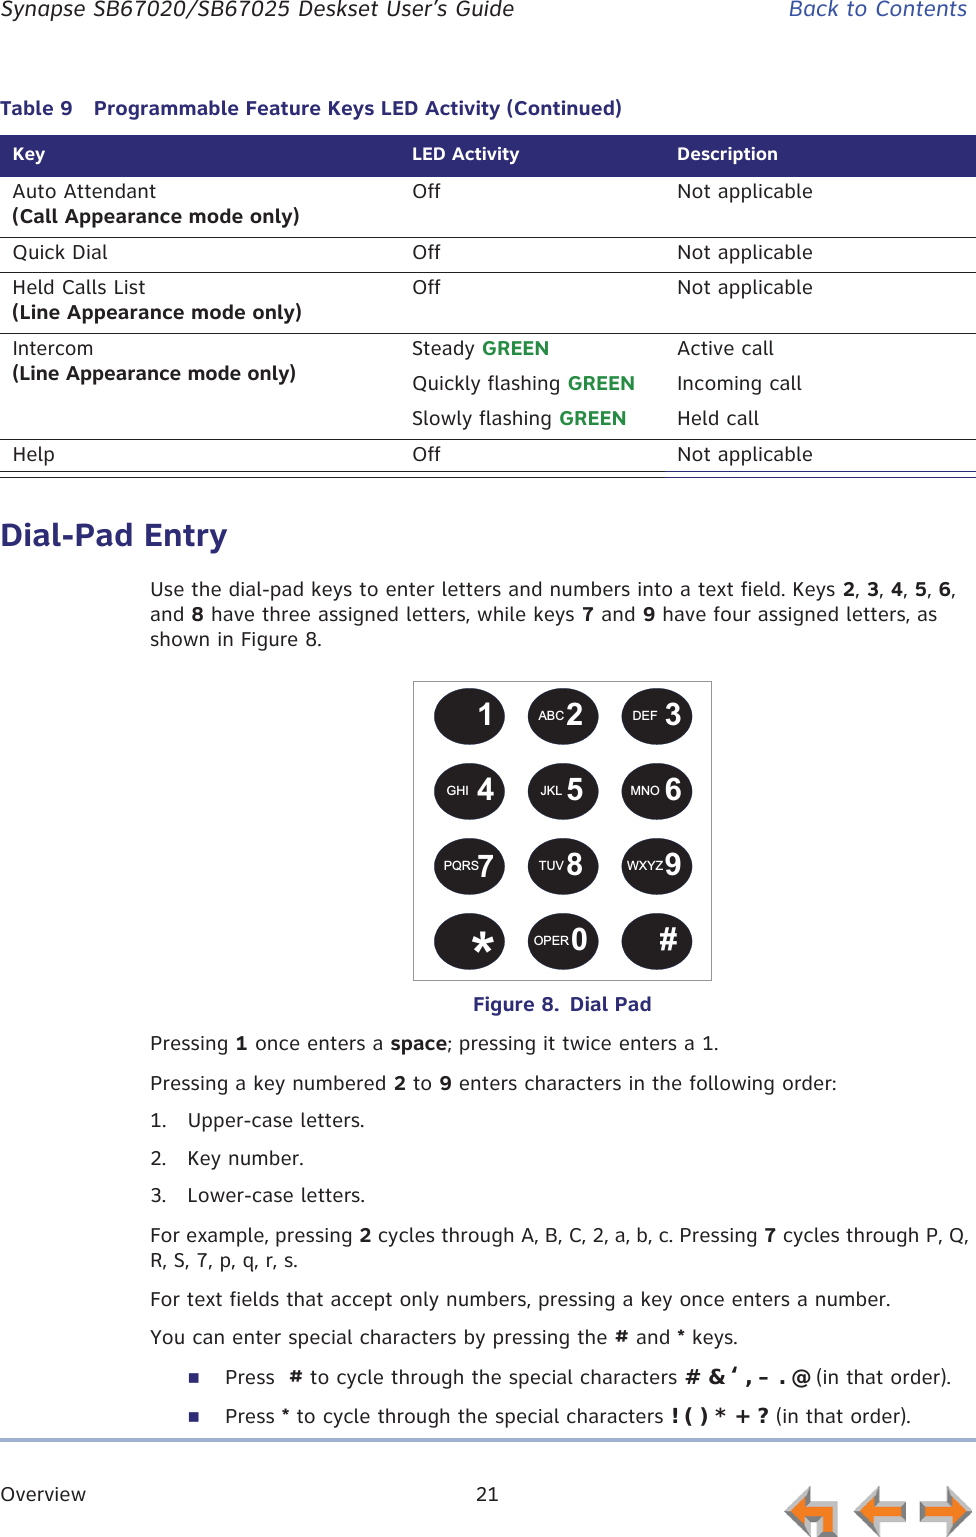
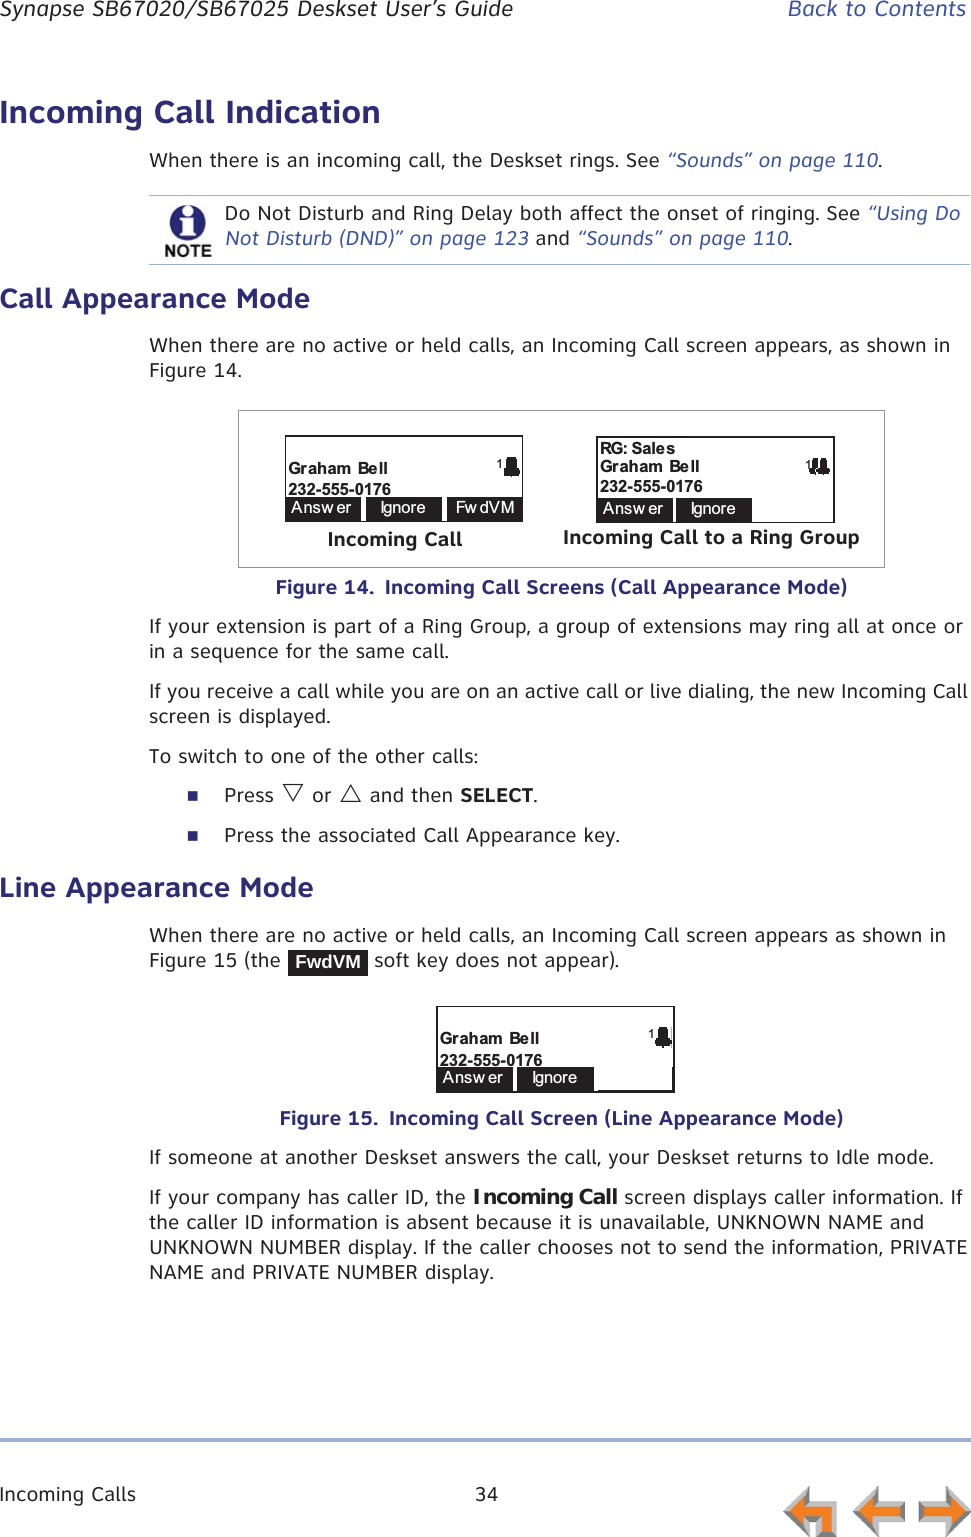
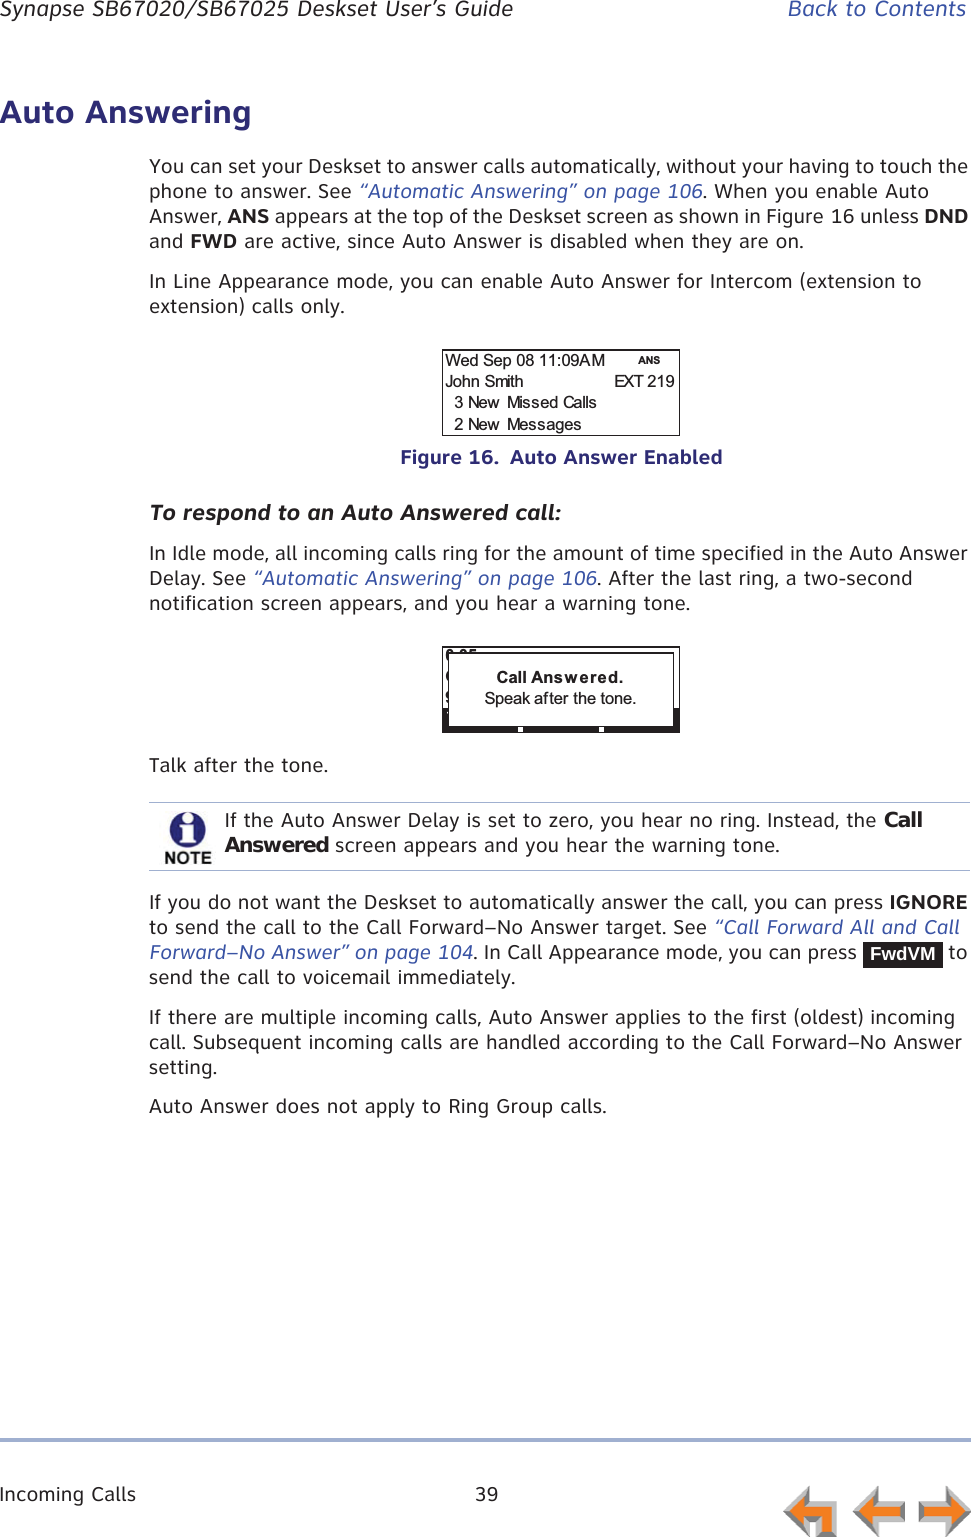
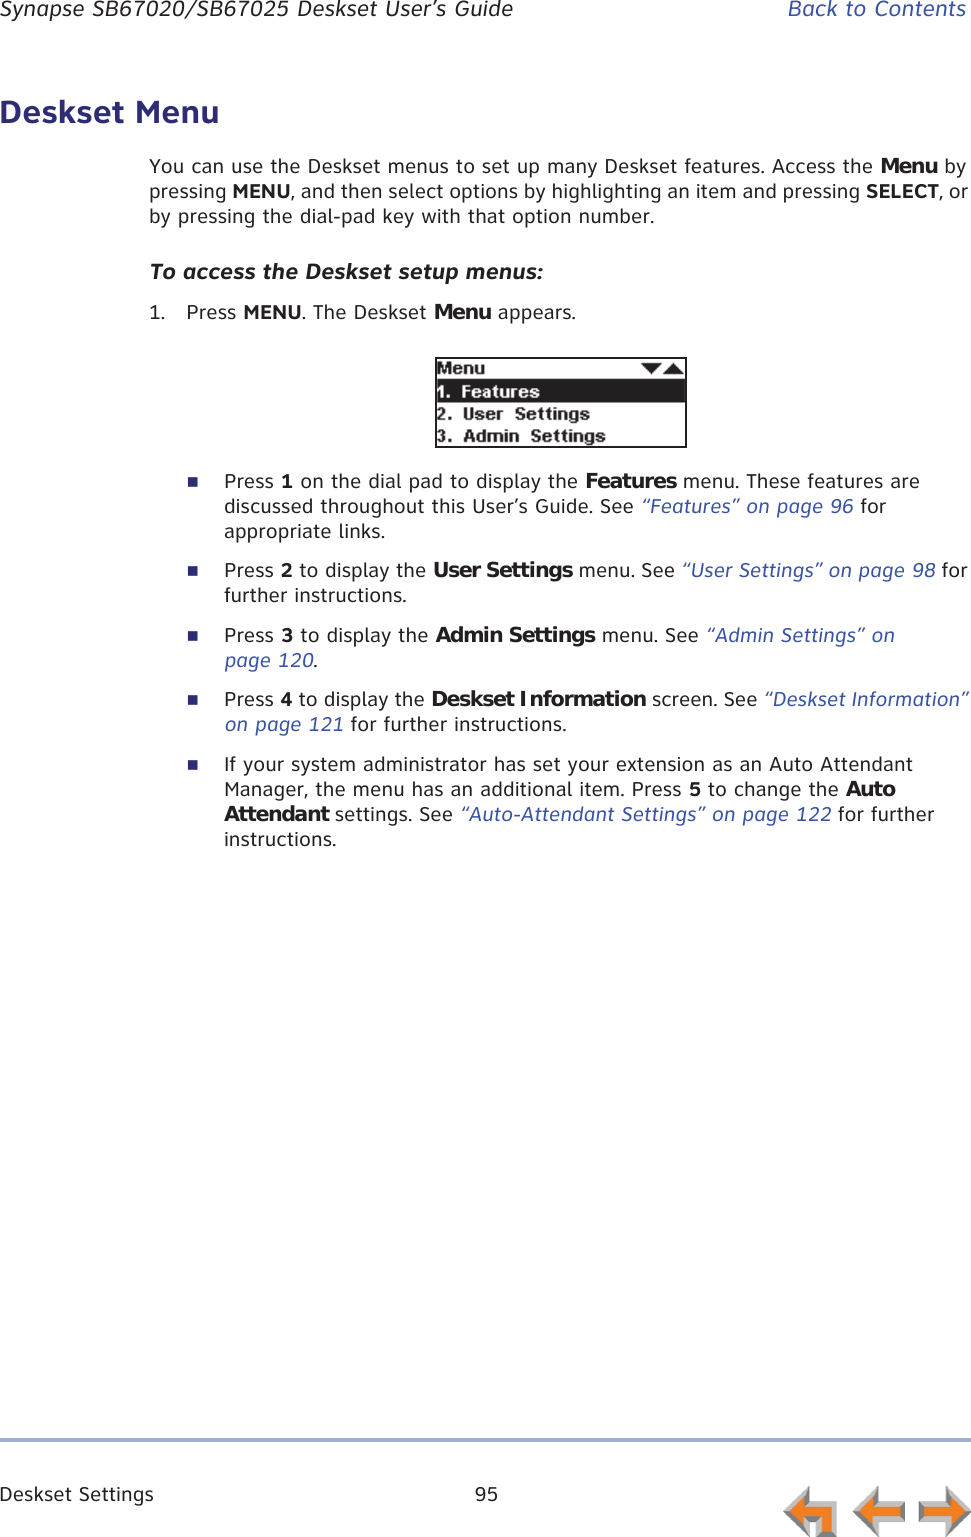
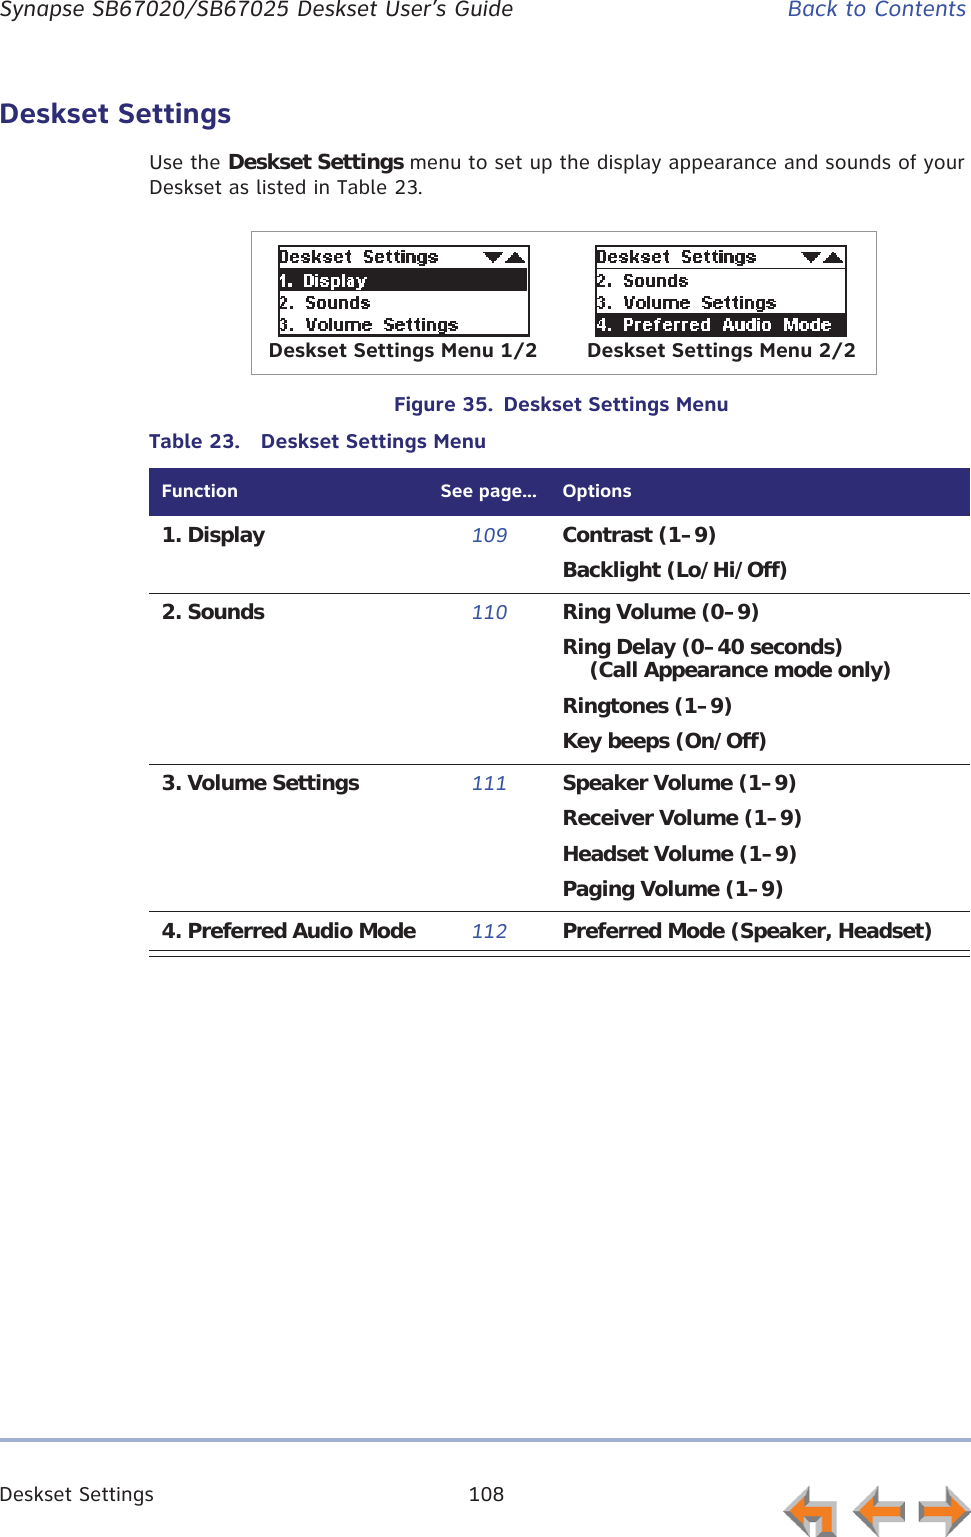
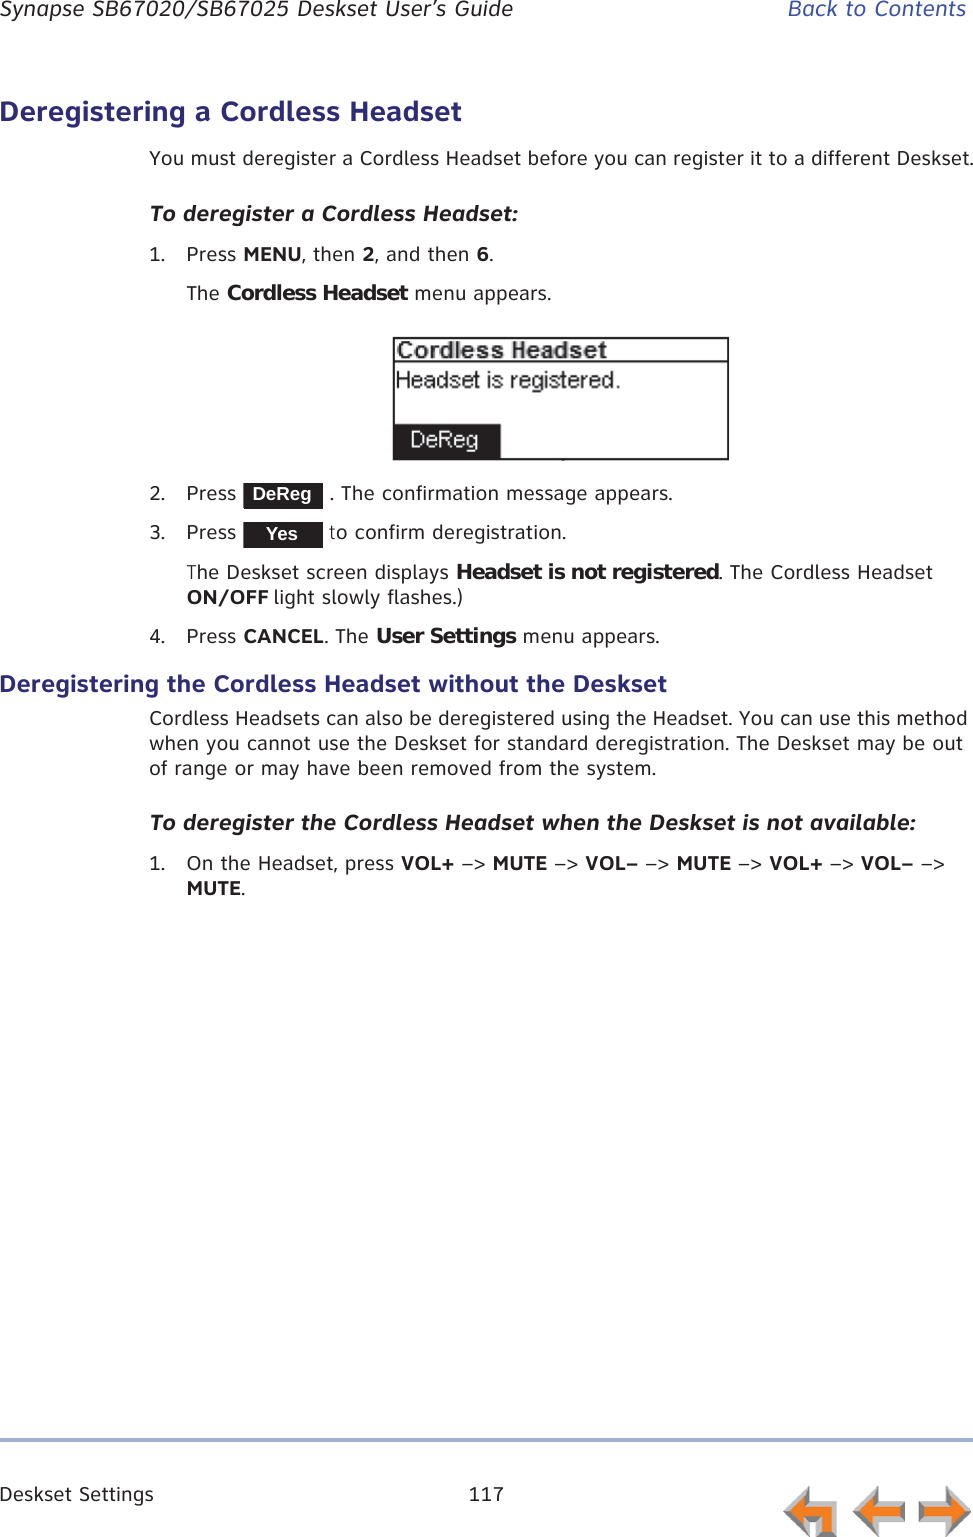
![Voicemail 78 Synapse SB67020/SB67025 Deskset User’s Guide Back to Contents6. Press to forward the message.The Message Forwarded screen appears.The forwarded message appears in the recipient’s Messages list.Recording an Introduction to Send with a Forwarded MessageYou can record an audio introduction to send with a forwarded message. To begin recording the introduction, press while forwarding a message.To record a message introduction:1. Press after selecting the destination for a forwarded message. The Play/Rec: Intro screen appears.2. Press to begin recording. The soft key changes to . 3. When finished recording, press . The message review screen appears.Reaching the 30-second limit automatically stops recording. You can or the announcement.4. Press to display the Forward Message screen.[Msg Intro Attached] appears on the screen.5. Press to forward the message with the introduction message attached.SendSendInt r oForward message to:Amy Lee - 203Message Forw arded.IntroIntroRecordStopStopPlayDeleteDoneForward message to:Linda Miller - 200[Msg Intro Attached]Int r o SendSend](https://usermanual.wiki/VTech-Telecommunications/80-9098-00/User-Guide-1845770-Page-224.png)


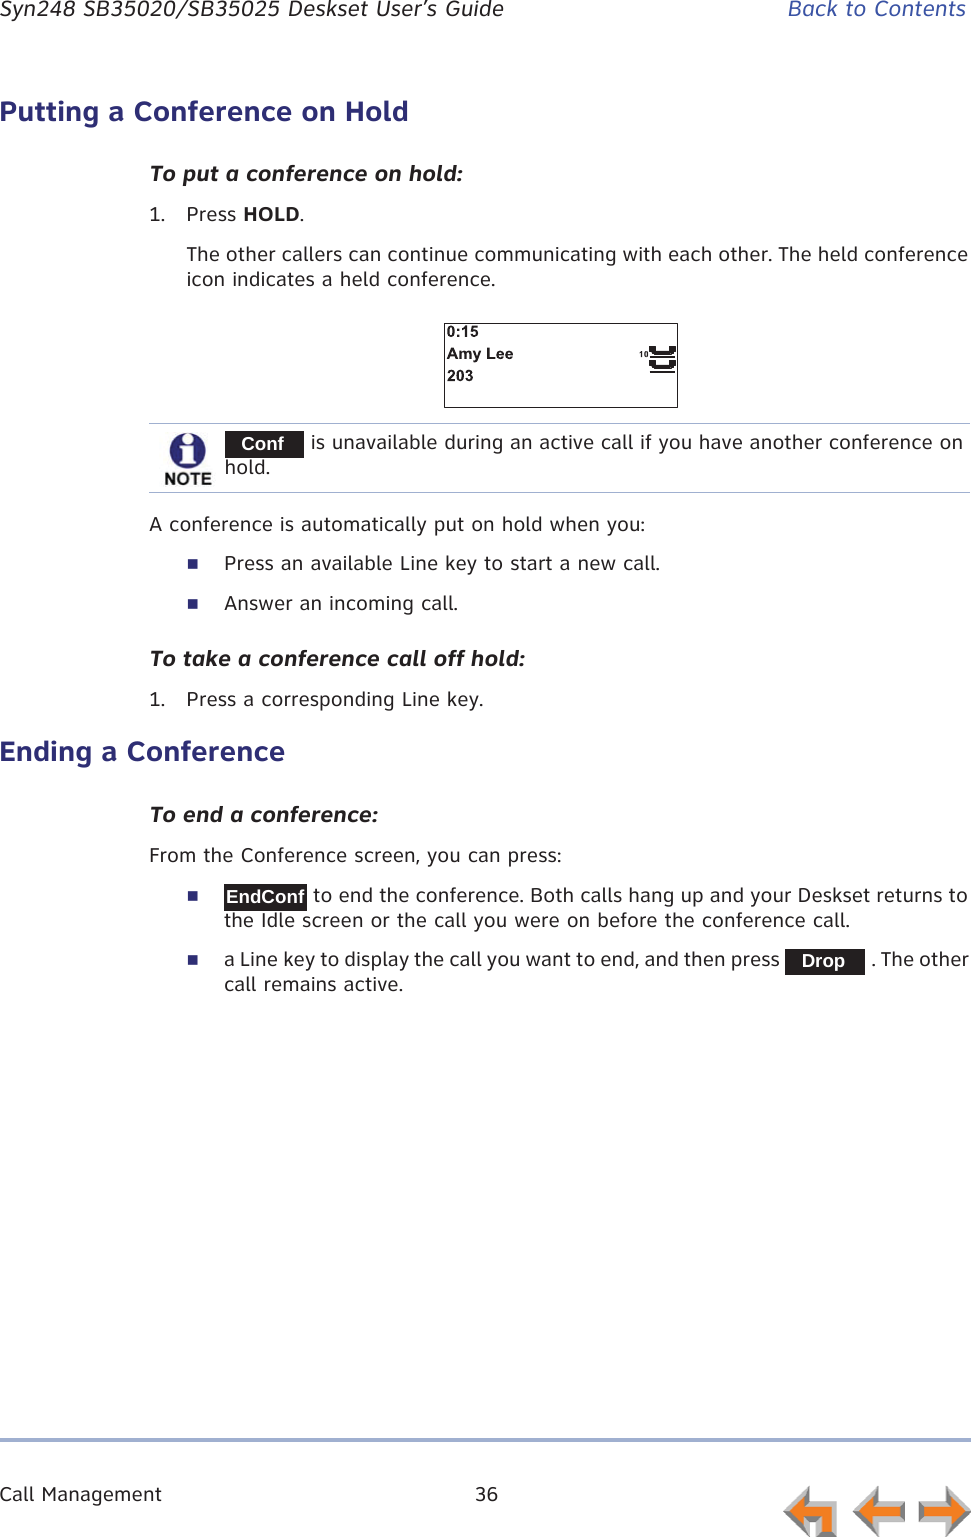
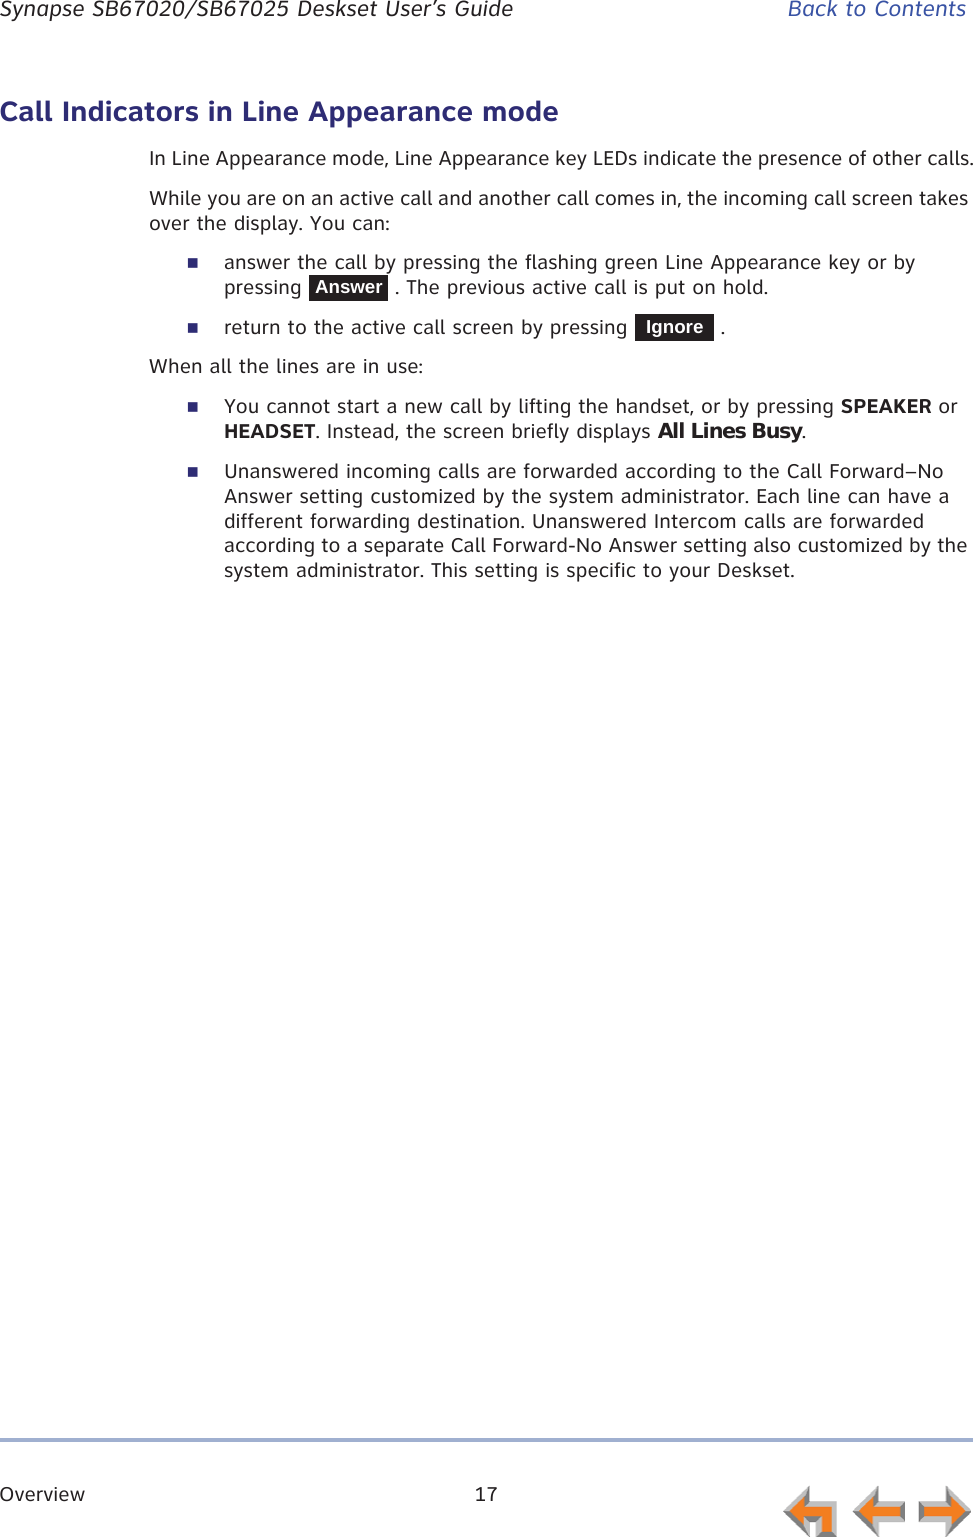
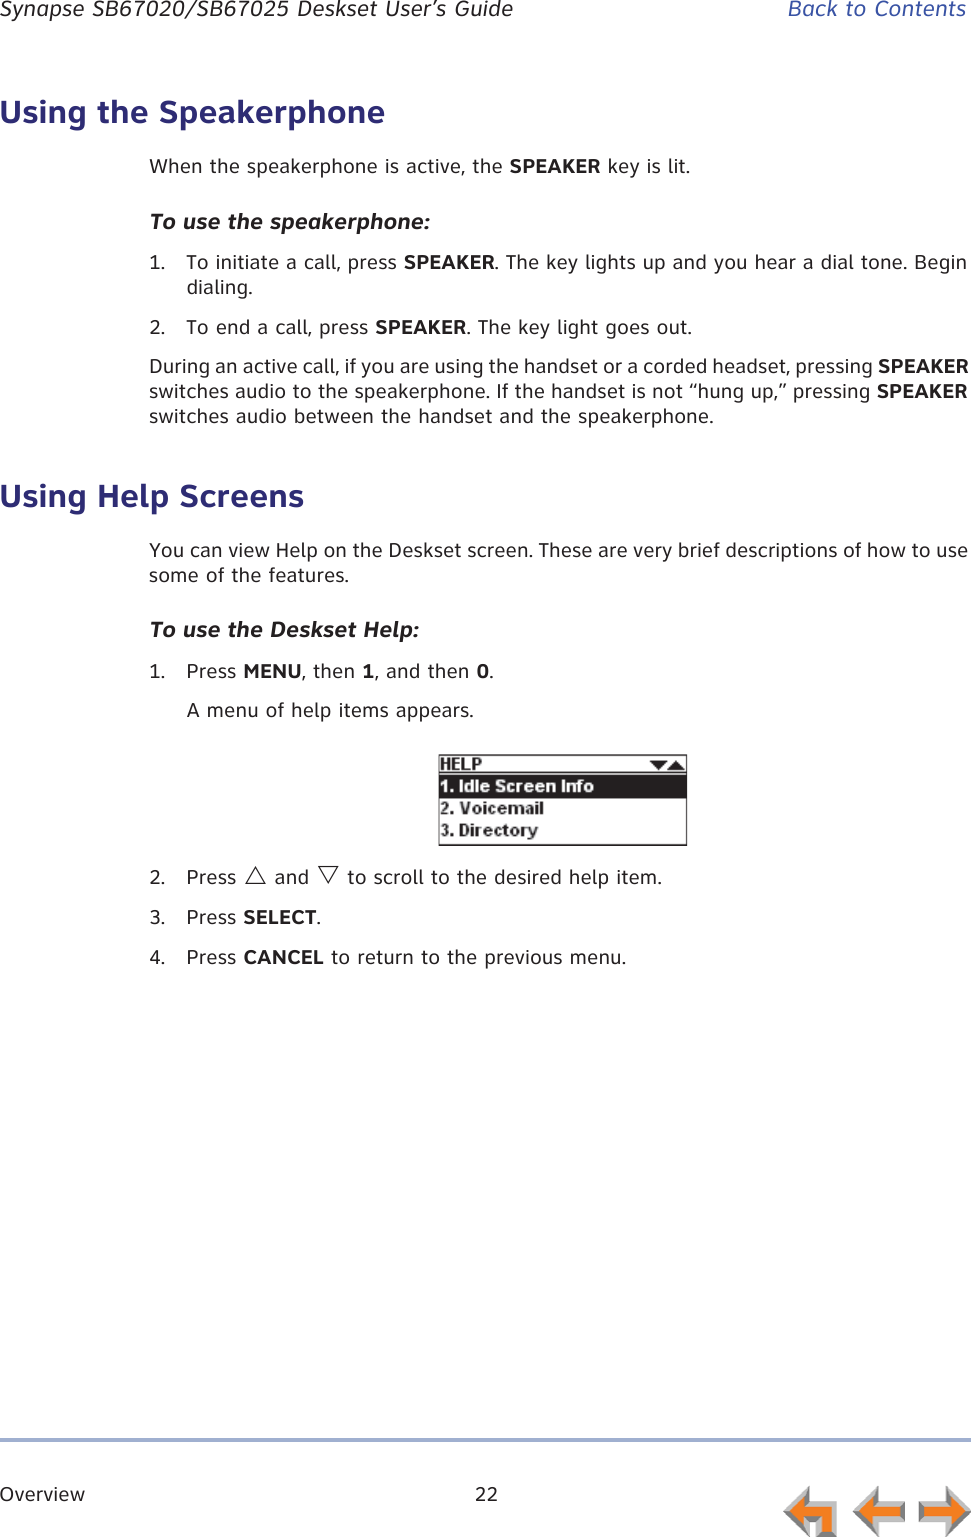
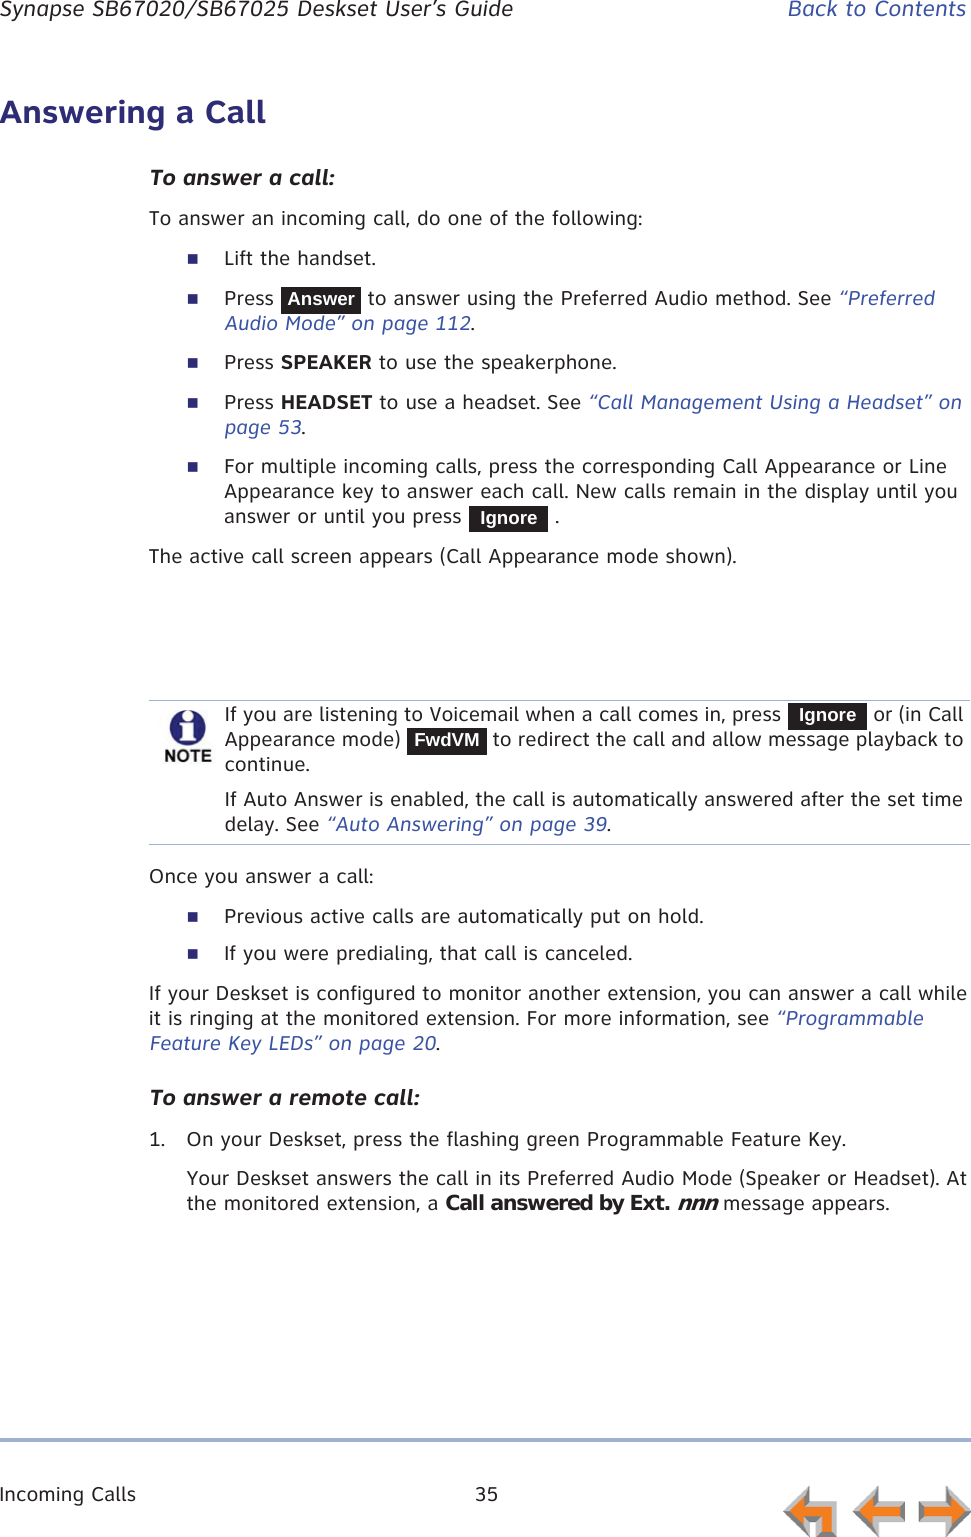
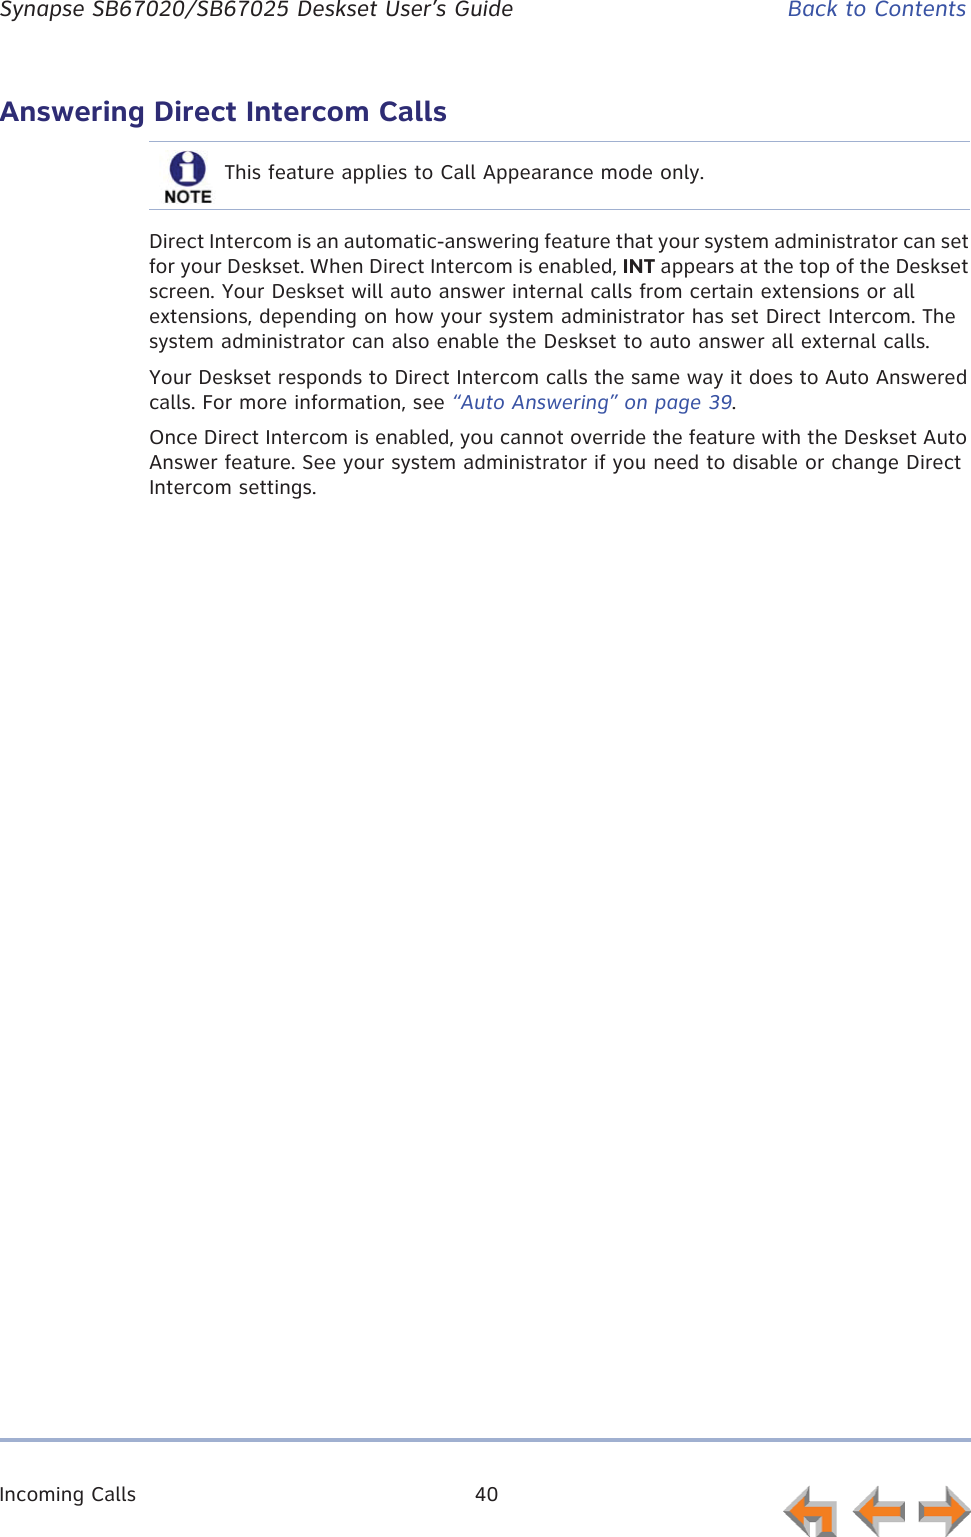
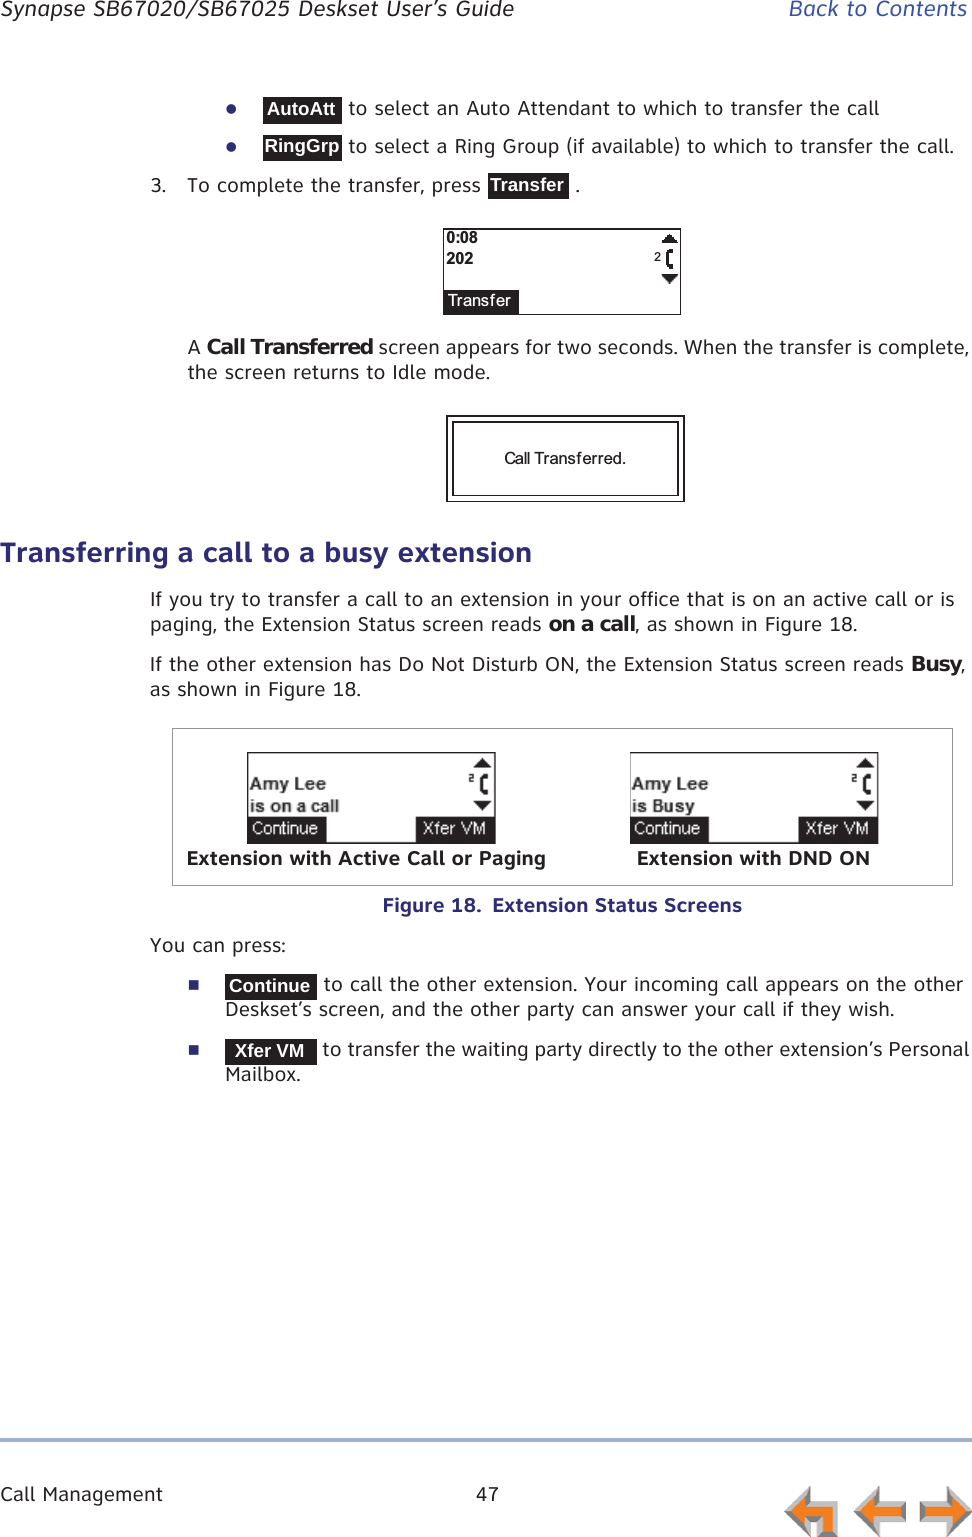
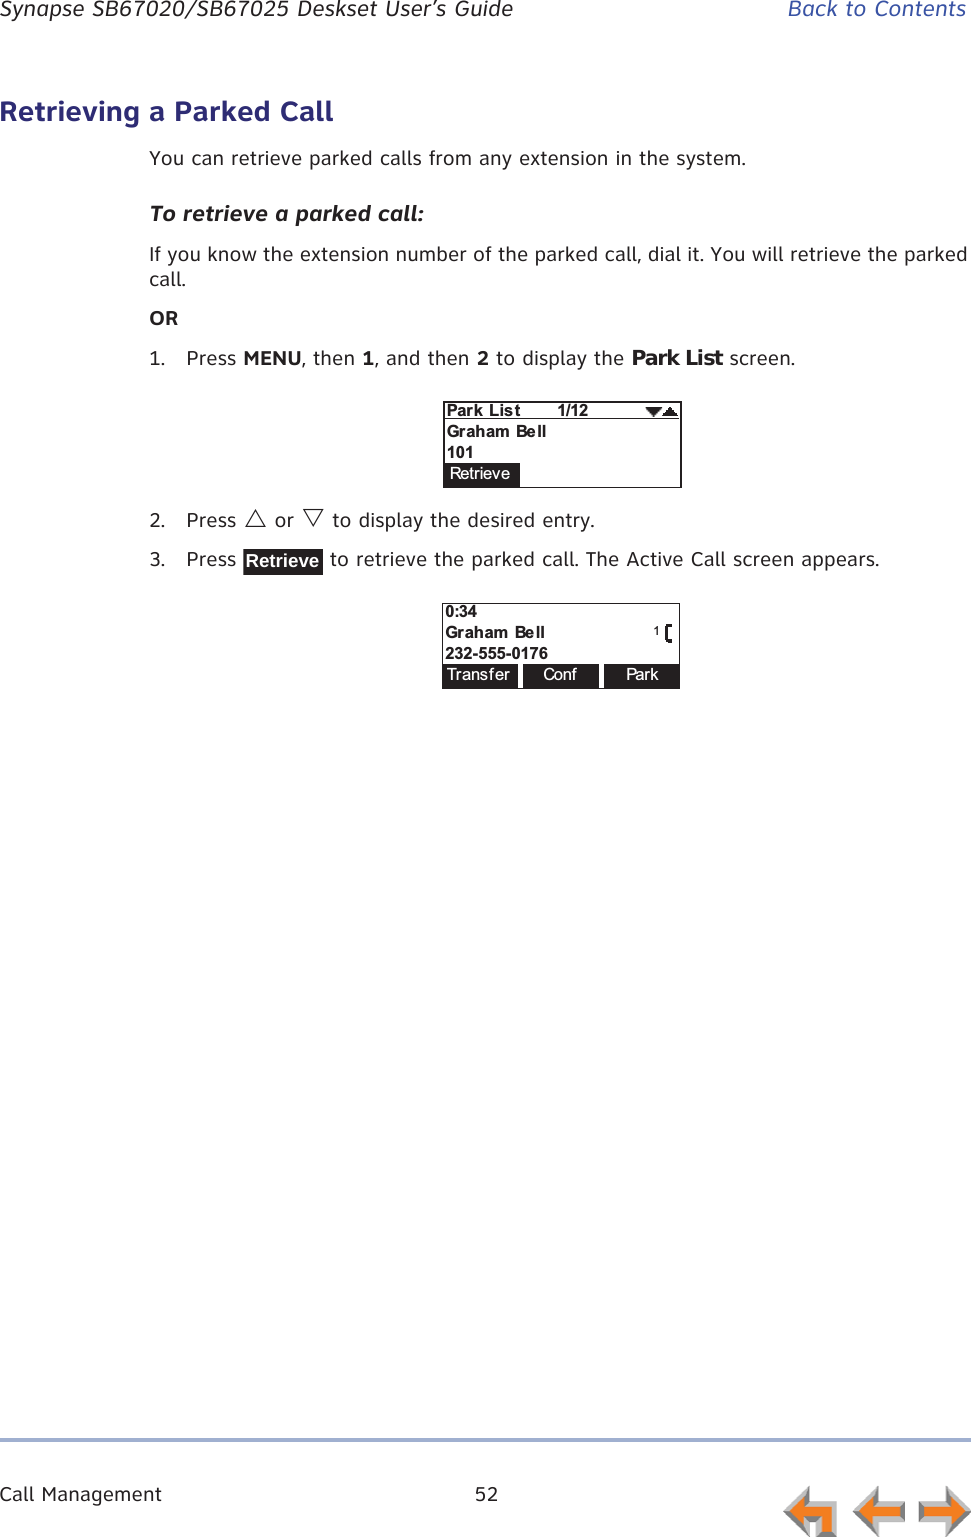
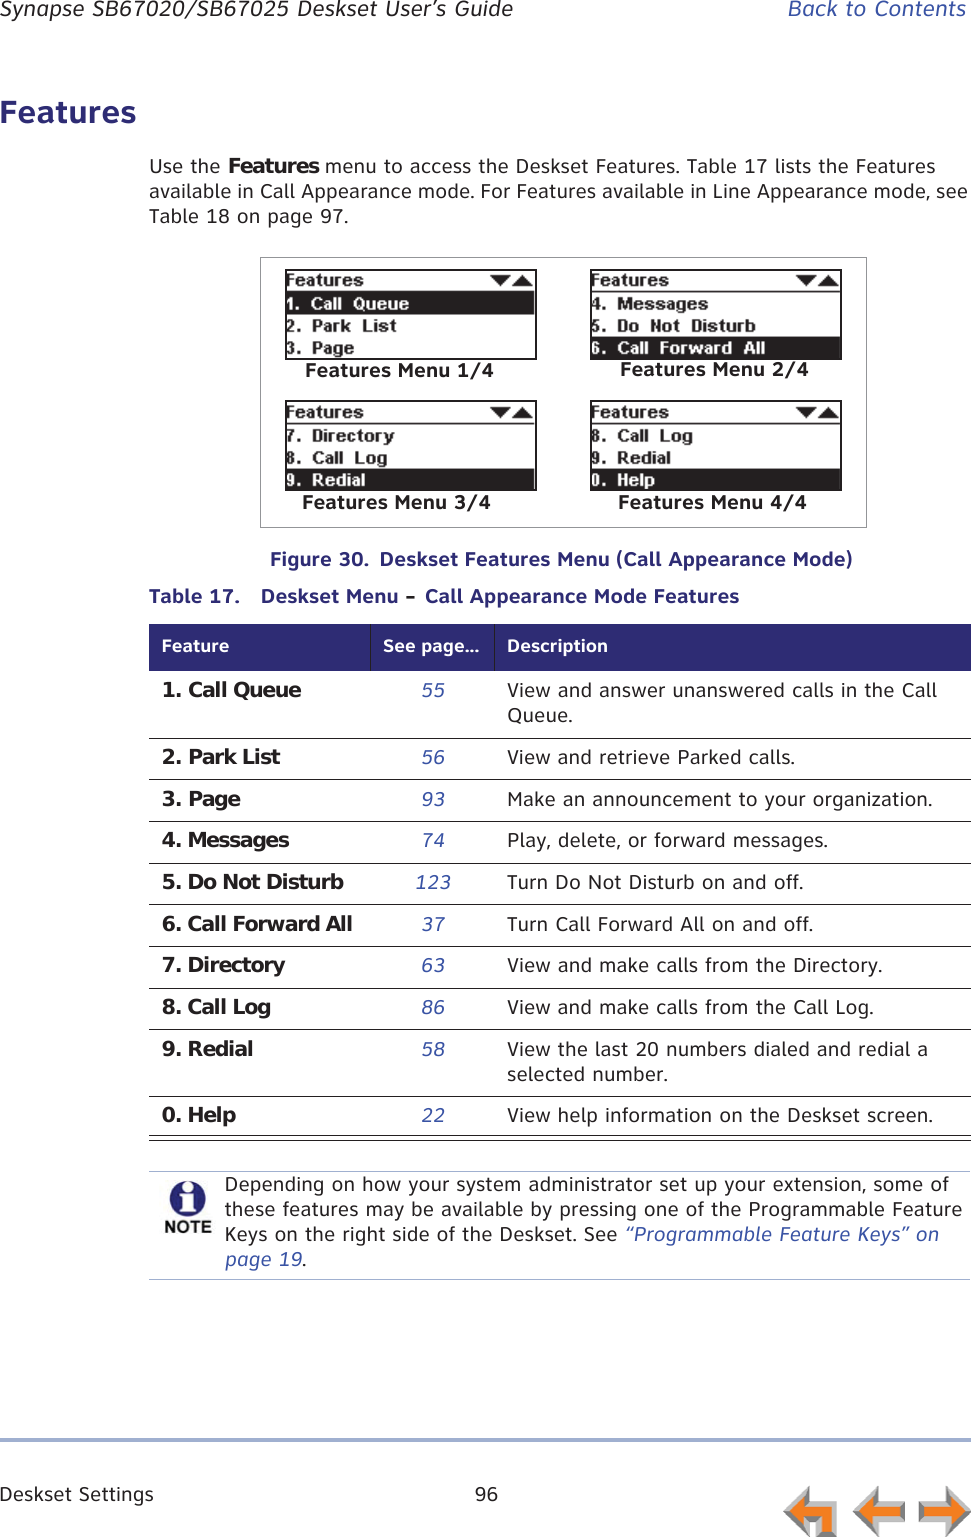
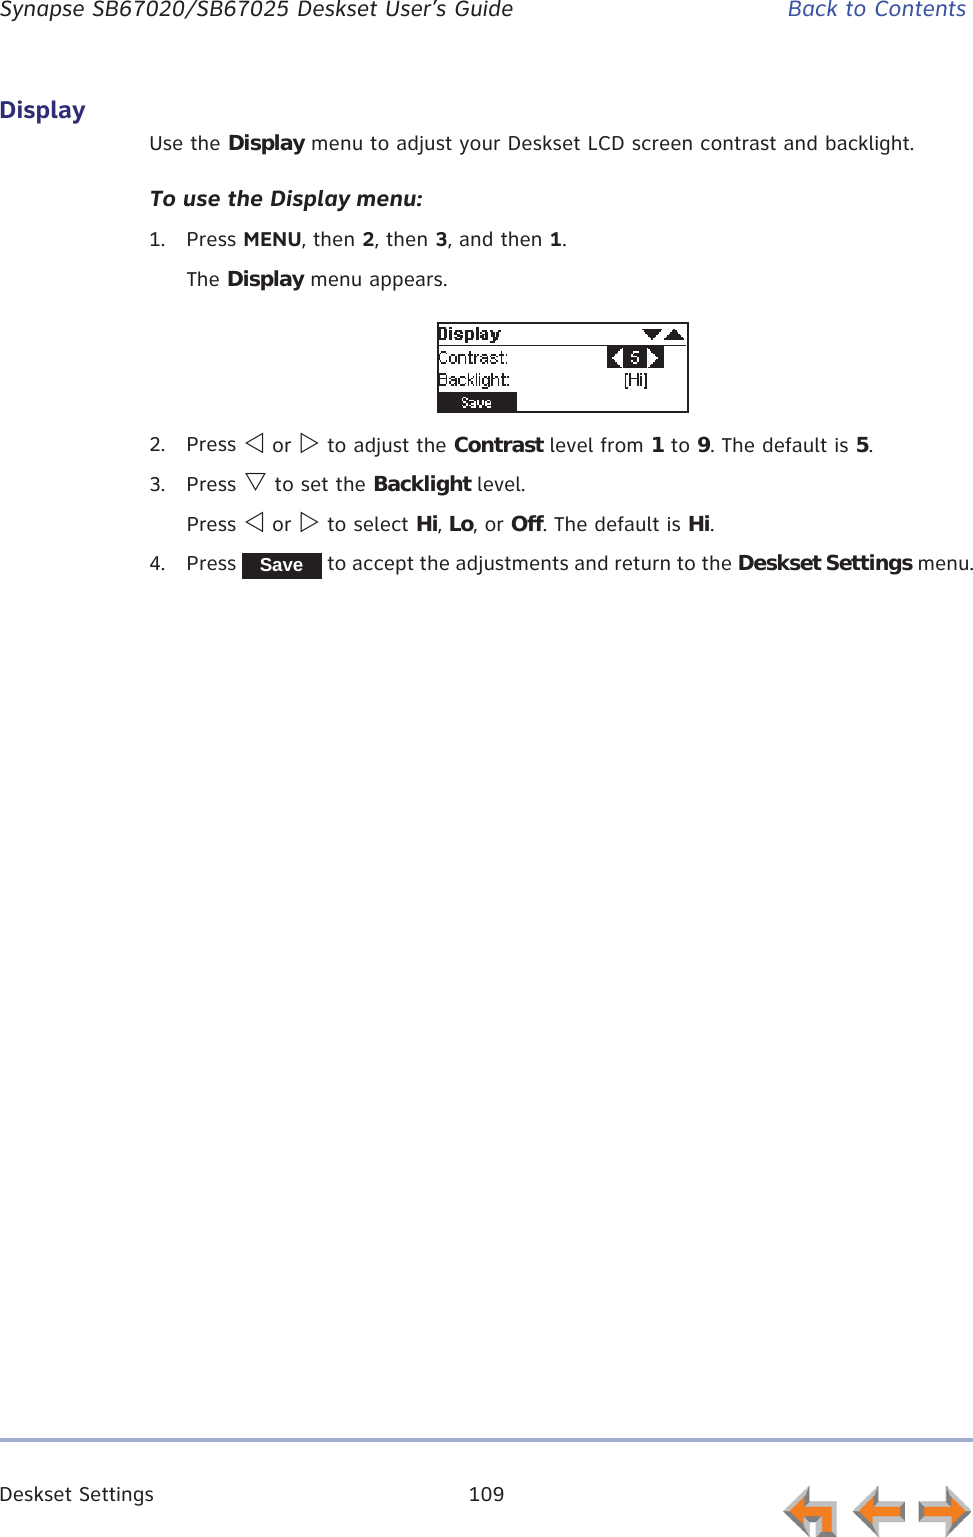
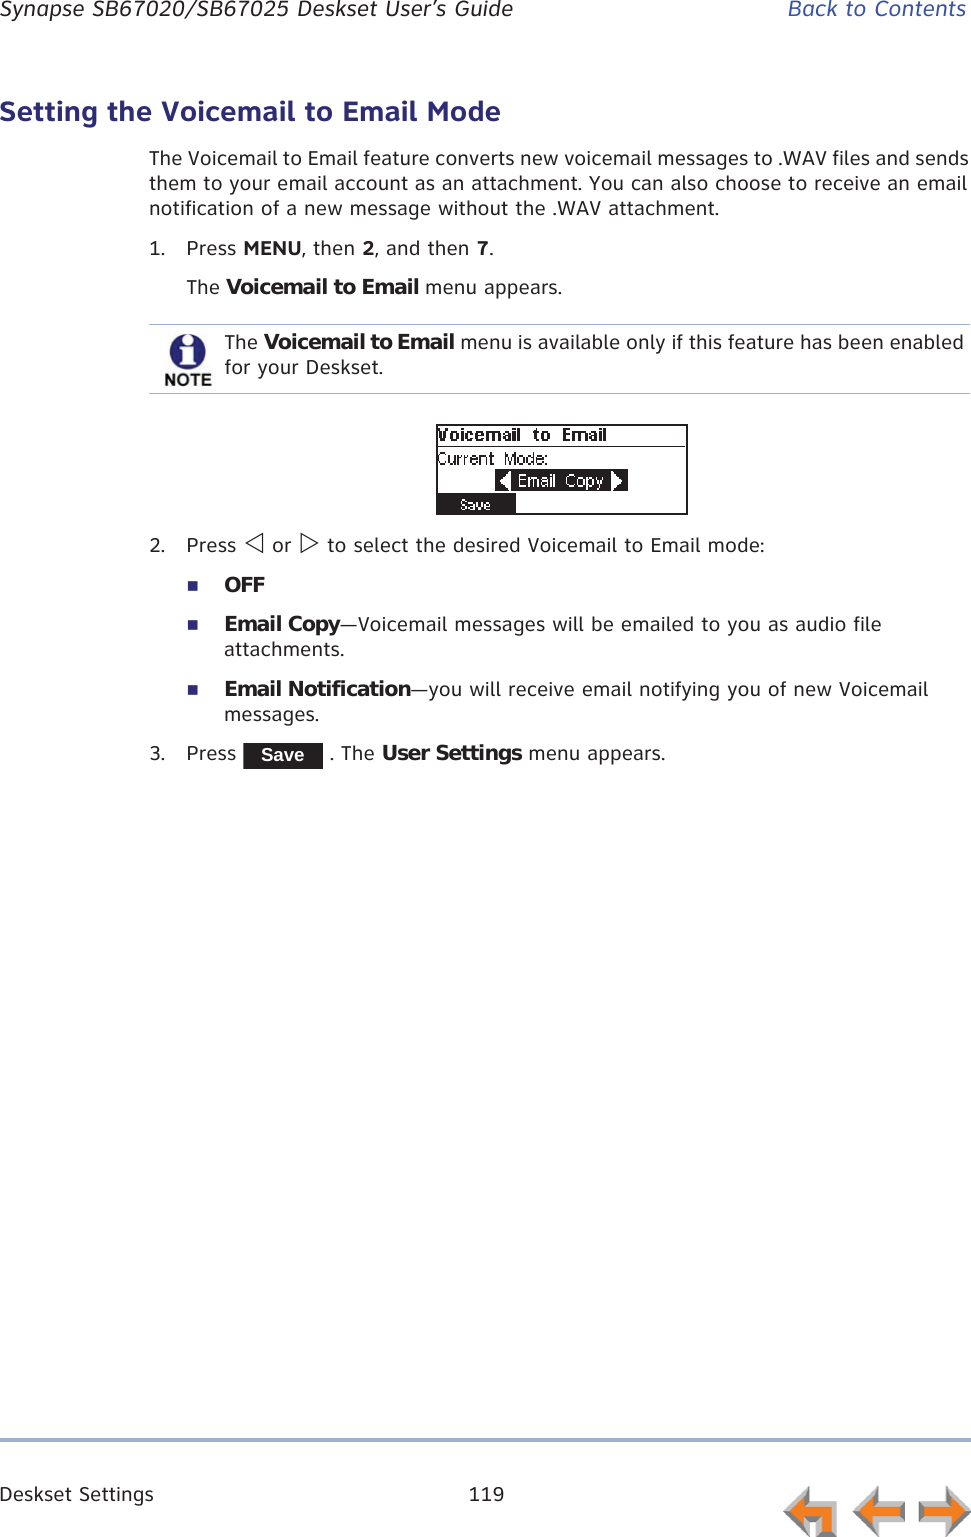
![Call Log 86 Synapse SB67020/SB67025 Deskset User’s Guide Back to ContentsUsing the Call LogThe Call Log soft keys, as shown in Figure 29 and described in Table 16, are available whenever the Call Log has at least one entry.Figure 29. Call Log FunctionsThe Voicemail message icon appears in call entries where the caller left a message. The icon remains until you delete the message. An ! icon indicates the message is new.If your company has caller ID, the caller information appears. If the caller ID information is absent because it is unavailable, UNKNOWN NAME and UNKNOWN NUMBER appear. If the caller chooses not to send the information, PRIVATE NAME and PRIVATE NUMBER appear.1. Name and number The Ring Group name can also appear here.2. NEW Indicates call was not answered and has not been reviewed.3. Voicemail message available for playback. Exclamation mark (!) indicates message is new.A Ring Group or Call Queue icon can also appear here. The Voicemail icon replaces other icons when both would apply.4. Current Call Log entry number/ total number of entries50/50 maximum.Table 16. Call Log Soft keysKey Description Key DescriptionPlays message. Appears only when there is a message.Deletes the entry.Dials the entry. Stores number in your Personal list.Clears [NEW] indication from the displayed entry.Deletes all entries.1234PlayMsgDeleteCallBackStoreClrNewDelAll](https://usermanual.wiki/VTech-Telecommunications/80-9098-00/User-Guide-1845770-Page-232.png)
![Call Log 87 Synapse SB67020/SB67025 Deskset User’s Guide Back to ContentsTo access the Call Log list:1. Call Appearance mode—Press MENU, then 1, and then 8.Line Appearance mode—Press MENU, then 1, and then 6.The most recent Call Log entry appears.2. Press V or U until the desired entry is on the screen.3. Press CANCEL to exit the Call Log.11:15a Oct 20 1/35Graham Be ll232-555-0176 [NEW]!Play Ms g Delete Callback](https://usermanual.wiki/VTech-Telecommunications/80-9098-00/User-Guide-1845770-Page-233.png)
![Call Log 88 Synapse SB67020/SB67025 Deskset User’s Guide Back to ContentsManaging Missed CallsAll incoming calls are recorded in the Call Log unless Call Forward All is on and calls are forwarded to another extension or external phone number (Call Appearance mode only). Unanswered calls that have not been reviewed are indicated by [NEW].To review and make calls from the Call Log:1. On the Call Log screen, press V or U to see the desired entry.Press to access dialing options before calling a number and to dial the displayed number. The Call Back screen appears.zPress to dial the on-screen number.zCall Log entries may not be in the proper format for dialing. In some areas, you need to remove the area code or add or remove a 1. Press Y or Z to view the dialing options. The following dialing options are available:nnn-nnnn (7 digits)1-nnn-nnnn (8 digits)nnn-nnn-nnnn (10 digits)1-nnn-nnn-nnnn (11 digits).Press to delete the displayed entry.2. Press CANCEL to exit the Call Log.CallBackCall StoreCall BackAngela Martin 732-555-7318 CallDelete](https://usermanual.wiki/VTech-Telecommunications/80-9098-00/User-Guide-1845770-Page-234.png)

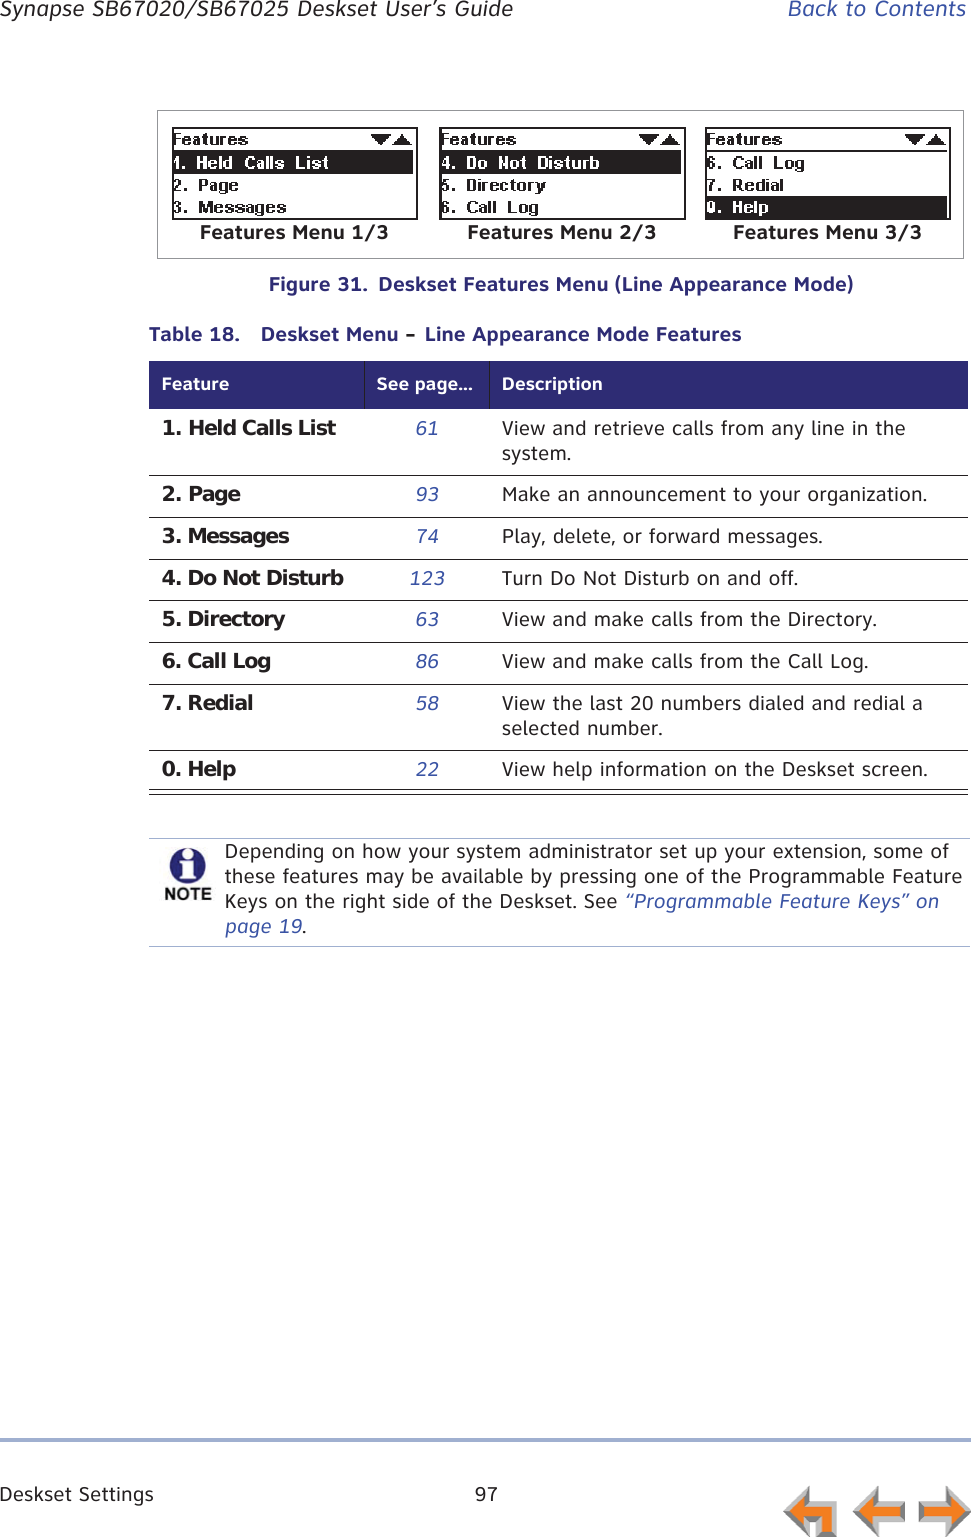
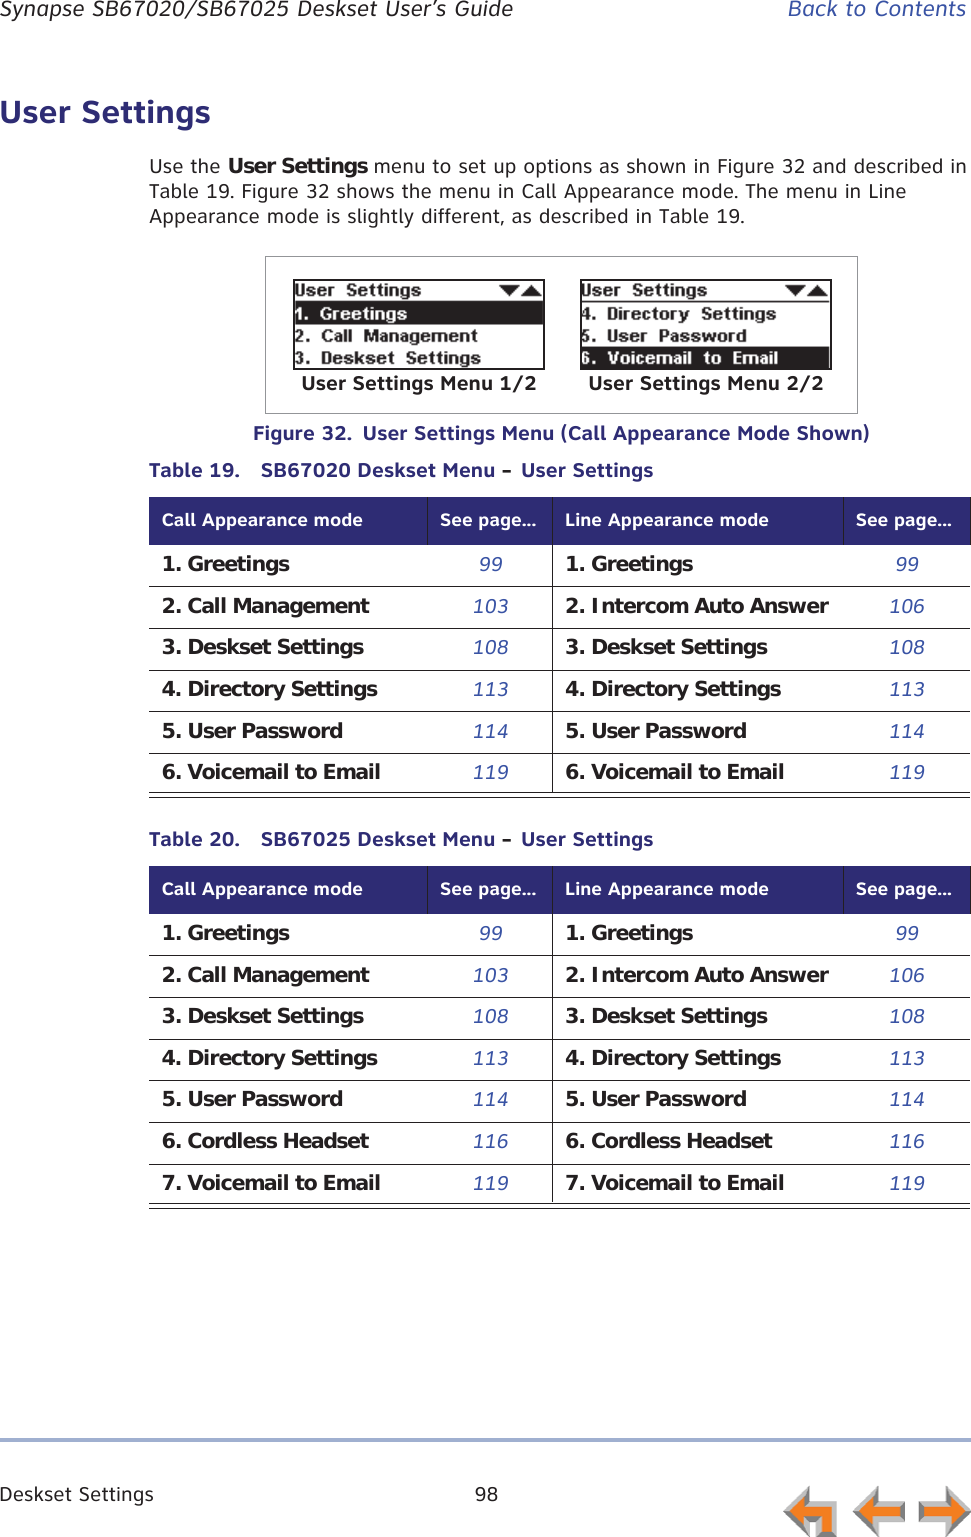
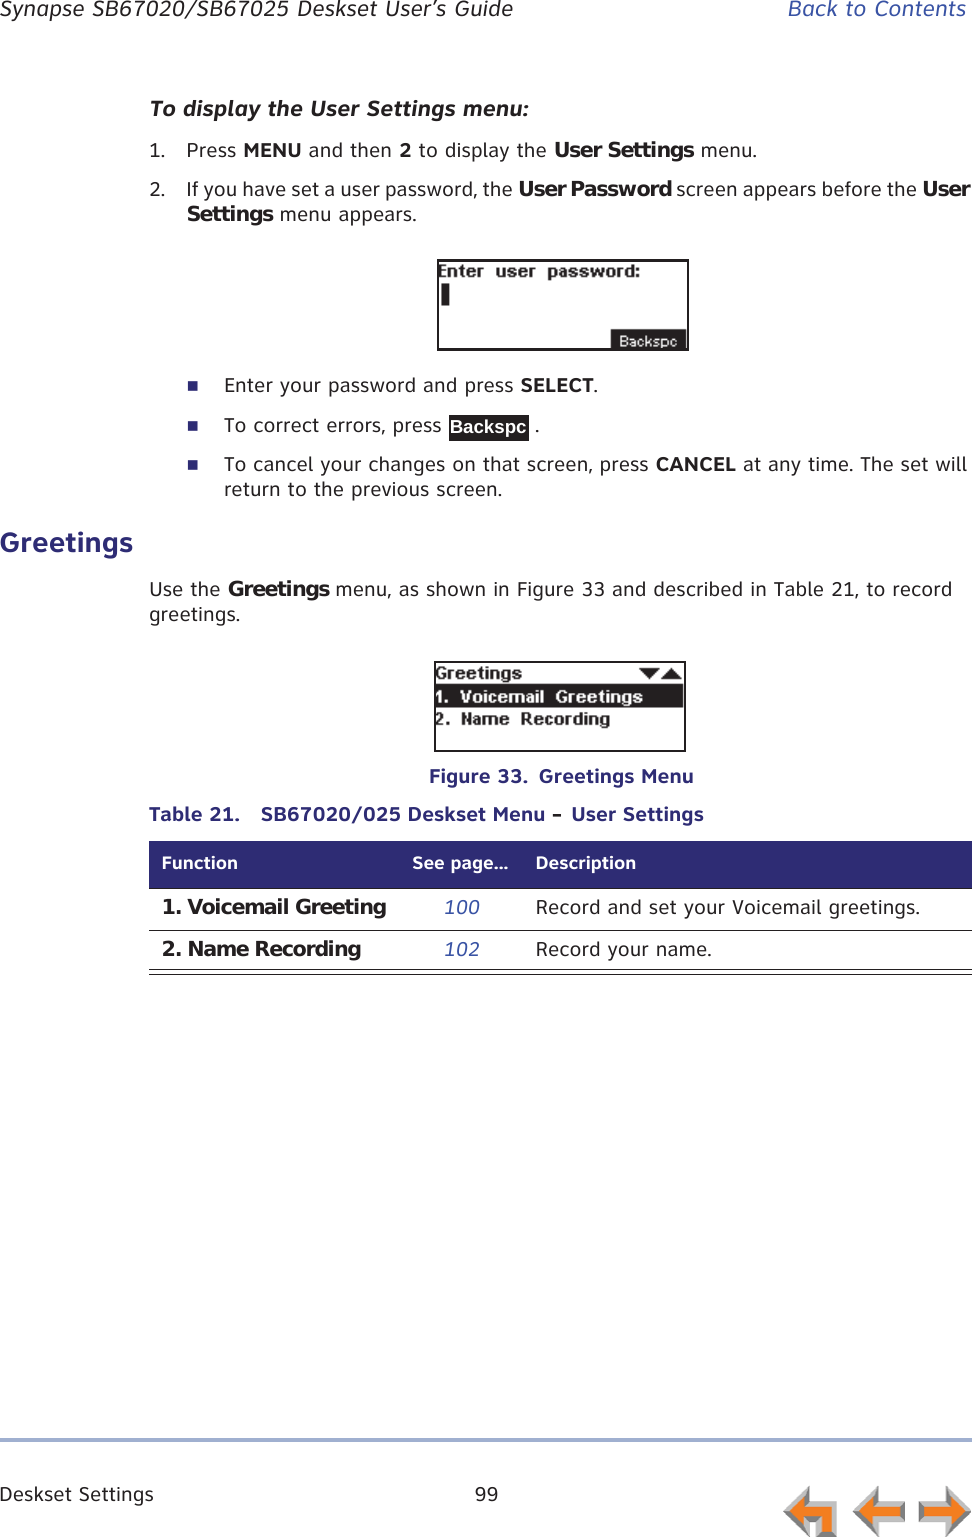
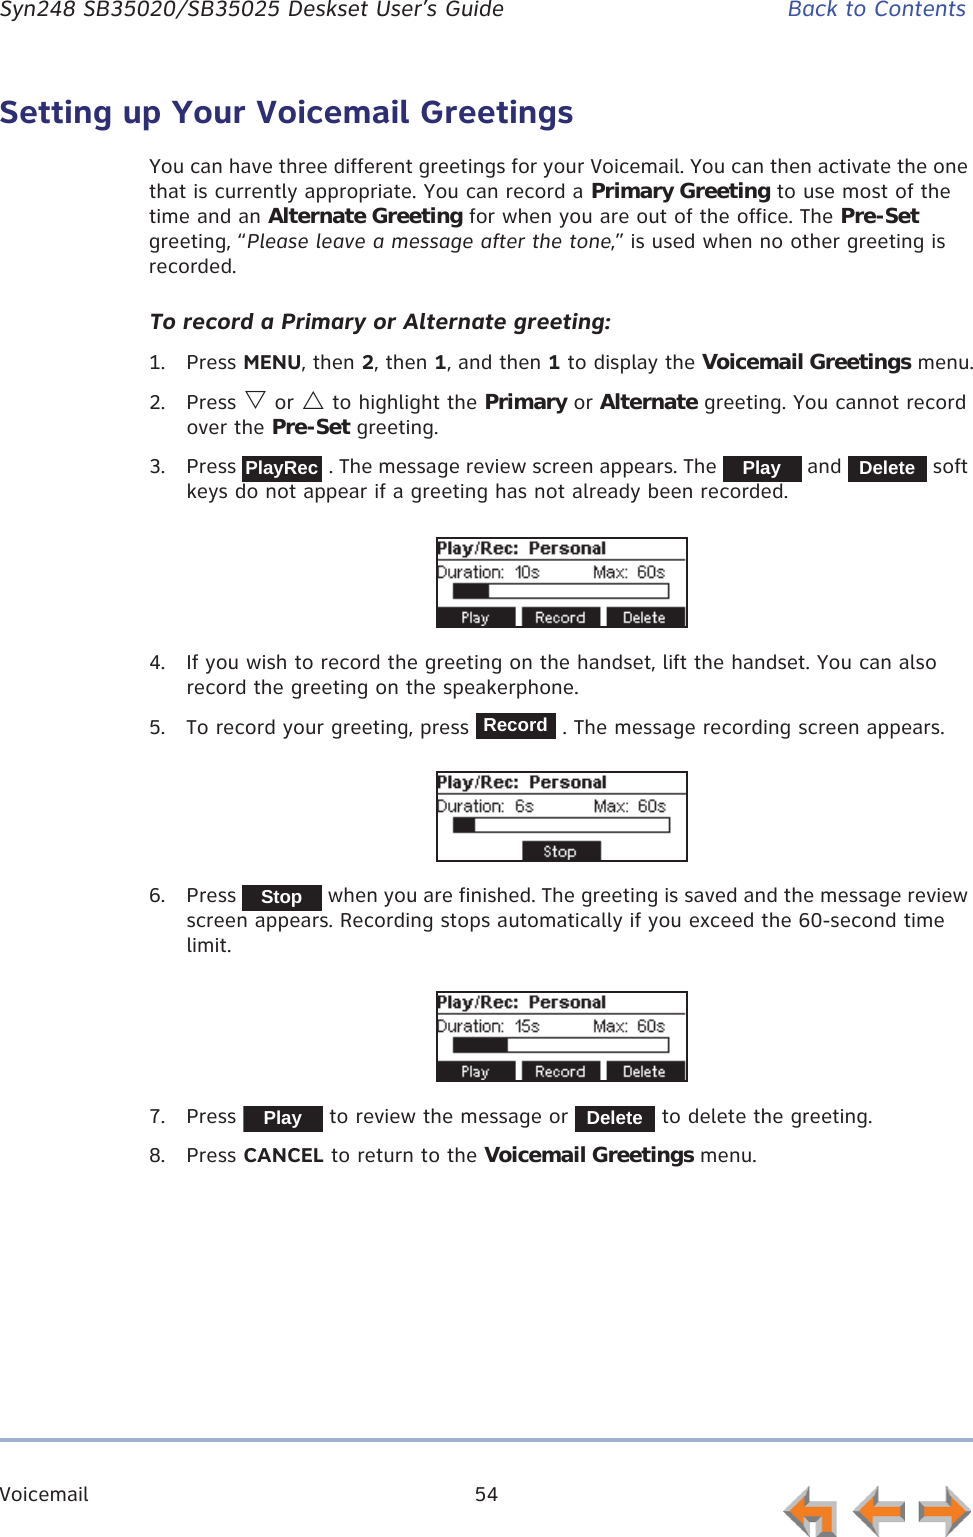
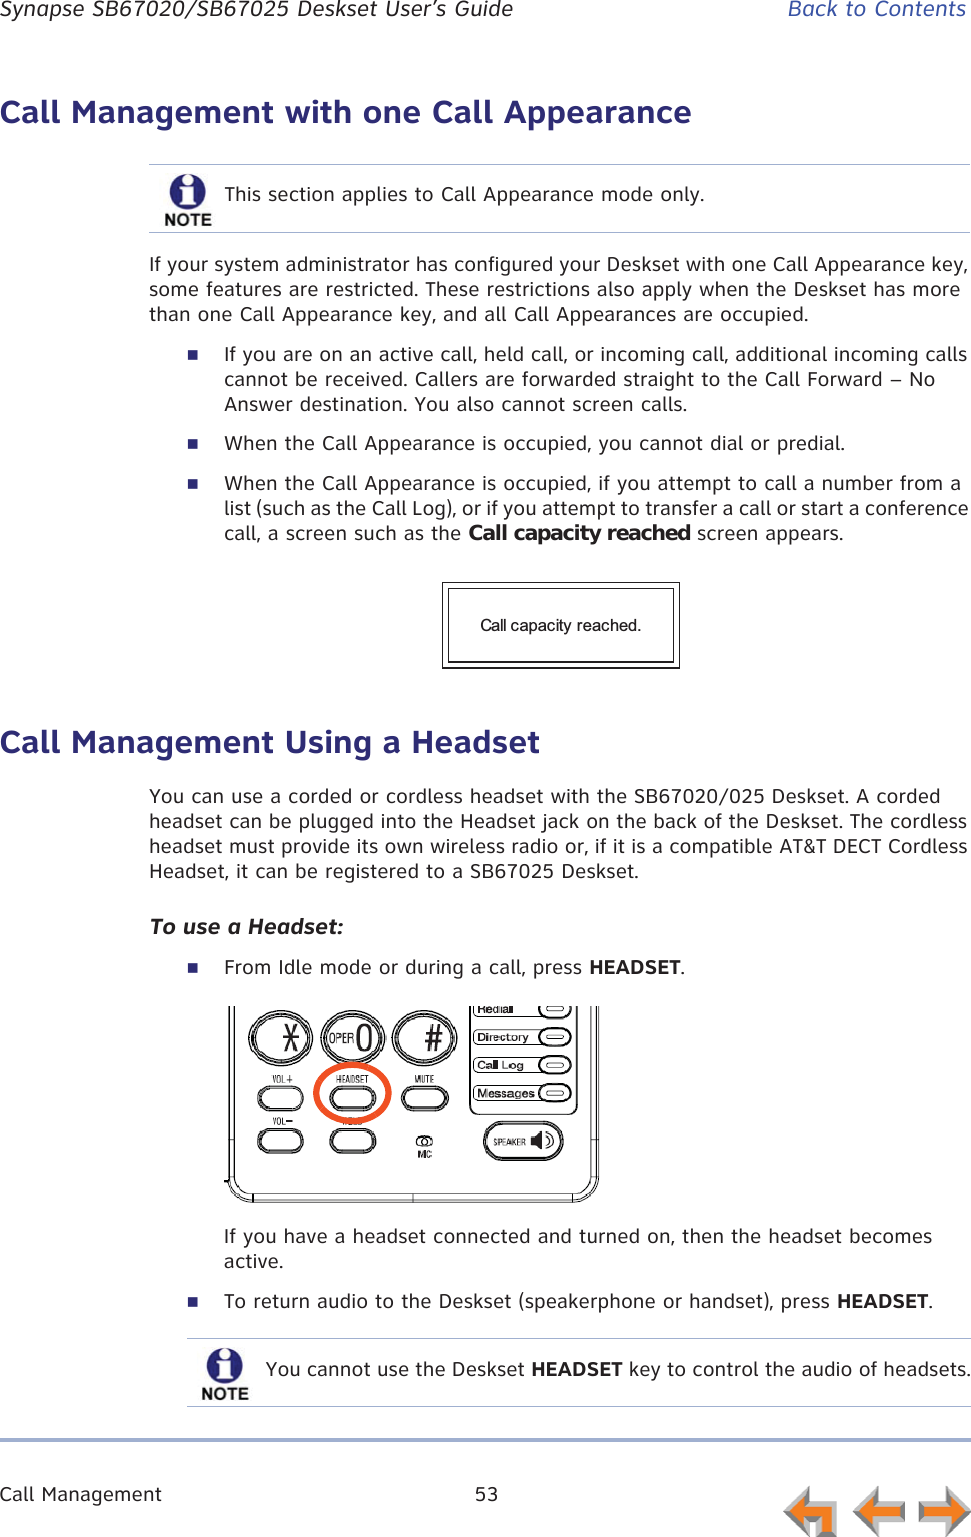
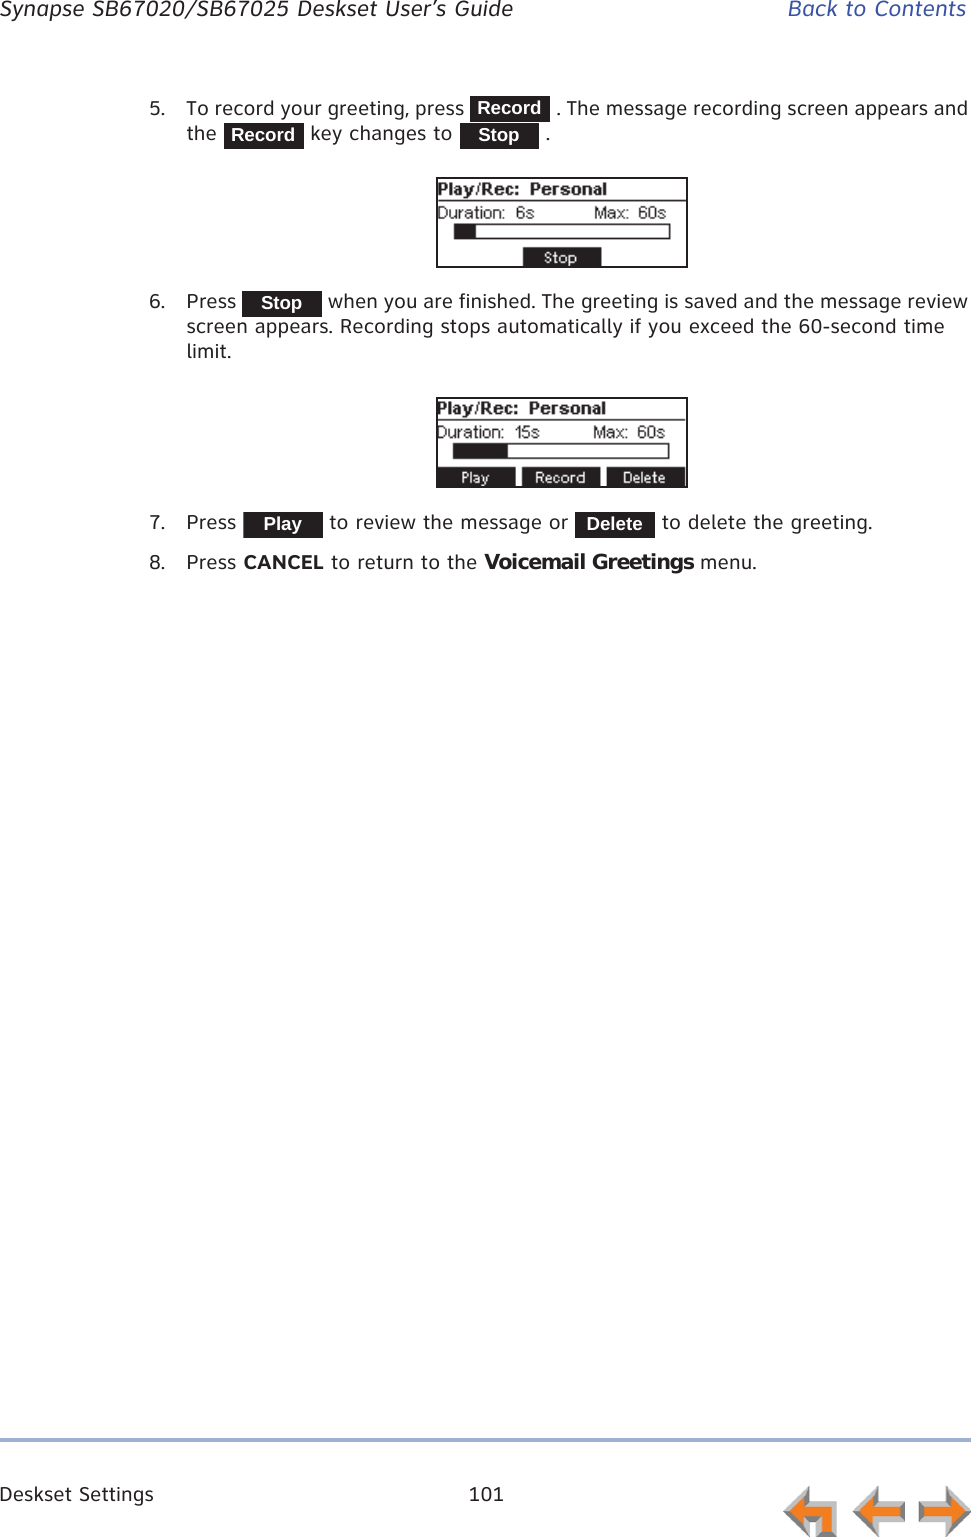
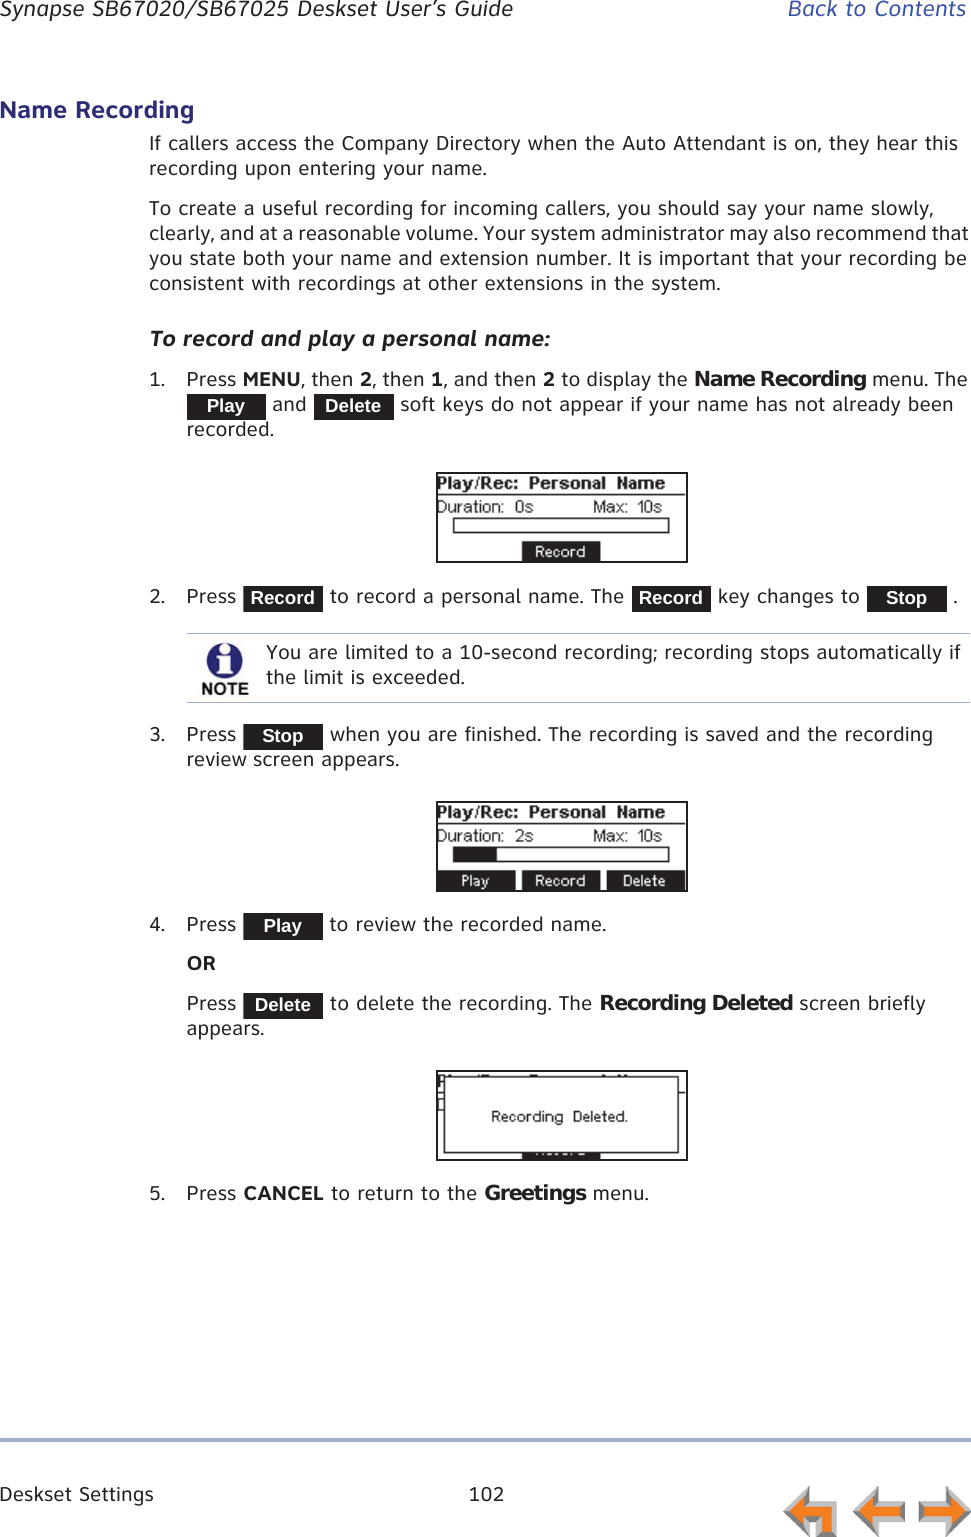
![Deskset Settings 100 Synapse SB67020/SB67025 Deskset User’s Guide Back to ContentsVoicemail GreetingsYou can have three different greetings for your Voicemail. You can then activate the one that is currently appropriate. You can record a Primary Greeting to use most of the time and an Alternate Greeting for when you are out of the office. The Pre-Setgreeting, “Please leave a message after the tone,” is used when no other greeting is recorded. To activate a greeting:1. Press MENU, then 2, then 1, and then 1 to display the Voicemail Greetings menu.Press U or V to highlight the Primary, Alternate, or Pre-Set greeting to be played to external callers. When you highlight the Pre-Set greeting, the PlayRec soft key changes to Play.2. Press to make the highlighted greeting the greeting played to callers. The system checks to see if the selected greeting has been recorded.If the selected greeting has been recorded, [ACTIVE] appears beside the selected greeting.If a greeting has not been recorded, Greeting not recorded appears. To record a Primary or Alternate greeting, see “To record a Primary or Alternate greeting:” on page 100.To record a Primary or Alternate greeting:1. Press MENU, then 2, then 1, and then 1 to display the Voicemail Greetings menu.2. Press V or U to highlight the Primary or Alternate greeting. You cannot record over the Pre-Set greeting.3. Press . The message review screen appears. The and soft keys do not appear if a greeting has not already been recorded.4. If you wish to record the greeting on the handset, lift the handset. You can also record the greeting on the speakerphone.You cannot delete or record over the Pre-Set greeting.ActivatePlayRecPlayDelete](https://usermanual.wiki/VTech-Telecommunications/80-9098-00/User-Guide-1845770-Page-246.png)


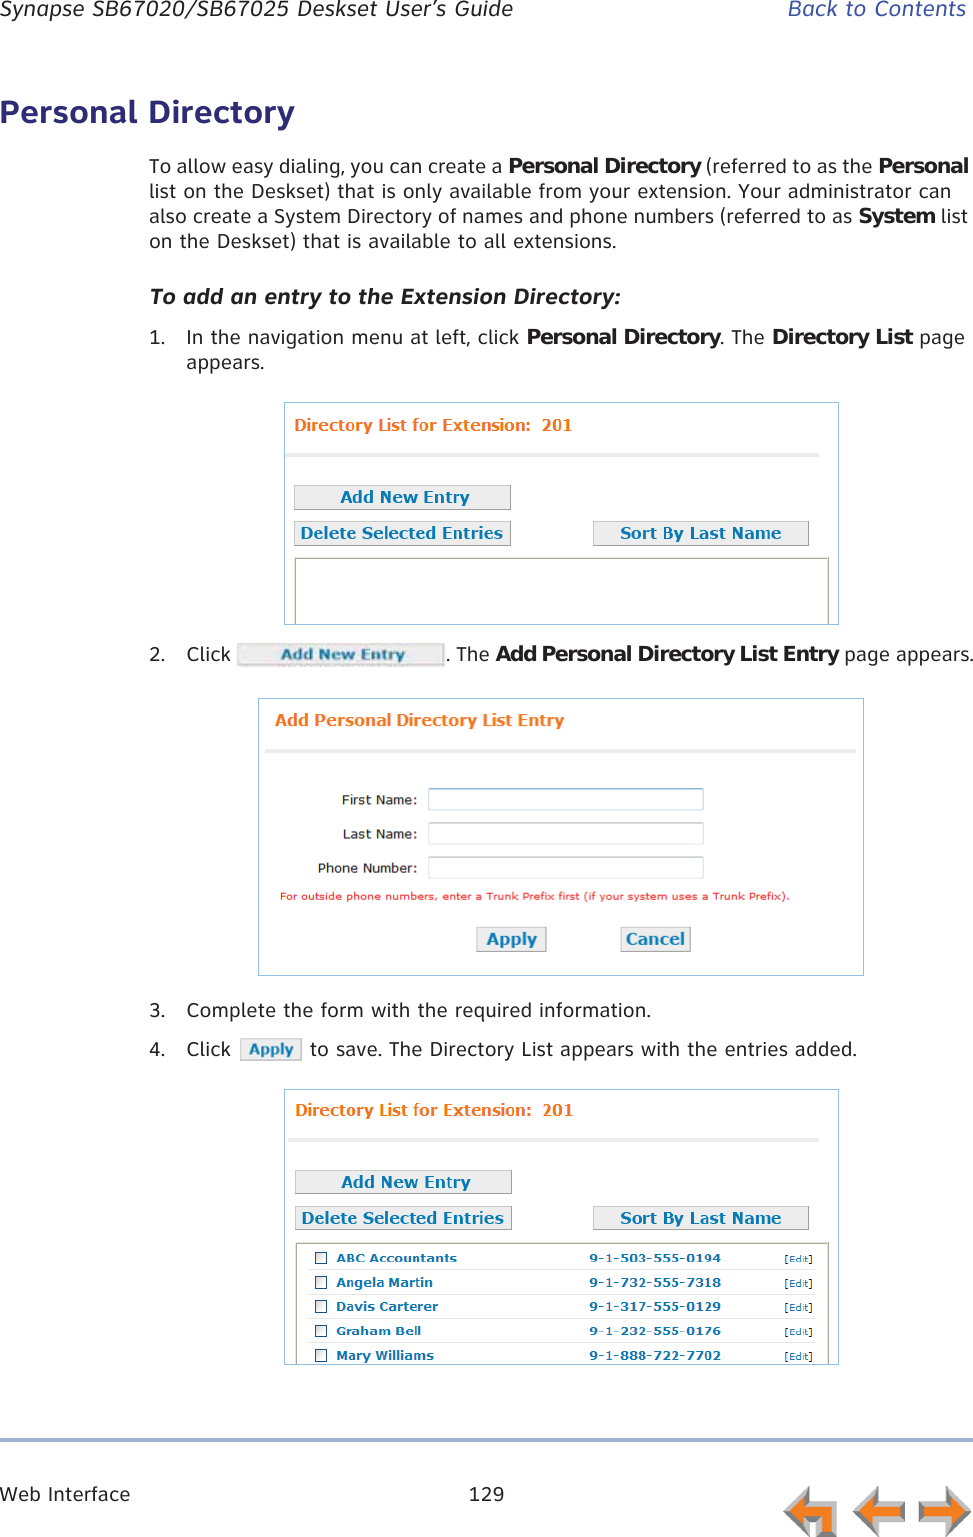
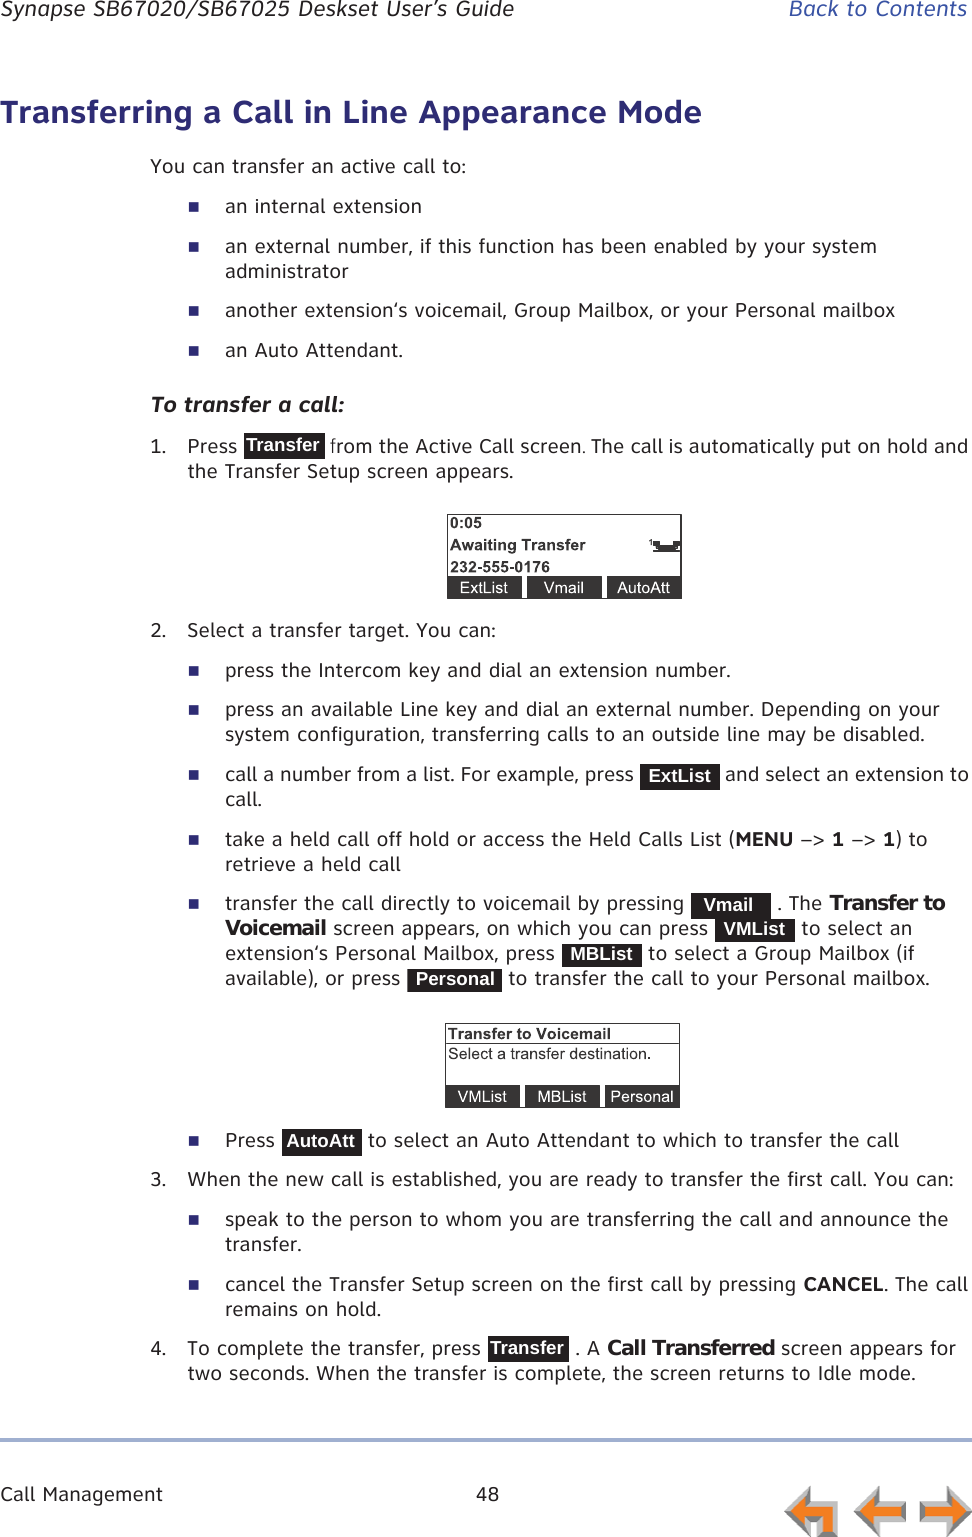
![Web Interface 130 Synapse SB67020/SB67025 Deskset User’s Guide Back to ContentsTo edit Personal Directory entries:1. In the navigation menu at left, click Personal Directory. The Directory List page appears.2. Click [Edit] next to the entry to be edited. The Edit Personal Directory List Entry page appears.3. Complete the form with the desired information.4. Click to accept your changes or to reject the changes.To sort and delete Personal Directory entries:1. In the navigation menu at left, click Personal Directory to display the Directory List.2. To sort entries by last name, click . The button then changes to . This action only works during the current session. The sort order reverts to listing the names by first name when you log in the next time.3. To delete Directory entries:a. Click the check boxes for the entries you want to delete.b. Click . All of the selected entries are removed.](https://usermanual.wiki/VTech-Telecommunications/80-9098-00/User-Guide-1845770-Page-276.png)