Varex Imaging Deutschland XRPAD2 802.11n 3T3R Mini PCIe Module User Manual
PerkinElmer Medical Imaging 802.11n 3T3R Mini PCIe Module Users Manual
UserManual.wiki
>
Varex Imaging Deutschland
>
XRPAD2 User Manual
>
Users Manual
Contents
1.
User manual
2.
Users Manual
Users Manual
Navigation menu
Upload a User Manual
Namespaces
Wiki Guide
HTML
PDF
Info
Views
User Manual
Discussion / Help
Navigation


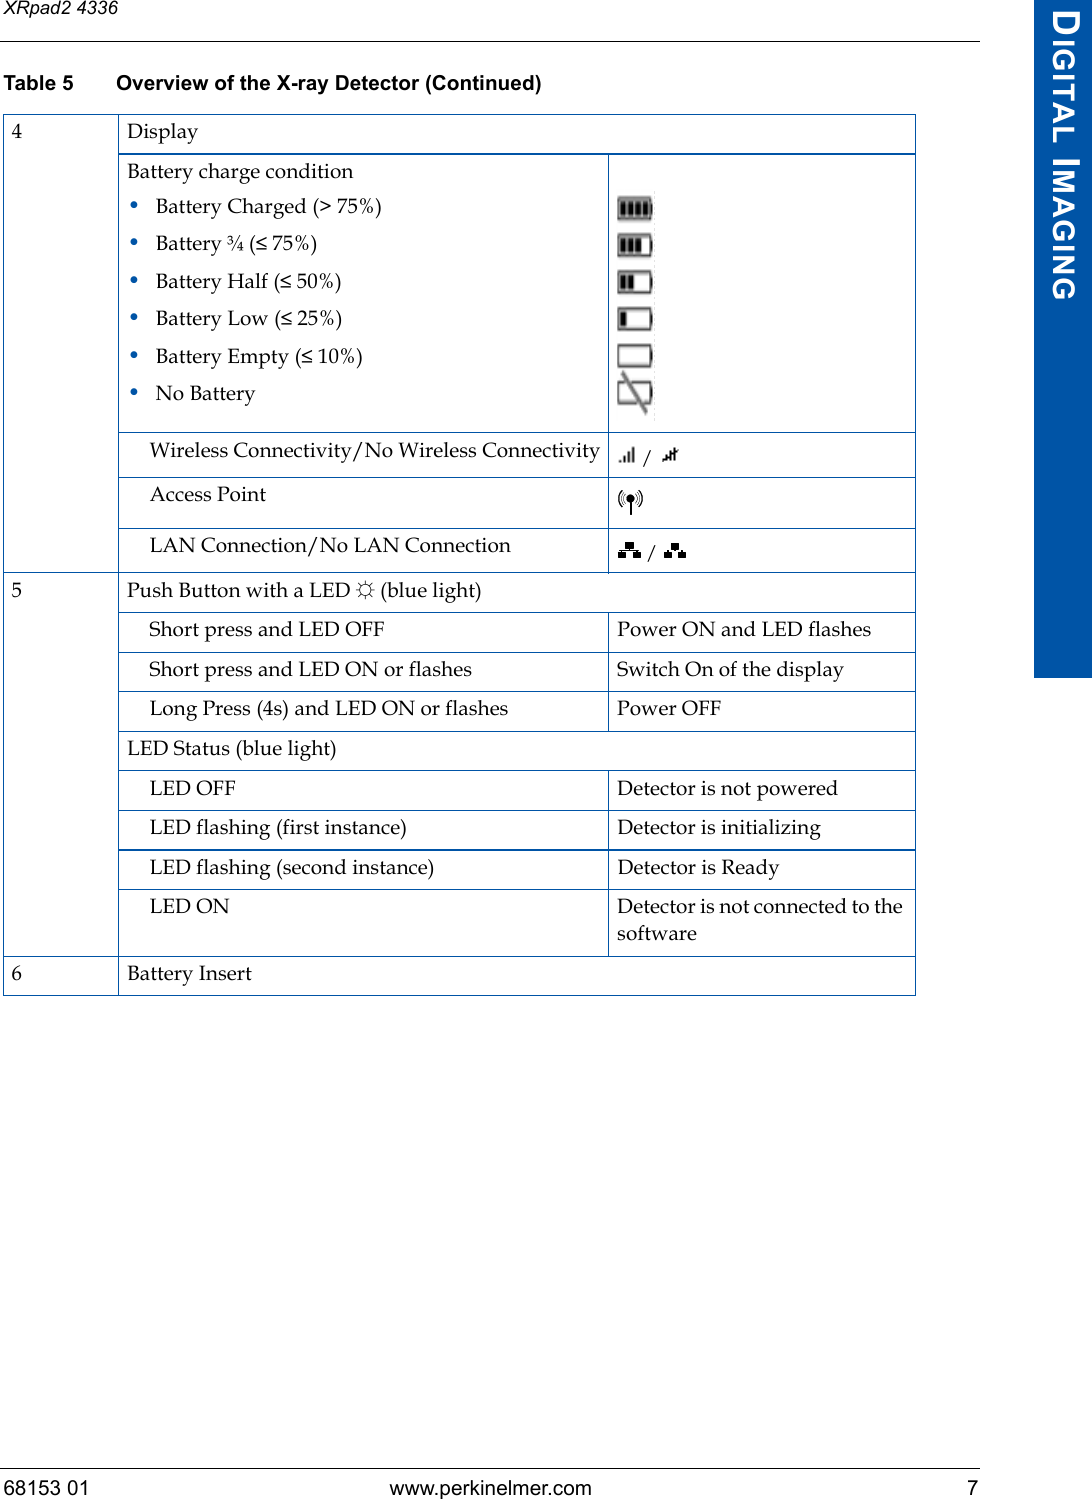
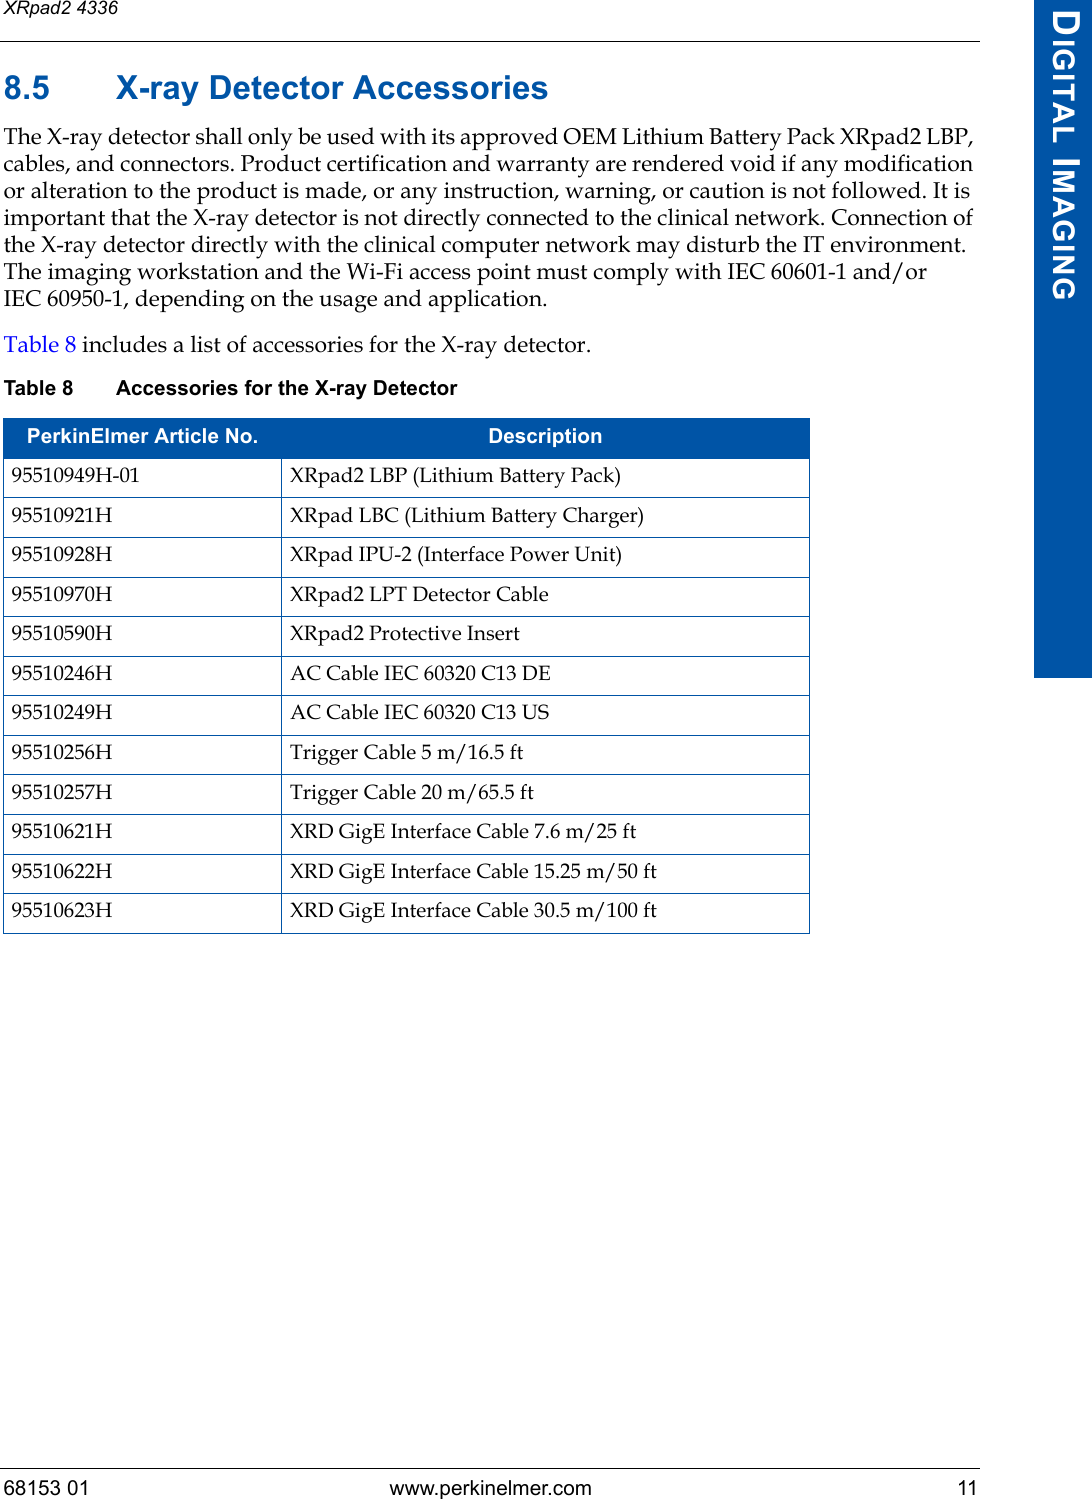
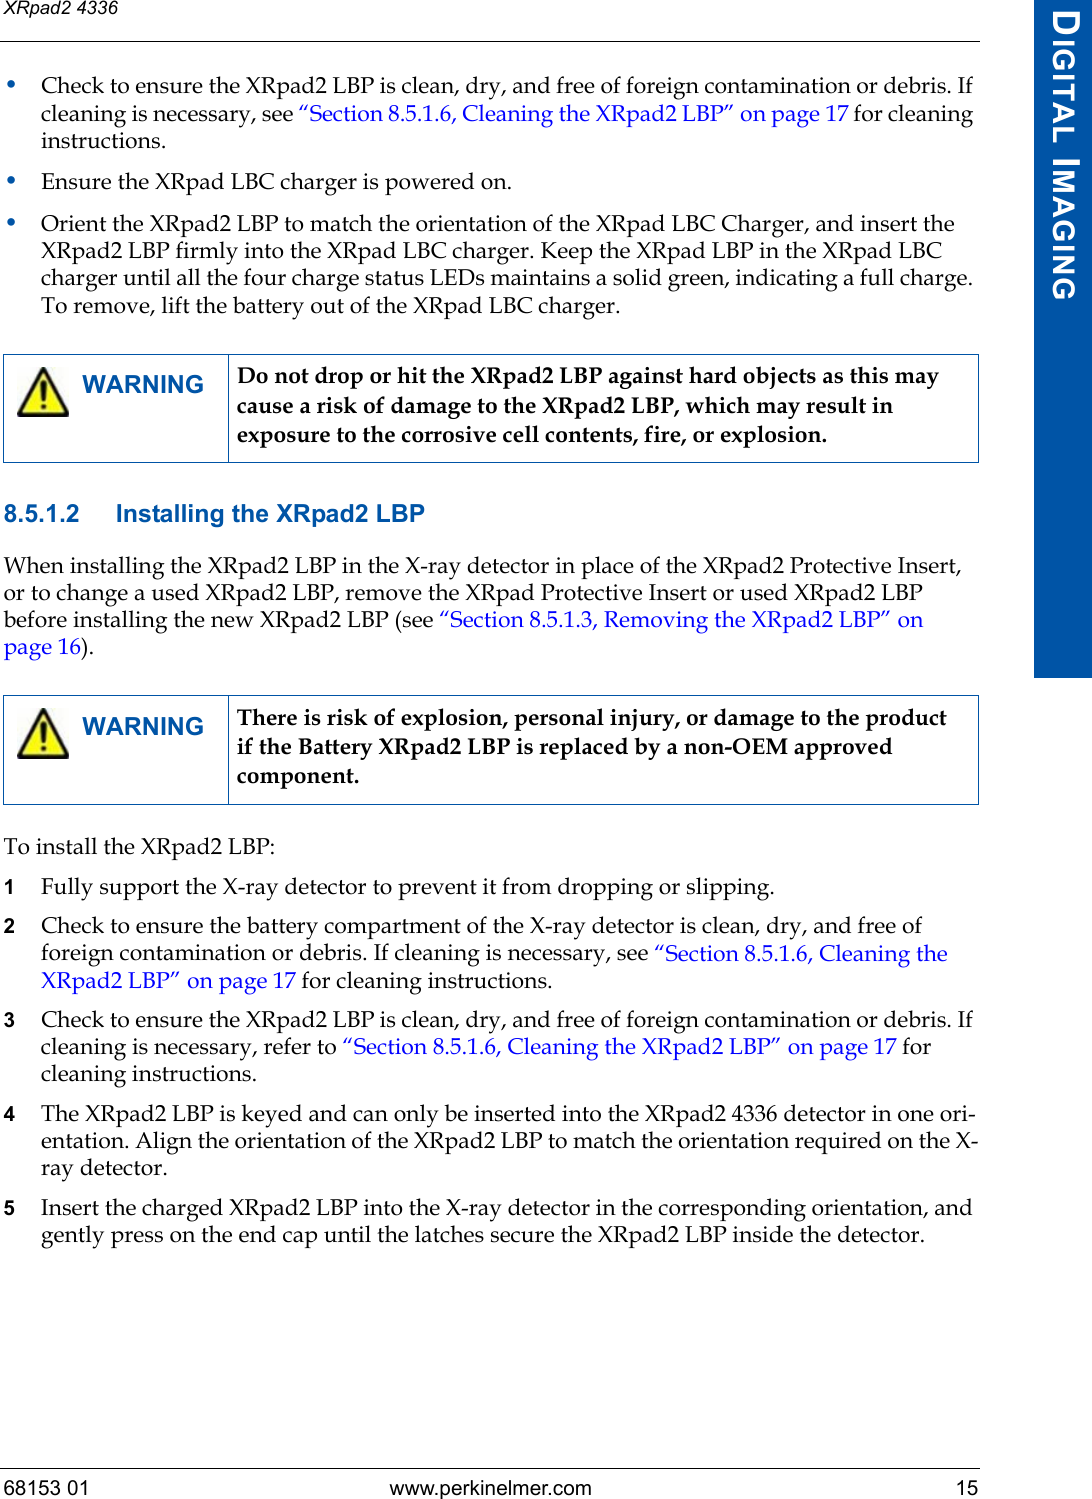
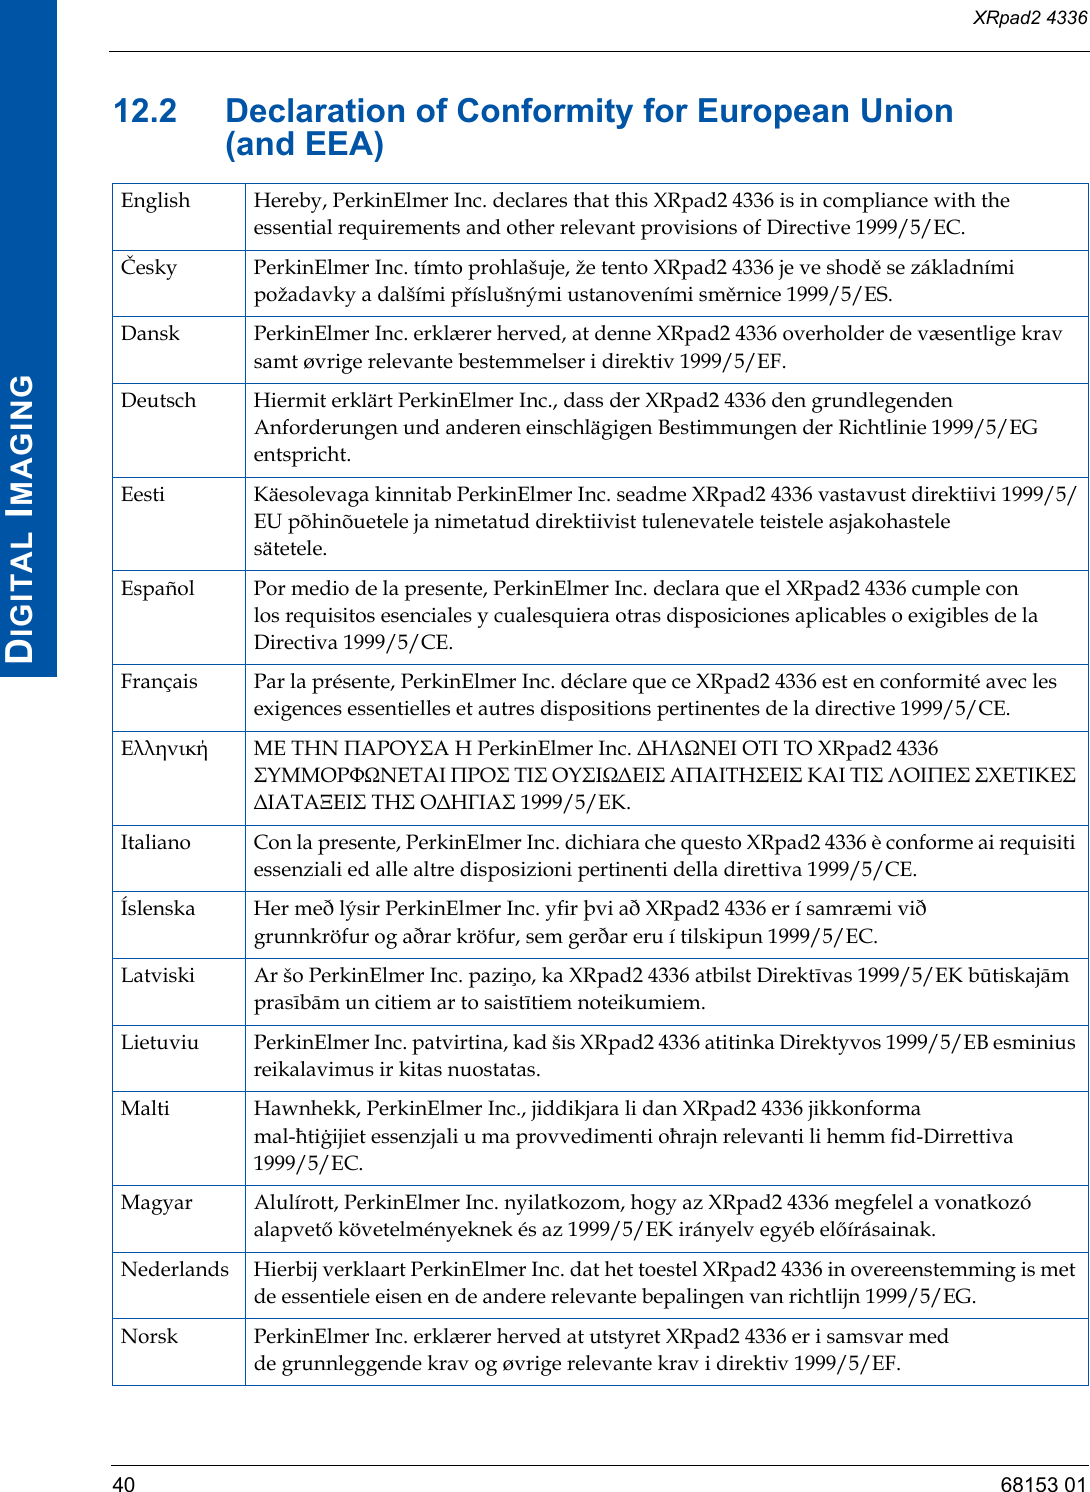
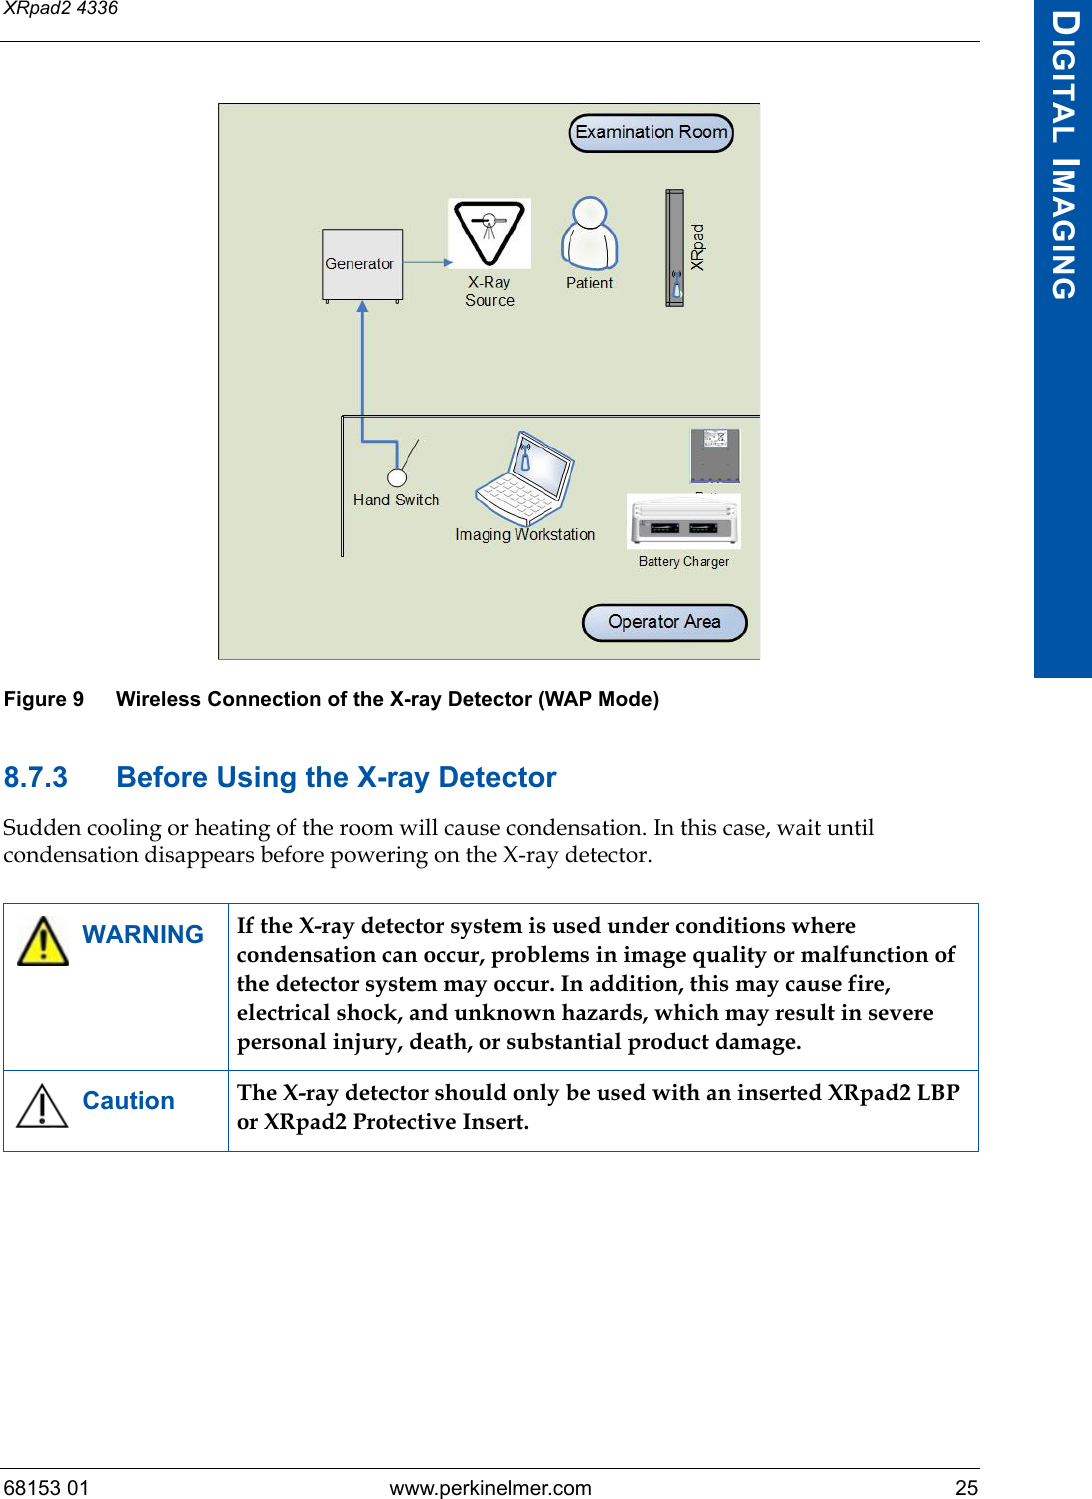
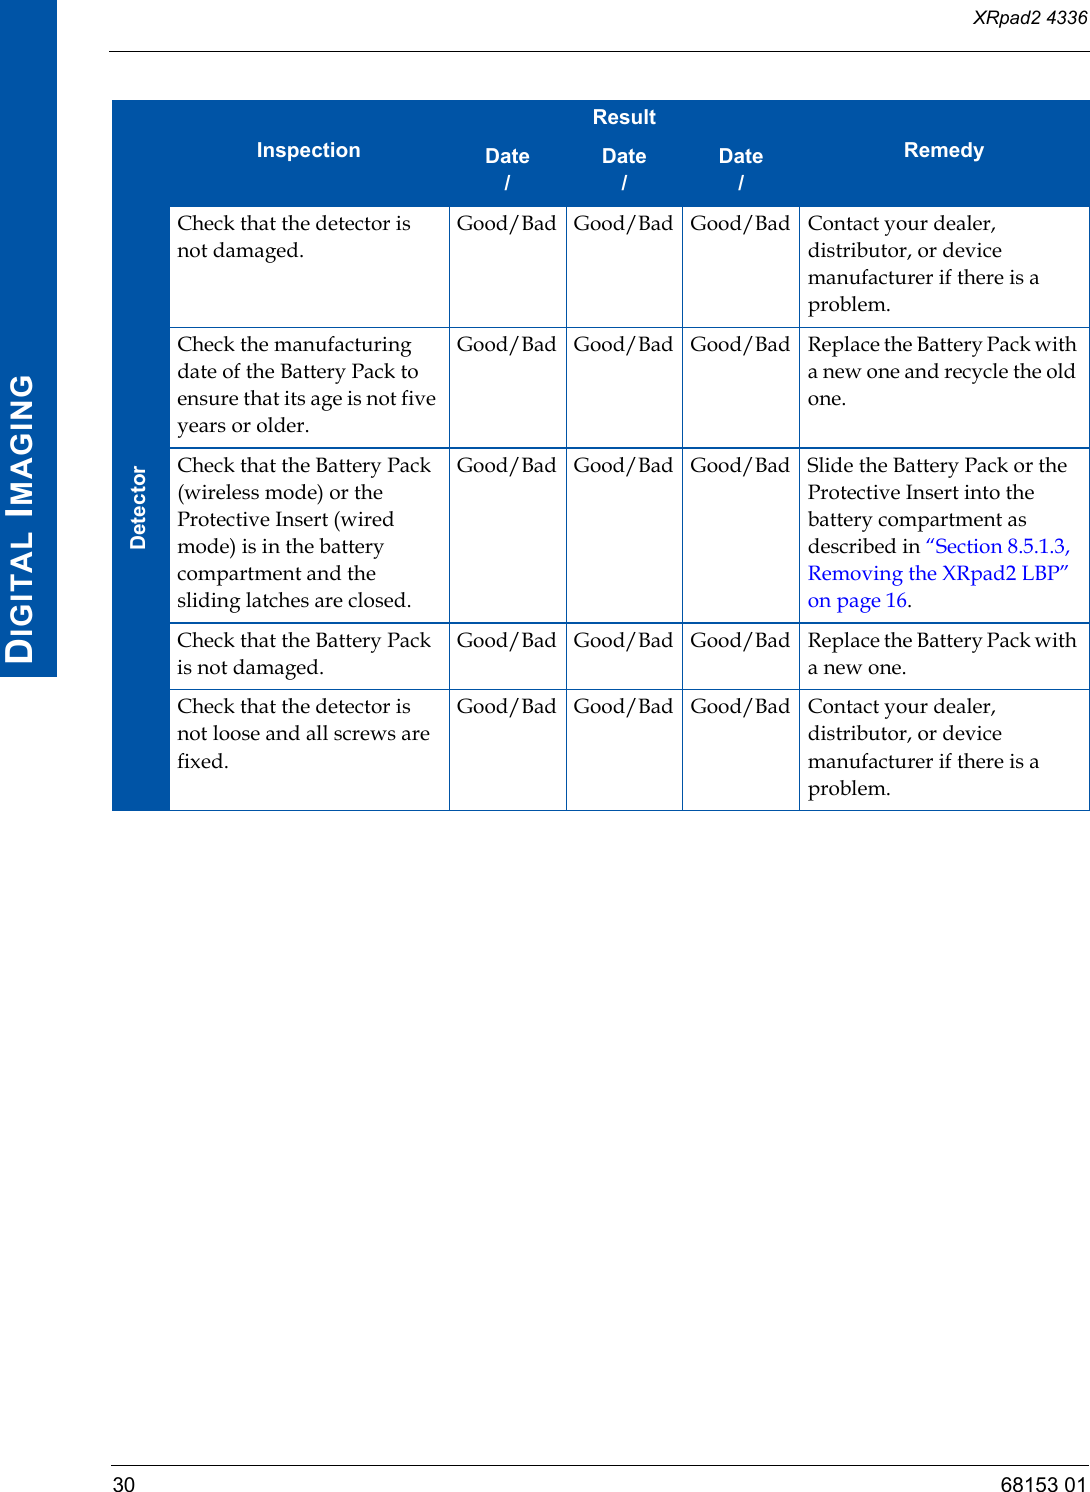
![XRpad2 433618 68153 01DIGITAL IMAGING8.5.1.7 Disposing of the XRpad2 LBPTo dispose of the XRpad2 LBP:•The XRpad2 LBP shall not be disposed with other waste at the end of its working life.•Recycle or dispose the battery in accordance with local, state, and federal/national laws and environmental regulations.•Do not place the battery in fire or incinerate.•For transporting, follow the requirements in “Section 8.5.1.4, Transportation and Storage” on page 16.8.5.2 XRpad IPU-2The XRpad IPU-2 is an Interface and Power Unit. The XRpad IPU-2 combines the Power Supply Unit with additional communication and trigger interfaces. The tethered power and communica-tion cable is connected to the X-ray detector. The communication data are split inside the XRpad IPU-2 into Gigabit Ethernet Interface, Detector Trigger Interface, Hand Switch and Generator Interface, and Detector Push Button Interface. The Gigabit Ethernet Interface of the XRpad IPU-2 is connected to the Imaging Workstation using a Cat 5e/6 cable. The maximum cable length is 31m. The AC cable must be connected to a properly grounded receptacle. The AC cable is remov-able and will be plugged to an IEC connector. The XRpad IPU-2 must be connected with a ground by the functional ground connector (Figure 6 [13]) or with the potential of the hospital by the potential equalization connector (Figure 6 [12]). The socket outlet shall be near the XRpad IPU-2 and shall be easily accessible. To isolate the equipment electrically from supply main on all poles simultaneously, the supply main switch (Figure 6 [1]) must be used.Figure 6 XRpad IPU-2WARNING Connecting the XRpad IPU-2 LAN port directly to the clinical computer network may disturb the IT environment.Front Panel Rear Panel123 45678910111213 14 15 16 17 18](https://usermanual.wiki/Varex-Imaging-Deutschland/XRPAD2.Users-Manual/User-Guide-2824009-Page-34.png)
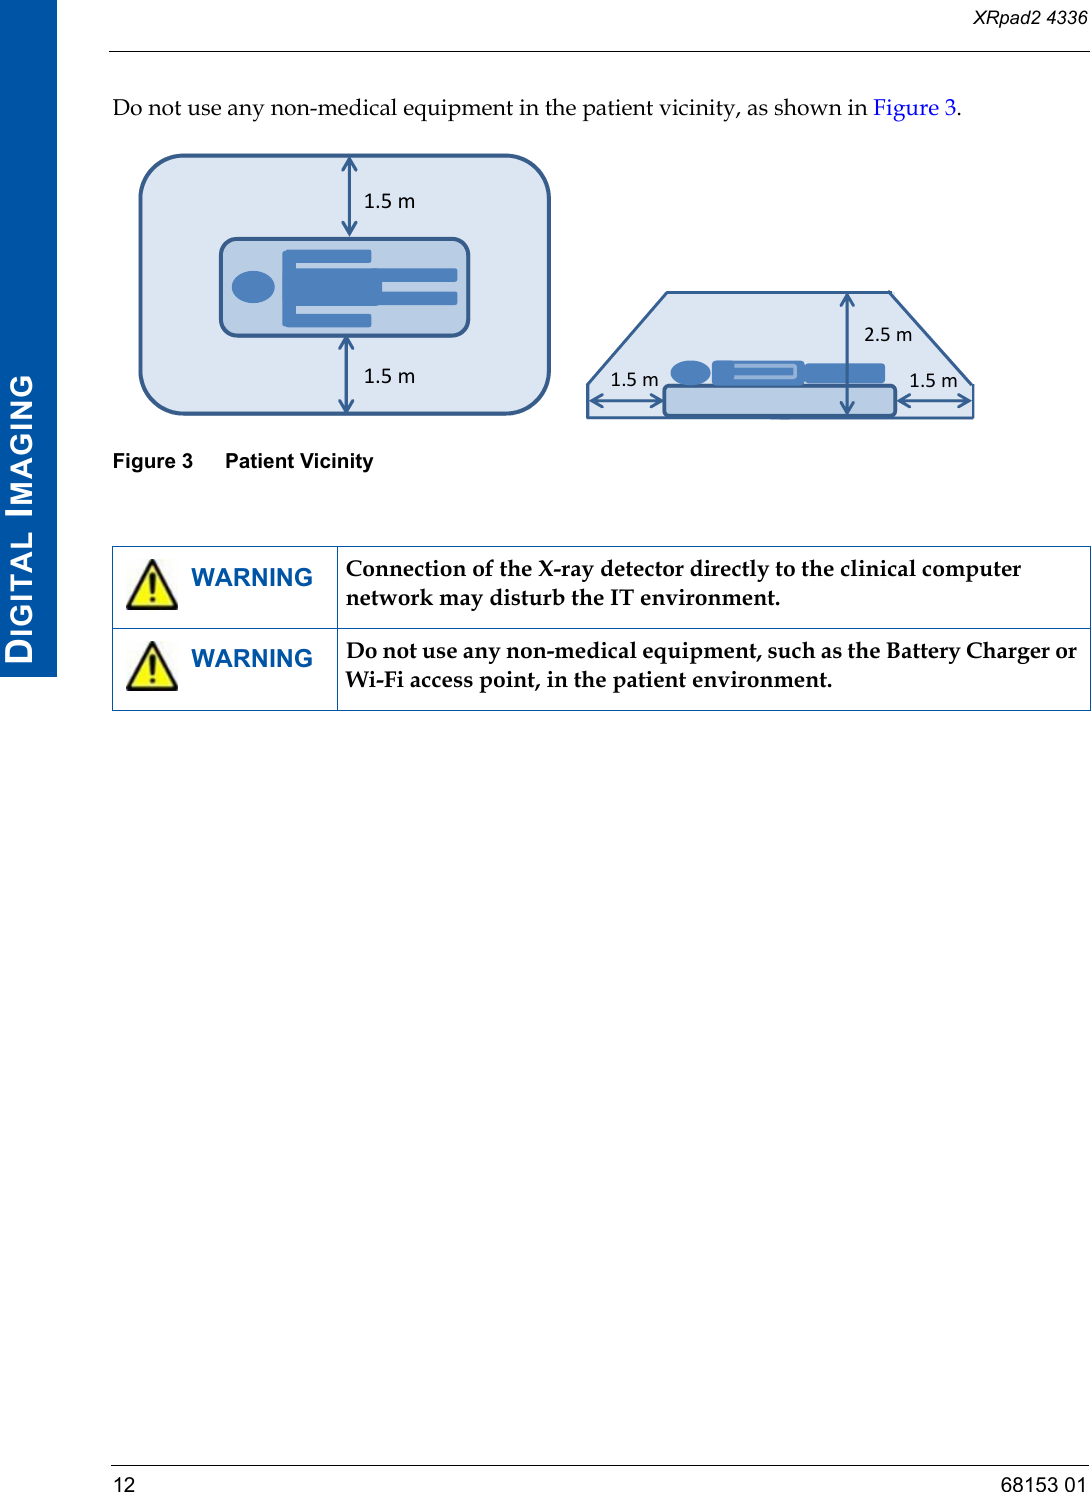
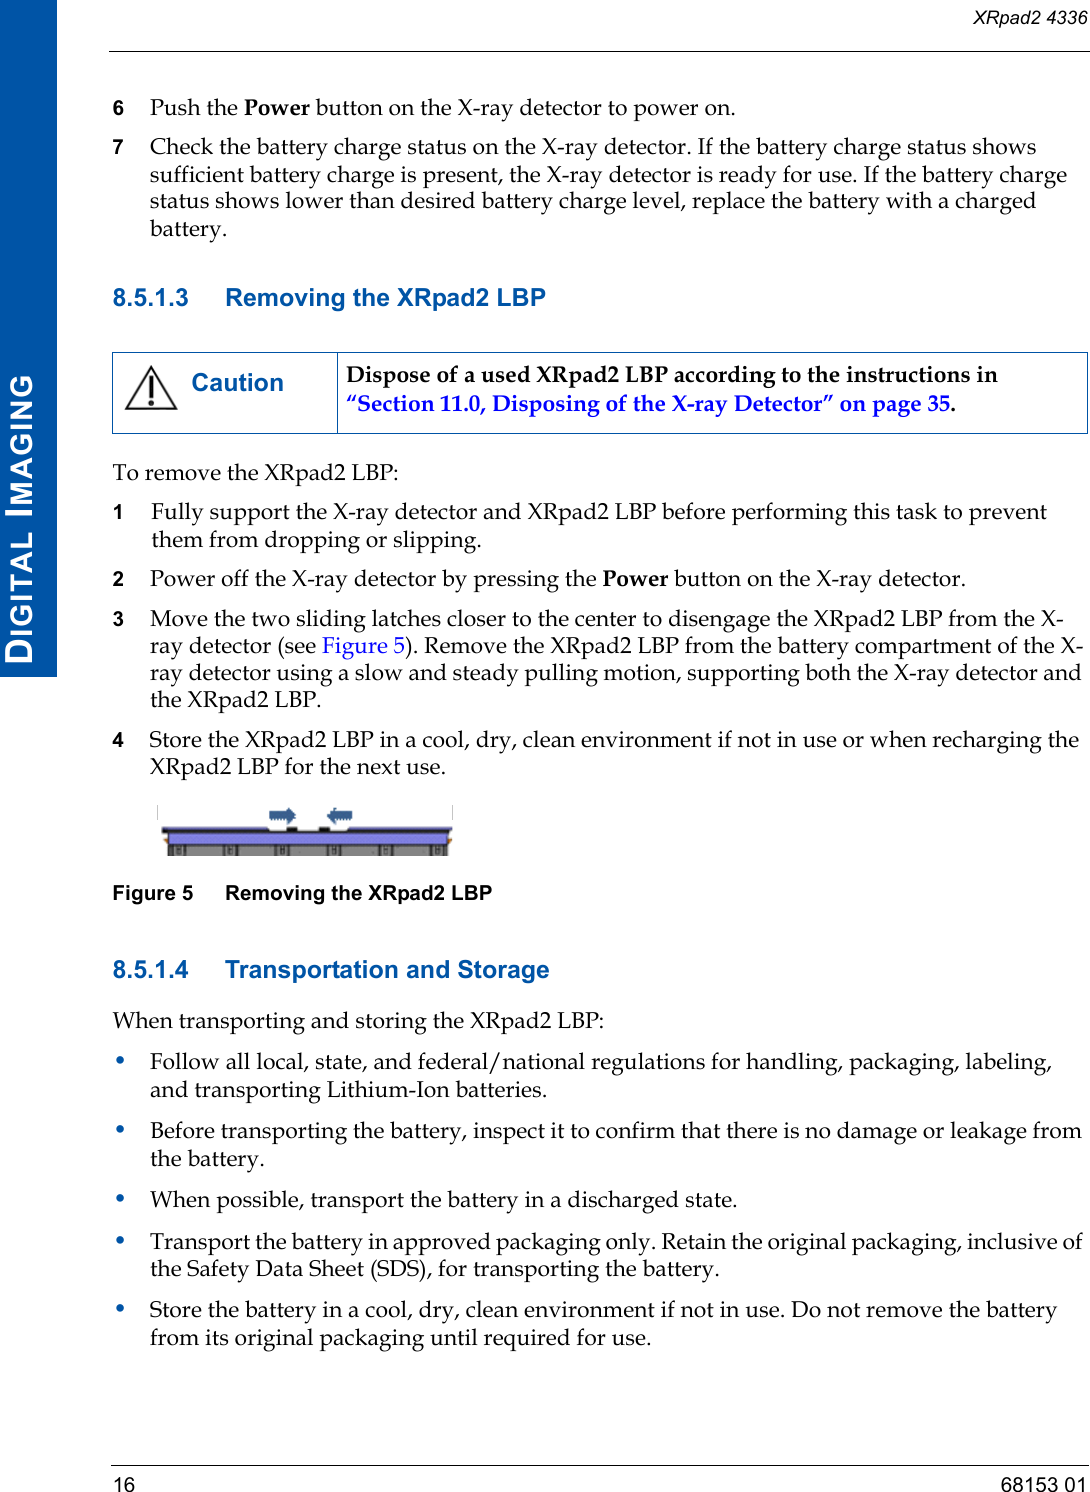
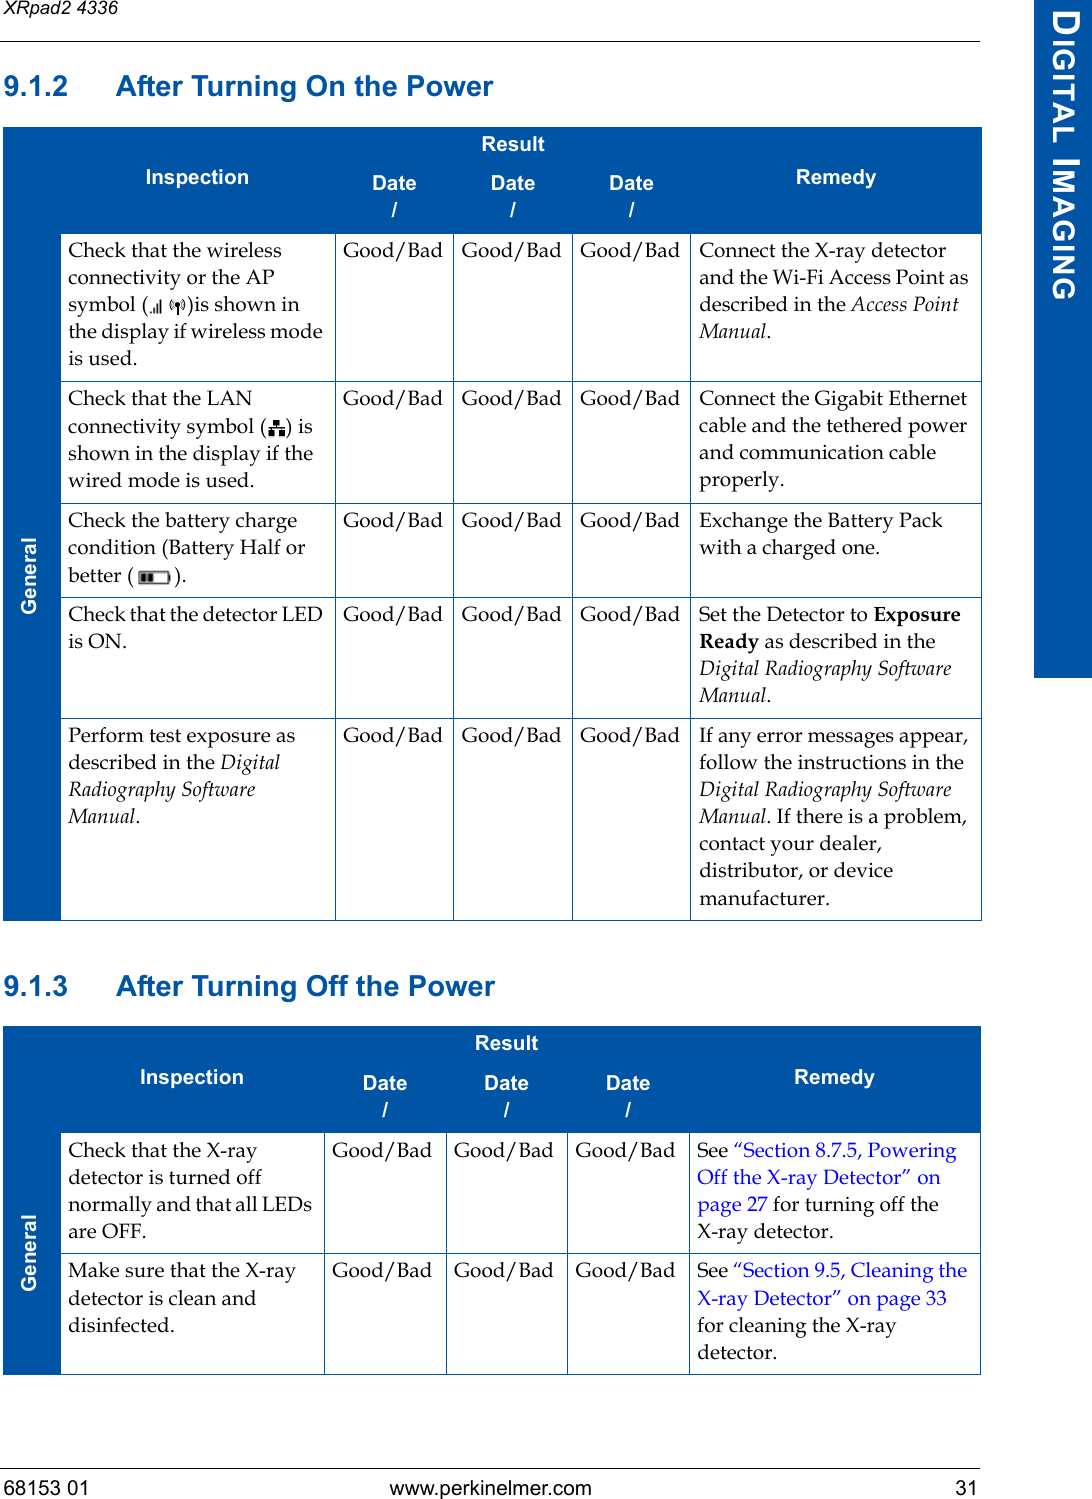
![XRpad2 433620 68153 01DIGITAL IMAGINGTable 11 includes the specification for the XRpad IPU-2.Table 11 Specification of the XRpad IPU-2Electrical SpecificationAC Input Voltage [16] 100 V … 240 VAC Frequency [16] 50 Hz/60 HzDC Output [8] 12.5 V/5 A, 15 V/1 A (voltage level is dependent of load)Trigger In Signal from Hand Switch [6] 5 V … 24 V/10 mA (SELV)Trigger Out Signal to Generator [5] Same level as Trigger In SignalTrigger In Signal [7, 9] 3.3 V … 5 V (SELV)Trigger Out Signal [7, 10] 3.3 VDC Output 5PF [7] 5 V/100 mAMechanical SpecificationSize 260 mm (L) × 205 mm (W) × 50 mm (H)Temperature RangesOperating 10°C to 35°CTransportation/Storage –10°C to 70°CRelative HumidityOperating 10% to 90%Transportation/Storage 0% to 90%Ingress Protection RatingIP40 rated (protection against particles > 1 mm)WARNING All external signals that are connected to the IPU-2 (especially PREP/EXPOSE and Trigger signals) should be from a Separated or Safety Extra-Low Voltage (SELV) circuit. Ignoring this warning may result in electric shock, which may result in severe personal injury, death, or substantial product damage.](https://usermanual.wiki/Varex-Imaging-Deutschland/XRPAD2.Users-Manual/User-Guide-2824009-Page-36.png)
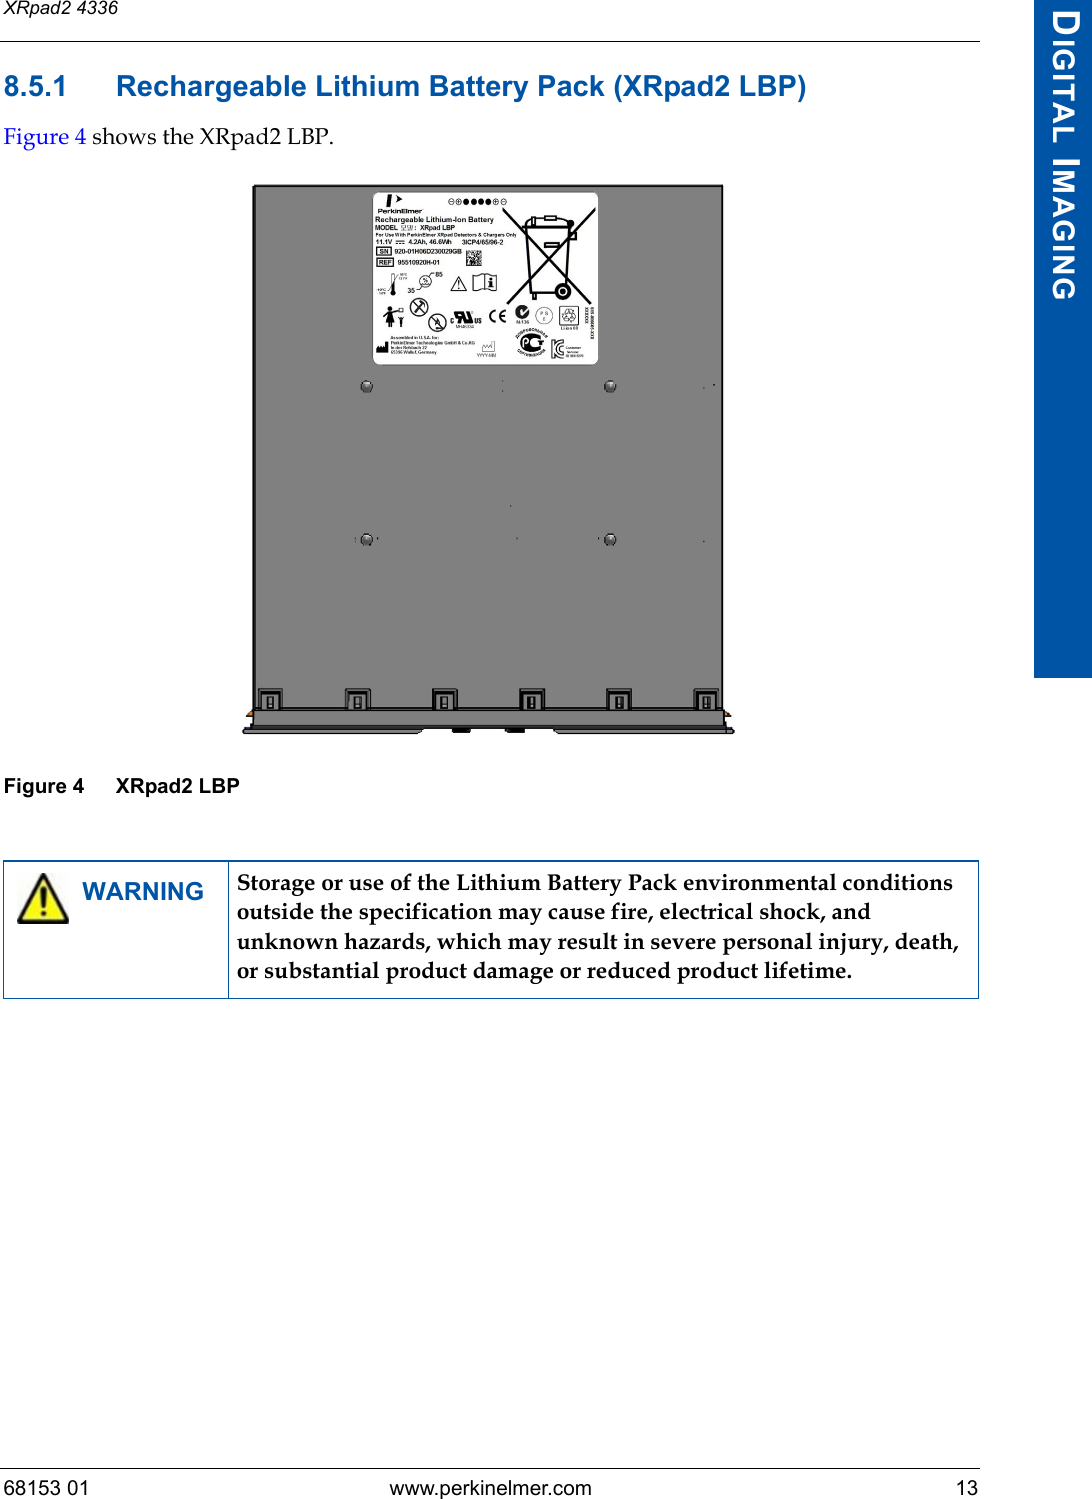
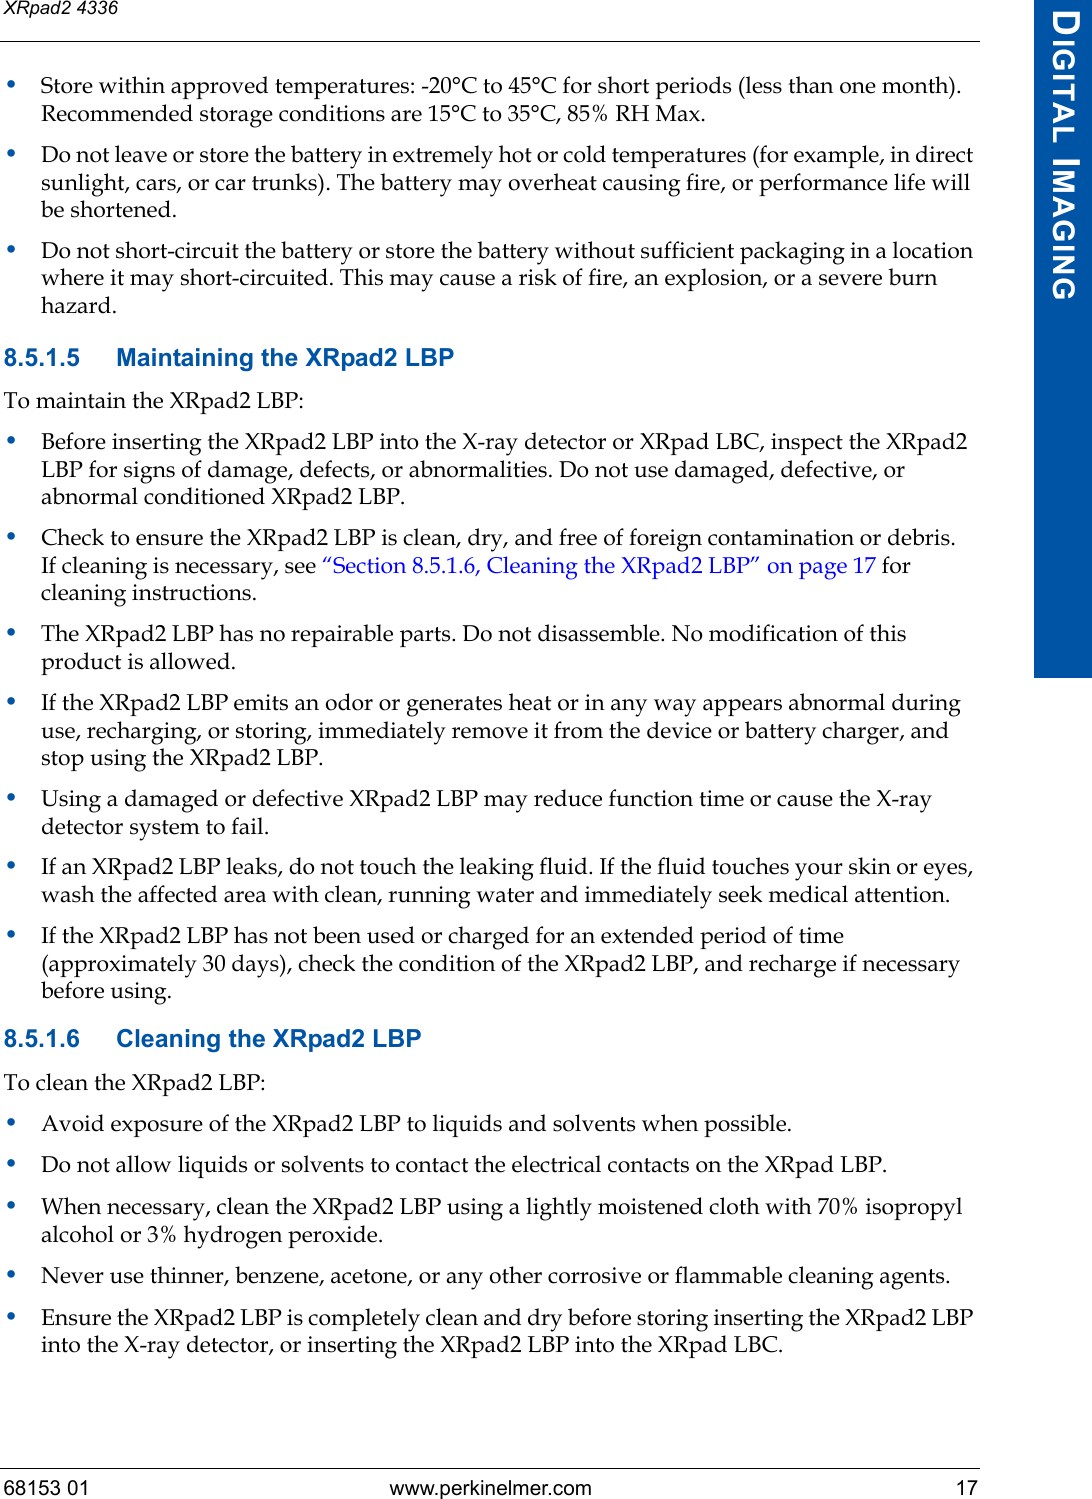
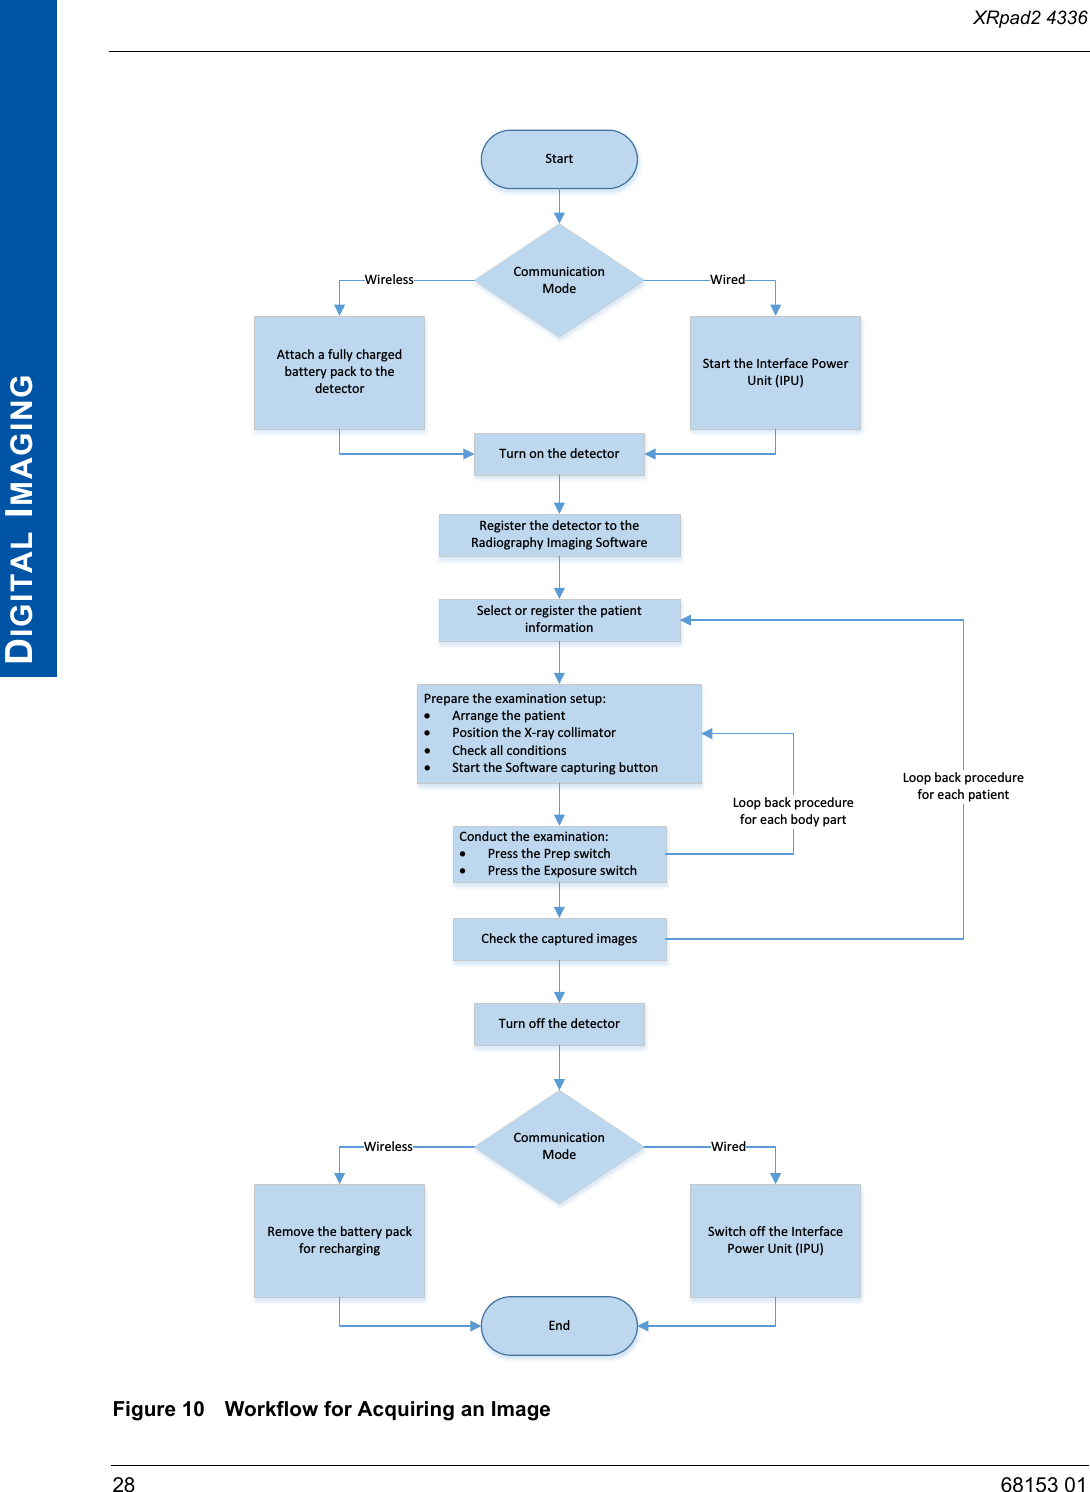
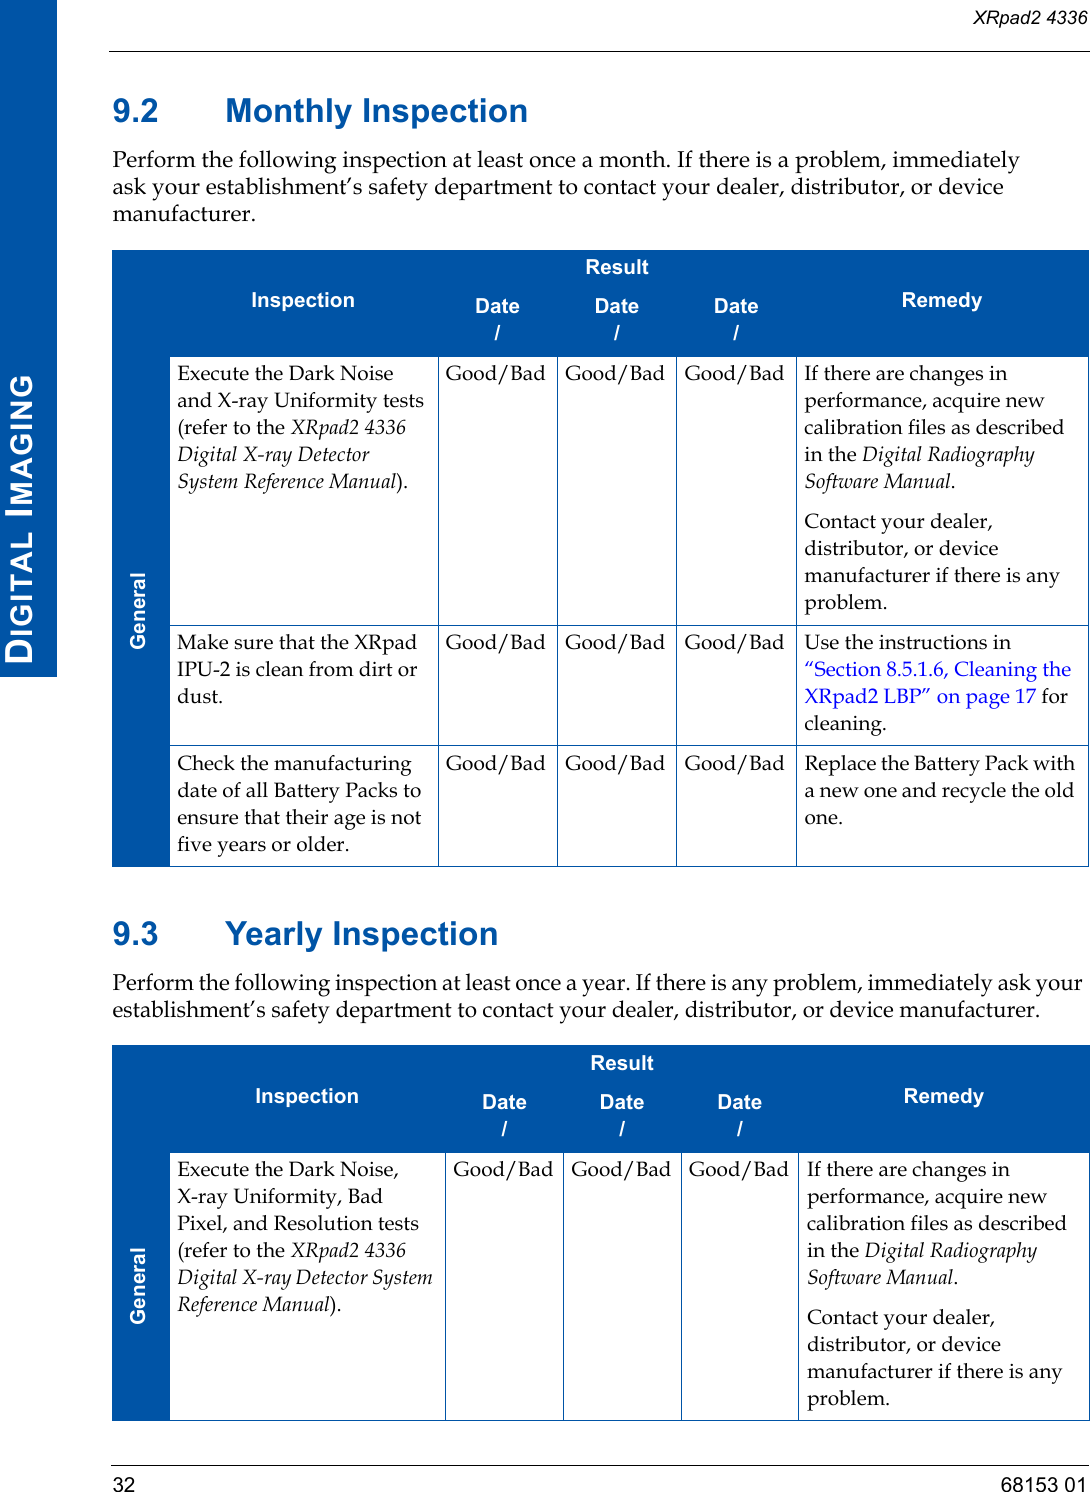
![68153 01 www.perkinelmer.com 27XRpad2 4336DIGITAL IMAGING8.7.5 Powering Off the X-ray DetectorThe X-ray detector is powered off by holding down one of the following three push buttons for more than four seconds:•X-ray detector (Figure 1 [5]) (wireless and wired mode).•XRpad IPU-2 push button (Figure 6 [5]) (wired mode).•Extended hand switch push button (wired mode)8.7.6 General Workflow for Acquiring an ImageFigure 10 shows the procedure for acquiring a clinical image after starting the Radiography Imaging Software. Details of the Radiography Imaging Software and the X-ray generator are described in their corresponding operation manuals.](https://usermanual.wiki/Varex-Imaging-Deutschland/XRPAD2.Users-Manual/User-Guide-2824009-Page-43.png)
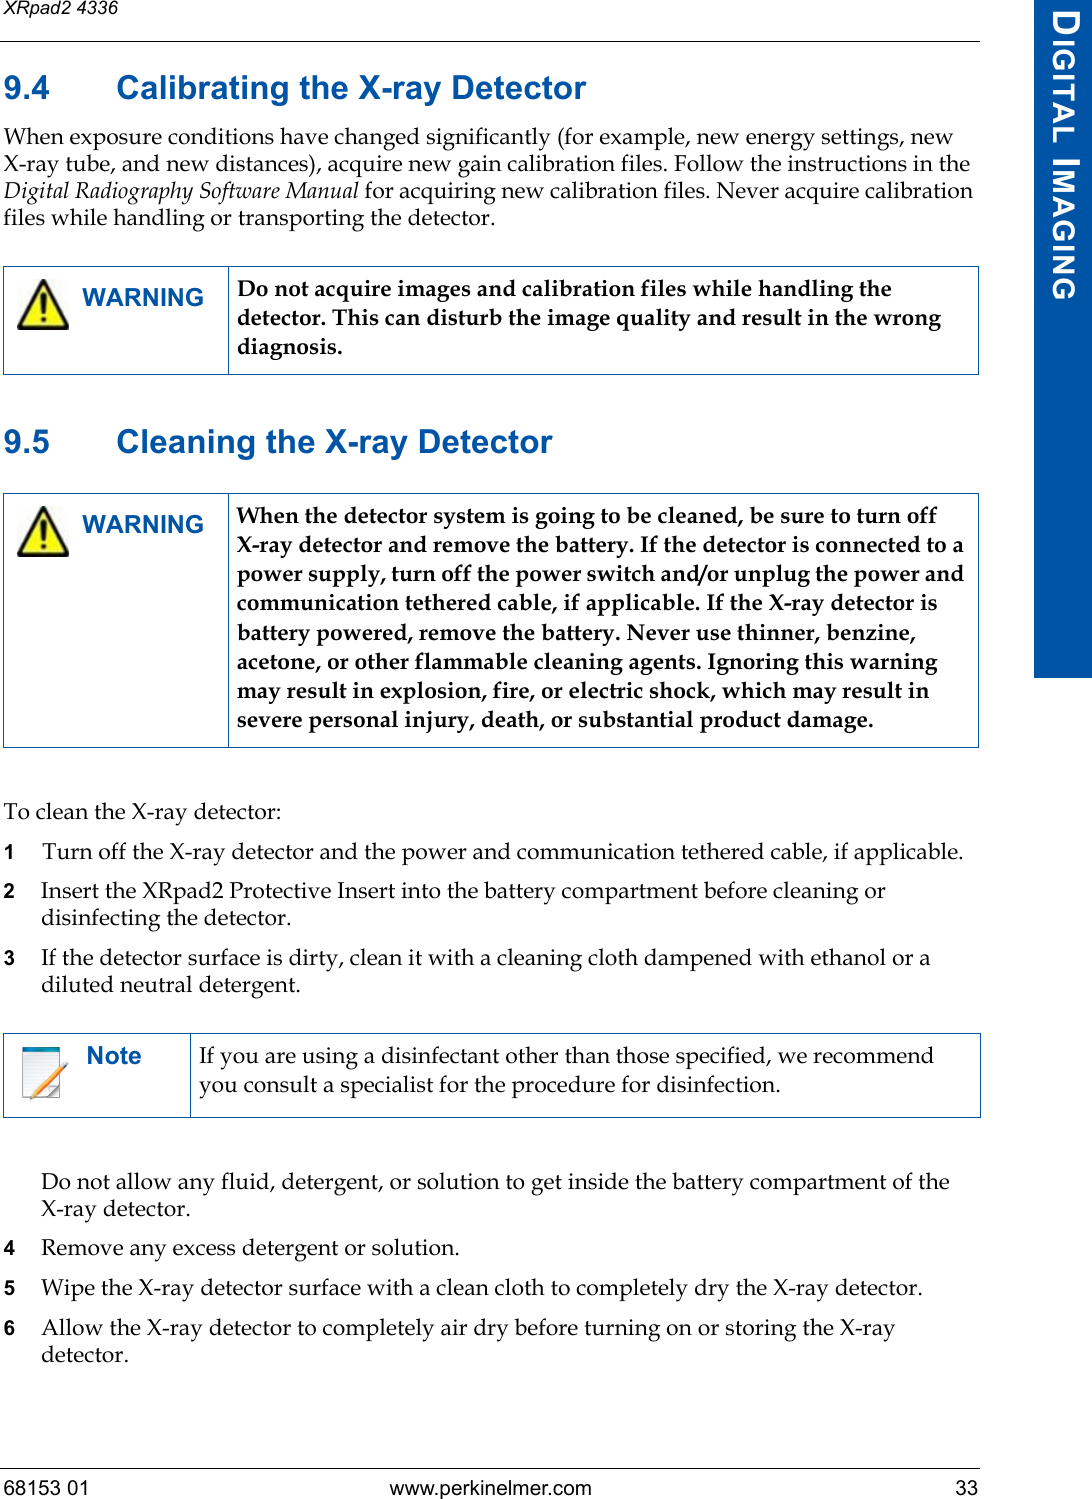

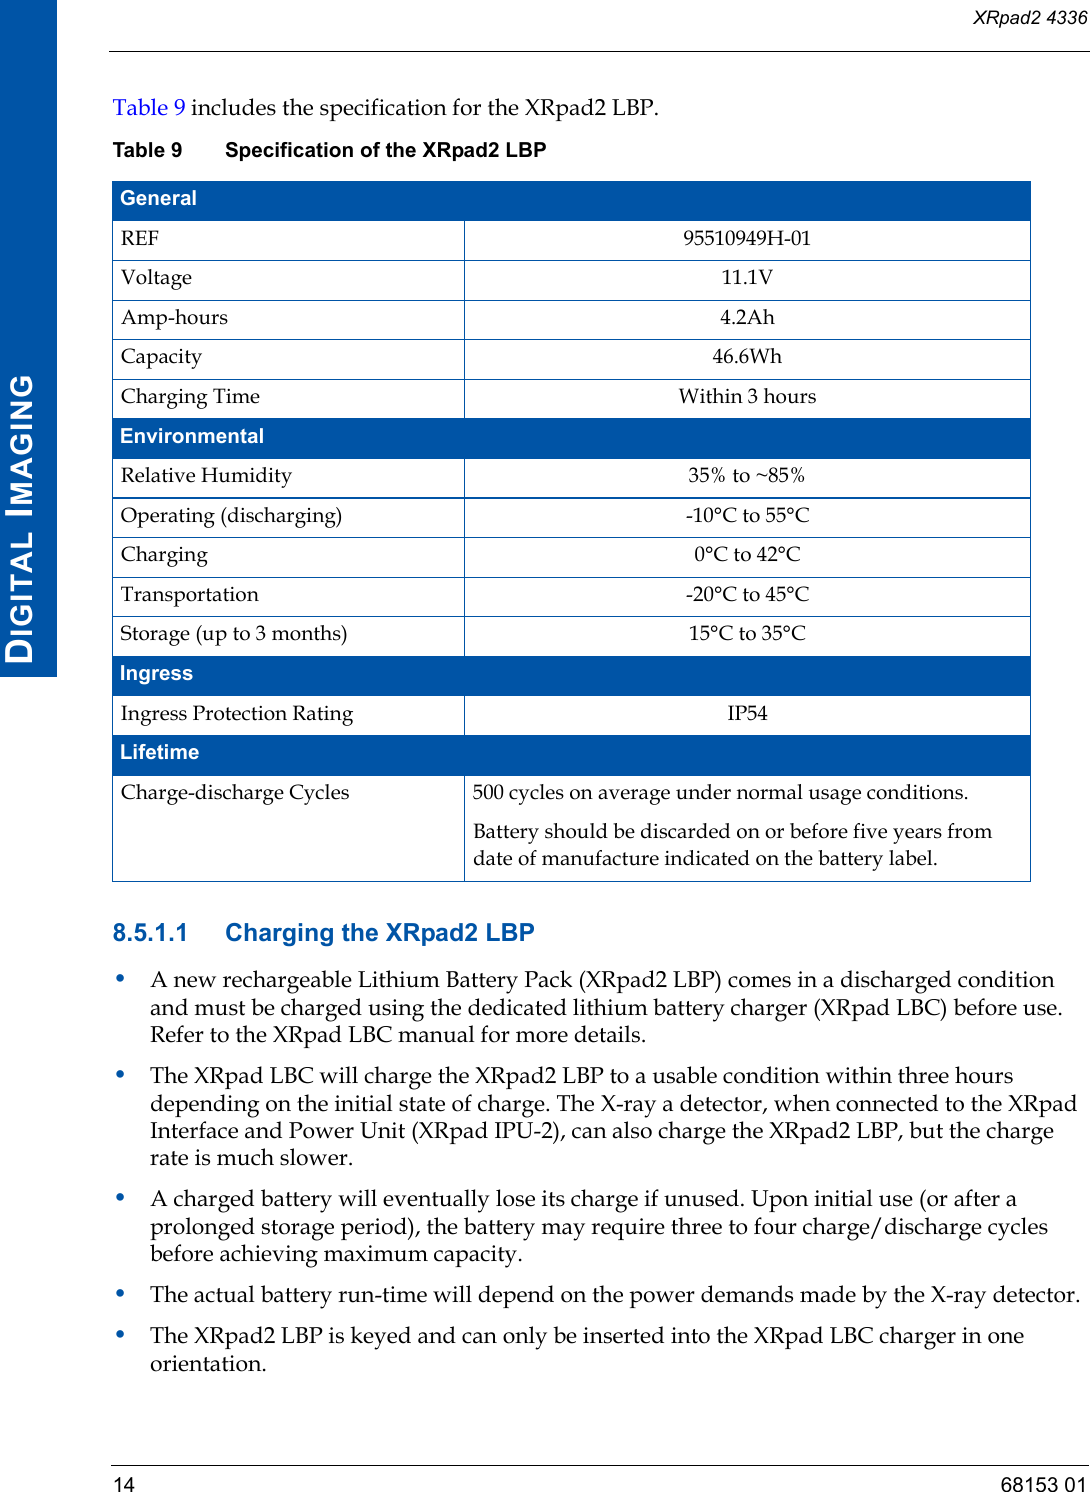
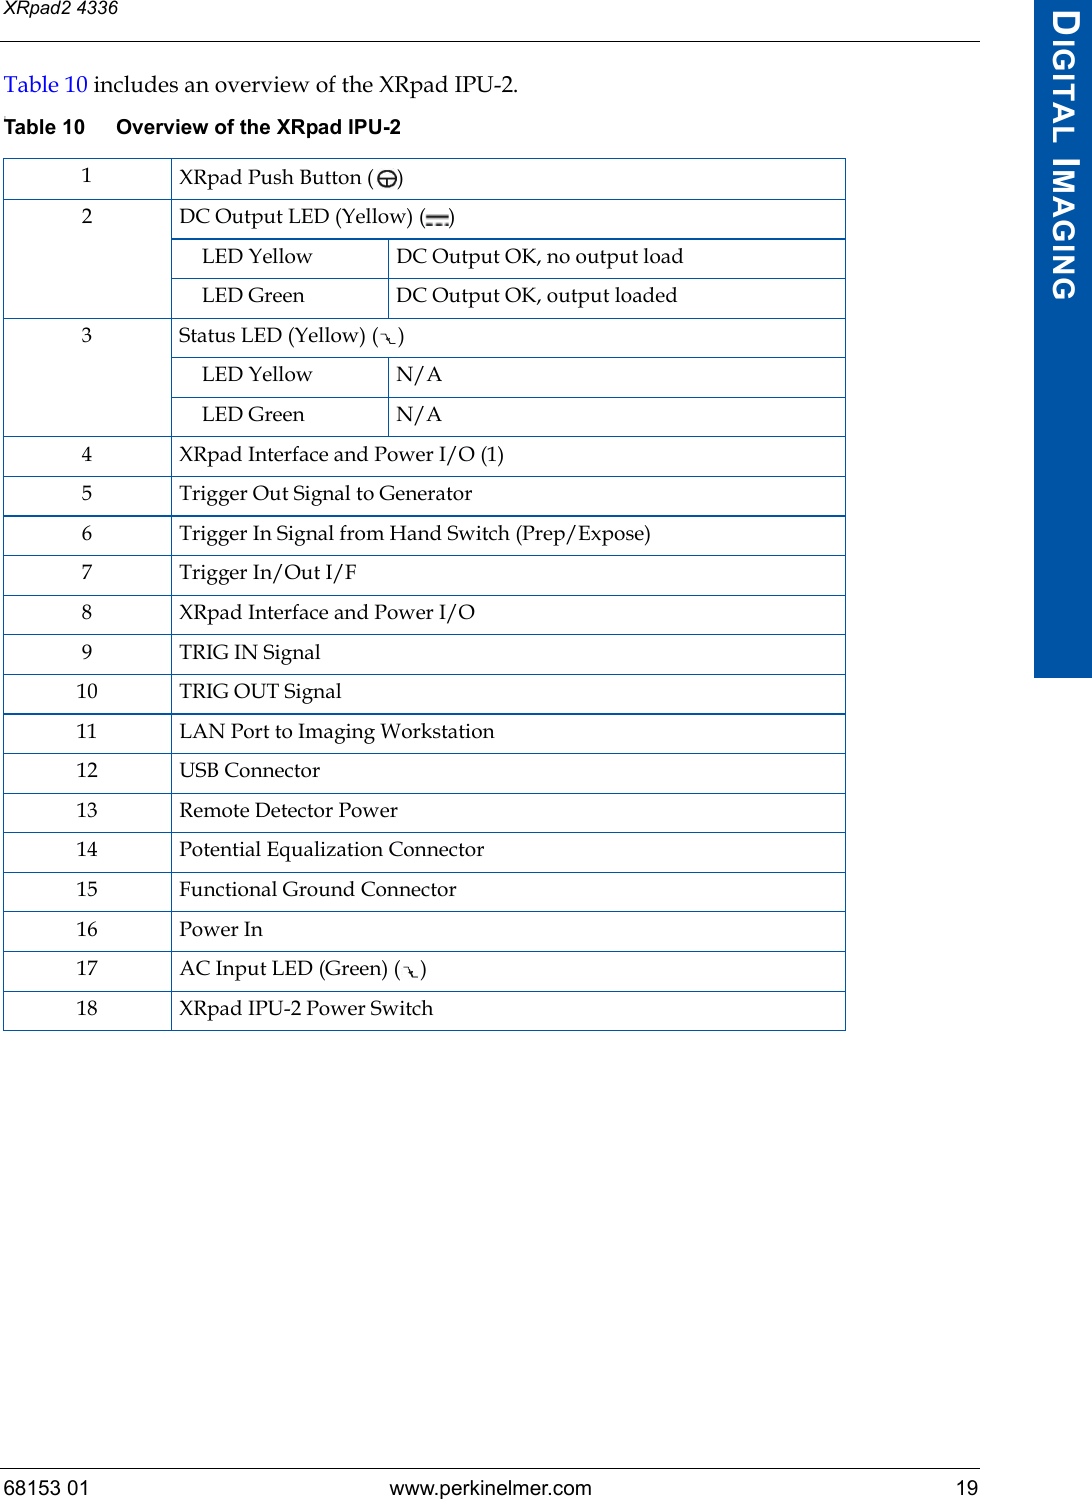
![XRpad2 433638 68153 01DIGITAL IMAGINGTable 14 Recommended Separation Distance between Portable and Mobile RF-Communication Equipment and the X-ray DetectorRecommended Separation Distance between Portable and Mobile RF-Communication Equipment and the X-ray DetectorThe X-ray detector is intended for use in the electromagnetic environment specified below. The installer, X-ray system manufacturer, or user of the X-ray detector should assure that it is used in such an environment.Rated Maximum Output Power of the Transmitter (W)150kHz to 80MHz 80MHz to 800MHz 800MHz to 2.5GHz0.01 0.12 0.12 0.230.1 0.38 0.38 0.731 1.2 1.2 2.310 3.8 3.8 7.3100 12 12 23For a transmitter rated at a maximum output power not listed above, the separation distance can be estimated using the equation in the corresponding column, where P is the maximum output (power rating of the transmitter in watt [W]) according to the transmitter manufacture and d is the recommended separation distance in meter (m).Note: This guideline may not apply in all situations. Electromagnetic propagation is affected by absorption and reflection from structures, objects, and people.Pd 2.1Pd 2.1Pd 3.2](https://usermanual.wiki/Varex-Imaging-Deutschland/XRPAD2.Users-Manual/User-Guide-2824009-Page-54.png)
![68153 01 www.perkinelmer.com 39XRpad2 4336DIGITAL IMAGINGTable 15 Guidance and Manufacturer’s Declaration of Electromagnetic Immunity (Portable Equipment) Guidance and Manufacturer’s Declaration of Electromagnetic ImmunityThe X-ray detector is intended for use in the electromagnetic environment specified below. The installer, X-ray system manufacturer, or user of the X-ray detector should assure that it is used in such an environment.Immunity Test IEC 60601 Test Compliance Electromagnetic Environment – GuidanceConducted radio-frequency fields (CEF)IEC 61000-4-6Radiated electromagnetic field (REF)IEC 61000-4-33V150 kHz to 80 MHz3V/m80 MHz to 2.5 GHz[V1] 3 V150 kHz to 80 MHz[E1] 3 V/m80 MHz to 2.5 GHzPortable and mobile RF-communication equipment should not be closer to any part of the X-ray detector including the data cables, than the recommended separation distance calculated from the equation appropriate for the frequency of the transmitter., for 150 kHz to 80 MHz,, for 80 MHz to 800 MHz,, for 800 MHz to 2.5 GHz,where P is the maximum output of the transmitter in watt (W) according to the transmitter manufacturer and d is the recommended separation distance in meter (m).Field strengths outside the shielded location from fixed RF transmitters, as determined by an electromagnetic site surveya, should be less than 3V/m.Interference may occur in the vicinity of equipment marked with the following symbol.a. Field strengths from fixed transmitters, such as base stations for radio (cellular/cordless) telephones and land mobile radios, amateur radio, AM and FM radio broadcast, and TV broadcast, cannot be predicted theoretically with accuracy. To assess the electromagnetic environment due to fixed RF transmitters, an electromagnetic site survey should be considered. If the mea-sured field strength in the location in which the X-ray detector is used exceeds the applicable RF compliance level above, the X-ray detector should be observed to verify normal operation. If abnormal performance is observed, additional measures may be necessary, such as re-orienting or relocating the X-ray detector.Note 1: These guidelines may not apply to all situations. Electromagnetic propagation is affected by absorption and reflection from structures, objects, and people.Note 2: It is essential that the actual shielding effectiveness and filter attenuation of the shielded location be verified to assure that they meet the minimum specification.Pd 2.1Pd 2.1Pd 3.2](https://usermanual.wiki/Varex-Imaging-Deutschland/XRPAD2.Users-Manual/User-Guide-2824009-Page-55.png)