Veebeam SC4113D Ripcord2 UWB IC User Manual Visio UG SC4113D vsd
Veebeam Limited Ripcord2 UWB IC Visio UG SC4113D vsd
Veebeam >
Users Guide

C
S
o
mm
unications
taccato
6195 Lusk Blvd, Suite 200
San Diego, CA 92121
858-812-1000
www.staccatocommunications.com
SC4113-D – RIPCORD2 UWB IC DVK User Guide
©2008 Staccato Communications, Inc. All rights reserved.
Abstract: This guide functions as a user guide for the installation and operation of the SC4113-D with regards
to regulatory testing
C
S
o
mm
unications
taccato
6195 Lusk Blvd, Suite 200
San Diego, CA 92121
858-812-1000
www.staccatocommunications.com
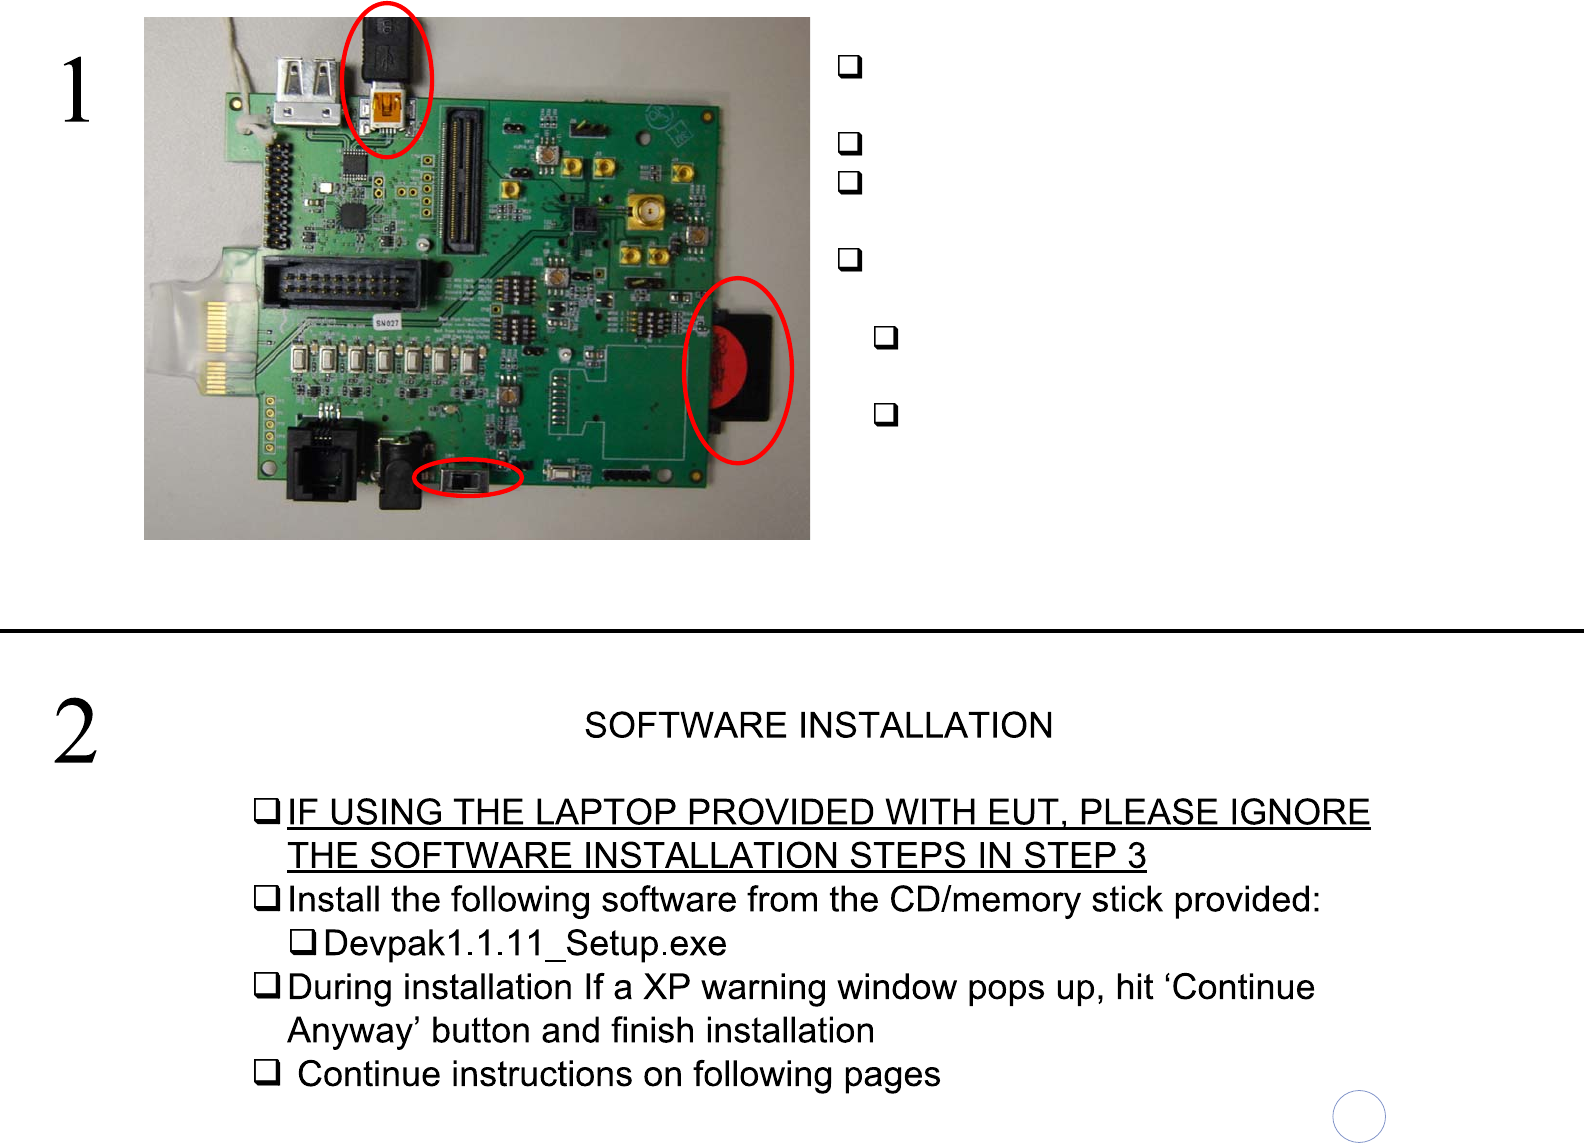
Make sure the appropriate flash card is
inserted in the slot shown ‘1’
Plug in USB cable into DUT as shown ‘2’
Plug the other end of the USB cable into
Laptop.
Toggle the power switch to power on the DUT
‘3’. NOTE:
The switch position shown in figure is the
‘OFF’ state
The DUT will be powered by the laptop via
USB
Hardware set up is done, please proceed to software set up
3
1
2
C
S
o
mm
unications
taccato
6195 Lusk Blvd, Suite 200
San Diego, CA 92121
858-812-1000
www.staccatocommunications.com
C
S
o
mm
unications
taccato
6195 Lusk Blvd, Suite 200
San Diego, CA 92121
858-812-1000
www.staccatocommunications.com
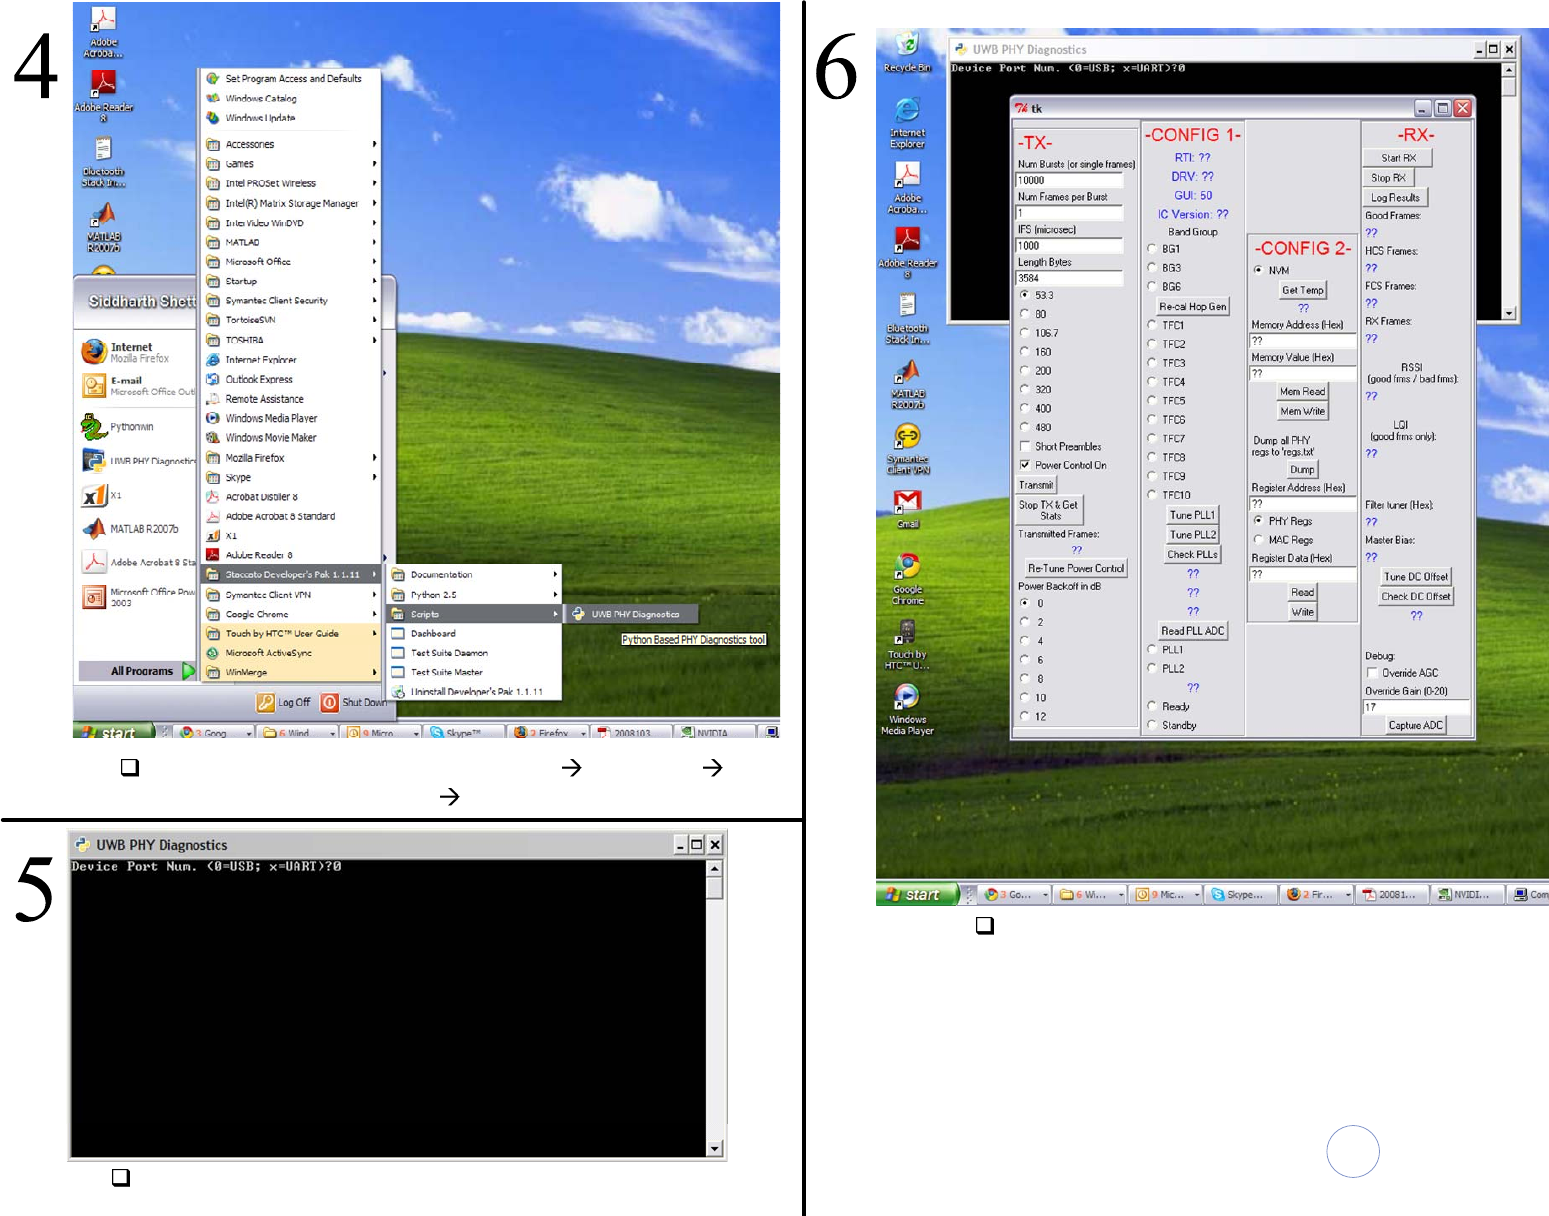
Launch UWB PHY Diagonostics Start Programs
>Staccato Developers Pak Scripts
Enter ‘0’ for connection via USB and press return
‘tk’ window should launch as shown above

C
S
o
mm
unications
taccato
6195 Lusk Blvd, Suite 200
San Diego, CA 92121
858-812-1000
www.staccatocommunications.com
C
S
o
mm
unications
taccato
6195 Lusk Blvd, Suite 200
San Diego, CA 92121
858-812-1000
www.staccatocommunications.com
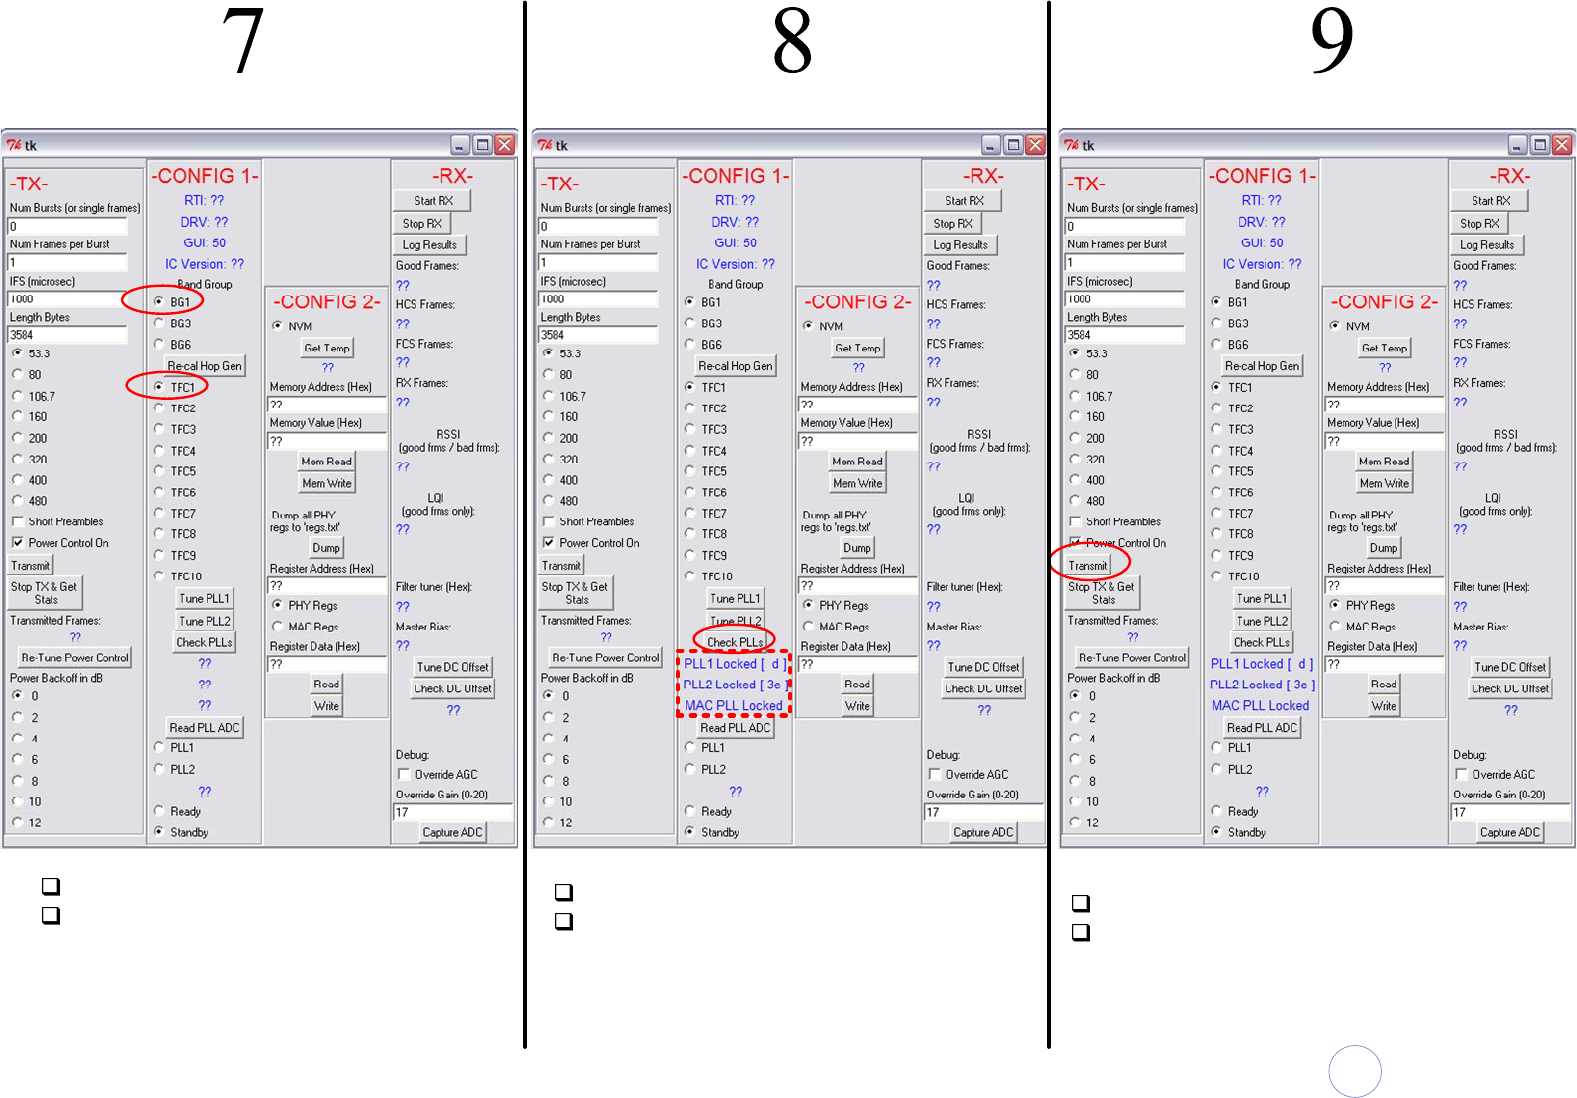
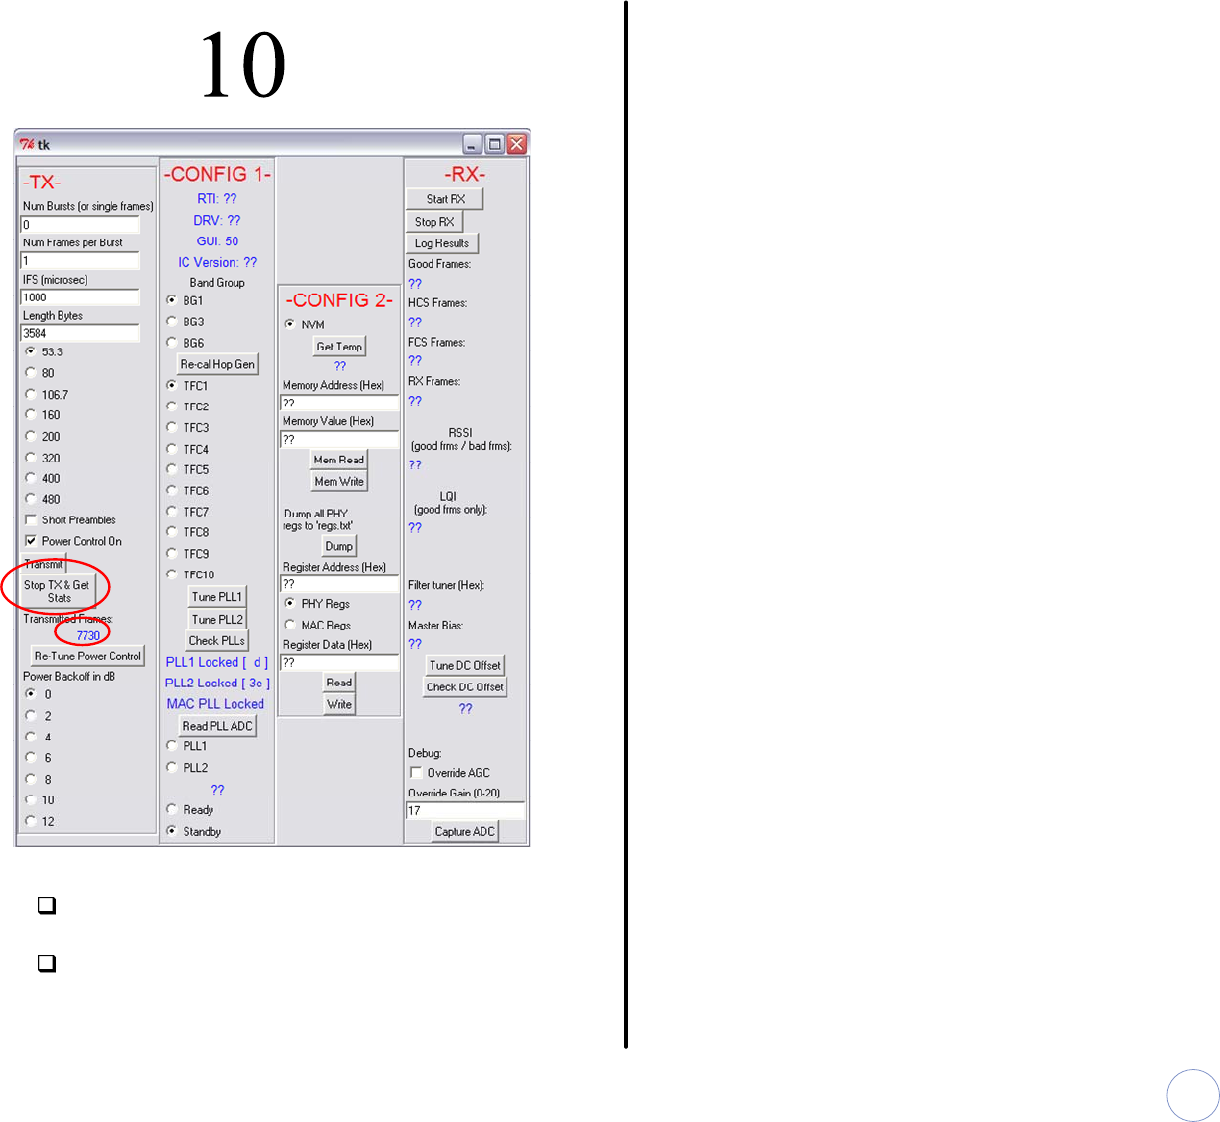
Select the appropriate BG(1/3/6)
Select TFC(1-10) Hit ‘Check PLLs’ button
At this point you should see the display
indicated in the red block. PLL1, PLL2
and MAC PLL must indicate ‘Locked’ in
order to proceed.
At this point the DUT is ready to transmit
Hit Transmit to start continuous
transmission
C
S
o
mm
unications
taccato
6195 Lusk Blvd, Suite 200
San Diego, CA 92121
858-812-1000
www.staccatocommunications.com
When finished with testing, hit ‘Stop TX
and Get Stats’ button to stop transmitter
At this point you can change TFC / BG
setting and repeat steps 7-10
End of Document