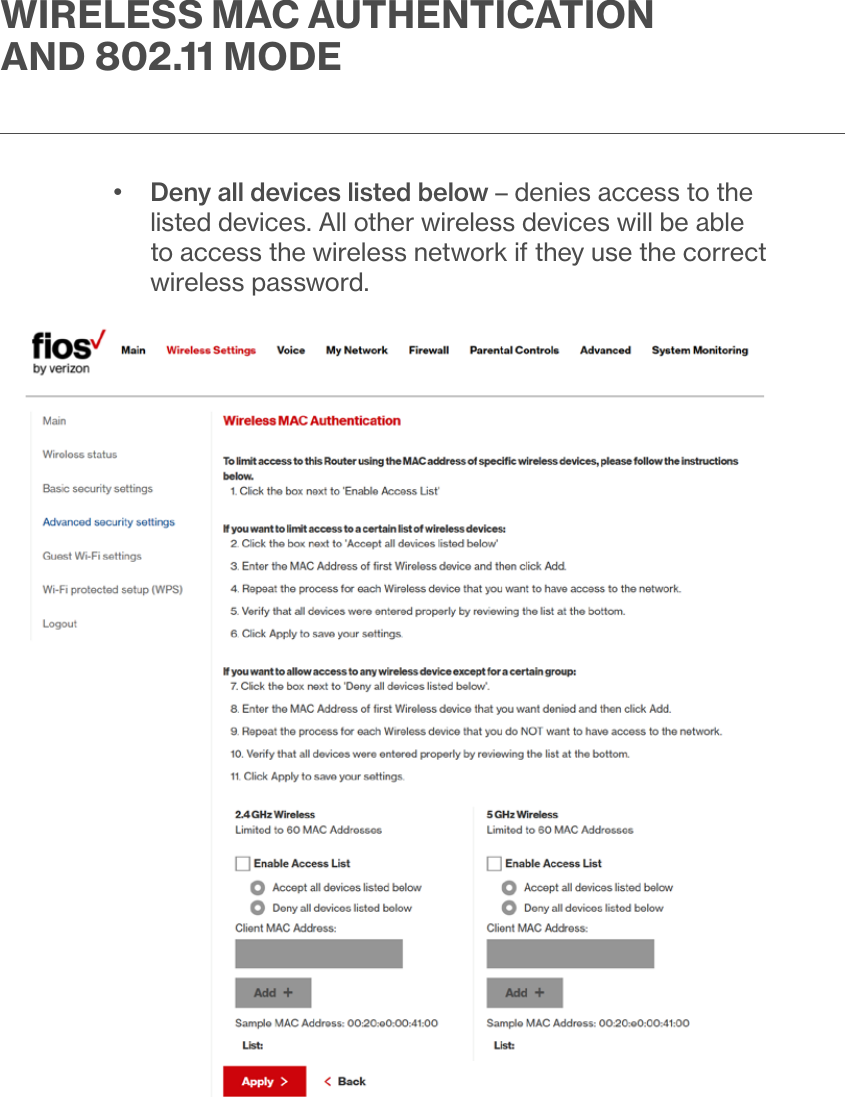
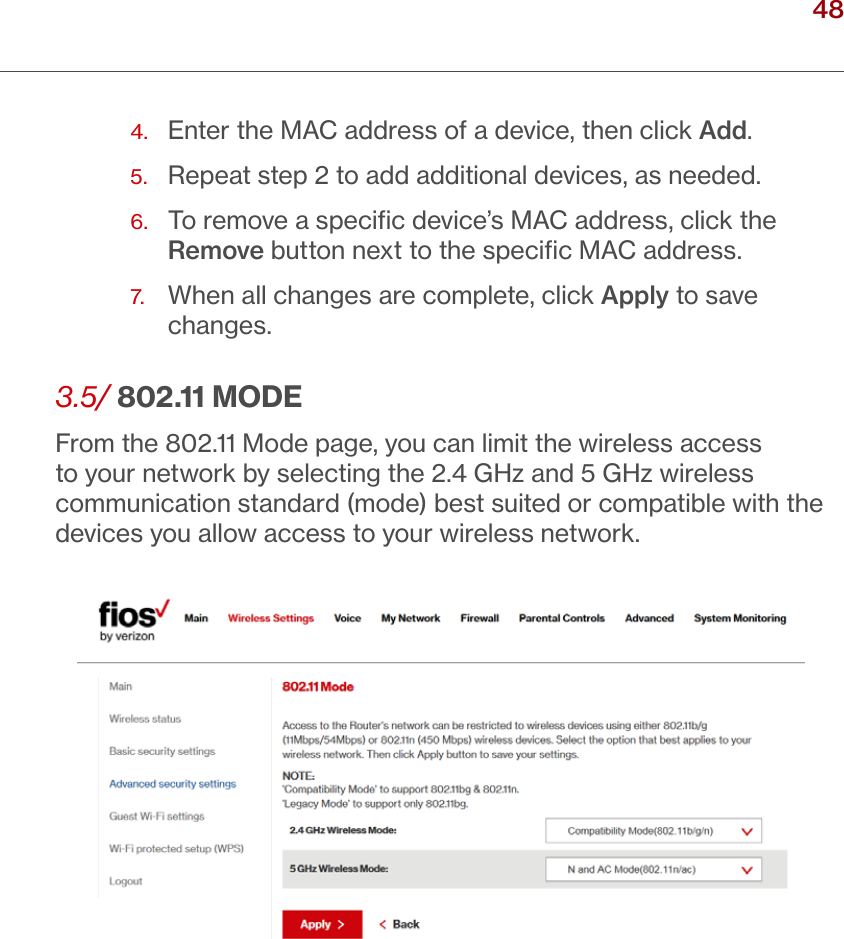
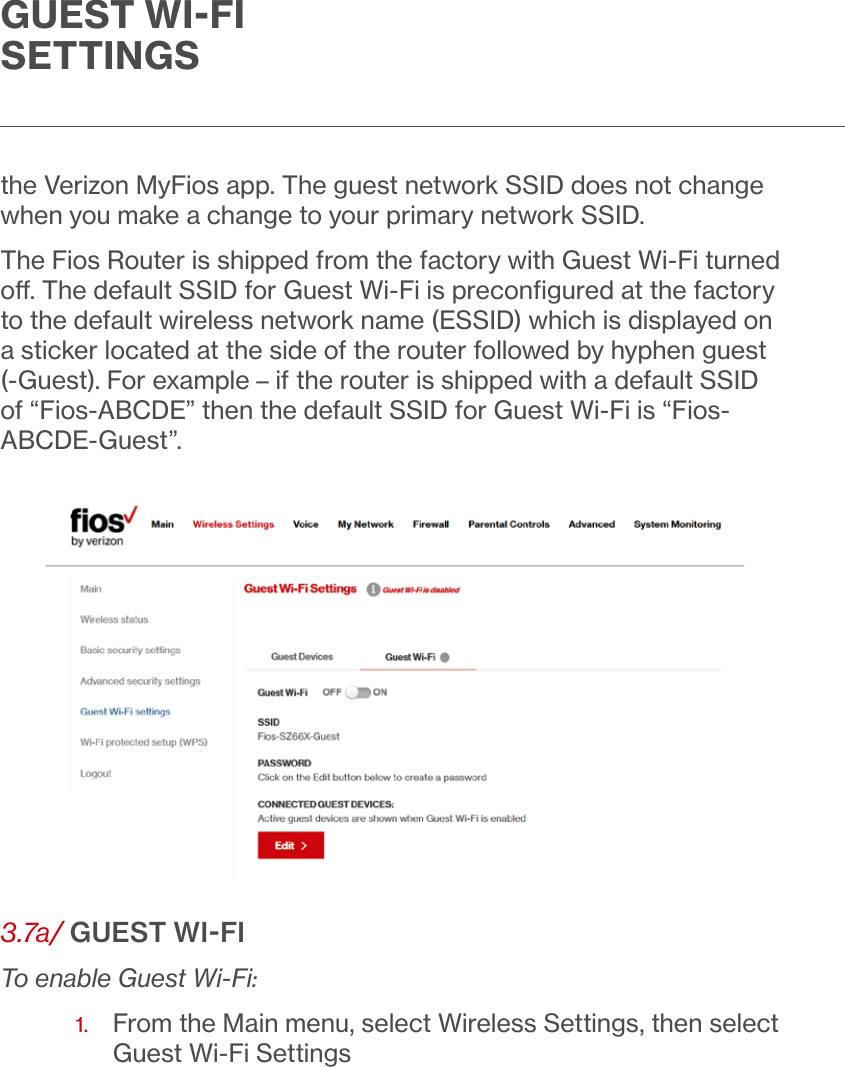
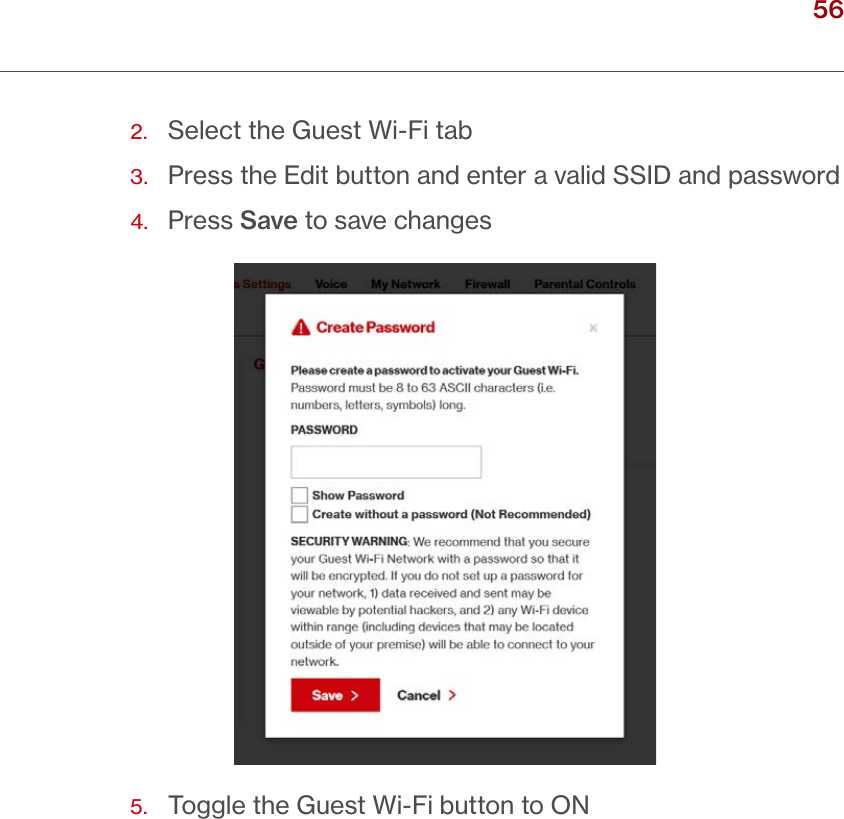
Verizon Online G2100 Fios-G2100 User Manual P1 P114 rev
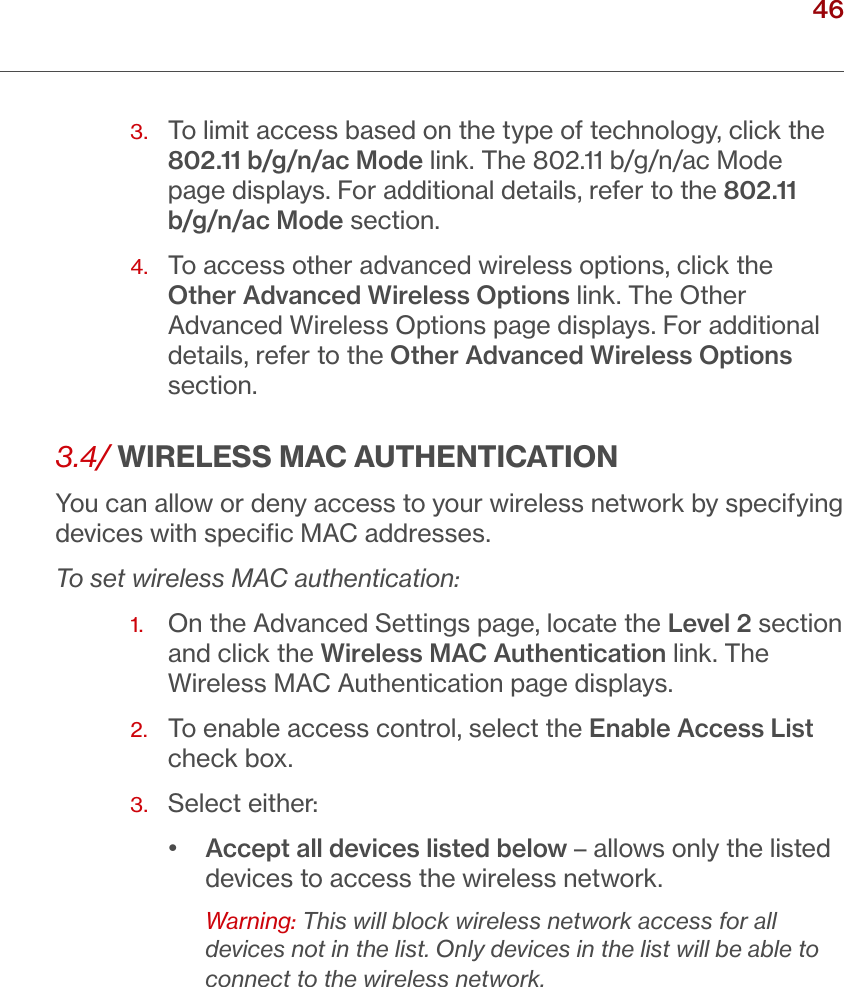
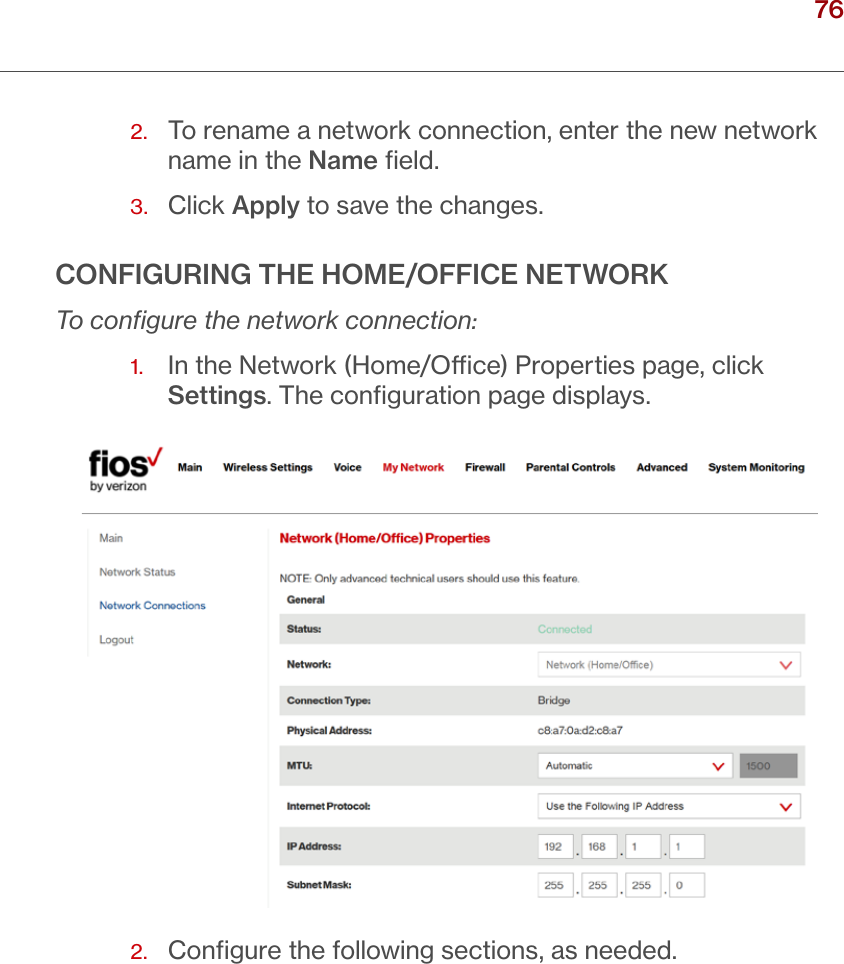
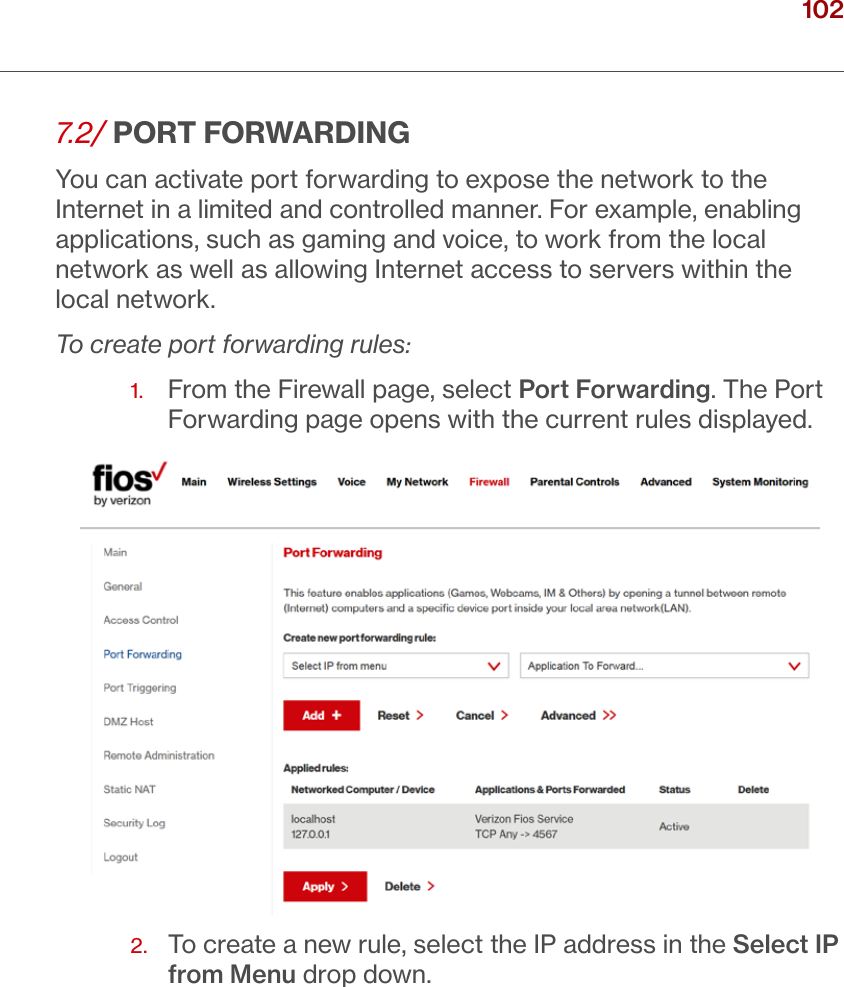
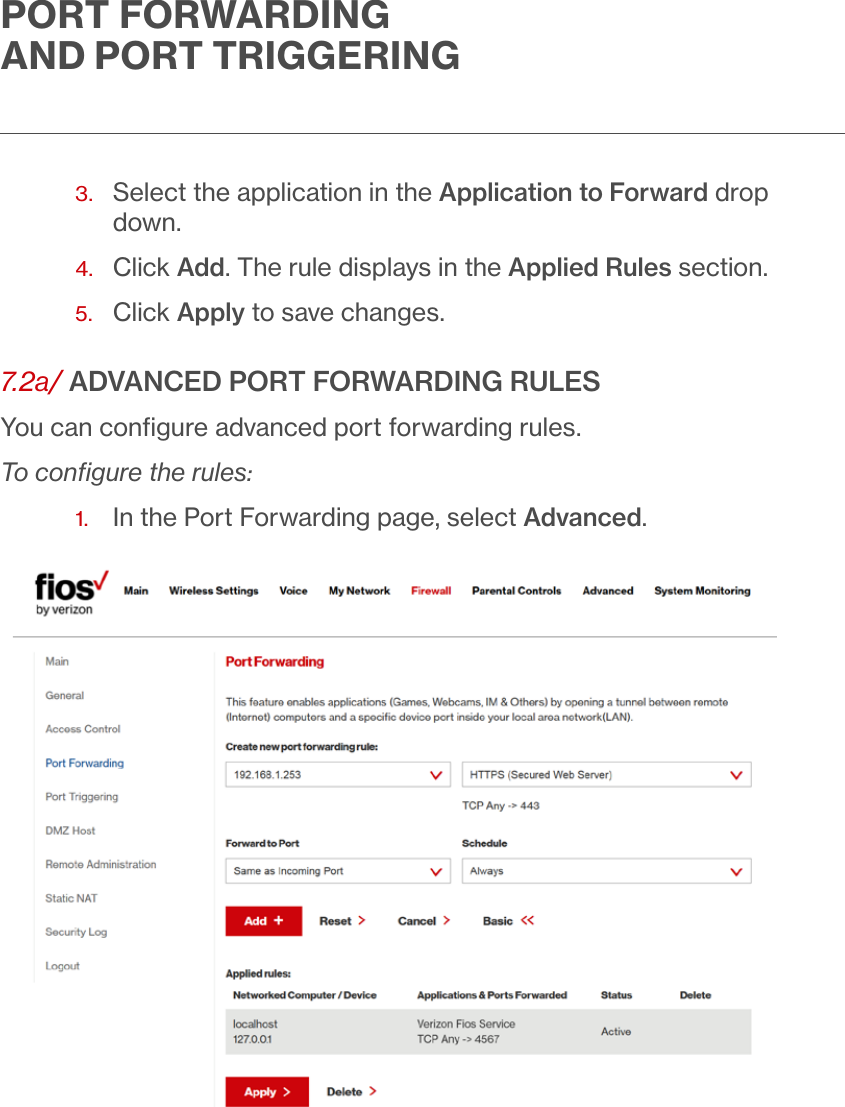
Verizon Online LLC Fios-G2100 P1 P114 rev
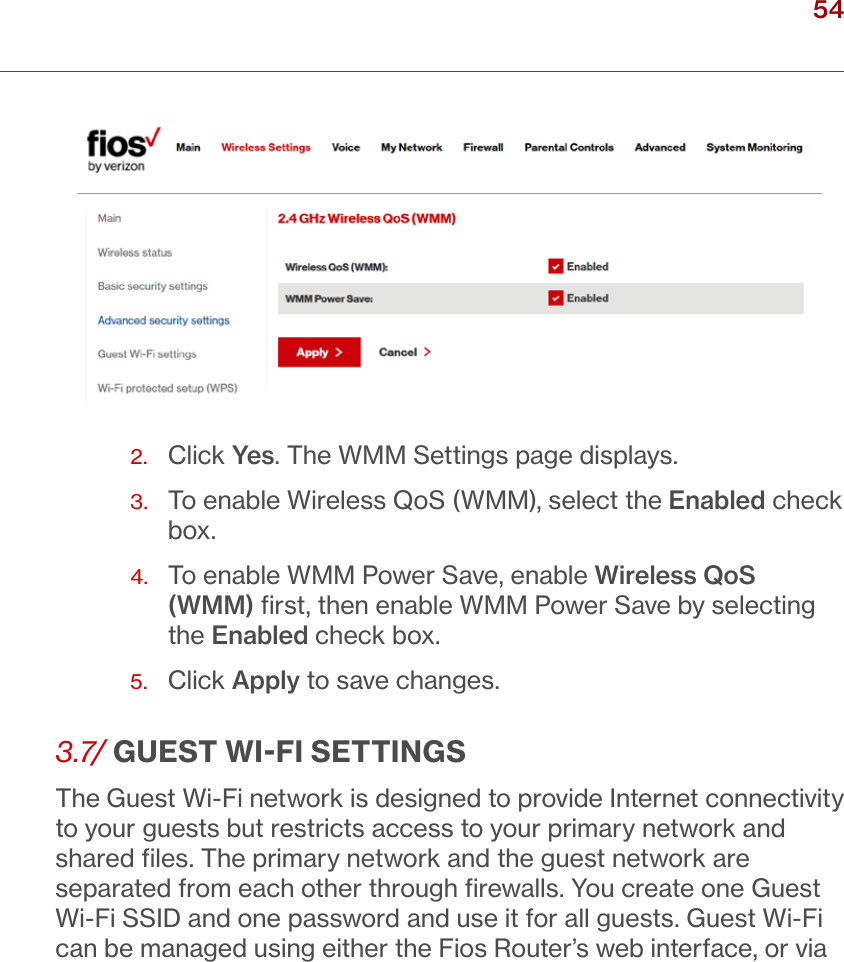
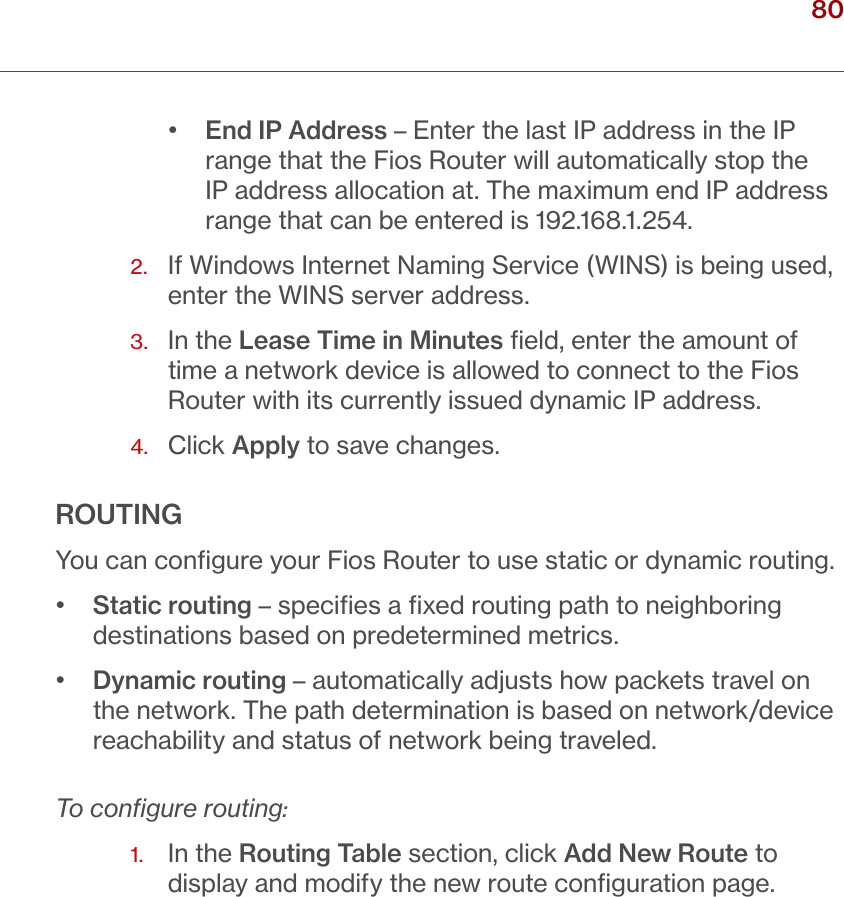
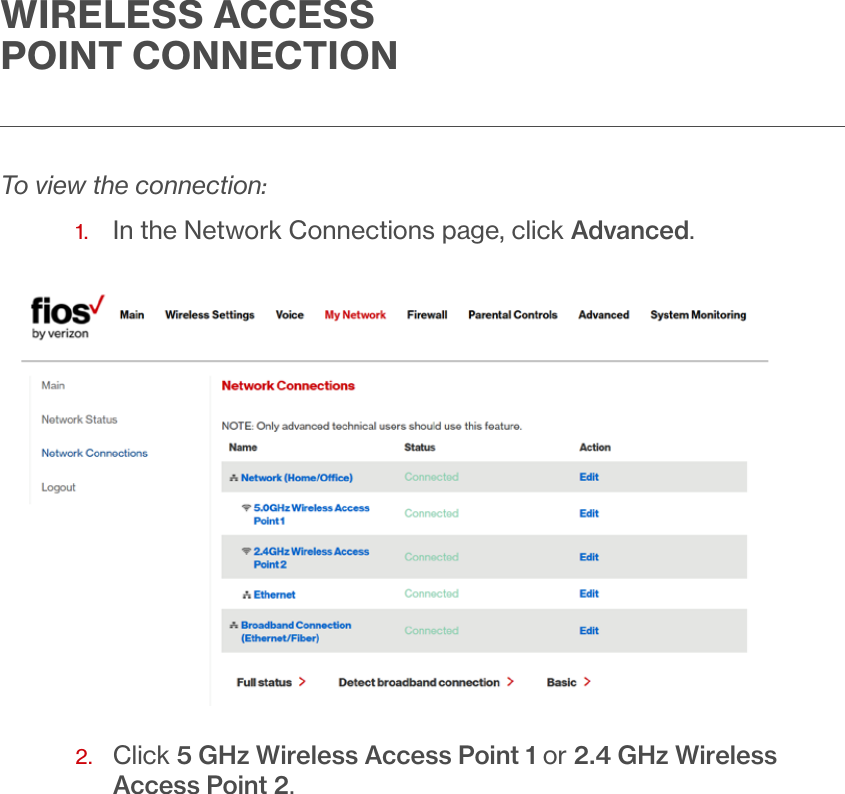
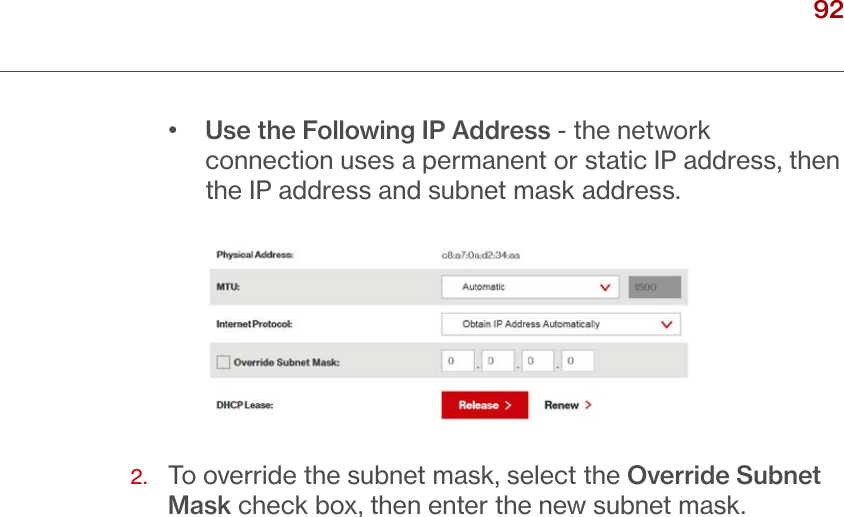
UserManual.wiki
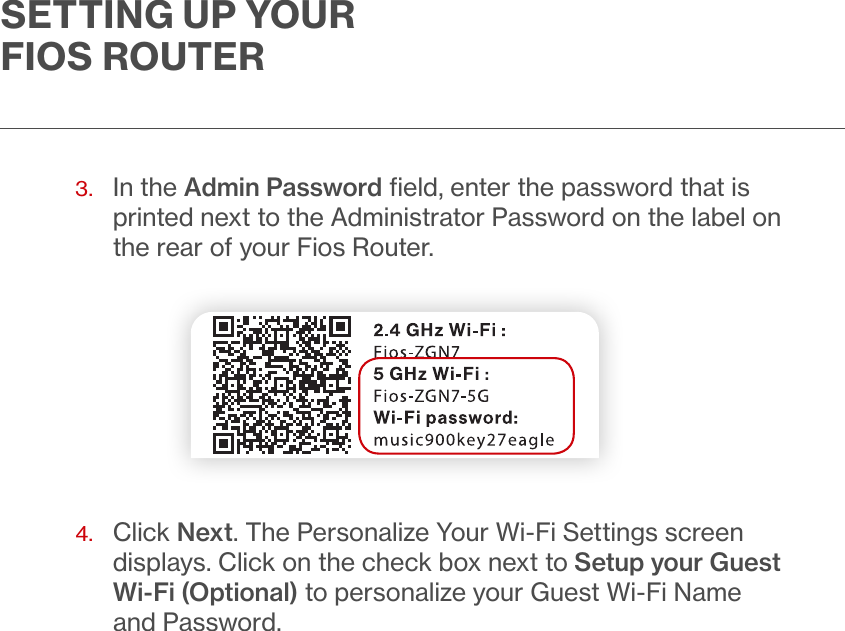
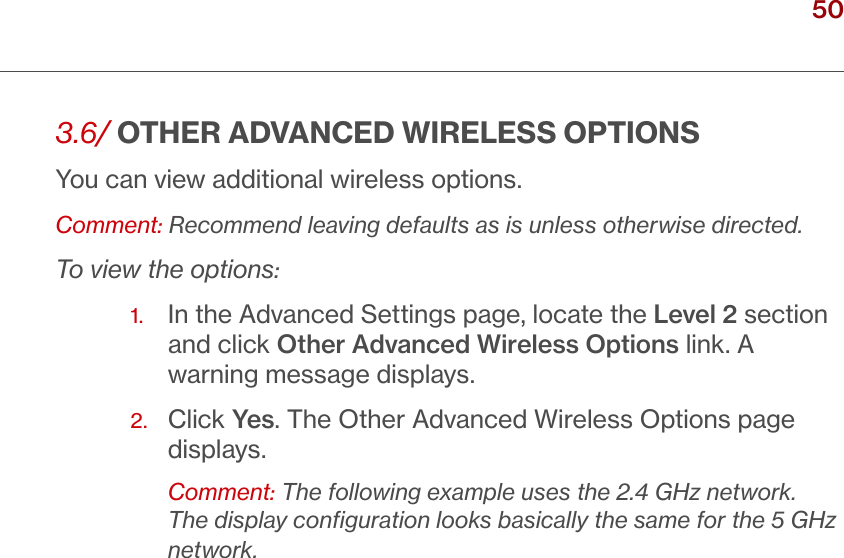
>
Verizon Online
>
G2100 User Manual
>
User Manual P1-P114 rev 2
Contents
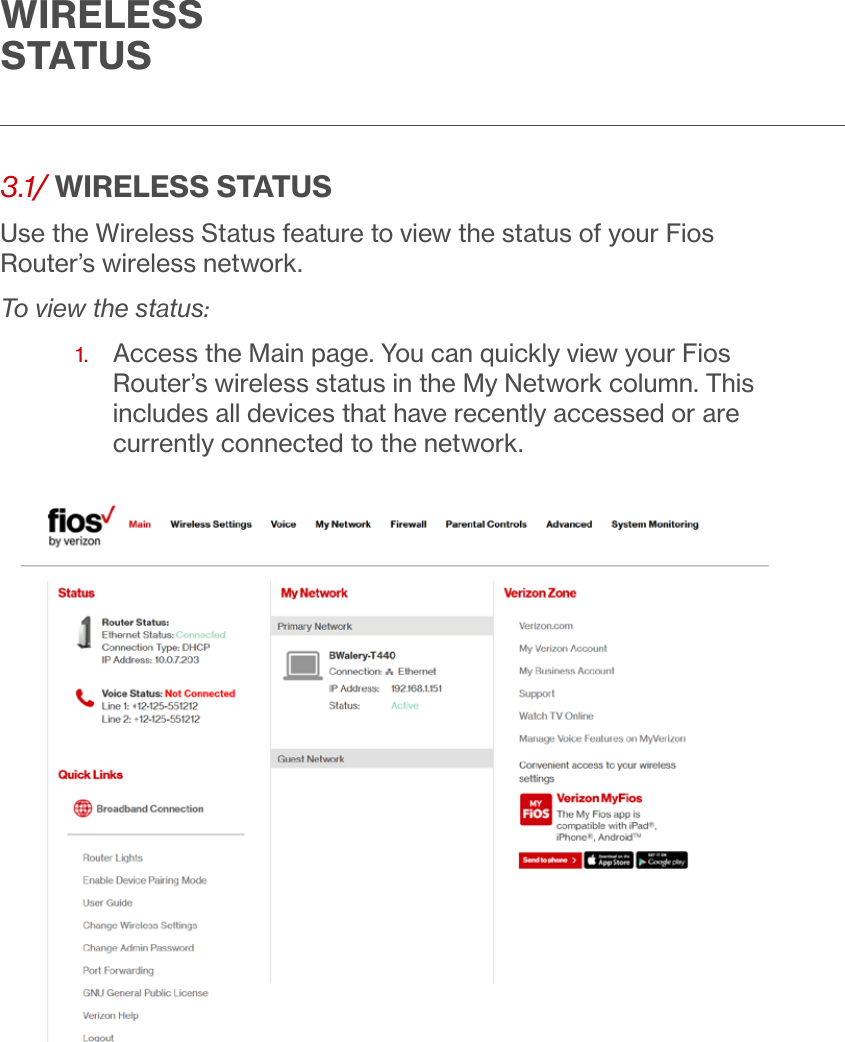
1.
User Manual P1-P114 rev 2
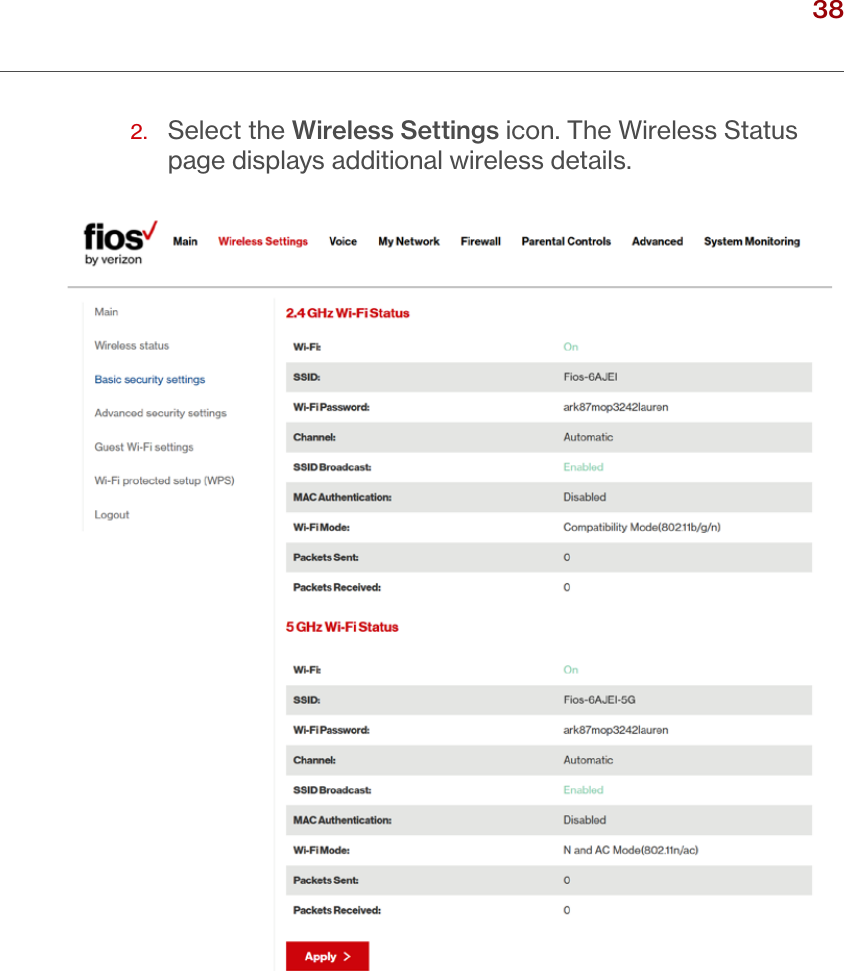
2.
User Manual P116-P225 rev 2
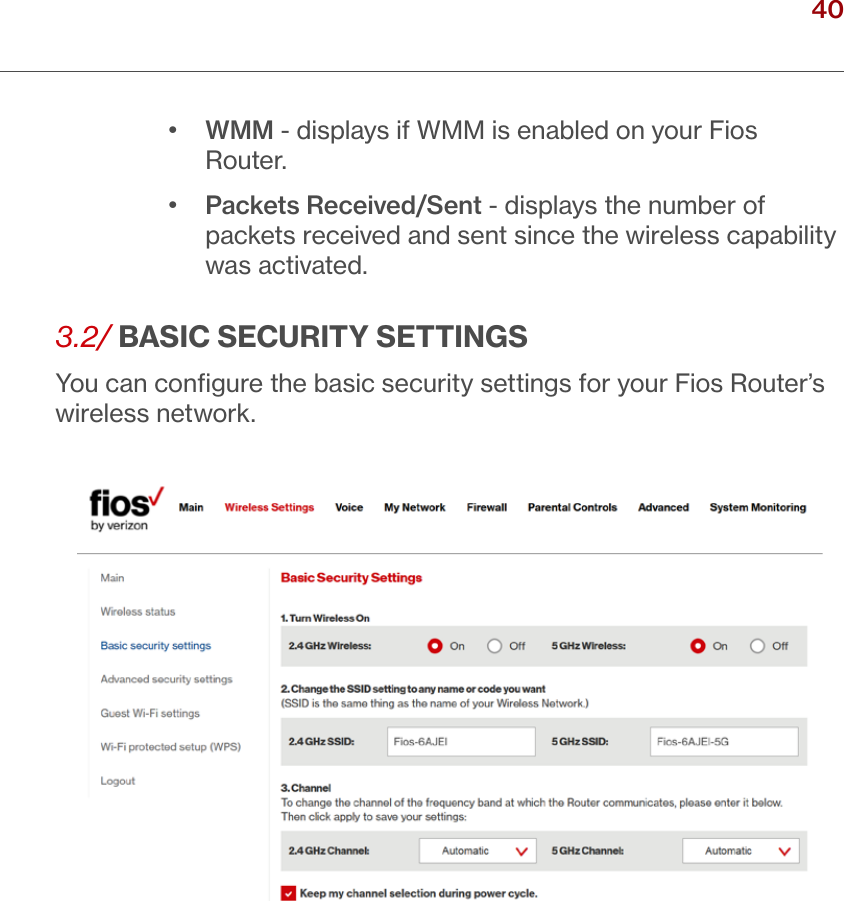
3.
User Manual P1-P114
4.
User Manual P115-P225
User Manual P1-P114 rev 2
Navigation menu
Upload a User Manual
Namespaces
Wiki Guide
HTML
PDF
Info
Views
User Manual
Discussion / Help
Navigation

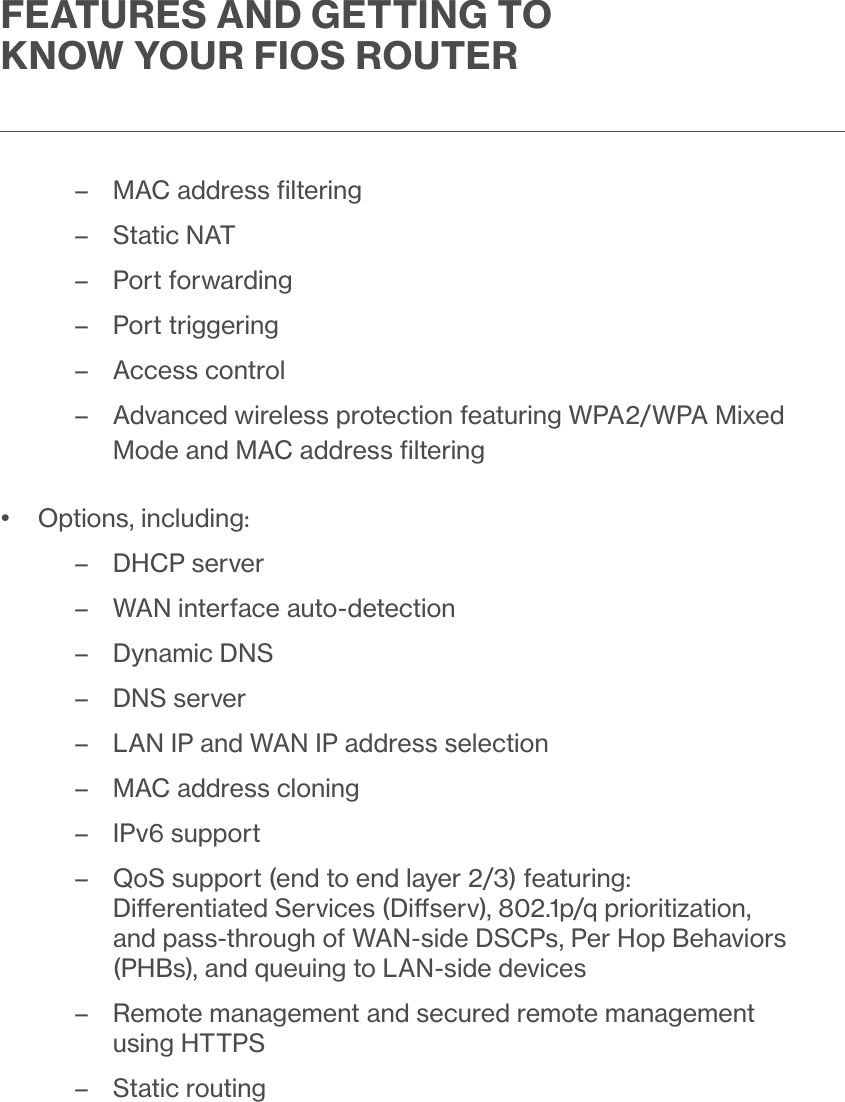
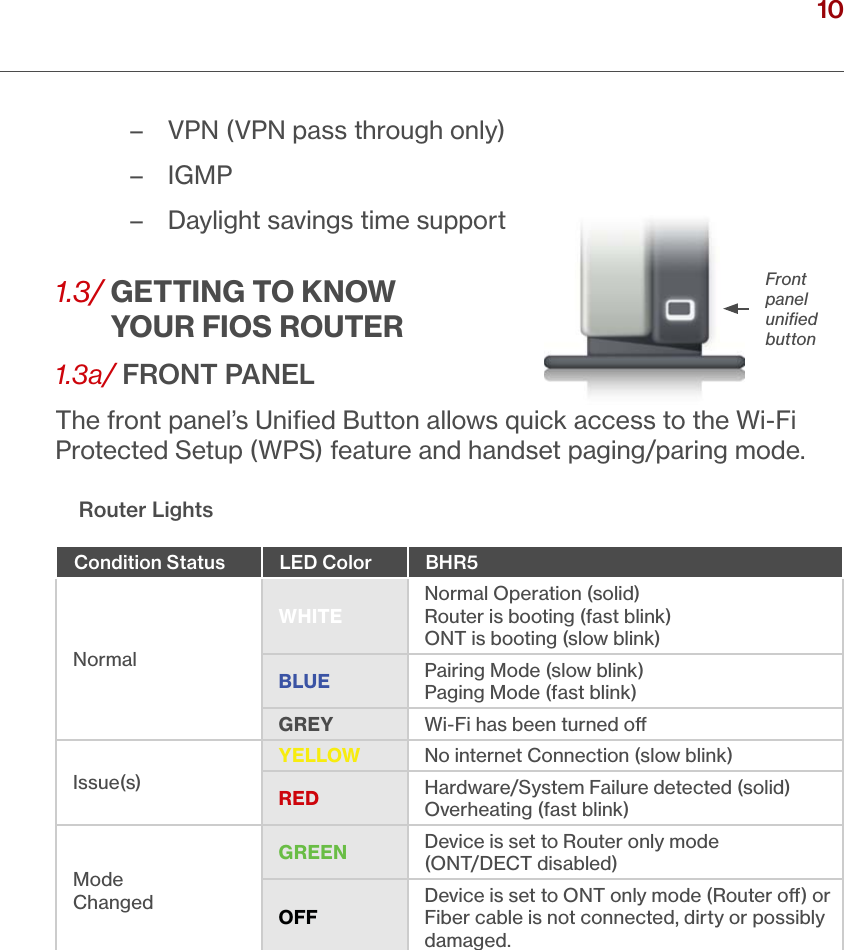
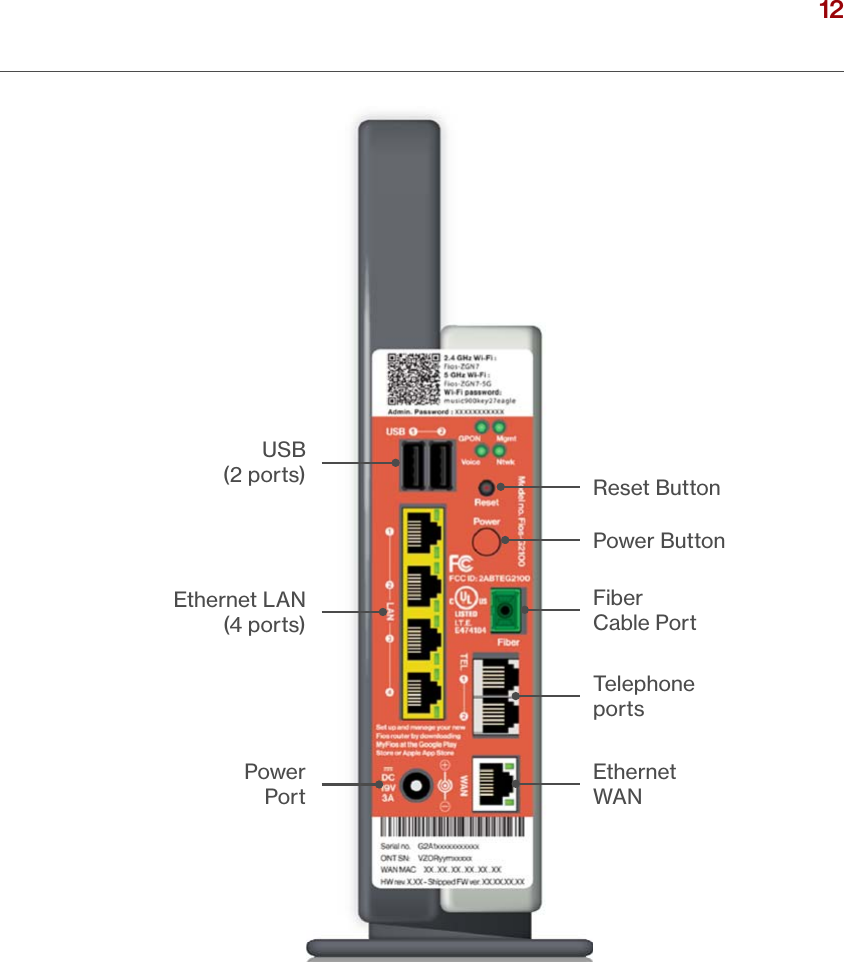
![GETTING TO KNOW YOUR FIOS ROUTERRefer to the ‘Connecting a Wi-Fi device using WPS’ and ‘Voice’ sections for more details. In addition, the Unified Button also provides a quick view of the operational state of the Fios Router using various colors as indicated in the chart above. Please refer to section 11.0h for details on the rear LEDs. 1.3b/ REAR PANELThe rear panel of your Fios Router has a label that contains important information about your device, including the default settings for the Fios Router’s wireless network name (ESSID), wireless password (WPA2 key), local URL for accessing the Fios Router’s administrative pages, and Fios Router administrator password. The label also contains a QR code that you can scan with your smartphone, tablet, or other camera-equipped Wi-Fi device to allow you to automatically connect your device to your Wi-Fi network without typing in a password (requires a QR code reading app with support for Wi-Fi QR codes). The rear panel of your Fios Router has 10 ports; Fiber and Ethernet WAN, Ethernet LAN [4], Telephone [2] and USB [2]. The rear panel also includes a DC power jack and a reset button.](https://usermanual.wiki/Verizon-Online/G2100.User-Manual-P1-P114-rev-2/User-Guide-3144970-Page-12.png)