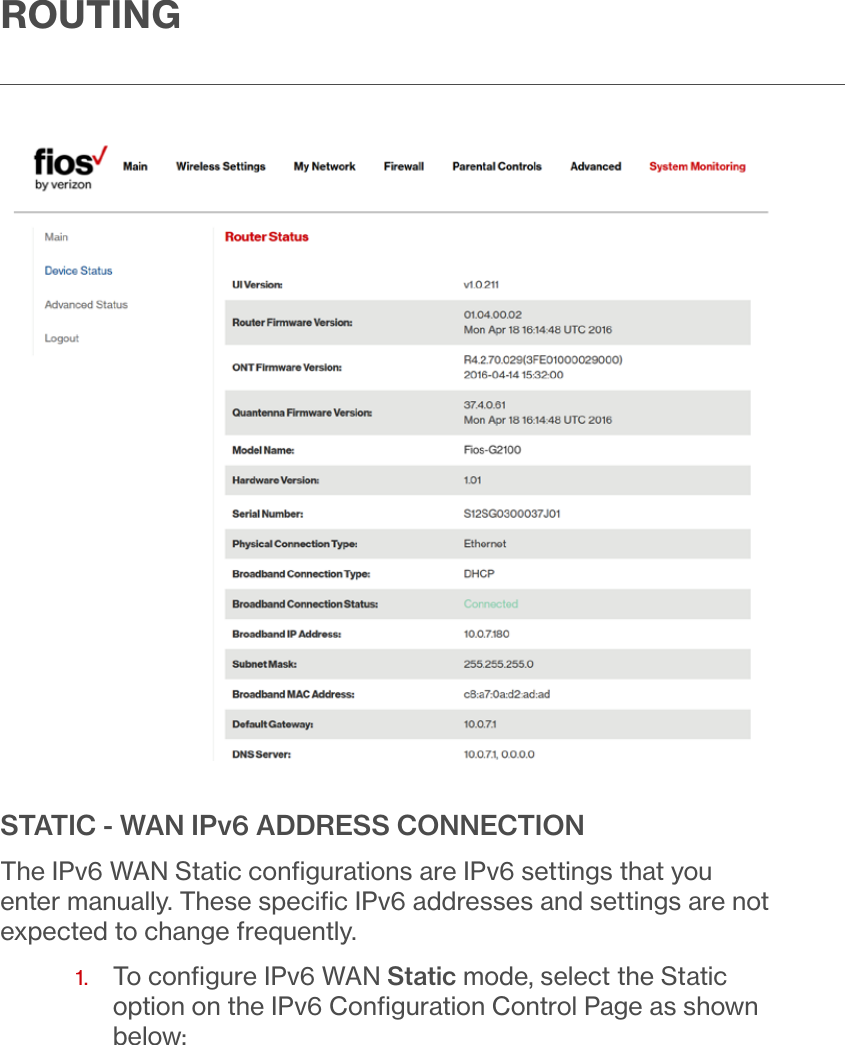
Verizon Online G2100 Fios-G2100 User Manual P114 P225 rev
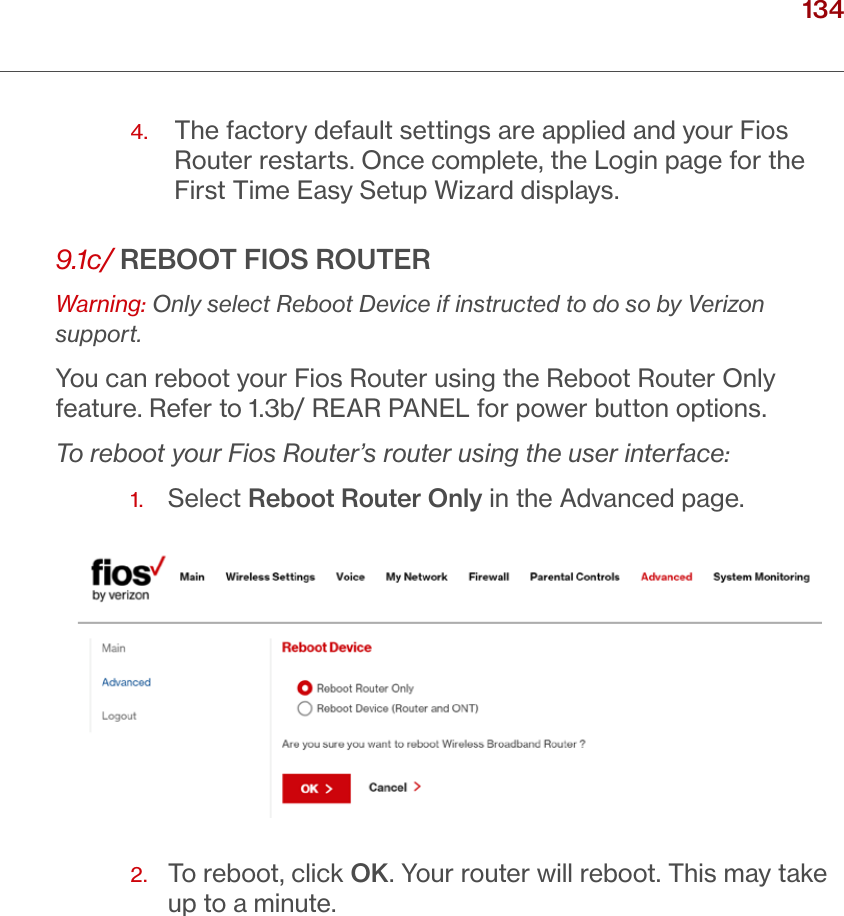
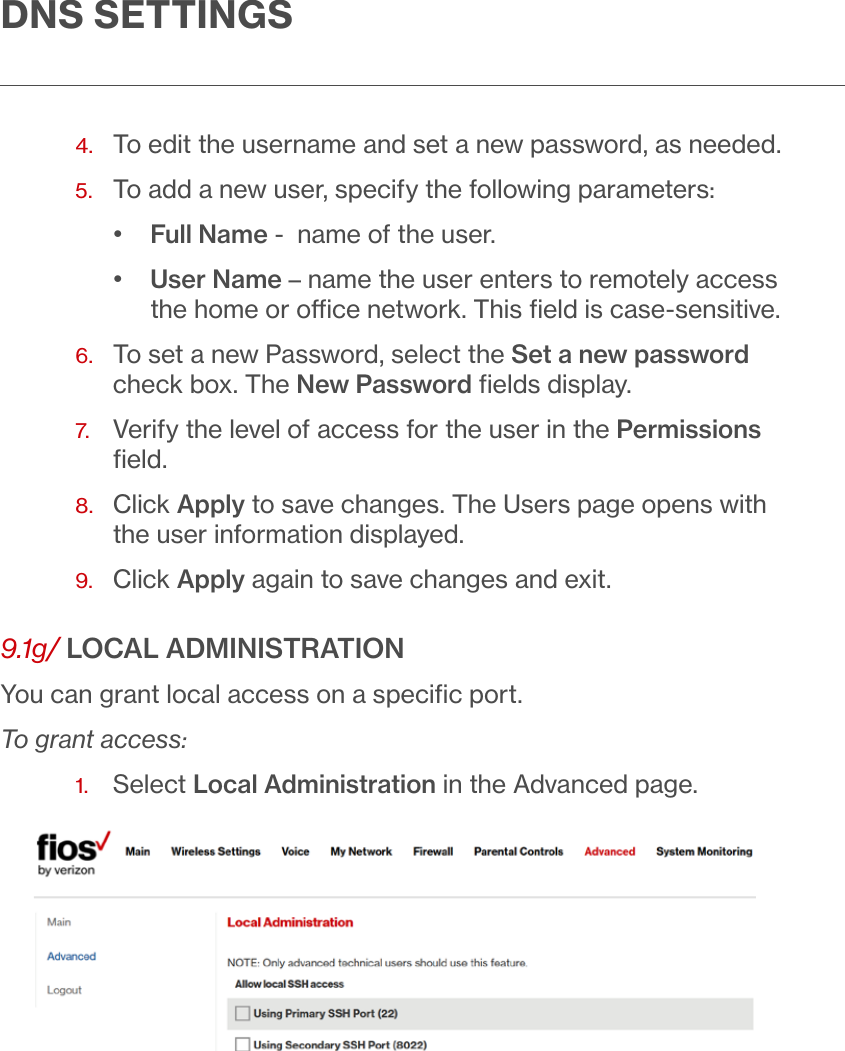
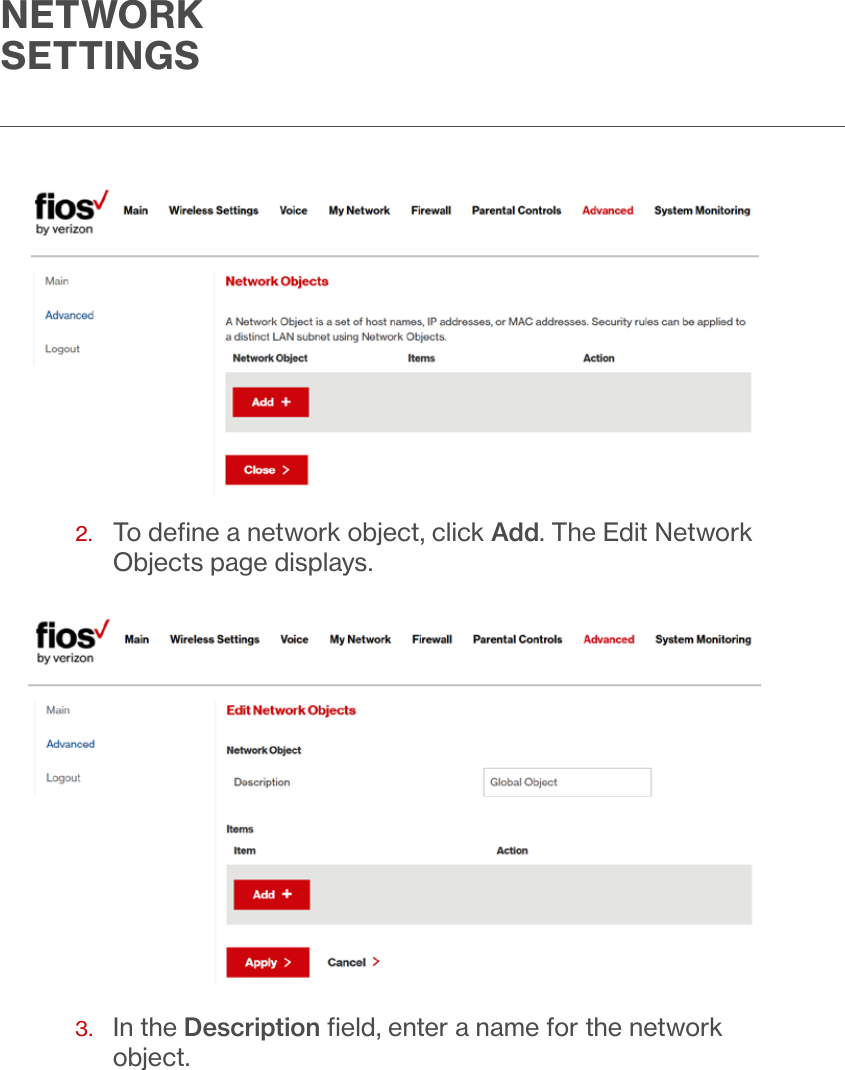
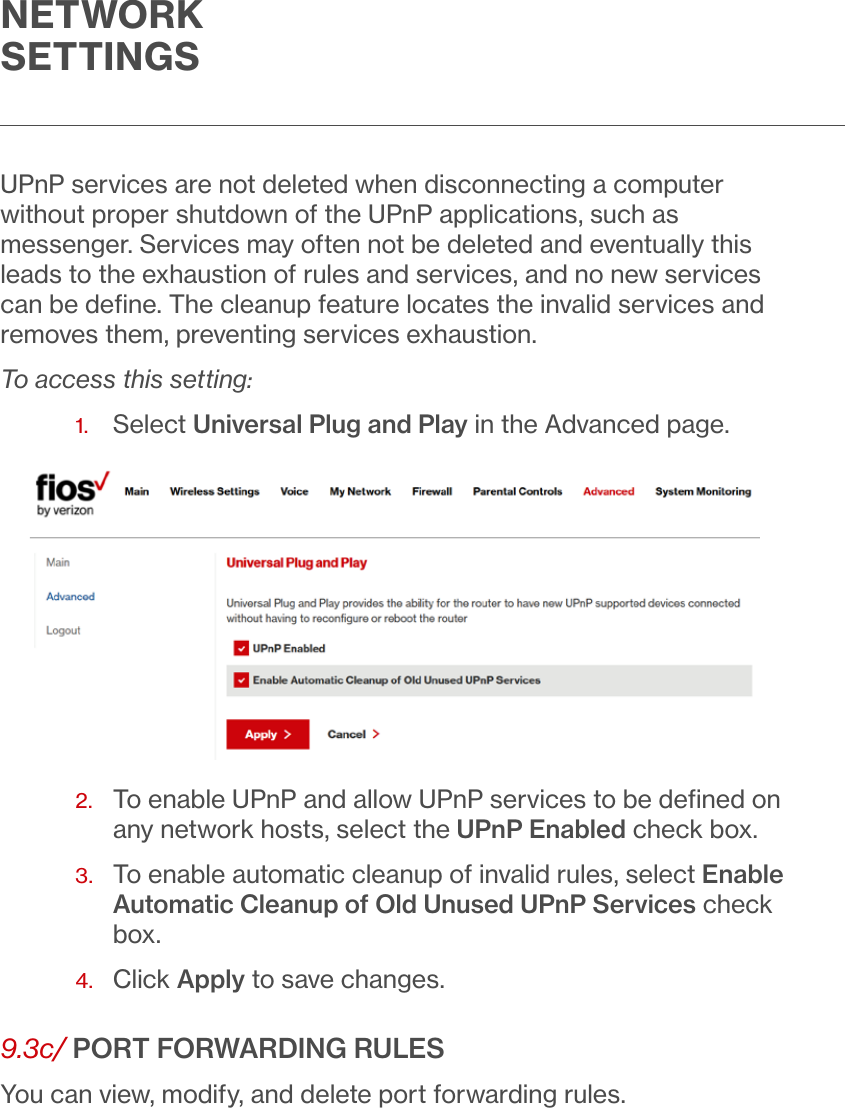
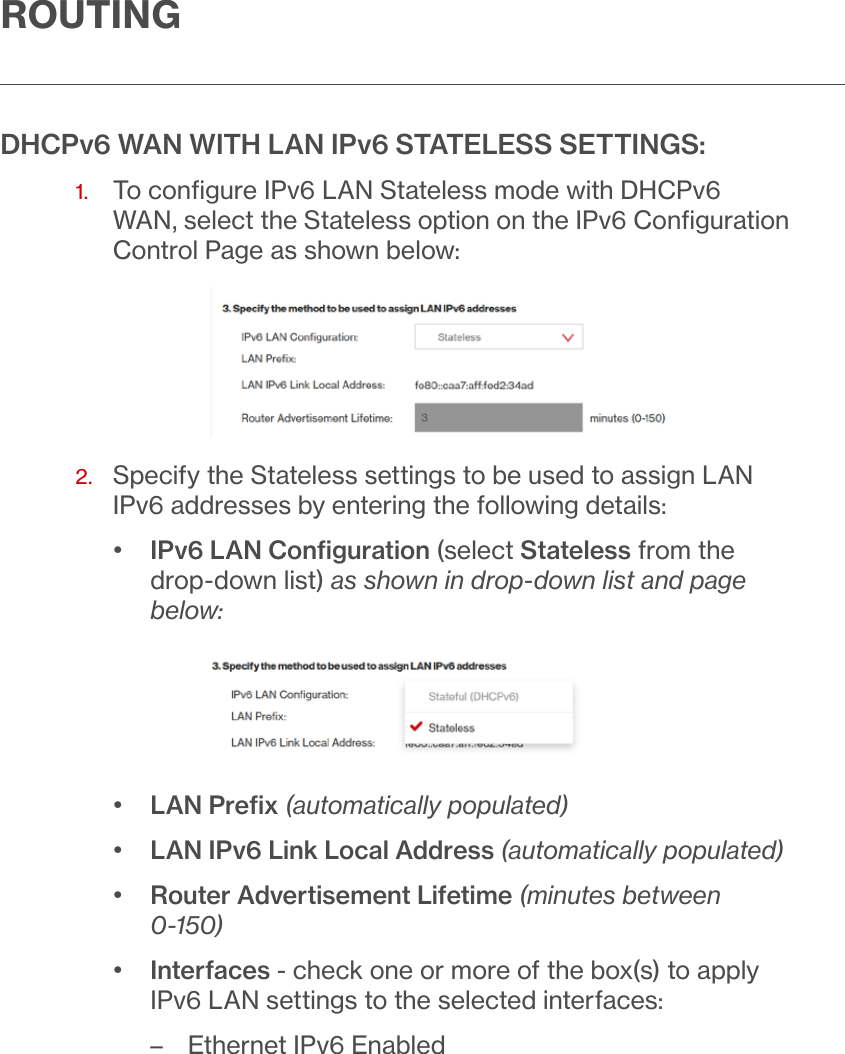
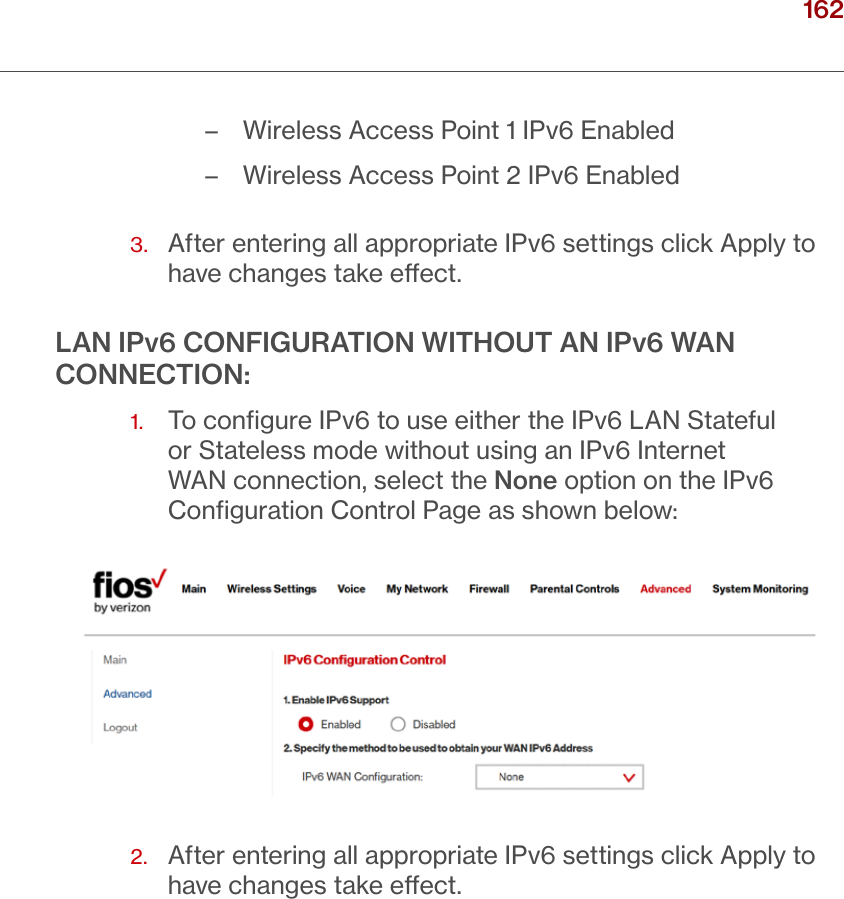
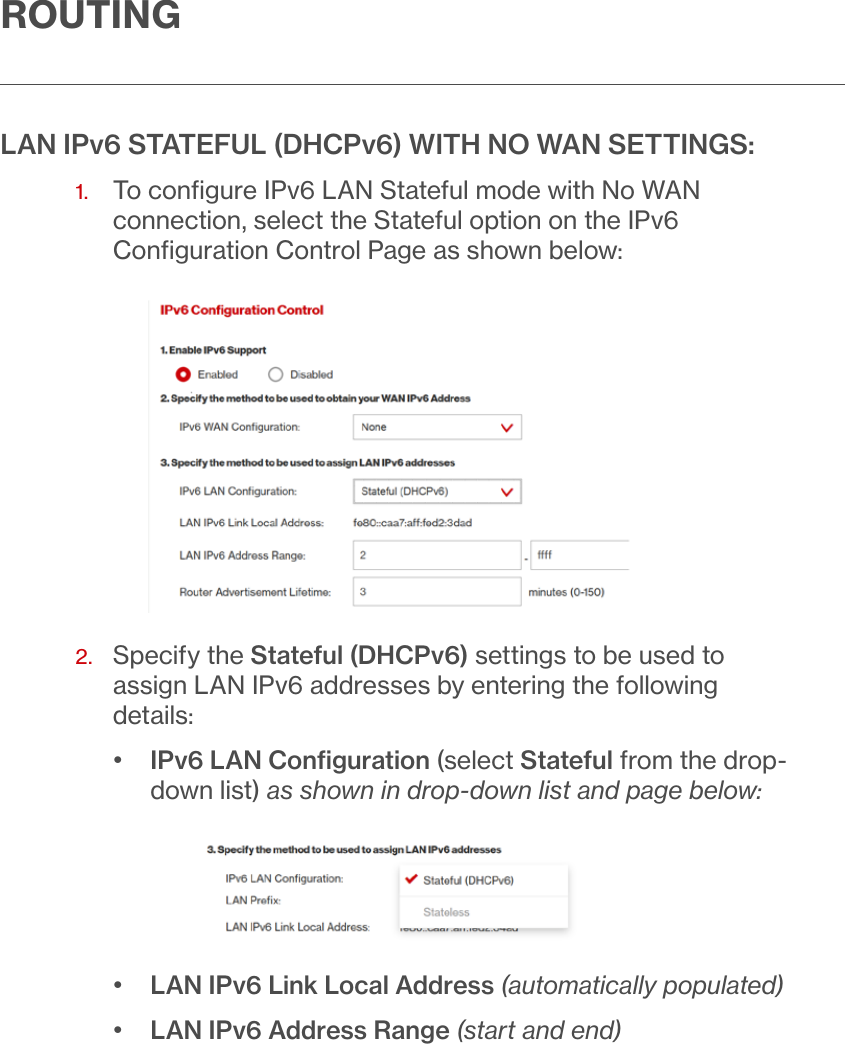
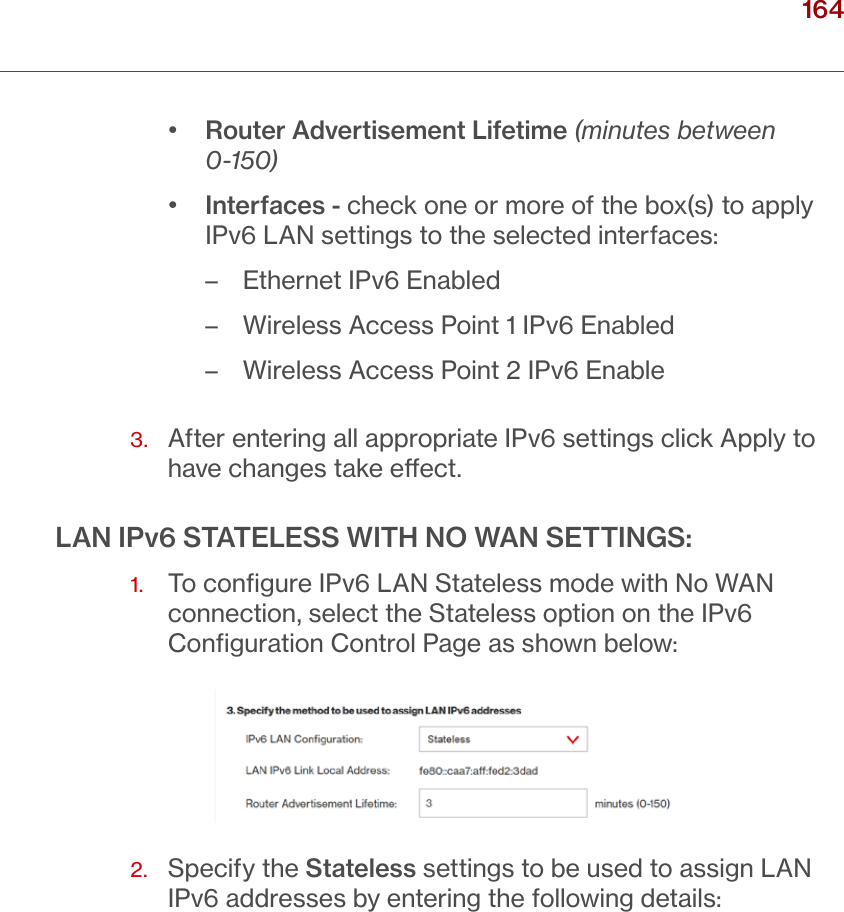
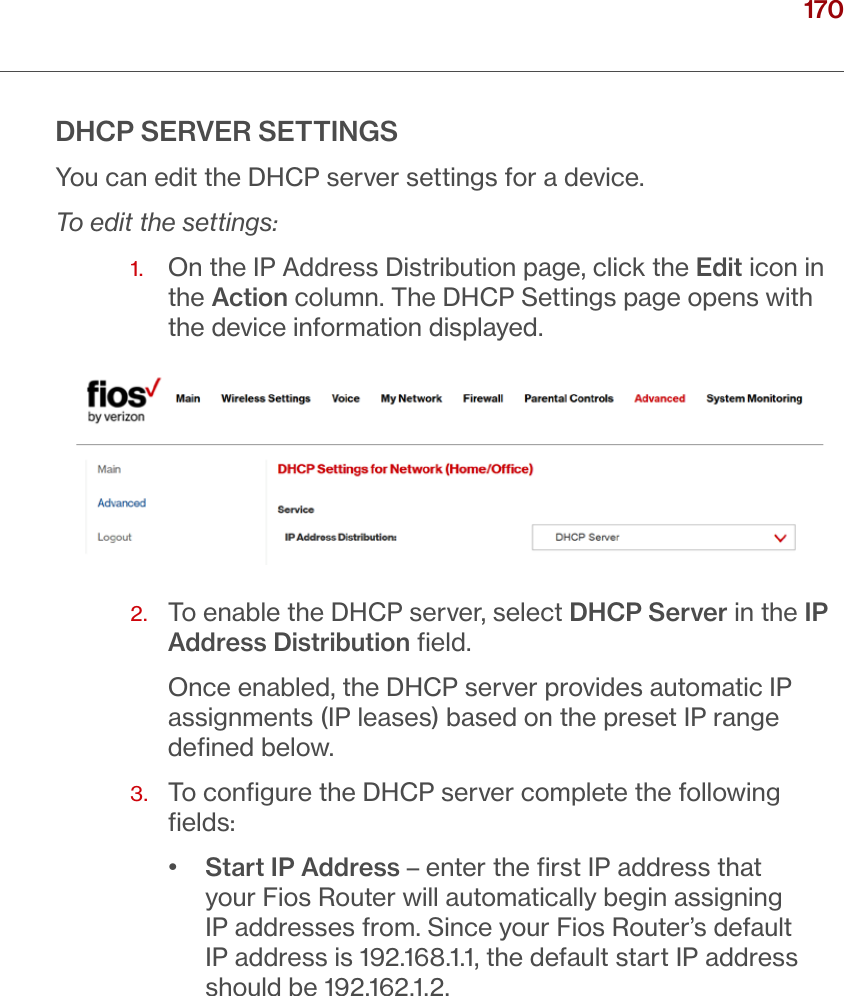
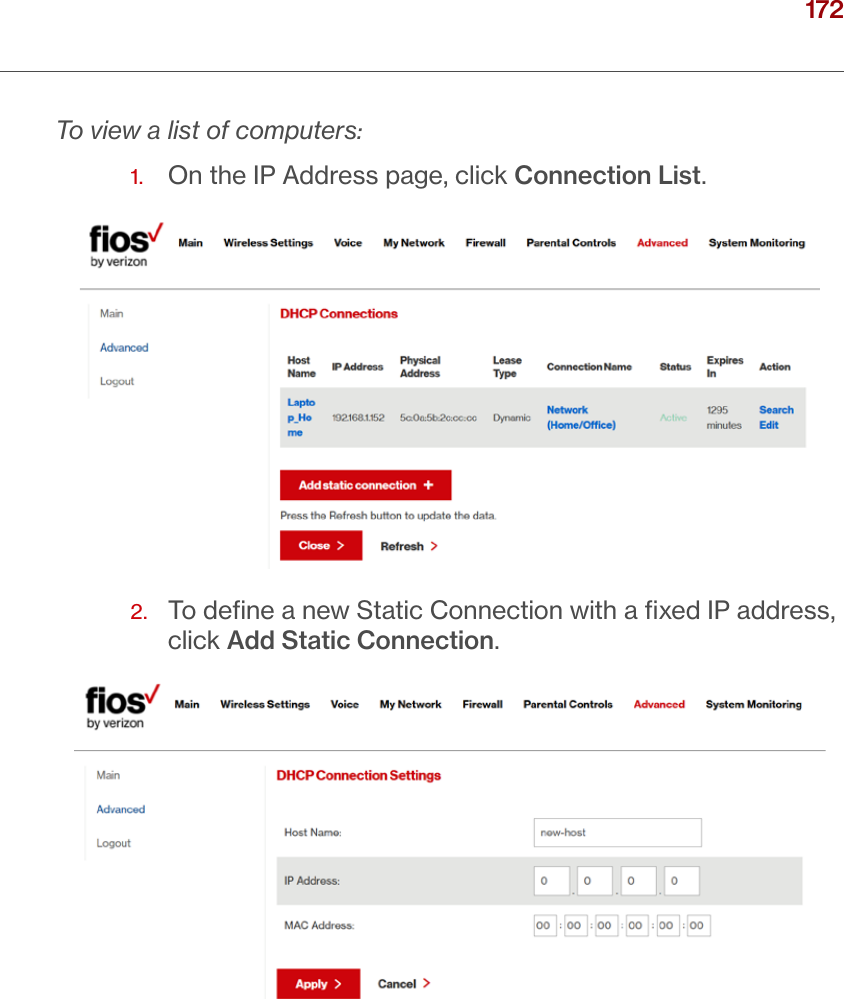
Verizon Online LLC Fios-G2100 P114 P225 rev
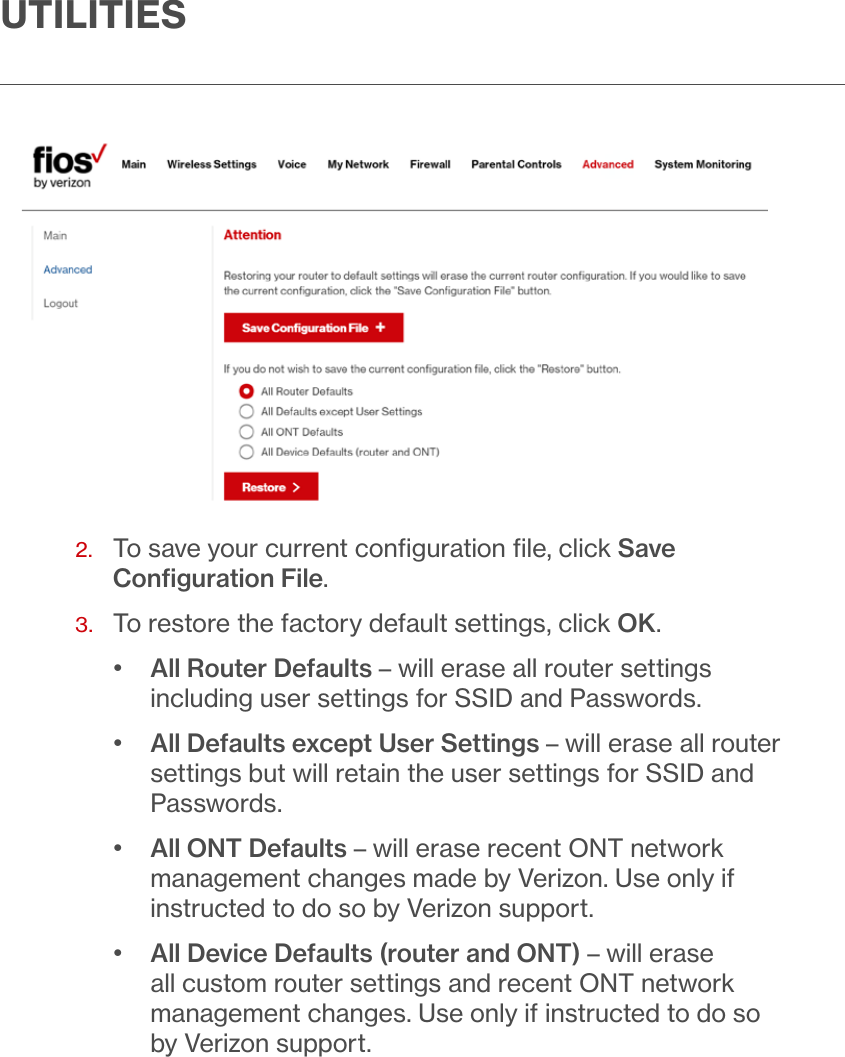
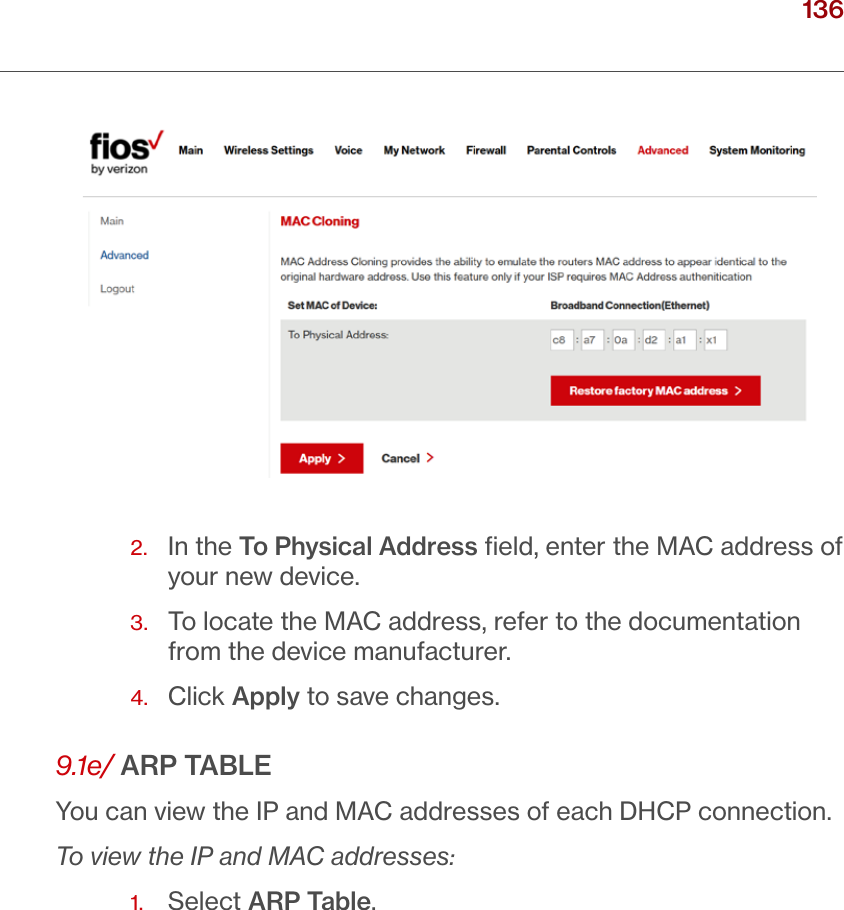
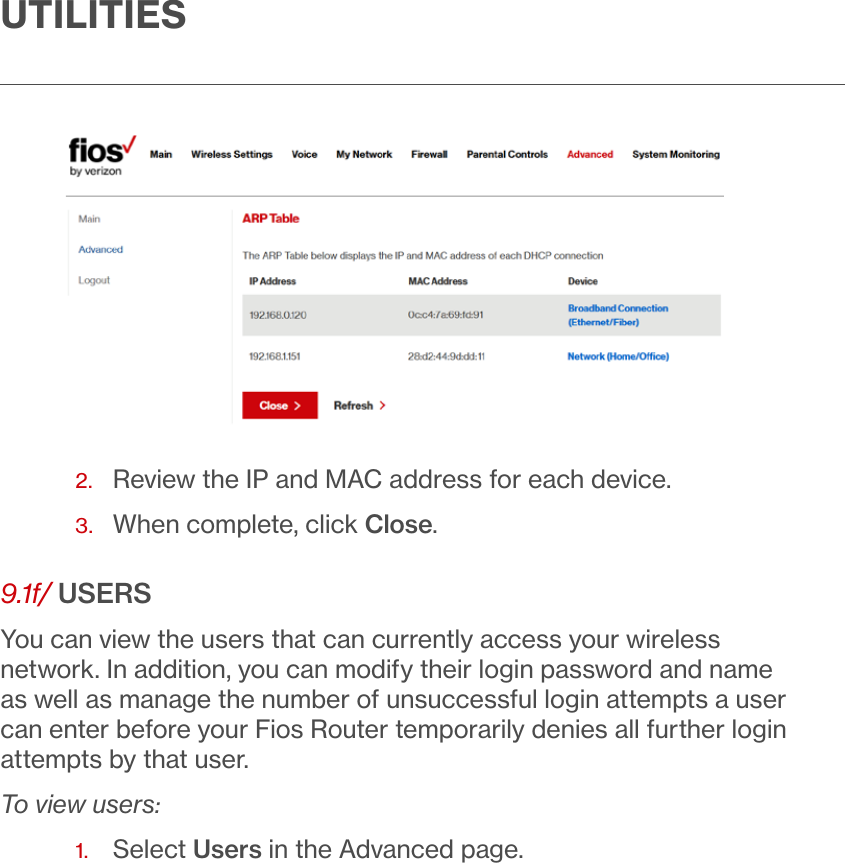
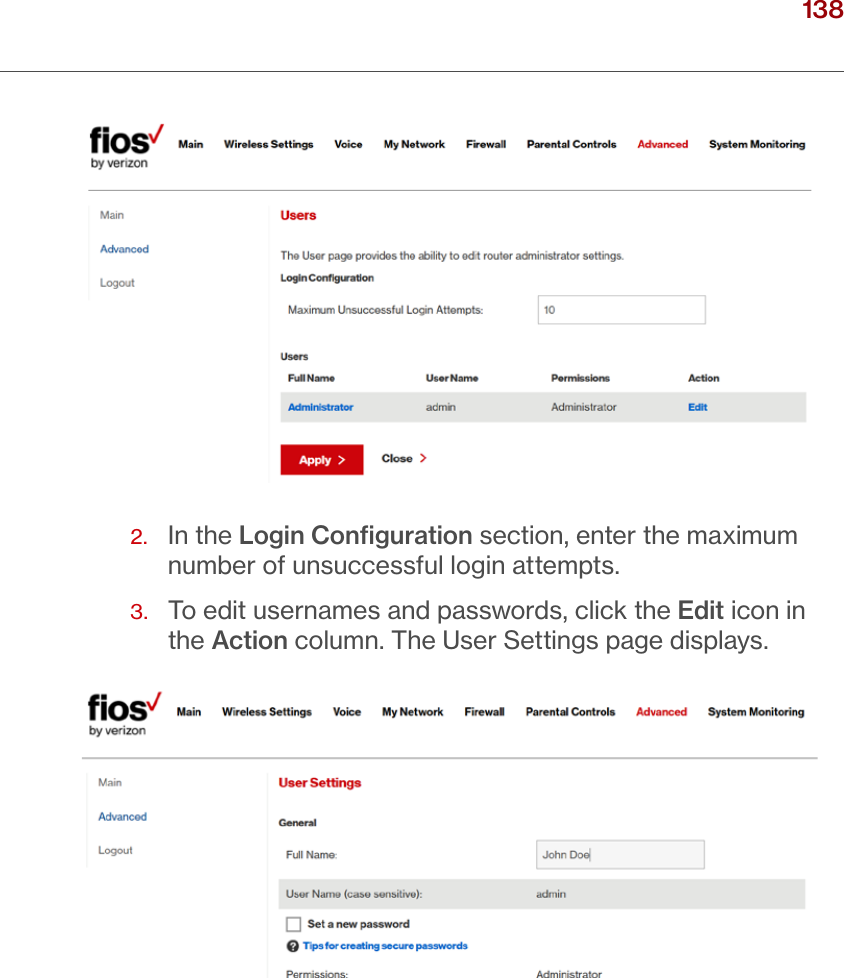
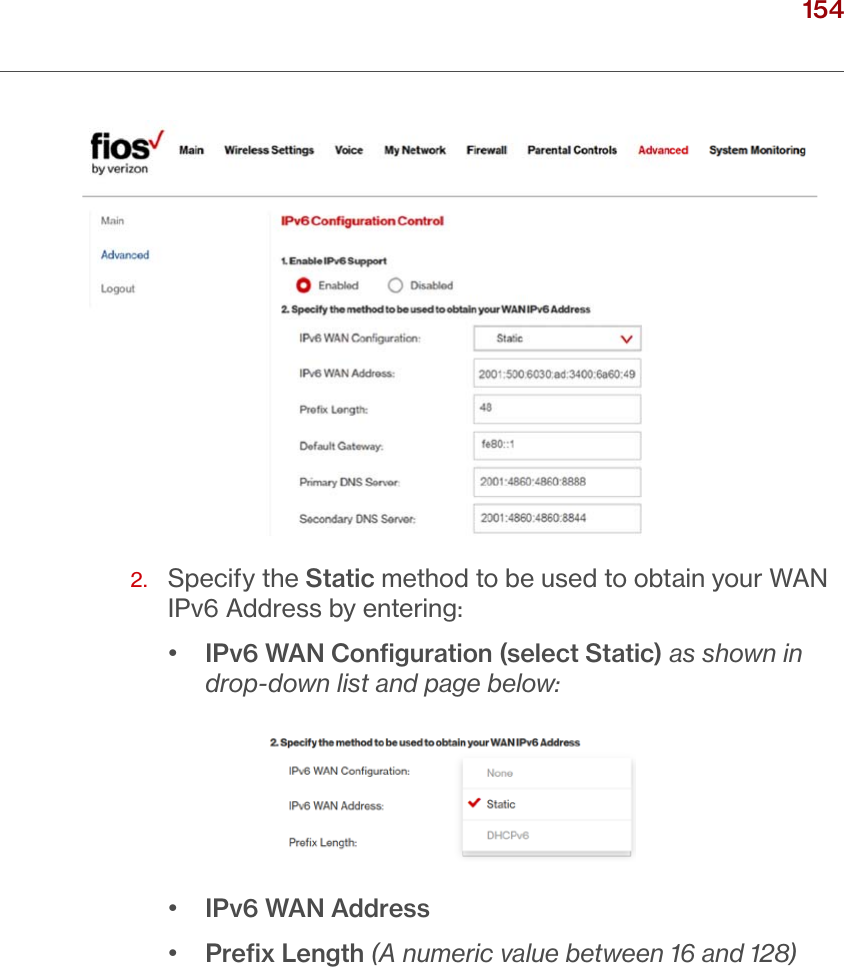
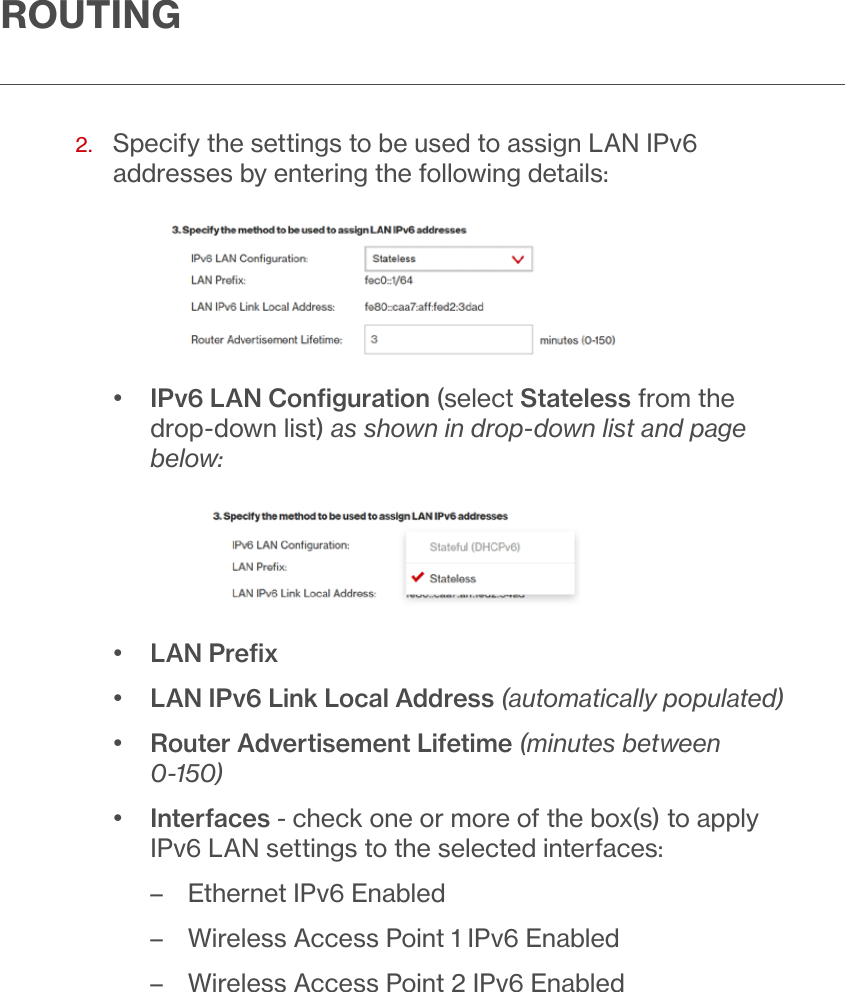
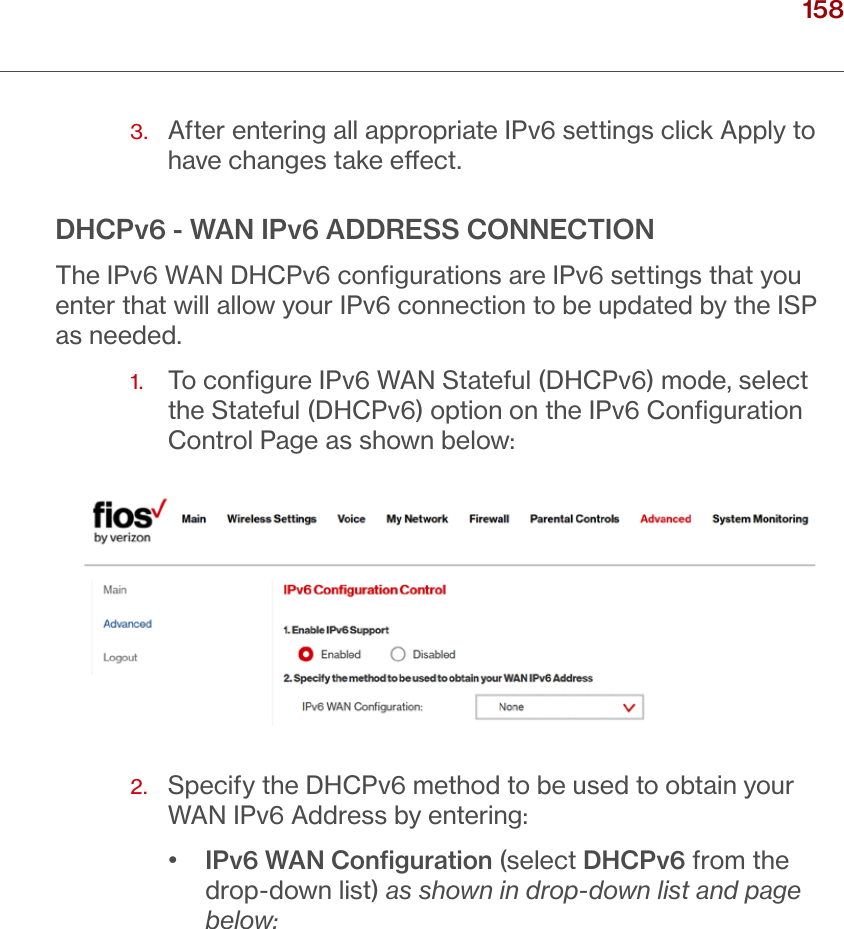
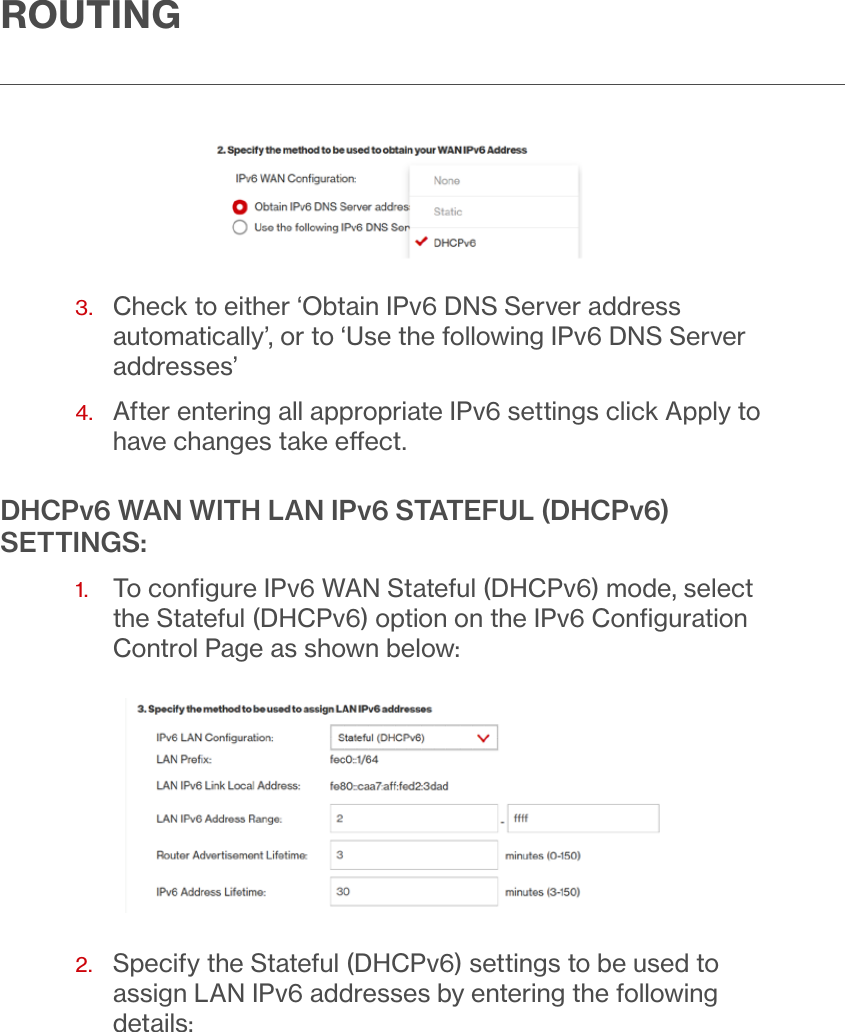
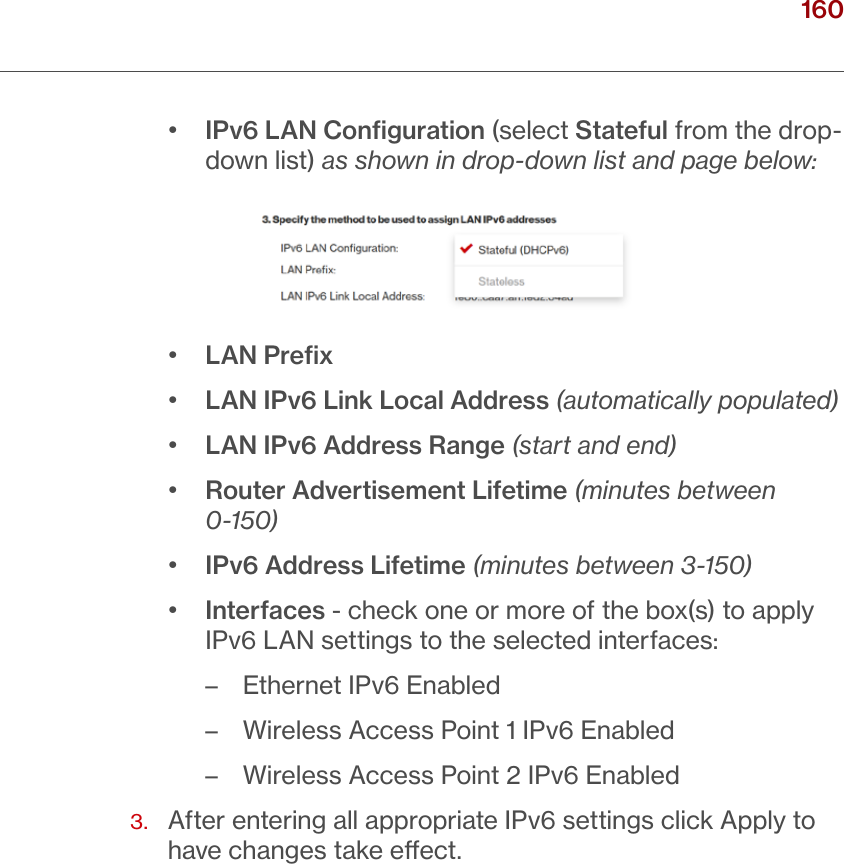
UserManual.wiki
>
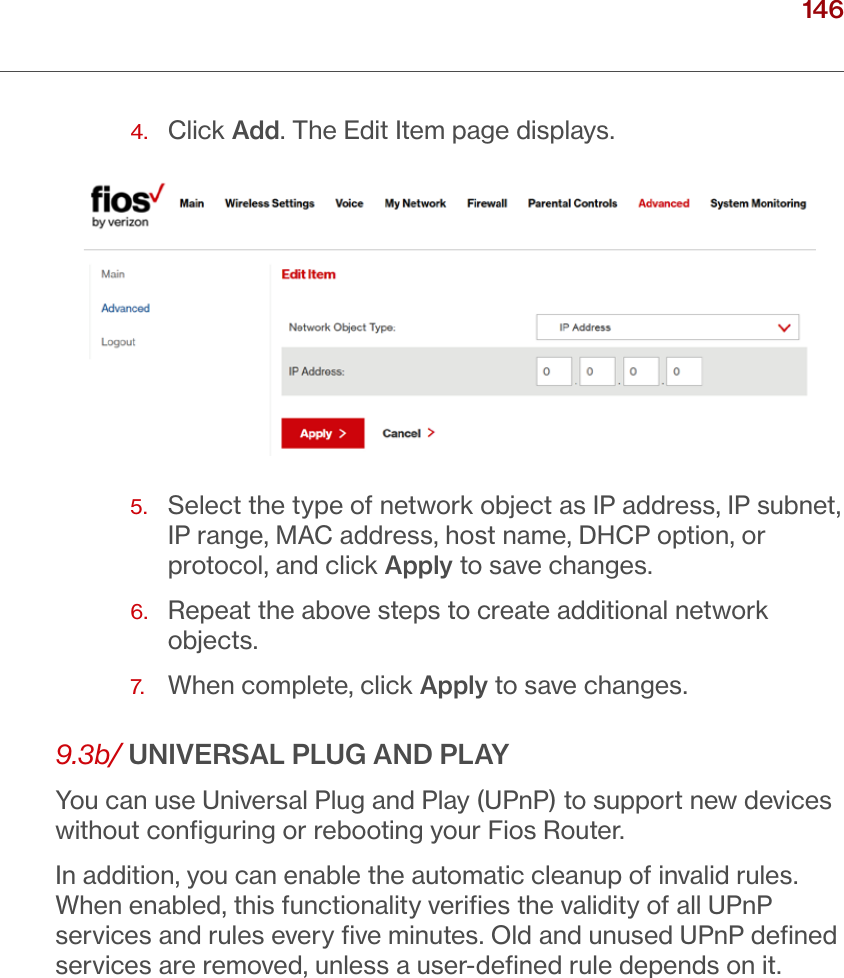
Verizon Online
>
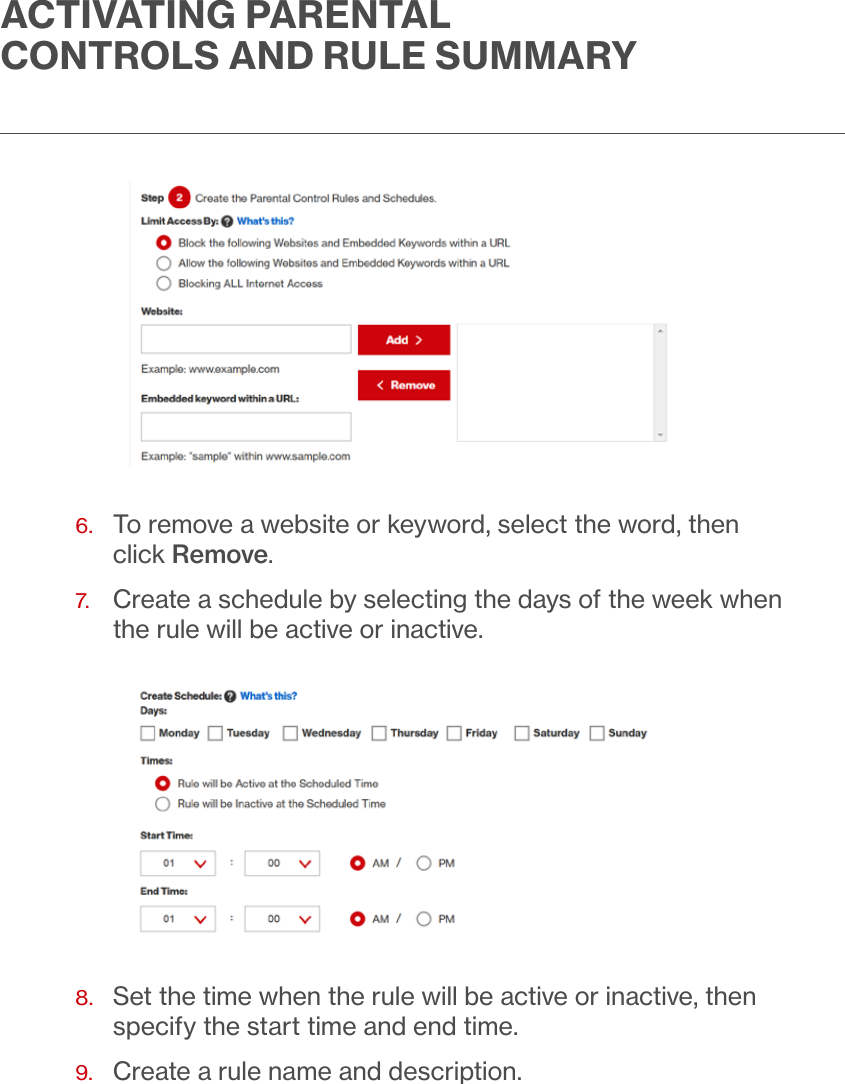
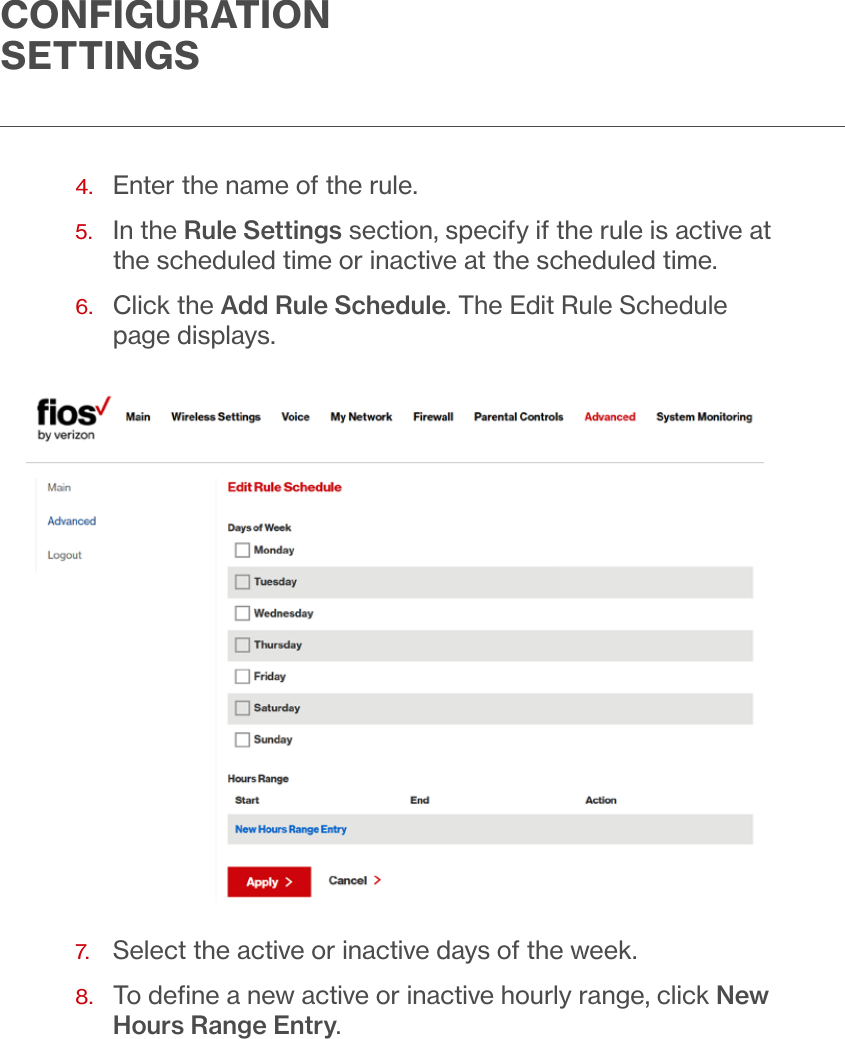
G2100 User Manual
>
User Manual P115-P225
Contents
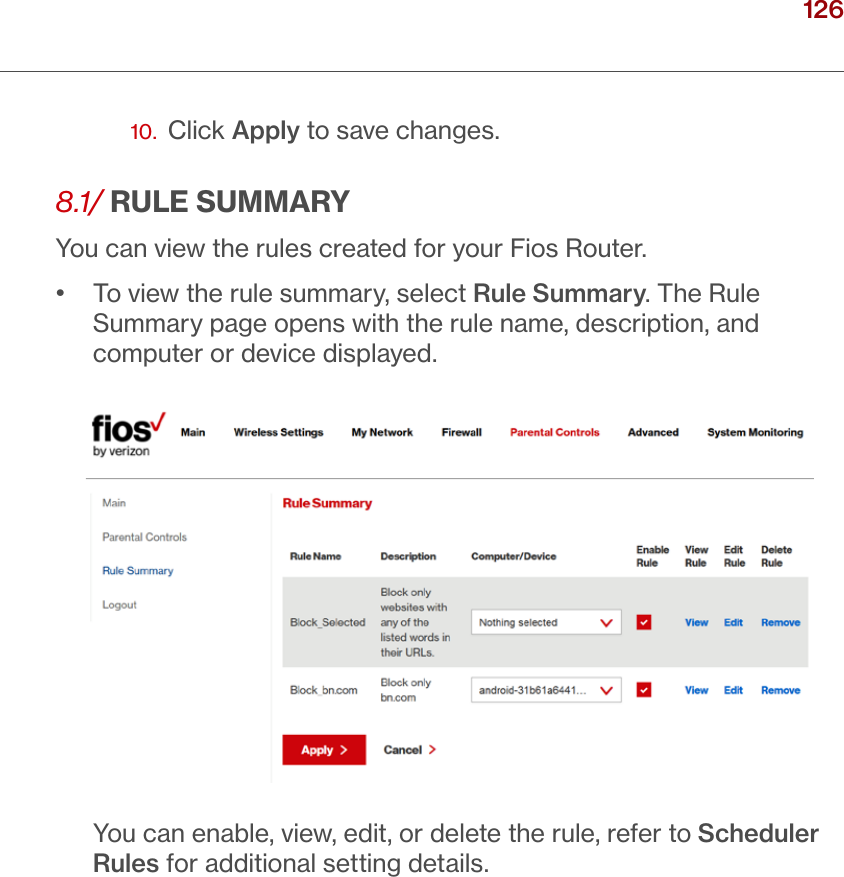
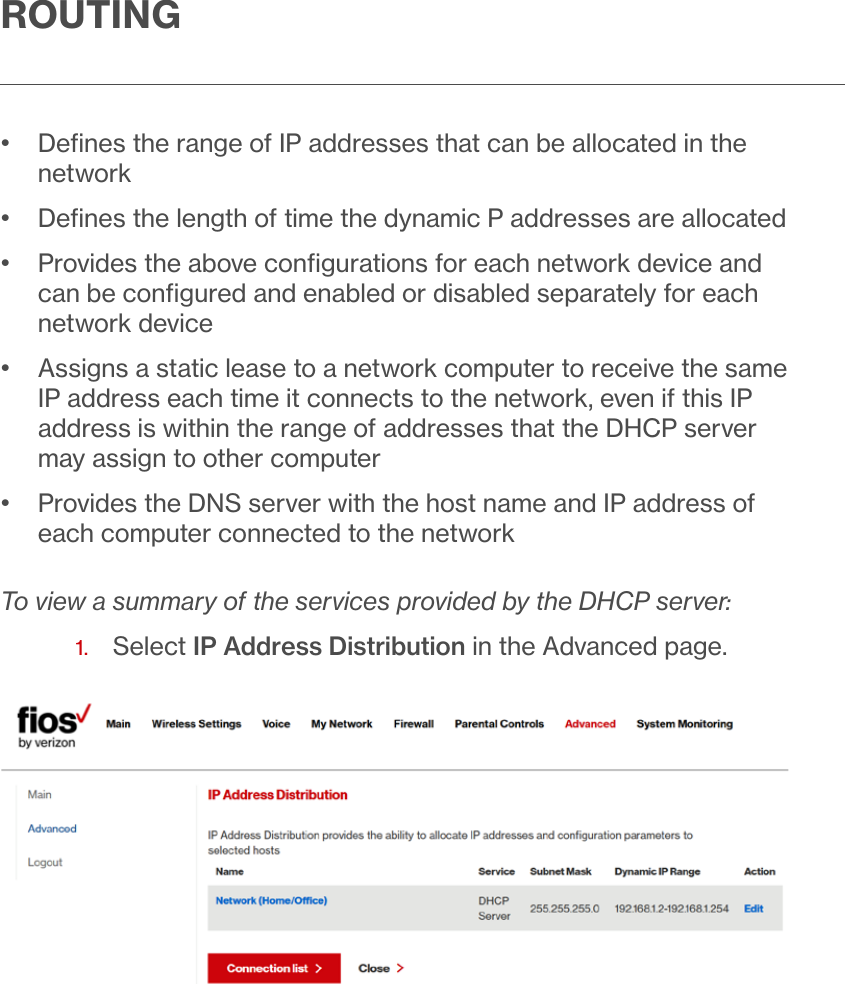
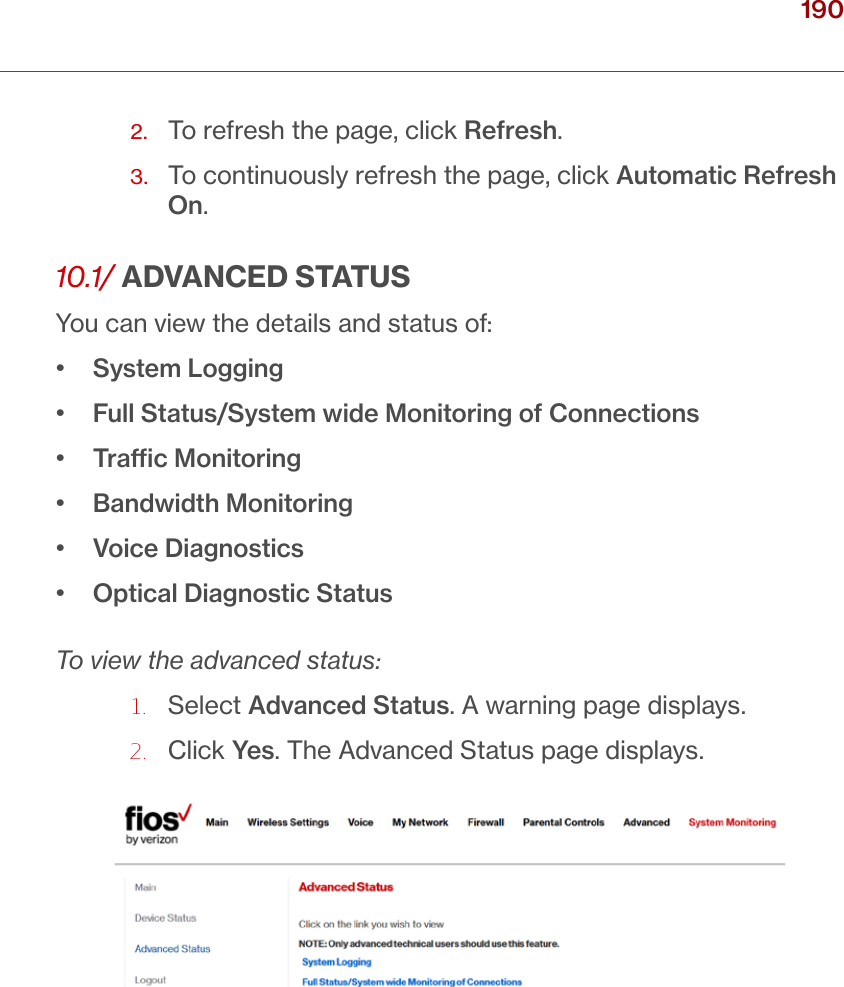
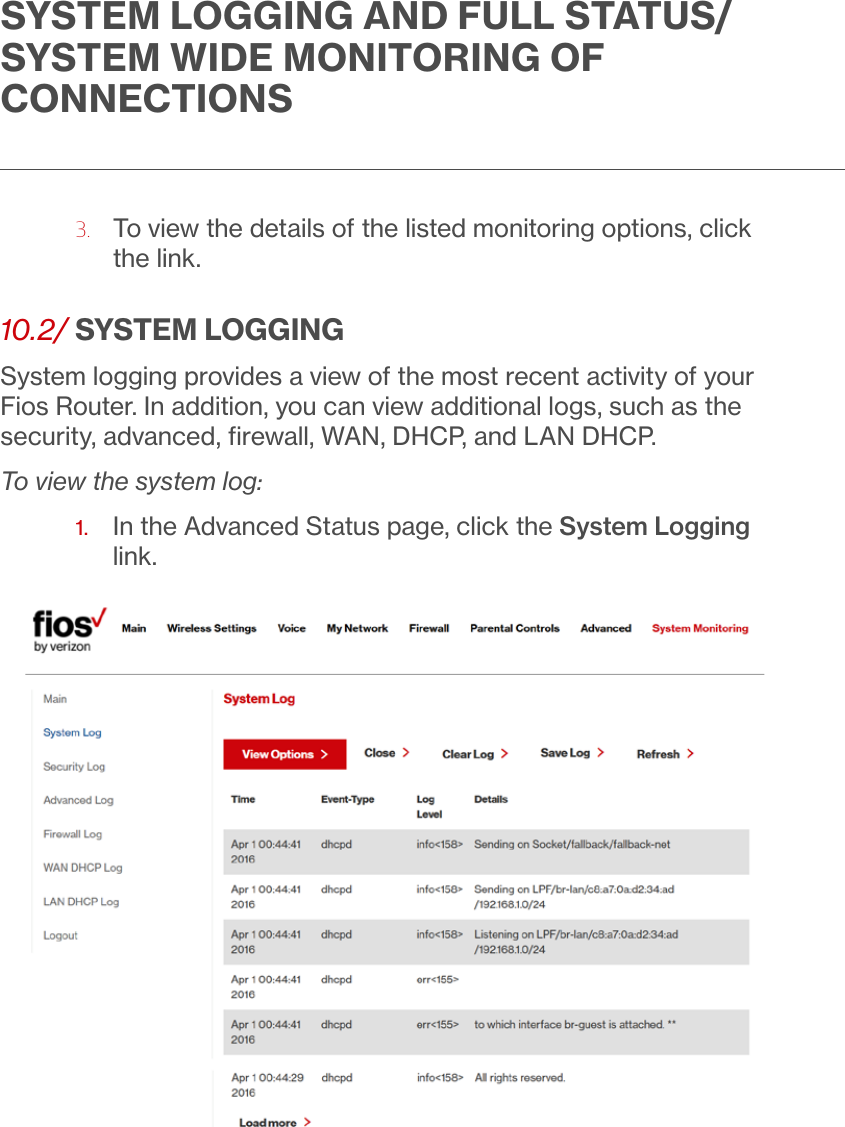
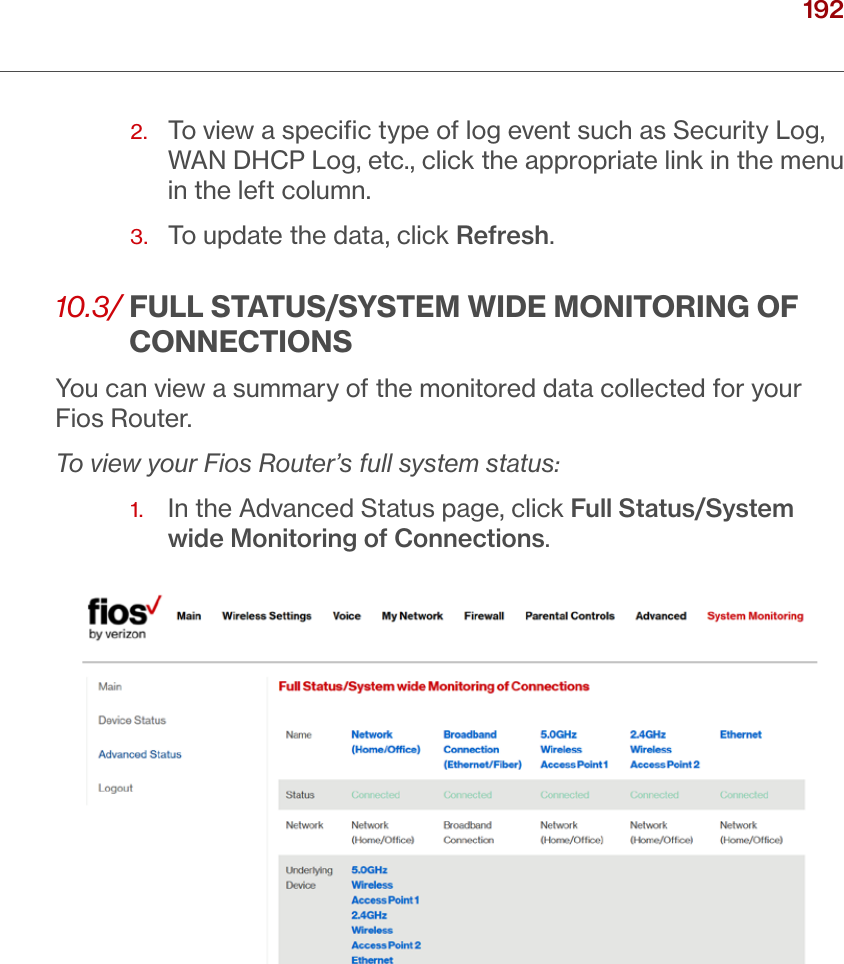
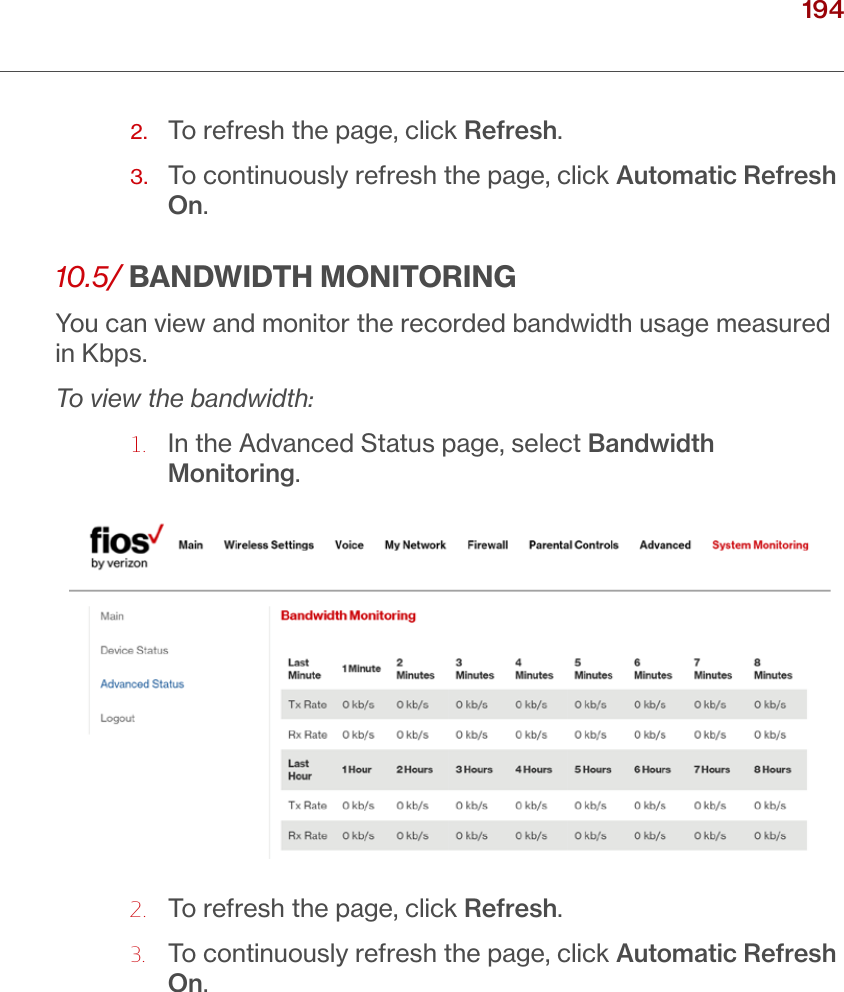
1.
User Manual P1-P114 rev 2
2.
User Manual P116-P225 rev 2
3.
User Manual P1-P114
4.
User Manual P115-P225
User Manual P115-P225
Navigation menu
Upload a User Manual
Namespaces
Wiki Guide
HTML
PDF
Info
Views
User Manual
Discussion / Help
Navigation


![GENERAL SPECIFICATIONS, LED INDICATORS AND ENVIRONMENTAL PARAMETERSCabling Type: Ethernet 10BaseT: UTP/STP Category 3 or 5 Ethernet 100BaseT: UTP/STP Category 5 Ethernet 1000BaseT: UTP/STP Category 5e Telco SC Fiber Optic Telco UTP Category 3 (voice-grade with RJ11 connector)Firewall: ICSA certified12.1/ LED INDICATORSFront Panel: Unified ButtonRear Panel: GPON, Mgmt, Voice, Ntwk, WAN Ethernet and LAN Ethernet [4]12.2/ ENVIRONMENTAL PARAMETERSDIMENSIONS AND WEIGHTFios-G2100: Size: 3.34” wide x 9.8” high x 9.25” deep (unit only) Weight: 1.56 lbs / 0.71 kgComplete System: Size: 10.16” wide x 3.78” high x 10.35” deep(inc. packaging) Weight: 2.63 lbs / 1.19 kg](https://usermanual.wiki/Verizon-Online/G2100.User-Manual-P115-P225/User-Guide-3214724-Page-103.png)